
Week 3 - Computer-aided design
This week was all about computer-aided design i.e. CAD. Fab academy has a large colletion of programs listed for students to get acquainted with. It is recommented that student test as many programs as possible and select few to do the weekly assingment of modeling the final project with them. List can be found under 2018 class archive here.
2D programs
I started the weekly assignment by looking through the lists of programs on this weeks fabacademy pages Some of them were familiar but many were totally new to me. As Neil discribed the Choice of which Software is more eor less a personal choice and free to explore
After going through each programs the www-pages, I selected few programs that I installed to my computer for more close inspection as this week we needed to try new software.
GIMP
The first program I installed was GIMP. It is an open source raster image manipulation software. Previously I have used Photoshop when I needed to work with Images. So it was interesting to see the difference. For some reason I did not find GIMP easy to use with my Photoshop background. So I decided to stick with my Photoshop for the future.
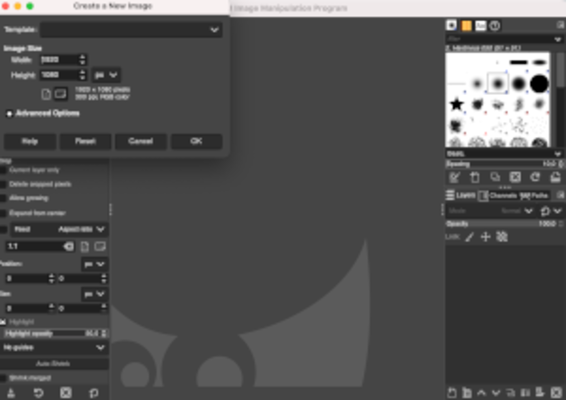
When starting Gimp, it will open without new image. So first thing is to create a new image. This is done from File -> New. There are options like image size and resolution that can be selected to start with.
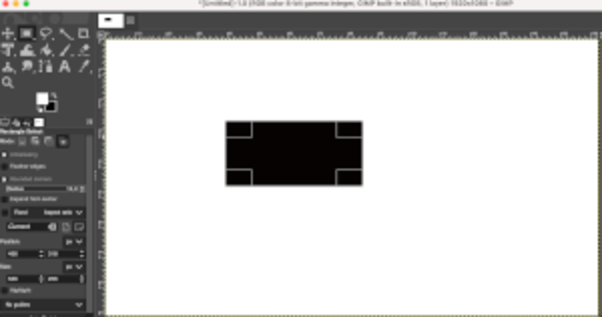
 Then I created a box using Rectangle select tool from tools menu. To make a box out of it, I used Edit -> Stroke Selection. From there line style and width can be selected. The result is a box with line color chosen.
 Drawing a line in Gimp is quite a weird prosedure. First select pencil for example (other tools make lines as well) select the properties of the line from the tool options window. Now to draw a line click your mouse left button (Windows) on the starting point. Before moving cursor or anything press the Shift key and start moving you mouse to the place you want your line to go. To finish the line click mouse button again.
 Adding text is quite easy, select the text tool from tool box, select font, size etc. and click to start typing.
GIF capture:
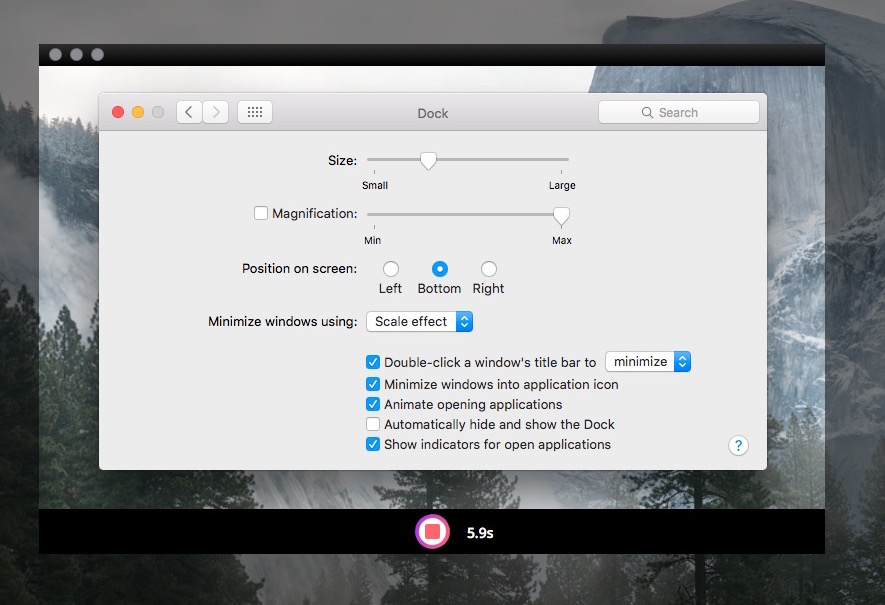
A picture talk a thousand words. I was looking for a better way to make a documentation and I come accross an open source gif maker for sirious of pictures to show the steps of making things http://gifmaker.org/: on the same spirit I also came across another open software that can compress gif files and optimise them for web called ImageOptim 2.I would say the highlight of this week was when I find a gif screen recorder that I managed to record the steps I made when learning to use Fusion 360. The software is called GIPHY CAPTURE.
CAD programs I have experience with:
2D Vector
CAD programs I have experience with:
-
Inkscape: I used this as software to teach people an introduction to digital design, for laser cutting in particular. A good open-source software for vector generation.
-
Vcarve: Not strictly speaking a design package. I used it with my CNC machine to generate tool paths. However it does have vector drawing tools inbuilt, so you can design in it if you want, although only good for basic tasks.
-
Corel Draw: This software we used as a print driver for our laser cutters. I rarely if ever designed in it, but i know how to operate the interface and modify vectors in it.
-
Illustrator: This software i am the most familiar with. I used it regularly for design work, and for creating laser cut designs i find it good. It is creatively a great piece of software. Where you can generate designs very easily. It does fall down a bit with a lack of parametric ability. Making adjustments to designs a bit challenging.
3d Programs
Blender
Blender is a powerful, free and open source 3D creation software. It supports 3D modelling, rigging, animation, simulation, rendering, compositing and motion tracking, even video editing and game creation.
Blender is based on meshes and can change the shape of basic geometry, and animate almost anything. While it is great for photorealistic rendering, creating organic models and simulations, it’s sometimes not the ideal tool for designing precise parametric models or mechanical parts. It definitely has many advantages. It’s free and open source, community driven, has ample learning resources and is capable of most things commercial CAD softwares can do.
It’s extra versatile if you’re into scripting as you can use Python to enhance object creation, rendering and managing repetitive tasks. It’s downsides are that it is not inherently parametric and it runs on geometrical meshes which are complicated to turn into Nurbs. Blender does support designing in Nurbs but it’s a bit of a side show. While it can export to all the necessary file formats, this may hamper CAD workflow.
For Fab Academy purposes, unless you’re already a Blender coding ninja, it seems a little overkill with all it’s simulation, animation or sculpting. Also I find Blender has a crowded and complex interface for beginners, which can make a steep learning curve. But to all their own. Some swear by the Blender and I can see why.
FreeCAD
FreeCAD is a free and open source parametric 3D modeller made primarily to design real-life objects of any size. It allows you to easily modify your design by going back into your model history and change parameters. It's freely available, open source and cross platform. A few other plus sides is that it has great forums, it’s highly customisable and also allows Python scripting.
I had a play around with FreeCAD and while it certainly is packs some punch for its unseemly interface, I found it a little cumbersome and a bit glitchy. Obviously it takes getting used to, but it was not very intuitive and I also found the work space crowded.
Fusion360
Autodesk’s Fusion 360 is one of the more powerful cloud-based parametric CAD programs out there, boasting nearly all the functionality we mentioned above. It can render parametric, solid geometry, allows for constrained and hierarchical design, includes simulation and testing, and even incorporates it’s own Computer Aided Manufacturing (CAM) tools in one package. Fusion 360 is sort of the new kid on the block, and rapidly catching up with big brother SolidWorks. Both hold a big chunk of the CAD market share.
With Fusion 360 one can create designs with a very easy-to-use, powerful industrial and mechanical design. It connects your entire product development process in a single cloud-based platform. Main big applications are:
For this week design Challenge, I created a Fusion file for a Tv stand addition to place my Sound system for my home.
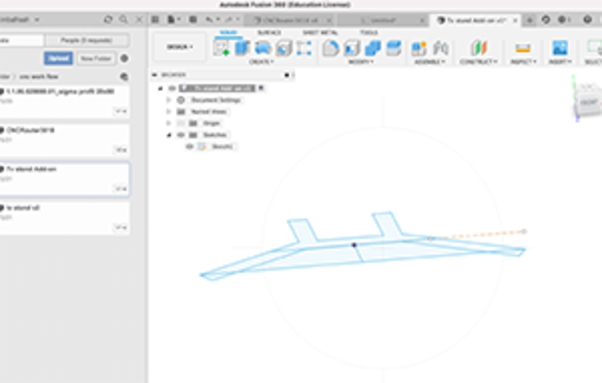
After sketching the deesign on a piece of Paper, Creatinfg a project folder in Fusion and giving it a name, I started Creating a new Design. The work flow is to Creat a Sketch as per the measurment of the Tv Stand 8 you can design parametric design, and use constrains to define relationships...)
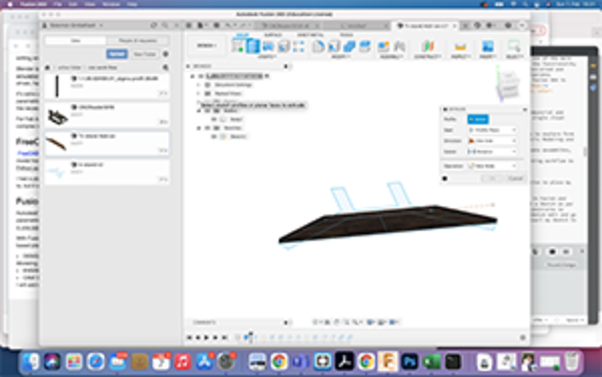
after finnishing up with the Sketch, Exit from the Sketch edit and go on to the Solid designing tools. In my case I use the extrude command to convert my Sketch to 3d.
