Week 1 - Principles and practices, project management
Fab Charter
The Fab Charter is the core set of principles that come with a FabLab, including responsibilites of the user. I have read and I approve the following Charter:
http://fab.cba.mit.edu/about/charter/
Project draft
Given the importance of open Source PCB milling machine for FabLab worldwide, Specially at these times where physical access to the labs all over the world is very limited due to health restrictions, a low price open source PCB milling final project makes an inpact. As I decided to investigate this topic, I now know from my short research on this topic that a lot of fab academy students have build CNC machines of different Scales, and I want to contribuite my share by Building a Scalable PCB milling Machine. With a major emphasic that the major hardware should be relatively very easy to access and readyly avalable from most hardware stores.
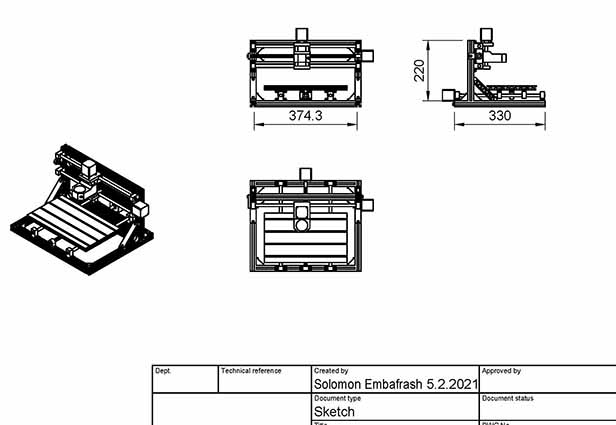
My current idea for a project is a cheap Scalable PCB milling Machine based on parts mainly from a HardWare Store and 3d printing holders and Joint. This project includes controlling the printer through USB with an ad-hoc host software. Here is a small sktech of the current idea:
Student agreement
I have read, approved and uploaded the Student agreement for the course.
SETTING UP A CLASS ARCHIVE SITE
As part of the Fab Academy right of passage, all students must create a website (like this one) hosted on the Fab Academy Archive. Each participating Lab has it’s own code repository. Getting your content onto the archive is as simple as uploading to the Lab repository. Webhooks take care of the rest, to automatically integrate changes in the repository into the Fab Academy Archive.
GIT
Git is a powerful open source version control. This was a first time I had worked on it and had so much fun figuring out how it works.
This included installing git, getting ssh key, creating account to fabacademy repository and learning how to control the repository updates.
The first step towards getting content on the archive, is to make a local copy (clone) of the remote repository. To do this, you need to be added to the repository as a developer. Once that’s taken care of, you can log in to the GitLab interface (git.fabacademy.org/fabacademy2018/< Lab Name >) use the credentials send via e-mail.
Authentication is needed to push content to the repository, so an SSH key must be generated and saved in the GitLab interface. Generated an SSH key from the terminal:
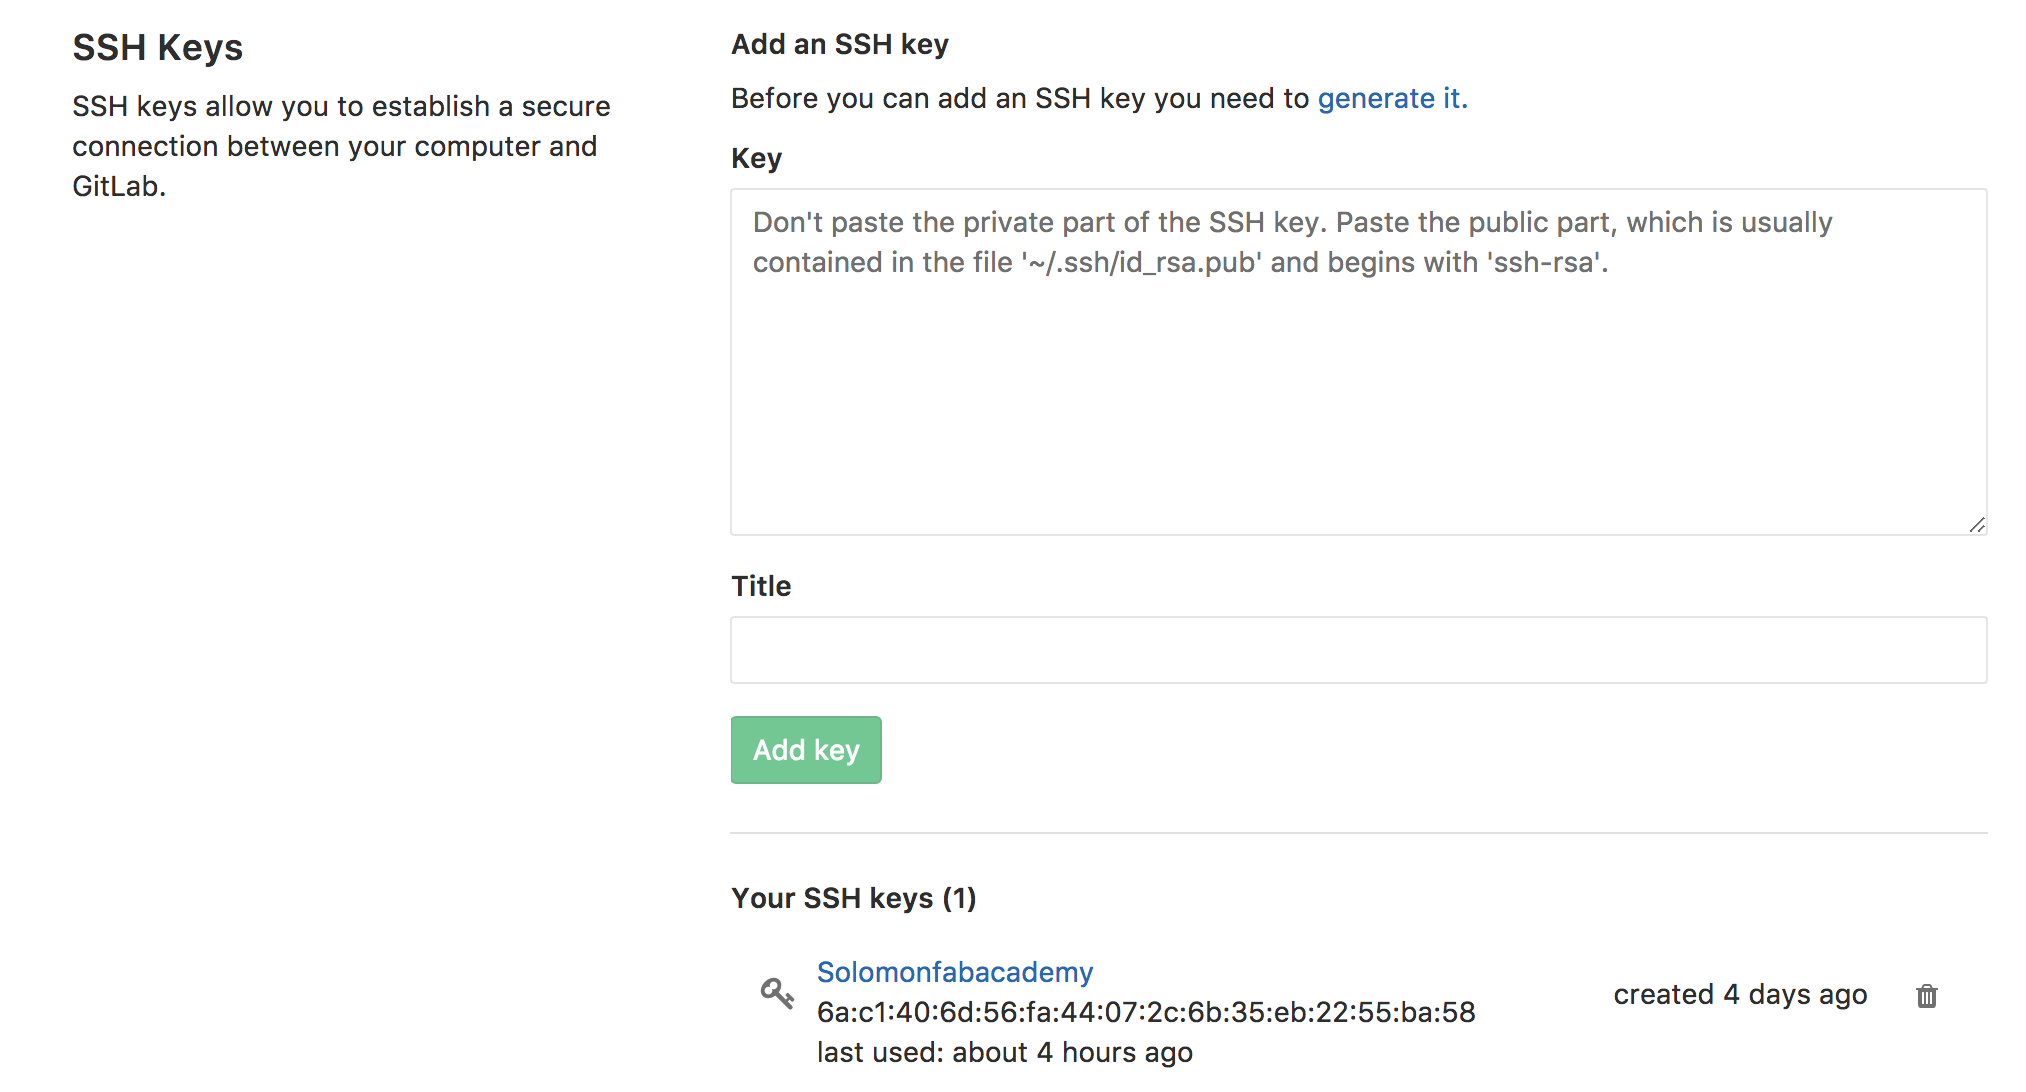
The output key needs to be saved in GitLab. I had a bit of trouble finding the SSH keys section in GitLab, so for reference, go to your user profile > Profile Settings > SSH Keys. Copy the key you generated and add it using the Add SSH Key button.
ssh-keygen -t rsa -C ""
After that I accessed our Fab Lab's project through the git.fabacademy site. Next step is to clone the repository, that is to make a local copy of the remote repository in our own machine. The clone address can bee seen from the project page. From the command prompt i typed:
git clone ""
Add all the files that I create to the Git staging area The git stage area, is a temporal place to group files and hence create a commit.
git add.
Commit the files to my local repository (that is store all file changes to the local repo). Note that it is necessary to include a significant message
git commit -m "Initial commit"
Creating the website
I used an existing template that Fiore demonstrated from an older fab academy student Massimo Menichinelli.
I made few changes to the HTML
I am familiar with Sublime Text editor so, in order to practice with another editor, I chose Brackets. It was my first time to hear about about it during Neil's lecture, and I wanted to give it a try. The big advantage of this editor is that it generates the HTML view dynamically, so you do not need to reload the browser everytime you make a change to the webpage. The second advantage is that a git plugin can be integrated and you can do your git push directly from the editor.
The template that I used utilize Bootstrap, a framework to develop responsive websites (that is, websites that adapts to the screen size). It is based on a grid-based system of 12 columns, in which the column size is defined by the resolution of the screen in which the website is structured. Bootsrap includes HTML code snippets (e.g. widgets), javascript and CSS in order to achieve the responsiveness. Furthermore, it facilitates the construction of sites by the means of widgets which save a lot of developing time.
Making a website using markdown
Before learning how to upload a website to my repository using git, I had to learn how to make a website.
The tool of my choice for that is a html editor called Brackets. I am using Markdown, a tool to convert plain text into html. In order to enjoy the benefit of a live preview, in installed a Brackets extension called Markdown Preview.
The written text can be formated relatively easy by using simple characters:
* # in front of a line makes a headline, ## makes it a headline of second degree, etc.. * Regularly written letters without any non-alphanumerical character in front of them are presented as regular text. * ‘ ‘(two blanks in a row) end a line with a line break and the following text starts in a new line. * A blank line between two lines makes a new paragraph.
Images can also be added easily with , whereas [Alt text] is the text that is shown when the image isn’t available for any reason whatsoever. (/path/to/img.jpg) is the path that leads to the image, relative to the file you’re working in at the moment../ moves up one folder in the hierachy.
Videos can be added by linking to platforms that are hosting them. I chose YouTube. After uploading a video on YouTube a click on ‘SHARE’ and then on ‘EMBED’ leads to a couple of lines of code that can be embedded in the document and then show the linked video on the website.
Uploading my repository using git
A big advantage of websites is that they are mostly available to people using a computer nearly everywhere on the third planet of our solar system. Therefore, it makes sense to upload a website to a server and make it accessible to others without the need of having the own computer being turned on all the time. During Fab Academy we’re using GitLab to upload our content to the internet.
The first step doing this is to log in at gitlab.fabcloud.org to generate the SHH Key. Therefore, in Git Bash I used the commandssh-keygen -t ed25519 -C "embafrash.solomon[at]aalto.fi"
to generate a key in Git Bash and then pasted it to https://gitlab.fabcloud.org/profile/keys/1552.
Afterwards I used the commandgit clone git@gitlab.fabcloud.org:academany/fabacademy/2019/labs/aalto/students/embafrash-Solomon.git
to clone the git repository from GitLab.
After working on the content that I wanted to upload, I added the files to the git directory using the commandgit add .
and commited it with the commandgit commit -m "commit message".
The upload to the server is done withgit push.
I have structured the files in the website as follows. The index, project files, and each week's documentation are stored in the root folder of the website. Then css folder contains all the CSS style files while the js contains the script files. The img folder contains all the images of each week while the source folder contains weekly 3d and 2d models, code libraries and similar files. Finally the .git folder contains the local version of the Git repository.
A visit to the archive site (archive.fabacademy.org/2019/labs/aalto/students/solomon-embafrash/) and a page refresh should reveal the fruits of your command line labour!