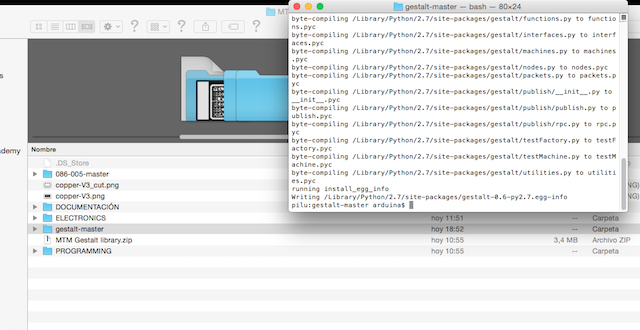
Navigate via Terminal to the folder you where have pyserial extracted, in this folder you should have a file called "setup.py"
Navigate in the command line where your pyGestalt folder is located. Run the command:
3. References Codes for begin:
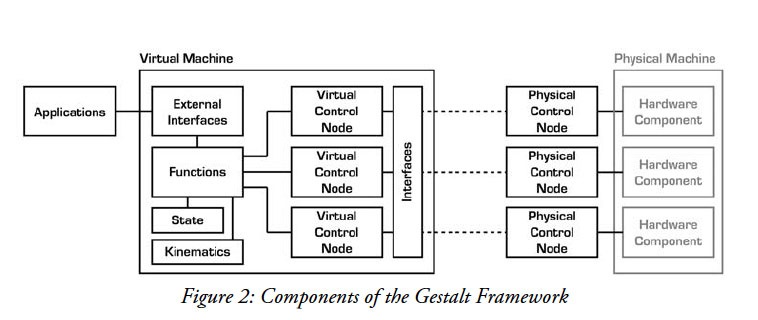
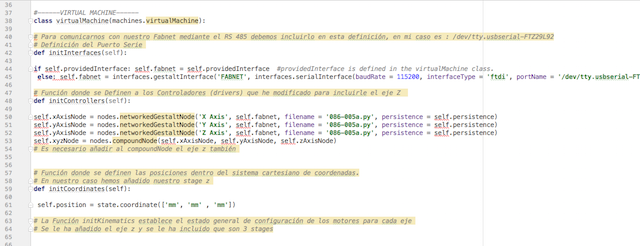
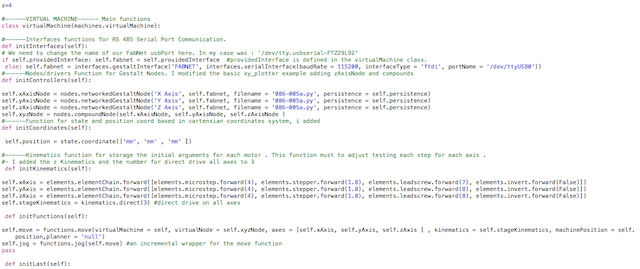
The Nadya´s Gestalt master contains, in addition to framework, code example which is a good seed to begin work. In the folder "examples/machines" will find several projects. I was studying the examples for identify the main functions that makes things work so i commented all:
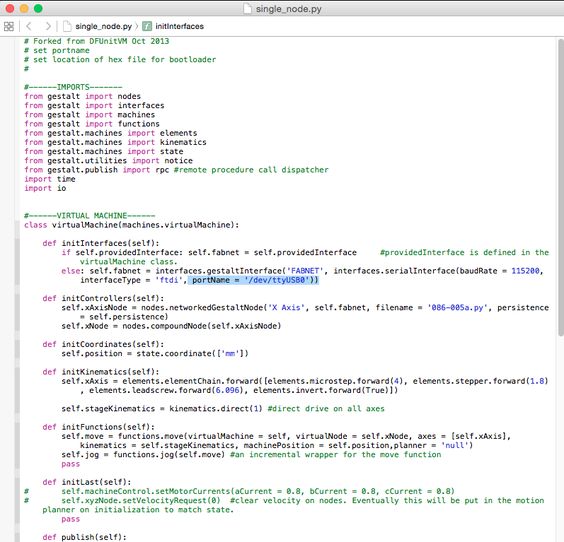
At the pic below you can see how i made the first modify, every time you connect your RS485 you must to change the lines in Serial Function, in my case :

We made the FTDI cable for serial communication, following the steps in :
Official website
This Wire connect to the gestalt board, engine and feed the board with 12v and a maximum of 2A.
Here is the simple diagram reference :
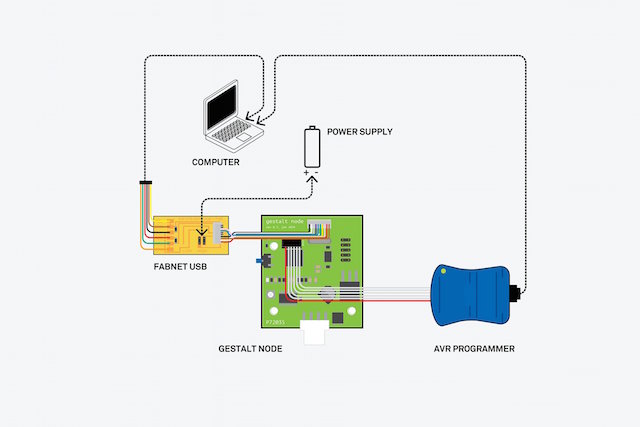
And the fabNet pin connectors described al Mechanical Design Week :

The Picker Machine & Gestalt Nodes
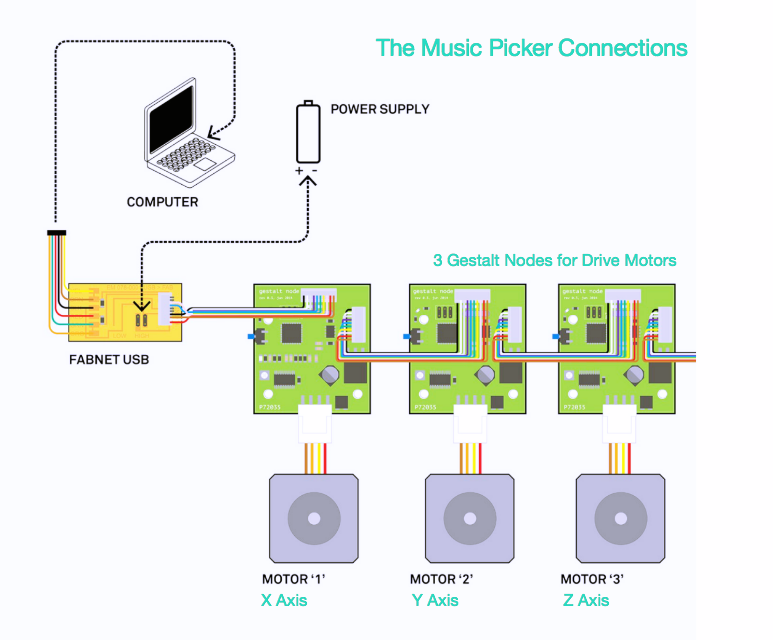
As you see above, our machine use 3 Axis for the moves.
The order to connect all electronics is important : Every time you want to check or add another node always Switch OFF the Power Suply first for not damage the nodes.
- Connect the each motor with his Gestalt node
- Connect the Main Gestalt Node to the FabNet
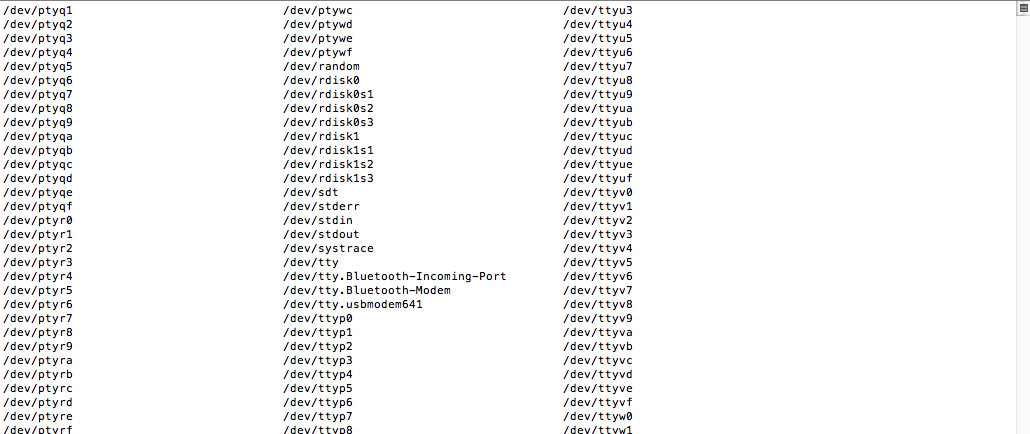
- Connect the RS485 to the computer
- Connect the Power Suply
- Switch on the Power Suply
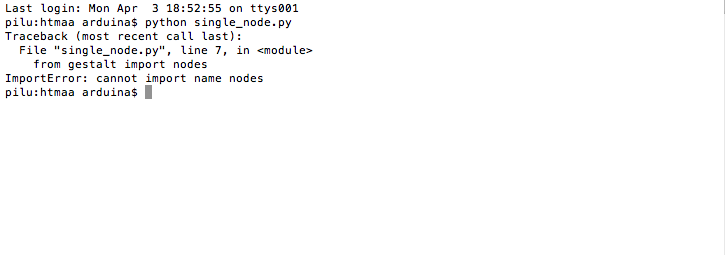
I was trying everything to be correct, accessing from console or terminal to the folder : "/examples/machines/htmaa" and run the script :
single_node.py (if you are using linux, remember to put before sudo to work properly).
If all goes well, the blue led from gestalt board blinks and at terminal screen you will see instructions indicating that we must press the button what you want to link to the program. Click the button and observe the motor connected to the board begins to rotate.
Before connect another gestalt node i was testing all motors and drivers for be sure all electronics is correct. All works fine so i decided to start connecting the second Stepper.
Music Picker Machine : The Code from Pilu Caballero on Vimeo.
It's time to try two Gestalt with our instructor for advance, repeat the previous step interconnecting two boards as described in the diagrams provided below.
Before you run a new program, it must be said that within the source code you will find the following command/funtion:
virtualMachine(persistenceFile = "test.vmp"), with the line managed to save the address of the Gestalt linked in other executions of the program, this it´ss not necessary to press the buttons on the board every time you run the script.
If you want to start over and the gestalt boards linking different axes (e.g. define as "y axis" a board that acted as "x axis" or simply replace them with others) we must delete this file, is a common mistake to have linked a board and trying to run with another different board get errors because the device is not. Once clarified this, you can run another script in the same folder, which in this case will move two axes of our machine.
When running in console python xy_plotter.py blinked bue leds of the two boards and on-screen gave us instructions to press the button on the board that would be the "x axis ", once you press another message asked us repeat the same action for the "x axis ". After this the script continued its runtime and both engines were its rotational movement.
OUR PICKER MACHINE CODE
WHAT moves must to do our motors :
X Axis move the machine to the Music Sheet 70 mm size between notes each 2mm
Y Axis move the Header to make holes perforation
Z Axis Roll Music Sheet beetwen line notes each 4mm
1. Modifying xy_plotter.py example for add the z Axis : My Instructor suggested the xyz_Example from oficial tutorial for deserve as back up. But i decided add all by me for learn and practice all tutorials reviewed.
2. After this and as i haven´t the machine i decided start with something with the goal to have the main things before work with my classmate Javi , so i declared the variables based in the steppers moves for apply 8 notes and add more notes later.
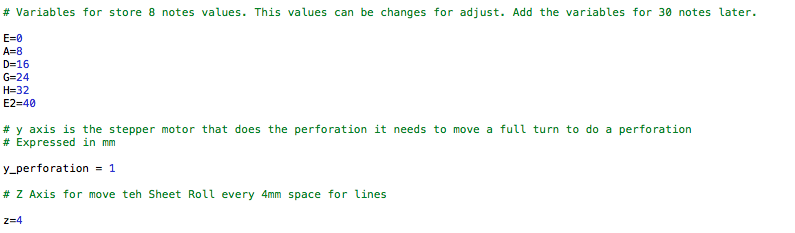
3. And a example Array for this variables :

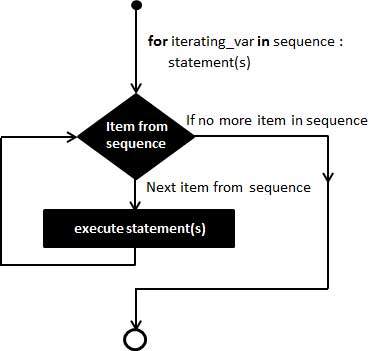
4. A For folowwing the Python reference : It has the ability to iterate over the items of any sequence, such as a list or a string.
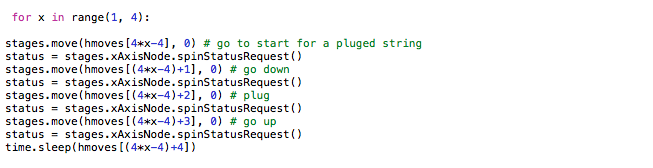
Finallly We was ready for focuss and here are our code :
OUR VARIABLES
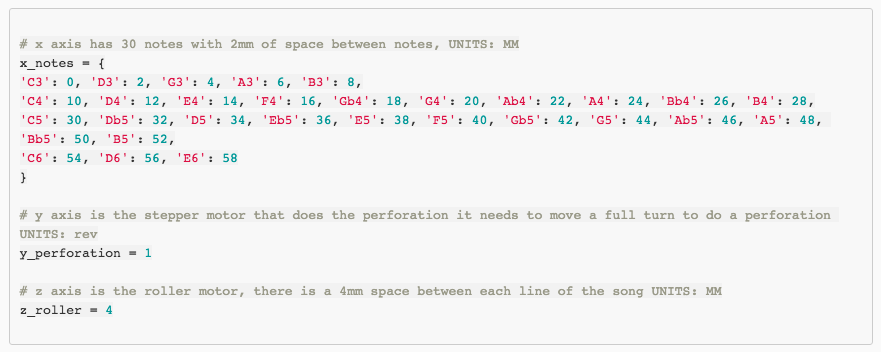
Javi gently change some things such the expression for Y Axis to ´revolutions´
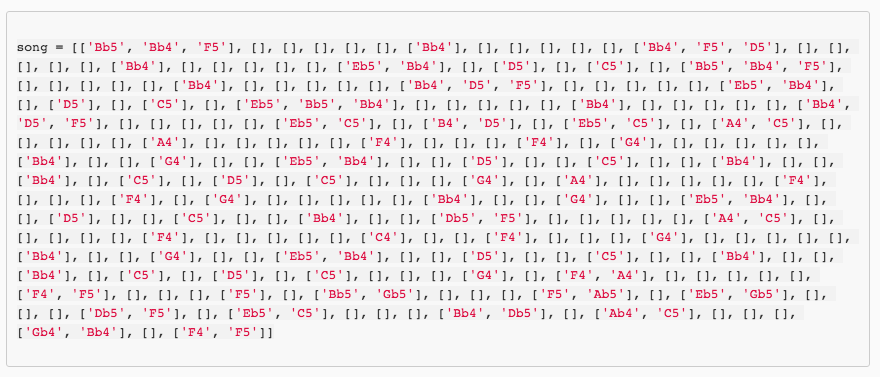
OUR SONG
The song data is stored in a bidimensional array, first dimension are the lines of each song and second dimension are the notes within each line. I used this great online editor to understand the notes that the music box used and how the roll sheets are structured. By the way the above song array is the intro theme of Star Wars!!
THE MAGIC
This is where all the magic happens: we iterate for each line of the song, creating the neccesary instuctions for the machine and appending each movement within the moves array, in pseudocode :
For each line in song position the z_roller
If not empty then for each note move the first x_note in the row
Make the perforation with y_perforation one revolution
Go back to the position x = 0
Move to next line
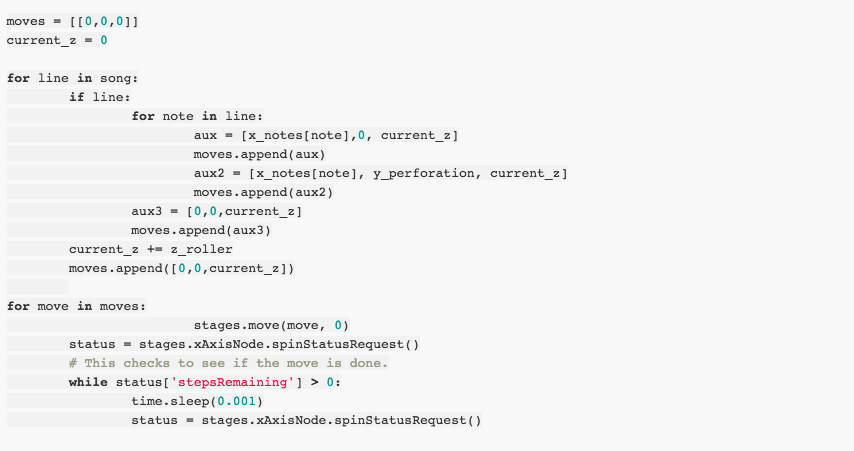
The last for loop is taken straight from the example code and feeds the machine with the moves array and checks that the last move has happened before sending the next one.
For surprise to my classmates i made some helps for our Final Video based in some sheet perforated :
Design Words for Music Picker Vídeo from Pilu Caballero on Vimeo.
Prototype Words for Music Picker Vídeo from Pilu Caballero on Vimeo.
Building Time Words for Picker Music Machine video from Pilu Caballero on Vimeo.
Code Words for Music Picker Machine Vídeo from Pilu Caballero on Vimeo.
WEEK´s LEARNED
This week i learned a lot about the Python enviroments, about Gestalt Frameworks. Obviously hot to power our machine, hot to wire better. At programming i learned about the use of arrays for motors movements and new midi parsers.
WEEK FILES
The Music Picker Machine Code
Javi´s midiparser
WEEK CONCLUSIONS
Work with people that neve consider the effort for advance, people as don´t believe in communication as a group was really difficult.
My own goal was have the music picker machine program and now we have the main things.
Probably if my fabmates focuss in the design we would have the machine ready for work.