Website Design, GitLab and Final Project Planning

Week 1

Introduction

All hail the non-programmers out there.

I thought I was so well prepared for this part. I made a GitHub account in November and experimented with templates. However, I never fully understood the interaction between the various interfaces. I didn't know which parts were meant to be created where. This week I learned that while git allows us to push and pull repositories and consolidate changes, it doesn't actually allow us to manipulate the content itself. We have to use other interfaces for that! (Insert lightbulb here) So I've learned a little bit about Brackets, Bootstrap, basic html coding and managed to get this page up and running.

Creating the website

The challenges

Where do you start when you know nothing at all?
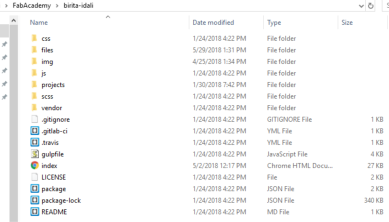
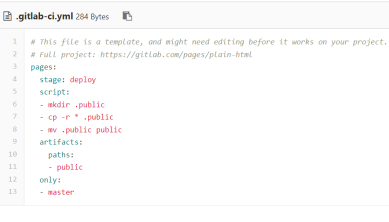
Git and GitLab

Git is awesome at what it does. Having never programmed anything before, I thought I needed to somehow write the code in the command window. You can imagine my frustration. Eventually, I figured it all out though, and now I use Git - sort of - for version control of my website. I didn't realize that the GitLab environment set up for us was "baby-proofed". When I couldn't access the "settings" for the provided repo, I forked my repo and set up a website myself. When I asked if others had had the same problems, I discovered that I was basically the kid that climbs on top of the counter to get a knife, not realizing that the bread was already buttered. xD
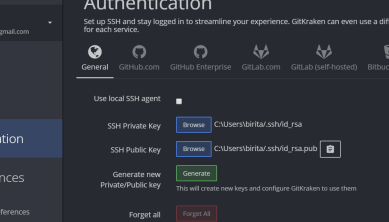
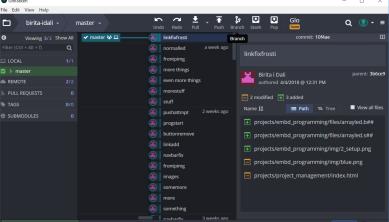
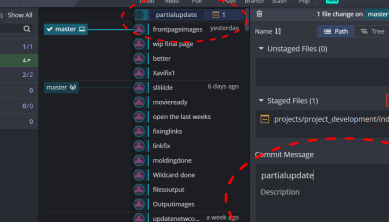
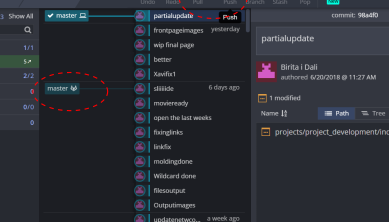
GitKraken

I knew I was somewhat afraid of Git by now, and GitBash was not helping me at all. That's when I looked for other interfaces and found GitKraken. I am a sucker for a good pun, so it spoke to me immediately. More importantly, GitKraken allows me to pull, push, commit and all that other stuff without writing a single command line. Instead I click on the appropriate buttons. It made the whole thing less daunting.
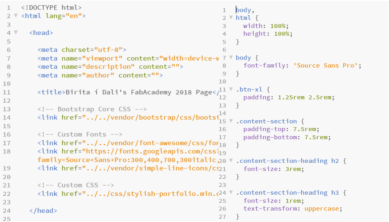
Brackets

One of the most frustrating things with getting started with Git was that every single tutorial says "Grab your favourite text editor and get started..." Well, what if you don't even know what a text editor is? My search led me to Brackets, which allows me to write and edit code, and by the click of a button it gives me a live preview of what my code creates. For example, I clicked it and can see if this paragraph is too long.
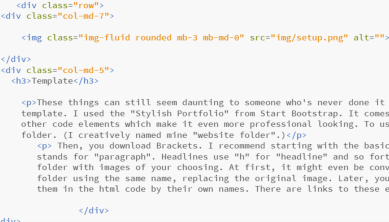
Start Bootstrap

So now I had the tools, but no idea how to use them. I felt like a kid holding a hammer but not knowing the difference between a nail and a screw. I did know that Bootstrap is a set of pre-written code packs that help us noobs make pretty things. My search for free templates led me to Start Bootstrap, a page with several themes, openly available for use and re-use. I picked my favourite, and bit by bit, I am starting to understand how the code works. At first I just replaced the text with my own, but now I am moving sections around and even modifying them.

Back to front-page

Applying my newfound knowledge

Code

There are a few things required to make a website. First, you need some html code. This is the base code that tells the browser how to display the things you put in. Like.. text, pictures, video and so on. With html you can control paragraphs, alignment and lots of other aspects of your website. You usually write your content directly intermingled with the html code, but it's not as difficult as it sounds, because we also have CSS code which handles all the parts that make your page pretty. In CSS you can control things like colors, fonts, distances between things and you can make html elements so that if you write a specific piece of html code it will call up pre-written parameters from the CSS doc.


Template

These things can still seem daunting to someone who's never done it before, which is why it can be a good idea to use a template. I used the "Stylish Portfolio" from Start Bootstrap. It comes with pre-written html and CSS codes, as well as other code elements which make it even more professional looking. To use this code, you download it and put it in a folder. (I creatively named mine "website folder".)

Then, you download Brackets. I recommend starting with the basic text elements. They are surrounded by "p" which stands for "paragraph". Headlines use "h" for "headline" and so forth. You can then try replacing images in the "img" folder with images of your choosing. At first, it might even be convenient to simply save your own image in the same folder using the same name, replacing the original image. Later, you can start putting in new images and referring to them in the html code by their own names. There are links to these elements in the first segment of this page.


Structure

The base structure of the page is an index page, which contains the html code, folders containing code, (which we don't need to think about for now,) and some folders which are of particular interest, namely the "img" and "files" folders. In these folders, we place images and files connected to our projects. We can then refer to these folders when we want to include links for people to download and try our files, or when we want to show them what we've done using images.

As you can see in the image on the left, you can edit, change, add or remove files directly in your folder interface.Un this example, windows explorer is used, but what is important to realize is that this is really as simple as it seems. If you put a picture into the right folder on your computer, commit and push it to your repository, it will be in that folder in your repo.


Generating SSH key

Before we can add to our GitLab repo we must first generate an SSH key. Essentially, the GitLab repo is locked, and in order to edit it, we have to show it that we have permission. The computer should then save the SSH key locally, so you only have to do this once per device. In GitKraken, open your preferences and select "authentication" and press "Generate" For more on SSH keys and GitKraken, and how to use them with GitLab, follow these excellent guides.

Guide on SSH keys for GitKraken Guide for generating SSH keys for GitLab the old way

Uploading files to the archive

In order to upload files to the archive, we write and prepare the file locally, or pull it from the repository. We then commit our changes and prepare them before pushing them to the repo. I use GitKraken to push files to the repository provided on gitLabs by fab Academy. Now the files are in the archive.


Staging

Let's say you've made changes in your text editor and you've saved them. Now it is time to stage your changes. Here, you can review the changes you have made and decide whether to keep your changes or not. Once you are satisfied, you stage all the changes you wish to keep, and you're ready for the next step. As you can see, in my example image I have several staged changes.

If for some reason you chose to use the basic Git UI for this, this corresponds to the "add" command: git add <filename> or git add*


Committing

To commit your changes, you name the commit. For example, if I were adding images to my input week, I might name the commit "input images". If I were working with other people, I might then write a short message about why I am making the changes, or what exactly the changes do. Since I am working alone, I mostly name my commits something simple, and assume that I will remember what they mean. You then press "Commit changes to n files" where n is the number of files you have staged for the commit. You should now see the version list update change from having a WIP at the top to having the name of your latest commit at the top. As you can see, I have many commits ready for the next step.

In the basic git ui, the command is: 'git commit -m "Commit message" ' where the commit message is where you would add the name and message about your commit. You could also write 'git commit -a'. to just commit all your changes at once.


Pushing or Pulling

Now you may have noticed in the intuitive version view that we have in GitKraken that the master on the computer is further ahead in versions than GitLab. This means that it is time to push. This will psuh your version of the repo to GitLab, thus updating the GitLab version with your changes. If you are making changes on multiple computers, or if other individuals are also making changes, the GitLab master might be further ahead than your computer master. If that is ever the case, you press "Pull" to update your local repo so it matches changes made to the GitLab master since your last sync. Once you have successfully pushed, the masters will merge, showing that they are matched.

If you are using the basic git command interface, the command is: 'git push origin master' and you have to use 'git status' in order to see whether your version is up to date or what changes you still have left to commit, push or even pull.


Making the website appear

A repository is not a website. In the most basic terms, to make the website visible you need to tell GitLab to run it, and how to run it. The Fab academy organizers had already enabled the runner for us, so all we needed to do was create a yml in the root directory. Don't follow the gitlab guides, because they assume that you have full control of all features, but in our case, we don't, because they've removed the things that we could really ruin. The GitLab guides happen to require you to fiddle with said things, which is why I had such a hard time getting my site up and running originally.

I can't remember where I got this particular yml file, but there's millions of them, mostly the same. You can see mine on the left.


Keeping track of the size

I have had a lot of trouble keeping the size of my website below the maximum. I didn't know that there are git commands to give you the size, because I do not use Git and do not intend to. At first, I just edited my images, making them smaller, but I didn't reduce the resolution. This meant that my images were accidentally up to 20 times larger than they ought to be. Once I discovered the problem, I used Inkscape to reduce the size, as it could do so with no hassle, while Gimp has changed since I last used it, and simple changes took up to half an hour longer to do in Gimp than they did in Inkscape. Now the average image is 150-200kb.

For videos, I use clipchamp to compress and do minor edits, and for files, I zip them and place them where needed.

Clipchamp