MIT Aapp Inventor 2
Creating an App
MIT App inventor 2
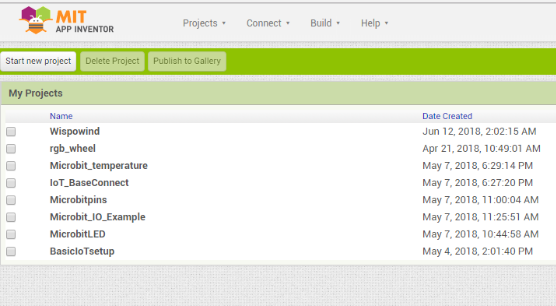
MIT App inventor 2 is a browser based platform for creating simple apps. You can sign in with your google account, making it very hassle-free to create an account and log in. Once there, you arrive on your home screen, where you click " New project" to start making an app.

Designer window
Designer window is the area where you design everything that you want to have in your app and how you want it to look. In "User Interface" You have various options for the user to interact with, such as labels, buttons, lists and so on. In "Layout" You have options for how the things you put in look and how they appea rin relation to all the other things in your app. The rest of the options are as intuitive as the first two. The one thing I expected to find in "connectivity" was a Bluetooth Low Energy option, but there is only a regular "bluetooth" option, which will not suffice for the bluetooth low energy boards available to us.

Bluetooth extension
Luckily, there are plenty of extensions available to add functionality to app inventor, and one of those extensions is this BLE extension. I followed the tutorial to set up my basic connection.
BLE extensionBLE basic connection tutorial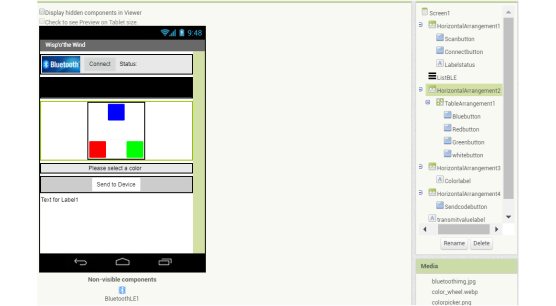
Components of my app
Once I had the basic connection set up, I added buttons in a layout I found pleasing, named them and configured them to my liking. I also added a label meant to show the color the user picks.
Blocks
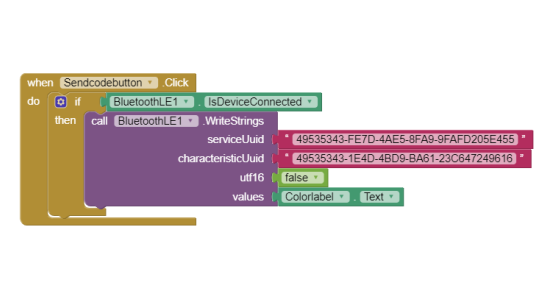
This part of the App Inventor reminds me a great deal of MicroBit, in that it uses handy "Puzzlepieces" to represent the code. You select the parts you wish to use, and tell them what you want them to do. For example, when the user presses "send to device" the App detects which color they have picked and sends a single letter to the connected RN-4871.
AI Companion
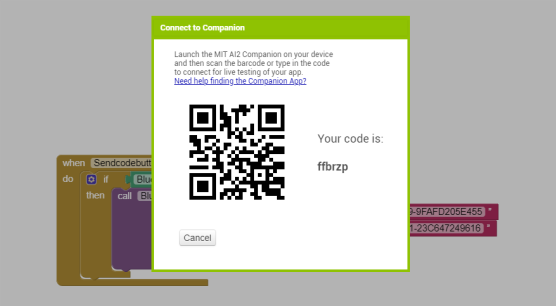
App Inventor two has a built in feature called the AI companion. You click "connect" and select "AI companion. One of the best aspects of the AI Companion is that it allows us to check the functionality and appearance of our app as we are developing it. To use the companion, you download the companion app in Play Store or whatever iPhone equivalent Apple people have. You then scan the QR code displayed on your computer, and hey presto! You're connected!
Exporting the finished app
Once you are satisfied with your app, you click "Build" and "App (Save .apk to my computer)" In order to share it, place your .apk in a repo on the internet and link to it. When people download it onto their phone, the app will go to their download folder, where if they select it they are given the option to install it. If you would like to download my app, you may do so here by clicking the button below or scanning the QR code on the left.
Willowisp app (.apk)Willowisp remixing (.api)It works!
The app works. It sends data to the TinyBLE and onwards from there to the computer. I edited it so it only sends single letters. b, r, g and w. Now I just need to edit my network so that the LED boards respond according to the signal. I tested the connection by plugging the computer RX to the TinyBLE TX, but this disconnects TinyBLE from the terminal immediately. This suggests that there is something wrong with the way that my Attiny is set up. I currently have it running on an echo code with only a single serial node, so it only receives from RN4871 and only sends to the bus.