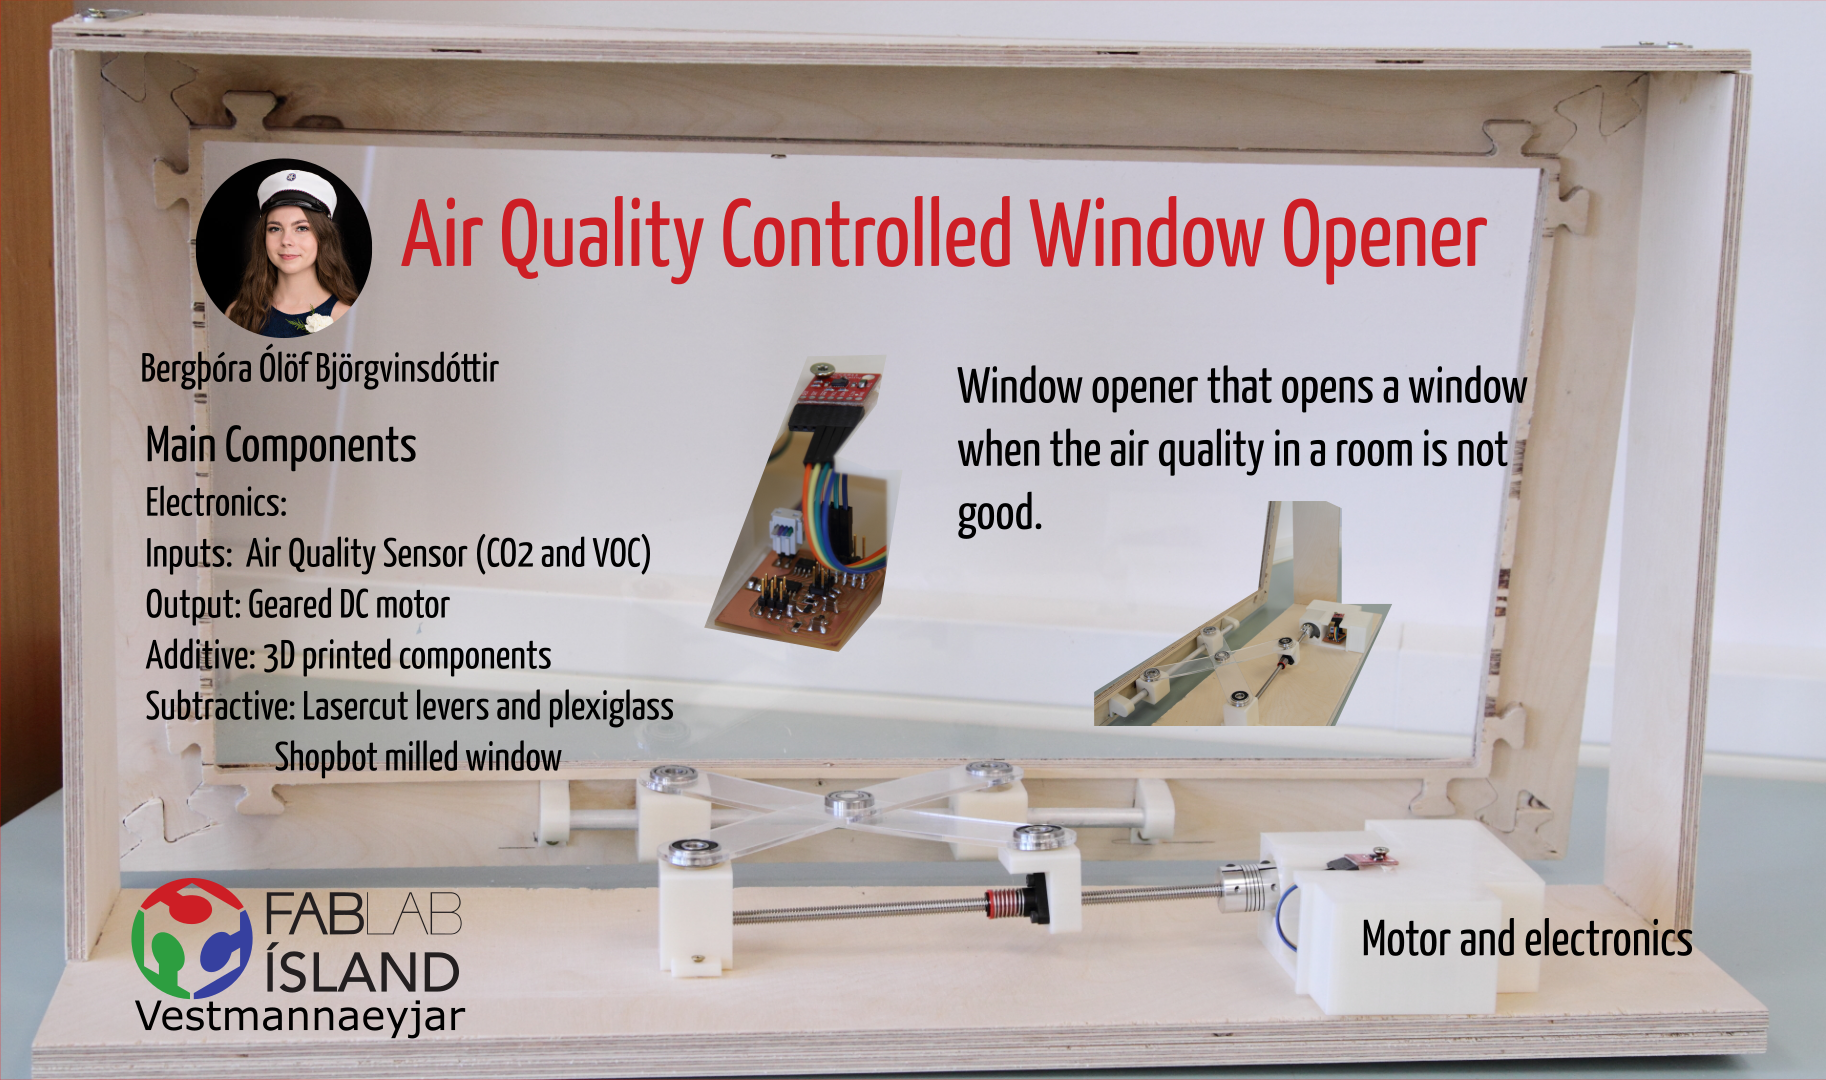
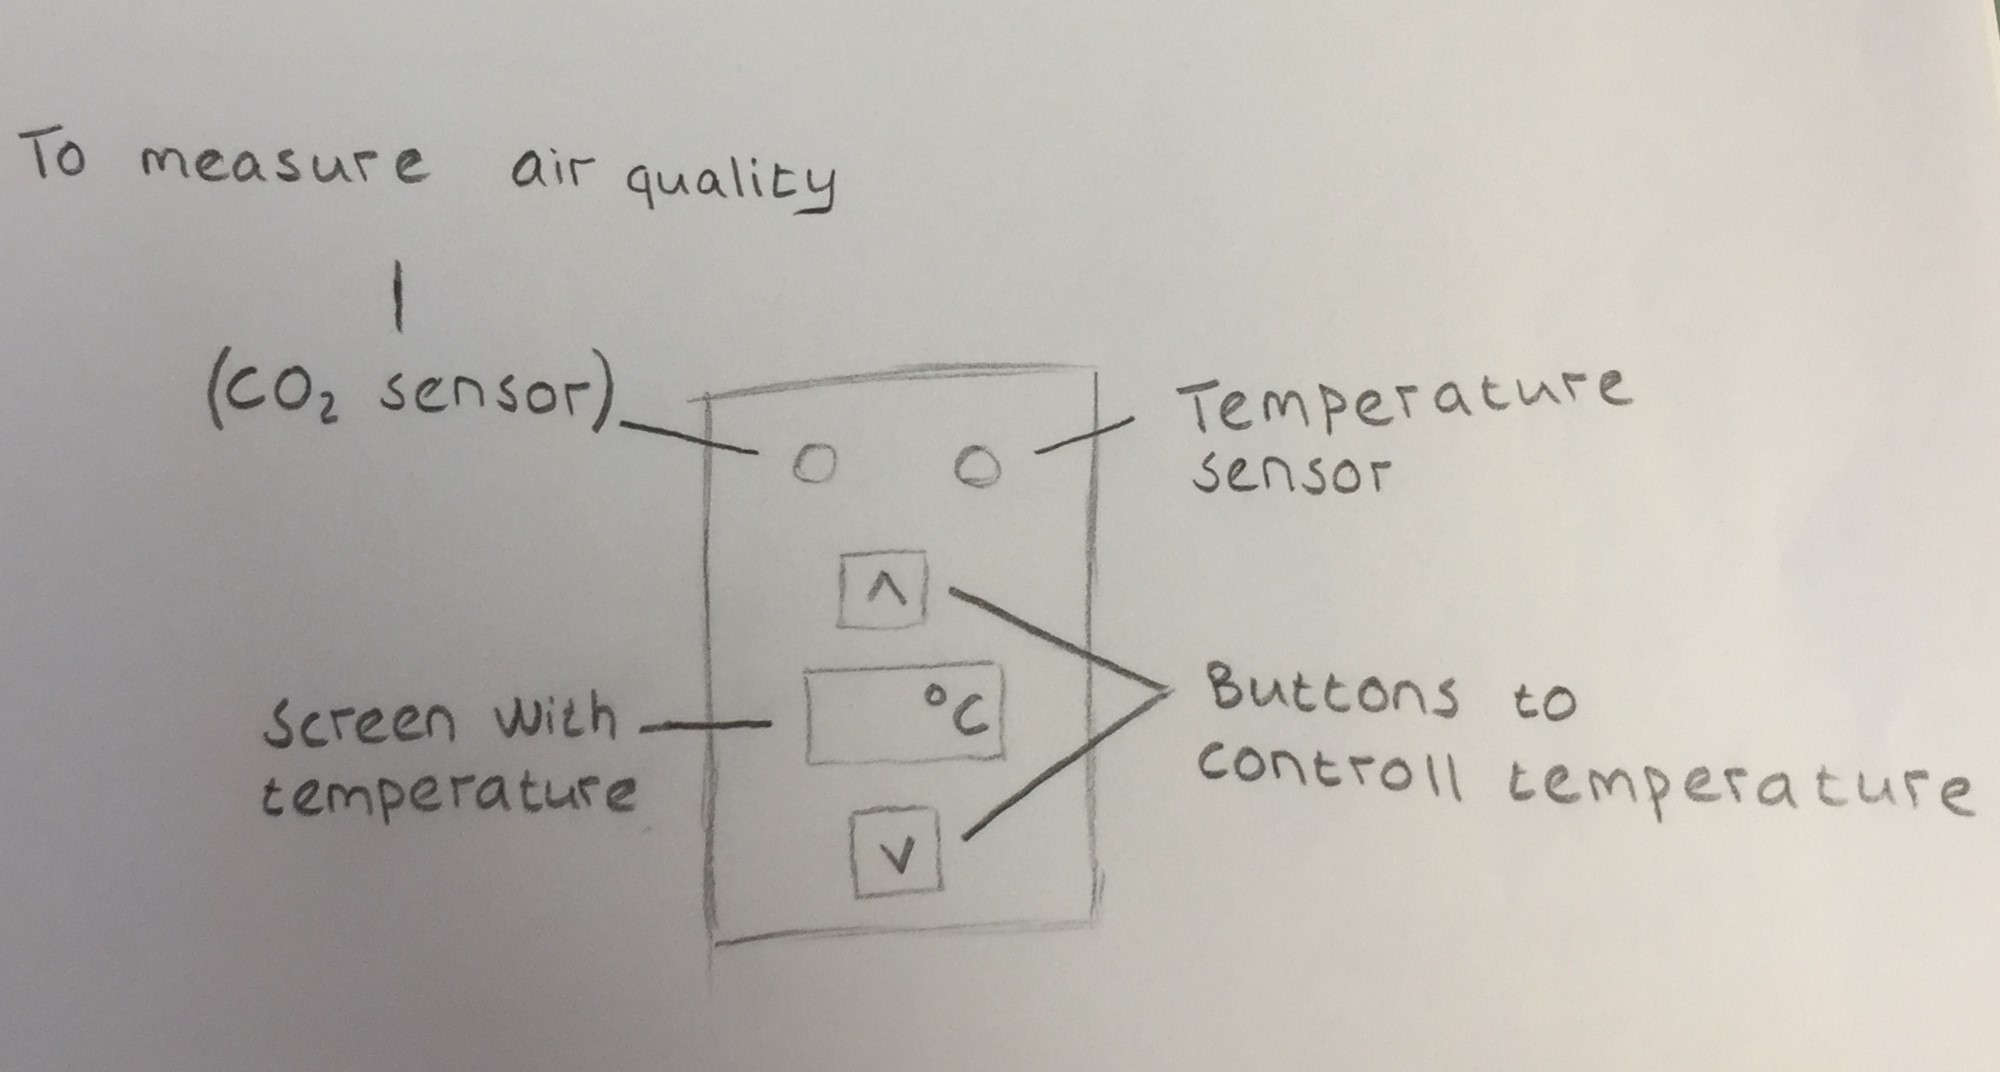
For my final project I had the idea to make a window opener that can be fastened to most types of windows and opens a window when the temperature in a room gets above a certain point and/or if the air quality is low. To sense the air quality and temperature I am going to use an air quality sensor that senses Carbon Dioxide, Volatile Organic Compounds and temperature.
To open the window I will use a dc motor with a gear head
that will communicate with the sensor thorugh a circuit I will design.
This kind of window opener could be usefull for example in class rooms, office spaces or any kind of rooms where the air quality is often low.
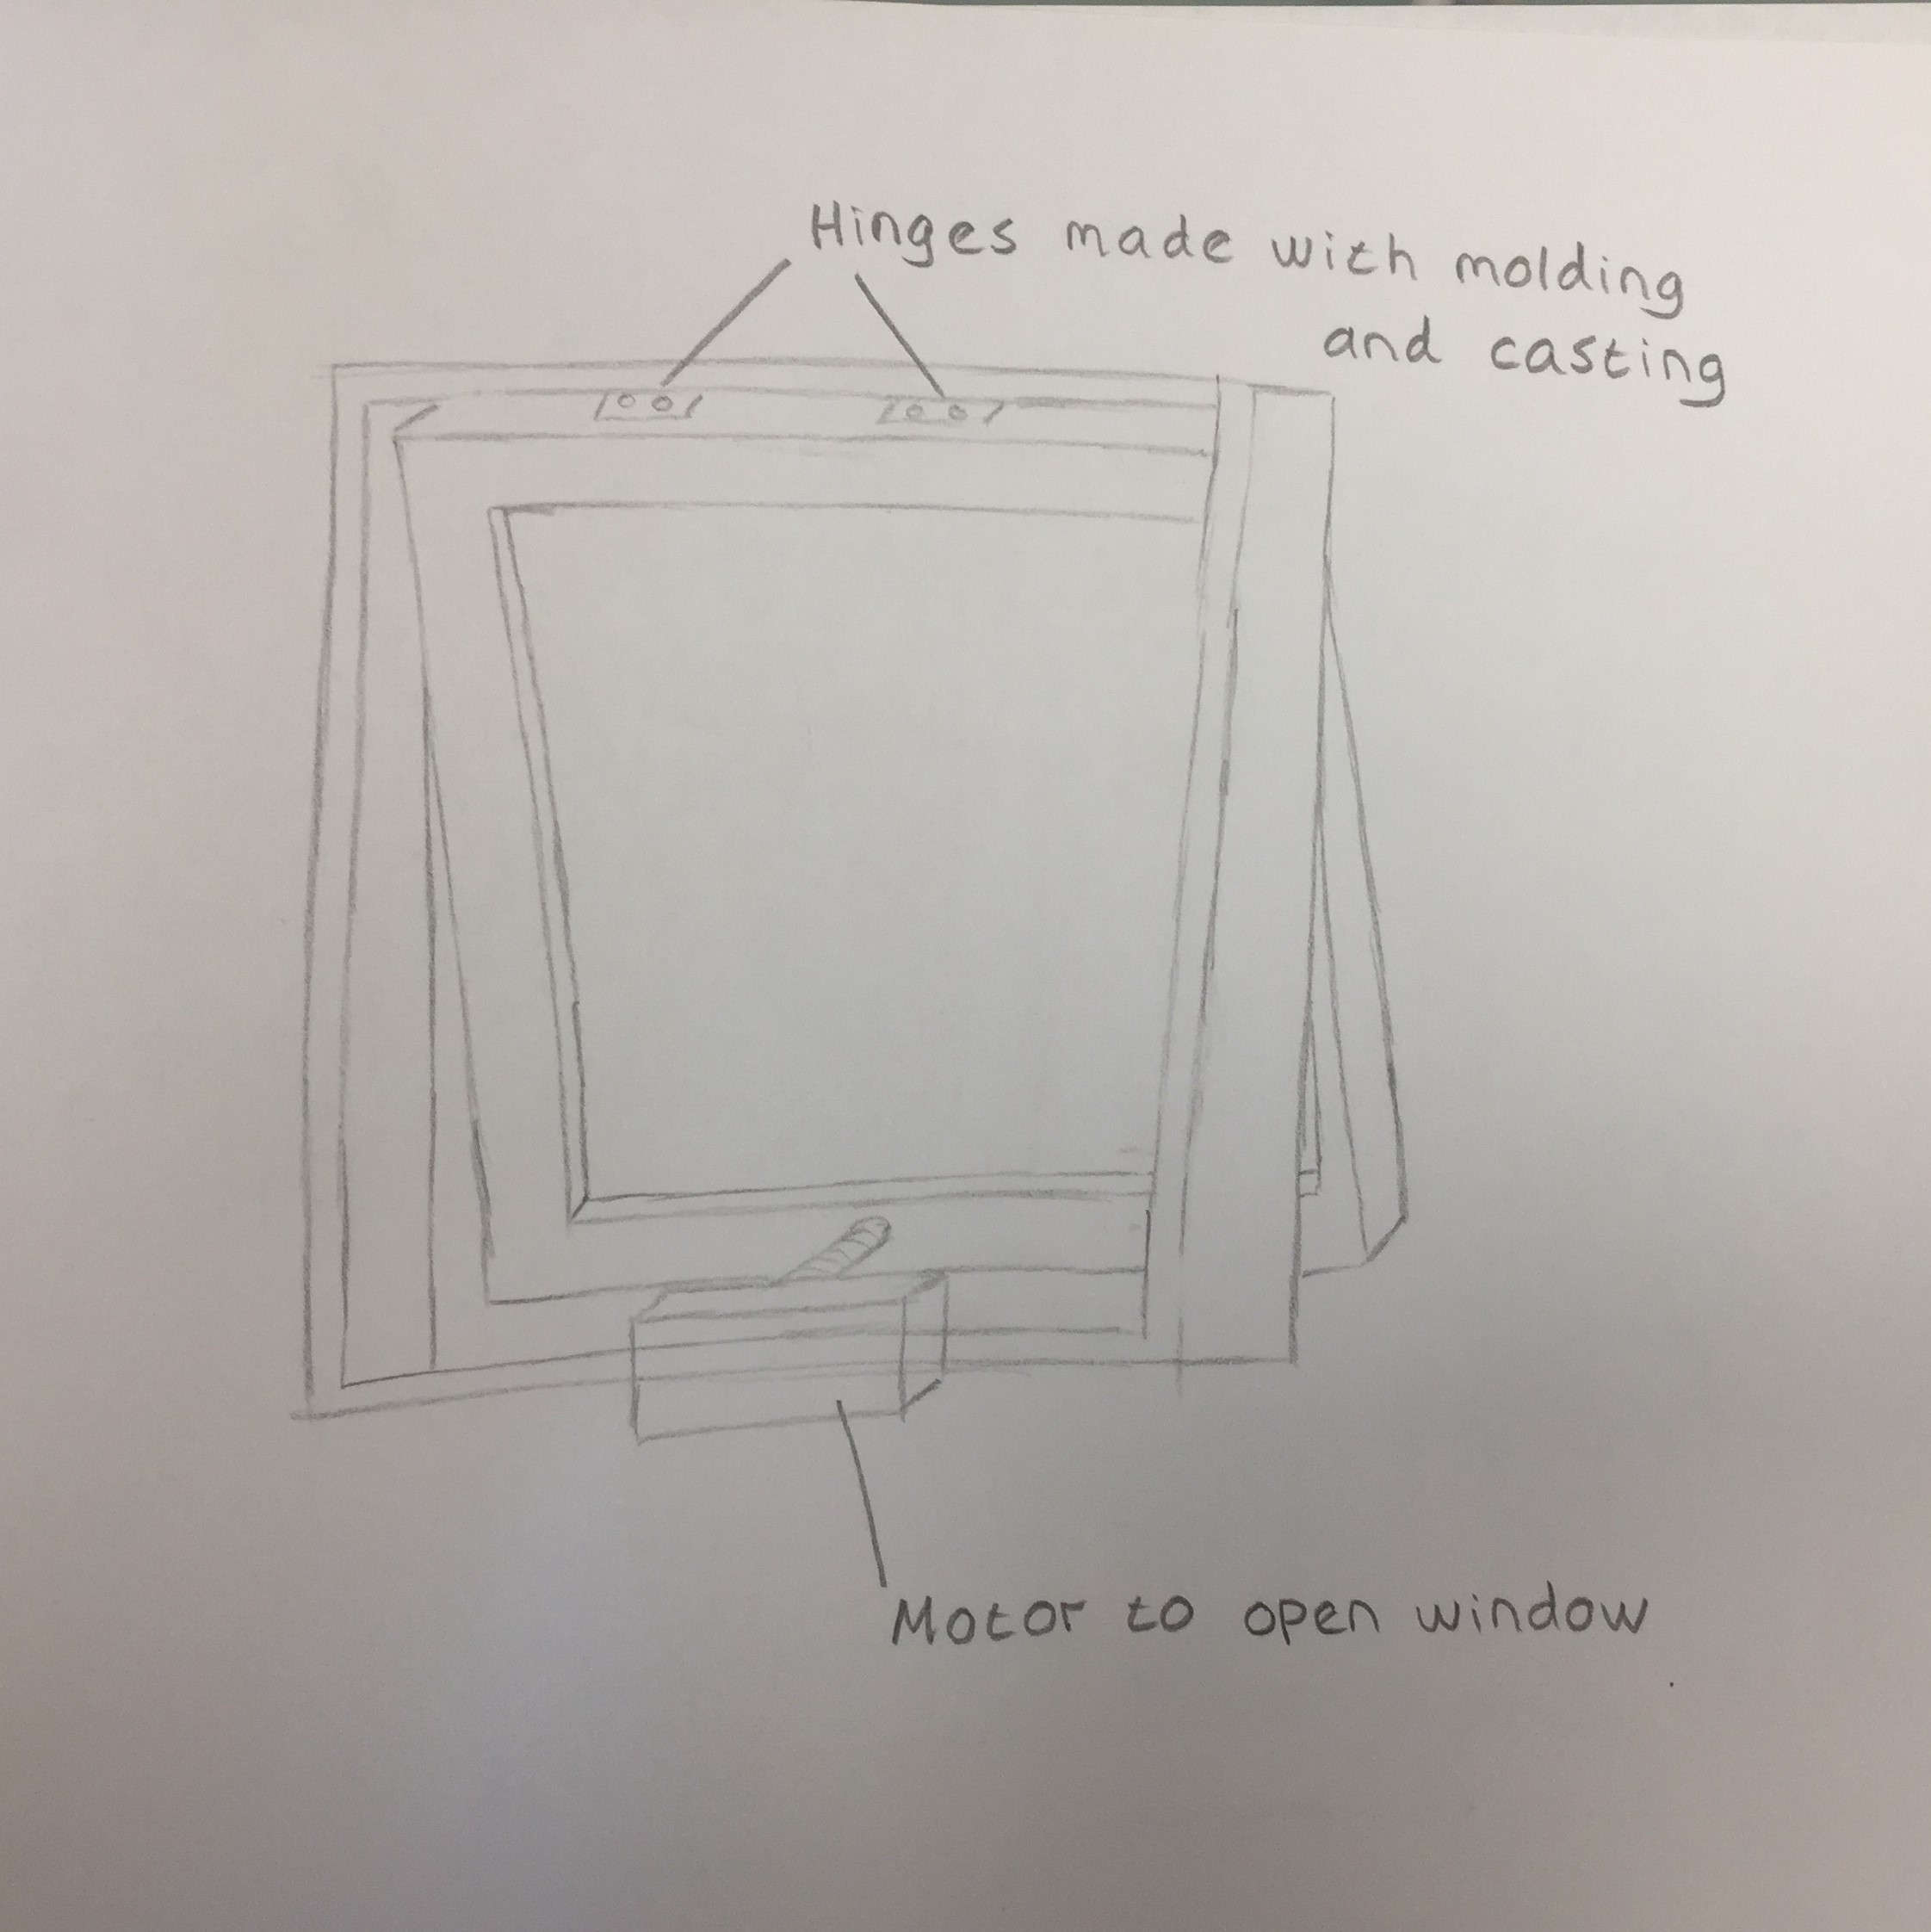
Here are some images of the final project both drawn in inkscape and on paper.
I created a model of the window in Fusion 360 that can open but I have not put the motors on that model yet.
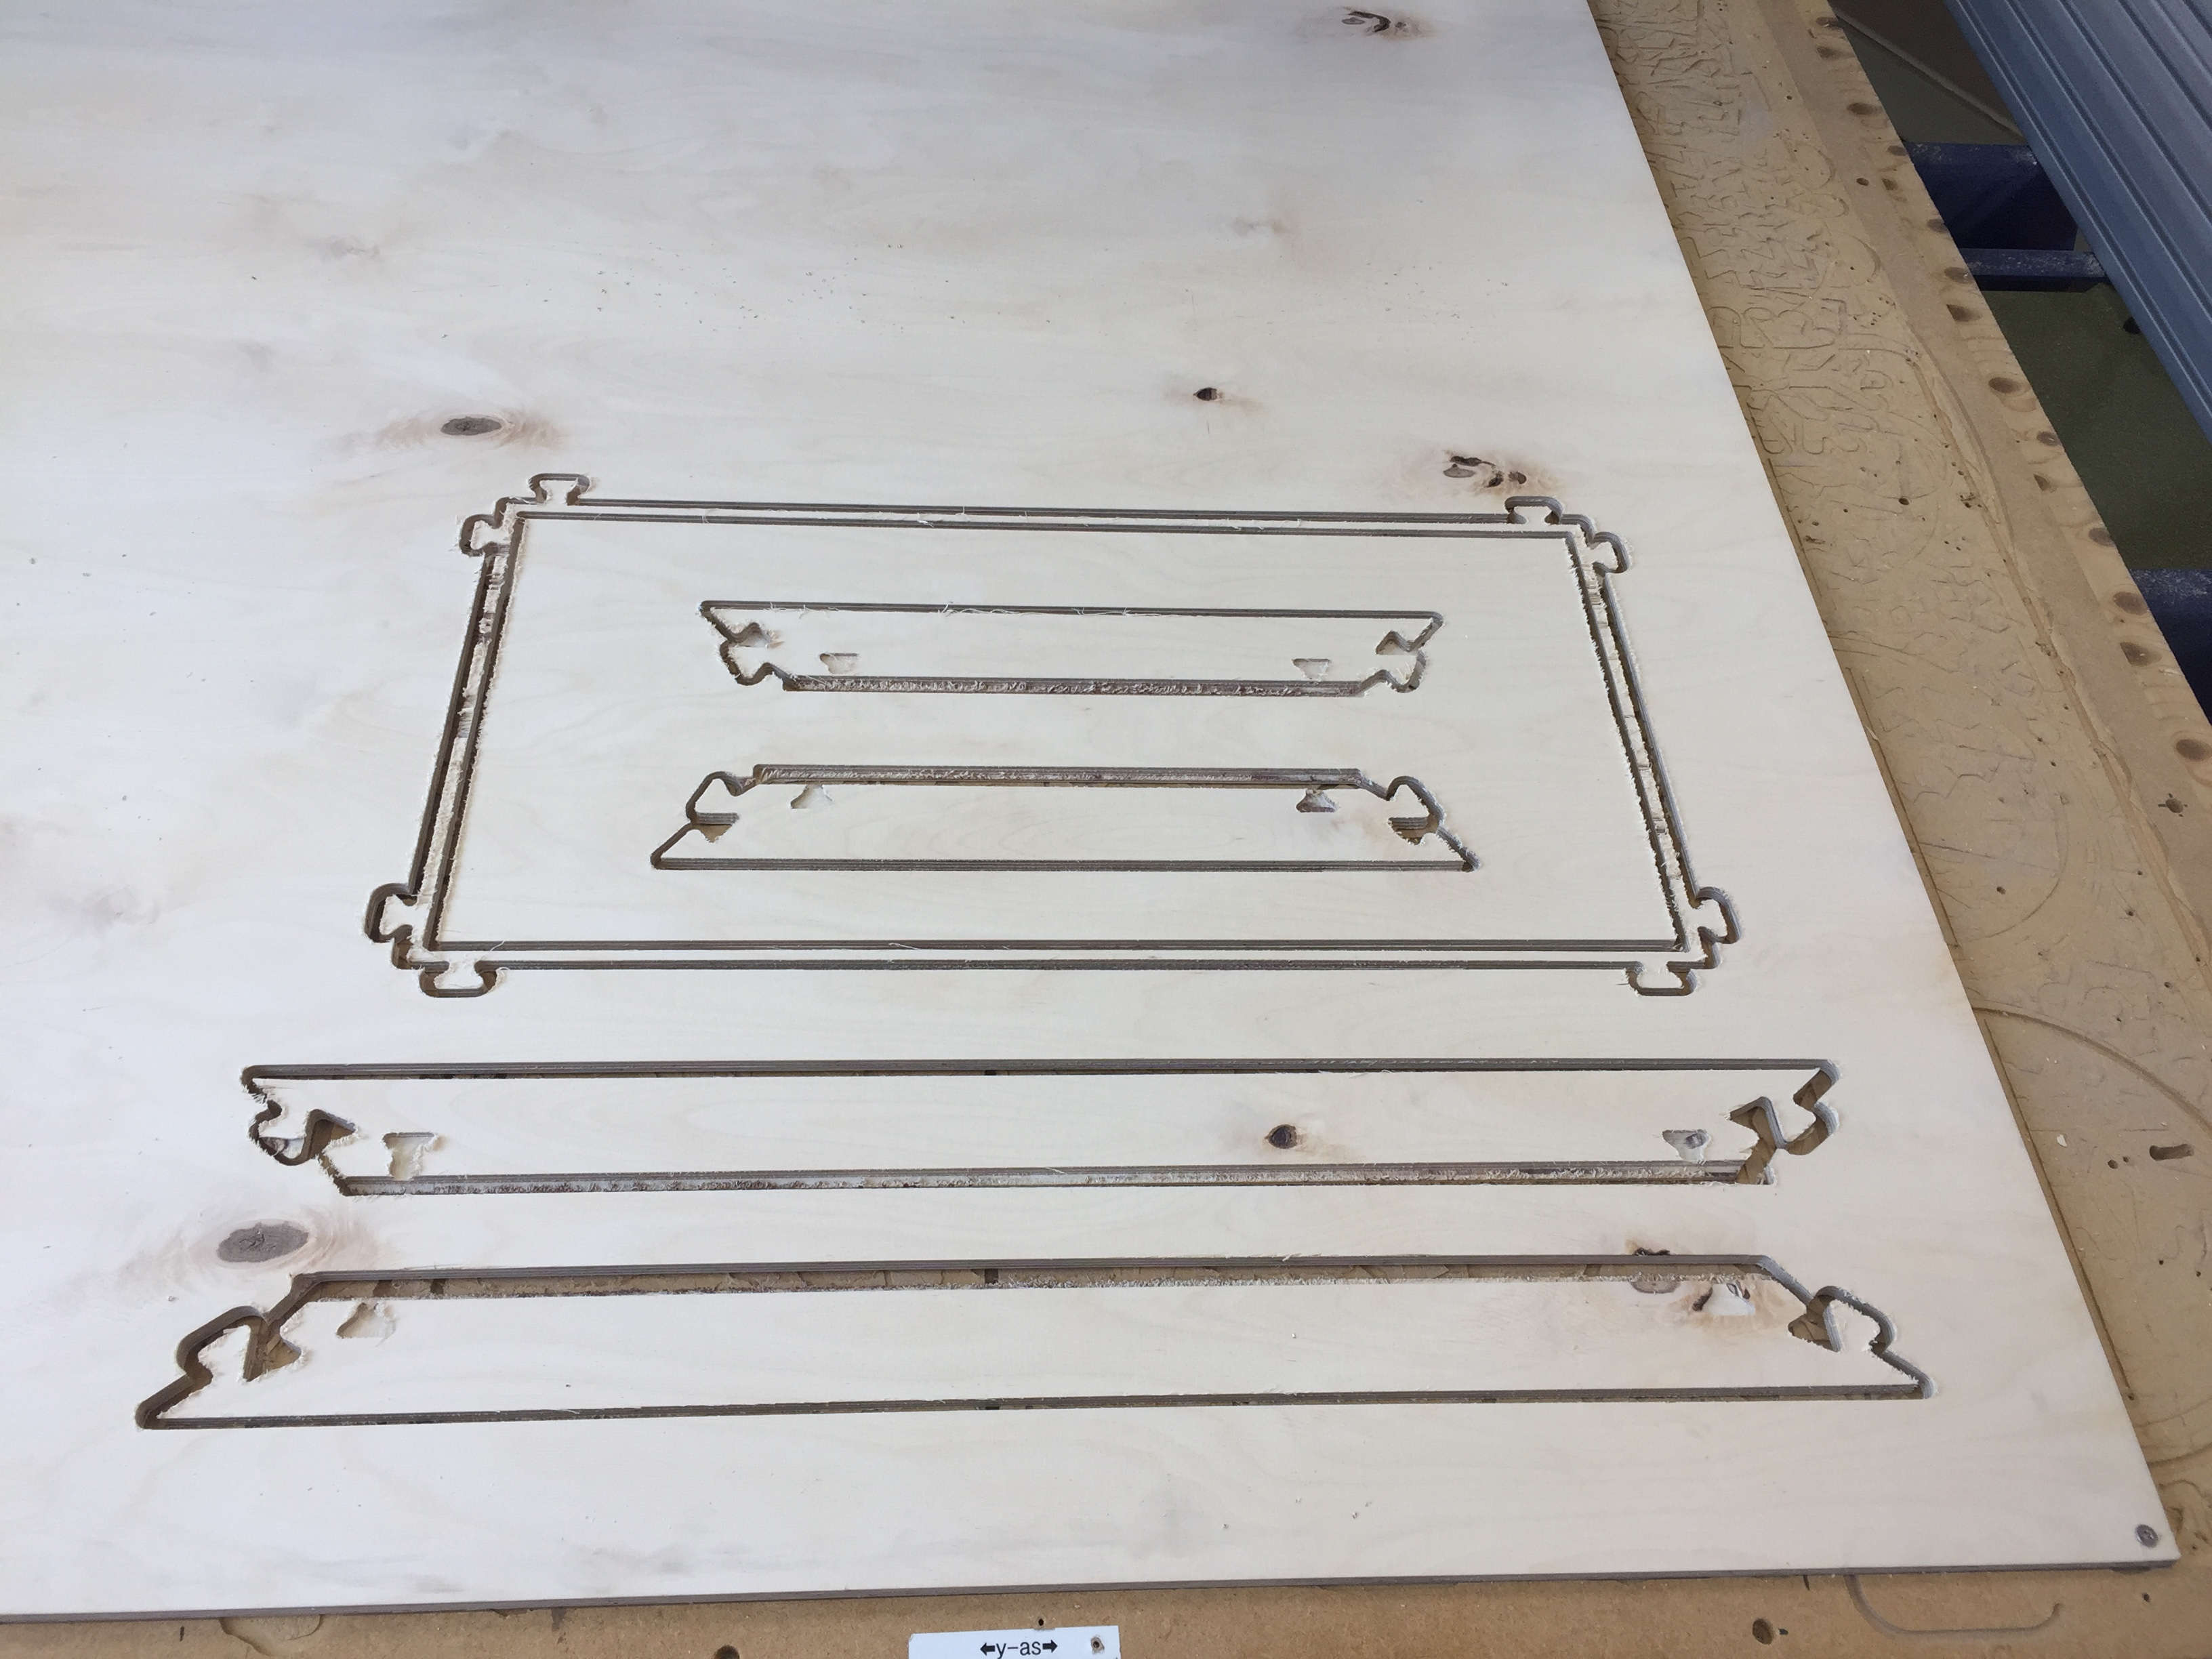
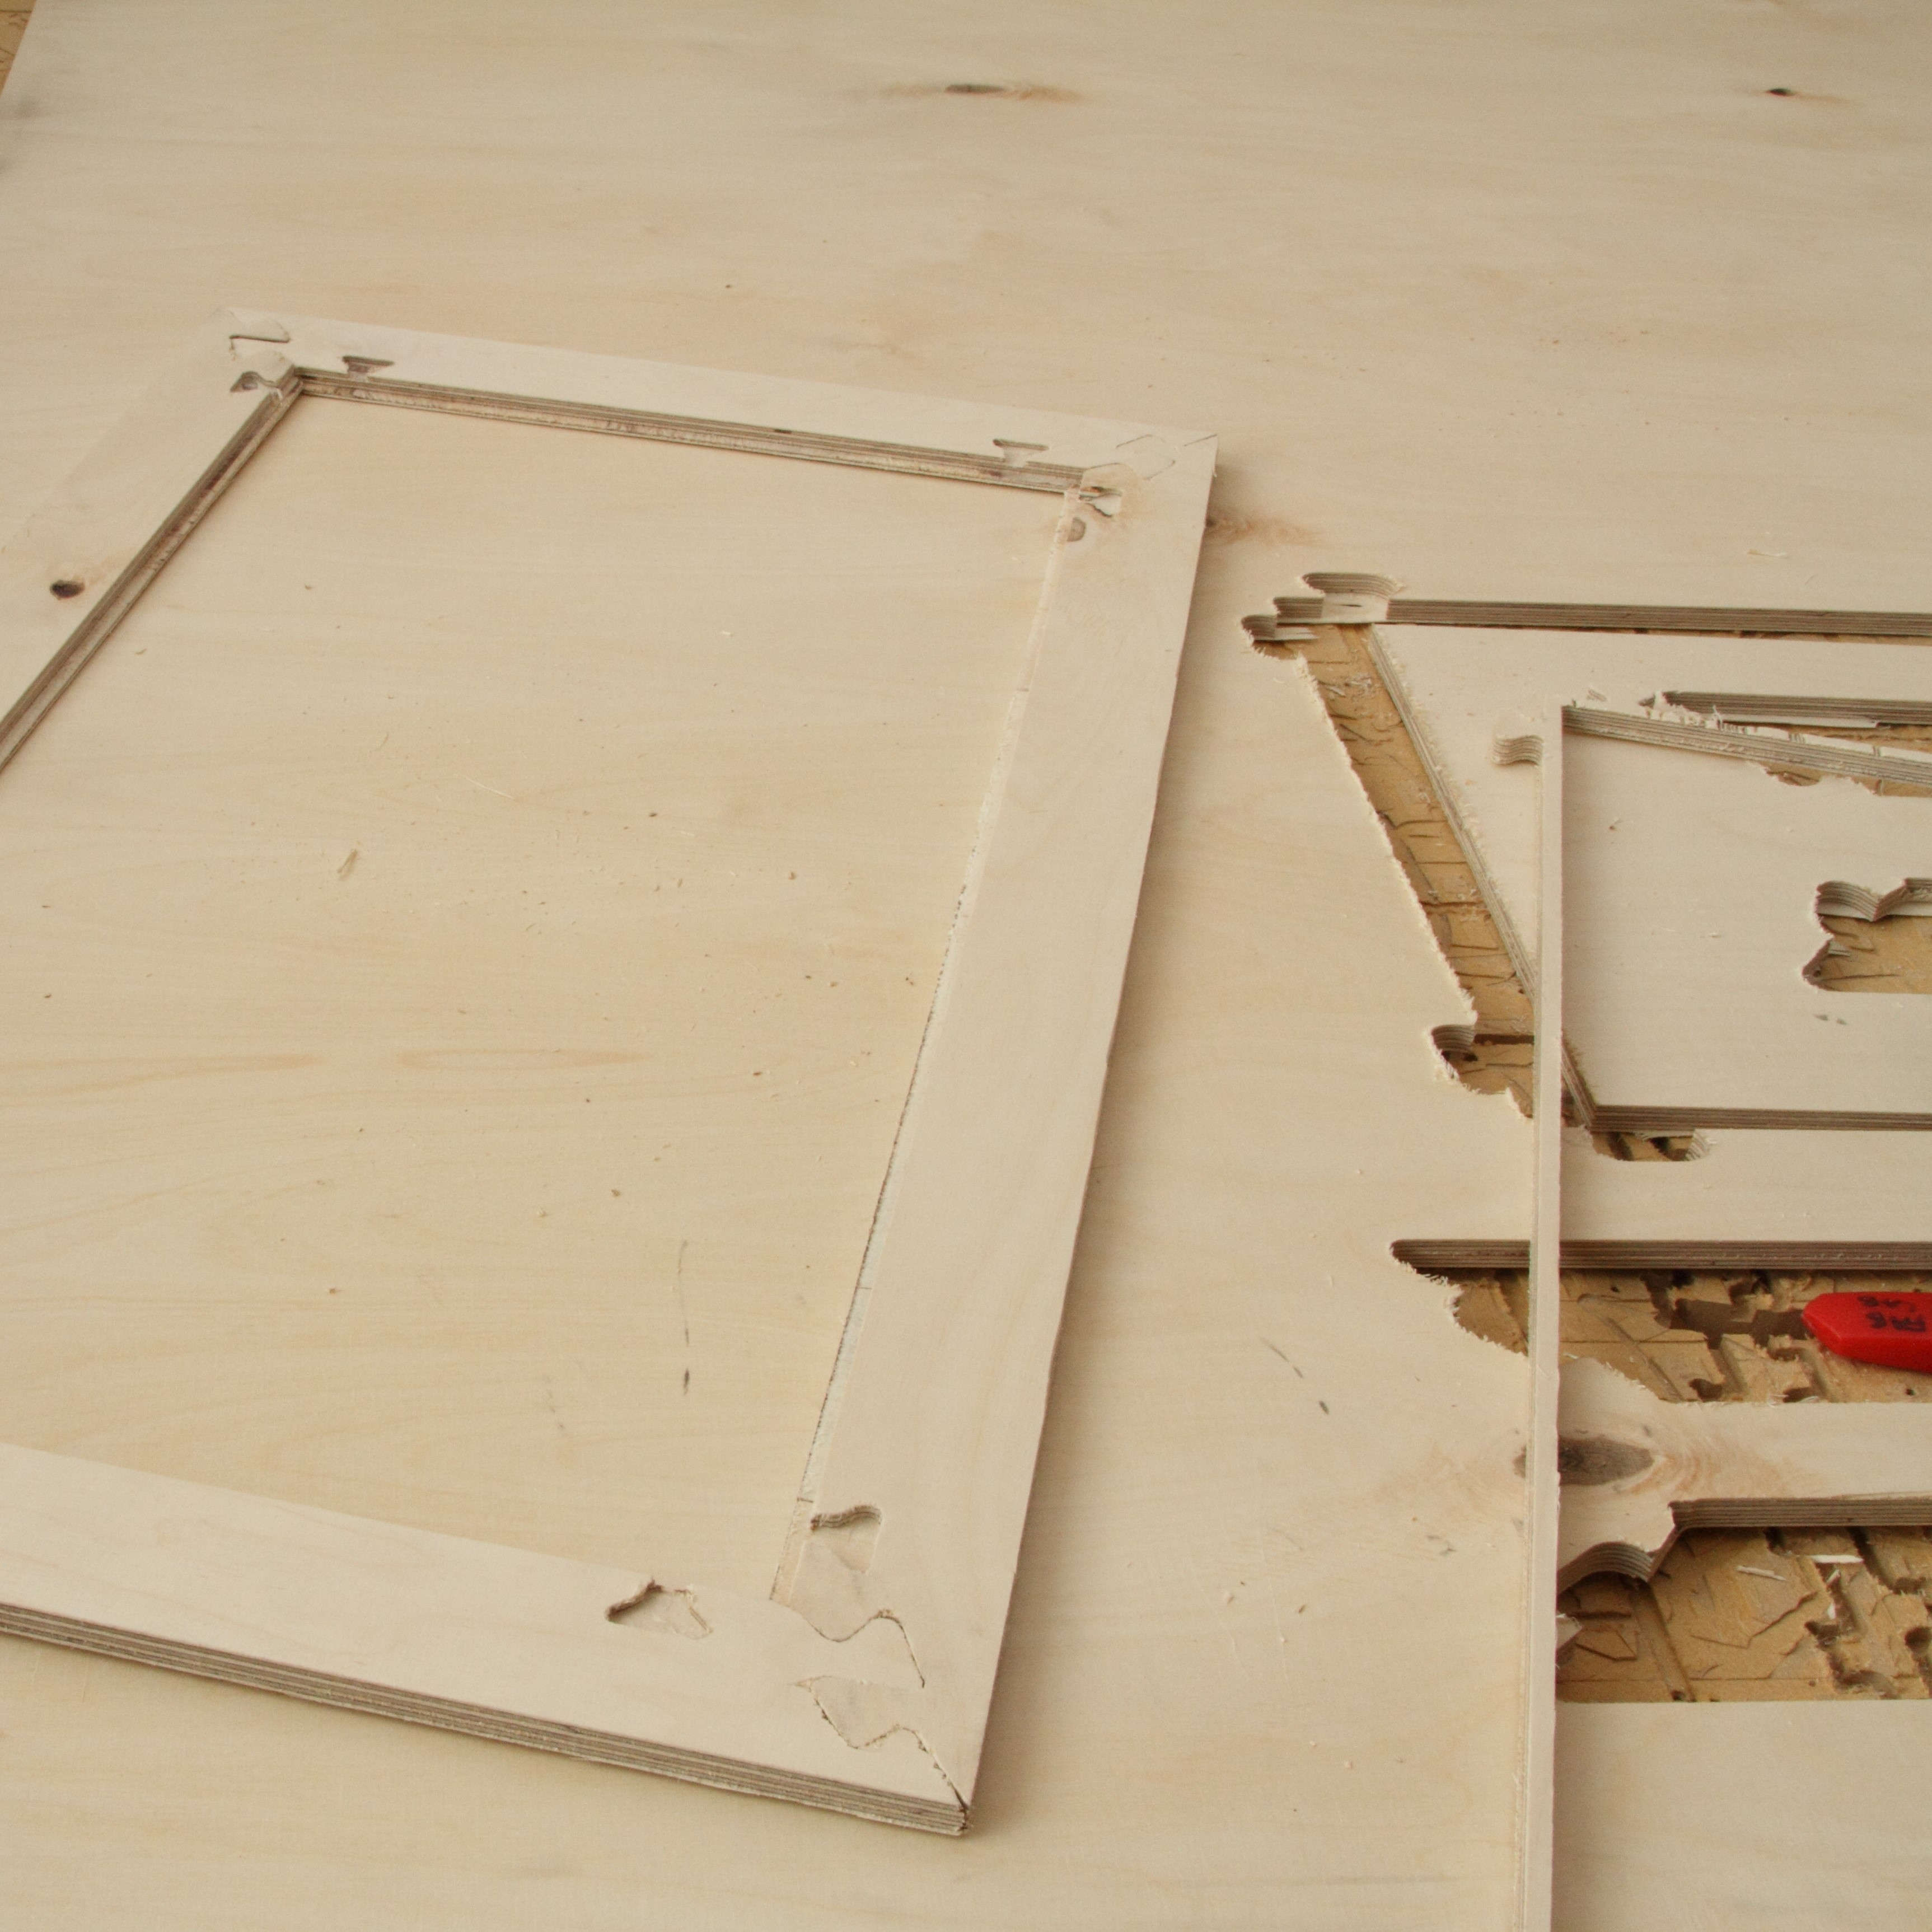
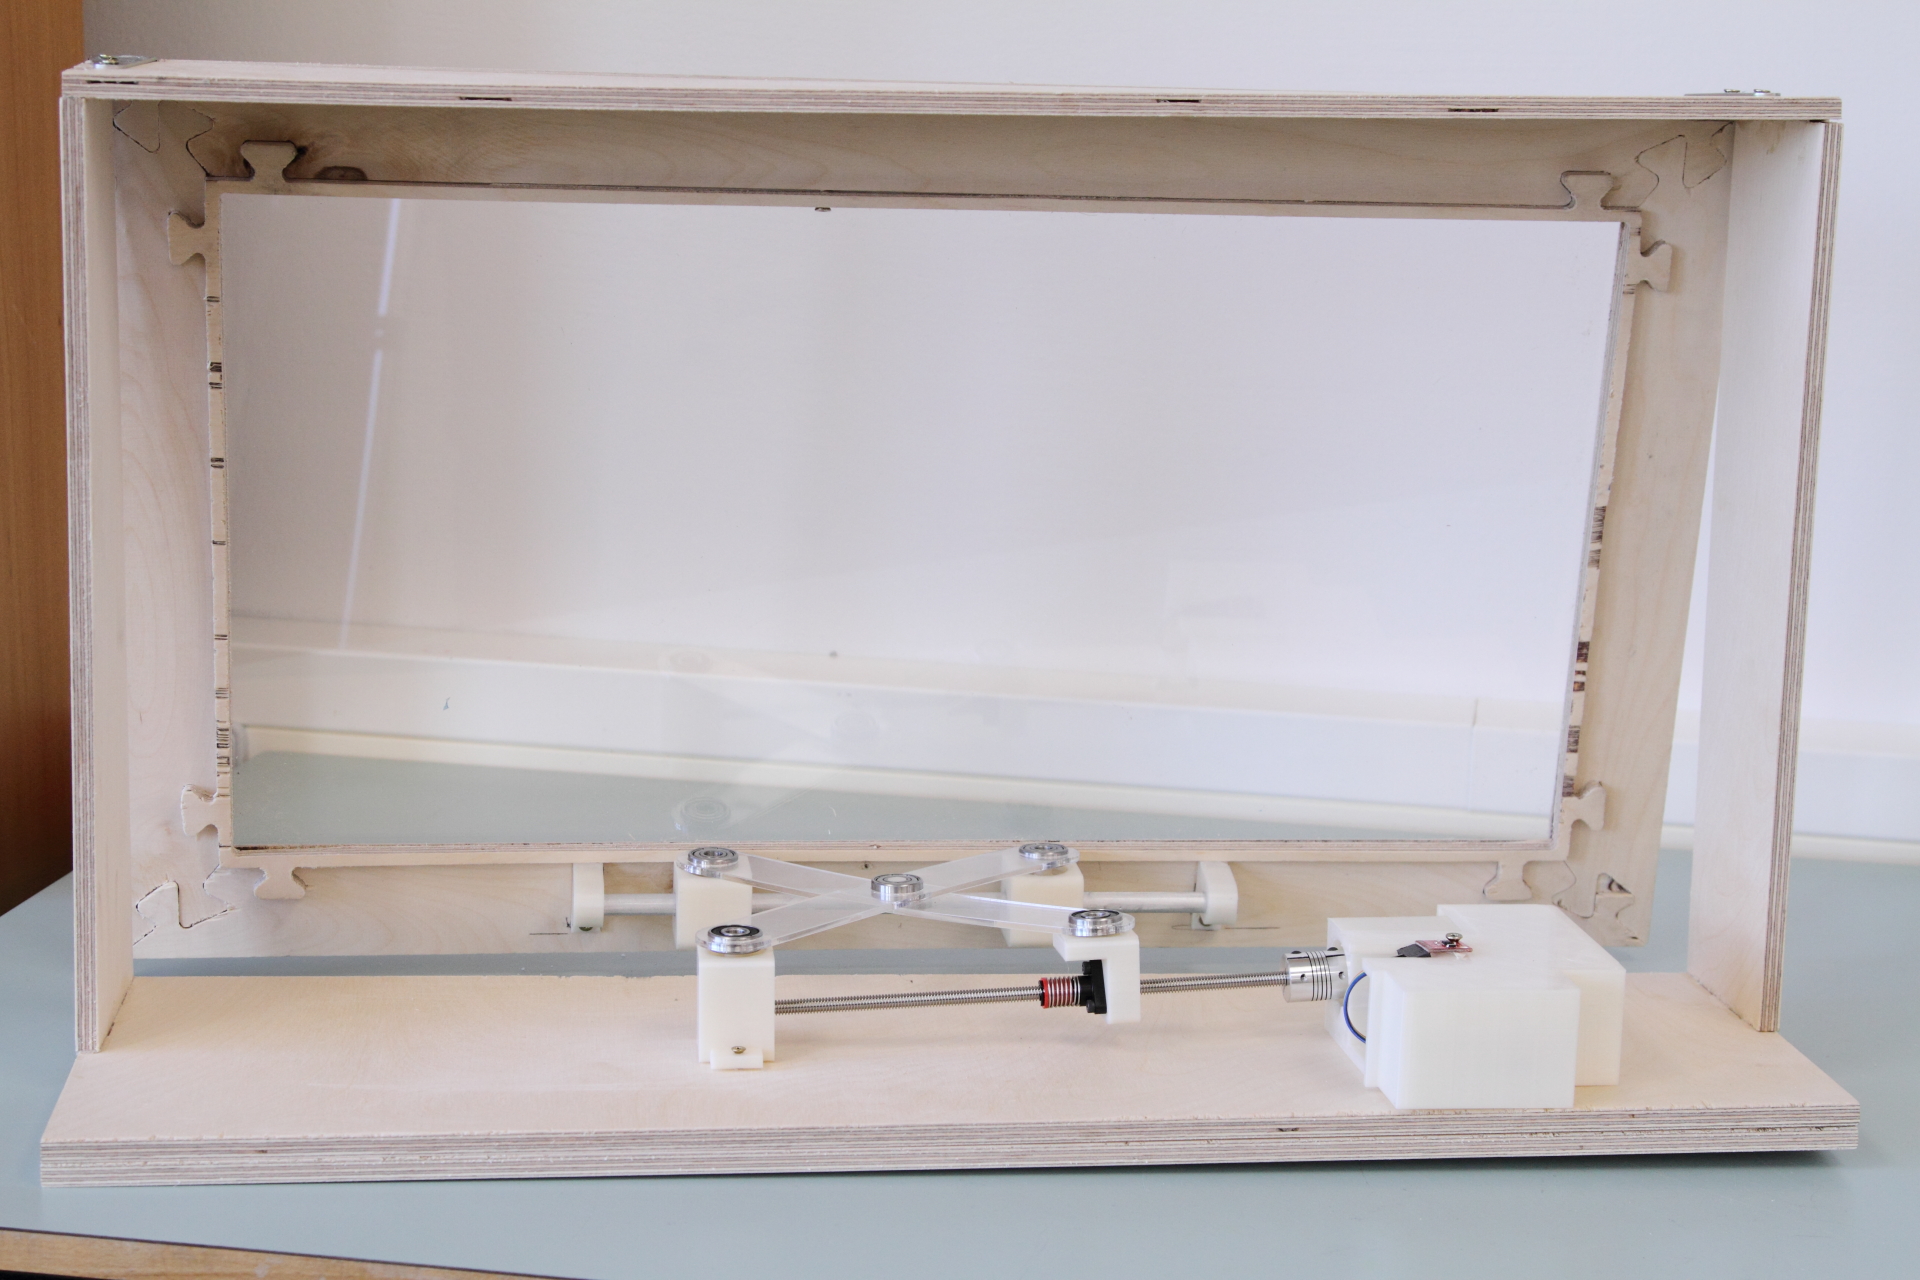
In the computer controlled machining week I made a window so that I would be able to show the mechanism of the window opener working. I did that to show proof of concept in the final project presentation.
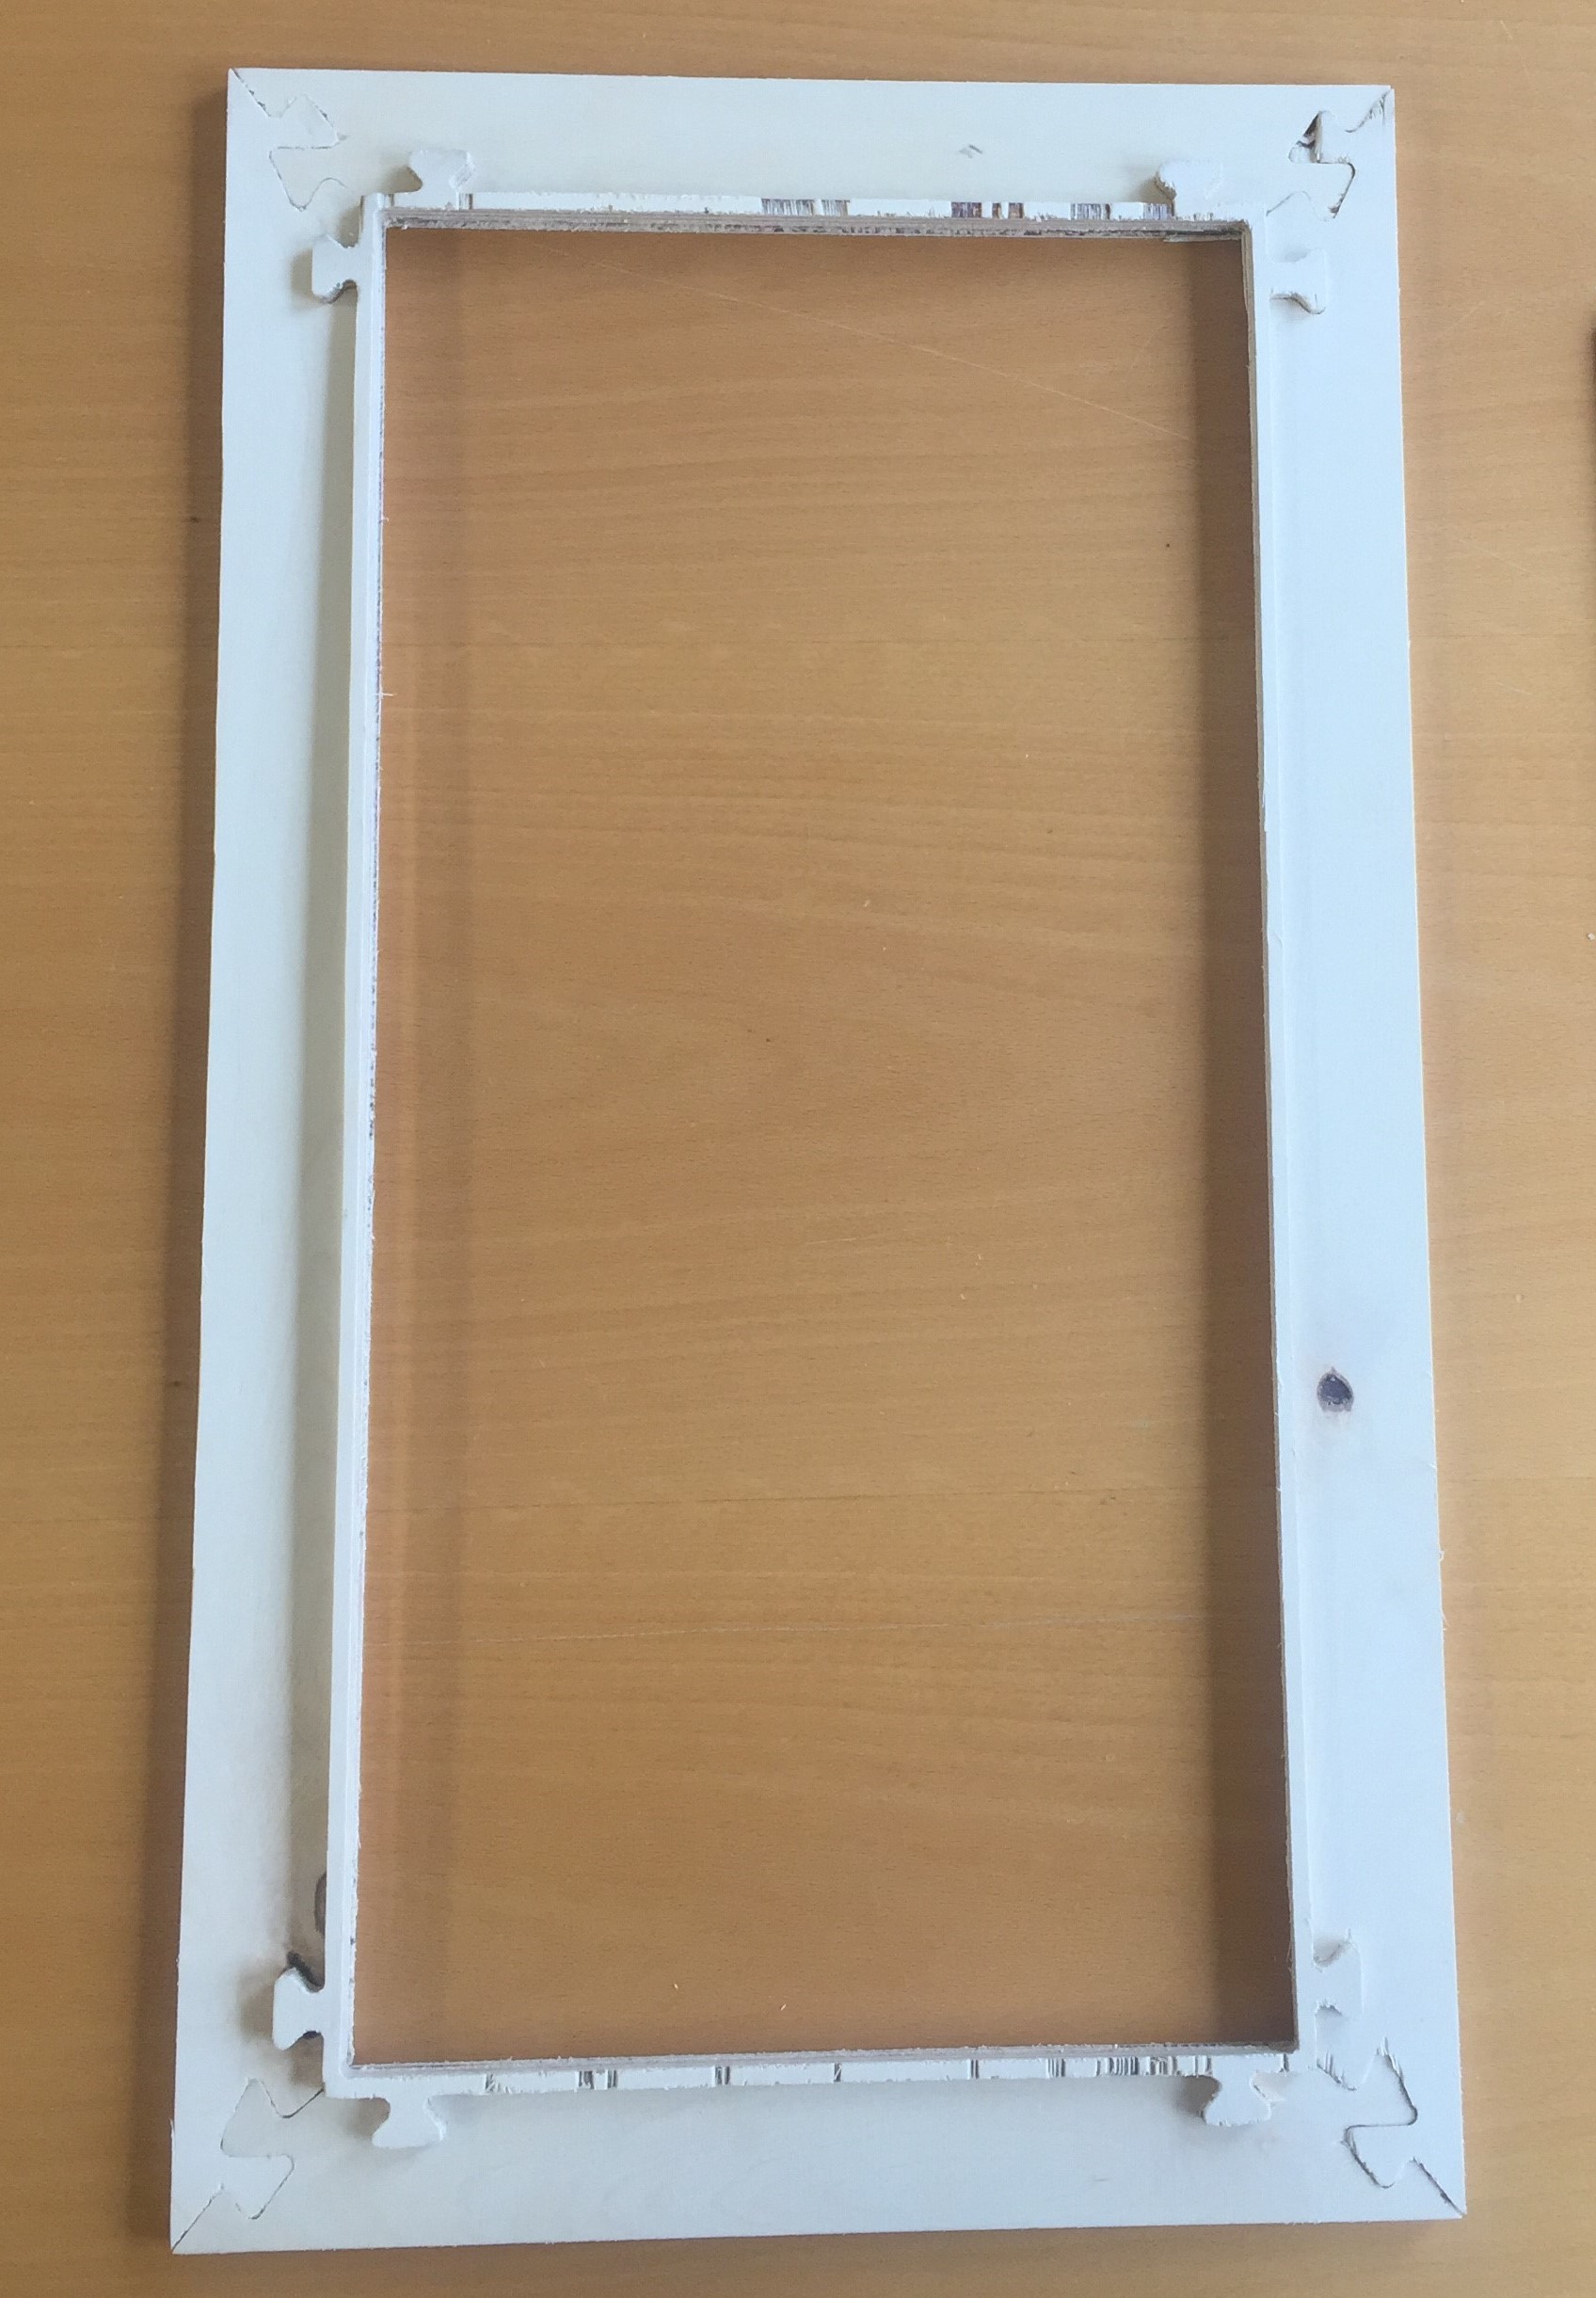
In the final outcome of the project you can see that I also created a frame around the window. To make that I just cut out rectangles the same size as the window that fitted together with simple a simple pressfit design. To fasten the two pieces together I used hinges.
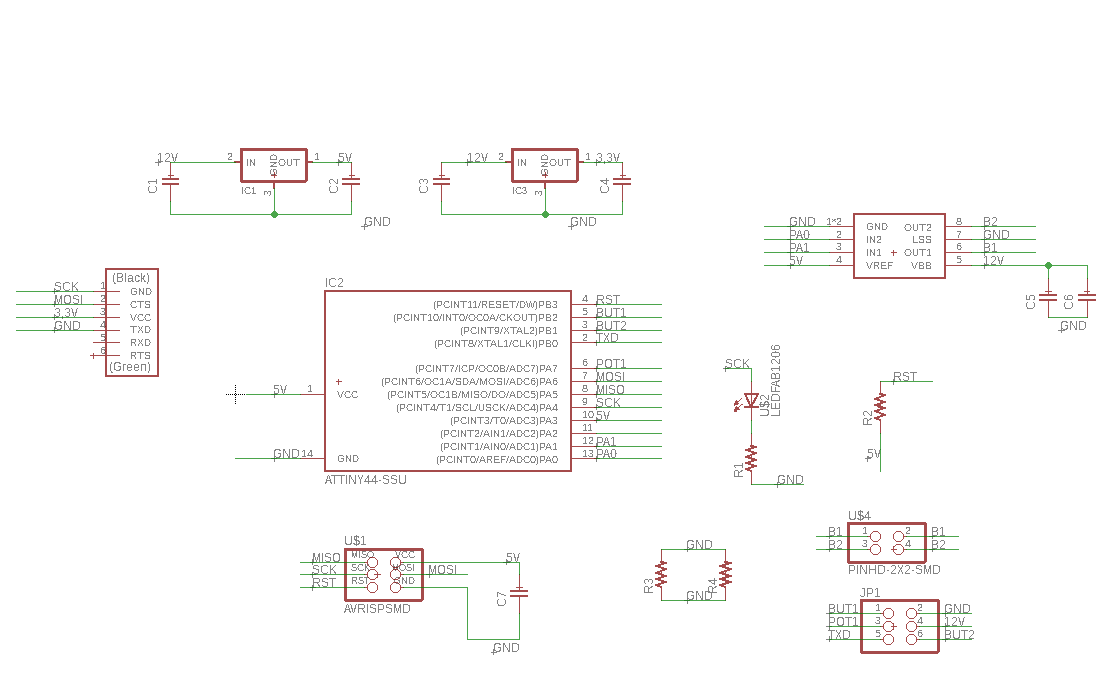
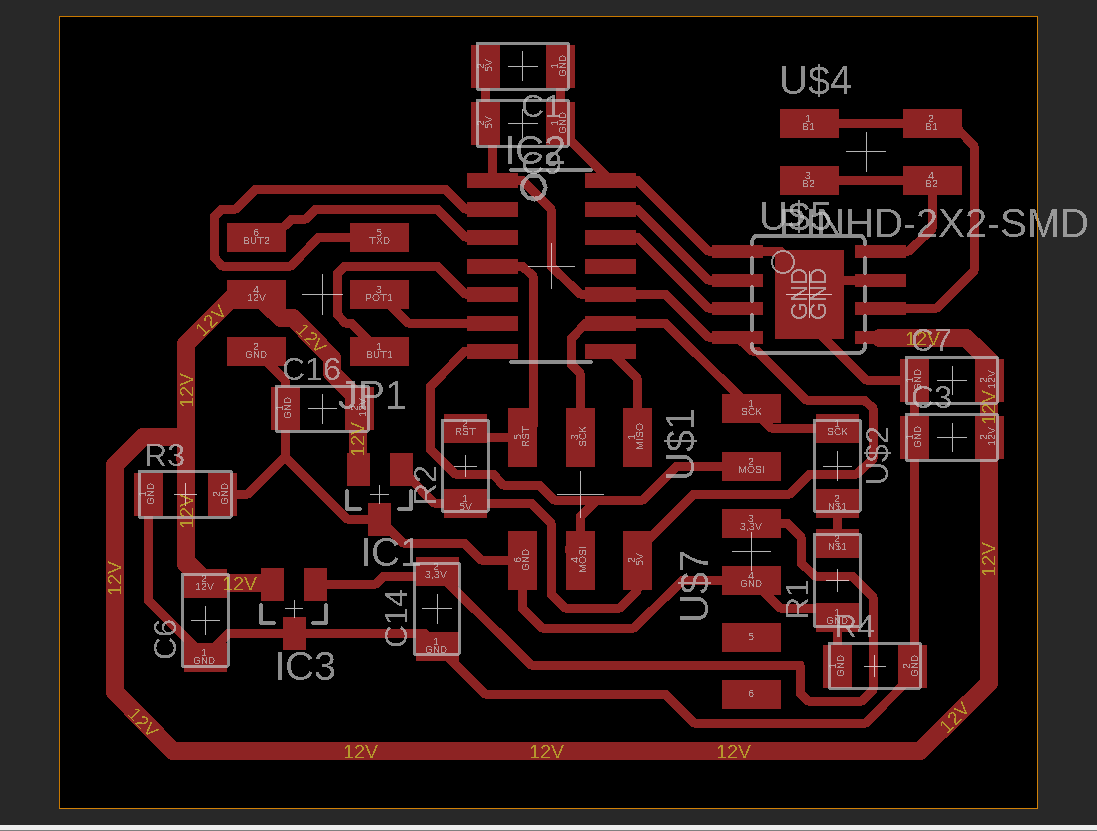
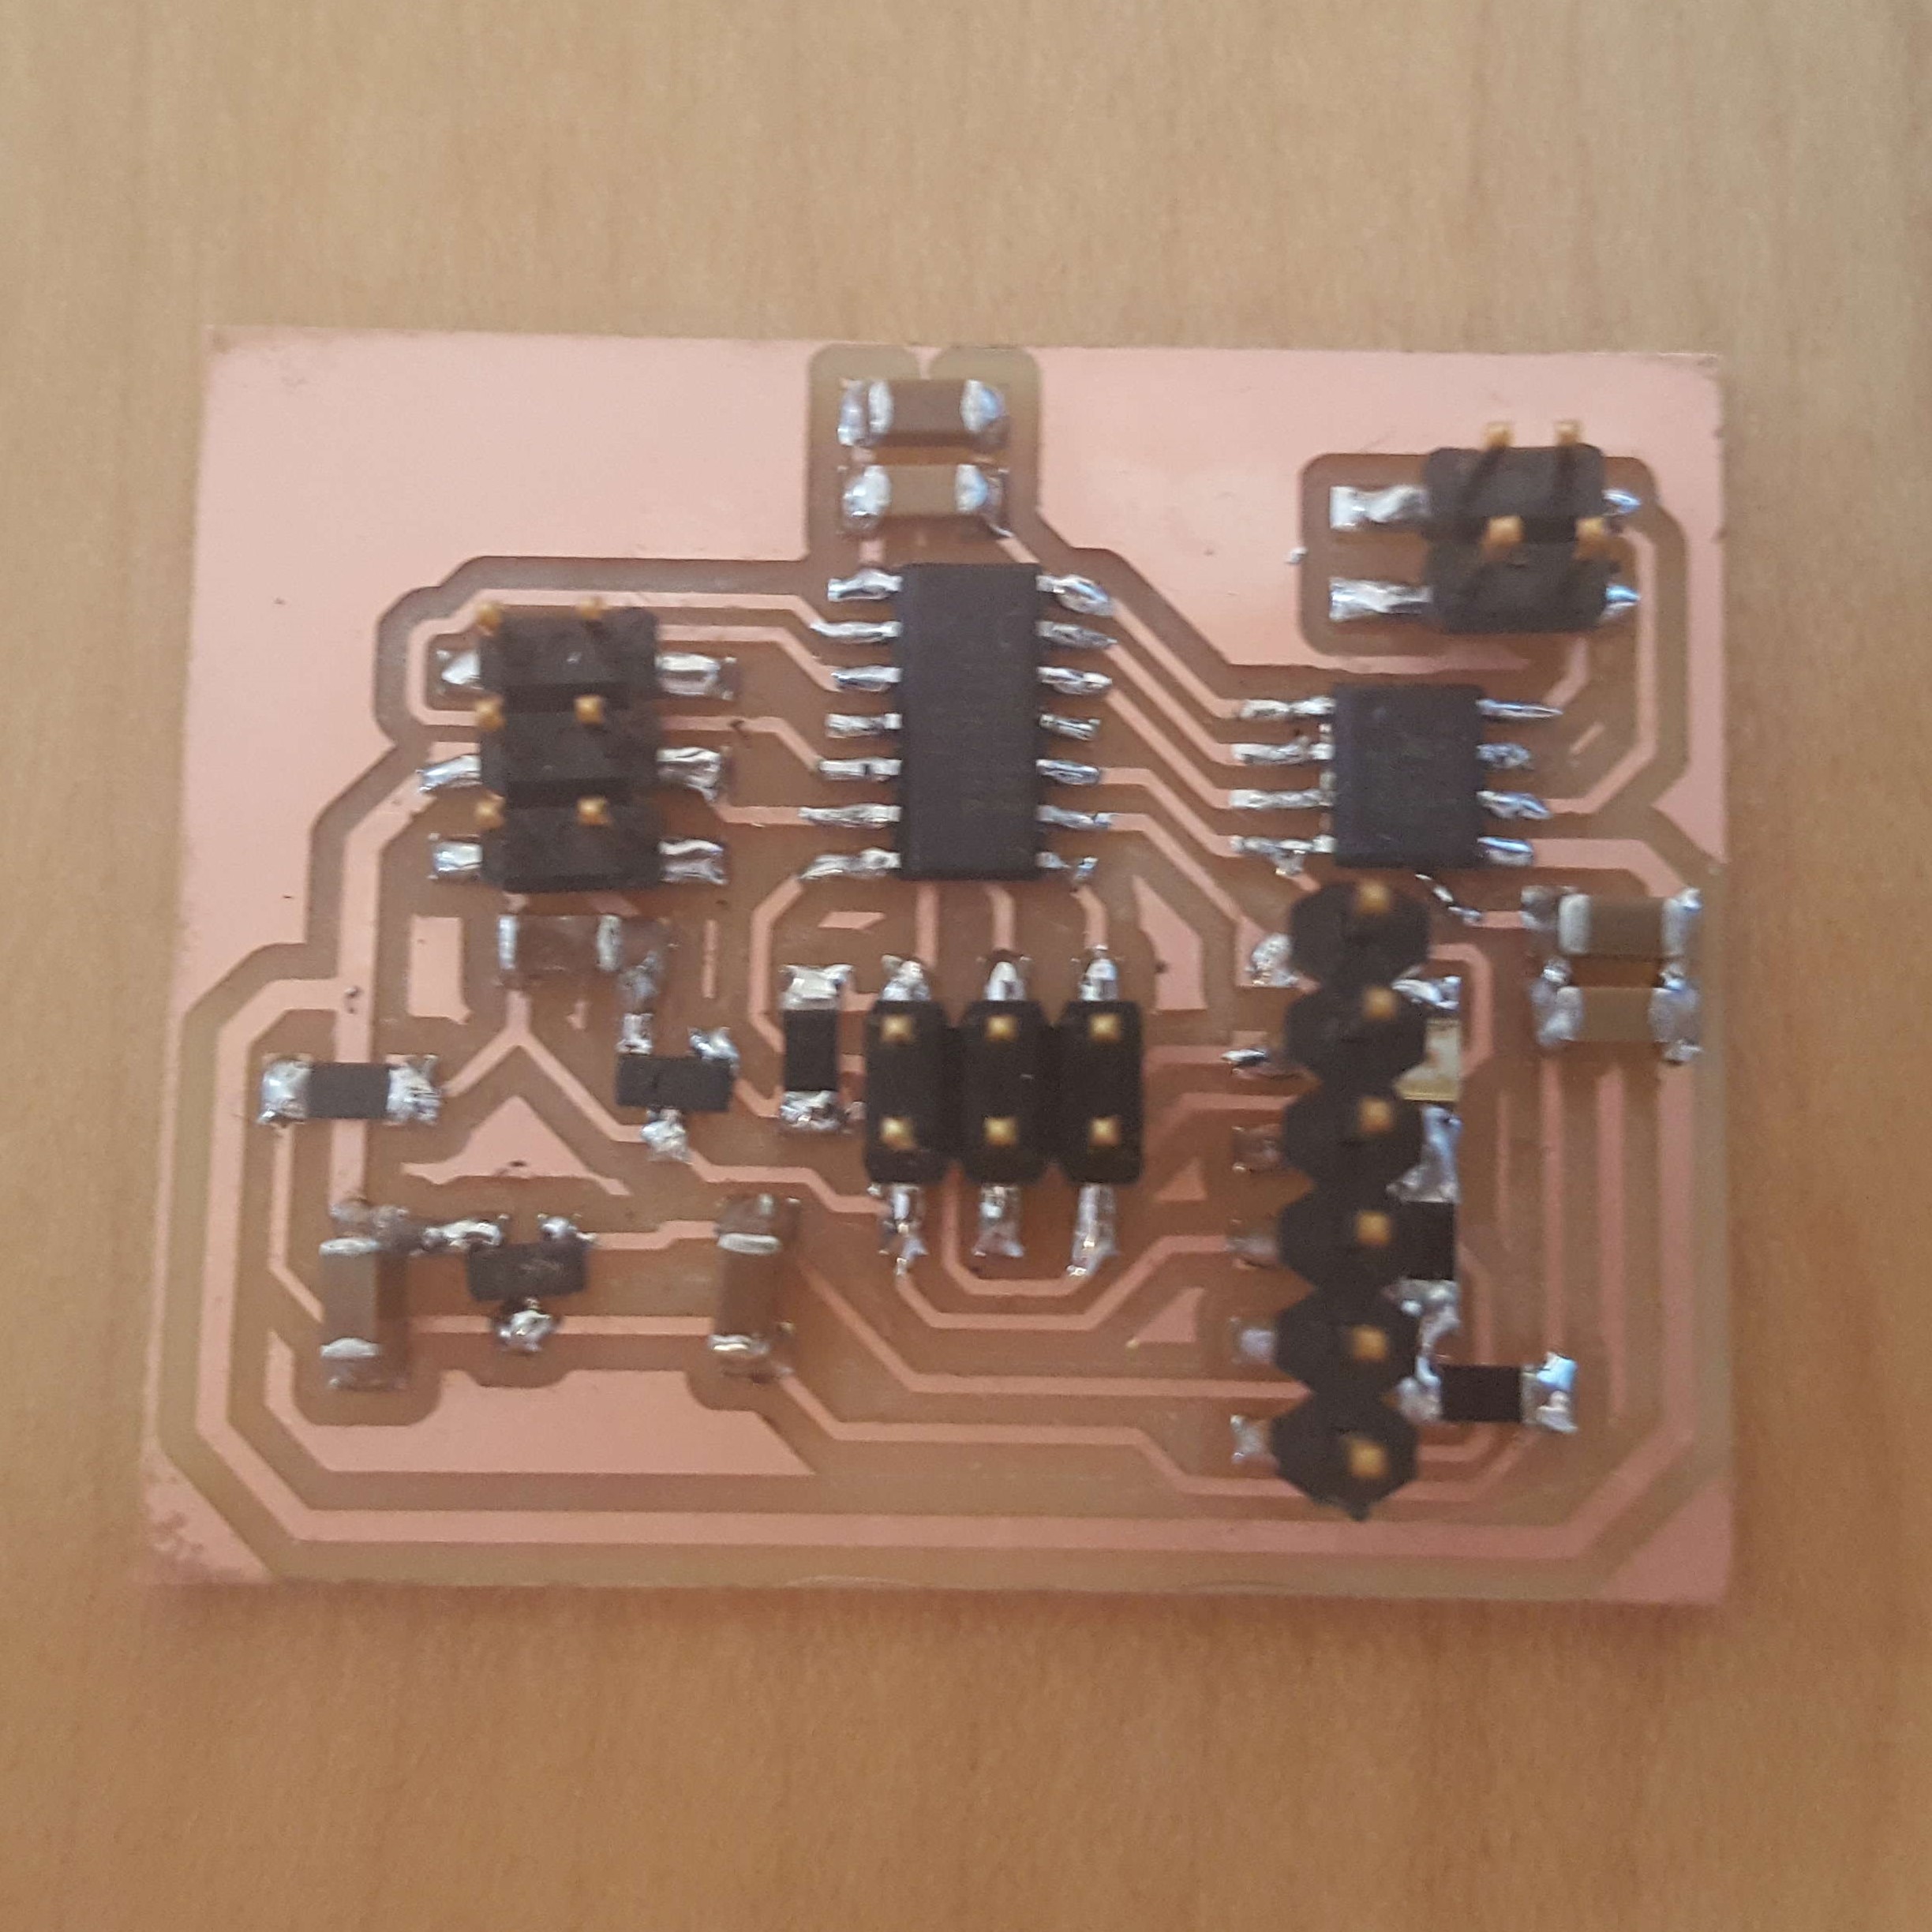
Then I started focusing on the electronics part of the final project. I made a board in eagle that controlls the dc motor based on the input from a sensor.
The components on the board are:
Attiny 44
1x H Bridge Motor Driver
2x 6pin Headers
1x 4pin Header
1x ftdi connector
2x 0𝛀 Resistor - Connecting two ground traces
1x 𝛀 Resistor
1x 10uf Capacitor - Next to the H Bridge
3x 2uf Capacitor- Around the Regulators
1x 1uf Capacitor - Above to the microcontroller
2x 0,1uf Capacitor - 1 above to the microcontroller and 1 next to the H Bridge.
1x 5v Regulator
1x 3,3v Regulator
I worked on the programming of the board in the input and output devices week.
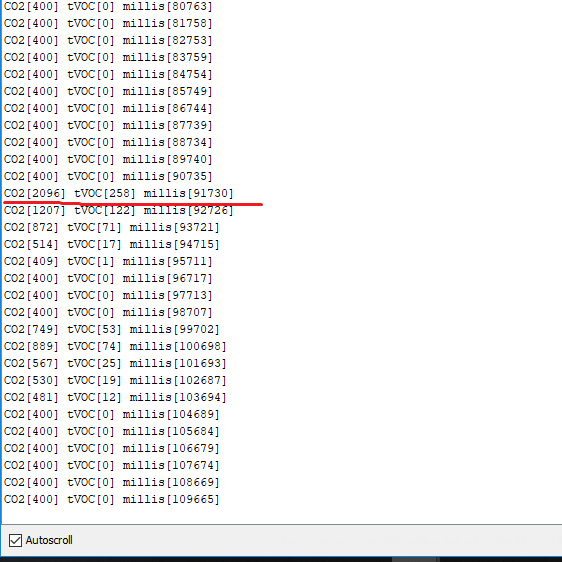
In the input week I programmed the board so that it would read information from the sensor. The air quality sensor from sparkfun has an arduino code you can copy and paste into arduino and change to fit your preferences. I downloaded one of those codes that is called Core and put it into arduino. I had some trouble getting information from the sensor to the serial monitor in arduino but I found out that before getting any values from the sensor I had to unplug the programmer from the board because it was blocking the signal from the sensor. When I had unplugged the programmer from the board I could see the values from the sensor in the serial monitor. To see if it worked I tried blowing on the sensor to see if the values would change and they did.
When the input portion of the project was working I needed to work on the output part.
The board will control a jameco dc motor with a gear head (part no. 253471) and I want it to turn according to the input the board gets from an air quality sensor. But before making the that code I first wanted to see if I could get the motor running with the board and use a potentiometer to control the spin direction.
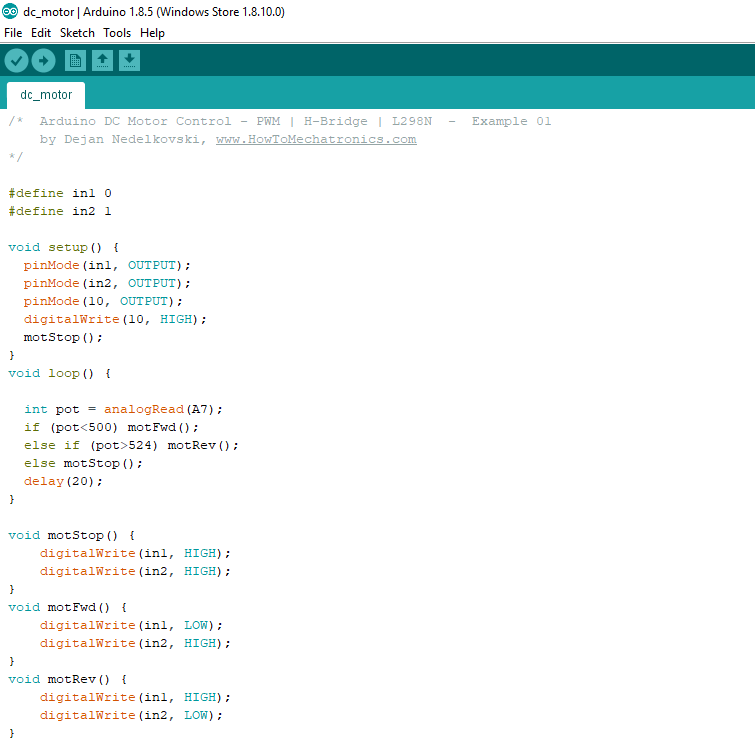
I found a code from Dejan Nedelkovski (HowToMechatronics.com) that's called Arduino DC Motor Control - PWM | H-Bridge | L298N - Example 01 and used that. I needed to change the code a little bit and this is how the code looked finally:
Here is a video of the motor opening the window and being controlled by the potentiometer.
Now I wanted to mix those codes together so that the sensor would controll the motor. But when I connected the sensor
to the board I could not get it to work. I tried connecting it to an arduino to make sure that it was the sensor that wasn't working but I still could not get any signals from it. The good thing about that is that atleast it wasn't my board that wasn't working. I am in the progress of figuring out what it is that is wrong with the sensor but for time management the code with the potentiometer will have to do for now.
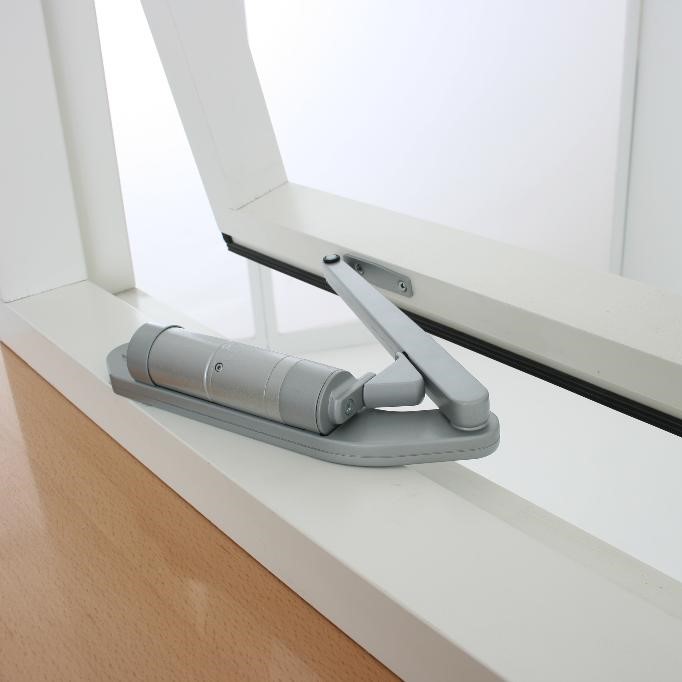
Then I started making the mechanism for the window opener. It took a bit of time to figure out what kind of mechanism I wanted to create. I found this 3D printed one oneline that
looks really good but it isn't very practical. The rail would be standing out and could break because of people walking into it.
I also found this one but I think it would be really complicated to make.
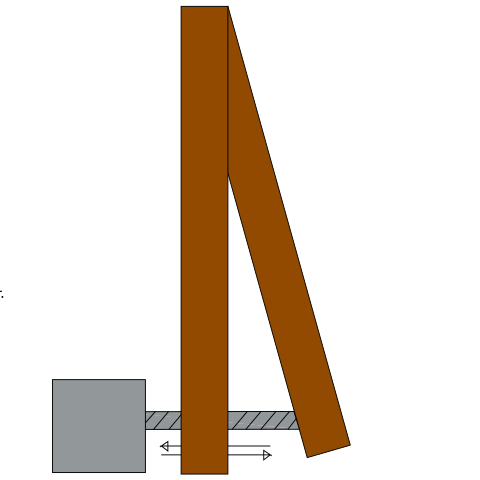
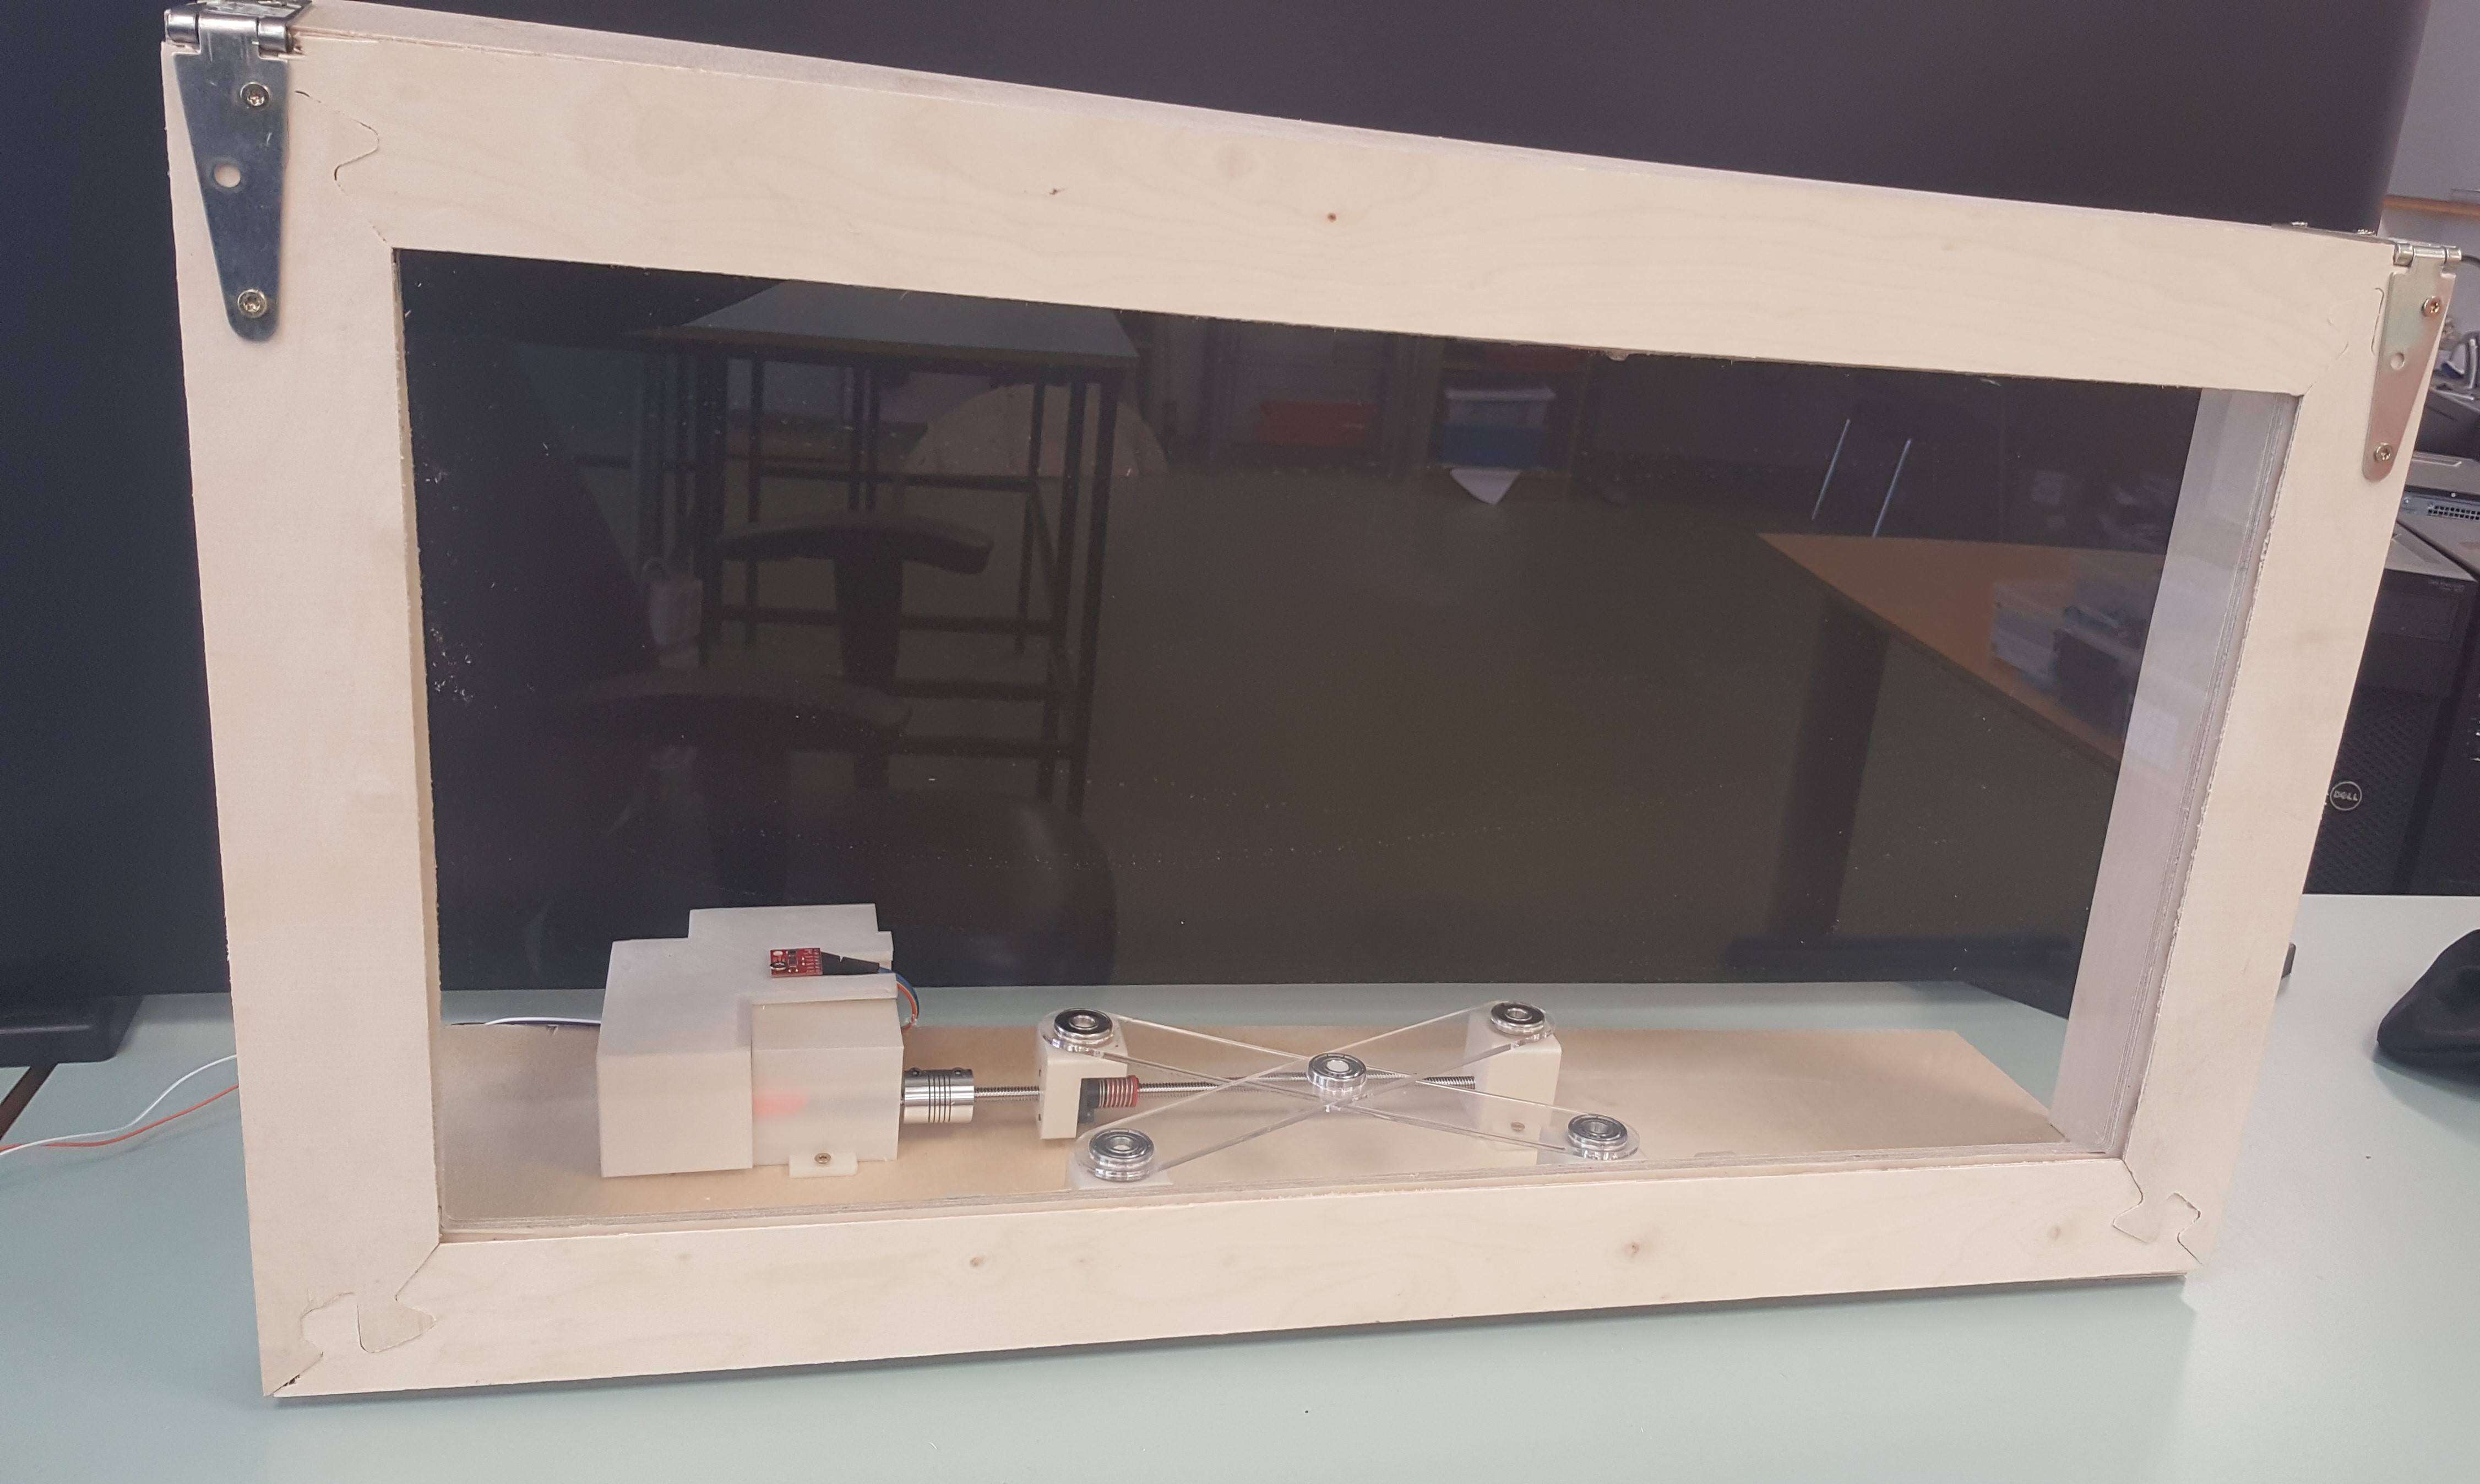
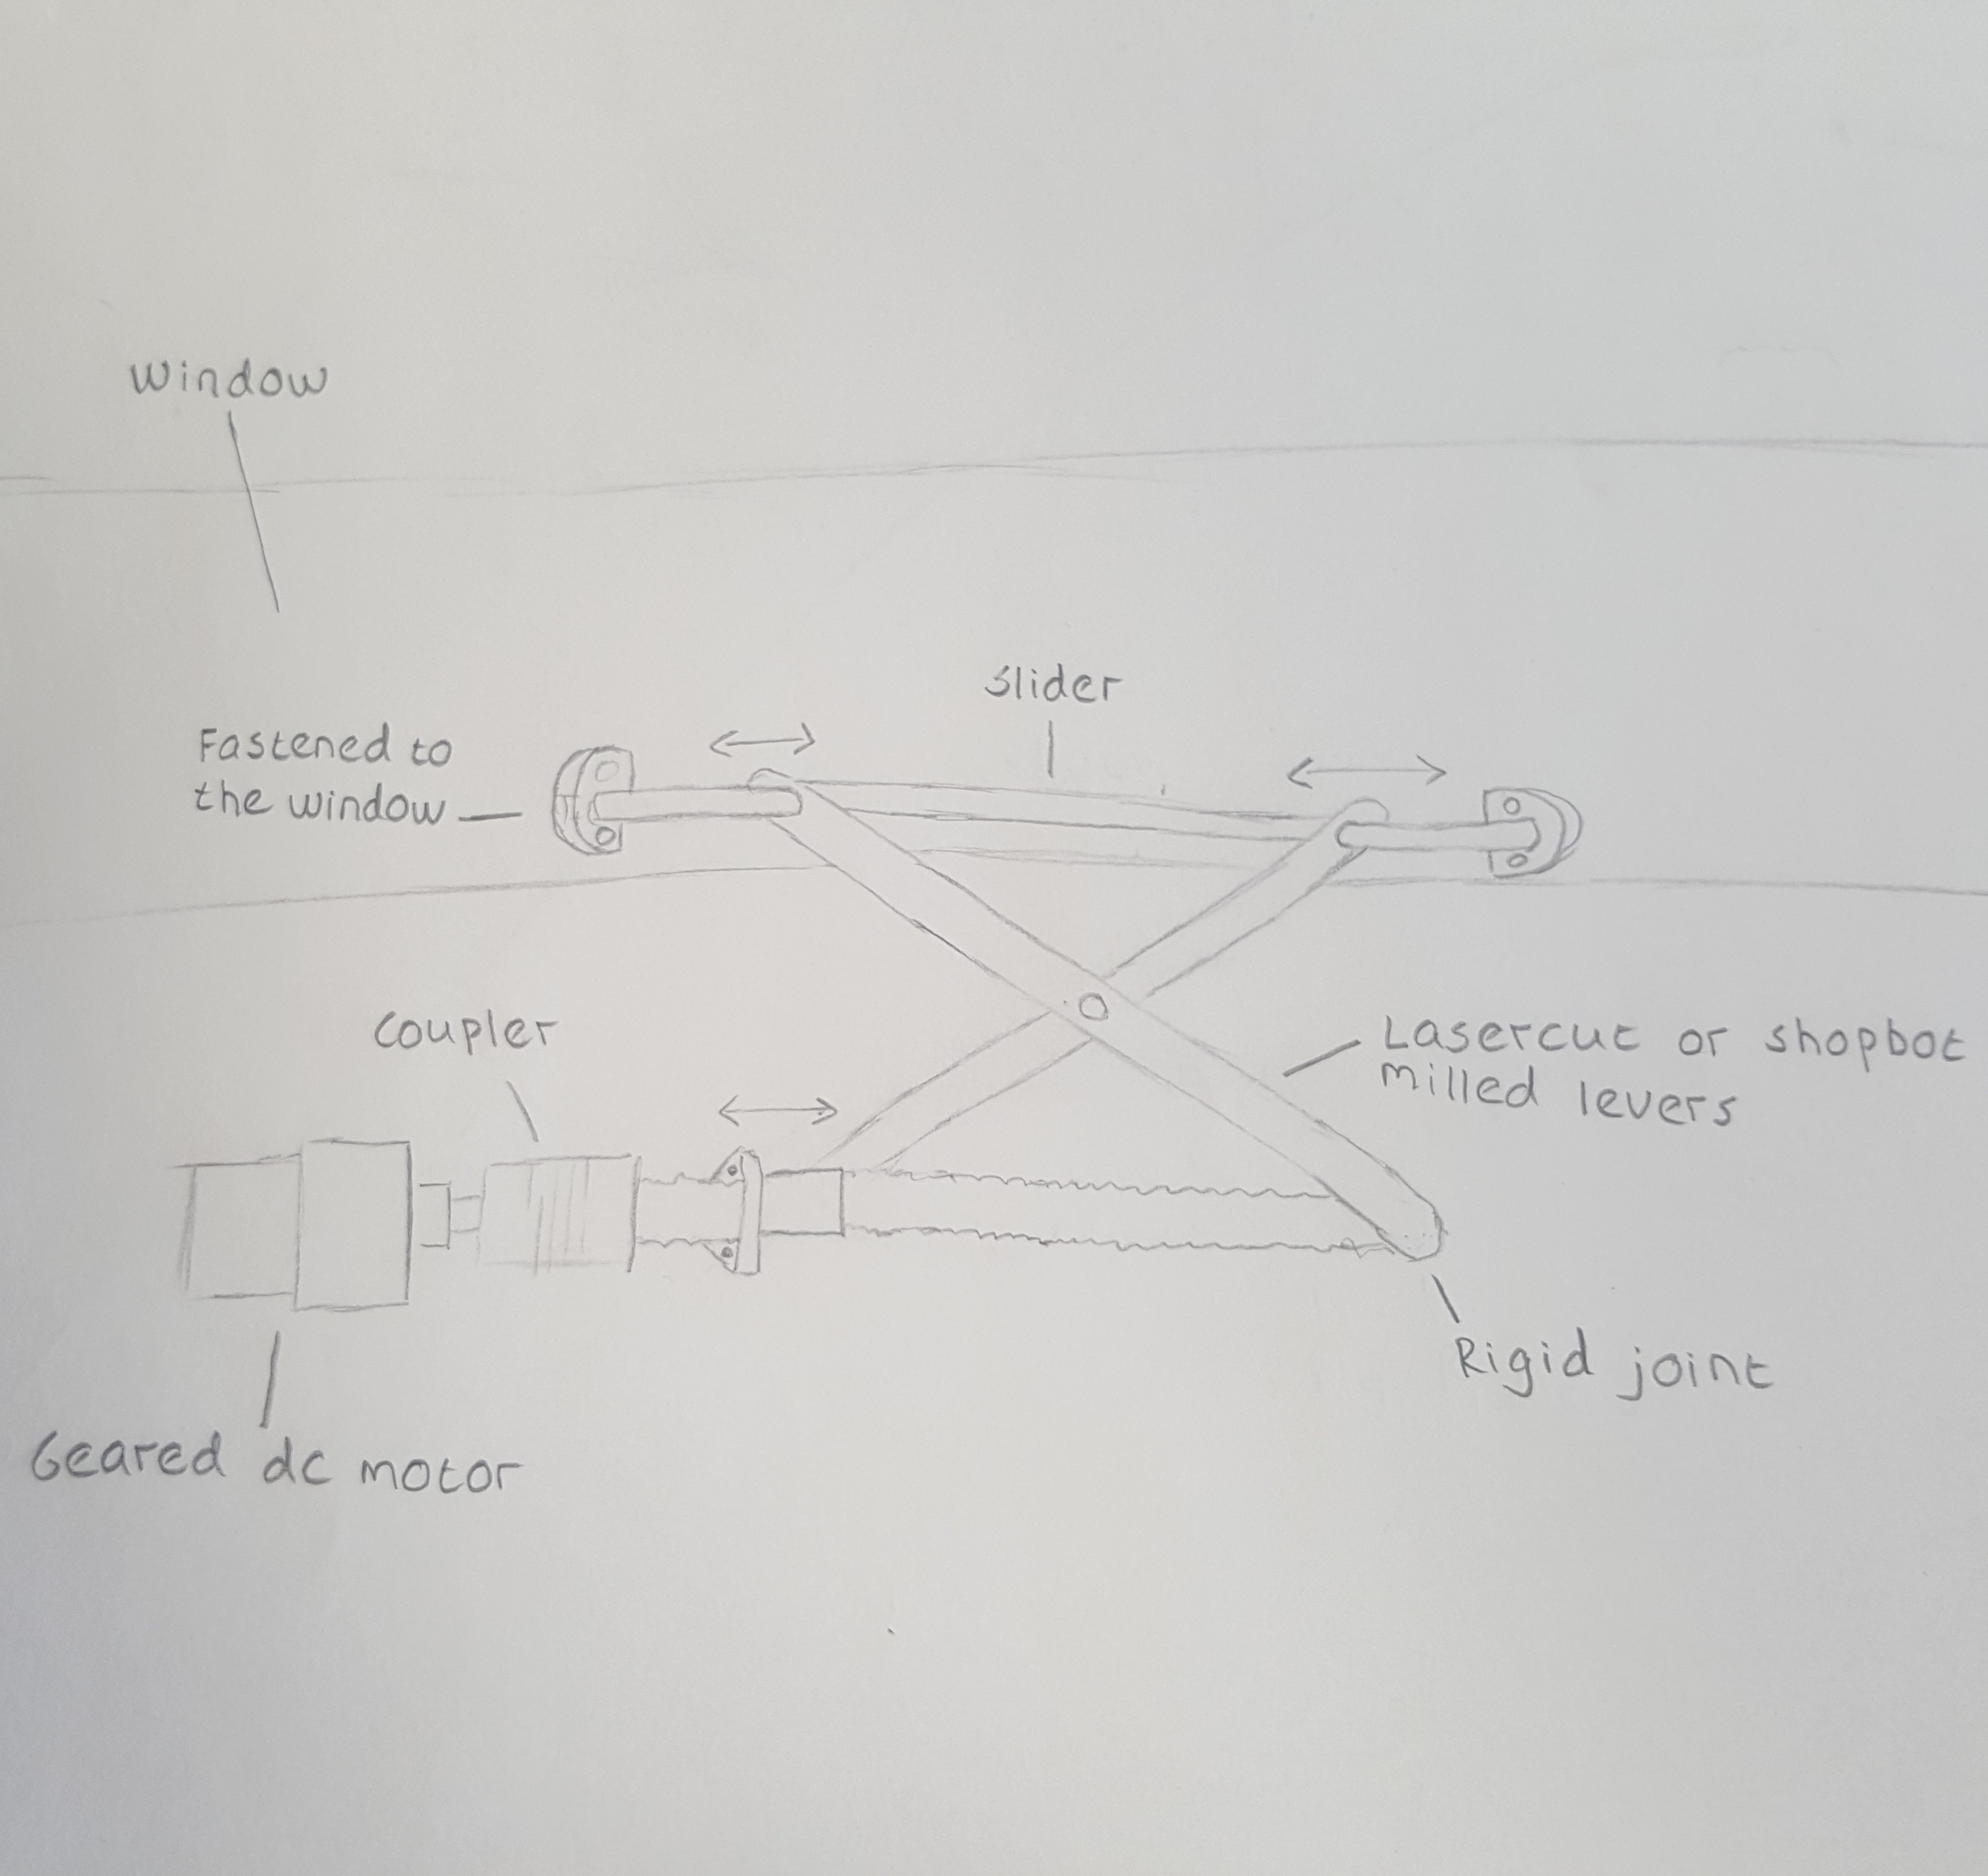
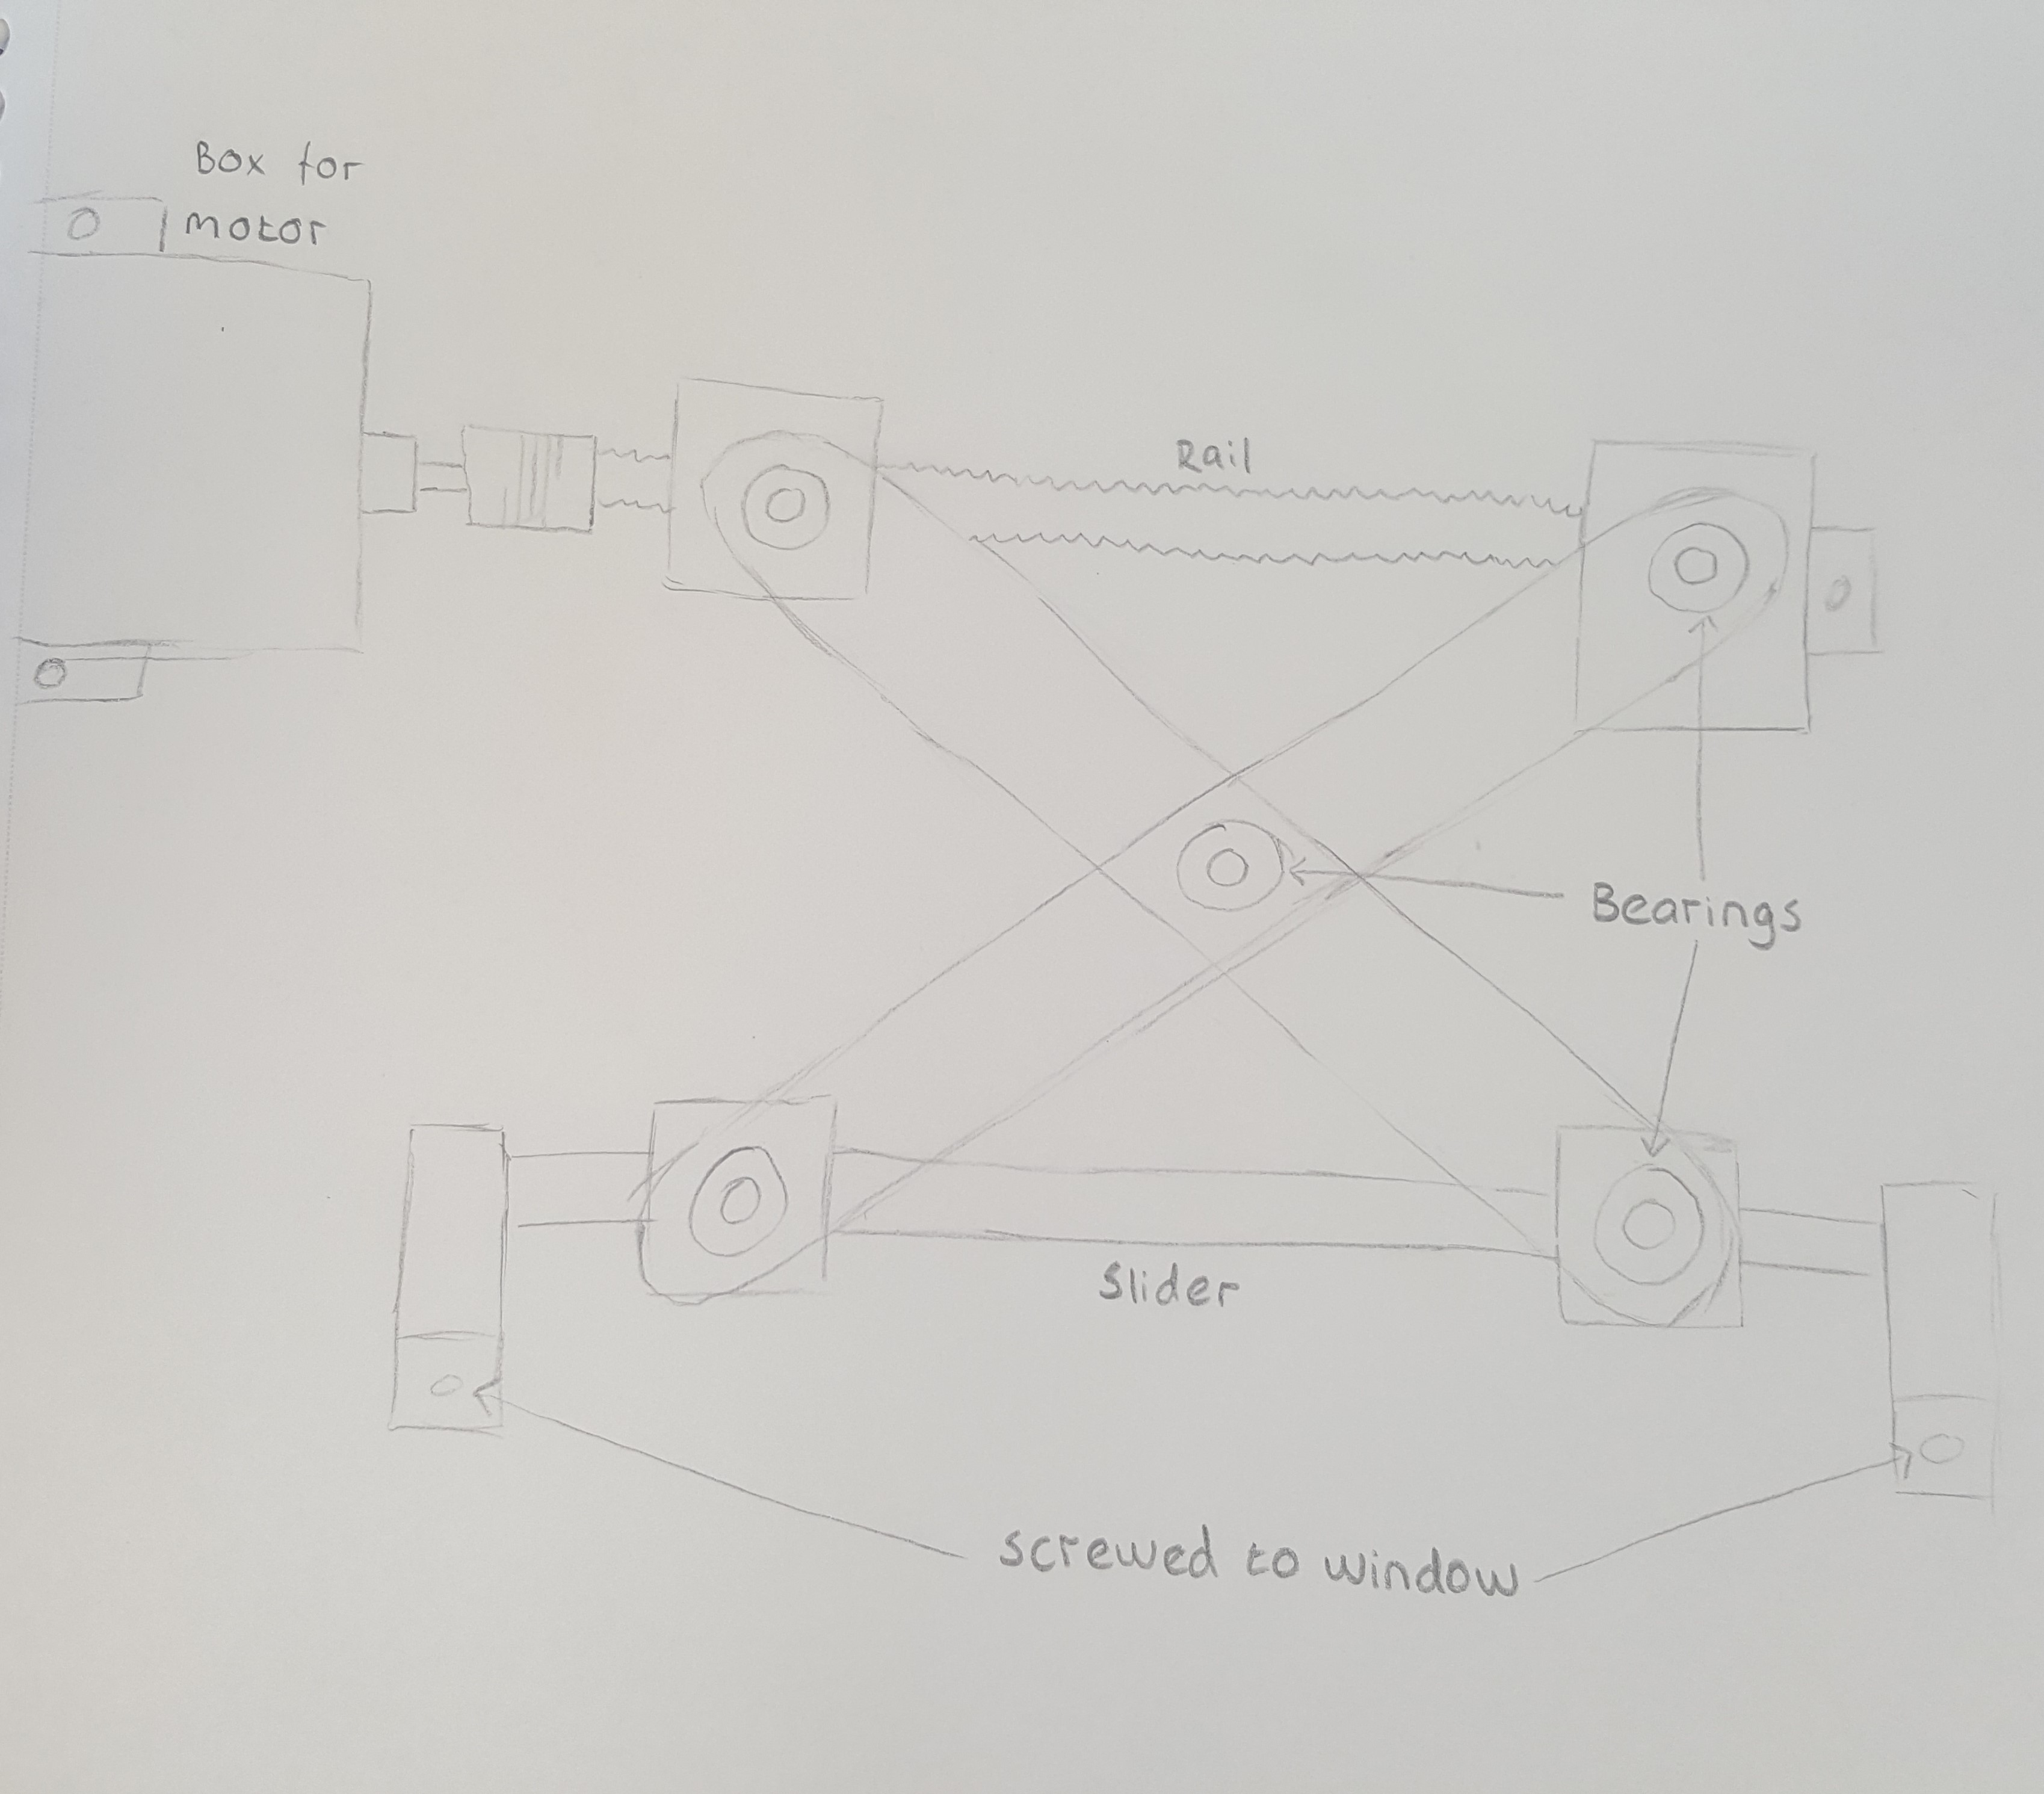
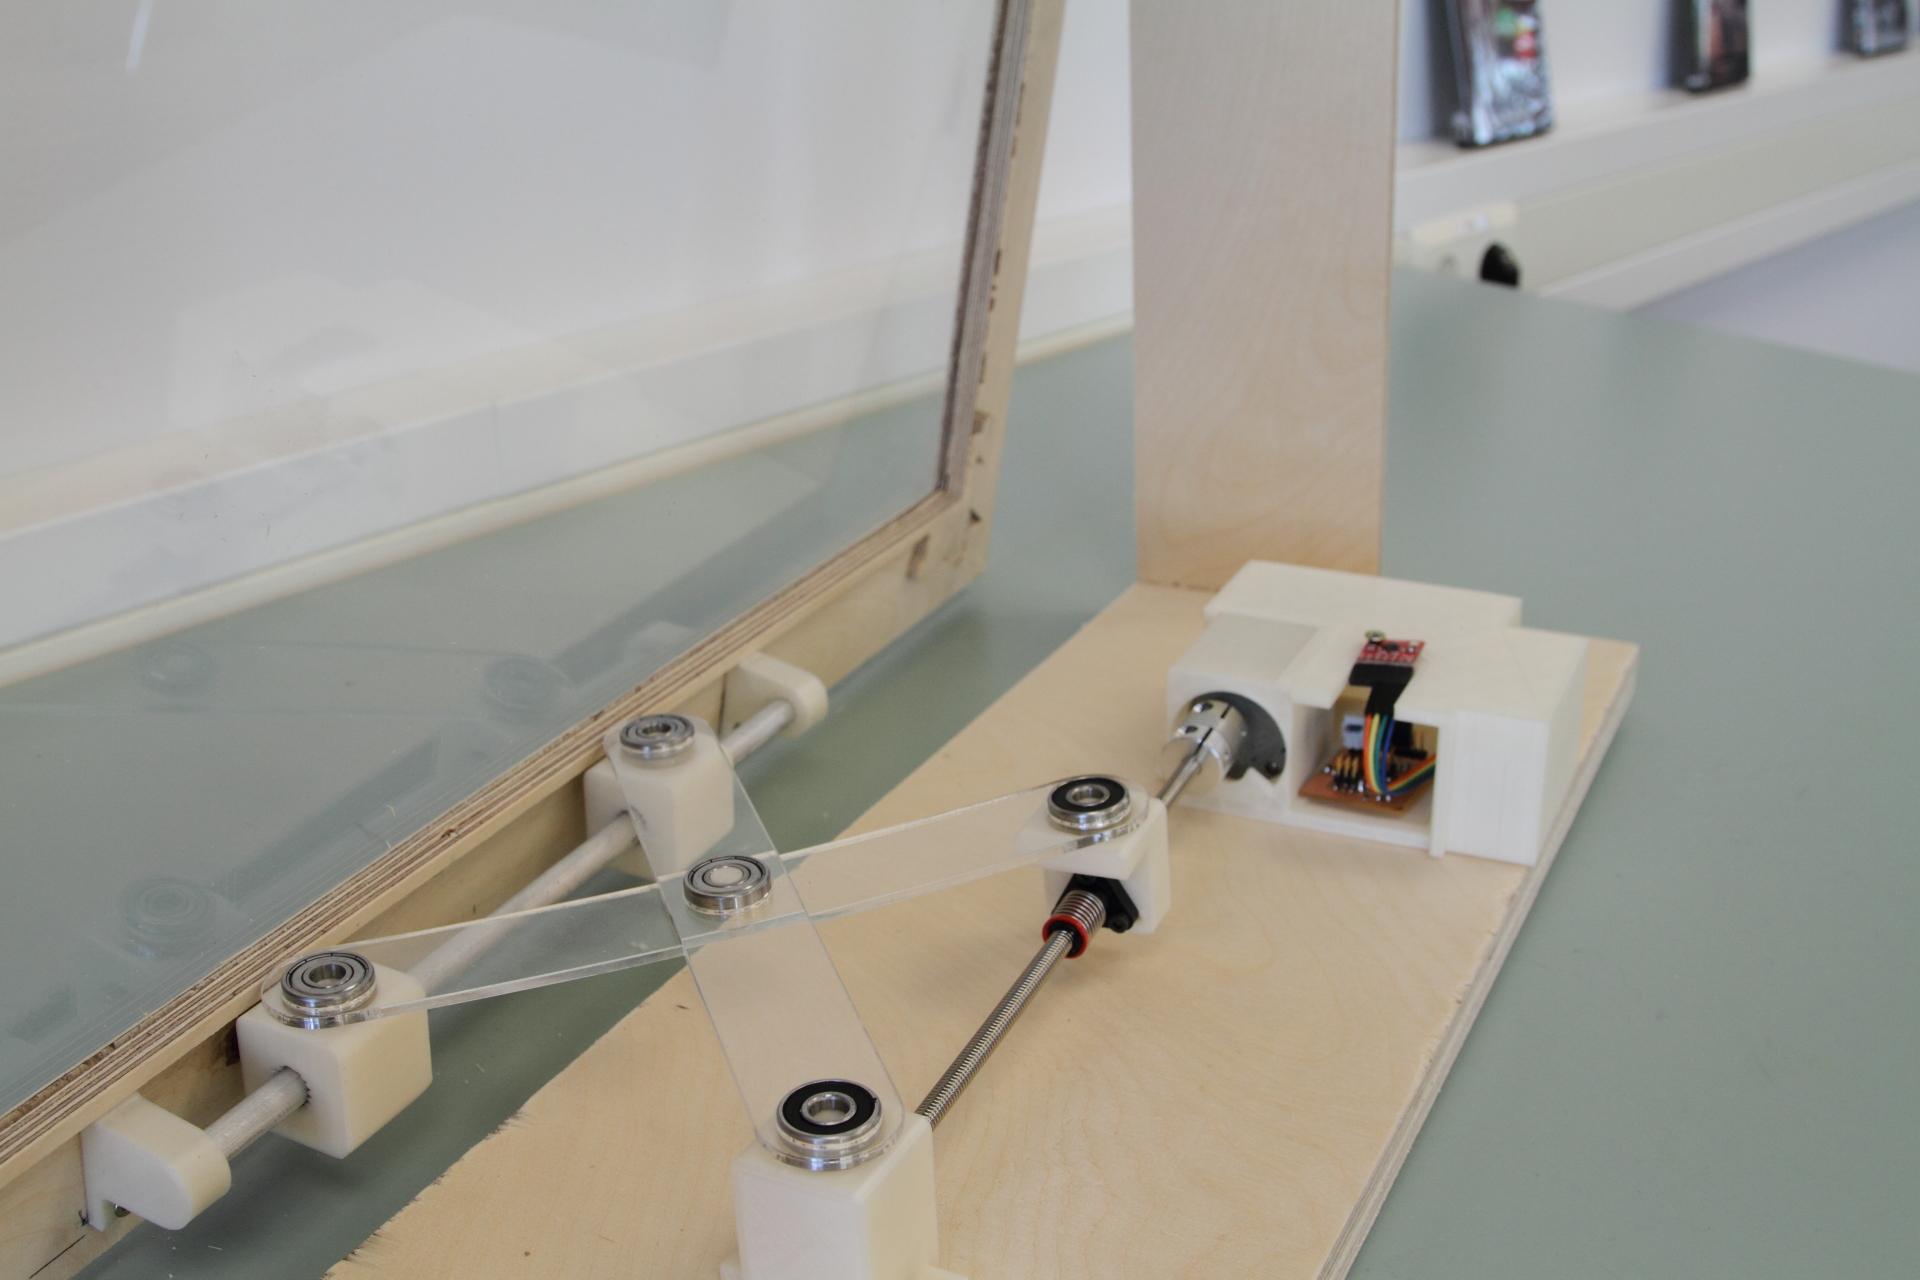
I was quite lost on what kind of design I wanted to make for the window opener but then Carl told me it would be clever to make levers that function like a scissor lift.
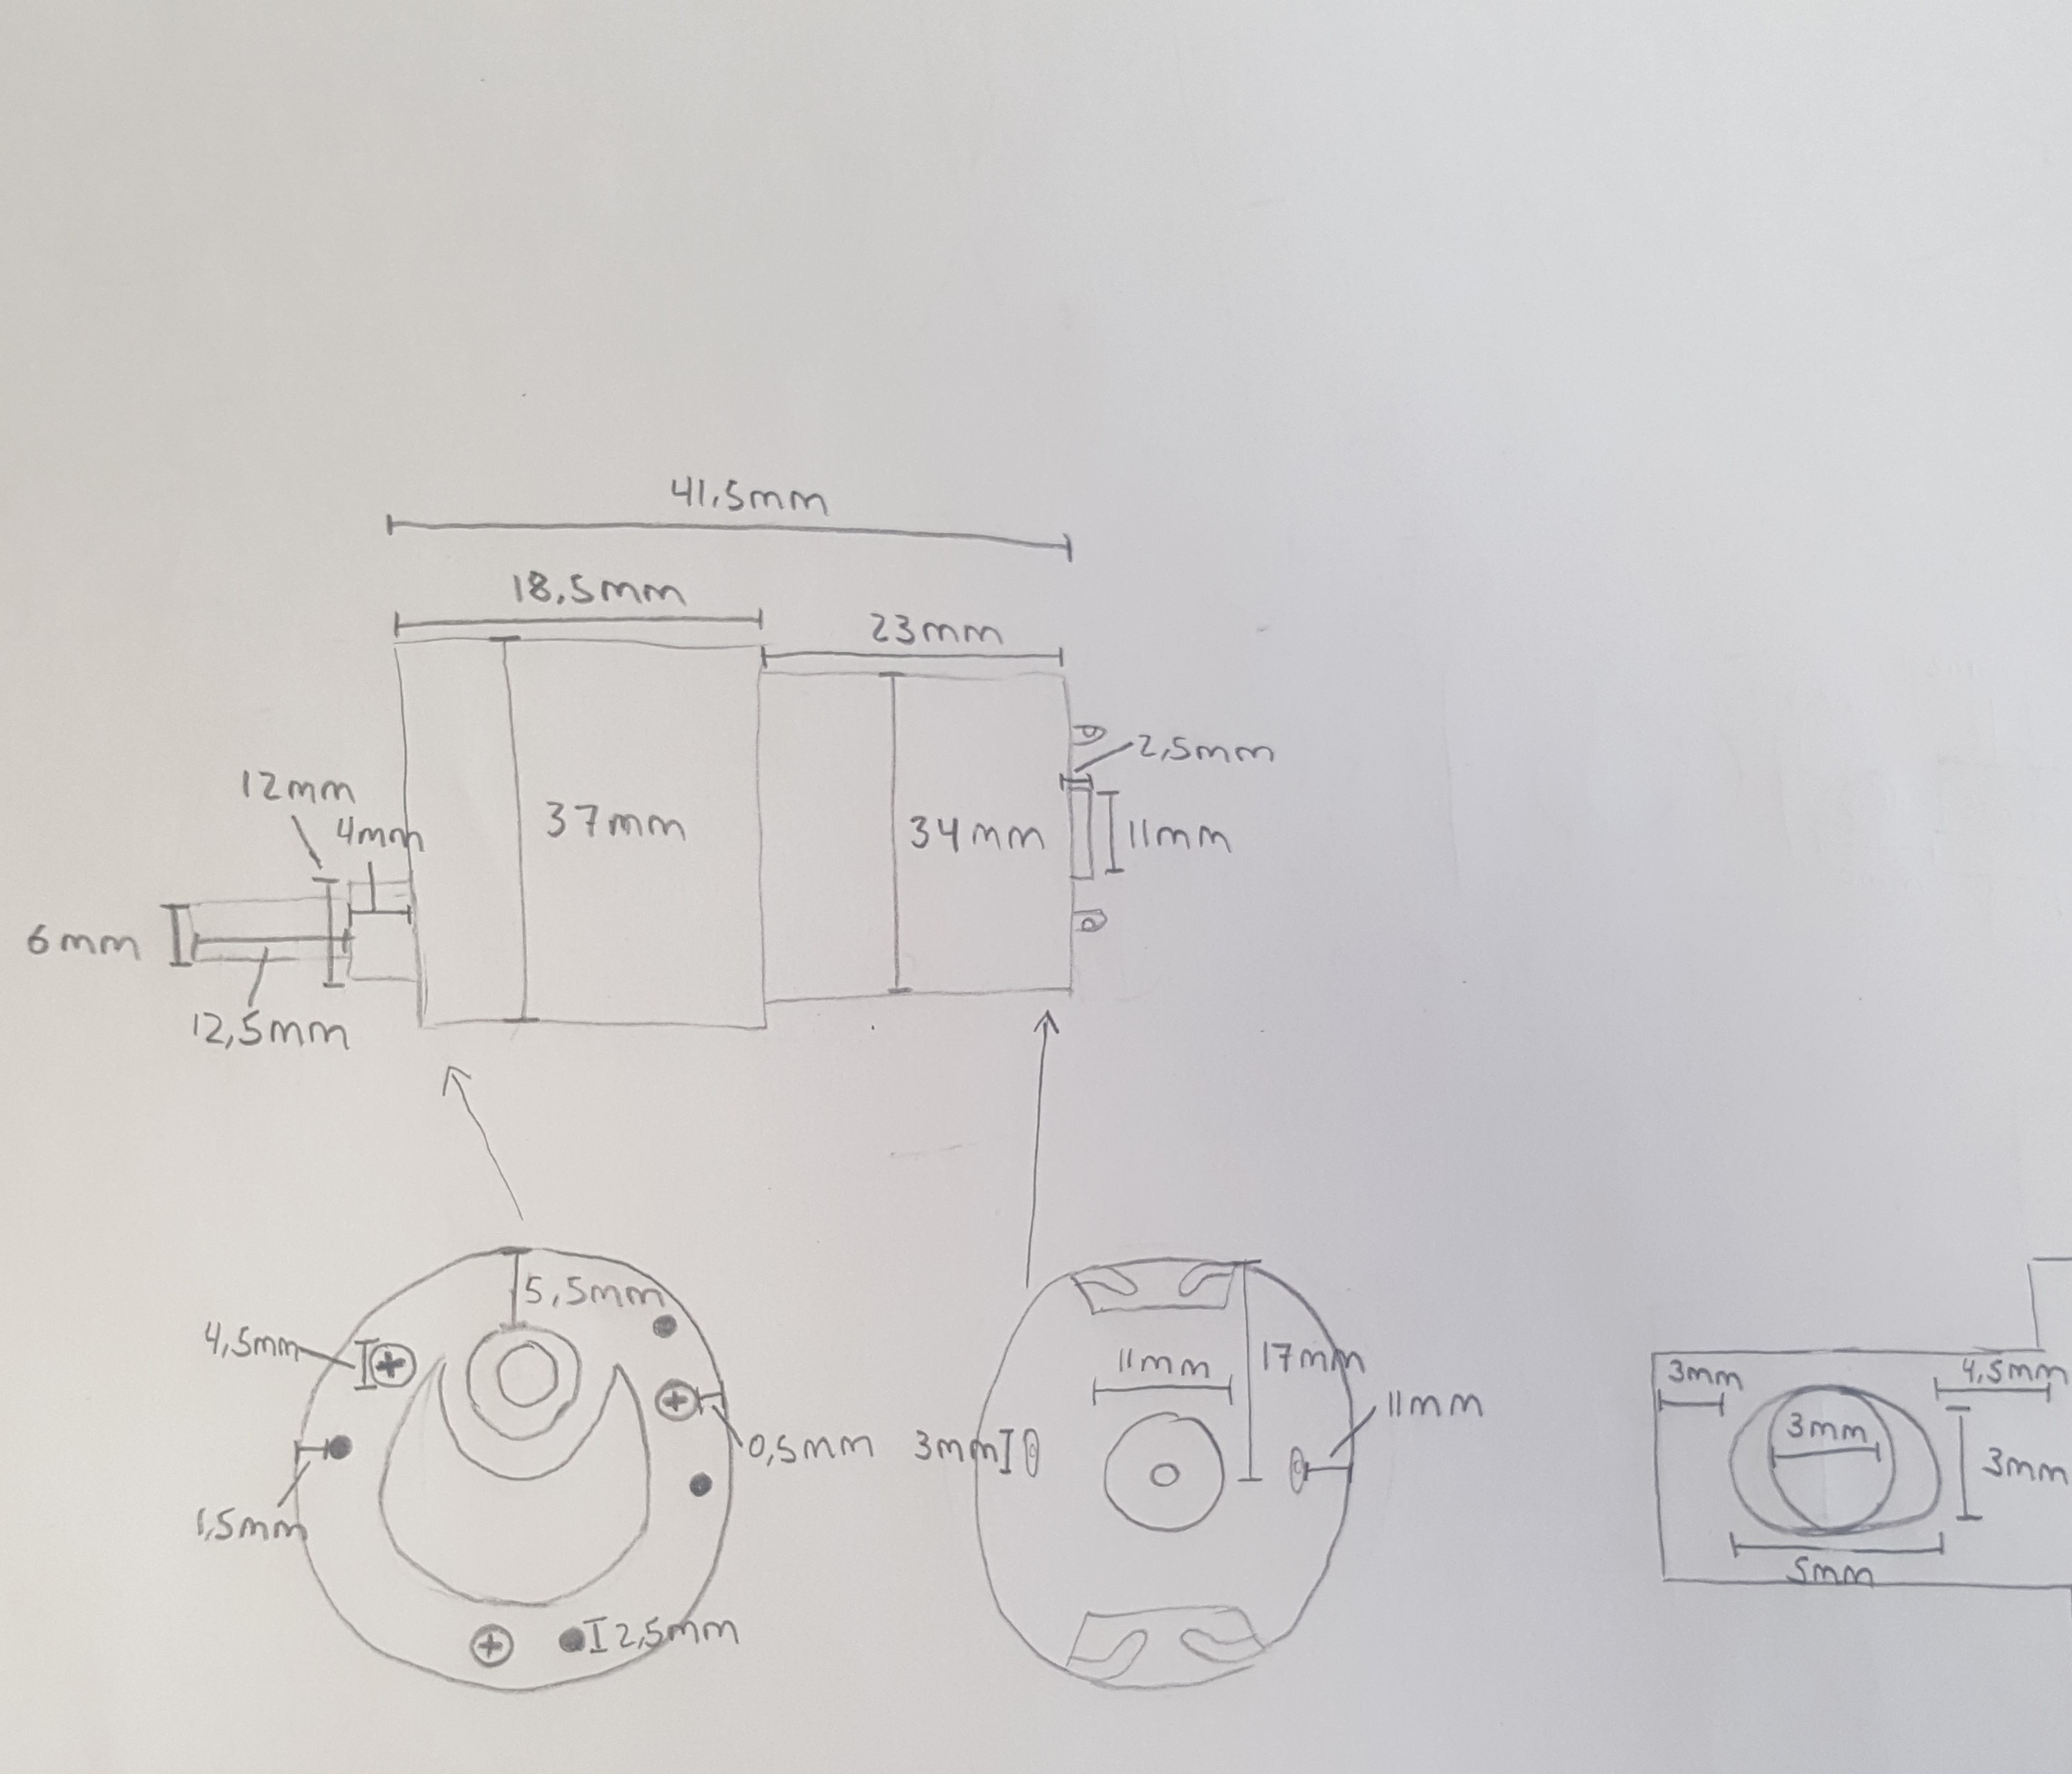
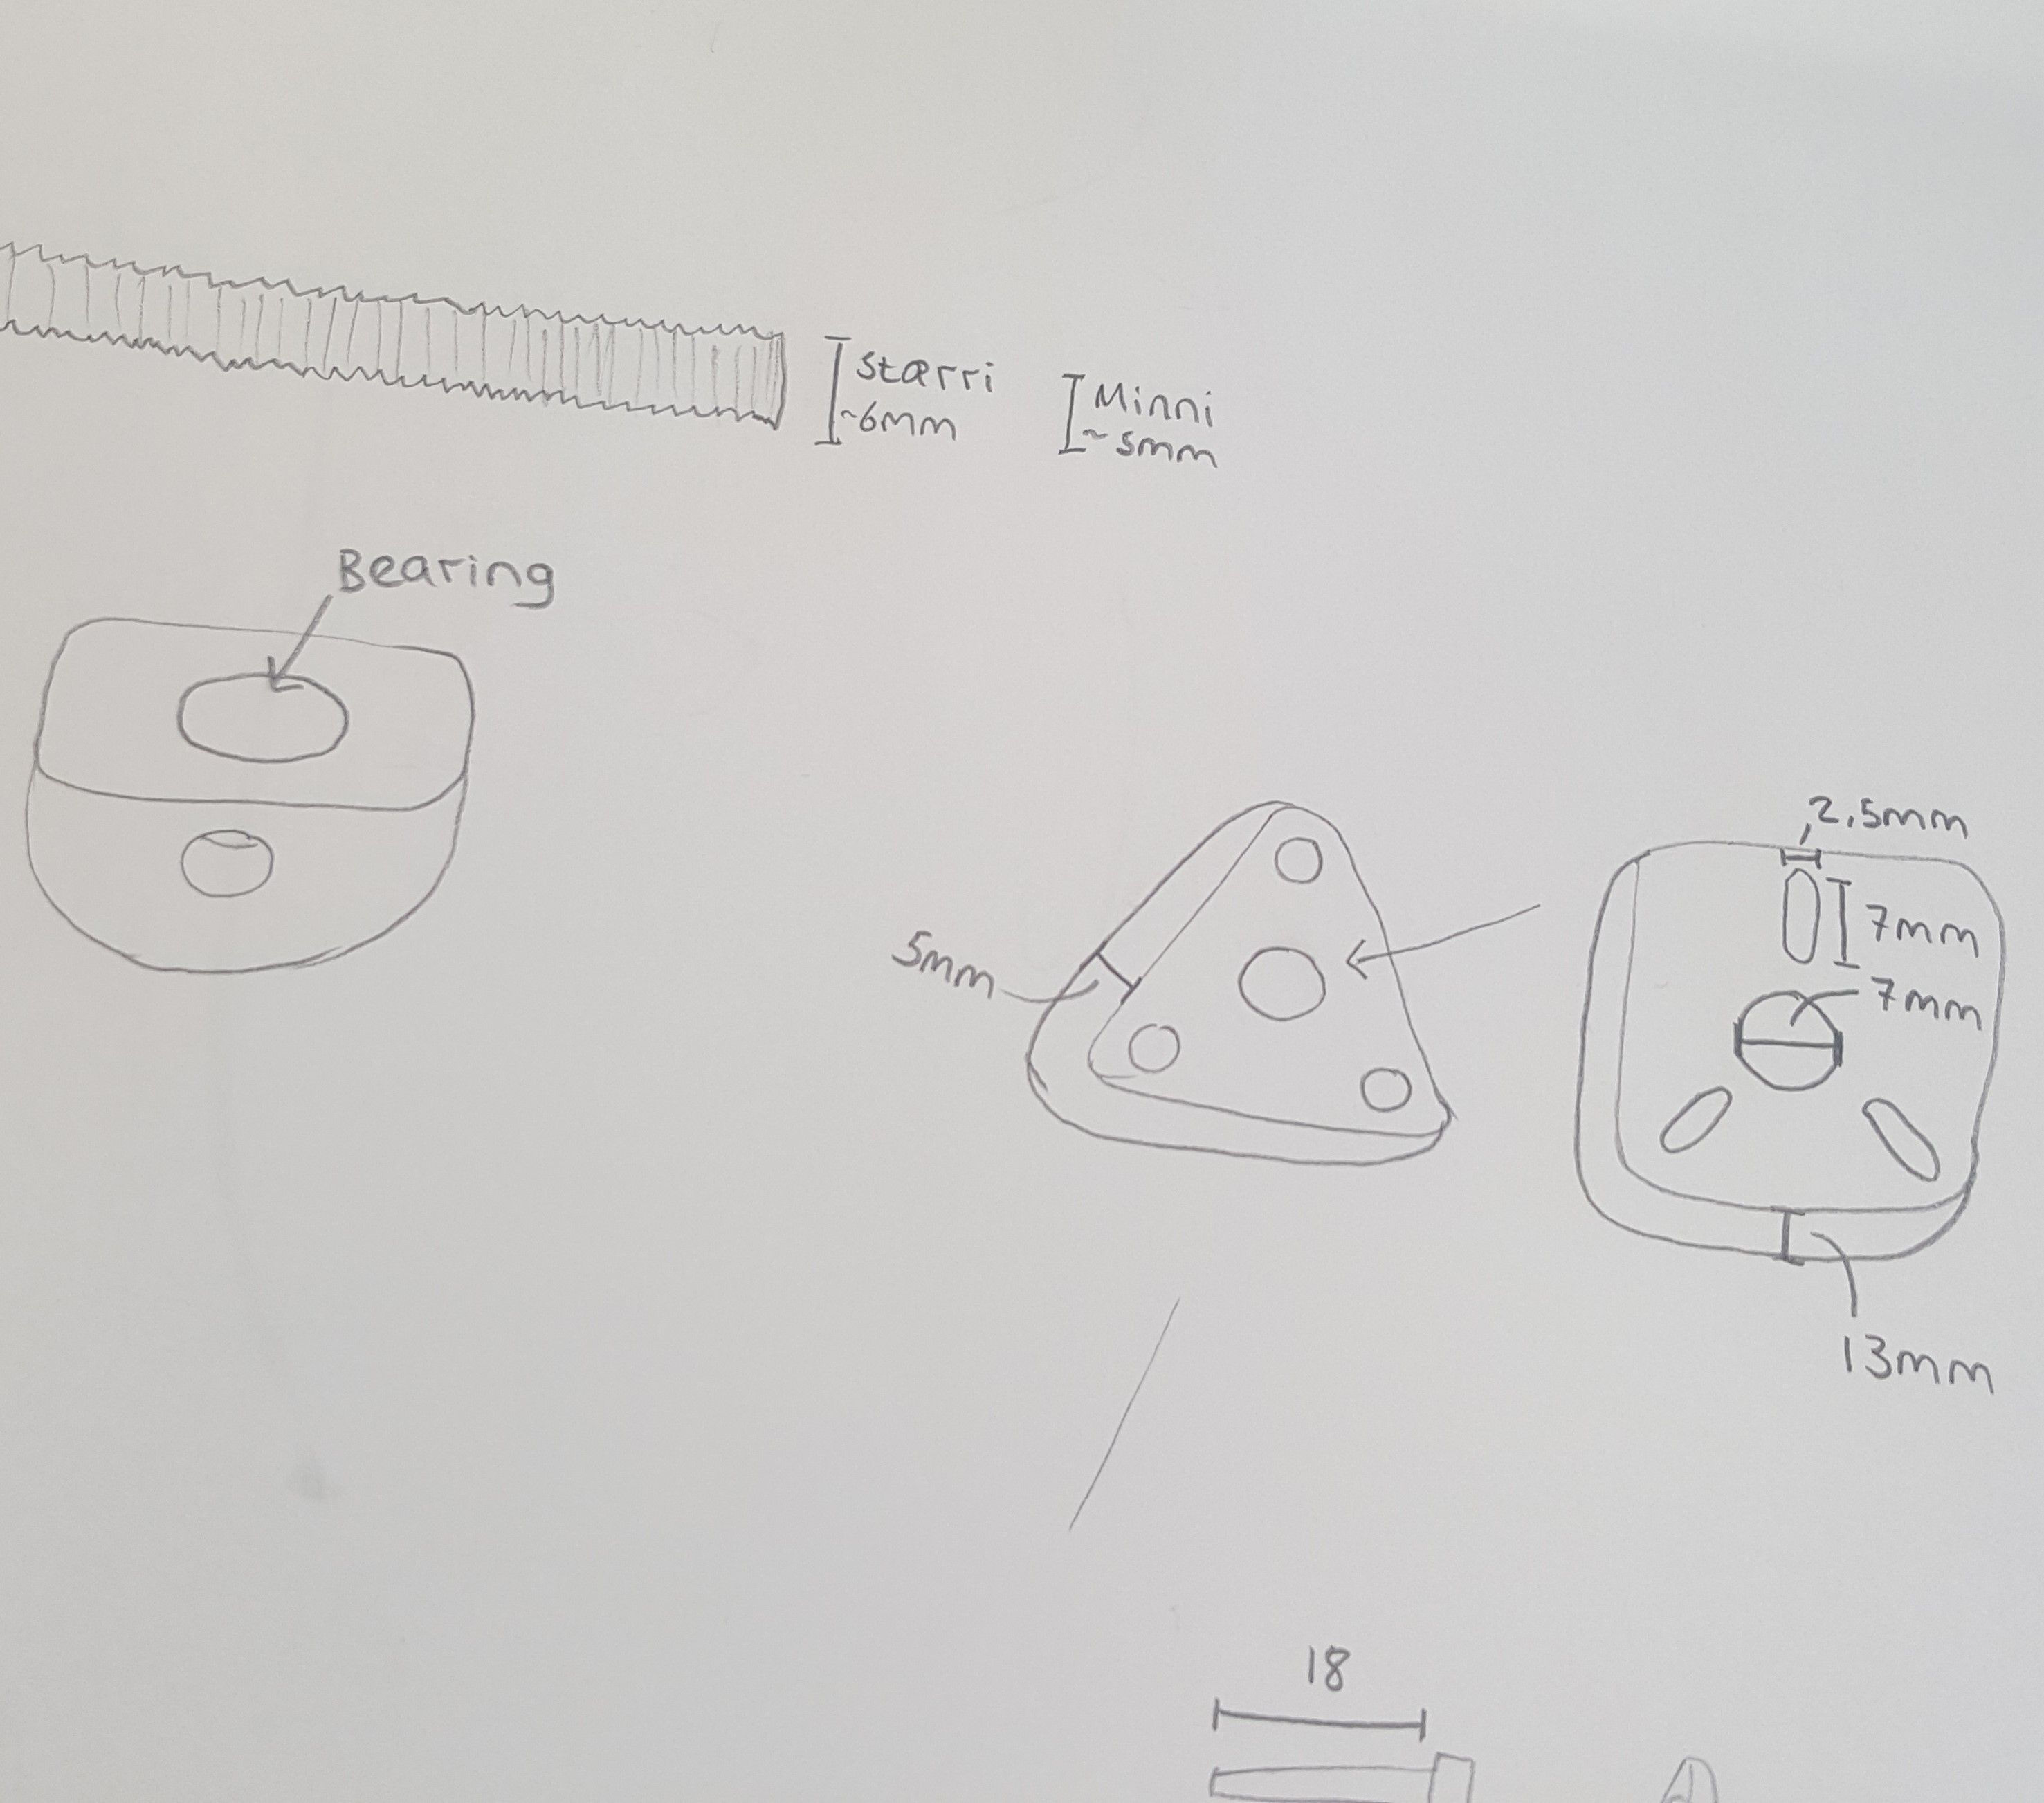
I worked with that idea and here are some photos I drew to explain the parts of the opener.
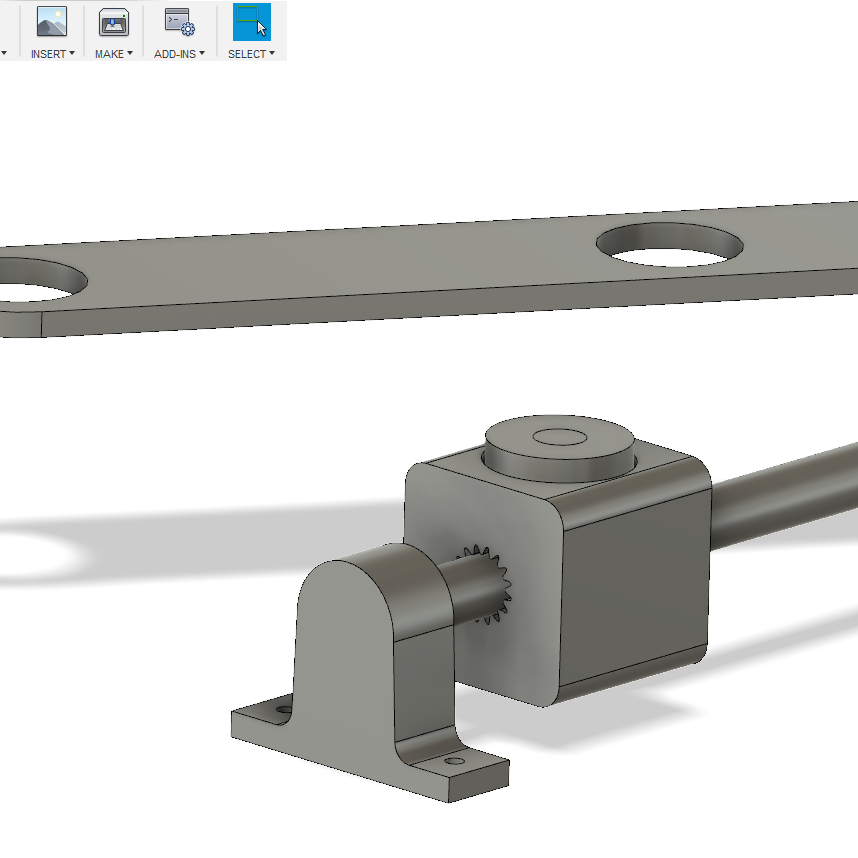
Before I went into Fusion 360 to design it I needed to measure the motor and all the components I wouldn't 3D print or laser cut.
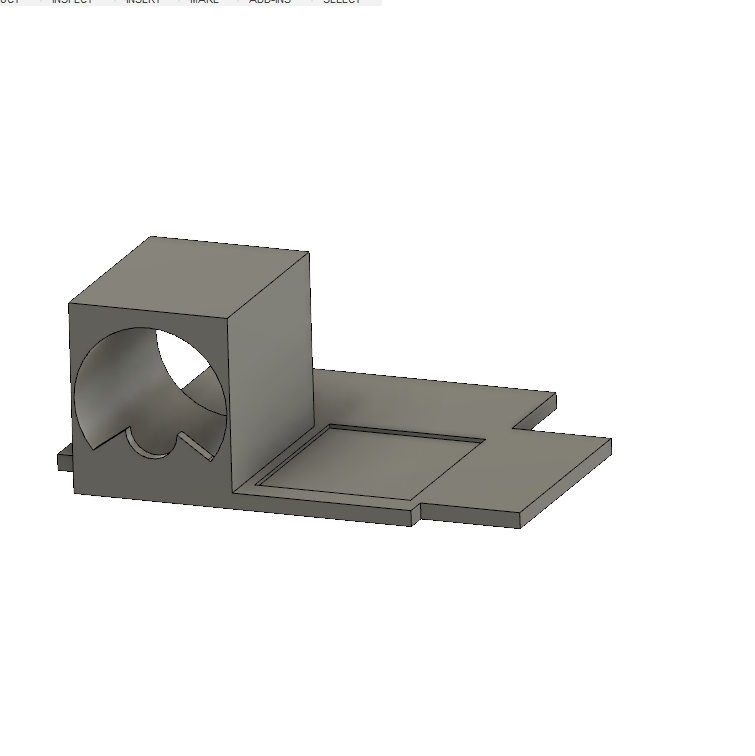
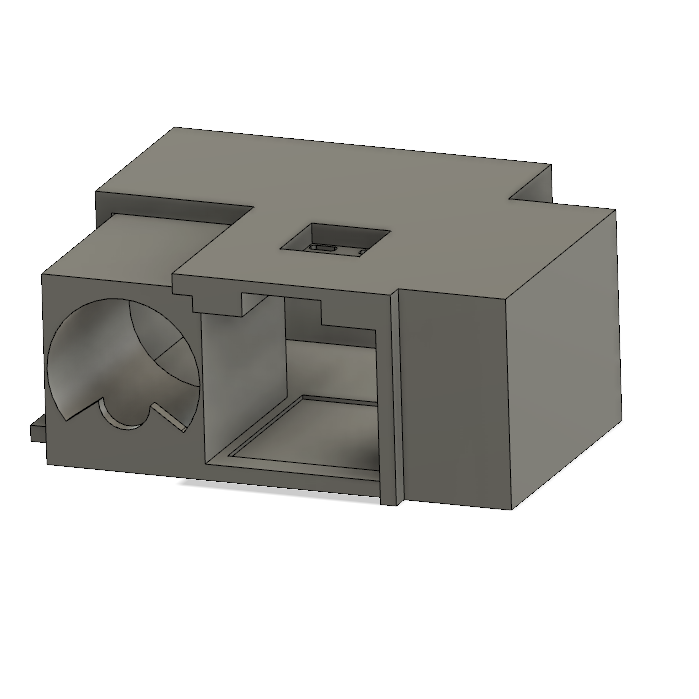
Then I created the design in Fusion 360.
Then I 3D printed and lasercut all the components, connected the motor and the circuit and assembled it.
Bill of materials (BOM)
Here are the materials that were used for the project:
Electronics:
Copper plate (for one circuit): I would fit 8 boards on one copper plate. 1 copper plate costs $6 so it would cost $0,75
1x Attiny 44: $1.18
1x H Bridge Motor Driver: $1.23
2x 6pin Headers: $0.43 x 2 = $0.86
1x 4pin Header: $0.43
1x ftdi connector: $0.51
2x 0𝛀 Resistor: $0.00133 x 2 = $0,00266
1x 𝛀 Resistor: $0,01
1x 10uf Capacitor: $0.18
3x 2uf Capacitor: $ $0.12
1x 1uf Capacitor: $0.12
2x 0,1uf Capacitor: $0.04
1x 5v Regulator: $0.34
1x 3,3v Regulator: $0.32
1x Geared dc motor - Jameco 253471 $13.45
Jumper Wires: A pack of 40 costs $3.95 and I need ca 10 so it'll cost $0,99.
4 pin header wire for motor: $2,3
Other materials:
9 mm thick wood: I found a 122x250:9mm Birch Plywood on husasmidjan.is $67,21. I would fit approximately 3 window designs on that plate and therefore the cost would be $22,41.
Plexi glass: One clear plexi glass sheet costs $14,13 in Iceland. I would fit 9 designs on one (300x600mm)sheet and the final cost would be $1,57.
PLA filament: I have estimated that I have used about 0,3kg of filament that costs $60 dollars a roll. Printing the 3D prints would cost $18.
2x hinges for window: 2 x $2 = $4
Screws: $3
Bearings: They can be quite expensive so instead of buying them I used ones from fidget spinners since they are cheaper. I needed 5 bearings so I bought 2 fidget spinners for $4 each which equals $8.
Final cost: $79,81
You can find more information on how to make all the components for this project in the Weekly assignments
category of my website.
The weeks where I talk about my final project are:
Computer Controlled Machining - Making the window.
Input Devices - Communicating with the sensor to the board.
Output Devices - Making an input from a sensor control a geared dc motor.
Applications and implications - Answering questions about the project.
Invention, intellectual property and income - Dissemenation of the project and licenses.