
Our assignment for the second week is in two parts
to work through a git tutorial and build a personal site in the class archive describing you and your final project.
Our assignment for the second week is in two parts to work through a git tutorial and build a personal site in the class archive describing you and your final project.
We use git for verion controll protocal because it is easy to use and you can use multible computers to work from and still work offline.
The first thing I did was
install Git Bash for Windows
and open my GitLab account.
To help me put up my Git I went through
a tutorial
that Linda Wanders, an instructor in Reykjavík, made.
I also read through tutorials from
GitLab documentation.
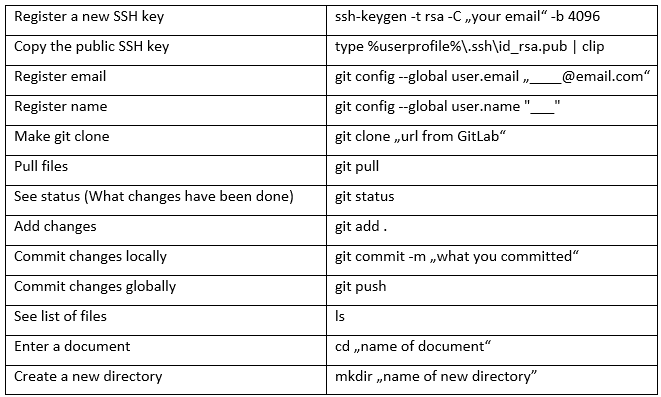
Then I made an SSH key and registered my email and name in Git Bash. Then I put the puplic SSH key to my GitLab
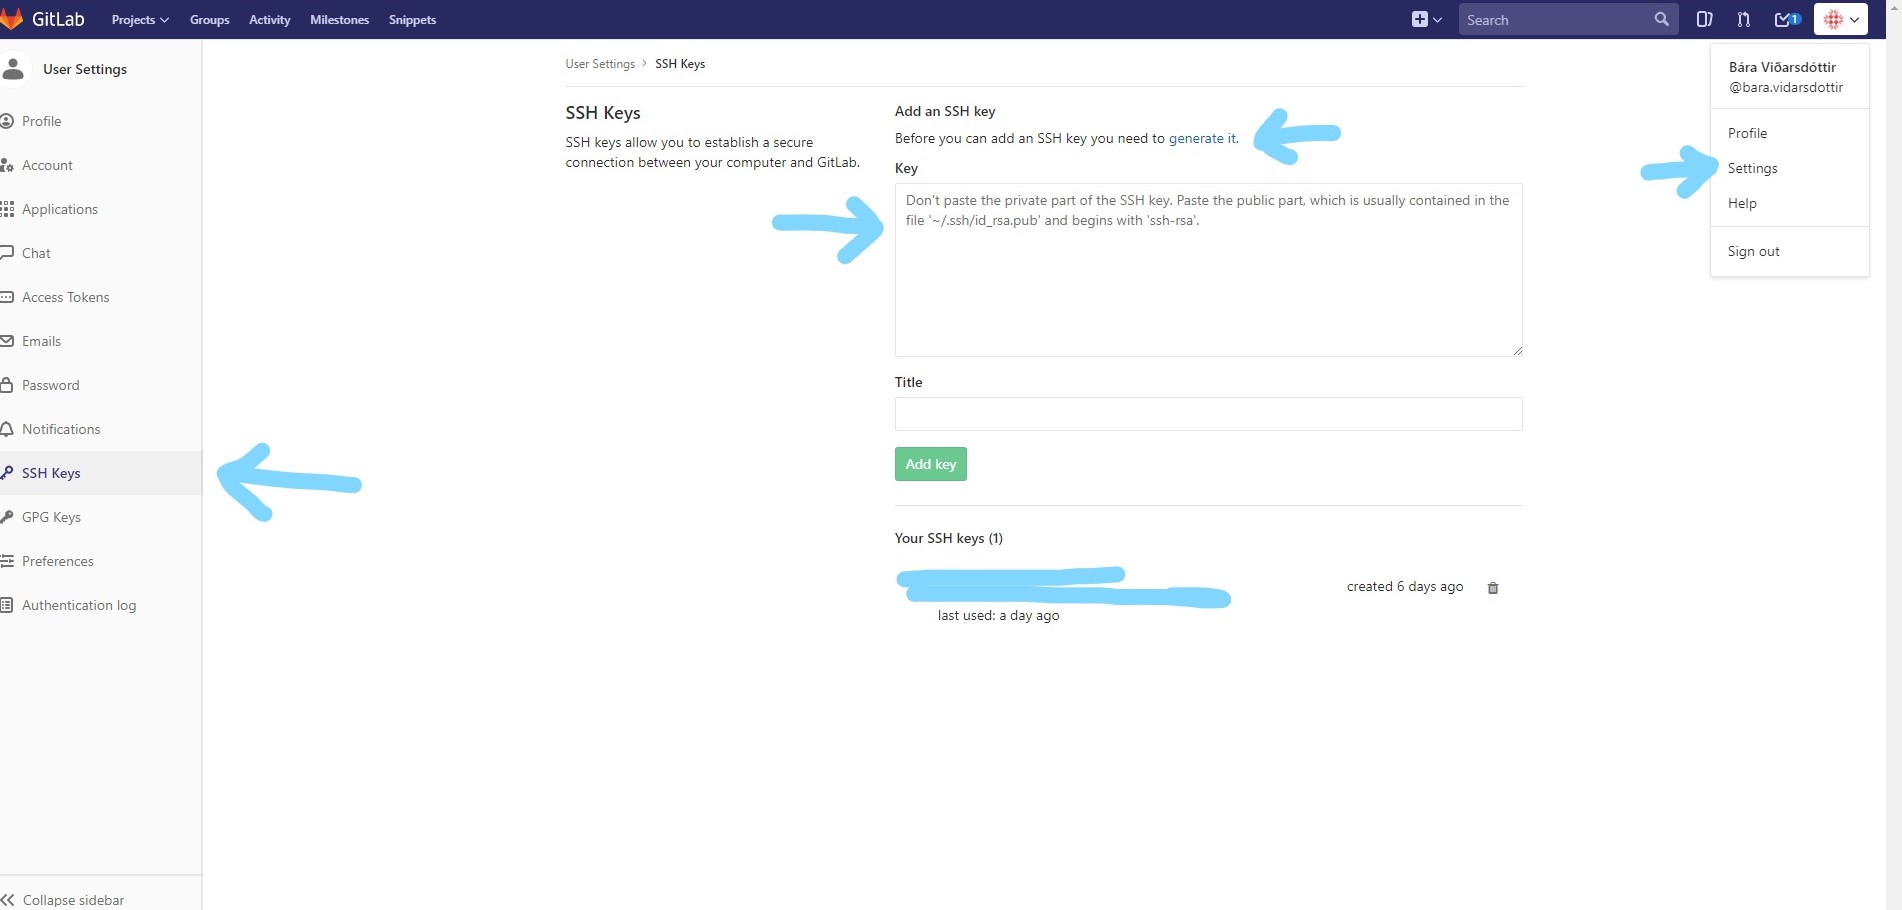
After that I made a folder through Git Bash and made a yml file in GitLab. You have to make the yml file so that the website can be seen by others. Here is a Link To see more about yml. After I made the yml file I made a Git clone in the folder I made before.
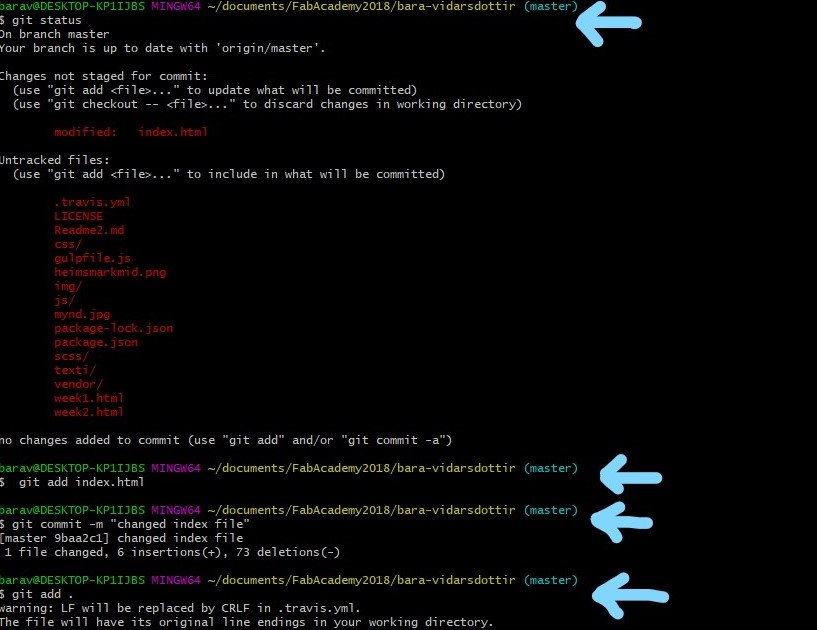
I then put my website in the new folder that is now connected with GitLab. Then I had to pull, check the status, add the changes, commit the changes and push.
Then my website was up and running

Here I had to type in: git pull


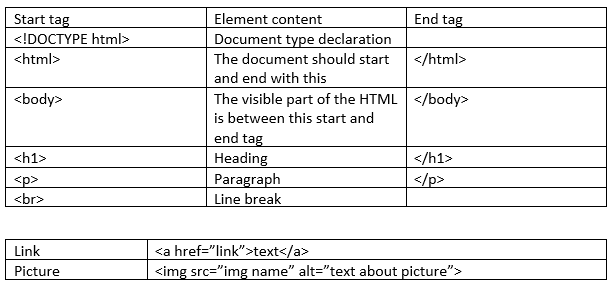
Making a website using HTML looked hard at first but I quickly got hang of the basics. To get started I went through
this tutorial
I used
Brackets
to work on the website, I really liked the live preview option it had so I could see the website as I worked on it.
After going through tutorials I made a very basic website from scratch, but it did not look very good. After I got that to work I found
a template
from
Start Bootstrap.
I then persinalised the website so it would fit my preferences. I decided to have the weekly projects on pages that I made my self,
even though they do not look as good as the rest of the website I wanted to show that I can make a basic site from scratch.
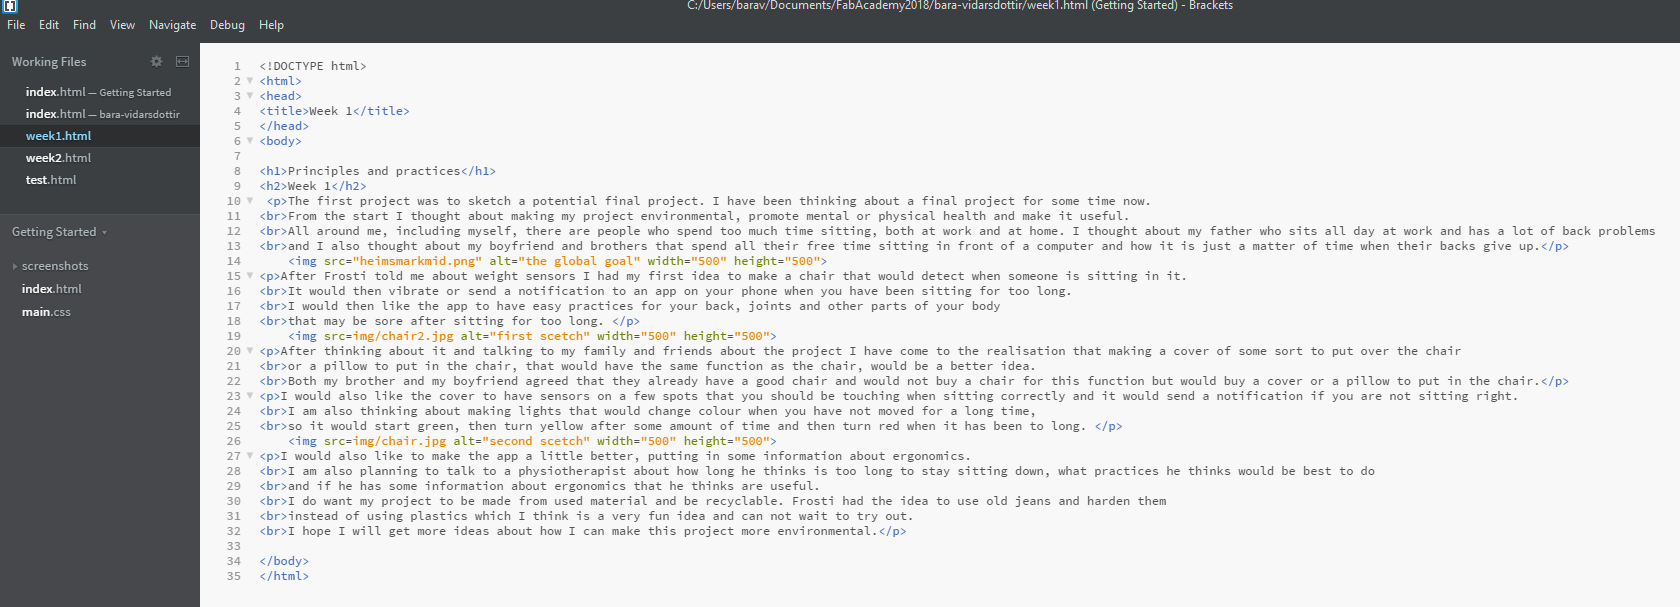
Here is how I made the first week. My folders and files for the website are pretty basicly structured. I named everything so that I would know where it was located. To keep the website in the right size I used Gimp to compres the photos. I also realized sending photos through mesenger compresses them and that takes less time then doing it through gimp.
The biggest problem I had with Git was just understanding it. It was all new to me and just looking at it made me scared.
The solution was just reading tutorials and trying it out. I also watched both recitations with Fiore and it shined a light on how Git works.
Another problem I had with Git was pushing my website through. The first time I tried it, it did not work and I could not find out why,
my instructor went through it with me and he also had problems finding out why it did not work. My solution to this problem was just starting over.
I did not have to make a new SSH key and did not have to register my email and name again but everything else I did over.
After doing it over everything worked fine and I got my website up.
Another thing I just forgot a few times was the commit-m “” command.
But after forgetting it a few times it has now stuck to my brain.
Making the website was pretty easy but I did have problem understanding the classes and do not really understand them
but I managed to work through it with trying a lot of things before figuring out the right thing.
But I found that HTML is very understandable and easy to figure out.
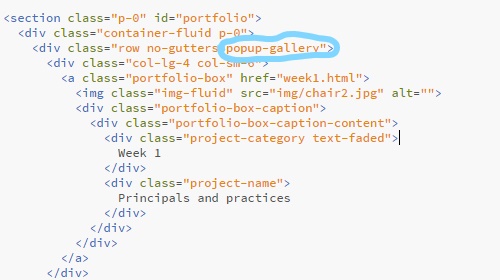
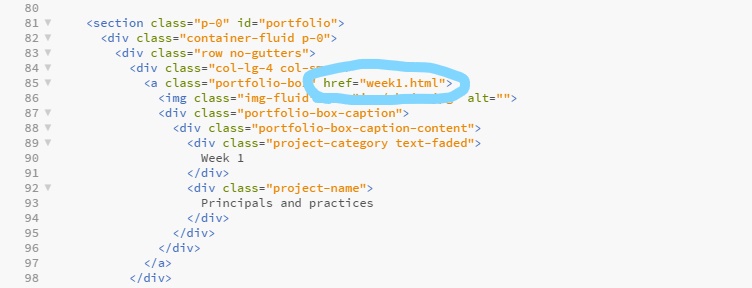
The templet I chose had a pop-up photo album but I wanted the photos to link to each weeks project page.
I looked up how to do it and found that it worked like putting in an image. But doing that did not work so I had to read through the template.
After going through it a few times I found that in one place it said in the class pop-up gallery.
After I took that out it worked fine.
Brackets
- A modern text editor that makes it easy to design in the browser.
Git Bash
and
GitLab
- Version control systems.
Microsoft Photos
- For photo editing.