Exercise 13. Interface and Application Programming
After the lesson about Interface and Application Programming, on Wednesday 18th April, the assignment for this week was to:
		INDIVIDUAL ASSIGNMENT:
			_ write an application that interfaces with an input &/or output device
				that you made


		GROUP ASSIGNMENT:
			_ compare as many tool options as possible
PREVIOUS CONSIDERATIONS
My final project Interface would be a Mobile Phone App made with App Inventor, but in this case, for the assignment I am going to do it with an online Interface Tool due to my PCB.
I will use Exercise 12 board I have designed to, and this PCB does not have a WIFI connection.
I choose Node.js: It is a JavaScript runtime built on Chrome's V8 JavaScript engine. Node.js uses an event-driven, non-blocking I/O model that makes it lightweight and efficient. Node.js' package ecosystem, npm, is the largest ecosystem of open source libraries in the world.
Node is designed to build scalable network applications, and I will combine it with ARDUINO PCB programming.
The idea is to:
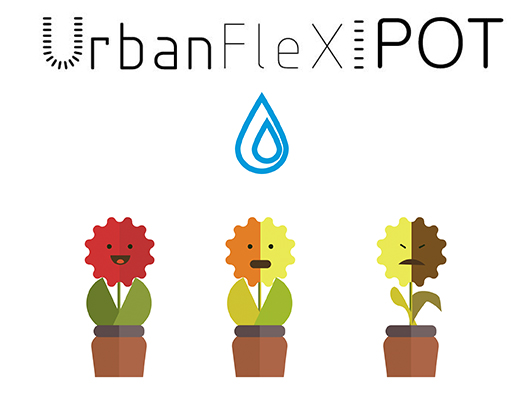
		_ Using ARDUINO: Take data from Humidity sensor (INPUT), which is connected to the PCB.
		_ Depending on Humidity data range, it must send a different signal to Node.
		_ Node has to show us a different graphic depending on these signals:
			-	A Happy Flower if the Humidity is correct
			-	A Worried Flower if Humidity is into a doubtful  range
			-	A Sad Flower if Humidity is low and it needs water
		_ User is receiving these graphic signals on the online screen, and the user himself is
		responsible for knowing if he has to water or not.
		Depending on that he/she uses watering button clicking on it.
		_ If the user uses the watering button, Node sends an action signal to my PCB,
		and Arduino Switches ON the Led for about 5 seconds (OUTPUT).
		It is a concept, Led will replace conceptually the watering action.
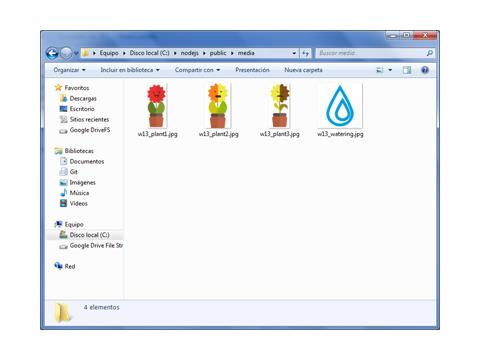
These are the graphics I have prepared using Illustrator, to the graphic interface:
On the other hand, to make sure that those different languages understand each other, I have to know the equivalences between them with the table below:
INDIVIDUAL ASSIGNMENT
1_NODE.JS: Downloadand getting it ready for programming.
2_SERVER: Creatinga server for my interface.
3_ARDUINO:Programming PCB to Send and Receive data.
4_HTML:writing Code for Node and interface.
5_NODE.JS: Installing library to receive and send data.
6_Modifying SERVER to link everything.
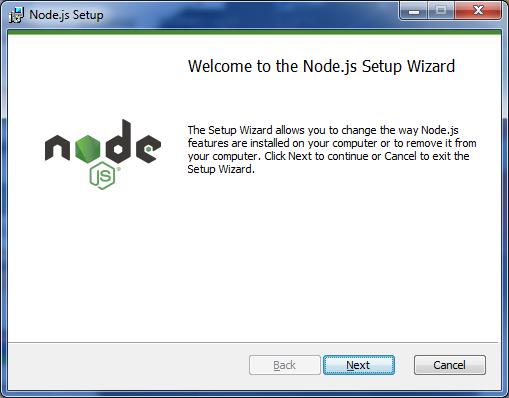
1_ NODE.JS: Download and getting it ready for programming
I have downloaded from NODE.JS site the recommended file to install it in my computer.
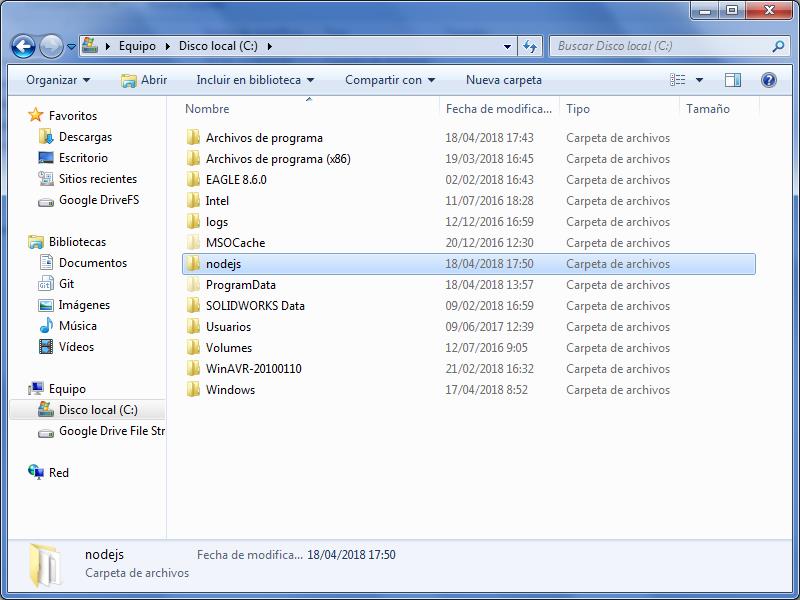
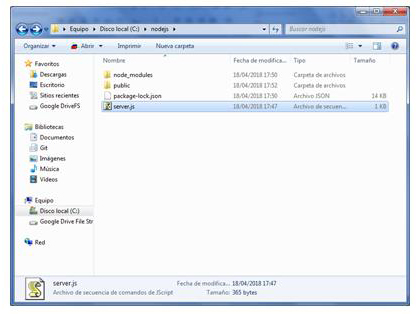
Create, when installing, the “nodejs” folder into C:// :
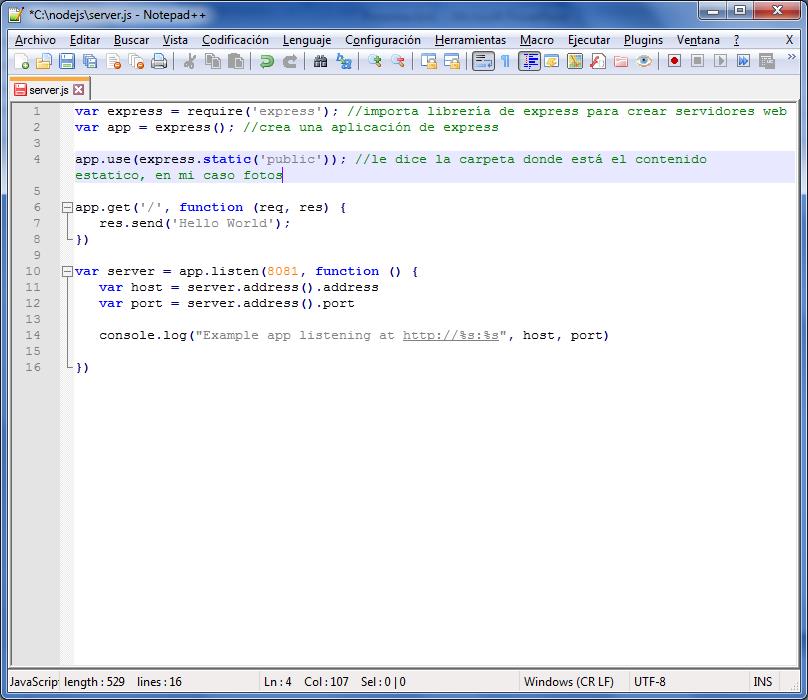
Then, I need an STATIC webpage, with static images, so I found in this site the code to create a NOTEPAD++ html file which I used as template later.
The template is a Hello World example, and it has to be saved in nodejs folder as server.js:
Save it in public folder, inside C://nodejs.
2_ SERVER: Creating a server for my interface
Once I have this html file done and into this folder, proof it, but for this it is important to create the server.
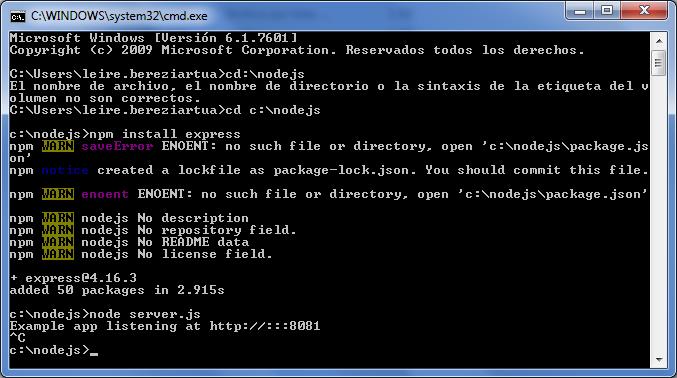
_ First of all it has to been installed Express library, which is in nodejs folder in C: For this write npm install express and execute it in cmd.
_ Then, create the server executing node server.js.
See the image below:
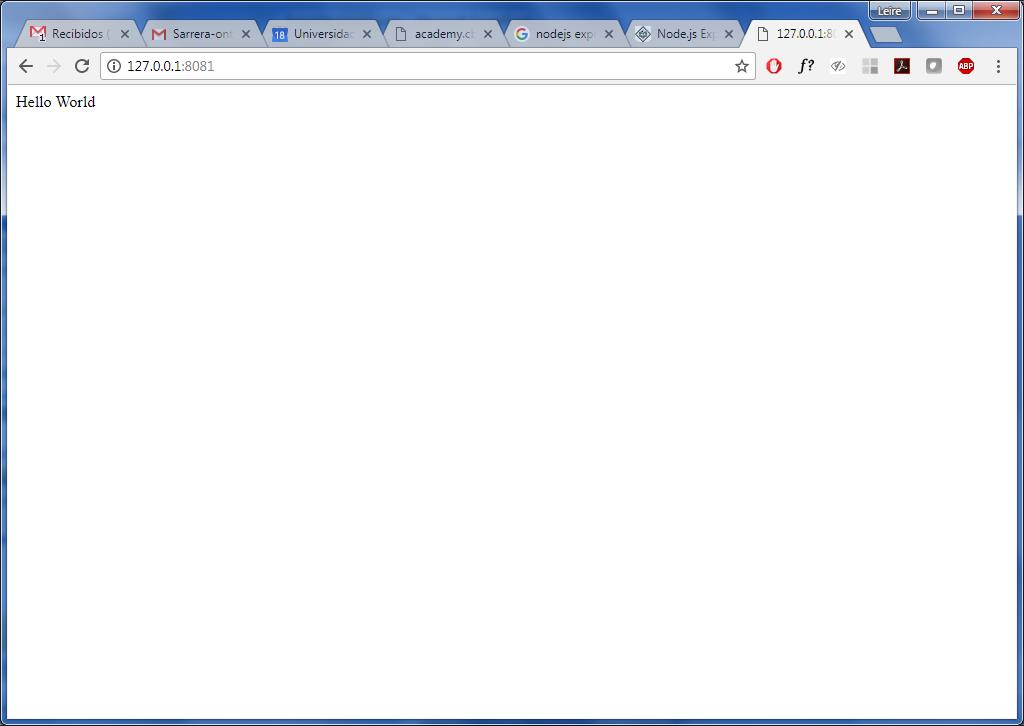
If we go to Chrome (or another internet explorer) and we write http://IP:8081, 128.0.0.1:8081 in my case (127.0.0.1 is my PC IP address), we can see that it is working.
It is saying Hello world:
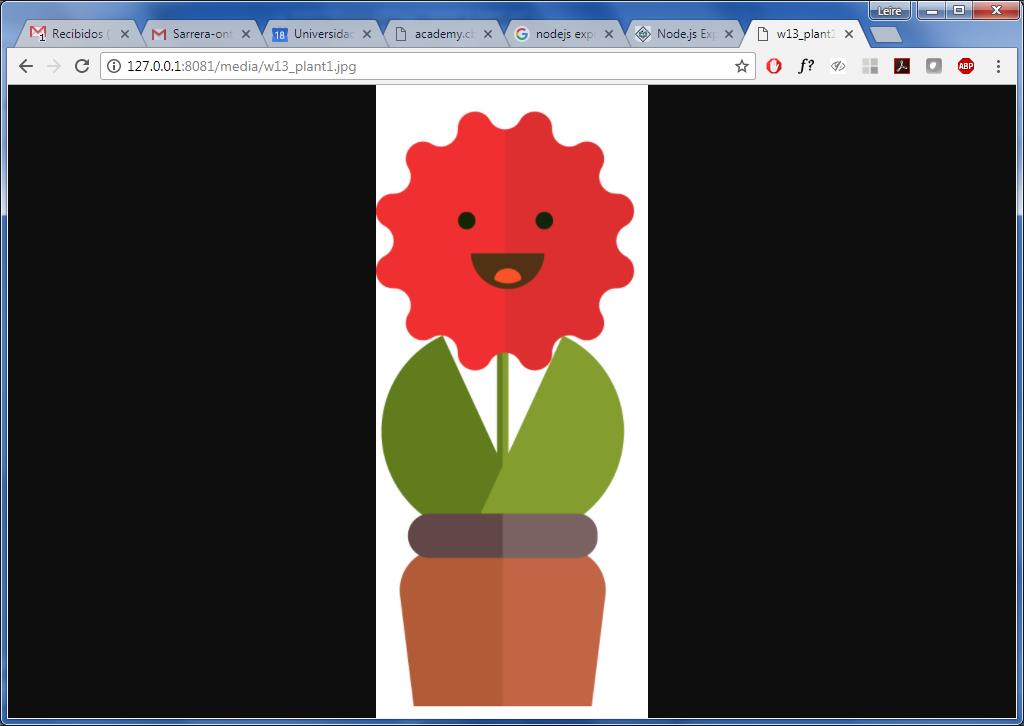
I copied flower pictures in media folder:
And I tested if the first image is working well if I write 128.0.0.1:8081/media/w13_plant1.jpg, and YES! Server is working well. See image below:
3_ ARDUINO: Programming PCB to Send and Receive data
Now, it is time to create CODE to program the PCB to send and receive data between sensors and HTML interface.
After having it written, program it as we done in exercise 08.
Code can be seen below, basically it:
_ It receives data from the Humidity sensor, and sends it to created html, NODE.JS program, which is controlling the interface.
_ NODE/Html inter-actuates with user, and if user sends a signal to watering plants: Node sends a signal to Arduino/PCB and it Switches on the led for 5 seconds.
#include//include library which implements software serial port, for communication int data = 0; //create a variable for data int humidity = 0; //create a variable for Humidity int pinLed = 7; //PB3 in Tiny const byte rxpin = 0; //not variable, reception on pin 0 const byte txpin = 1; //not variable, transmision on pin 1. Sends message to PC, communication of micro-controller with PC. unsigned long previusMillis=0; unsigned long currentMillis; SoftwareSerial mySerial (rxpin, txpin); //set up a new serial object, and say which pin is for reception and which for trasmision void setup() { // put your setup code here, to run once: Here we are configuring speed of the serial port mySerial.begin(9600); //bits per second, 9600 is standard speed pinMode(pinLed, OUTPUT); //saying LED is the OUTPUT } void loop() { // put your main code here, to run repeatedly: //FOR THE INPUT: HUMIDITY currentMillis=millis(); //time counter; it takes execution time, in which second is Micro-controller in this moment exactly. if ((currentMillis-previusMillis)>1000){ // in this way we make sure that the function "medir" (we have created down, to execute it separately) is working every-secong, without being bloqued. medir(); //execute medir() function (down). previusMillis=currentMillis; //actualices the time counter. } //FOR THE OUTPUT: LED int dato=mySerial.read(); //It is reading everytime if User sends a watering signal (1) or not (0) from NODE.JS if (dato==49){ //49=Character "1" in Dec, if user send signal, it will be 1, if not 0. digitalWrite(pinLed, HIGH); //Switch on Led for 5 seconds, then Switch of it. delay(5000); digitalWrite(pinLed, LOW); } } void medir(){ data=analogRead(A2); //humidity sensor read: number humidity=(int)((data*10)/77); // we need to make a percent, and logical operation would be data*100/773, but the DATA is too big (long number) fot this Attiny44 (77000>32000) if ((humidity<70) && (humidity>40)) { mySerial.print ("1"); //Sends a "1" signal to NODE.JS program } else { if (humidity<40) { mySerial.print ("2"); //Sends a "2" signal to NODE.JS program } else { mySerial.print ("0"); //Sends a "0" signal to NODE.JS program } } }
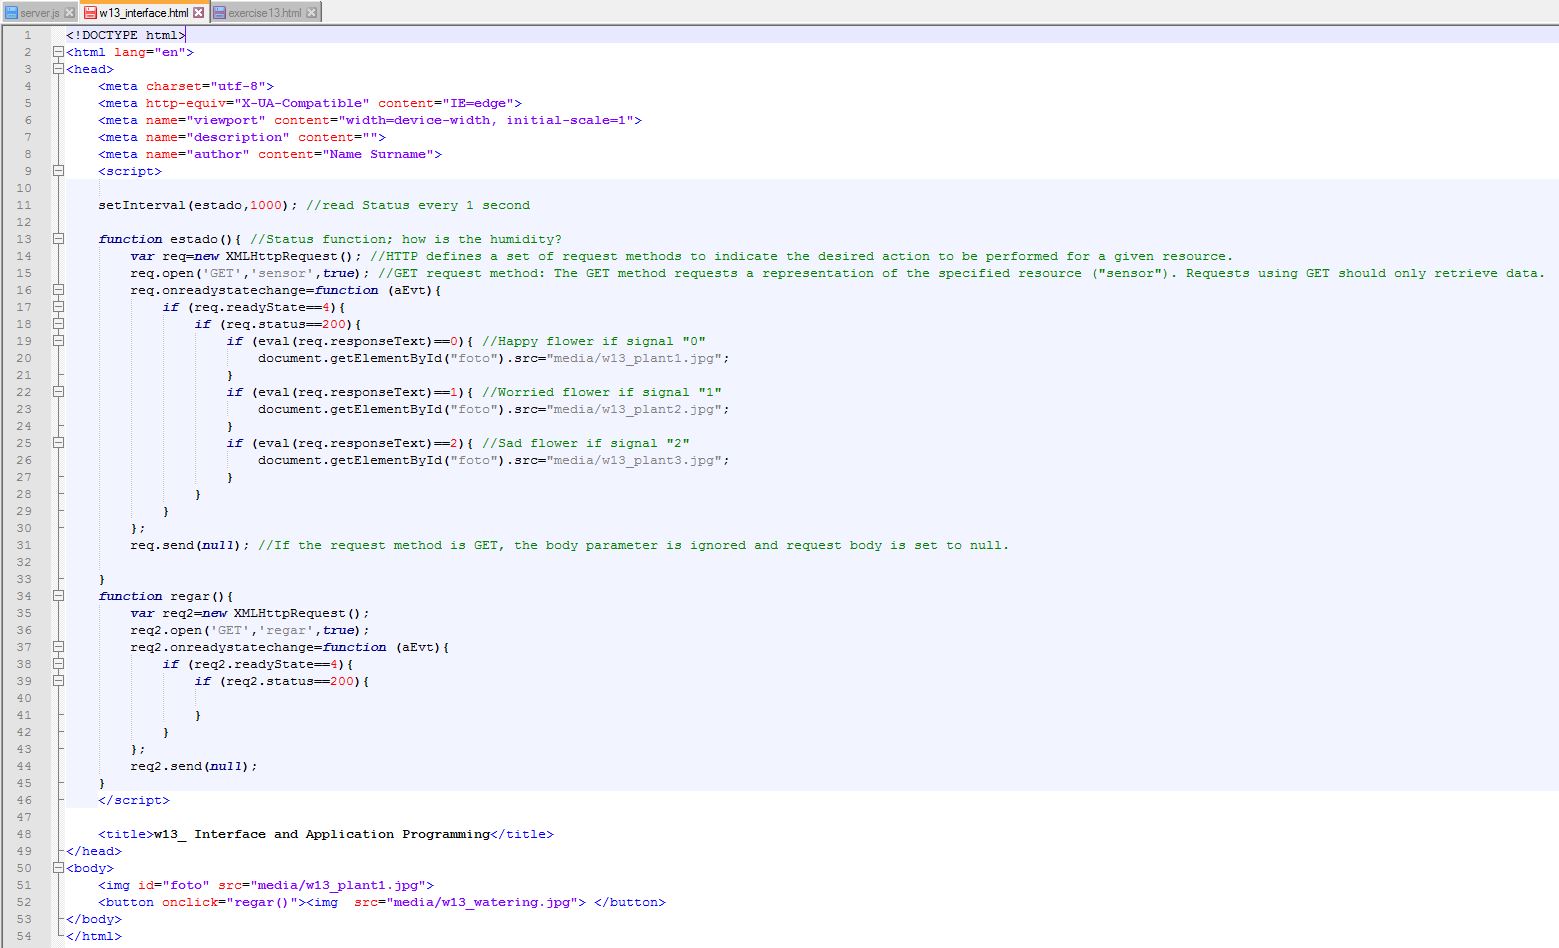
4_ HTML: writing Code for Node and interface
And, obviously, is necessary to modify HTML CODE on nodejs to link it with Arduino INPUT and OUTPUTs.
For this, I have used a XMLHttpRequest method. XMLHttpRequest objects interact with servers. You can retrieve data from a URL without having to do a full page refresh. This enables a Web page to update just part of a page without disrupting what the user is doing.
CODE:
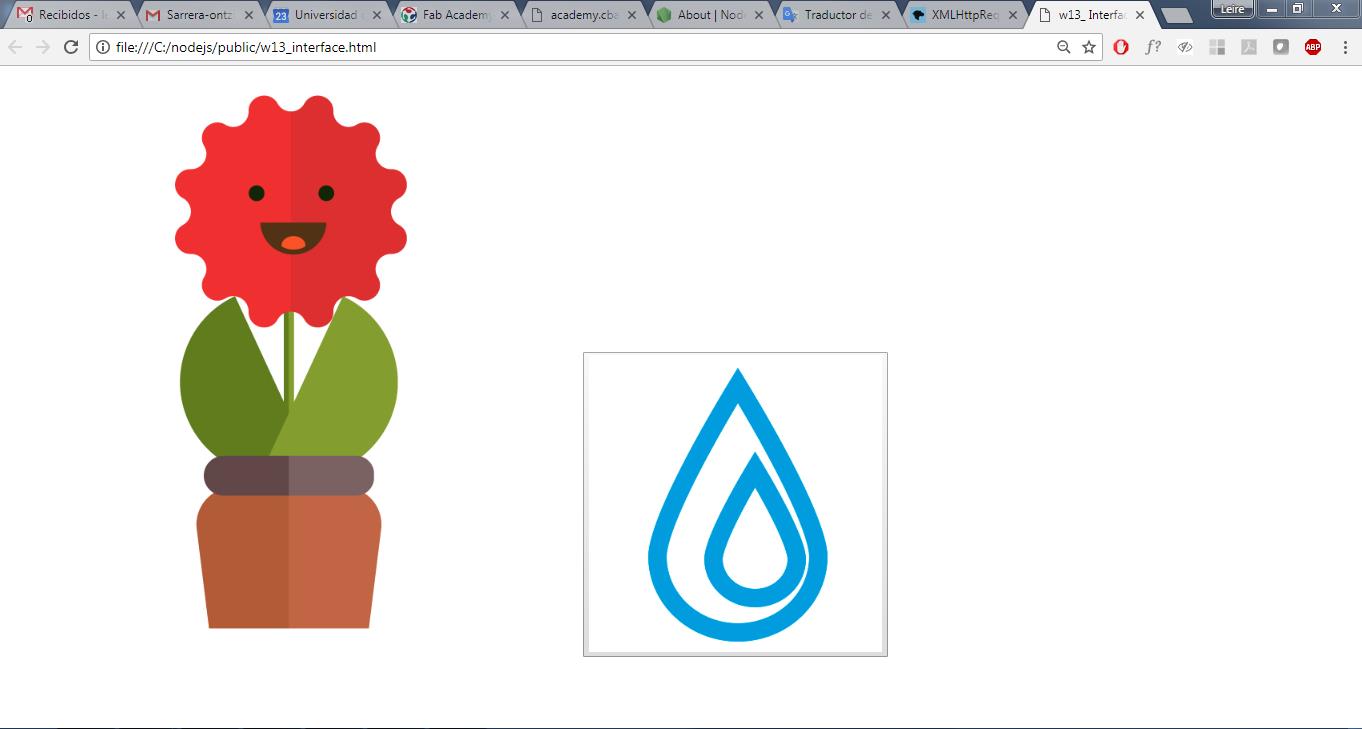
We can see HTML preview in the image below:
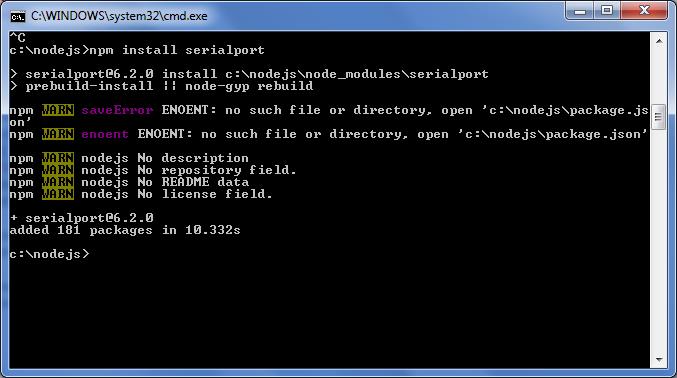
5_ NODE.JS: Installing library to receive and send data
And, for being able to receive and send data from HTML, it is necessary to install Serial Port library in NODE:
6_ Modifying SERVER to link everything
And finally, it is needed to link everything, create functions like “sensor”, “regar”, “data”, etc. used in HTML.
It is important to close CMD to modify server.js file. Used CODE below:
var express = require('express'); //imports express library to create web servers
var app = express(); //creates an express application

app.use(express.static('public')); // say where my static files are, in my case pictures

app.get('/', function (req, res) {
   res.send('UrbanFleXIPOT coming soon :)');
})

app.get('/sensor', function (req, res) {
   res.send(""+dato);
})
app.get('/regar', function (req, res) {
   res.send("regando");
   port.write("1");
})

var server = app.listen(8081, function () {
   var host = server.address().address
   var port = server.address().port

   console.log("Example app listening at http://%s:%s", host, port)

})

var SerialPort = require('serialport');

var port = new SerialPort('COM6', {
  baudRate: 9600
});


var dato=0;

port.open(function (err) {
  if (err) {
    return console.log('Error opening port: ', err.message);
  }
});

// The open event is always emitted
port.on('open', function() {
  // open logic
});

port.on('data', function(data){dato=data;
console.log('Dato recibido: ', dato);
});
7_ FINAL RESULT
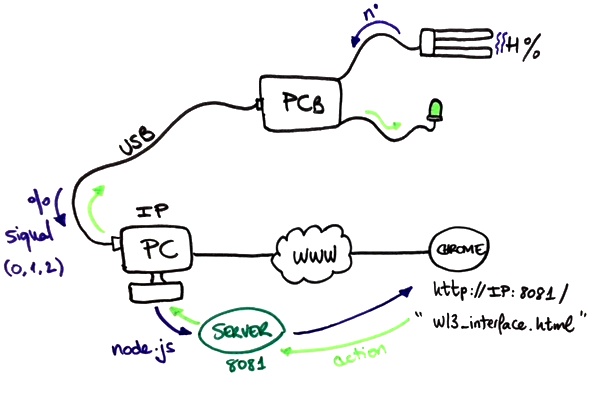
The picture above helped me to undestand better how communications between different platforms/languages/elements has been working.
And finally! I test my PCB in the server I have created, with a personal interface, and it was OK! OUH YEAH!
It is Magic for me, I am Industrial Designer, very mechanical, and it is difficult to me to trust and believe these kind of things. I have to say too THANK YOU to mates in this adventure, Szilard and Javi! You two have a lot of patience with me :)
NOTE: To make it run, it is important to reinitialize Server in CMD as I have done in step 2 >> node server.js
GROUP ASSIGNMENT
This week group assignment has been to compare as many tool options as possible. When interface an application can be used different languages and tools, with an input or/and output device. We have tried these ones:
Java
Java is a general-purpose, concurrent, object-oriented programming language. The main characteristic are:
- It is a language that is compiled, generating compiled class files, but these compiled classes are actually interpreted by the java virtual machine.
- It is a multiplatform language: The same java code that works in an operating system will work in any other operating system that has the java virtual machine installed.
- It is a safe language: The virtual machine performs security checks when executing the java code, and the language itself lacks insecure features, such as pointers.
- Thanks to the java API we can extend the language to be able to, for example, communicate with computers through network, access databases, create dynamic HTML pages and create visual applications in the style window.
We have developed a simple application that take data from a device through the serial port and make a plot with the data.
The App have two files, the first one PlotData.java make the plot of the data and the second one, is a thread that take the data from the serial port SensorReader.java.

To make this application we have used two Libraries.
- The jfreechart for plot the data. Click here to download the library.
- jSerialComm for the serial communication. Click here to download the library.
Matlab
MATLAB is a high performance technical environment for numerical calculation and visualization. The main characteristic are:
- Numerical analysis
- Matrix calculation
- Signals processing Graphics
We have developed a simple program that take data from the serial port and make a plot of the data.
data=zeros(1,25);
timer = 200;
s = serial('COM8','Baudrate',115200, 'DataBits', 8, 'Terminator','CR/LF','Parity','none');
s.Baudrate = 115200;
fopen(s);
tic;
while toc <= timer
    if s.BytesAvailable >= 0
    line=fgetl(s)
    data=[data(2:end) str2double(line)];
    plot(data);
    end
     pause(1);
end
fclose(s);
delete(s)
clear s

Nodejs
Node.js is an execution environment for JavaScript built with the Chrome V8 JavaScript engine. Node.js uses a non-blocking, event-oriented I / O operations model that makes it lightweight and efficient. We have developed a simple aplication that takes data from the serial port and sends the data to a cloud service to store the information. To be able to do this we had have to install two libraries using the npm tool.
sudo npm install serialport
The developed code is:
var request = require('request');
var API_KEY = '74DNWV8QOLN8CST6'; // ThingSpeak 'write' API key
var SerialPort = require('serialport');
const Readline = SerialPort.parsers.Readline;
var port = new SerialPort('/dev/ttyUSB0', {
  baudRate: 115200
});
var dato=0;

const parser = port.pipe(new Readline({ delimiter: '\r\n' }));

port.open(function (err) {
  if (err) {
    return console.log('Error opening port: ', err.message);
  }
});

// The open event is always emitted
port.on('open', function() {
  // open logic
});

parser.on('data', function(data){dato=data;});

setInterval(intervalFunc, 20000);

function intervalFunc() {
 var url='https://api.thingspeak.com/update?api_key='+API_KEY+'&field1='+dato;
  request.get(url,
	function (error, response, body) {
		    if (!error && response.statusCode == 200) {
		        console.log(body);
		    }else{
		        console.log('error');
		    }
	});
}
The app take the data from the serial port and every 20 seconds sends the last received data to the ThingSpeak cloud service.

Node-red
Node-RED is a flow engine for the IoT, which allows graphically defining service flows. It is a very light visual tool, programmed in NodeJS and that can be executed from devices as limited as a Raspberry. We have developed a simple app that takes the data from the serial port and plot it.


Python
The main characteristic of python are:
- Python is a very simple language, so it is very easy to start to work in this language. Python's natural pseudo-code is one of its great strengths.
- Using the Python language you can create all kinds of programs; General purpose programs and Web pages can also be developed on it.
- Depends on the Python nature of being Open Suorce; has been modified so that it can work on various platforms.
- When programming in Python we should not worry about low level details, (how to handle the memory used by the program).
- Python contains a large number of libraries, data types and functions incorporated in the language itself, which help to perform many common tasks without having to program them from scratch.
We have developed a simple application that take the data from the serial port and then plots the data. To be able of implement this aplication we have to install some libraries.
	python -mpip install -U matplotlib
	python -mpip install -U pyserial
Once we have installed libraries, we can test the aplication. The developed code is below.
import os
import matplotlib.pyplot as plt
import serial
import io


tempC = []
plt.ion()
cnt=0

def plotNow():
    plt.clf()
    plt.ylim(0,50)
    plt.title('Temperature sensor')
    plt.grid(True)
    plt.ylabel('Temp C')
    plt.plot(tempC, 'rx-', label='Degrees C')
    plt.legend(loc='upper right')
    plt.plot(tempC)
    plt.show()

#pre-load dummy data
for i in range(0,26):
    tempC.append(0)
ser = serial.Serial()
ser.baudrate = 115200
ser.port = '/dev/ttyUSB0'
ser.open()
while True:
    temp = ser.readline()
    print(temp)
    tempC.append(int(temp))
    tempC.pop(0)
    plotNow()
    plt.pause(.5)
