Interface programming is a lesson that connects the end user via a visible computer input and/or output interface to the device output and/or input, respectively. I have reviewed several interfaces.
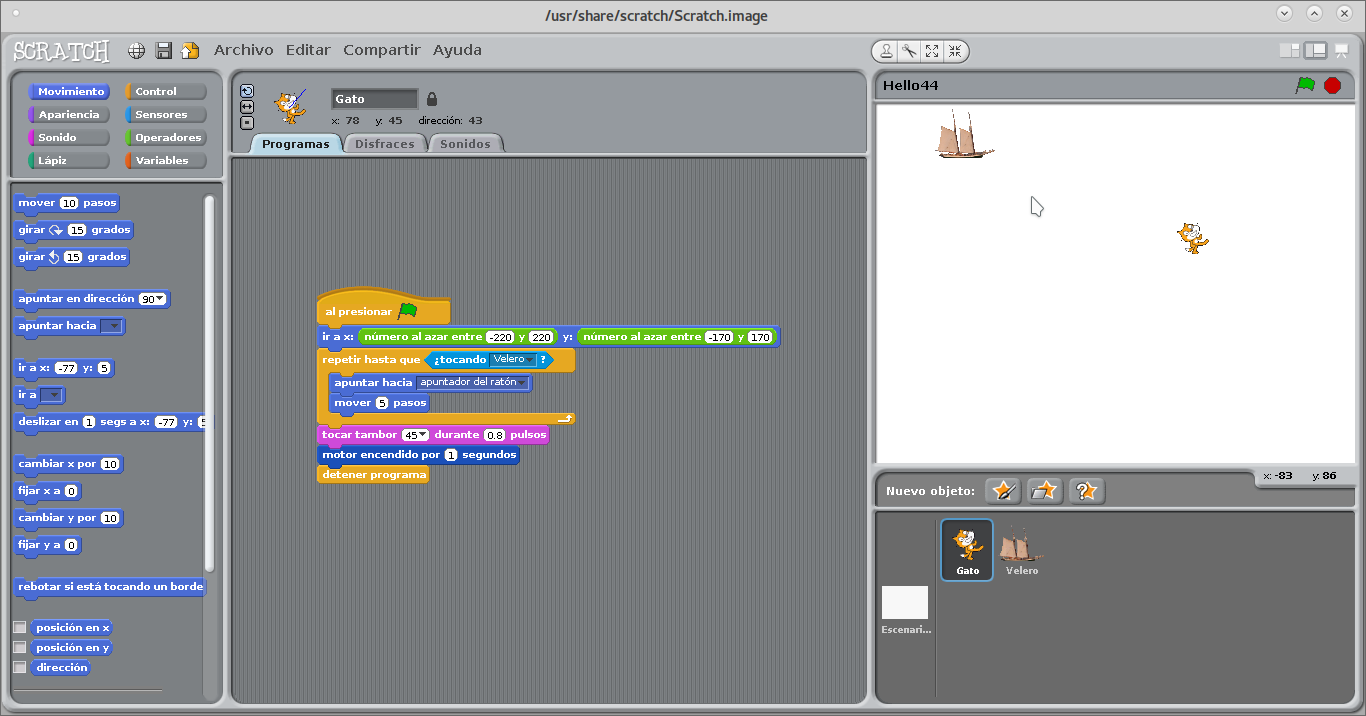
I have used Scratch for its usability. But I have not been able to connect it to my board. I tryed connecting Scratch with an Arduino. But my browser is not able to use the Javascript on that page for making the connection to the USB port where TeleKIT is plugged.
My Scratch application helps a cat chase a sailboat by following the mouse pointer. When it reaches the sailboat, it stops and lights a LED on the board.
I have modified several scripts from the Arduino example scripts to:
echo "Send this message to Arduino UNO" > /dev/ttyACM0
It is visible via the Arduino serial console. I have not been able to receive the output of the program as is supposed to with
tail -f /dev/ttyACM0
By connecting a phototransistor to pin 2, we can send to the computer serial port the binary data it detects. It can be read through the tail command. Here is the code copied via the Arduino IDE html function:
      /*
        DigitalReadSerial
       Reads the light provision, prints the result to the serial monitor

       This example code is licensed by Quiliro 2018 GNU GPLv3.
       */

      // digital pin 2 has a phototransistor attached to it. Give it a name:
      int photoTrans = 2;

      // the setup routine runs once when you press reset:
      void setup() {
        // initialize serial communication at 9600 bits per second:
        Serial.begin(9600);
        // make the pushbutton's pin an input:
        pinMode(photoTrans, INPUT);
      }

      // the loop routine runs over and over again forever:
      void loop() {
        // read the input pin:
        int lightState = digitalRead(photoTrans);
        // print out the state of the button:
        Serial.println(lightState);
        delay(1);        // delay in between reads for stability
      }
      /*
       BlinkFull
       Turns on an LED on, then as fast as it can.

       This example code is licensed by Quiliro 2018 GNU GPLv3..
       */

      // Pin 13 has a LED connected on most Arduino boards.
      // I give it a name:
      int led = 13;              // LED's pin

      // the setup routine runs once when you press reset:
      void setup() {
        // initialize the LED's pin as an output.
        pinMode(led, OUTPUT);
      }

      // the loop routine runs over and over again forever:
      void loop() {

            // turn the pin on:
            digitalWrite(led, HIGH);
            delay(30);
            // turn the pin off:
            digitalWrite(led, LOW);
            delay(30);
      }
      /*
        ResetLED
       Turns on the onboard LED off.

       This example code is licensed by Quiliro 2018 GNU GPLv3..
       */

      // Pin 13 has a LED connected on most Arduino boards.
      // I give it a name:
      int led = 13;              // LED's pin

      // the setup routine runs once when you press reset:
      void setup() {
        // initialize the LED's pin as an output.
        pinMode(led, OUTPUT);
      }

      void loop() {

            // turn the pin off:
            digitalWrite(led, LOW);


      }
At a tutorial for BASh connection with Arduino, there is an Arduino script which will not go through Arduino IDE verification because the line:
// [ Enter ] else if ( int(inChar) == 13 ) {
should be:
// [ Enter ]else if ( int(inChar) == 13 ) {
So the script runs correctly with the code as follows:
      String inputString = "";

      String lastcmd = "";

      boolean stringComplete = false;

      int sensor = A0;

      int ledstate = LOW;

      //use some wiring from this pin to reset pin to disable auto-reset

      int resetPin = 8;

      //Check if inputString match the given cmd string

      bool cmd(String cmd){

        if (inputString.startsWith(cmd)){
          return true;
        }
        else {
          return false;
        }

      }

      //Simply blink the led for some time

      void blink(int led, int mil){

        digitalWrite(led,HIGH);
        delay(mil);
        digitalWrite(led,LOW);
        delay(mil);

      }

      //This function will restart your board

      void(* reboot) (void) = 0;

      void setup() {

        //Set the serial port speed

        Serial.begin(115200);
        inputString.reserve(255);
        pinMode(13,OUTPUT);

        //with some wiring from the resetPin (pin 8) to the reset pin, this will disable auto-restart

        digitalWrite(resetPin,HIGH);

        //blink 3 times to show that system is starting

        blink(13,200);
        blink(13,200);
        blink(13,200);

        //print a cool penguin and initial prompt

        Serial.println("  .^.");
        Serial.println("  /\V\\");
        Serial.println(" / - \\");
        Serial.println("/(   )\\");
        Serial.println(" ^`~'^");
        Serial.print("Arduino:");

      }

      //Perform actions based on the input

      void check_input(String input){

        //if the input is an exclamation, repeat last command

        if(cmd("!")){
          inputString = lastcmd;
        }

        //Turn led on

        if (cmd("led_on")){

          ledstate = HIGH;
          Serial.println("LED was turned on");

          //Turn led off

        }
        else if (cmd("led_off")) {

          ledstate = LOW;
          Serial.println("LED was turned off");

          //Read sensor pin

        }
        else if (cmd("read_sensor")) {

          Serial.println("Sensor value was:"+String(analogRead(sensor)));

          //Call blink function

        }
        else if (cmd("blink")) {

          blink(13,200);

          blink(13,200);

          blink(13,200);

          //Call reboot

        }
        else if (cmd("reboot")) {

          Serial.println("Rebooting...");
          delay(200);
          reboot();

          //Show time since last boot in milliseconds

        }
        else if (cmd("uptime")) {

          unsigned long time = millis();
          Serial.println("Uptime: "+String(time));

          //Input string does not have any registered command

        }
        else {

          Serial.println(" command not found->"+inputString);

        }

        //Add the command to "history"
        lastcmd = inputString;

        //prepare for next command
        inputString = "";
        stringComplete = false;
        Serial.print("Arduino:");

      }

      //The main loop function

      void loop() {

        serialEvent();
        if (stringComplete) {

          //Call our input handler function

          check_input(inputString);

        }
        digitalWrite(13,ledstate);

      }

      //This function works when we have data comming from the serial port

      void serialEvent() {

        while (Serial.available()) {

          char inChar = (char)Serial.read();
          // [ Backspace ]

          if ( inChar == '\b') {

            //inputString.remove(inputString.length() - 1, inputString.length());
            Serial.print(' ');
            Serial.print('\b');

          }
          // [ Enter ]
          else if ( int(inChar) == 13 ) {

            inChar = '\n';

          }
          else {

            //add current character to input command

            inputString += inChar;

            //Serial.print(int(inChar)); //debug control characters

          }

          if (inChar == '\n') {

            stringComplete = true;

          }

        }

      }
A snapshot of the program running
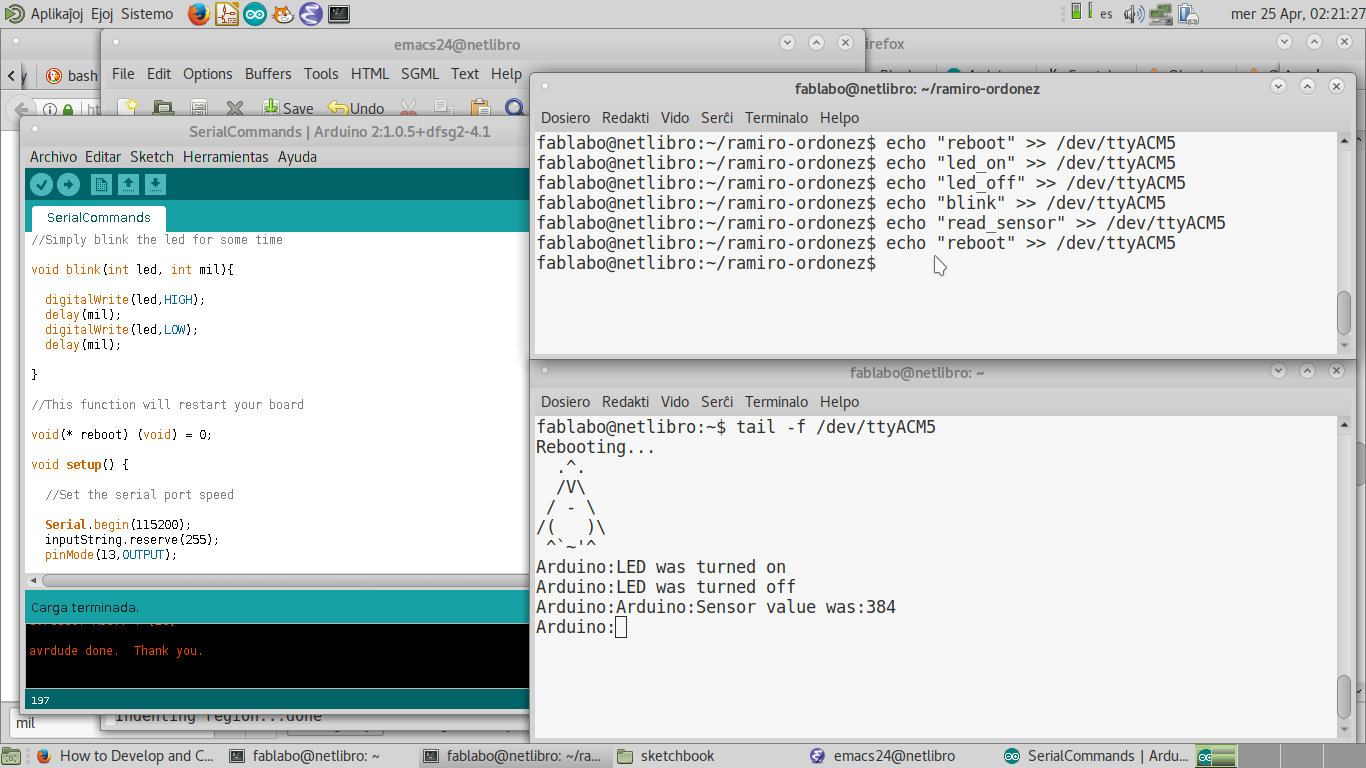
It was strange to have the message printed on the tail terminal, not immediately when it was executed, but when then next command was executed. In the Arduino IDE serial console, the message was printed immediately.
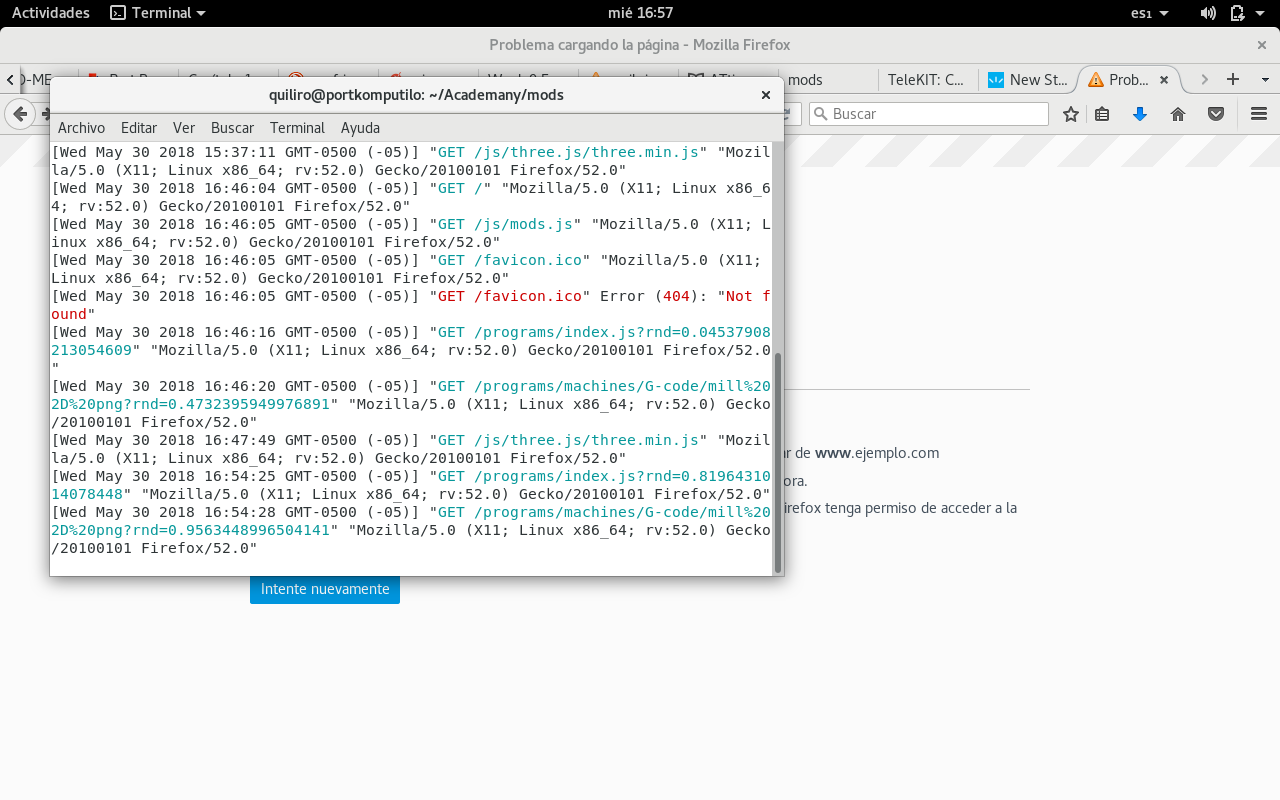
On Debian 9.0.3 (testing) 64 bit, the TeleKIT serial port was recognized but it was not possible to connect to it via the Arduino IDE. An error popped up when opening the Tools menu (regardless of wether there was a board connected to the USB port or not). The message was:
java.lang.NullPointerException thrown while loading gnu.io.RXTXCommDriver
Nevertheless, once the board was programmed on another computer, the board could communicate via the console. It is important to mention that the port has problems with communication if the speed is not the same on the board and on the console. It was possible for me to program the serial port speed only via the Arduino IDE.
With an update via
	  sudo apt update
	  sudo apt upgrade
and then using Arduino IDE via the Fritzing Interface, the port was recognized by the Arduino IDE. Perhaps it is something else I did.
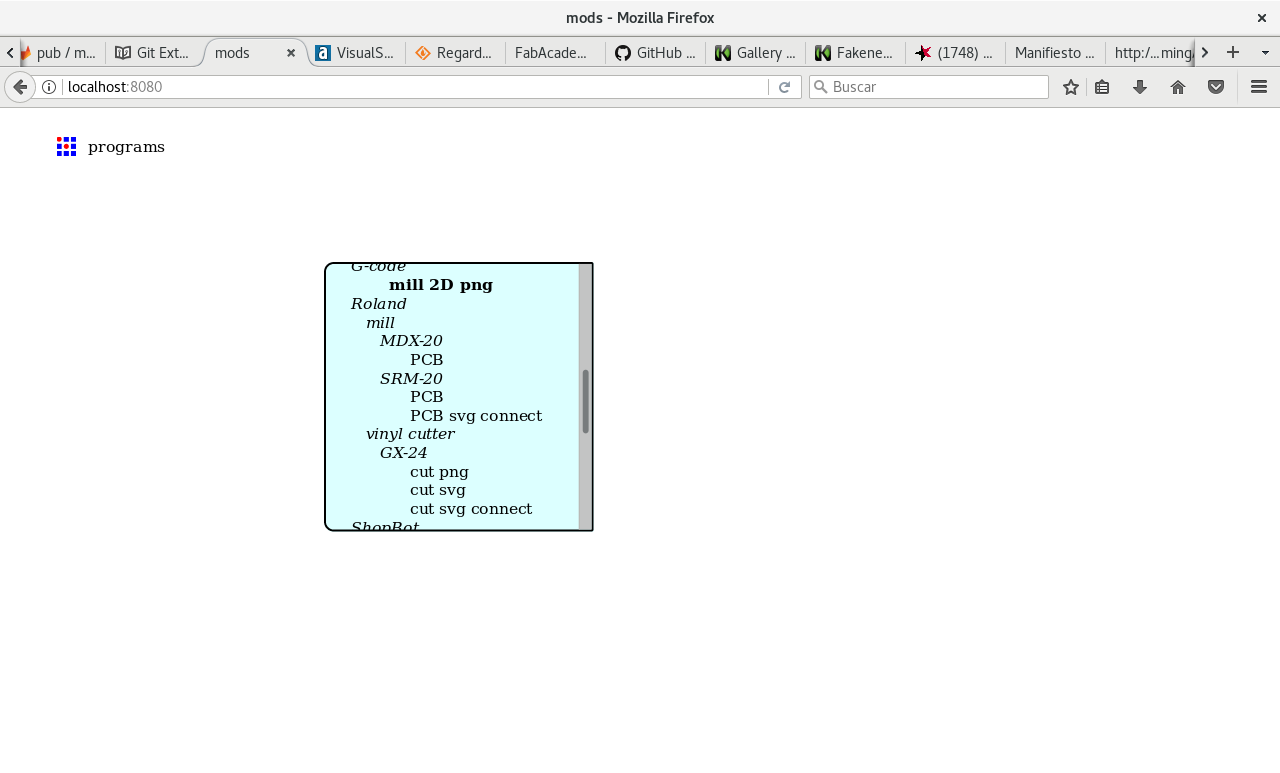
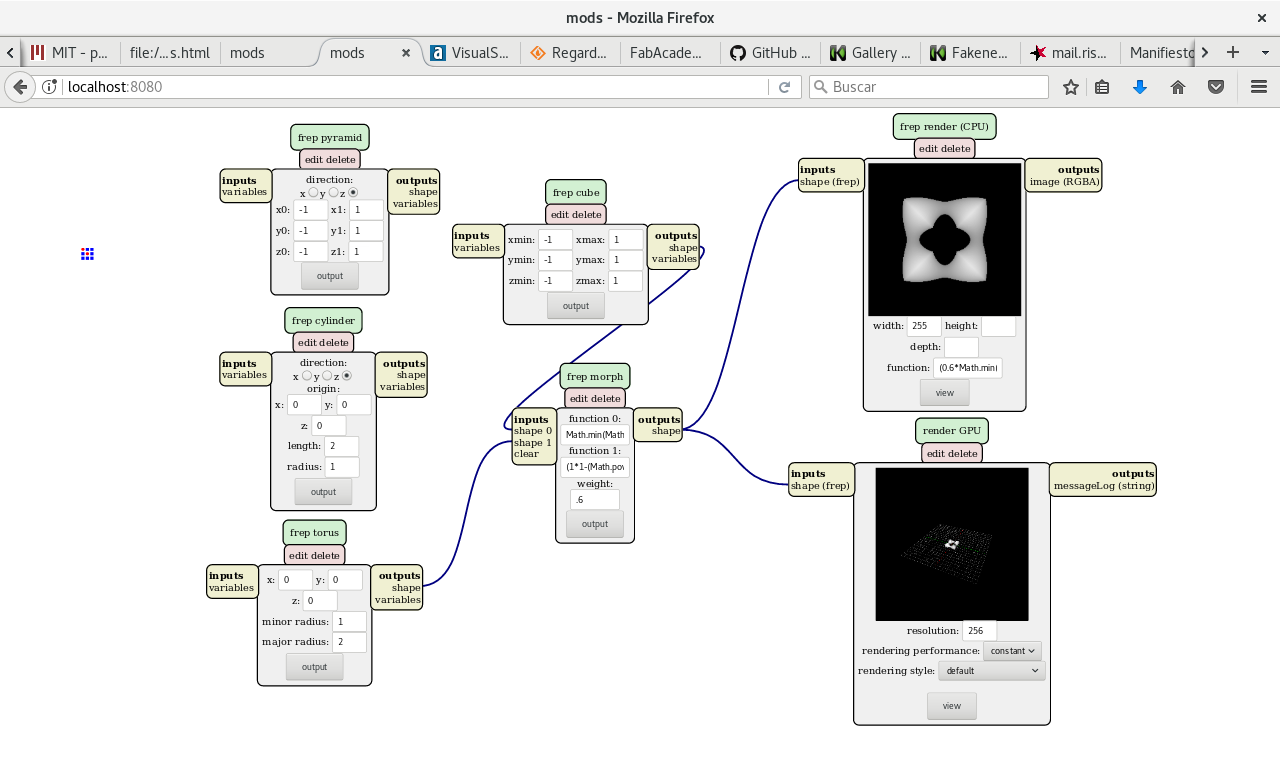
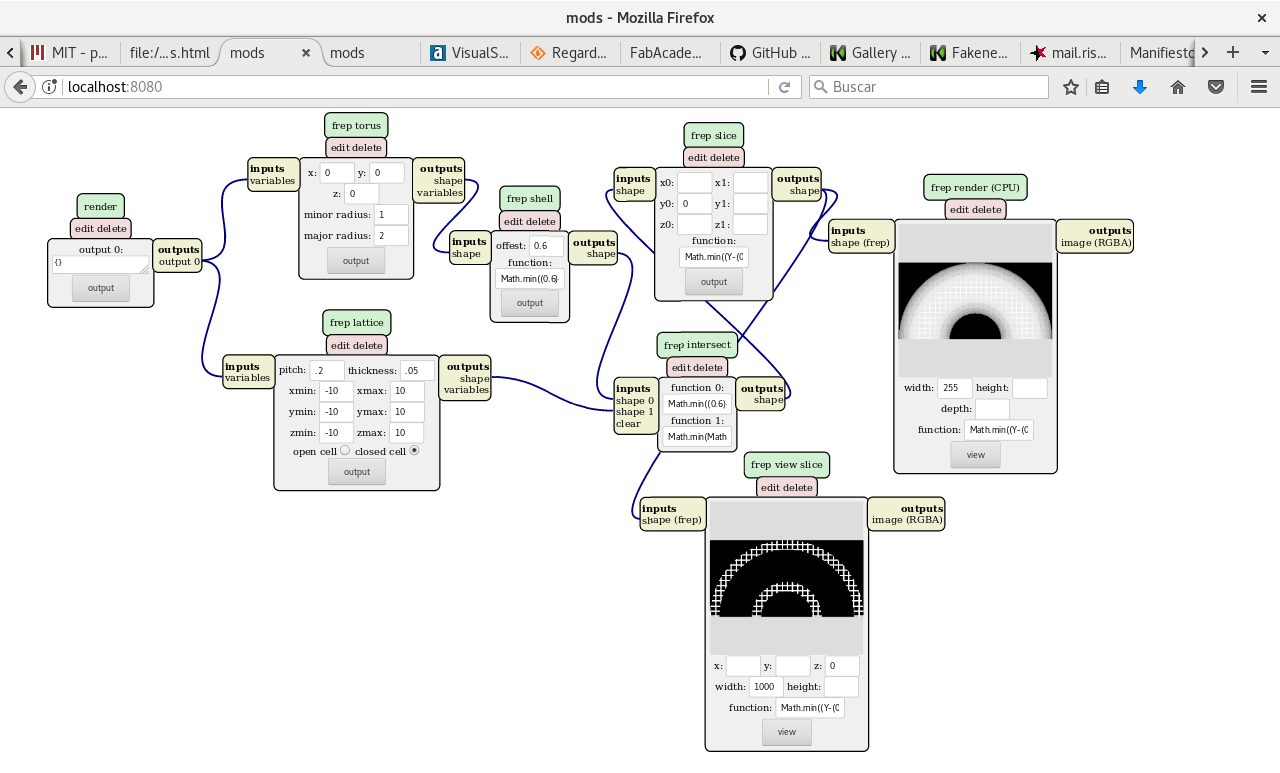
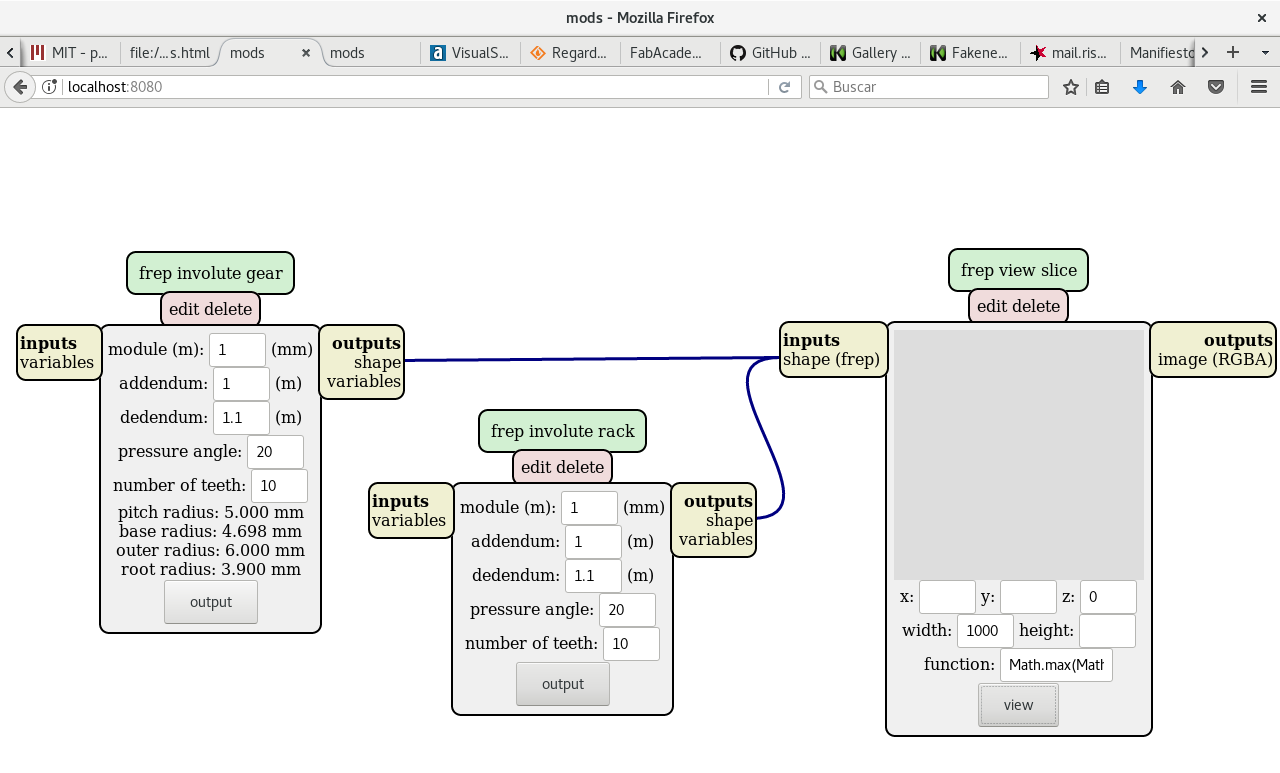
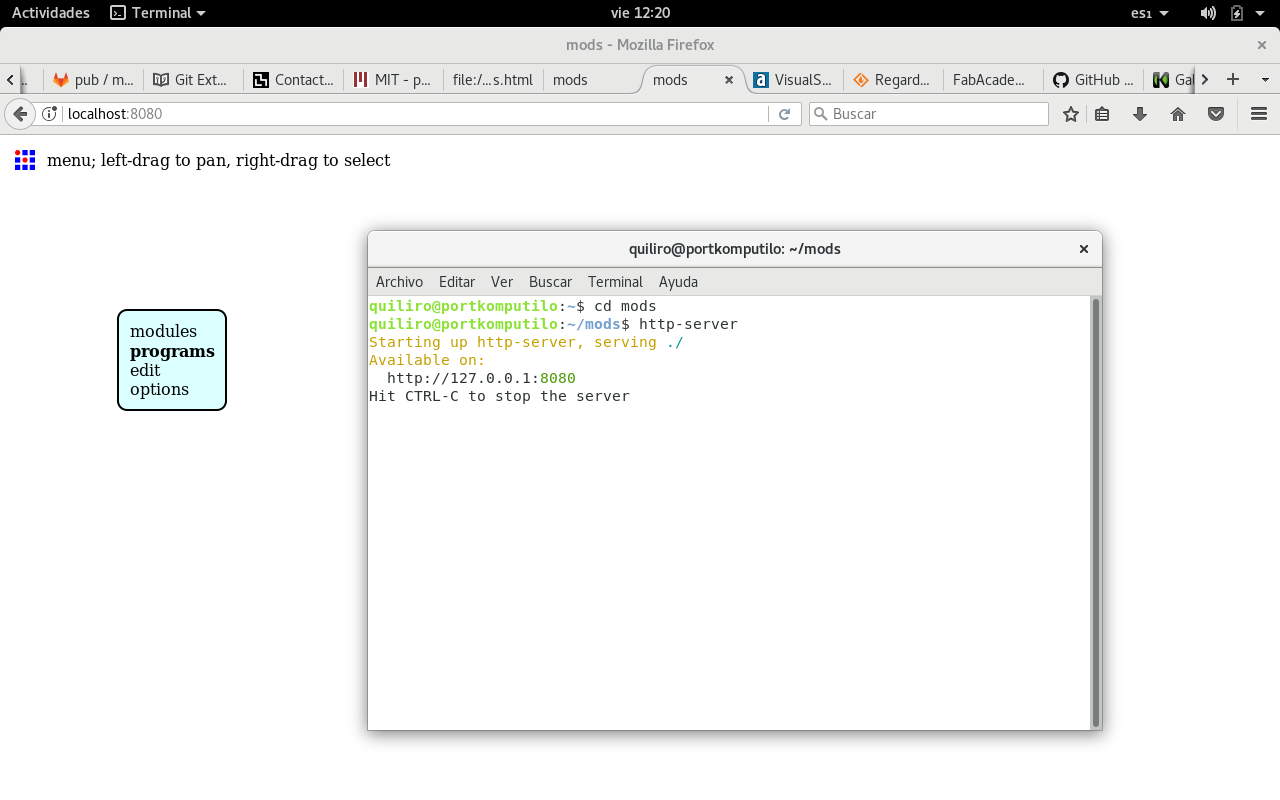
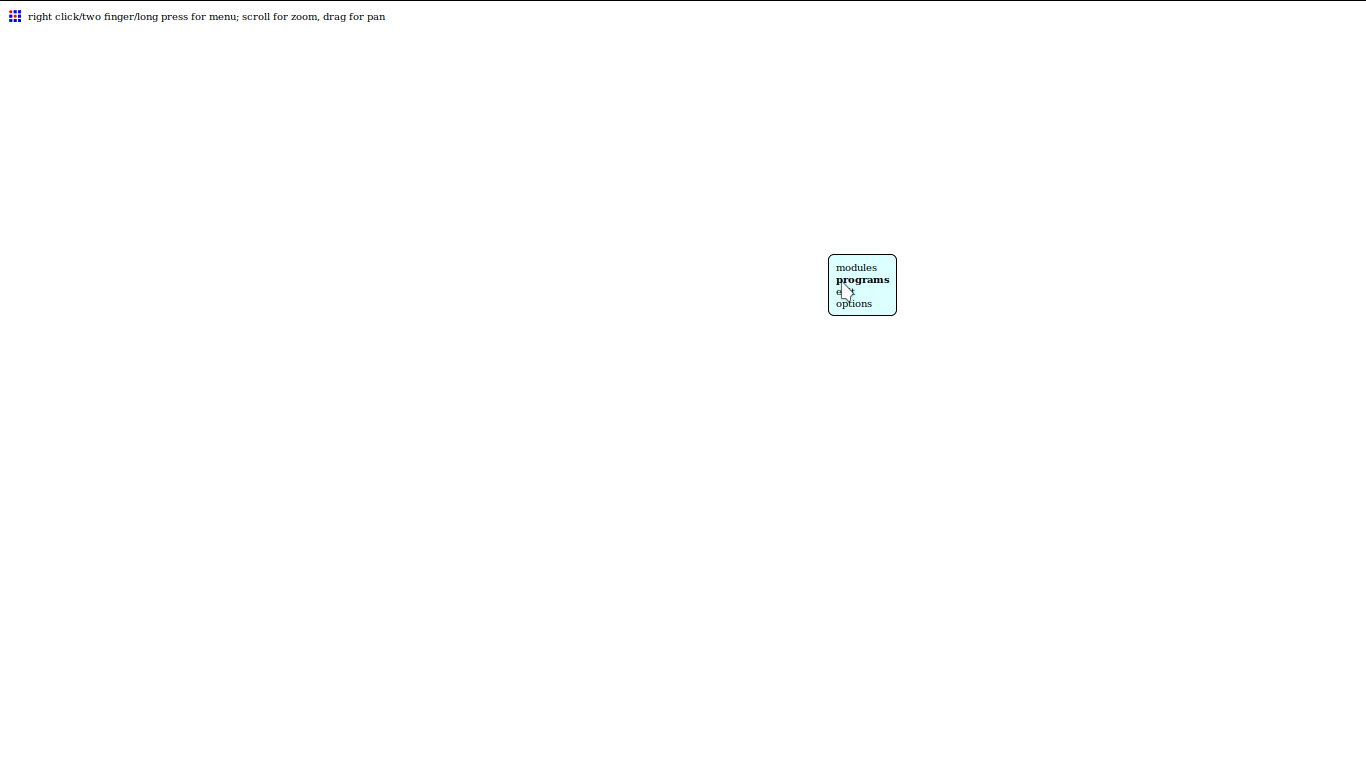
In order to make an interface in Mods we made a group assignment to create a gears of the desired number of teeth and export to a CNC millable file.
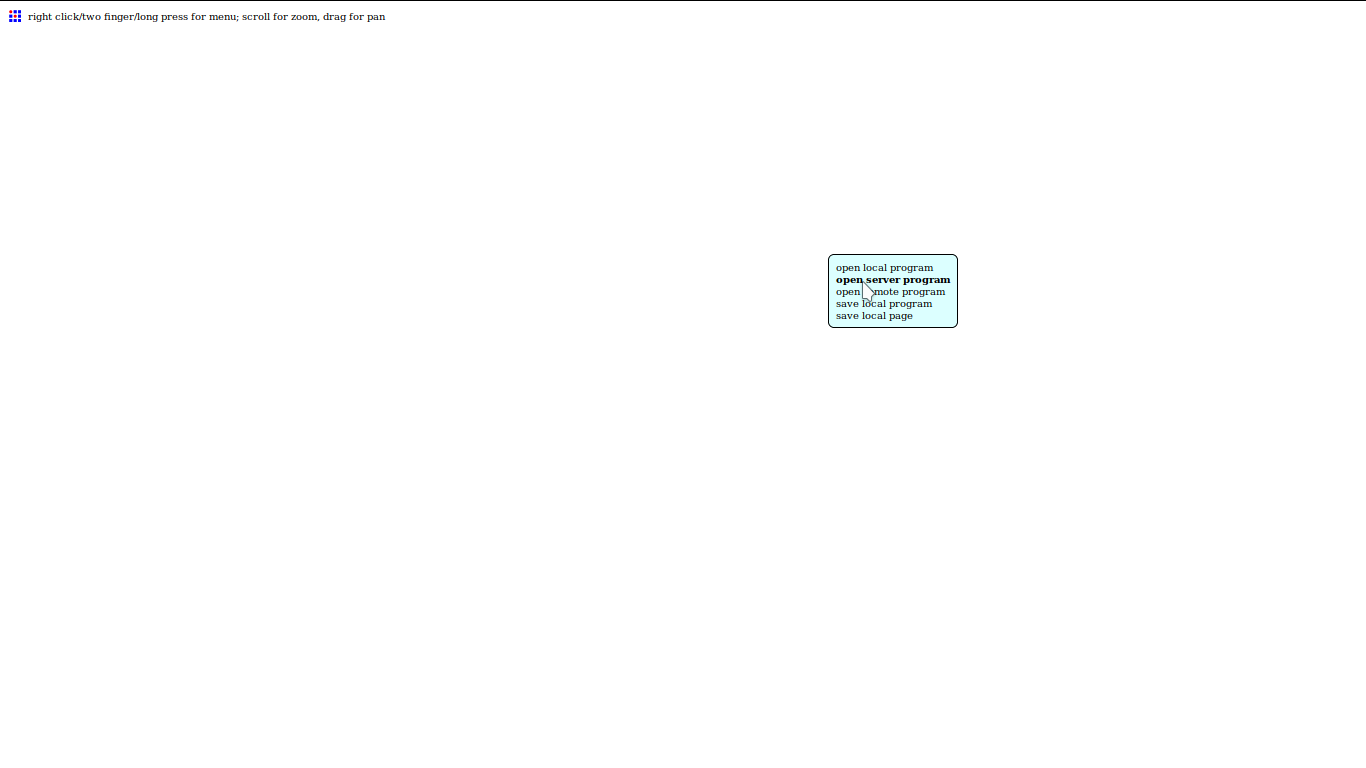
First we chose program on the right buton actived menu:
Then we chose the current server to select the program from:
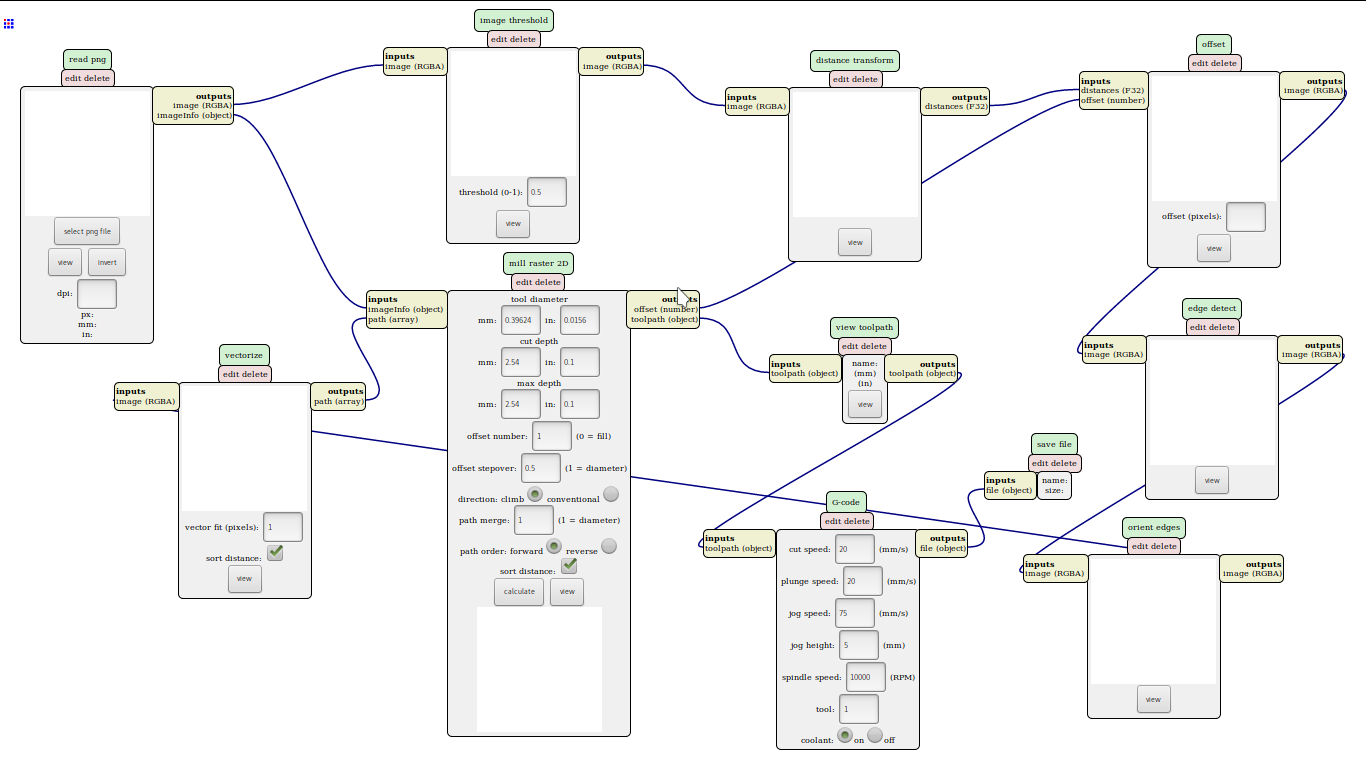
The program we chose was the one that generates Gcode for milling from a PNG file source:

So the program in javascrip was loaded on the web page:
Then selected on an empty space the new program to insert:
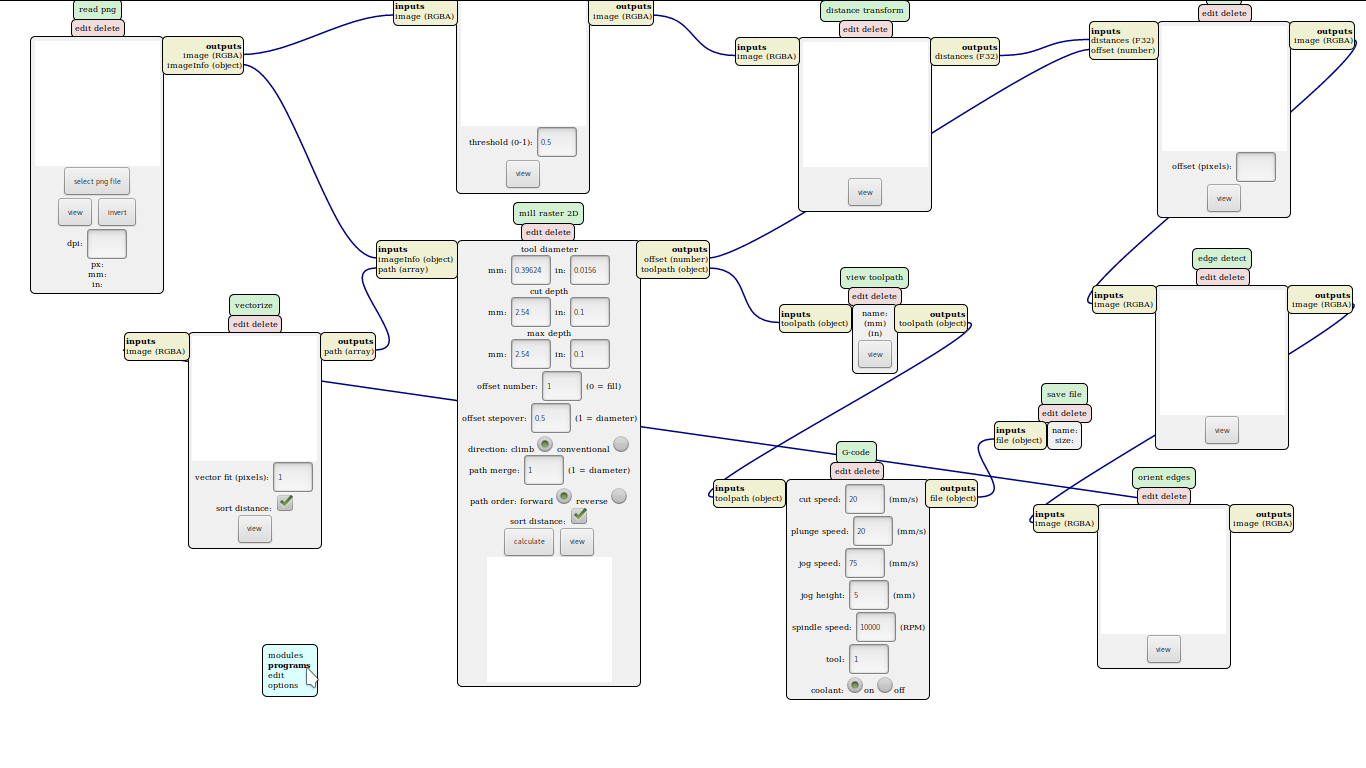
Chose the server as the source of the program again:
Selected the program that generates a gear in PNG file from data we enter on the input boxes:
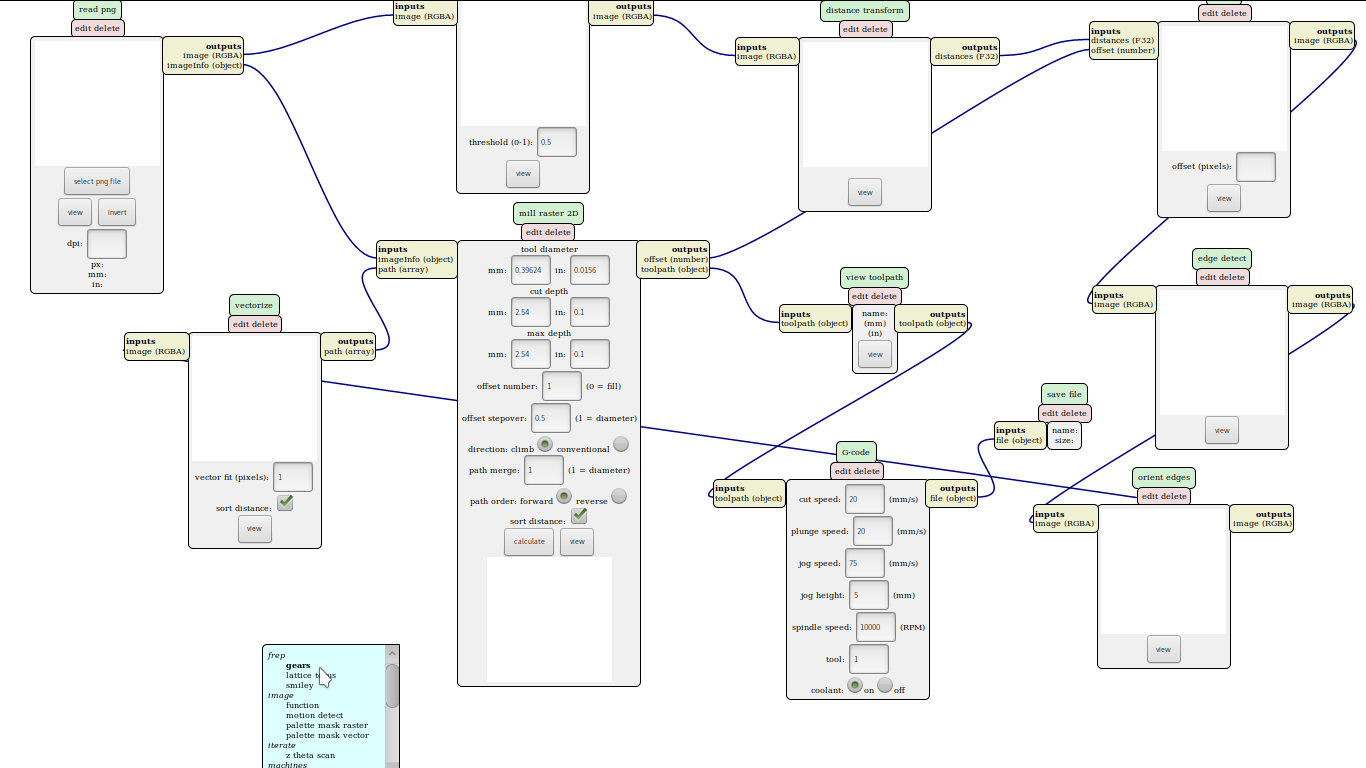
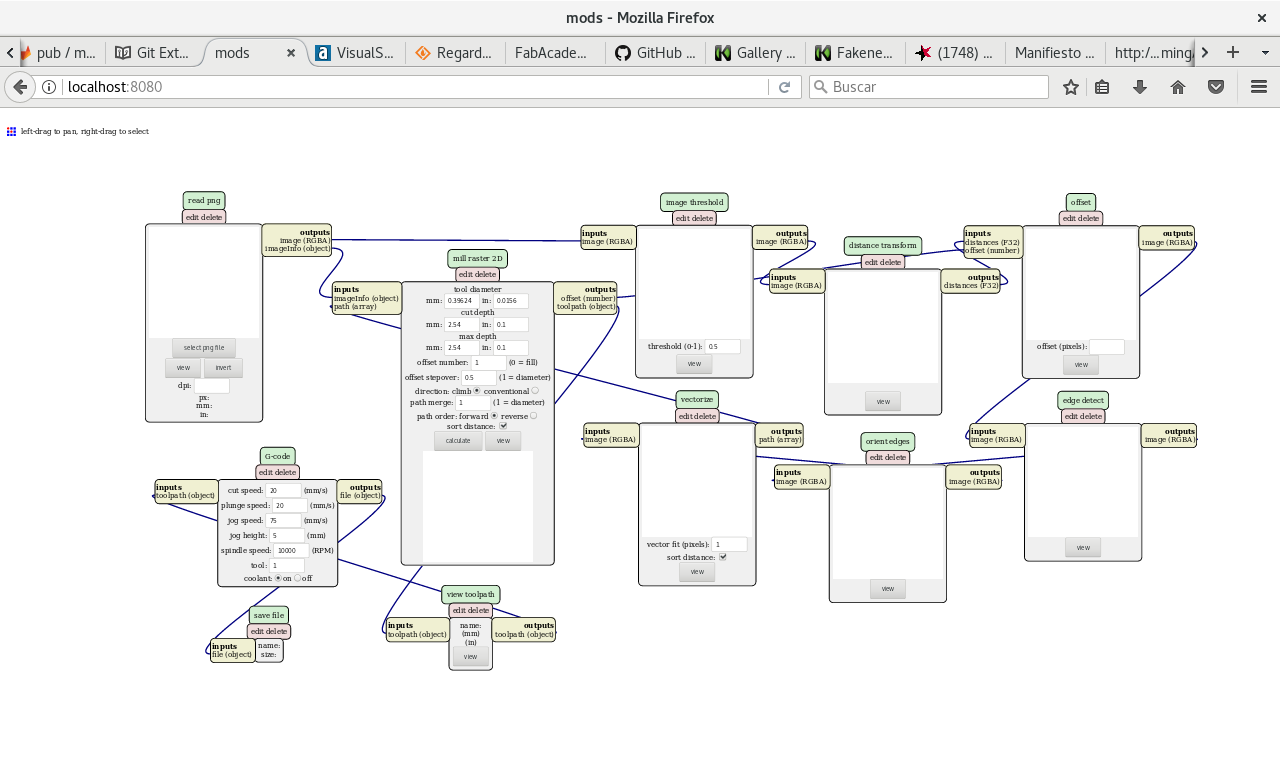
So the program appeared at the top of the window. But we moved the 3 mods of the program to a free space:
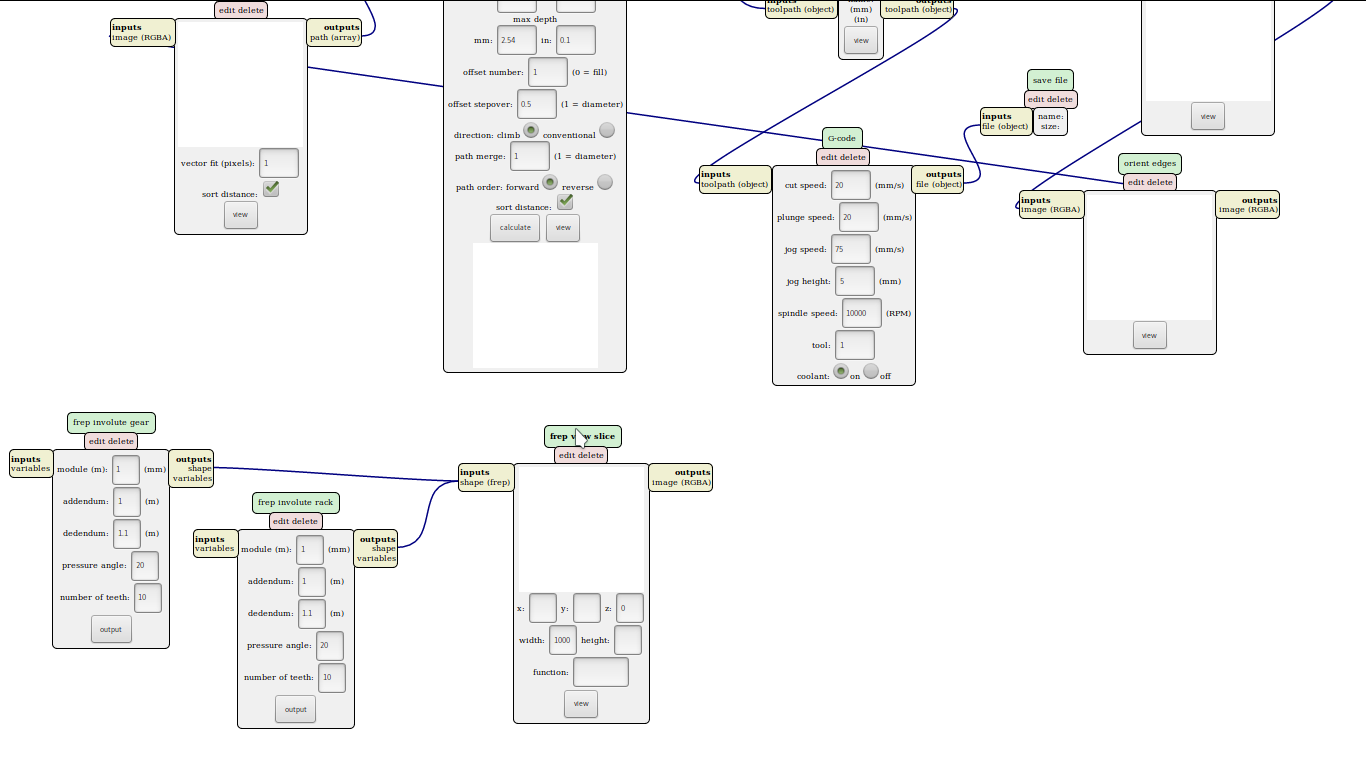
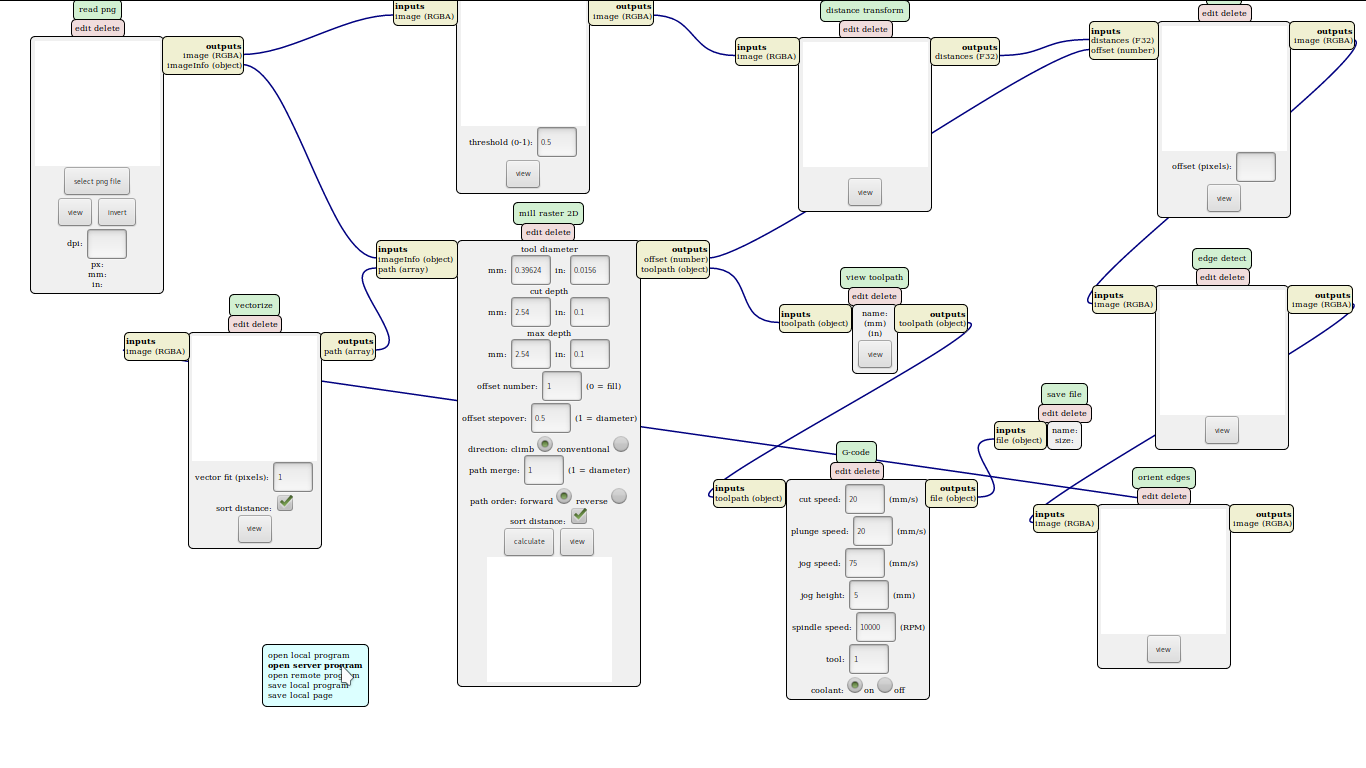
We removed the involute rack module from the gears program which we did not need any more. Then we placed them close to the part where their output would feed the inputs of our Gcode generation program. Last we added the size module in order to have the image info output as needed by the mill raster 2D module from the Gcode generating program:
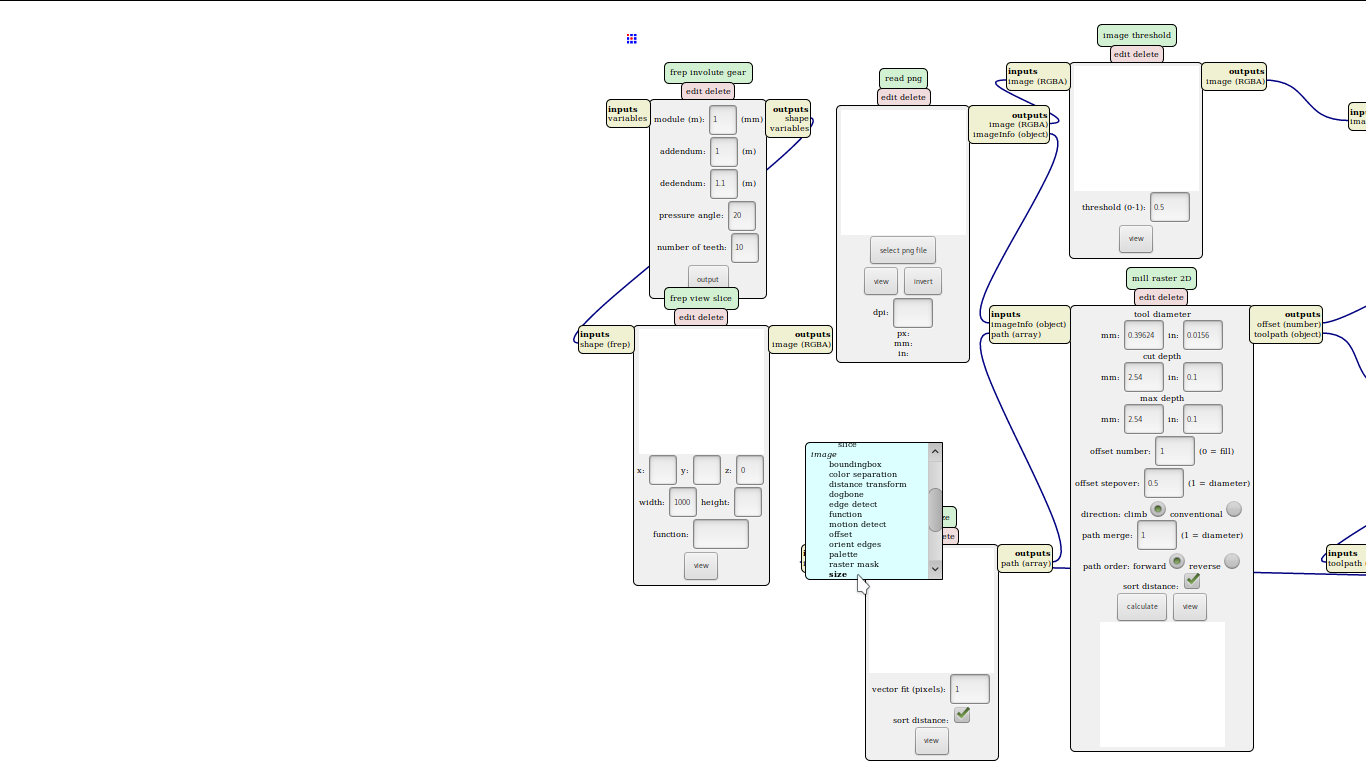
We removed read PNG module from the gears program which we did not need any more. And we finally linked the outputs to the inputs as follows:
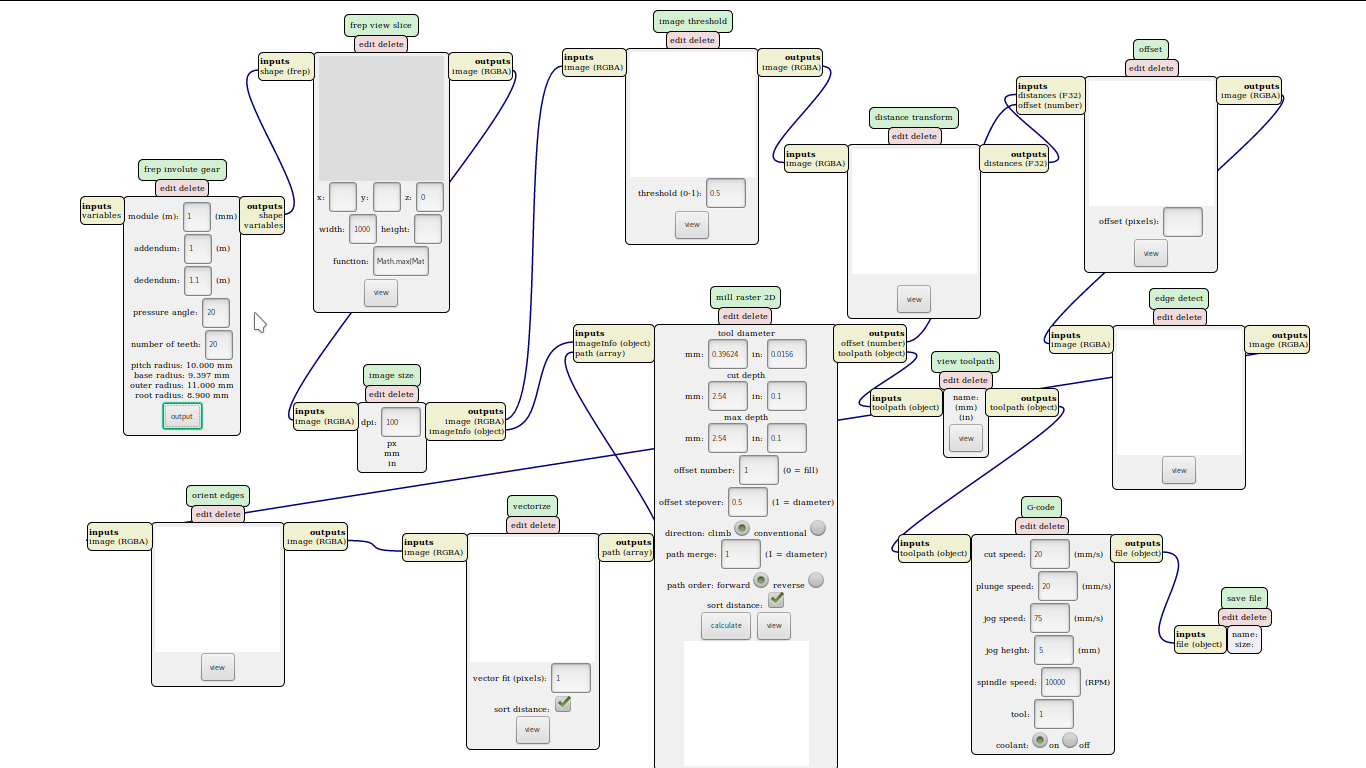
So now we can parametrically generate a gear in Gcode. Then we can save the program for local use by selecting programs and the save local program (from the menu activated by the right mouse button). We can access this program with the modifications and the default parameters we saved it with on the browser without connecting to the server.
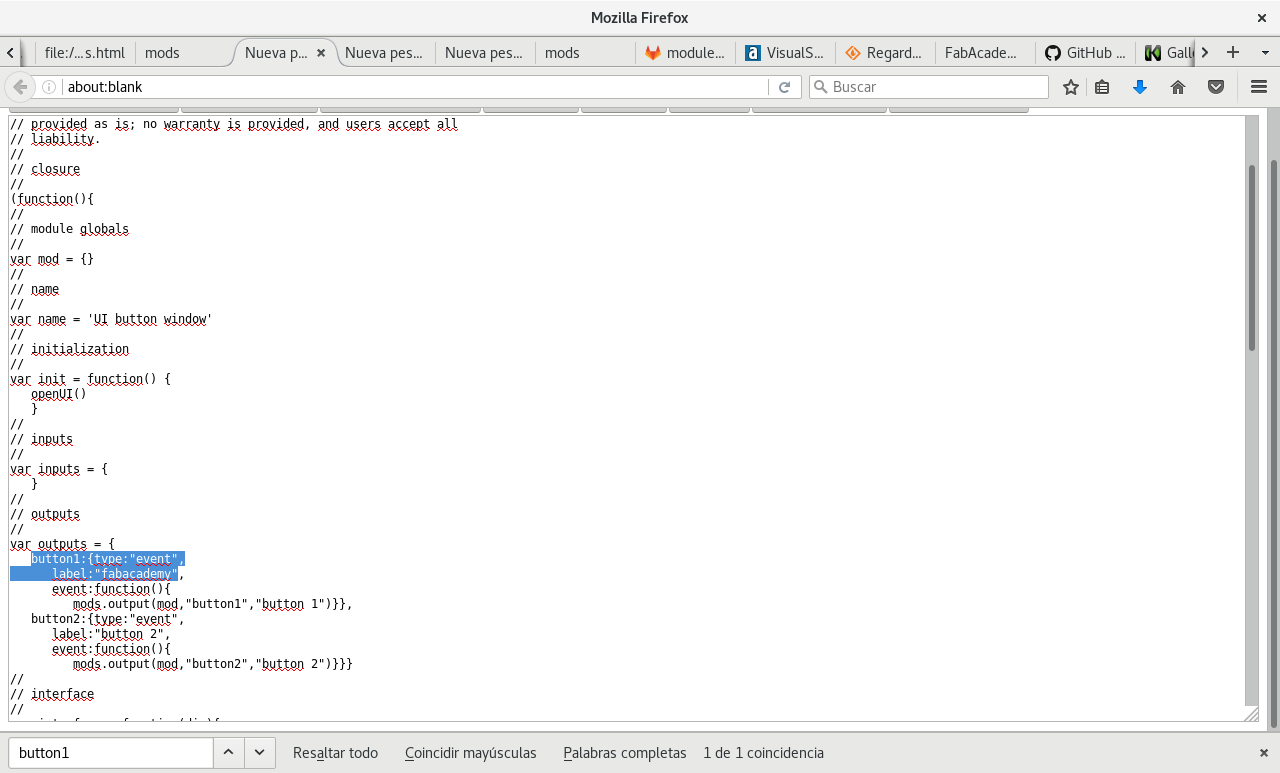
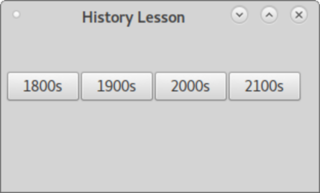
Ruby Shoes is a language for creating window applications what will run on any brand of desktop. It is very simple to write applications with. Here is the program of a test application I made for fun.


      # coding: utf-8
      # Copyright 2019 Quiliro Ordonez
      # GNU AGPLv3

      Shoes.app(:title => "History Lesson", :height => 150, :width => 300) do
        stack do
          @p = para
        end
        flow do
          button("1800s") { @p.replace "The eighteen hundreds were the time of the industrial revolution. It brought the power of machinery to fabrication. This provided great multiplication of production capacity." }
          button("1900s") { @p.replace "The nineteen hundreds had great use of hidrocarbons to increase production even more. They also allowed the proliferation of computers." }
          button("2000s") { @p.replace "The twenty hundreds gave rise to nano- and bio-technology." }
          button("2100s") { @p.replace "The twentyone hundreds will be the era of unlimited life expectancy." }
        end
      end

      # Alternative process to run this same application.-
      # Opening Shoes IRB (interactive interpreter) -> Alt + =
      # Commands entered:
      #app = Shoes.app(:title => "History Lesson", :height => 75, :width => 300) {}
      #app.stack { @p = app.para }
      #f = app.flow { app.button("1800s") { @p.replace "Eighteen hundreds" } }
      #f.button("1900s") { @p.replace "Nineteen hundreds" }
      #f.button("2000s") { @p.replace "Twenty hundreds" }
      #f.button("2100s") { @p.replace "Twentyone hundreds" }

      # Shoes script which does the same thing
      # to be run with .shoes/federales/shoes HistoryLesson.rb
Here is the Shoes History lesson practice exercise source code.
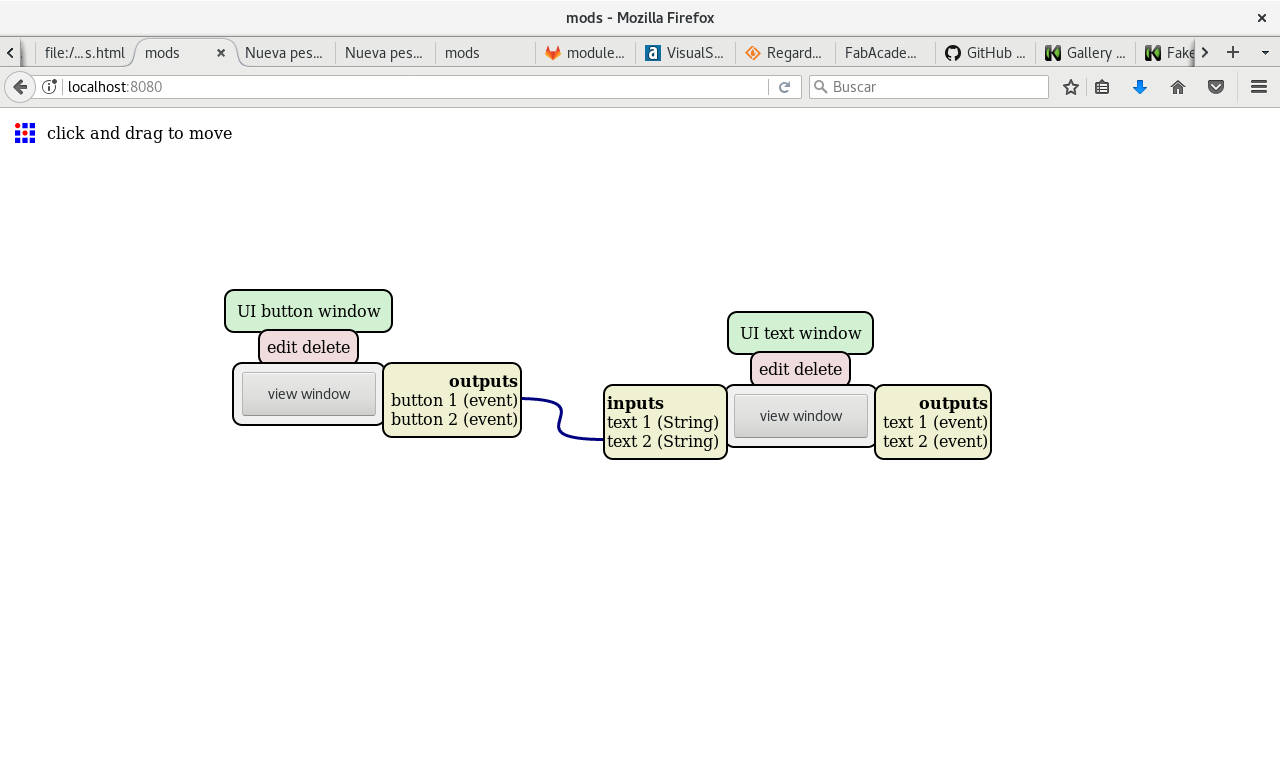
I have made an interface to manage the received data of my final project's receiver from the transmitted data of my final project's transmitter. So I point the transmitter to the receiver as per my final project. This receiver is connected to an FTDI to USB dongle. And the dongle is connected to the USB port on a computer.
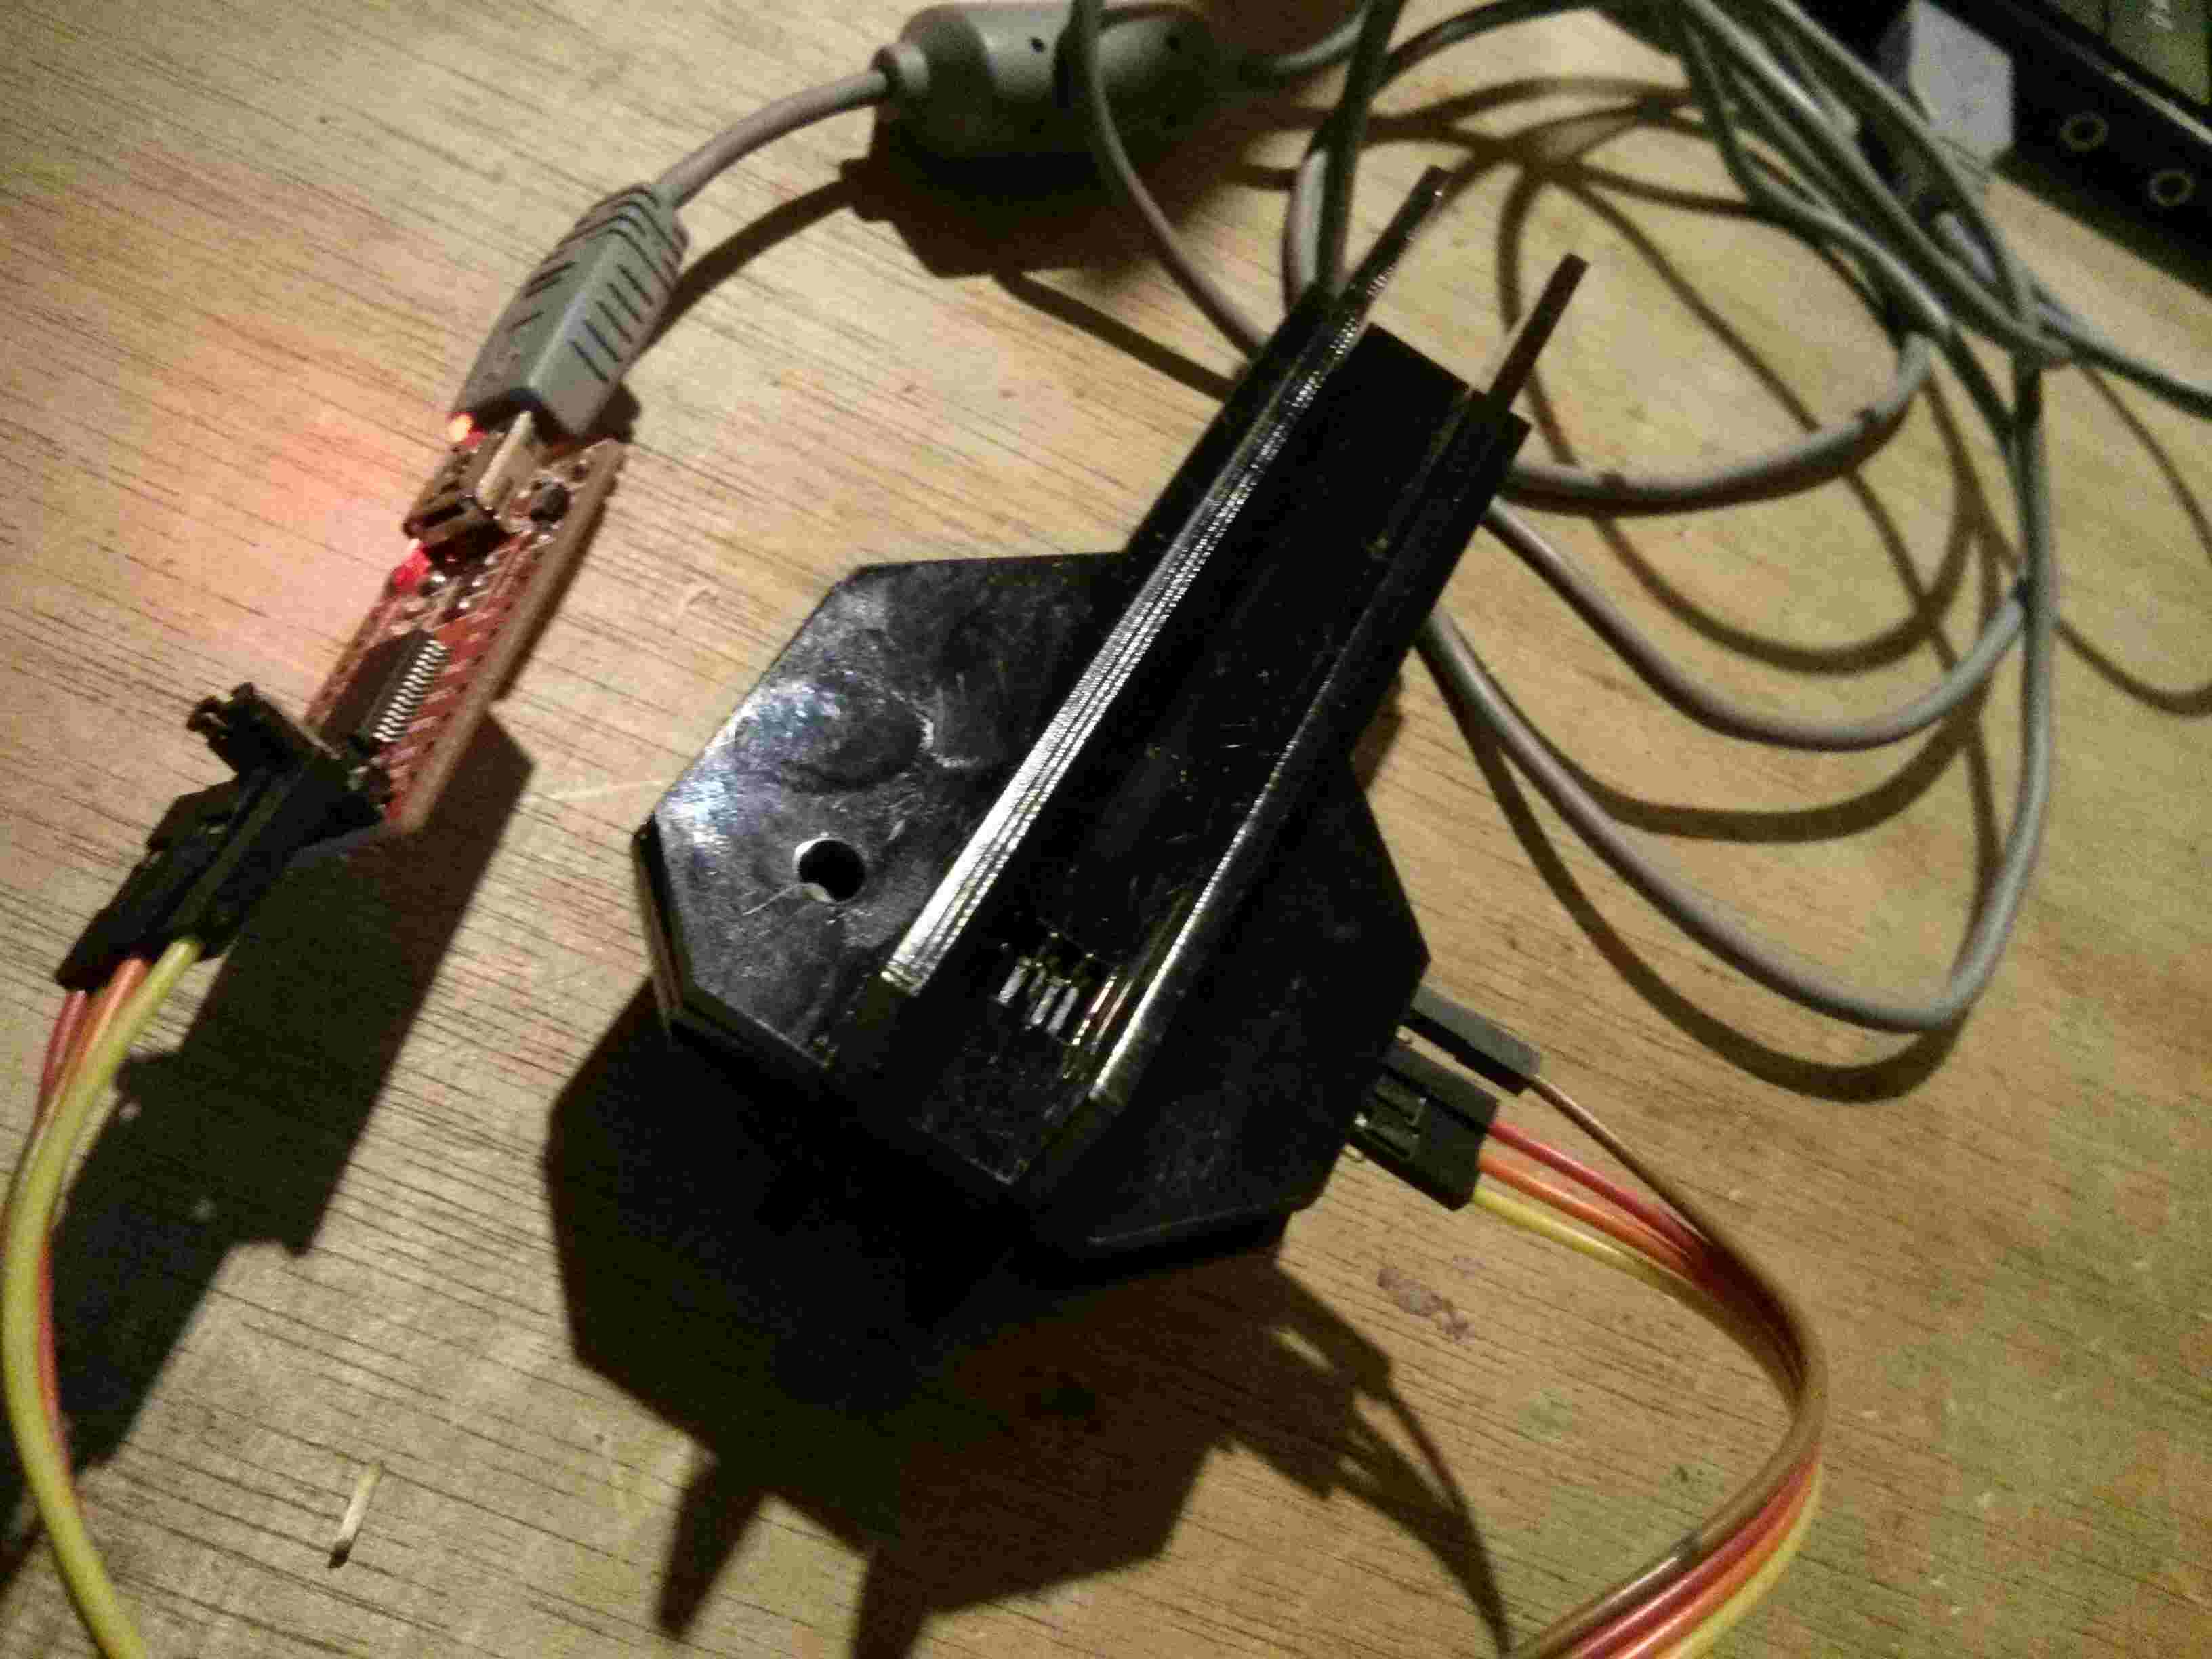
I must send the received data on my receiver to the USB port in my computer. Then the data should be handled by the user interface. I made a new program for my receiver which sends the received light data to the FTDI port.
And I program the receiver with my In-System Programmer.
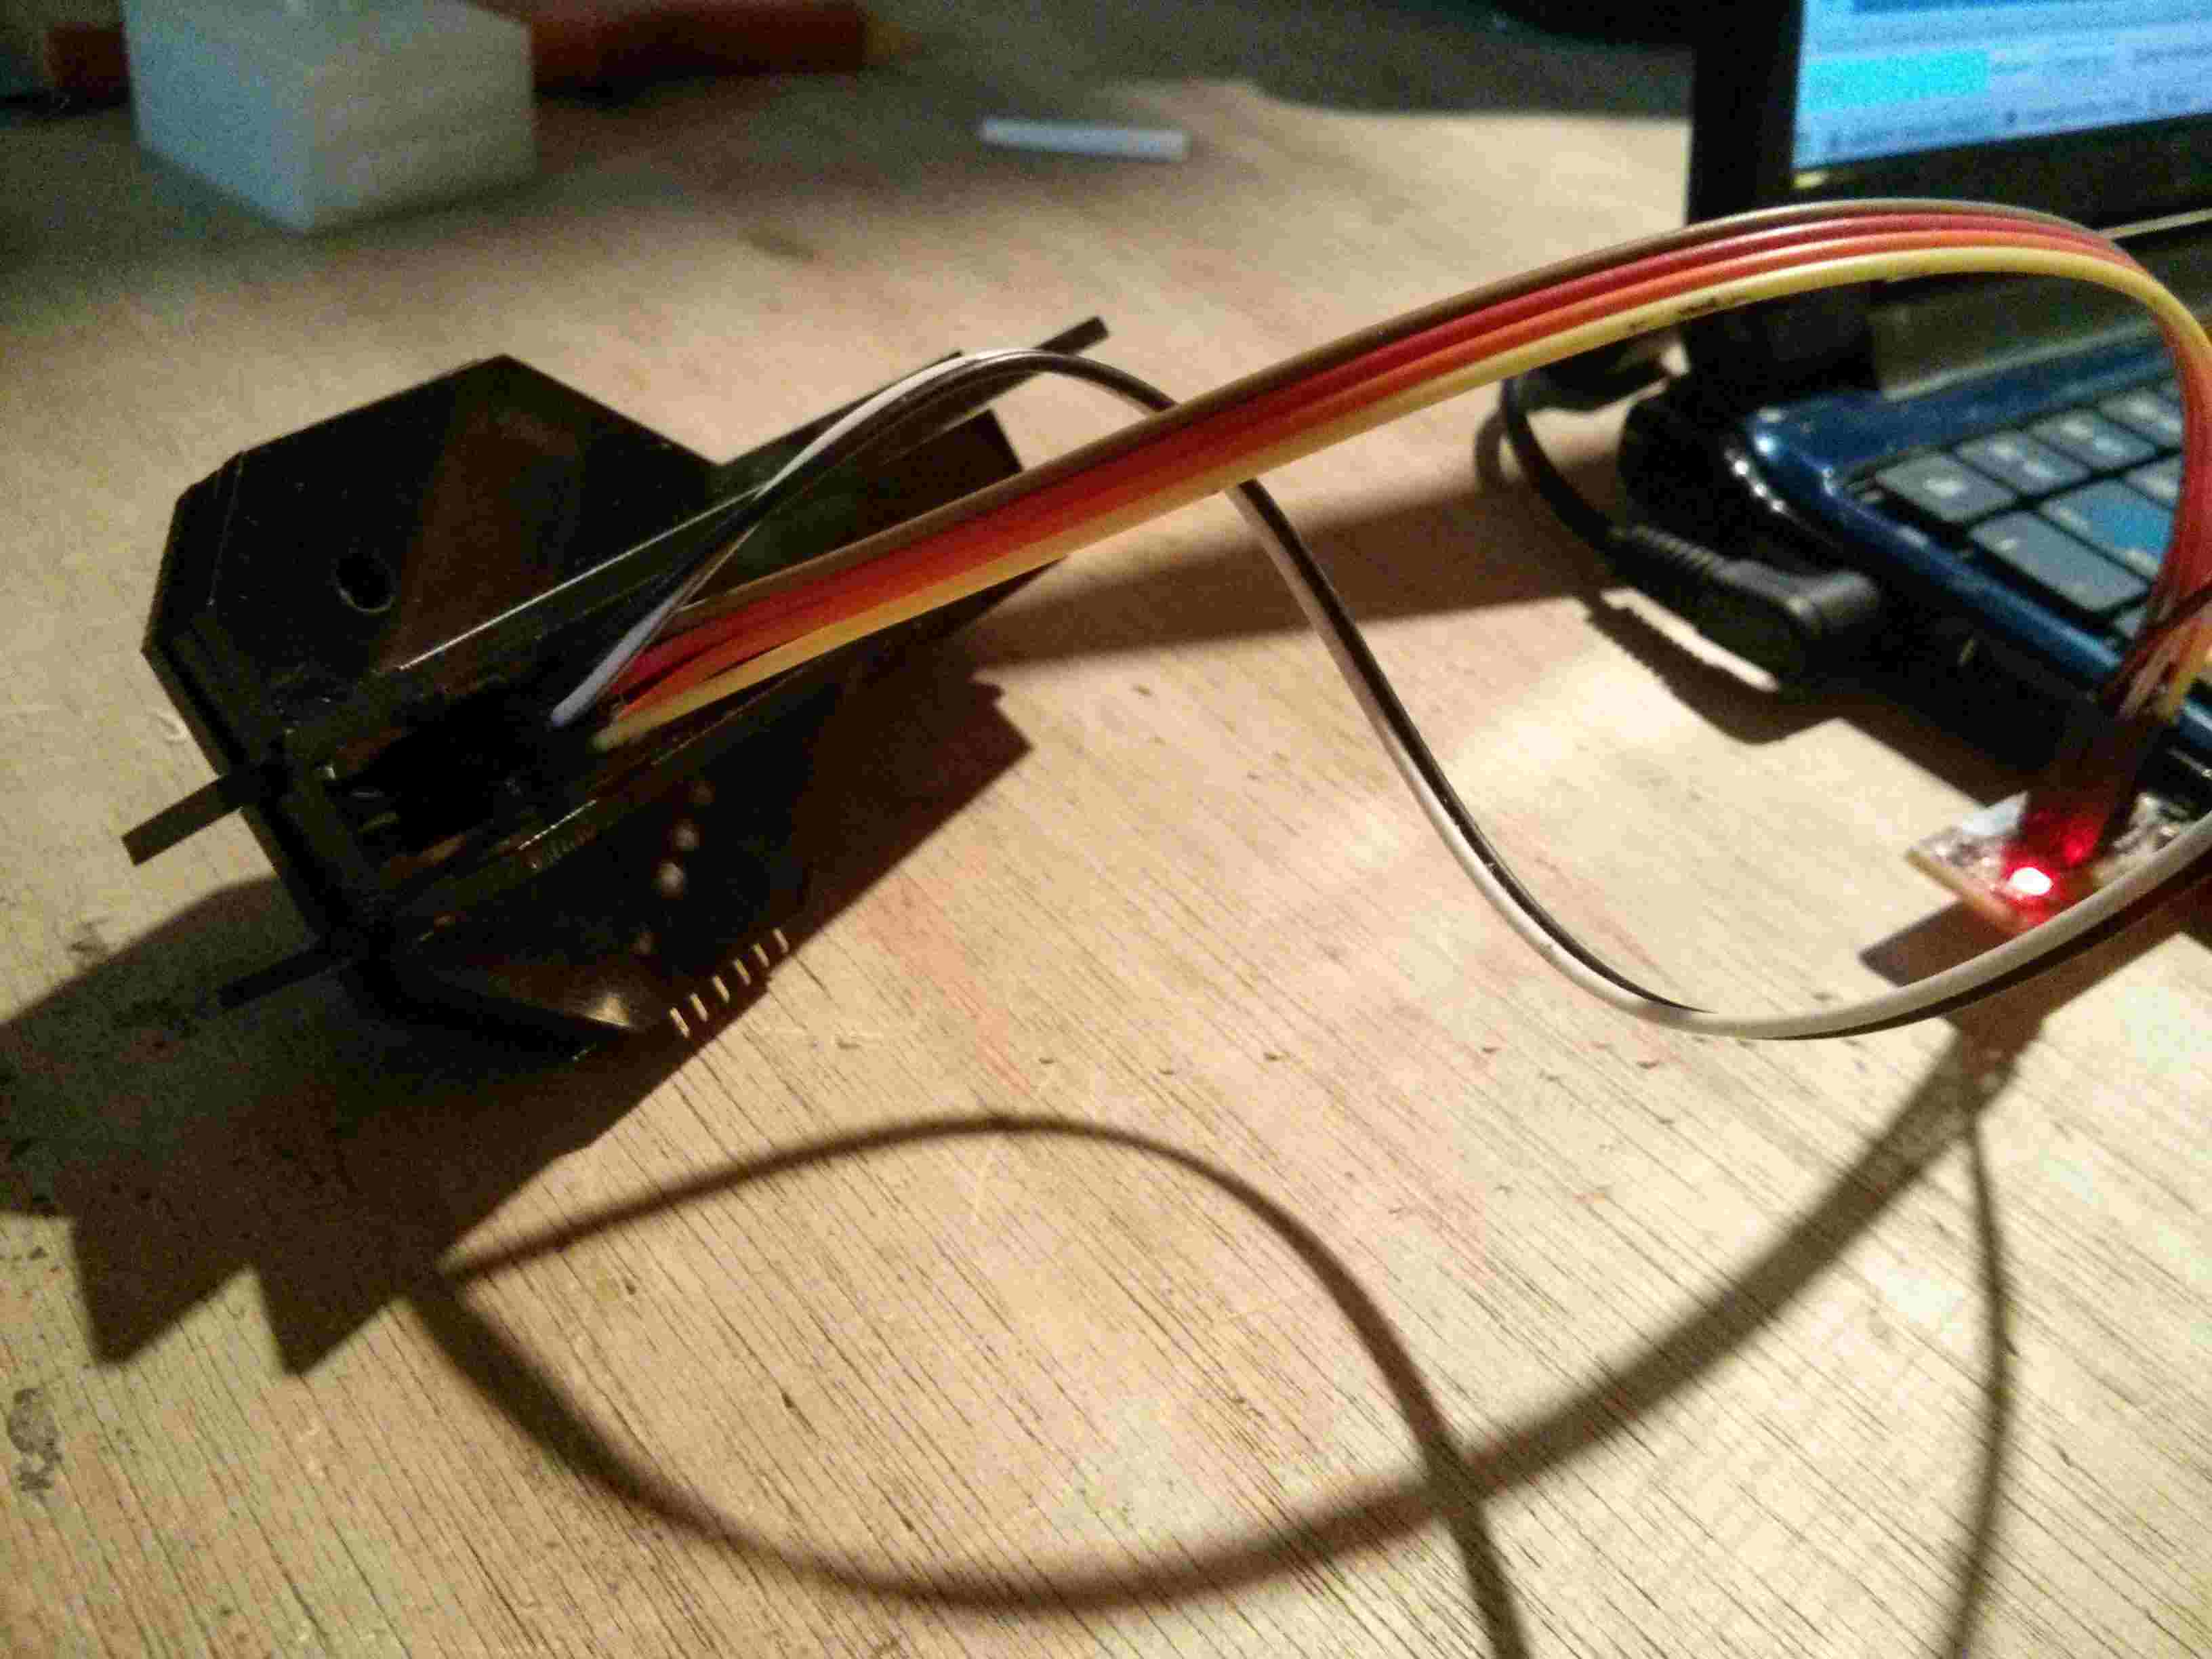
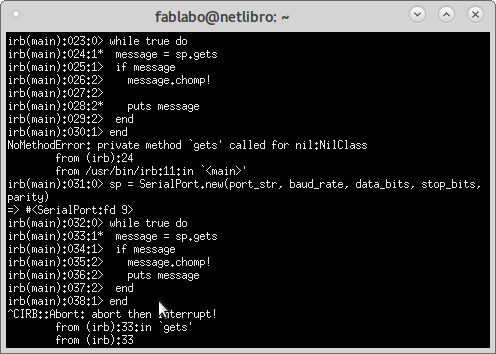
The received light data on the receiver is sent to the computer USB port. And it is detected by a Ruby program on my computer.
        require "serialport"
        port_str = "/dev/ttyUSB0"
        baud_rate = 115200
        data_bits = 8
        stop_bits = 1
        parity = SerialPort::NONE

        sp = SerialPort.new(port_str, baud_rate, data_bits, stop_bits, parity)
        while true do
         message = sp.gets
         if message
           message.chomp!

           puts message
         end
        end
In practice I could not make it work because the In-System-Programming port is destroyed.
My interface asks the user to order it to detect the incomming data. Then it pops up a window saying it is detecting the incomming data. When the interface detects 100 data received, it opens another window reporting such event.
This is the Ruby Shoes program for the user interface.
        Shoes.app {
          button("Start reading data") {

            require "serialport"
            port_str = "/dev/ttyUSB0"
            baud_rate = 115200
            data_bits = 8
            stop_bits = 1
            parity = SerialPort::NONE
            sp = SerialPort.new(port_str, baud_rate, data_bits, stop_bits, parity)

            cuenta=0
            anterior=0
            actual=1

            while true do
              luz = sp.gets
              alert(luz)
              if luz > 100
                if anterior != actual
                  cuenta = cuenta + 1
                  anterior = actual
                end
              end
              if cuenta > 100
                alert("100 pulses received.")
              end
                # message.chomp!
                # puts message
            end
          }
        }
It works when not including the ruby serial port data detection when tested without the FTDI-to-USB dongle. Shoes shows a problem when including the SerialPort gem (a library). The SerialPort gem is used for communicating with the USB port via the Ruby language.
I have developed another interface for shoes because I thought I had not developed one.
      # GUI_send.rb
      # Copyright Quiliro Ordóñez 2019
      # GNU AGPLv3

      # coding: utf-8

      # Parameters for serial comunication via USB
      require "serialport"
      port_str = "/dev/ttyUSB0"
      baud_rate = 9600
      data_bits = 8
      stop_bits = 1
      parity = SerialPort::NONE

      Shoes.app
      :title => "TeleKIT",
      :width =>450, :height => 50
      do
        para "¿Cuál es tu mensaje?"
        @enviado = edit_line
        button "Enviar" do
          # Data sent to serial port.
          sp = SerialPort.new(port_str, baud_rate, data_bits, stop_bits, parity)
          sp.print(@enviado,"\n", "\r")
          sp.close
          alert(@enviado.text, :title => "Enviado al otro terminal")
        end
      end
Here is the source code to the new Shoes app to communicate with TeleKIT.
When executing, I have a problem with the SerialPort library because apparently Shoes needs it to be loaded separately by way of its own configuration interface.
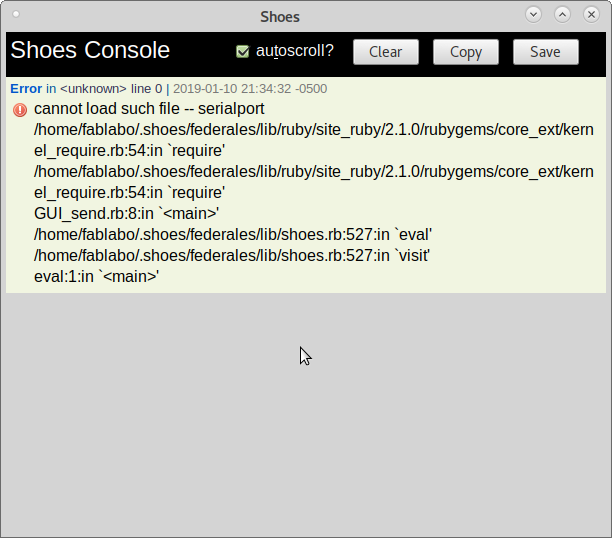
So I commented out the parts of the Shoes program preamble. So it presents the initial window.

But when I press the Send button. I have no result. When I press Alt + =, I see the errors on the console as displayed below. The other serial communication command could not be executed.
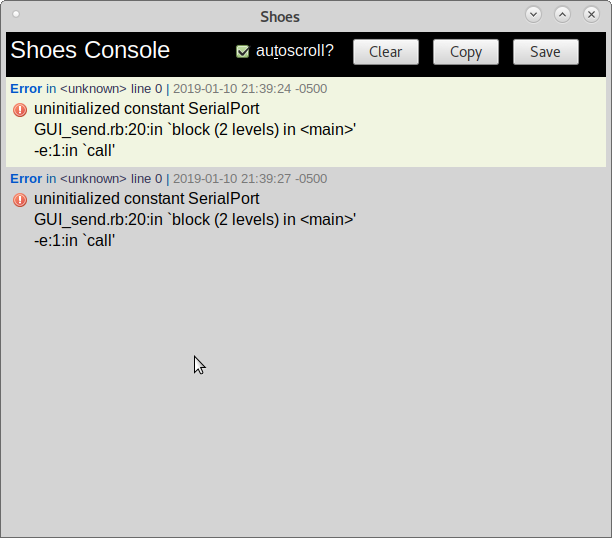
Which is caused by this line:
sp = SerialPort.new(port_str, baud_rate, data_bits, stop_bits, parity)
I think this can be repaired by including the serialport gem from the Configuration interface.
There is also an interactive Shoes terminal where you can test Shoes' commands realtime. It can be shown with Alt + /. And looks like this.
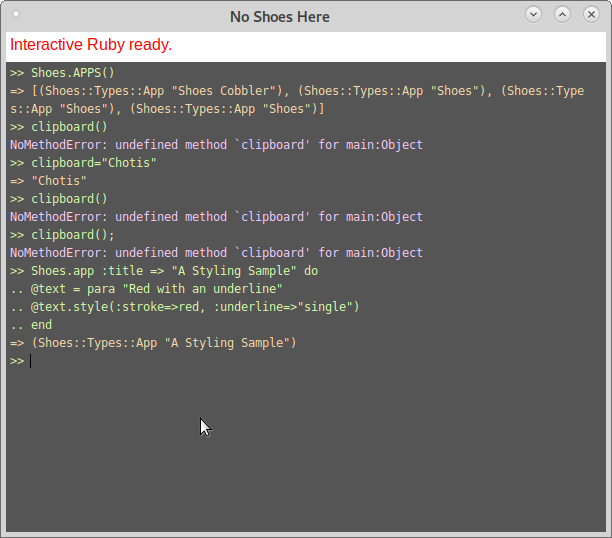
You can also practice just Ruby on the Ruby terminal. Just type irb at the BASh terminal. You will get something like this.
Regarding the firmware: the sending TeleKIT device must add this code to the existing one on the microcontroller.
      int incomingByte = 0;   // for incoming serial data

      void setup() {
        Serial.begin(9600);     // opens serial port, sets data rate to 9600 bps
      }

      void loop() {

        // send data only when you receive data:
        if (Serial.available() > 0) {
                // read the incoming byte:
                incomingByte = Serial.read();
          if(incomingByte=="0")
          {
            digitalWrite(led,0);
          }
          else
          {
            digitalWrite(led,1);
          }

        }
      }
Loading this code to the microcontroller is not possible because the ISP connections are destroyed. It is necessary to make a new PCB and resolder the electronics in order to make the software tests.
But the device is positively detected as a USB device through the FTDI-to-USB dongle.

And as /dev/ttyUSB0.

So it is probable that the script works.