We start by learning about the 3D printing machines; their characteristics, functions and operation mode. Fab Lab ZOI has two 3D printing machines. Some of the most important conditions that determine the quality of a good impression are: - If it exceeds 45 degrees you need support material. This rule has one exception: when the figure is circular, this 45-degree rule can vary. The circular structures are self-supporting. - The quality of the print can be resolved from the design of the piece: When we design our products, we must design them thinking about the way we are going to print them. It is preferable to avoid using support material in 3D printing because it always leaves traces in the design that makes it lose realism and quality. - Large-scale pieces can be printed by pieces: Pieces that exceed the limits of a 3D printer, can be printed in smaller pieces and then assembled them into modules to obtain the desired shape. For this reason, it is advisable to model them thinking already in the fragmentation that the impression will have and in the way we are going to put them together. An important fact in these pieces is that the modeling must contemplate the dimensions of tolerance, as we saw in a previous lesson of press fit, so that at the time of assembly, the piece is completely solid. - The temperature of the bed and the extruder are what determine the surface and structural quality of the piece. Each material has special characteristics of casting and drying, it is therefore essential to inform the data shit of the material, to know how we must configure the machine. - The success of the 3D piece is in the base. It is important to make sure that the first filament lines that form the base of the
3D model are properly settled. The success of the rest of the model depends on that. If there is any failure of extrusion, it is better to fix it immediately. A technique that is used to ensure the correct adherence of the material in the first layers of the printing, is with glue. The whole structure will be built on these first filaments; therefore, it is essential to ensure that it will support the weight. - Guiding the filament fabric ensures that the pieces would not break. It is important to analyze the use that we are going to give the piece, to know how to place the filament. It is necessary to know the type of loads and forces that we are going to execute on the piece. It is also important to place the model in such a way that the printing lines are perpendicular to the pressure zones. As a group task, we made the calibration of the machine with the 3D model provided. We threw the first test in "draft" quality and, as we see in the images, the filament left empty spaces in between.Fusion 360, Rhino, FreeCAD < To model a piece that was not possible to be machined, I chose the shape of a seed that has many perforations and that gives a honeycomb effect. Even though I am an industrial designer, 3D modeling is a great challenge for me. During these years I have specialized as creative director of my design studio and I have stayed away from 3D modeling. This was one of the motivations that encouraged me to study the Fab Academy, to learn again. My piece is modeled in Fusion, a new software for me. I was very impressed by the fusion interface, it works from a logic of thought different from the most common ones, like for example rhino that you work based on lines or surfaces. In this case I really liked Fusion, because I like to draw a two-dimensional illustration and then make it three-dimensional. Fusion is a new tool for me, so the modeling is not very detailed. I chose the modeling of a seed, since it has holes pierced in different angles and rounded both in the internal and external circumference that is why I chose this seed for this task. Once I finished the 3D modeling of my piece, I exported it to the STL format. br> ------------ Design and 3D print an object (small, few cm) that could not be made subtractively
When I had the piece ready for printing, my instructor made me realize that a 5-axis CNC could do the machining of my piece, so I designed in Rhino another piece that could not be machined in CNC. I made a simple figure from a profile, which contained two spheres hunted inside the structure, ensuring that when wanting to do that work in a CNC nyfuna strawberry (milling) could enter to cut, having the 3D printed a big advantage over the CNC
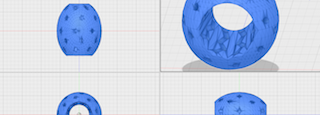
Here we see the piece printed in PLA. I did it initially, but I did not like the finished one, because it was left with a lot of support material. Although I did a very detailed job of removing the support material, the surface was not very good, even one of the spheres (the small one) was printed along with the support material and it was not easy to identify it, so I never found it , but the larger sphere if I could differentiate it from the support material.
I prepared another file to do it now vertically so that I did not have much support material. I configured so that the print only had a base plate and without support material. He printed with great difficulty when he did not have support material and when he reached 1.5cm in height he began to print on himself.
I redesigned the file and configured it with a thicker support wall, but again it damaged a third of the print, so this piece despite being circular if needed support.
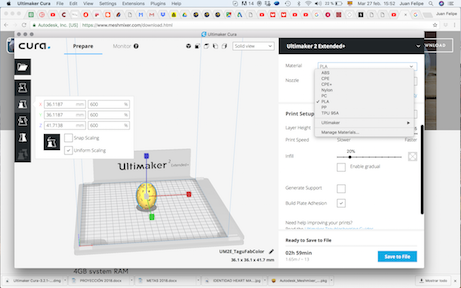
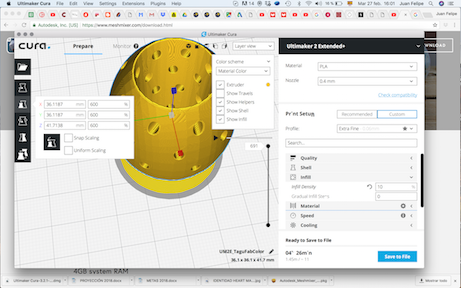
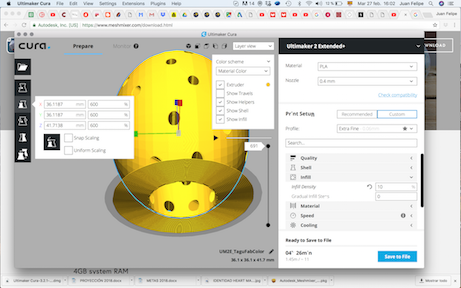
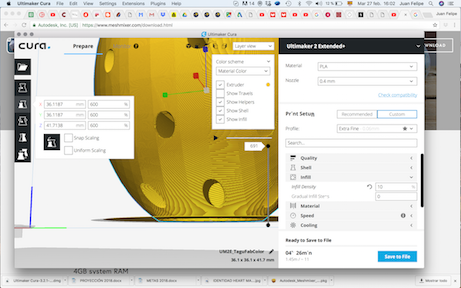
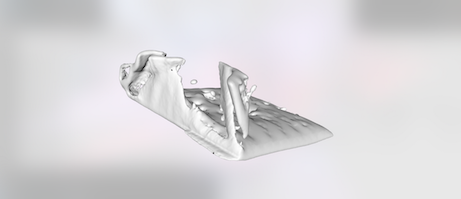
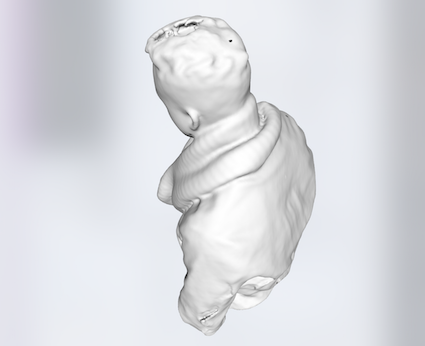
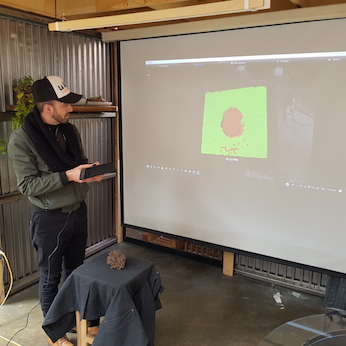
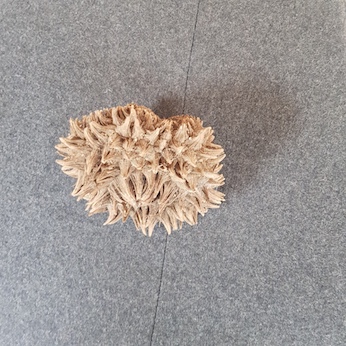
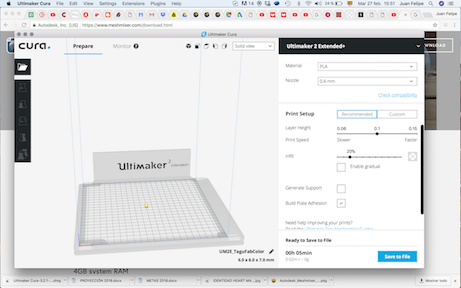
I am very impressed to see the big difference that can be made in the 3d printing configuration of the machine. The same 3d model can have different results from very bad to very good depending only on the configuration. For the Scan exercise, I did several tests. I was very interested in knowing the software that allows to do this and try to get the best result. I compared the quality of some Free Mobile Apps: 123D Catch, Trnio, Scann3D and Seene, being the last of the best results. We also did tests with my friends, scanning our entire body. Kinect is excellent for large scale figures, although it requires a lot of precision from the person doing the registration and a lot of stillness from the person being scanned. Finally I managed the visit to a laboratory of a university to test the accuracy of the Scanner Picsa de Roland, is the scaner with which I achieved greater precision for small pieces such as tagua seed. The detail is almost perfect, even though the result is mesh and it is not easy to edit it to reach 100% of the shape.When exporting the file the size of the piece was very small, in Cura I resized it to the real scale.