Materials, tools and software
3D Printers dimension (Tools)
3D scanner (Tools)
PLA (Materials)
Meshmixer (Materials)
Solidworks (Software)
 |
 |
 |
 |
|---|
3D Printers dimension (Tools)
3D scanner (Tools)
PLA (Materials)
Meshmixer (Materials)
Solidworks (Software)

In this program we can modeling yours designs in 2D and 3D if you can export to many formats.
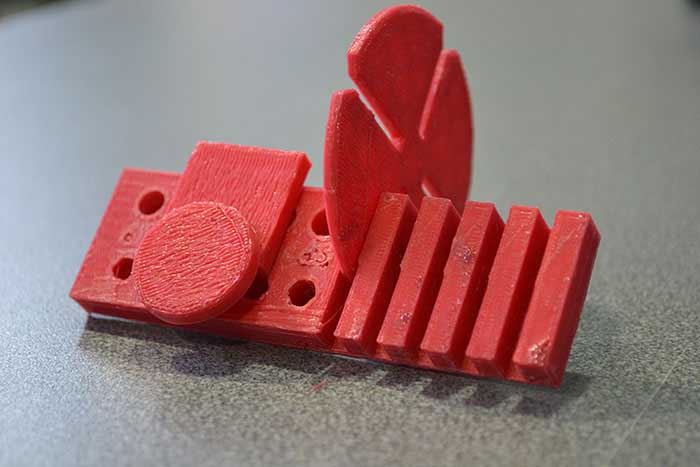
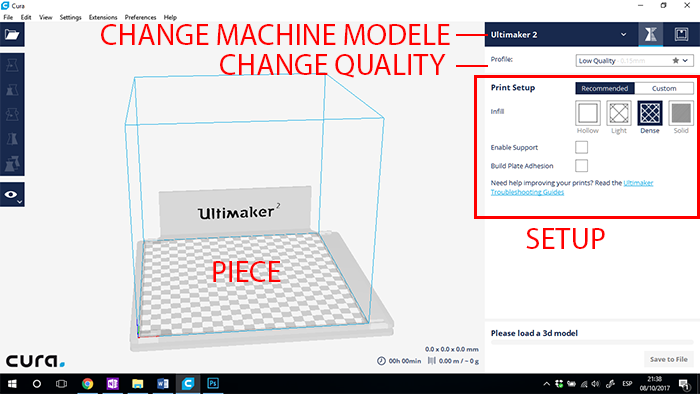
It's a test design of the printing where you can take different measures for the settings of the printing.
A piece in which an essay is generated to know the behavior of the same to be able to generate presffit and constructive details or sets.
To perform a print test we use SolidWorks in which we can model your designs in 2D or 3D and you can export in several formats.
In order to realize the piece for test of impression took into account several factors to analyze among them the behavior of assemblies with
several dimensions, thicknesses and geometries.
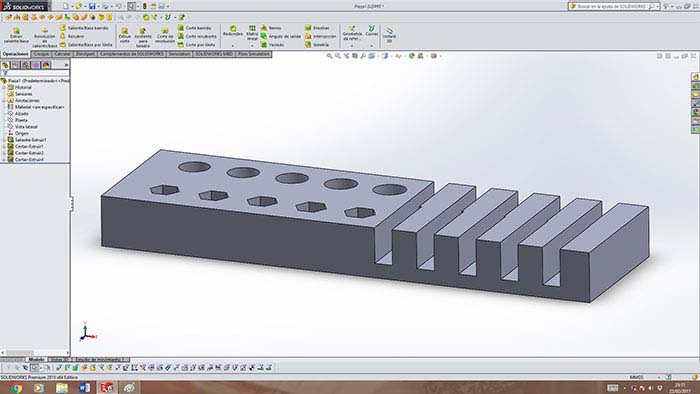
It is a design that tests the printing where different measures can be taken for the configuration of the printing.
A piece in which an essay is generated to know the behavior of the same to be able to generate details and constructive sets or press fit.
In addition, my brother designed a piece in which we analyze and understand the behavior of 3D printing below a link to visualize their information With all these data, we were very useful to be able to design our pieces.
link Juan Guerra assignments
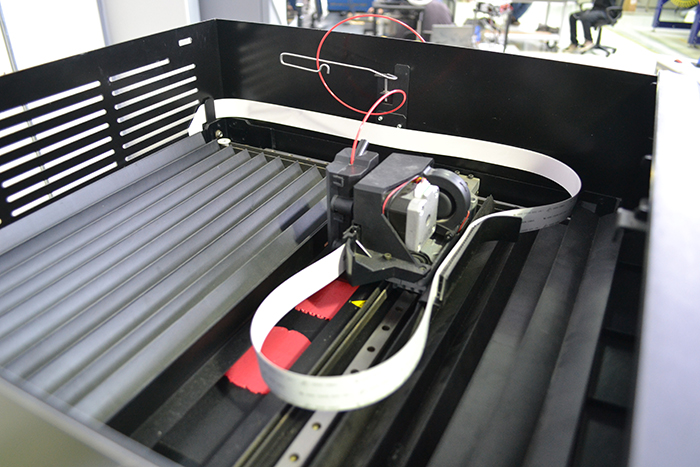
To print, check the calibration of the machine and the correct collocation of material.
We put in the plate permanent stick for a greater addition.
I had only one problem, which you can see the process of the print test where the filament did not stick on the plate. To solve this I put some glue sticks. For this problem we repeated the damaged parts that were the couplings, as can be seen in the image.
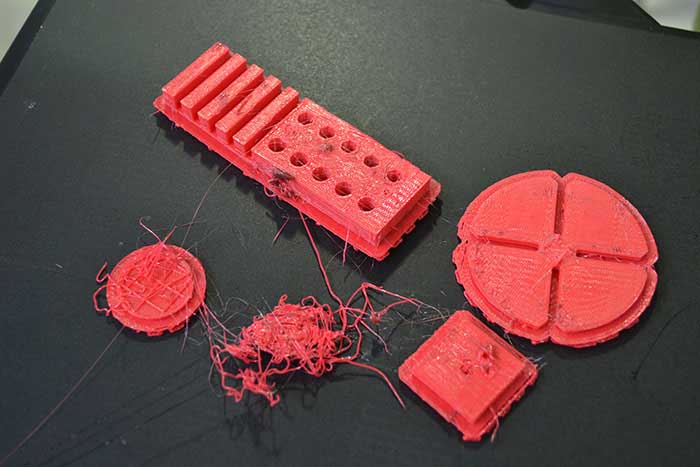
once the pieces are repeated we can see the finished pieces.
For this process, I use Rhino + Grasshopper to make a parametric design and make an artistic piece.
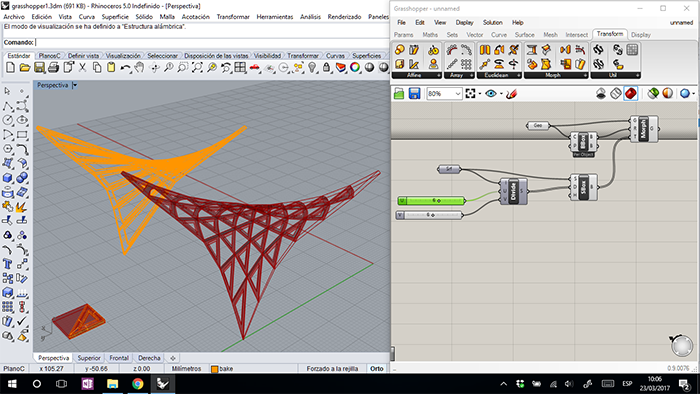
This piece is very difficult to perform in another process based on the complexity of its details in
which it is a syncretism between a geometric and organic morphology symbolizing a rupture between the
fractal geometry of nature.
Within the design was generated a curved surface with four points of level for which the different genre
heights, the development of the supports was done with Meshmixer.
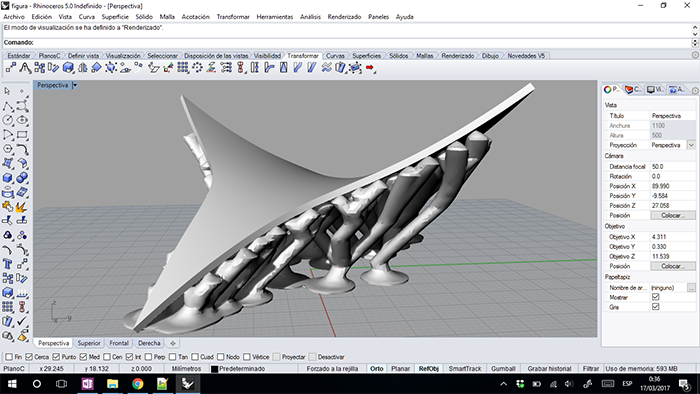
All this modeling saved in STL format and Cura software used to generate the print files.
Unless it is really necessary, avoid ABS. A few years ago it was the most used material to print in 3D. Now, however,
PLA is used much more, since in addition to being biodegradable, it is easier to print with it.
It is recommended before trying any of the different types of existing filaments, find out what is the recommended
temperature for your filament and also if it needs the bed to have an average temperature.
The design can also help you improve the printing times or complexity, so I also recommend researching the software that will be used to generate the piece.
The limitation of this process found in the time of printing and the size of the bed.
On the other hand we could observe the flexibility of elaboration of complex pieces and customized designs.
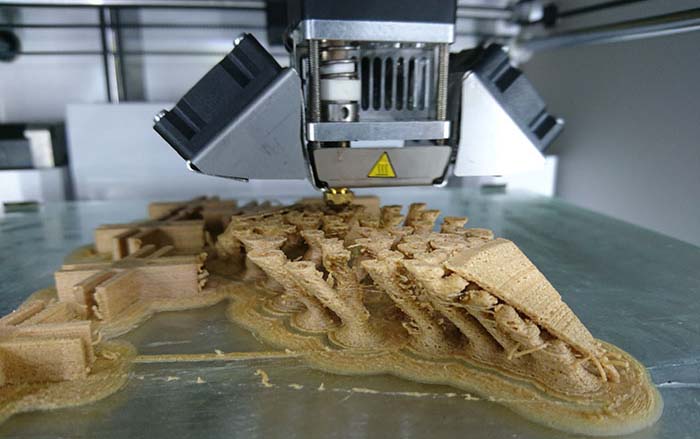
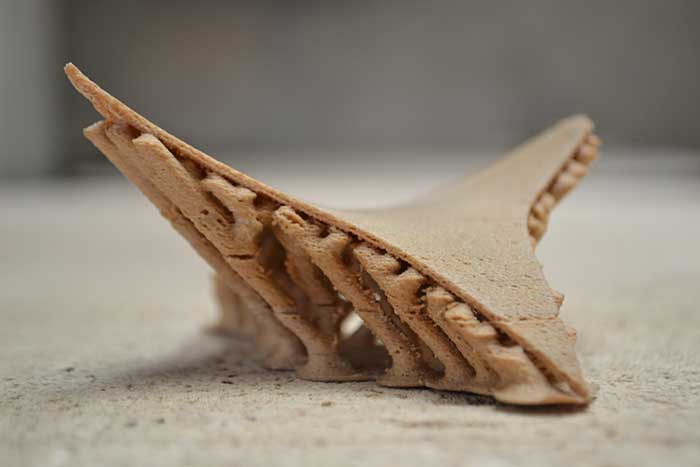
The material used is a filament with a mixture of wood with PLA base in which it generates a finish similar
to a piece made of wood.
-Made from PLA and recycled wood fibers
-Print useful objects with a wood texture and feel
-Printed wooden parts can be post processed by sanding or painting
-Extrusion temperature range: 210 C - 230 C
If you want to know a little more about this material below I attach a link.
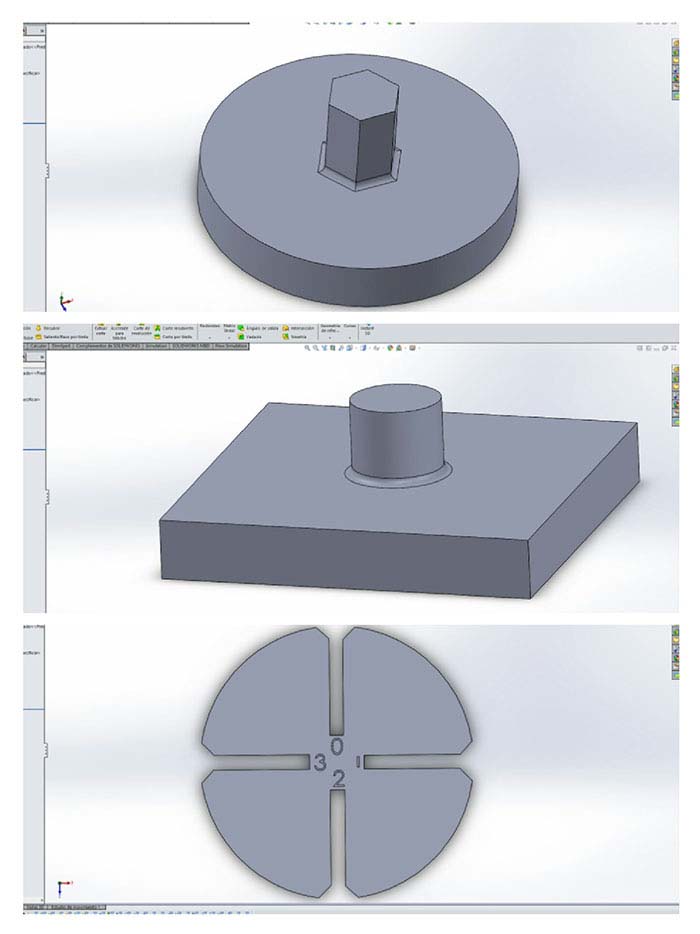
To print on this machine, the CURA software used in which we calibrate the print parameters as shown in the
first image and in the following; the print process can be seen.
for this piece the predetermined configurations were used as you can see in the image.
Unlike the MAKERBOT REPLICATOR Z18, the ULTIMAKER has thermal control in its bed so it maintains the right temperature for each material objteniendo a better adision of the piece to the bed avoiding the error of the previous piece.
Then we can see the finished piece.
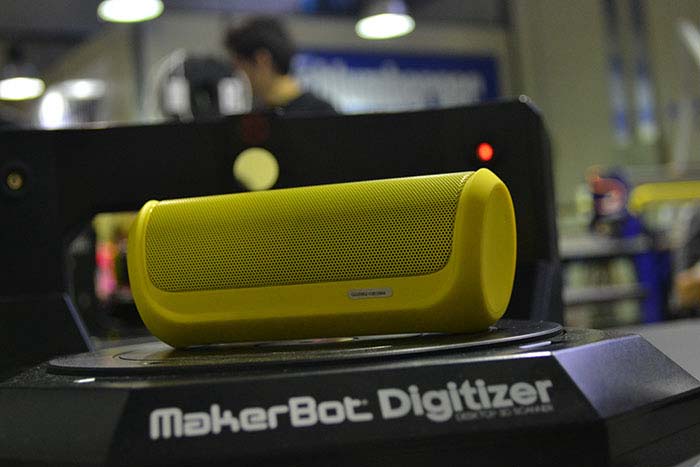
To start to use the scanner, take the following cautions:
- Install the software in your PC
- Make sure the lens cap is closed
- Calibrate the scanner
- Place the scanner in a space with low light
- It is advisable not to scan bright objects in bright areas
Once the software is installed we will use the own piece for the calibration of the scanner and follow the steps explained in the software.
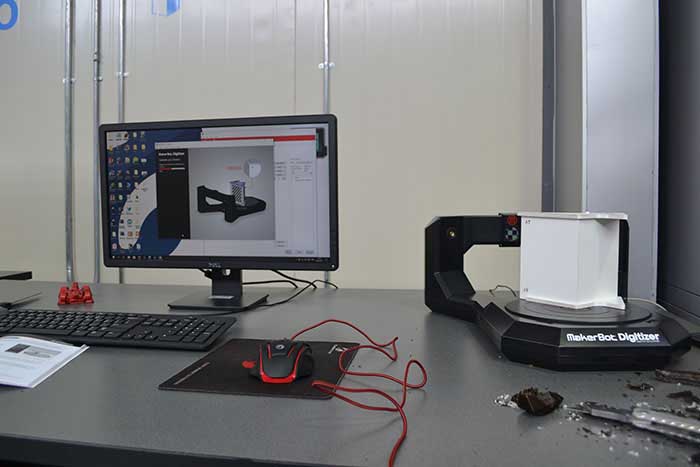
As in this case we are in a place with a lot of lighting we choose a low-gloss object to have a better quality in the scan.
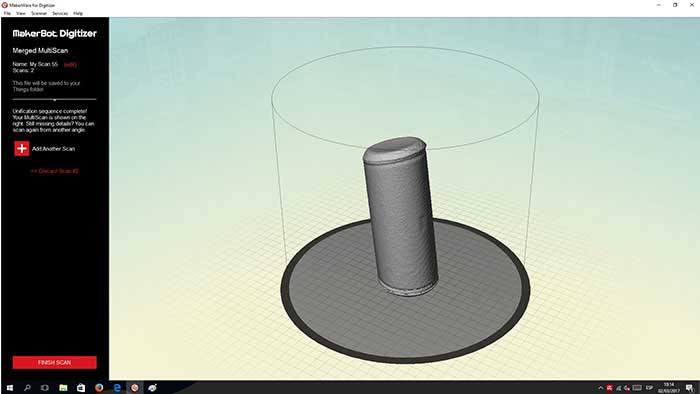
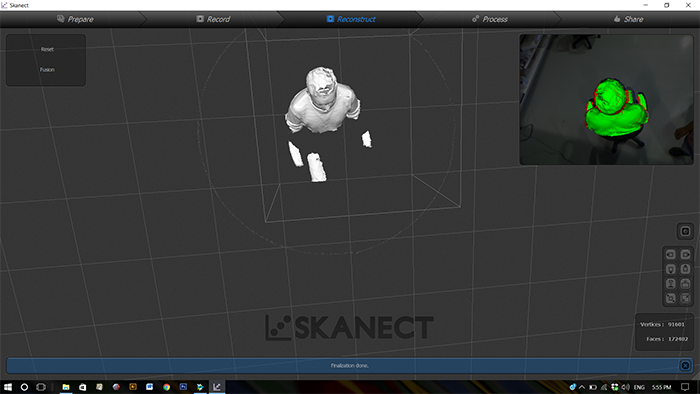
In the following image we can see the finished scanning process.
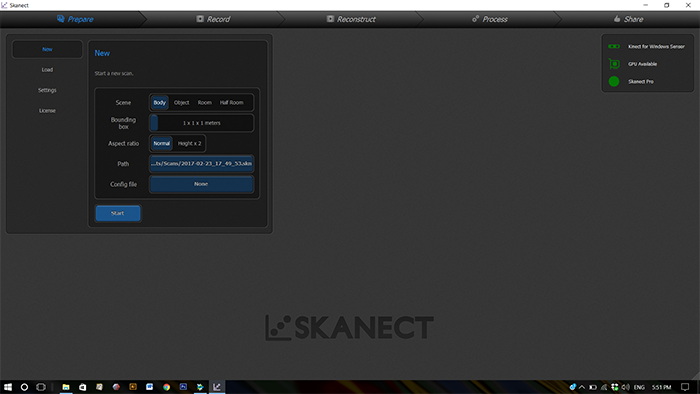
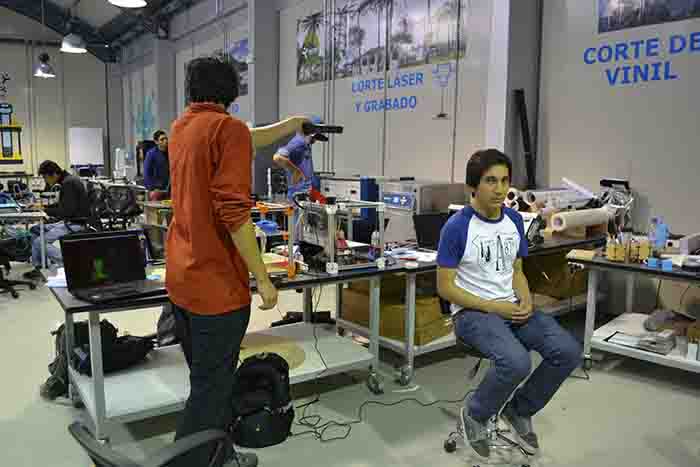
With this tool, can scanning something big objects.
Frist install the SKANECT software and the drivers of Microsoft Kinect
Second, in the skanect take the correct distance with the object to scan put its green color and we can proceed to scan.
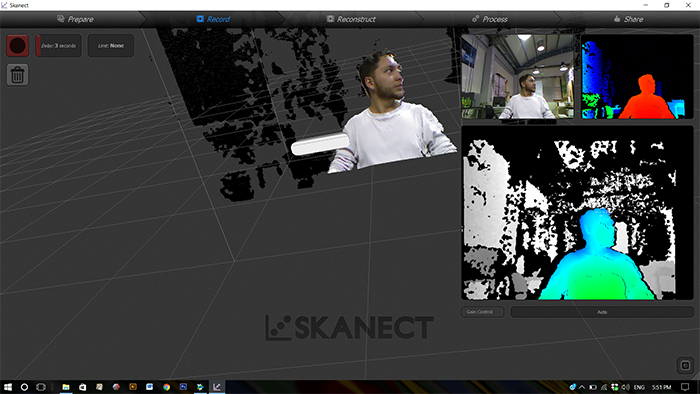
For correct scanning, check that the kinect is evenly distributed.
Meshmixer is a software for editing three-dimensional formats which allows us to modify, repair or create files simply and quickly. The program supports the main three-dimensional formats such as STL, OBJ, 3DM among others.
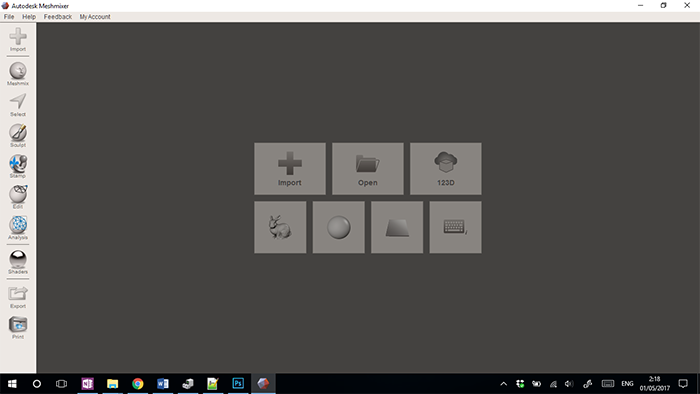
When do you get the files to proceed to edit and repair the fails in this software.
Upload the file then we saved in skanect. When the file is open you can see the file than you scan. Look at the following image.
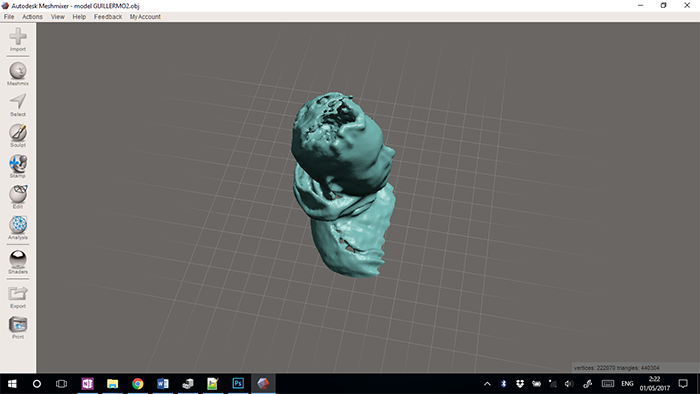
We can use tools like "Sculpt", and select some options, I used "Fall Off" and then select "spike" to apply in the file.
Followed by this we use the SMOOTH tool to soften the figure and generate a better resolution in the figure.
This file can harm the printing.
Yes, In this assignment, I can see the operation of 3D printing and the differences with the other processes
In the documentation can see all process to make this assignment
The versatility and ease of development with which almost anything can be create in this process
Can see this two items in my documentation
I had only one problem, which you can see the process of the print test where the filament did not stick on the plate. To solve this I put some glue sticks
For my profession I had the opportunity to experience previously with 3D printing and I had basic knowledge about
this process but it helped me a lot to be able to experiment and learn more about this process.
But the one that I liked the most this week was the 3D scan since I knew about it and I had been able to do it but
with a few brief features so I could experiment with two very different types of scanning, each one of them being a
very useful process to generate reverse engineering processes and can expand their research for new uses.