Index
________________________________________________________________________
Introduction
Neil gave a tour across the recommended programs where we can work pixels, vector, Booleans, design 2d, 3d etc.
Here my journey through some programs. I already know most of them because I am an architect and work with these programs every day, but I took the opportunity to learn a little but more trough tutorials. Anyway I use tutorials for learning, a lot of what I do is done by memory, just connecting past knowledge to archive what I visualize.
I love tutorials. I believe is a legitimate way of learning, solving problems by yourself learning from the experience of other people. Nothing comes from nothing; I mean, somebody else have done something similar before of probably the same thing, even better, so learning from others instead of starting from scratch is also a valuable option.
“Outside of formal contractual programs or the network’s Fab Academy program for training there is a growing online body of information which addresses many questions, and a growing archive of tutorials online.” http://www.fabfoundation.org/index.php/setting-up-a-fab-lab/index.html
“As students needed new skills for their projects they would learn them from their peers and then in turn pass them on. Along the way, they would leave behind extensive tutorial material that they assembled as they worked.” Neil Gershenfeld
“Tutorial is an important teaching-learning tool. It helps learners enhance their intellectual, communication and social skills.” http://medind.nic.in/ibi/t06/i3/ibit06i3p198.pdf
Model (raster, vector, 2D, 3D, render, animate, SIMULATE ...) a possible final project, and post it on your class page
Raster
handdrawing + photoshop
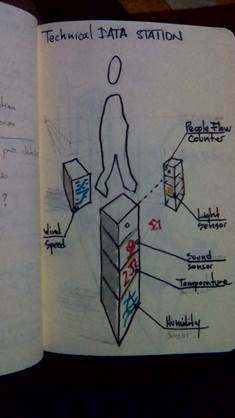
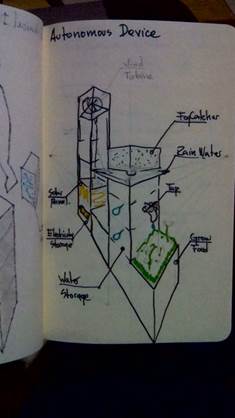
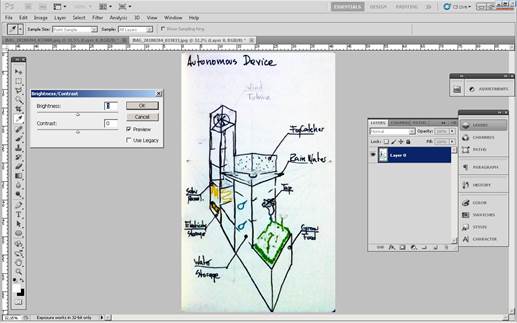
1. First I draw by hand two of the ideas I have for the final project and I took a picture of them with my cell phone
2. I opened Adobe Photoshop of the adobe family. It is a raster graphics editor developed and published by Adobe Systems for macOS and Windows. Photoshop was created in 1988 by Thomas and John Knoll. Since then, it has become the de facto industry standard in raster graphics editing, such that the word "Photoshop" has become a verb as in "to Photoshop an image," "photoshopping" and "photoshop contest", though Adobe discourages such use. It can edit and compose raster images in multiple layers and supports masks, alpha compositing and several color models including RGB, CMYK, CIELAB, spot color and duotone. Photoshop has vast support for graphic file formats but also uses its own PSD and PSB file formats which support all the aforementioned features. In addition to raster graphics, it has limited abilities to edit or render text, vector graphics (especially through clipping path), 3D graphics and video. Photoshop's feature set can be expanded by Photoshop plug-ins, programs developed and distributed independently of Photoshop that can run inside it and offer new or enhanced features. (wikepedia)

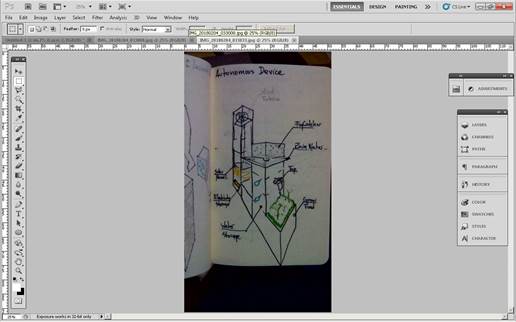
3. In Photoshop I opened the photos of the drawings.
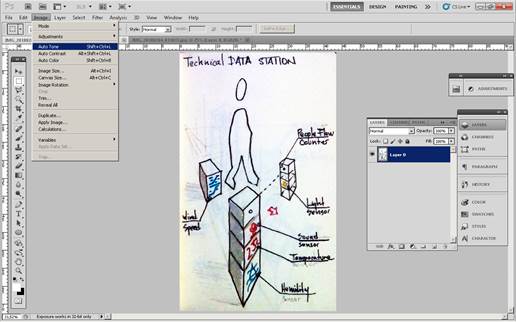
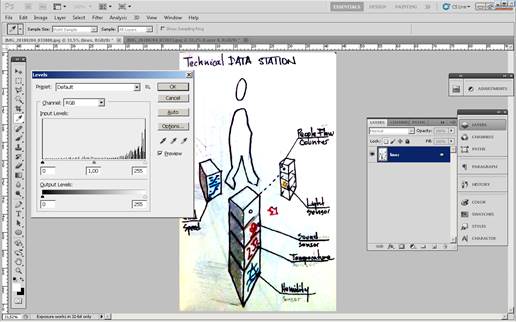
4. Cropped the image and with Edit / Transform / Wrap I made the image flatter. In edit put AutoTone, AutoColor and AutoContrast. And agin in edit opened the window of Contrast and Brightness’ and gave more of it.
5.
I
started using some og the steps of this tutorial
https://www.digitalartsonline.co.uk/tutorials/photoshop/sketch-paint-in-photoshop/#6
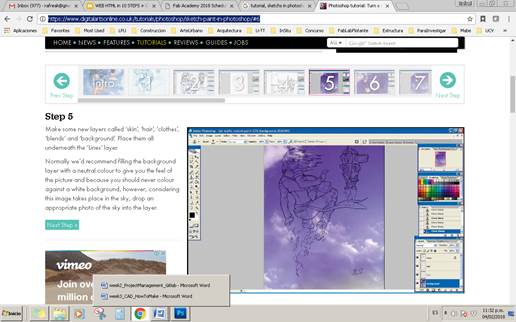
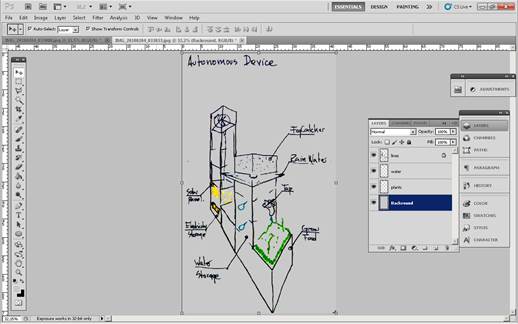
6. Press Cmd/Ctrl + L to alter the levels, then drag the black triangle slider to the right, just halfway before the first peak. If your scanner has picked up noise, you may need to drag the white triangle slider to the middle of the right peak. With the white pixels transparent, click lock transparent pixels in the Layers panel and name the layer ‘Lines’.
7. Make some new layers called ‘skin’, ‘hair’, ‘clothes’, ‘blends’ and ‘background’. Place them all underneath the ‘Lines’ layer. Normally we’d recommend filling the background layer with a neutral colour to give you the feel of the picture and because you should never colour against a white background
8. A lot of tutorials suggest filling each section of an image with a flat color on its own layer at this stage, but this can be very dull, so we’re going to break it up a bit and shade each section as we go. To block colors in, use a round hard-edge brush with the following settings: Opacity and Flow: 100 per cent, spacing 1 per cent, size jitter set to Pen pressure, angle jitter set to pen tilt, with airbrush and smoothing ticked. Pick a suitable skin color and fill the area on the ‘skin’ layer.
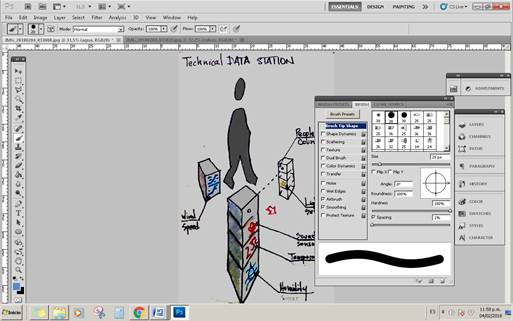
9. While holding Cmd/Ctrl, click on the thumbnail of the skin layer (found in the layers palette) to make a selection. Now click on the ‘blends’ layer and using the same brush, this time with a blue colour, add shading for the skin.
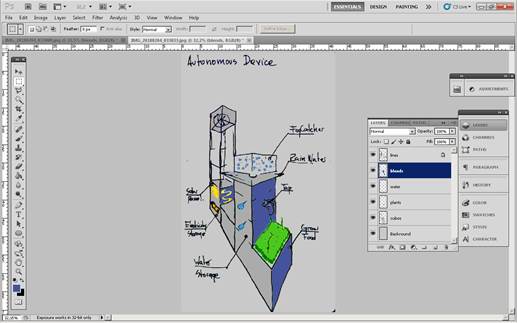
10. The result
11. I don´t love the result. I think it need more practice, but at least I learned some new techniques in photoshop.
Vector
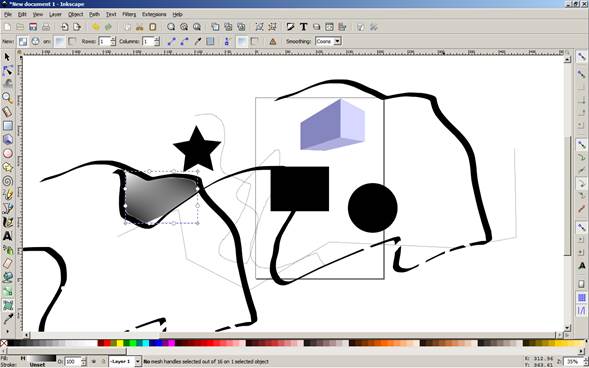
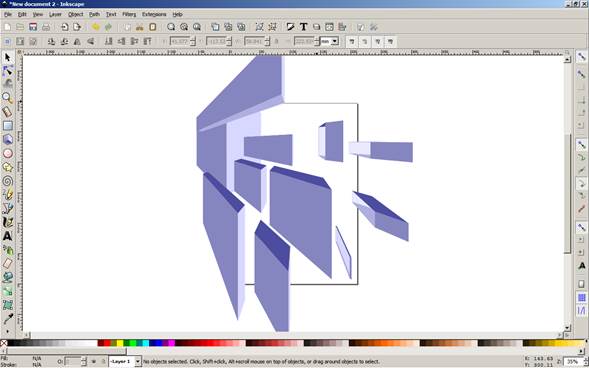
Inkscape
My tutor suggested trying also an open source 2d program, like Inkscape of glimp. I selected the first one, because I heard a lot about this program. I will do the basic tutorial just to experiment a bit on it. I like that many commands are very easy with the keyboard.
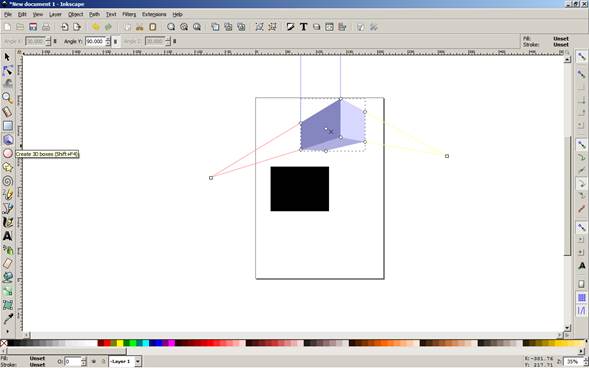
Recommend the Create 3d boxes
Ilustrator
Adobe Illustrator is a vector graphics editor developed and marketed by Adobe Systems.
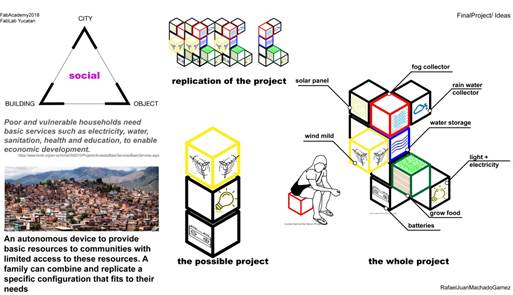
1. Here I will add what I did for the first assignment. The first Final Project Ideas. I did one page in Ilustrator, by myself without tutorials. I only use the tutorials to learn new things.
2.
I
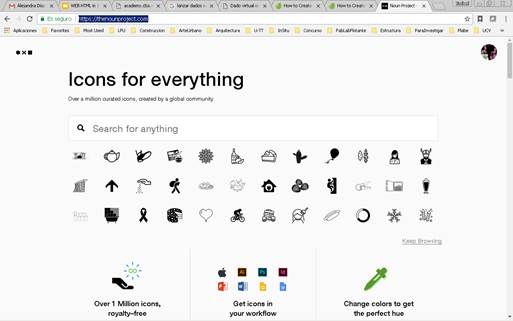
did this page using images downloaded from the internet and icons from a web
page I love, where you can download any icon you want just respecting the name
of the person that did it. If you see the icons I used have some little text
next to them. That´s
the author.
https://thenounproject.com/
3.
I
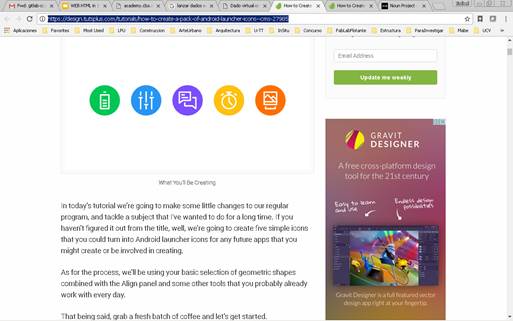
decided to make my own icons for the project, so I selected a tutorial for that
How to Create a Pack of Android Launcher Icons in Adobe Illustrator
https://design.tutsplus.com/tutorials/how-to-create-a-pack-of-android-launcher-icons--cms-27985
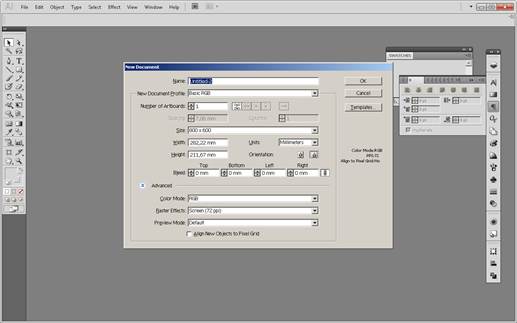
4. Set up a new document
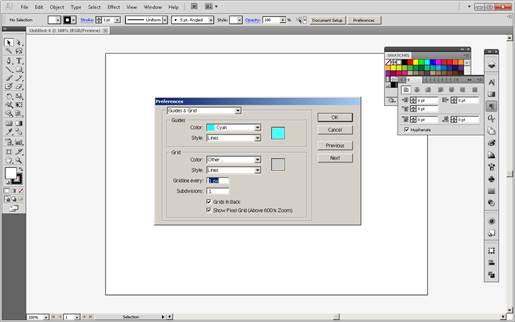
5.
Go to
the Edit > Preferences > Guides & Grid submenu, and adjust the
following settings:
Gridline every: 1 px
Subdivisions: 1
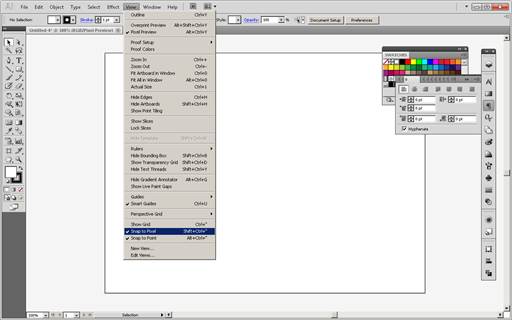
6. Enable the Snap to Grid option found under the View menu, which will transform into Snap to Pixel each time you enter Pixel Preview mode.
7.
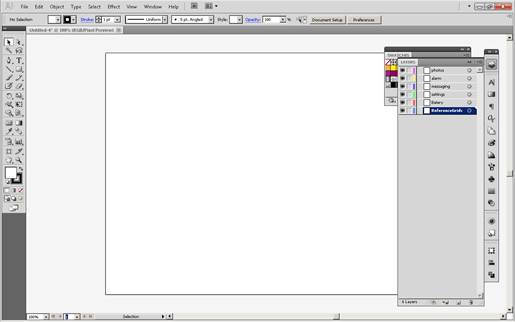
bring
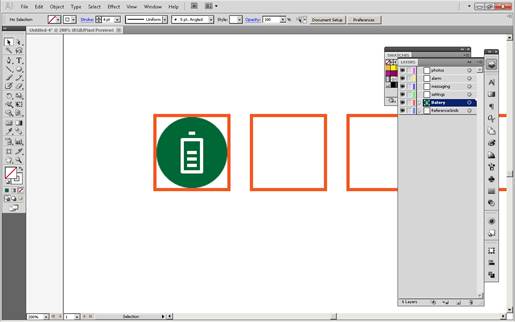
up the Layers panel, and create a total of six layers, which we will rename as
follows:
layer 1: reference grids
layer 2: battery
layer 3: settings
layer 4: messaging
layer 5: alarm
layer 6: photos
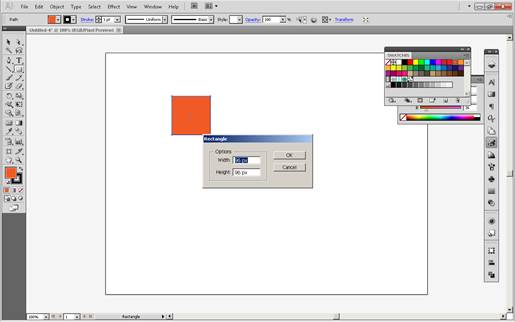
8. grab the Rectangle Tool (M) and create a 96 x 96 px orange
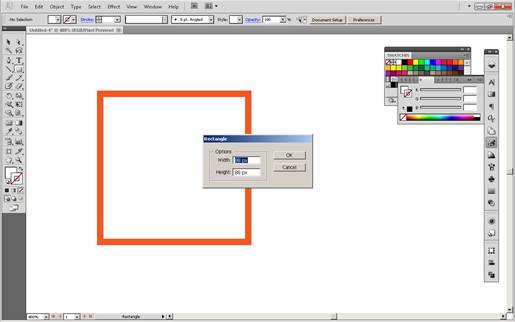
9. Add another smaller 88 x 88 px one
10. Group the two squares composing the reference grid using the Control-G keyboard shortcut, and then create three copies at a distance of 24 px from one another, making sure to align them to the center of the Artboard.

11. 88 x 88 px circle, which we will color using, center aligning it to the underlying active drawing area afterwards.
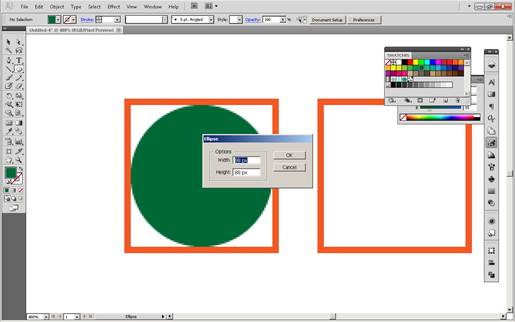
12. Create the battery’s main body using a 24 x 40 px rectangle, which we will color using white and then center align to the larger circle, at a distance of 20 px from its bottom edge.
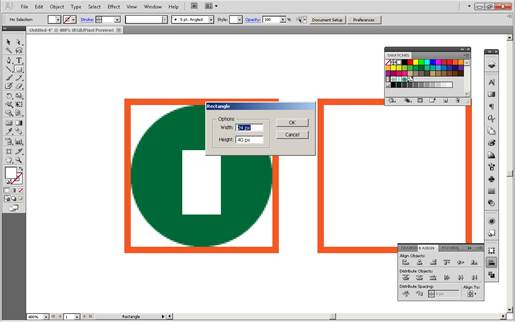
13. Turn the shape that we’ve just created into an outline, by flipping its Fill with its Stroke (Shift-X), and then setting its Weight to 4 px and its Corner to Round Join, all from within the Stroke panel.
14. Create the first state indicator bar, using either a 12 x 4 px rectangle or a 12 px wide stroke with a 4 px Weight, which we will center align to the battery’s body, leaving a 4 px gap around it.
15. Add two more indicator bars, which we will vertically stack at a distance of 4 px from one another, grouping them together (Control-G) afterwards.
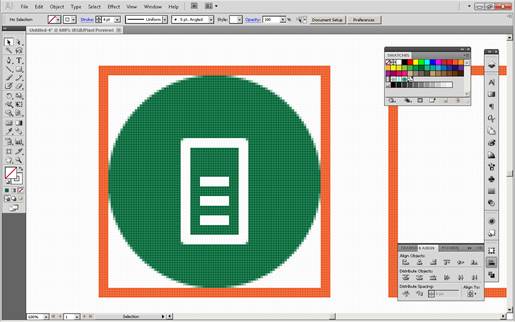
16. Finish off the icon by adding the top cap, which we will create using a smaller 8 x 4 px rectangle that we will center align to the battery’s body, at a distance of 6 px (4 px for the padding + 2 px for the top half of the stroke).
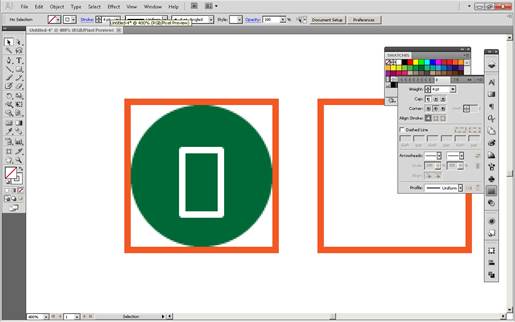
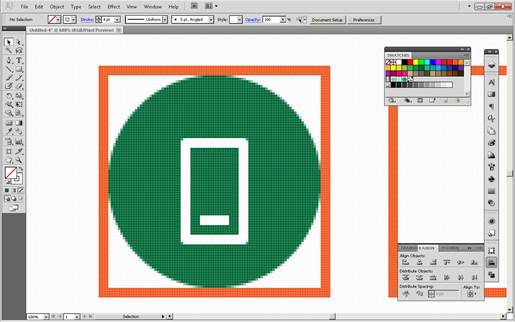
Once you’re done, don’t forget to select and group (Control-G) all the battery’s composing shapes, doing the same thing for all of the icon’s composing sections as well.
17.
First
icon ready
I will continue doing the others in the process of defining my final project.
So far I learned something knew. I can do my own icons!
I updated my final project ideas with my first icon.
3d design
Types
1.
I
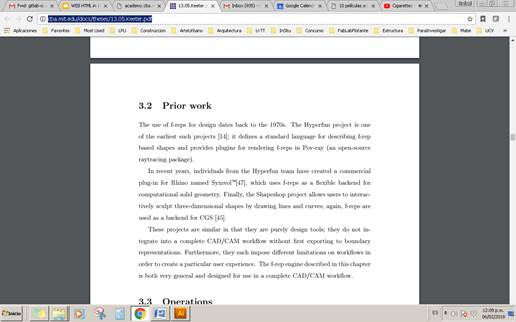
started reding one of Neil´s recomendations
http://cba.mit.edu/docs/theses/13.05.Keeter.pdf
it is a very complex thesis but helps understand how computers calculate a 3d.
It could be a solid a mesh, a triangulation, etc. Each of one has a very
different process to be done, and from there is the difficulty of programs to
understand each other.
Programs
Blender

Blender is a professional, free and open-source 3D computer graphics software toolset used for creating animated films, visual effects, art, 3D printed models, interactive 3D applications and video games. Blender's features include 3D modeling, UV unwrapping, texturing, raster graphics editing, rigging and skinning, fluid and smoke simulation, particle simulation, soft body simulation, sculpting, animating, match moving, camera tracking, rendering, motion graphics, video editing and compositing. It also features an integrated game engine. (Wikipedia)
1.
Download
the program from the web page
https://www.blender.org/download/
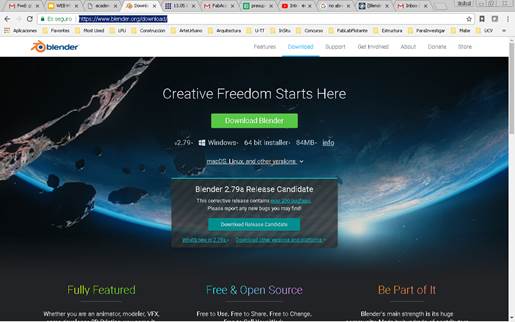
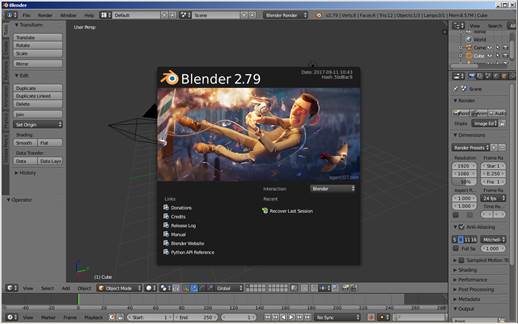
2. Install
3. After install. The program didn´t open due a problem with my opengl graphic card. My computer is old and doesn´t have the configuration to support the program
4. I search in the web if there was a solution
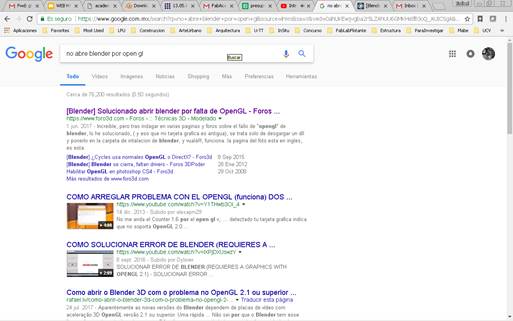
5. I found an easy solution
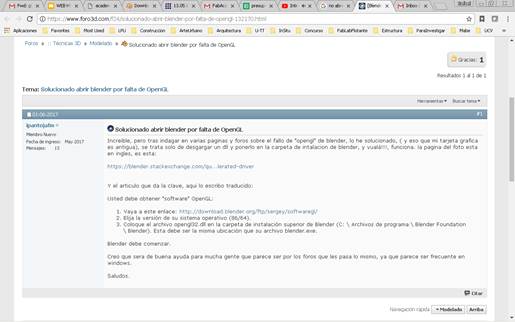
6.
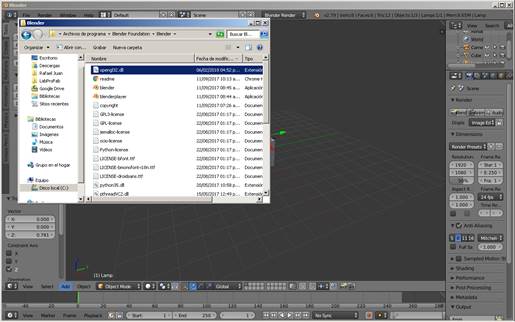
Downloaded
the file opengl32.dll, that have to be copied in the folder of the program on
c:/ Archivos de programa/ Blender Foundation/ Blender
This way the program opened.
7. I watched the tutorial recorded in Barcelona this week
8. Blender is based on meshes
9. Open the program. This is how it look like
10. Default interface
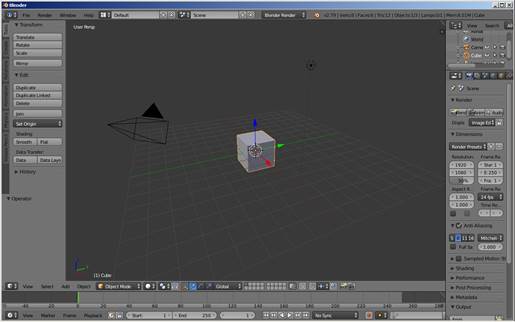
11. With the tutorial I have an overview, but I am far away of using the program right. I will do another tutorial later.
12. But I learned how to do a simple animation
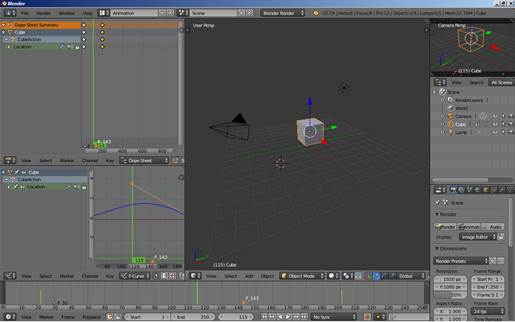
13. With a program Cam Studio a friend gave me long time ago, I am recording the steps for the animation
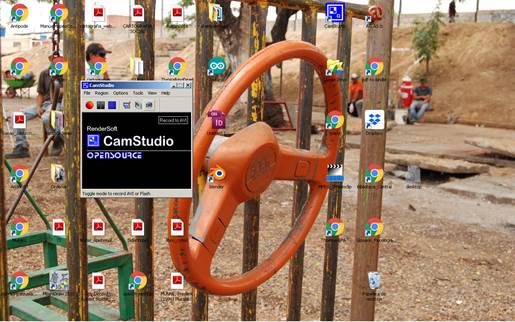
14.
Put
the interface in Animation. To add key frames press “I”, location,
move the cube and add another key frame
do it again
play the animation
I selected with the left button the orange circle in the key frames to move
the cube after the key frames were set.
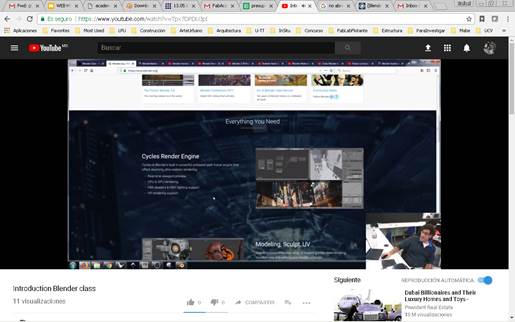
https://youtu.be/h4jvab9rCF4
Rhinoceros

Rhinoceros (typically abbreviated Rhino, or Rhino3D) is a commercial 3D computer graphics and computer-aided design (CAD) application software developed by Robert McNeel & Associates, an American, privately-held, employee-owned company founded in 1980. Rhinoceros geometry is based on the NURBS mathematical model, which focuses on producing mathematically precise representation of curves and freeform surfaces in computer graphics (as opposed to polygon mesh-based applications).
Rhinoceros is used in processes of computer-aided design (CAD), computer-aided manufacturing (CAM), rapid prototyping, 3D printing and reverse engineering in industries including architecture, industrial design (e.g. automotive design, watercraft design), product design (e.g. jewelry design) as well as for multimedia and graphic design.[2]
Rhinoceros is developed for the Microsoft Windows operating system and OS X. A visual scripting language add-on for Rhino, Grasshopper, is developed by Robert McNeel & Associates.
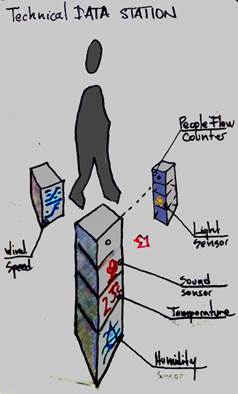
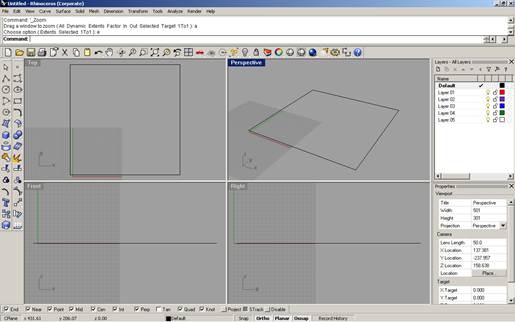
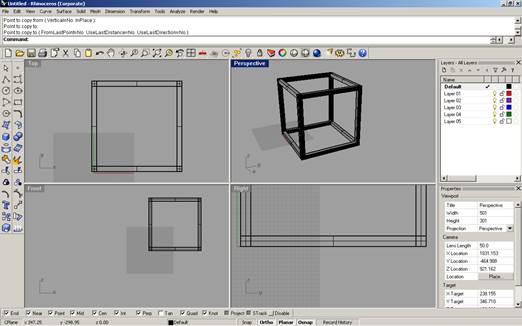
1. I already have and know how to use this program. I decided to start modeling my project. I know they are going to be cubes. So I will outline the sizes and the minimum elements I will need, to start having an idea.
2. Set the unit in millimeters for more precision
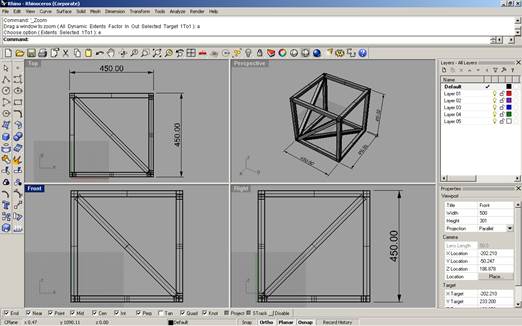
3. Draw a square of 450 x 450 mm
4. Make an offset of 2,54 mm or 1 inch. Then draw squares at the corners
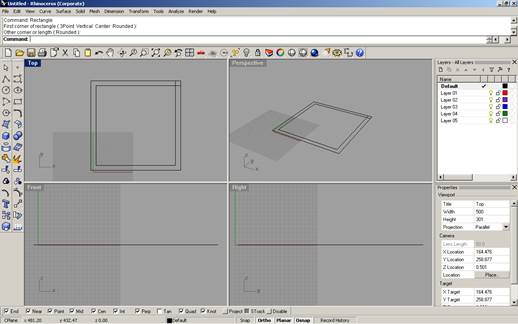
5. Extrude the two big squares together to a height of 25.4 mm. Set the view into shaded
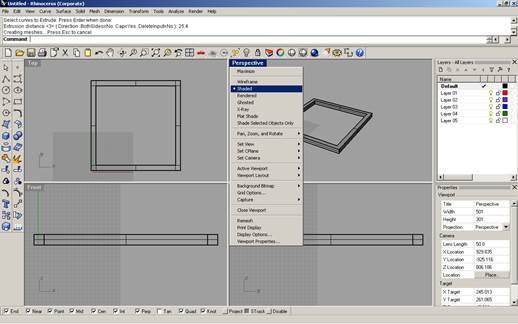
6. Extrude the 4 little squares to 450 height and copy the base to the top. The cube is ready
7. Make the diagonals
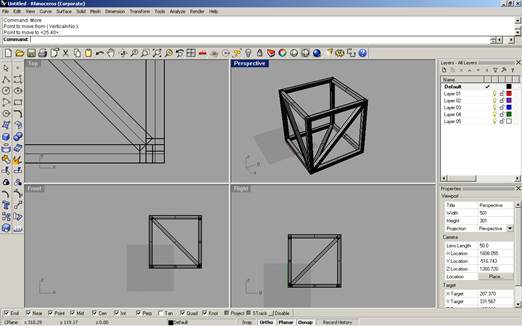
8. Dim
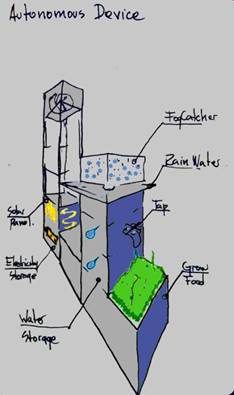
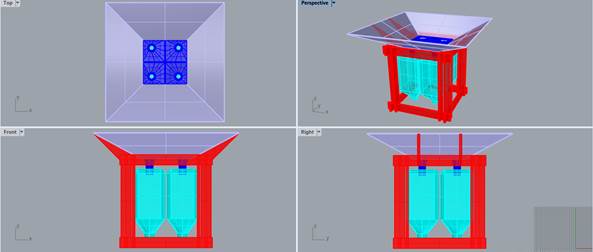
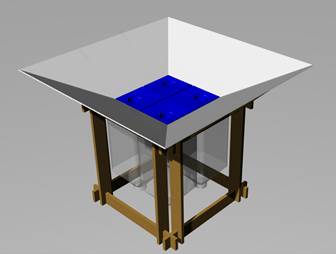
I also 3D modelled on Rhino the parts for 2 of the modules of my final project:
1. Water Collector
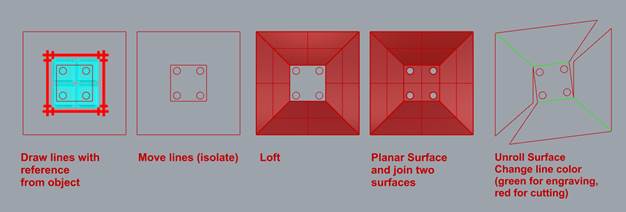
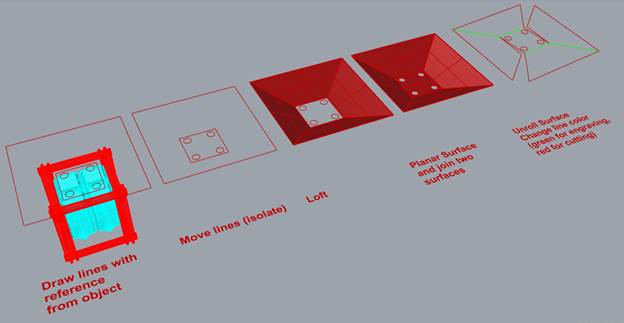
2. Holders for water collector
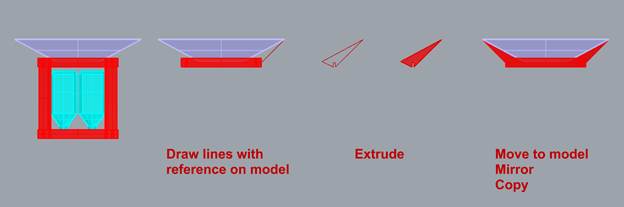
3. Funnels
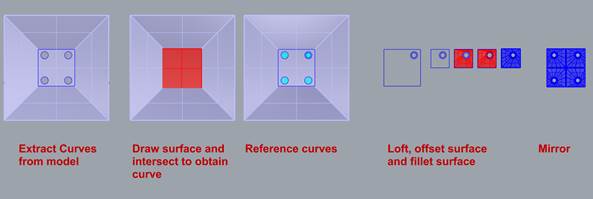
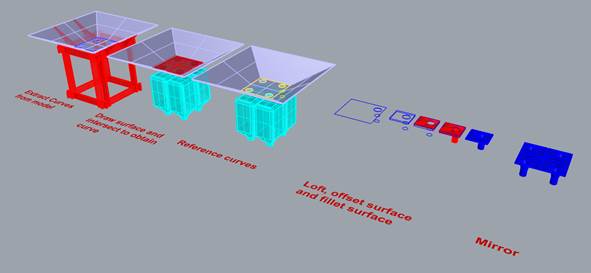
4. Final Model

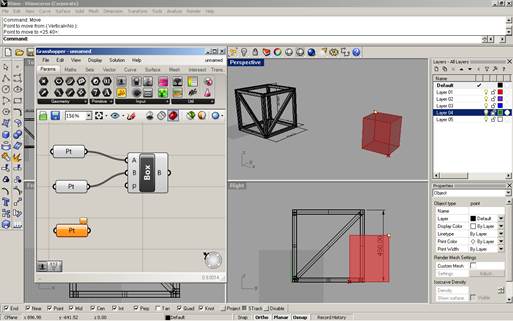
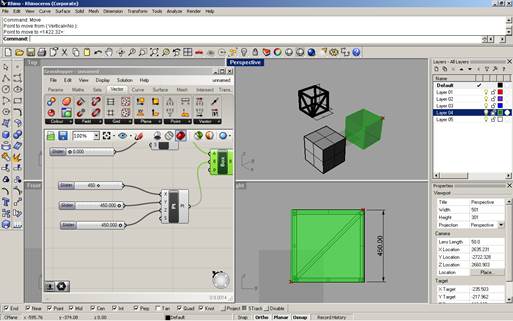
Rhinoceros + Grasshopper
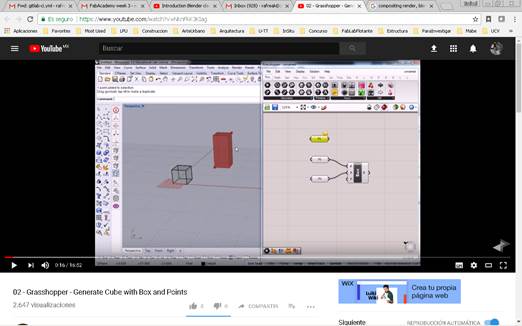
1. I also had grasshopper installed in my computer. But I really don´t know how to use it well. So chose a tutorial to build cubes with it.
2. Type grasshopper / enter
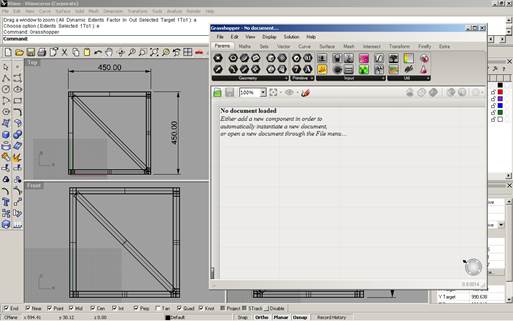
3. Put box 2p and 3 points. Connect to the box
Conclusions
· There are two types of images Raster end Vector
o Raster
§ Are created with pixel based programs or captures by a scanner of photo camera.
§ A pixel is a single point or the smallest unit single element in a display device
§ If you zoom any raster image you will start to see little squares that compound the image
o Vector
§ Are created with vector softwares
§ Common for physical products
§ Also used in CAD, engineering and 3d
§ Vectors are mathematical calculations from one point to other that form lines, and shapes. Zooming into a vector graphic will always look the same
Download files / descargar archivos