week 10 / Semana 10
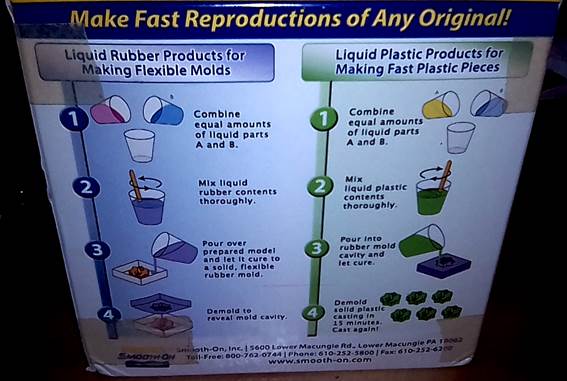
review the safety data sheets for each of your molding and casting materials,
then make and compare test casts with each of them
group assignment:
review the safety data sheets for each of your molding and casting materials,
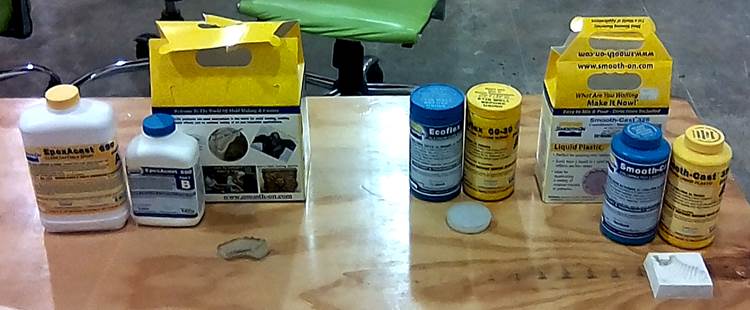
Searched in the web page the safety data sheet of each product. We are using Smoth-on products
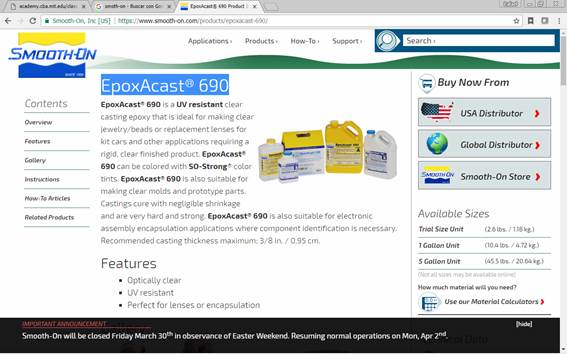
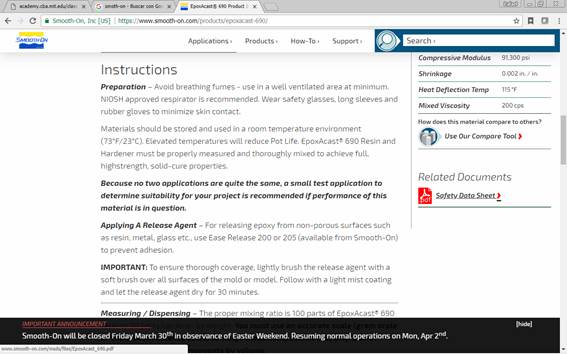
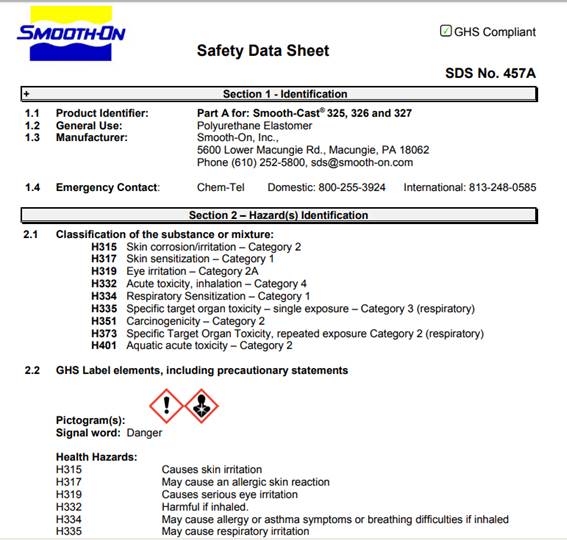
EpoxAcast® 690
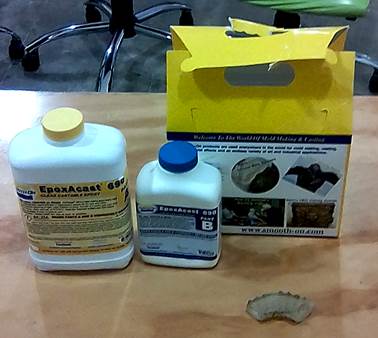
“EpoxAcast® 690 is a UV resistant clear casting epoxy that is ideal for making clear jewelry/beads or replacement lenses for kit cars and other applications requiring a rigid, clear finished product. EpoxAcast® 690 can be colored with SO-Strong® color tints. EpoxAcast® 690 is also suitable for making clear molds and prototype parts. Castings cure with negligible shrinkage and are very hard and strong. EpoxAcast® 690 is also suitable for electronic assembly encapsulation applications where component identification is necessary. Recommended casting thickness maximum; 3/8 in. / 0.95 cm”
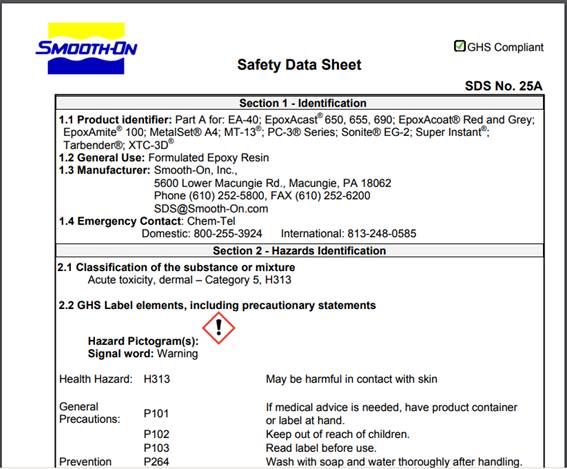
· May be harmful in contact with skin
· Wash with soap and water thoroughly after handling
· Wear protective gloves/protective clothing/eye
· protection/face protection
· IF ON SKIN: Wash with plenty of soap and water
Ecoflex 00-30
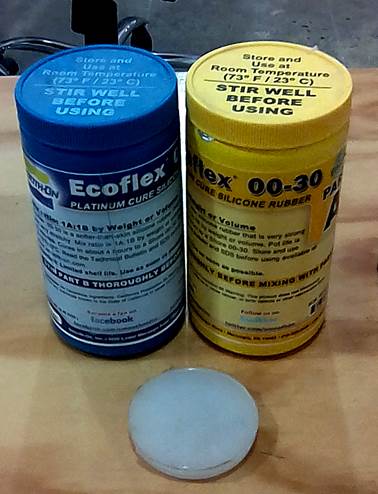
“Ecoflex™ rubbers are platinum-catalyzed silicones that are versatile and easy to use. Ecoflex™ rubbers are mixed 1A:1B by weight or volume and cured at room temperature with negligible shrinkage. Low viscosity ensures easy mixing and de-airing, or you can choose to mix and dispense using our convenient dispensing cartridges. Cured material is skin safe and certified by an independent laboratory to ISO 10993-10, Biological evaluation of medical devices, Part 10: Tests for irritation and skin sensitization.”
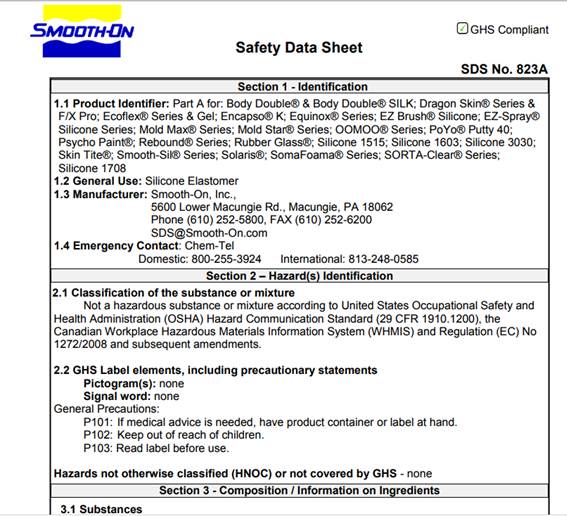
2.1 Classification of the substance or mixture
Not a hazardous substance or mixture according to United States Occupational Safety and
Health Administration (OSHA) Hazard Communication Standard (29 CFR 1910.1200), the
Canadian Workplace Hazardous Materials Information System (WHMIS) and Regulation (EC) No
1272/2008 and subsequent amendments.
2.2 GHS Label elements, including precautionary statements
Pictogram(s): none
Signal word: none
General Precautions:
P101: If medical advice is needed, have product container or label at hand.
P102: Keep out of reach of children.
P103: Read label before use
8.1 Control parameters: none defined
8.2 Exposure controls:
Respiratory Protection: Should a respirator be needed, follow OSHA respirator regulations 29 CFR 1910.134 and European Standards EN 141, 143 and 371; wear an MSHA/NIOSH or European Standards EN 141, 143 and 371 approved respirators equipped with organic vapor cartridges.
Hand Protection: Wear any liquid-tight gloves such as butyl rubber, neoprene or PVC.
Eye Protection: Safety glasses with side shields per OSHA eye- and face-protection regulations
29 CFR 1910.133 and European Standard EN166. Contact lenses are not eye protective devices. Appropriate eye protection must be worn instead of, or in conjunction with contact lenses.
Other Protective Clothing/Equipment: Additional protective clothing or equipment is not normally required. Provide eye bath and safety shower.
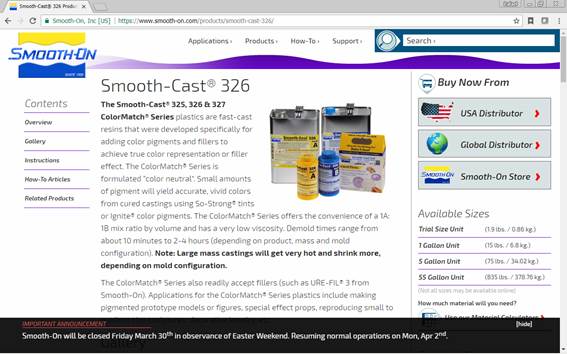
Smooth-cast 326
“The Smooth-Cast® 325, 326 & 327 ColorMatch® Series plastics are fast-cast resins that were developed specifically for adding color pigments and fillers to achieve true color representation or filler effect. The ColorMatch® Series is formulated “color neutral”. Small amounts of pigment will yield accurate, vivid colors from cured castings using So-Strong® tints or Ignite® color pigments. The ColorMatch® Series offers the convenience of a 1A: 1B mix ratio by volume and has a very low viscosity. Demold times range from about 10 minutes to 2-4 hours (depending on product, mass and mold configuration). Note: Large mass castings will get very hot and shrink more, depending on mold configuration.”
then make and compare test casts with each of them
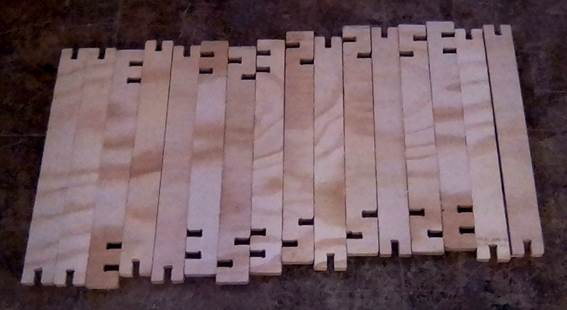
1.
I will
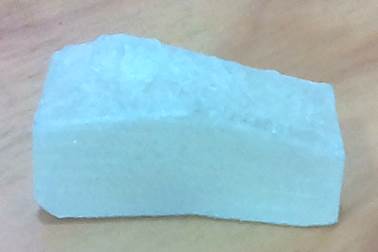
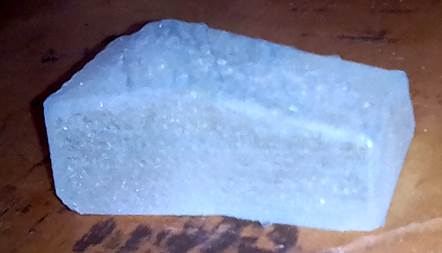
do my cast in this wax. So first I have to take measures of it and draw it in
3d
7,4 x 5,1 x 3,8 cms
2.
I draw
it in rhinoceros
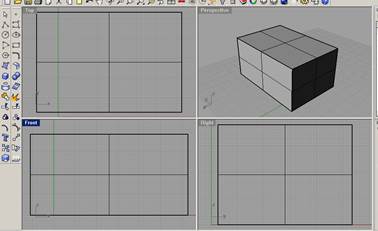

3. But what I really needed the complete model including the wax like this
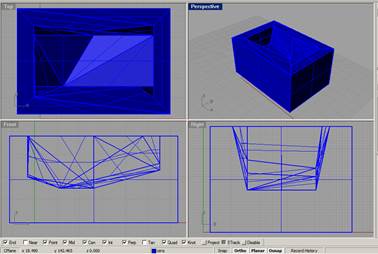
4. I exported the model to .stl format
5.
Learn
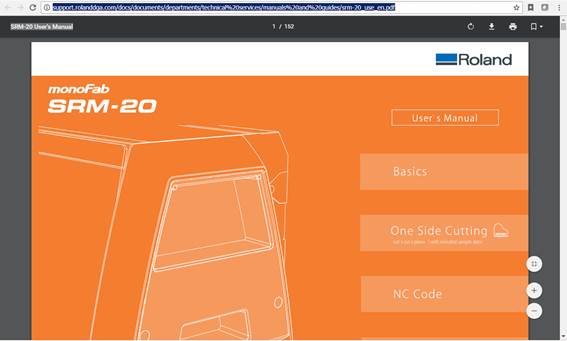
how to use the Modela Roland monofab srm-20 with this Tutorial SRM-20
User's Manual.
6. Turn on the machine and open the program
7.
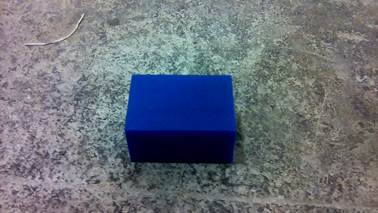
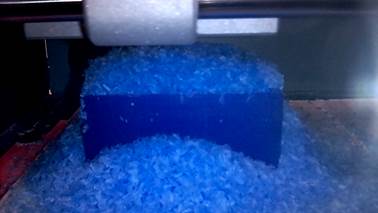
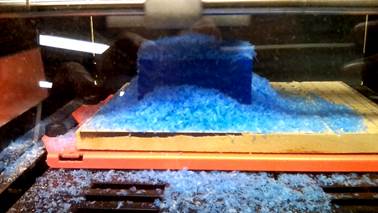
Use a
piece of machinable wax
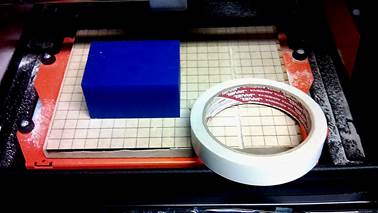
8. Click on view s the bed would be clear to put the wax
9. Fix the machining wax to the bed of the machine with double side tape
10. Open the model on Modela player and followed the user´s guide
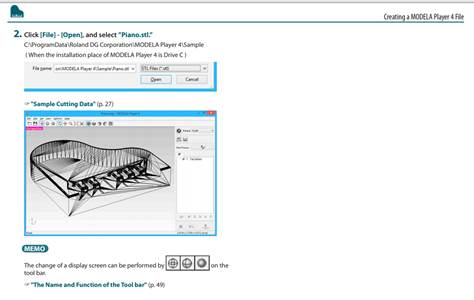
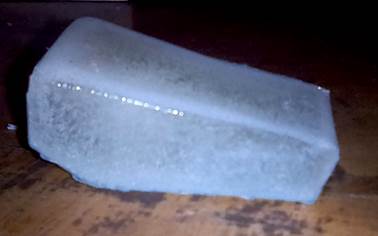
11. Select the end mill to carve on the wax, and make the paths
12. Select the round mill for the details and make the paths
13. Use the Vpanel software to define the 0,0,0 on the wax piece
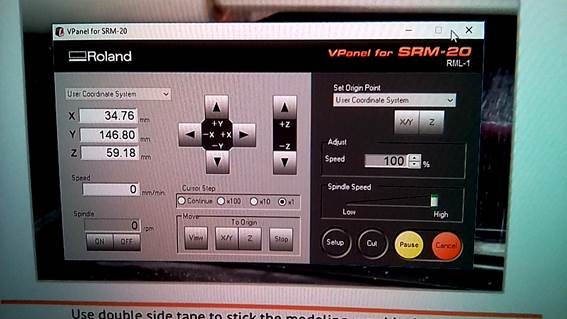
14. Send the code to the machine
15. Clean the wax of the cast
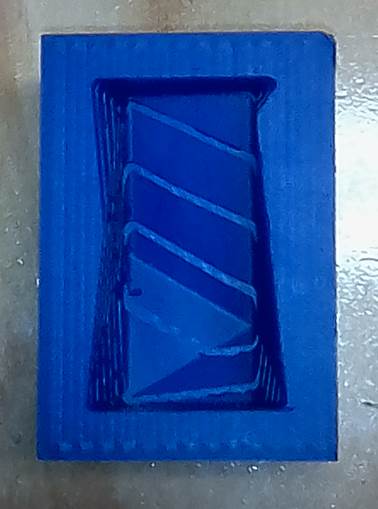
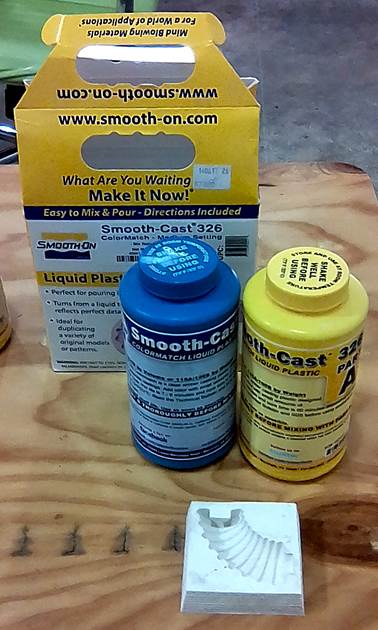
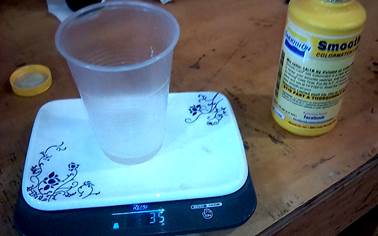
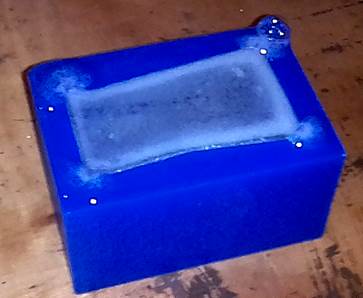
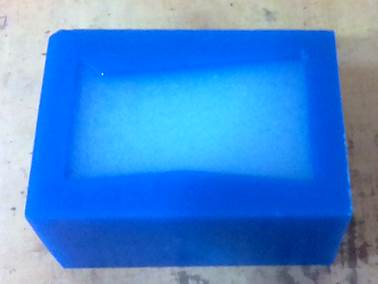
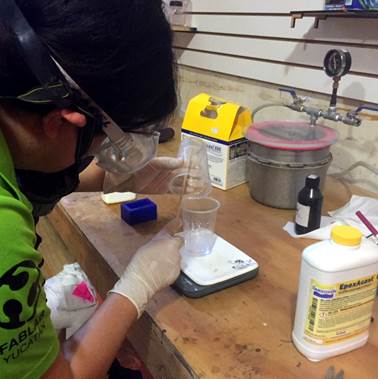
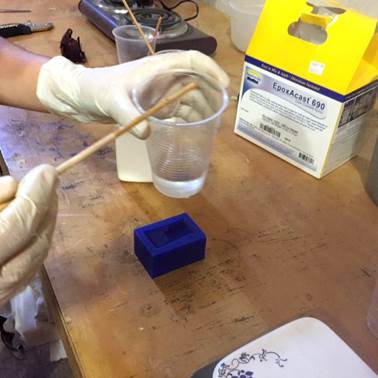
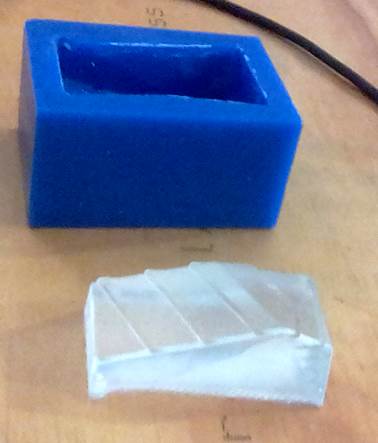
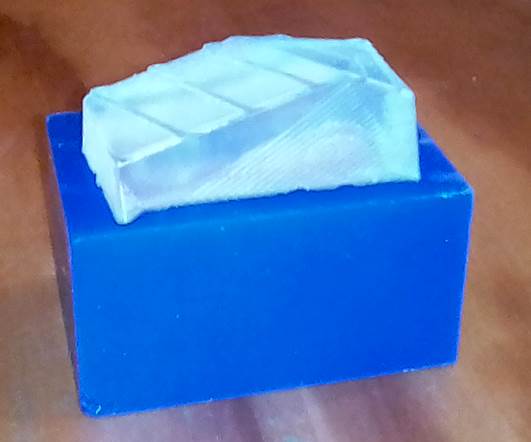
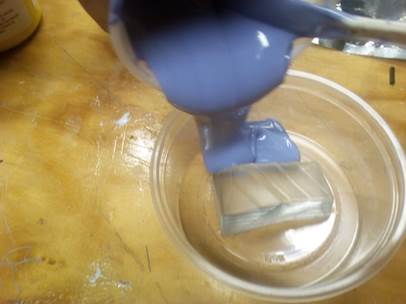
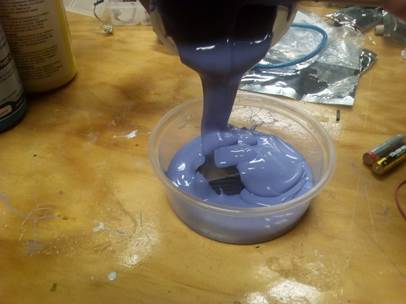
First cast / SMOOTH-CAST 326
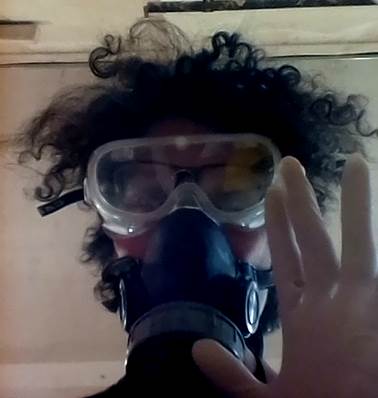
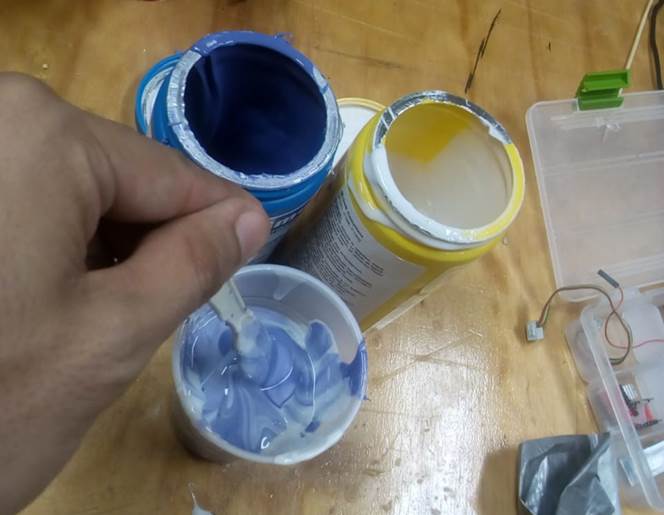
1. Use the safety equipment
2.
Open
the pot
This one was very hard and I had to use a tool
3. Have a weight meter. Weight the glass first
4. The mixing proportion is 1:1. That means the same portion of each pot (the yellow and the blue)
5.
Use
the same weight for each one
6.
Mix it
a couple of minutes
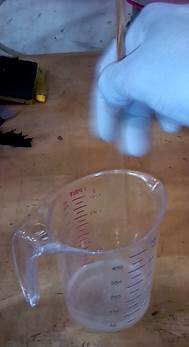
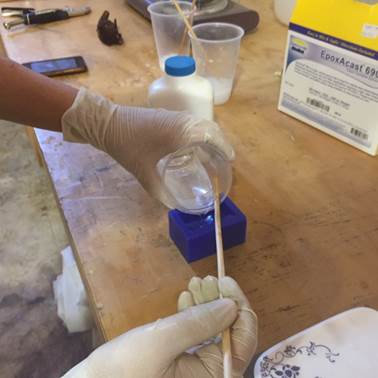
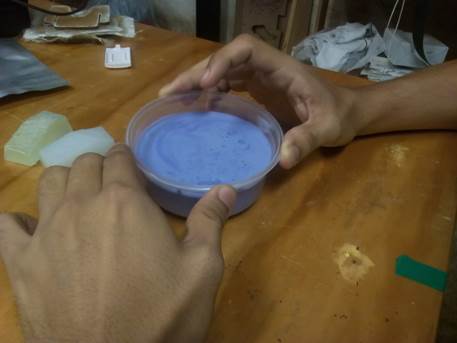
7. Pour it into the mold
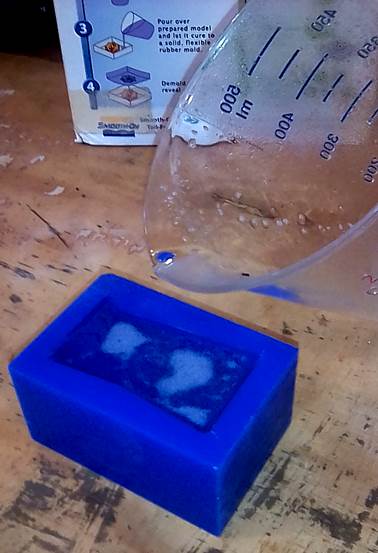
8. Wait 15 minutes and the model will be ready
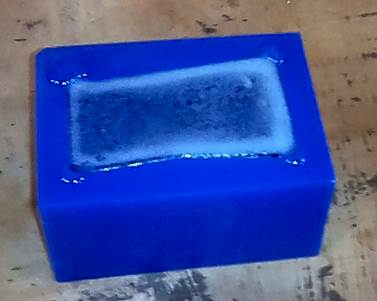
9.
Unmold,
with the help of a little spatula. But the model comes very easy out of the
mould
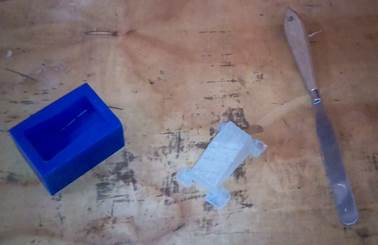
10. Remove the extra of material from the edges with a cutter
11. The model is ready
12. Next
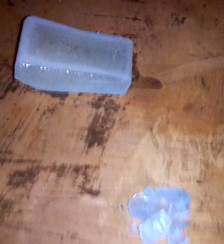
Second Cast / Eco Flex
1. Steps 1 to 6 from the previous activity
2.
I have
to wait in this case 4 hours.
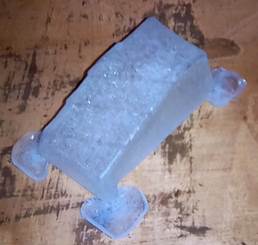
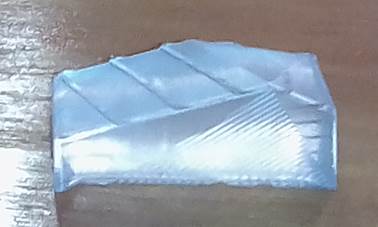
Third cast / Epoxacast
1. Steps 1 to 6 from the previous activity
2.
The
mixing ratio is 100 of the A component and 30 of the B component
3. I have to wait in this case 24 hours.
4. The result is a transparent but though model
rubber mold
As you noticed I poured the resin piece straight from the wax mold. To complete the assignment both my local tutor and the Barcelona tutors told me to use the resin piece to make a silicon mold. So I did it.
1. I put my resin piece on a recipient.
2. I used Smooth-Sil 945 from Smooth-On, which is liquid rubber to make exact copies of original models with a lot of detail. In this case, the resin part is the original model.
For making this liquid rubber, you have to mix equal amounts of the 2 liquid parts A and B until I got a homogenous light purple color. I had 25 minutes before the mix started to hard.
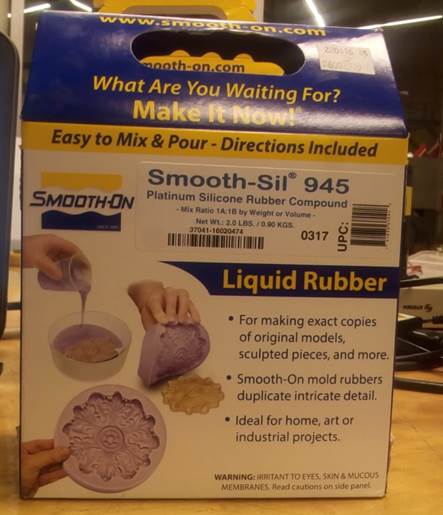
3. I poured the mix on the recipient with my resin piece and waited 6 hours until it got completely hard.
Then, I hit the bottom of the recipient for about 5 minutes to take out the air bubbles.


4. After 6 hours, I demolded the rubber to obtain a very well defined mold that now I can use to make many more resin parts.
PENDING PICTURE OF RUBBER MOLD
individual assignment:
design a 3D mold around the stock and tooling that you'll be using, machine it, and use it to cast parts
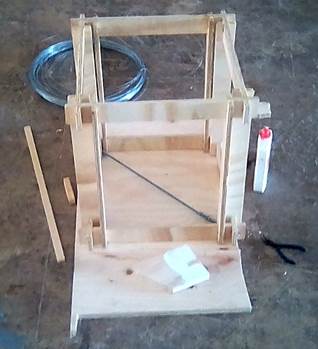
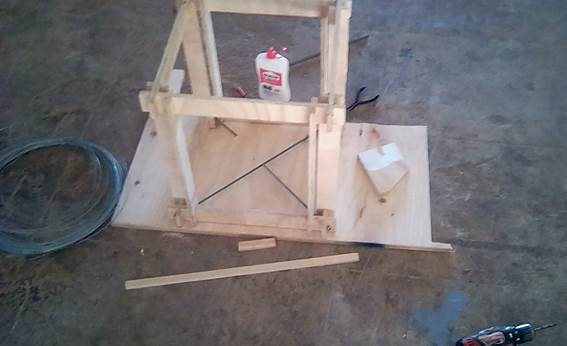
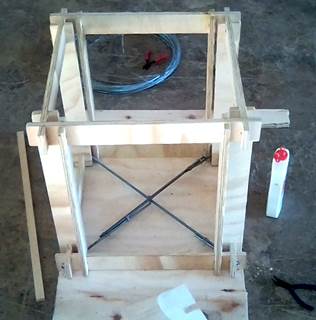
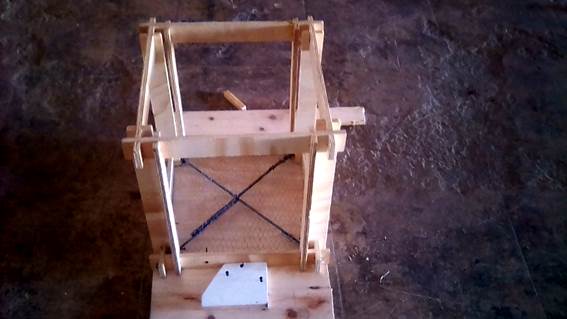
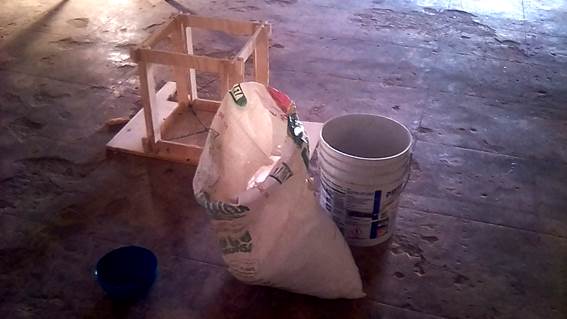
I want to cast a concrete plate for the cube I designed and built for the Week 8 / Computer controlled machining. Since the assignment design a 3d mold to cast part and I wanted to do something for my final project experimenting with the tings I already have. I split part of the assigment with the group assigment. There I designed a 3d mold and casted it with the different materials. And for the individual I took the chance to also cast but a fixed part and experiment with that to see if could work for my final project
1. I will make the model from the 3d model I did with the CNC machine. I want to make a concrete piece in it
2.
I
assembled the piece again, because it is modular and transportable to be built
on site
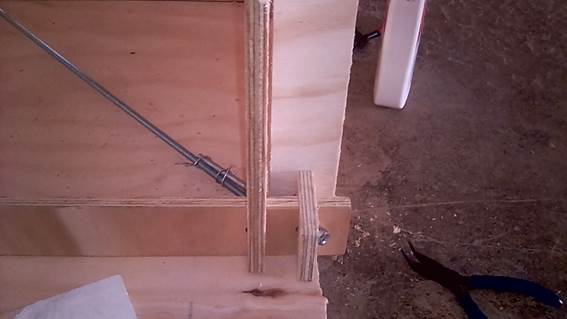
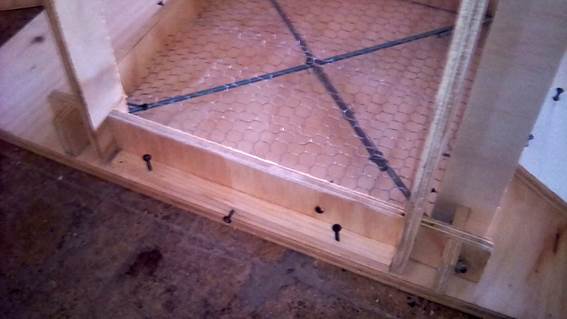
3.
I have
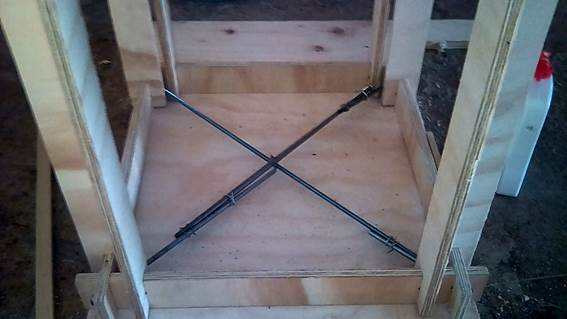
to reinforce it with iron the inside of the cavity that will be filled. I recycled
a couple of bars of the lab. To join the bars I used wired
4.
The
iron is adjusted with the help of a nut
5. Tomorrow I will mix the concrete and use foam instead of stones to make the piece lighter
6.
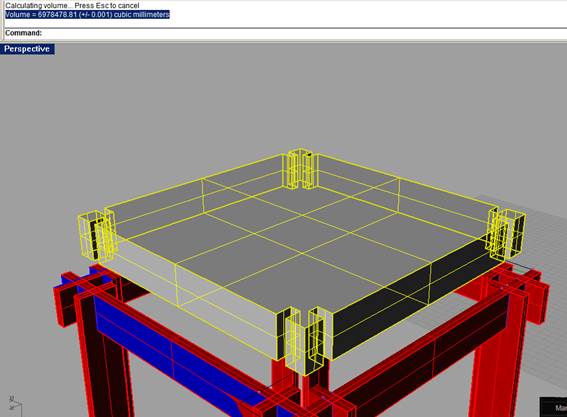
I have
to calculate the volume of the piece in order to calculate the rate of cement,
water and foam. The foam will be to make it lighter
6,978,478.81 (+/- 0.001) cubic millimeters
0,066m3
7. The proportion for the mix will be 1:4:2 (cement, sand, stones) I will add foam. (thanks Fabio Lopez for giving the proportions for the mix)
8.
I
fixed the piece to the wood bed
9.
I went
to the store to buy sand and stones, so I carried for 3 blocks 25 kgs a bag with
the two materials
10.
I
started mixing the components and poured it into the piece.
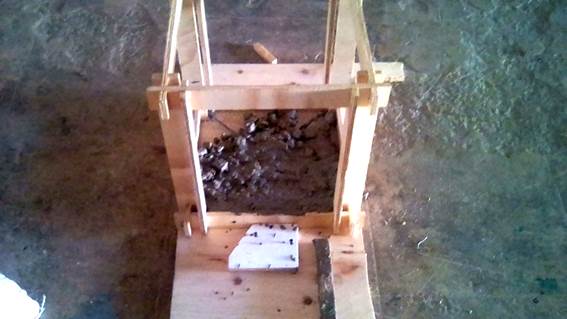
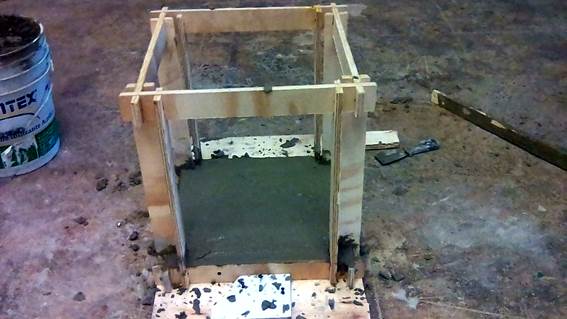
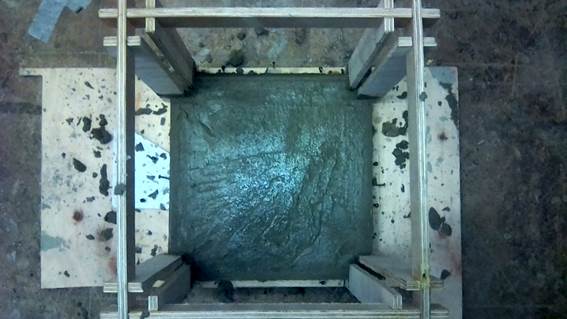
11. I will see tomorrow how the mix set
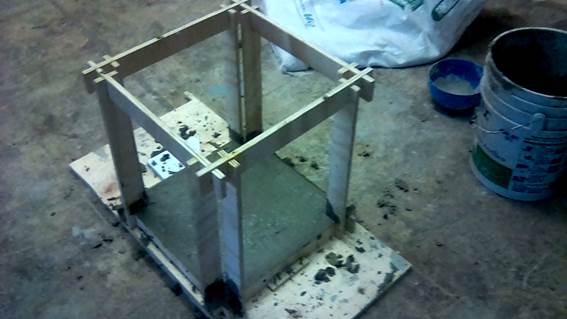
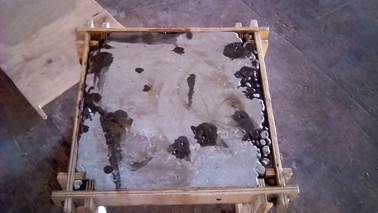
12. It worked. But when I turned the other way around, some parts weren´t cover. I was because I didn´t vibrate it. I know I have to vibrate concrete but I needed to leave the lab because they were closing and I preferred to finish instead of continuing the next day. Anyway I am happy with the experiment.
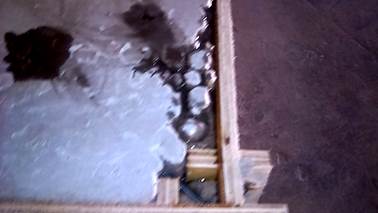
13.
I filled
the holes with resin, but in many parts leaked and also de concrete absorbed.
Just experimenting
Conclusions
· Learned how to use the MonoFab and shape a model with it
· Tested different materials for from the flexible to the stronger like concrete
· Each material has its own capacities and forms to be worked. I mean, some need more time than others for example, but the result is always different. We have to be clear what we want and for sure there will be a material for that
Download files / Descargar archivos