Week 9 / semana 9
read a microcontroller data sheet
compare the performance and development workflows for other architectures
individual assignment:
read a microcontroller data sheet
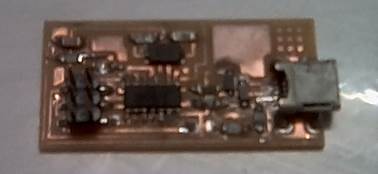
I am using a ATtiny44 for my blinking board as well as my ISP programmer
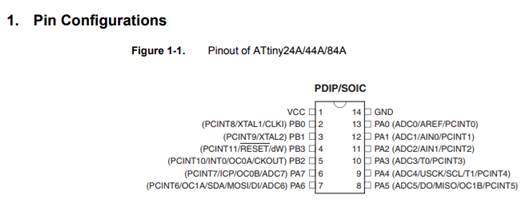
Things that called my attention in the general information:
– 128/256/512 Bytes of Internal SRAM
– Data Retention: 20 years at 85°C / 100 years at 25°C
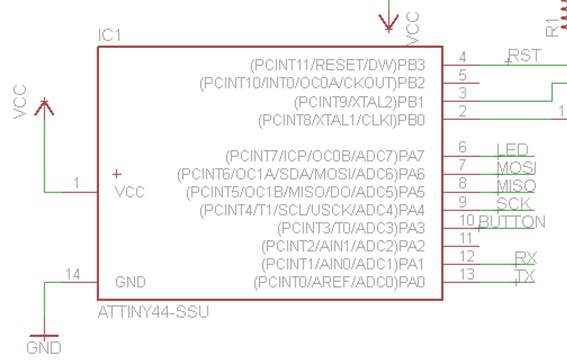
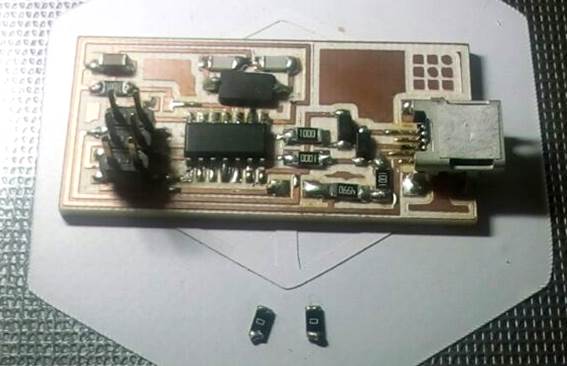
My board is connected schematically like this
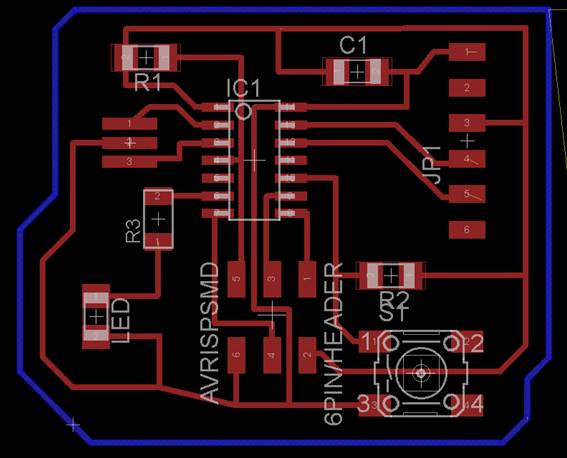
And on the board the traces are linked like this
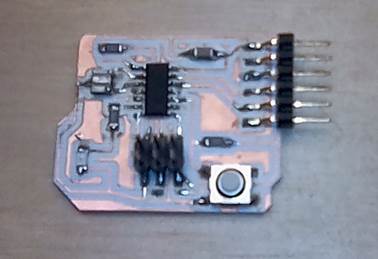
This is how I connected my pins and their configuration. On red is where I connected the LED, and on green the button.
|
name |
pin |
type |
description |
use |
|
VCC |
1 |
supply voltage |
||
|
GND |
14 |
ground |
||
|
PB0 |
2 |
Port B |
PCINT8/XTAL1/CLKI |
XTAL 1 (1) |
|
PB1 |
3 |
PCINT9/XTAL2 |
XTAL 1 (3) |
|
|
PB2 |
5 |
PCINT10/INT0/OC0A/CKOUT |
||
|
PB3 |
4 |
PCINT11/RESET/DW |
RESET |
|
|
PA7 |
6 |
Port A |
PCINT7/ICP/OC0B/ADC7 |
LED |
|
PA6 |
7 |
PCINT6/OC1A/SDA/MOSI/ADC6 |
MOSI |
|
|
PA5 |
8 |
PCINT5/OC1B/MISO/DO/ADC5 |
MISO |
|
|
PA4 |
9 |
PCINT4/T1/SCL/USCK/ADC4 |
SCK |
|
|
PA3 |
10 |
PCINT3/T0/ADC3 |
BUTTON |
|
|
PA2 |
11 |
PCINT2/AIN1/ADC2 |
||
|
PA1 |
12 |
PCINT1/AIN0/ADC1 |
RX |
|
|
PA0 |
13 |
PCINT0/AREF/ADC0 |
TX |
|
Types of ports

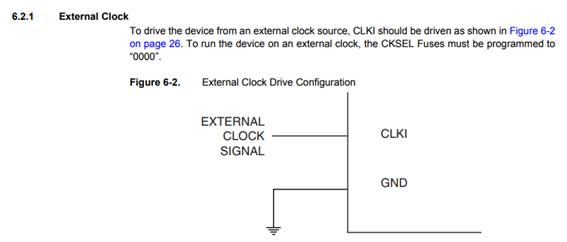
The external clock is the XTAL. It is connected to pin 2 and VCC
program your board to
do something, with as many different programming languages and programming
environments as possible
first try
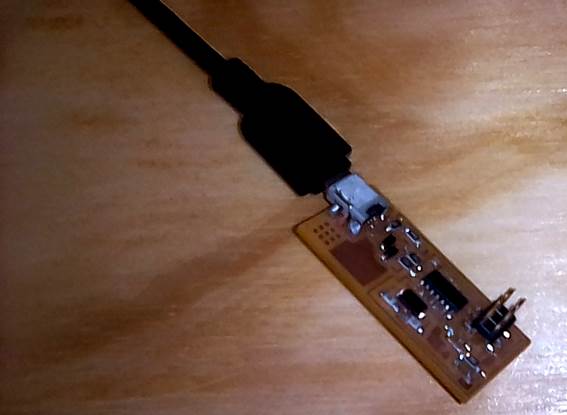
1. Remove the 0 ohms resistance from the fabISP I did before in order to make it a programmer to program my board later
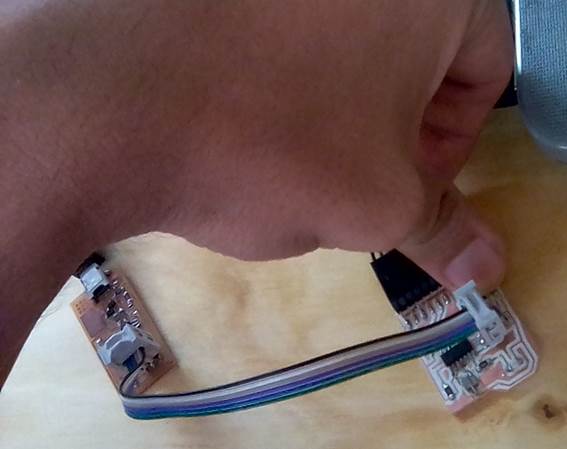
2. Before and after
3. Connected both between them and to the computer, been careful that the ground (black cable) was connected to the ground pin in both PCB
4. My computer recognized the FabISP programmer. The other one not, because has nothing loaded yet.
5. I followed this tutorial from Irina Chernyakova
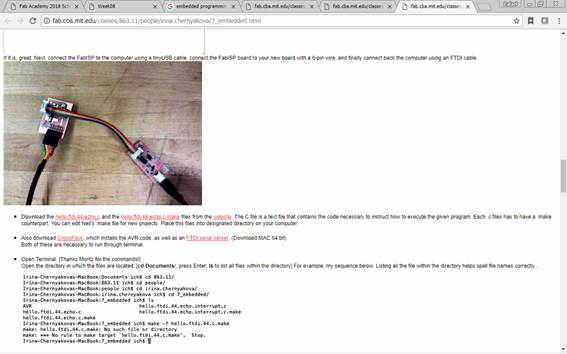
6. Download the hello.ftdi.44.echo.c and the hello.ftdi.44.echo.c.make files from the website. The C file is a text file that contains the code necessary to instruct how to execute the given program. Each .c files has to have a .make counterpart. You can edit Neil's .make file for new projects. Place this files into designated directory on your computer
7. Just click download as

I put it in the assignment folder, but also a copy on the a firmware folder I
copied in the desktop
Note: I think there is something wrong with
my FabIsp programmer because my computer is always telling that there is a new
device that is not recognizable. Suspicious. So I connected another FabISP and
the message is not appearing anymore.
When I was testing the voltimeter with my FabIsp a couple of weeks ago, I
realized with help of a friend that probably one of the components was not well
connected or burned. I will check it later. For now I am going to work with the
other FabISP.
8. Also download CrossPack, which installs the AVR code; as well as an FTDI serial server. Both of these are necessary to run through terminal. But I think this is more for mac (apple)
9. FTDI serial server (USB)
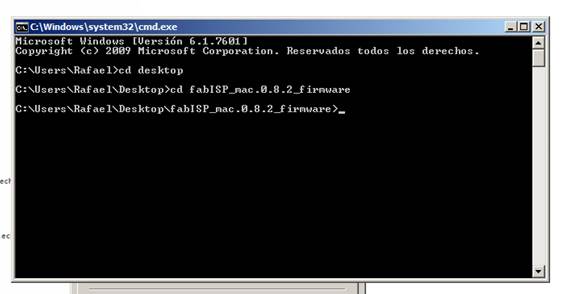
10. I went to another tutorial that I think also works for windows. This tutorial describes how to use command line utilities to install and run hello.ftdi.44.echo.c on a basic board used in 863.13

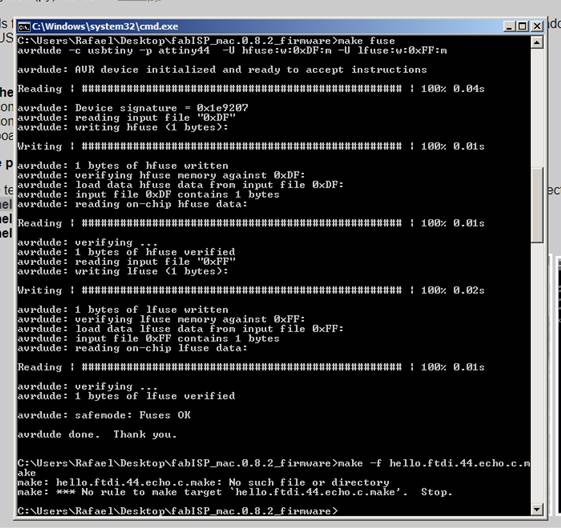
11. Use your terminal to CD into the directory containing the hello.ftdi.44.echo files
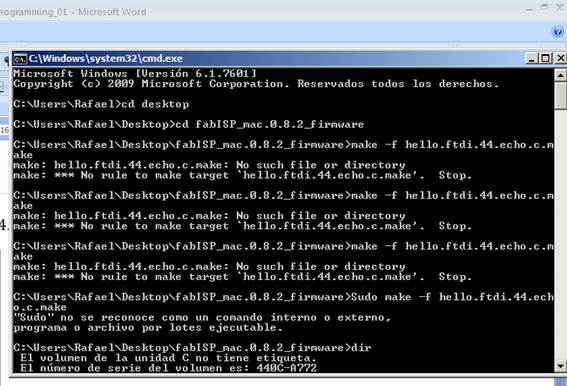
12. I wrote the command
make -f hello.ftdi.44.echo.c.make
but does not work
Second try
1.
I went
to another page
http://archive.fabacademy.org/2016/fablabamsterdam/students/21/08EmbeddedProgramming.html
2.
I
typed on the cmd:
avrdude –c usbtiny –p t44
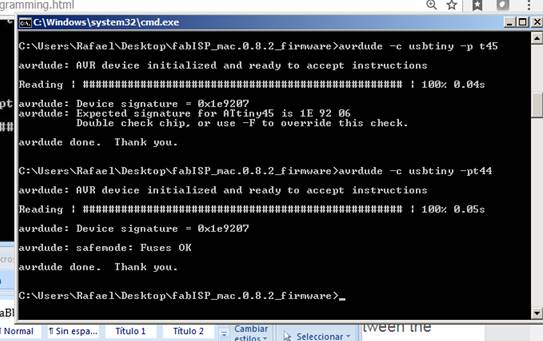
3. After trying many ways. No one was working
Third try
4. Last try
5. Cd to the folder with the firmware
6. Make clean
7. Make hex
8. Make fuse
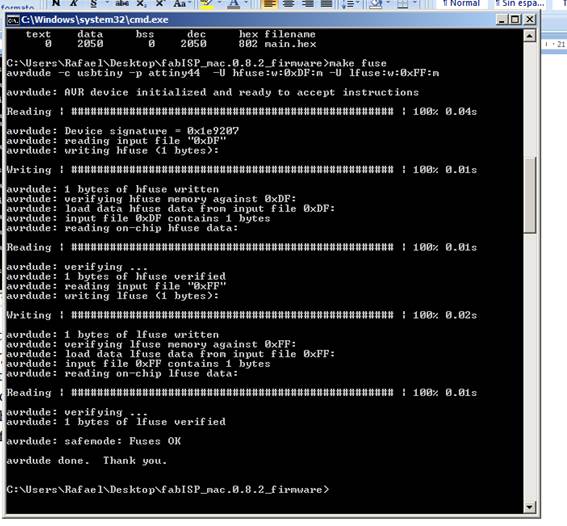
9. And again, did not work
Fourth try
10. Will try with arduino
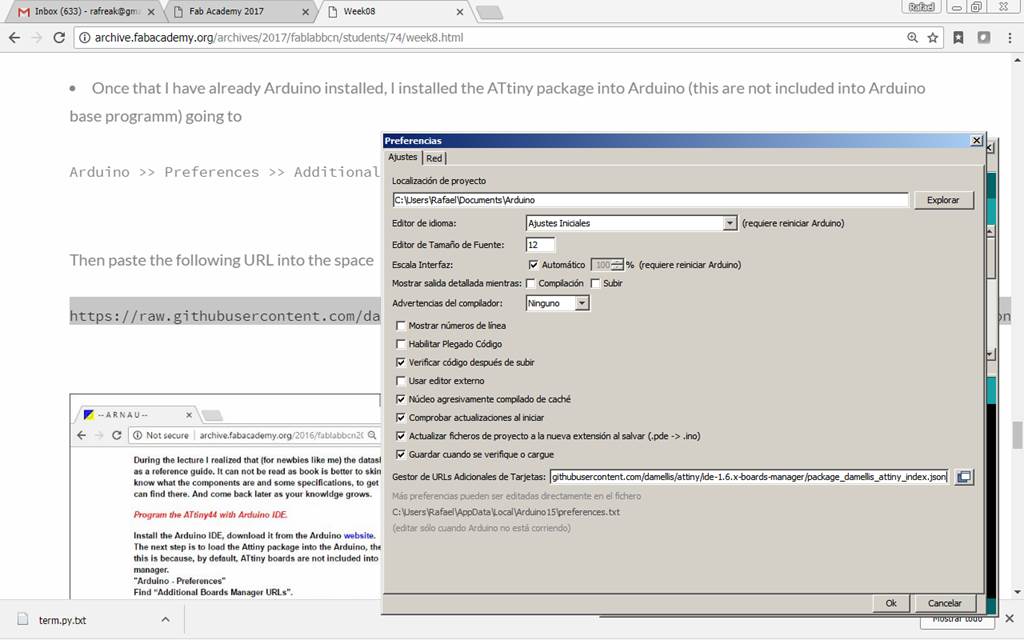
12. installed the ATtiny package into Arduino (this are not included into Arduino base programm) going to Arduino >> Preferences >> Additional Boards Manager URLs
13.
Then
paste the following URL into the space
https://raw.githubusercontent.com/damellis/attiny/ide-1.6.x-boards-manager/package_damellis_attiny_index.json
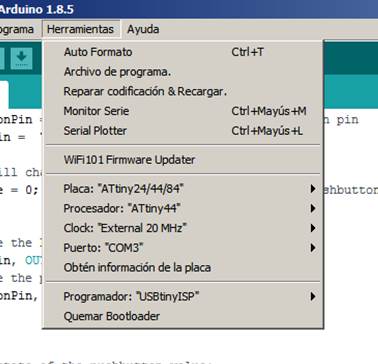
14. Tools >> Board >> Board Manager menu

15. Tools >> Boards >> Select ATtiny
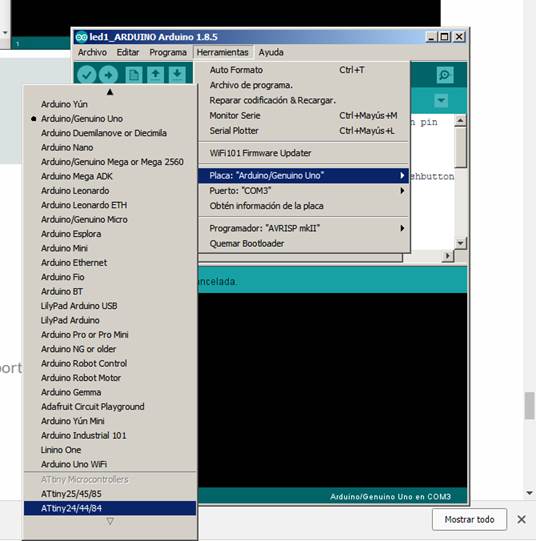
16. Tools >> Boards >> Select ATtiny
17. Tools >> Processor >> Select ATtiny44
18. Tools >> Clock >> Select 20MHz (external)
19. Tools >> Programmer >> USBtinyISP
20. Tools >> Burn Bootloader
21. Didn´t work
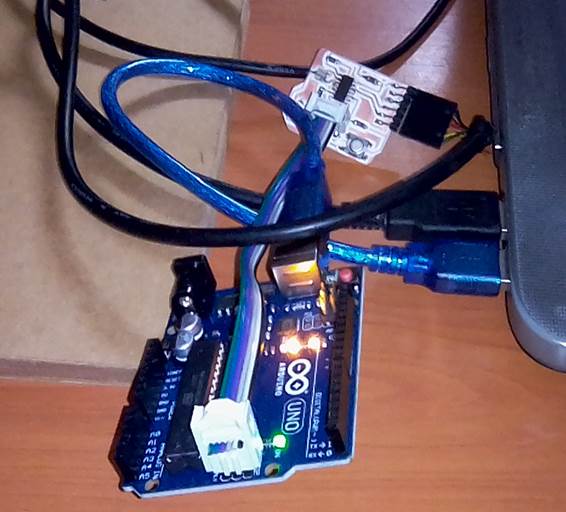
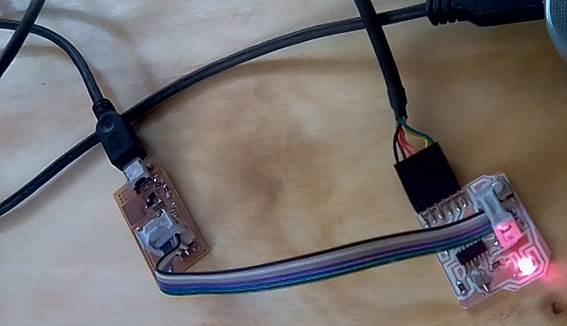
22. How it is connected
Fifth try
23. Again…
24. I changed the FTDI cable
25. Connected the fabISP and made sure the computer was recognizing the device

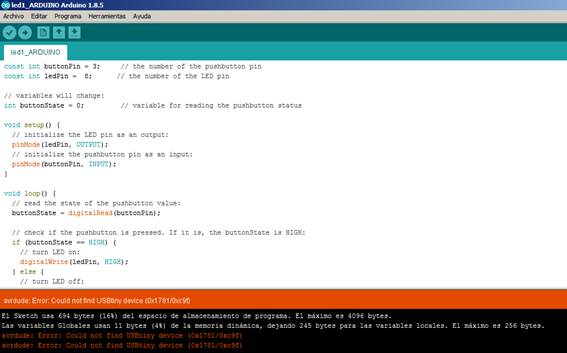
26. Opened arduino with the file I already created for making the led blink
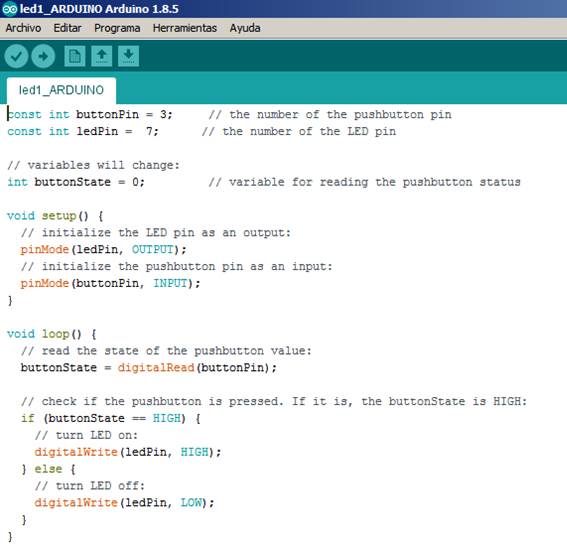
27. Checked that the configuration was right
28. Connect the FTDI cable to the PCB with the LED, also connect the ribbon cable between the FabIsp and the LedPCB
29. Click on Bur Bootloader of Quemar Bootloader
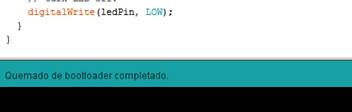
30. Pressed upload
31. And…
32. Finally it worked!!! Video
group assignment:
compare the performance and development workflows for other architectures
Download files / Descargar archivos