COMPUTER - AIDED DESIGN
THIS WEEK WE LEARNED 2D AND 3D TOOLS
BACKGROUND.
This week we learned from 2D and 3D tools and other designs programs that will serve for our projects in the course and professional life.

2D DESIGN
A raster graphics editor is a computer program that allows users to create and edit images interactively on the computer screen and save them in one of many "bitmap" or "raster" formats such as JPEG, PNG, GIF and TIFF. Vector graphics editors are often contrasted with raster graphics editors, yet their capabilities complement each other. The technical difference between vector and raster editors stem from the difference between vector and raster images. Vector graphics are created mathematically, using geometric formulas. Each element is created and manipulated numerically; essentially using Cartesian coordinates for the placement of key points, and then a mathematical algorithm to connect the dots and define the colors.
Raster images include digital photos. A raster image is made up of rows and columns of dots, called pixels, and is generally more photo-realistic.
3D DESIGN
3D design is the process of using software to create a mathematical representation of a 3-dimensional object or shape. The created object is called a 3D model and these 3-dimensional models are used for computer-generated (CG) design. 3D design is used in a variety of industries to help artists shape, communicate, document, analyze, and share their ideas.
Previously I had knowledge of corel draw, photoshop, autocad and cinema 4D. However, in parametric design programs my contact has been recent. With these programs, numerical control machinery and 3d printers, the advanced design is enhanced.
Model (raster, vector, 2D, 3D, render, animate, simulate, ...) a possible final project,
ASSIGNMENTS
and post it on your class page
COREL DRAW
Corel Draw offers a seamless design experience for graphics, layout, illustration, photo editing, tracing, web images, print projects, art, typography, and more
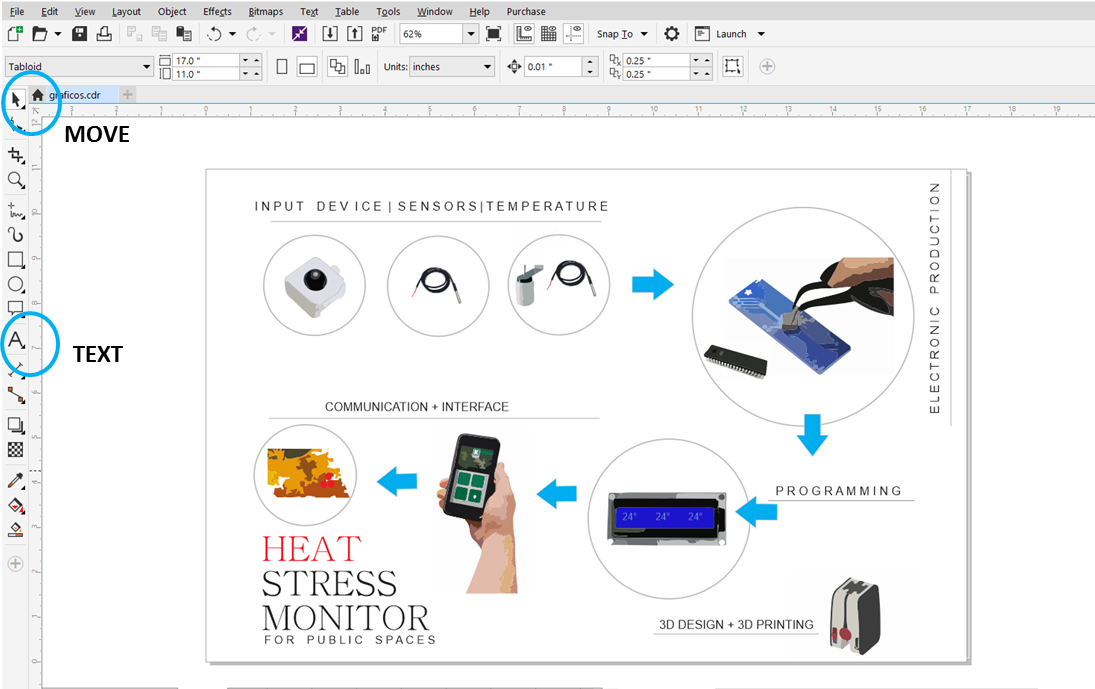
I decided to make vectors to illustrate the idea of my final project.
Step 1: Open the "corel draw" program. Define the size of the work area (tabloid) and import the images to vectorize.
Step 2: Right click on the image and select the option "Quick trace"
Step 3: Repeat the procedure with the necessary images.


FUSION 360
The second exploration was Fusion 360. Fusion 360TM is the first 3D CAD, CAM, and CAE tool of its kind. It connects your entire product development process in a single cloud-based platform that works on both Mac and PC..
I had not worked on it, but on other CAD platforms, for which I was made a friendly and versatile platform. As in all CAD, draw the plant and everything will be extruded. With some video tutorials from the OFFICIAL page it was enough to model.

I decided to make one of the parts of my final project that required 3d printing. It is a small container of liquid for the wet bulb temperature sensor.The first was to draw concentric circles and similarly circular perforations. The program really made it easy for me. The modeling was very similar to other Autodesk programs such as 3dMax for example. In the next video is the process step by step.
THINKERCAD
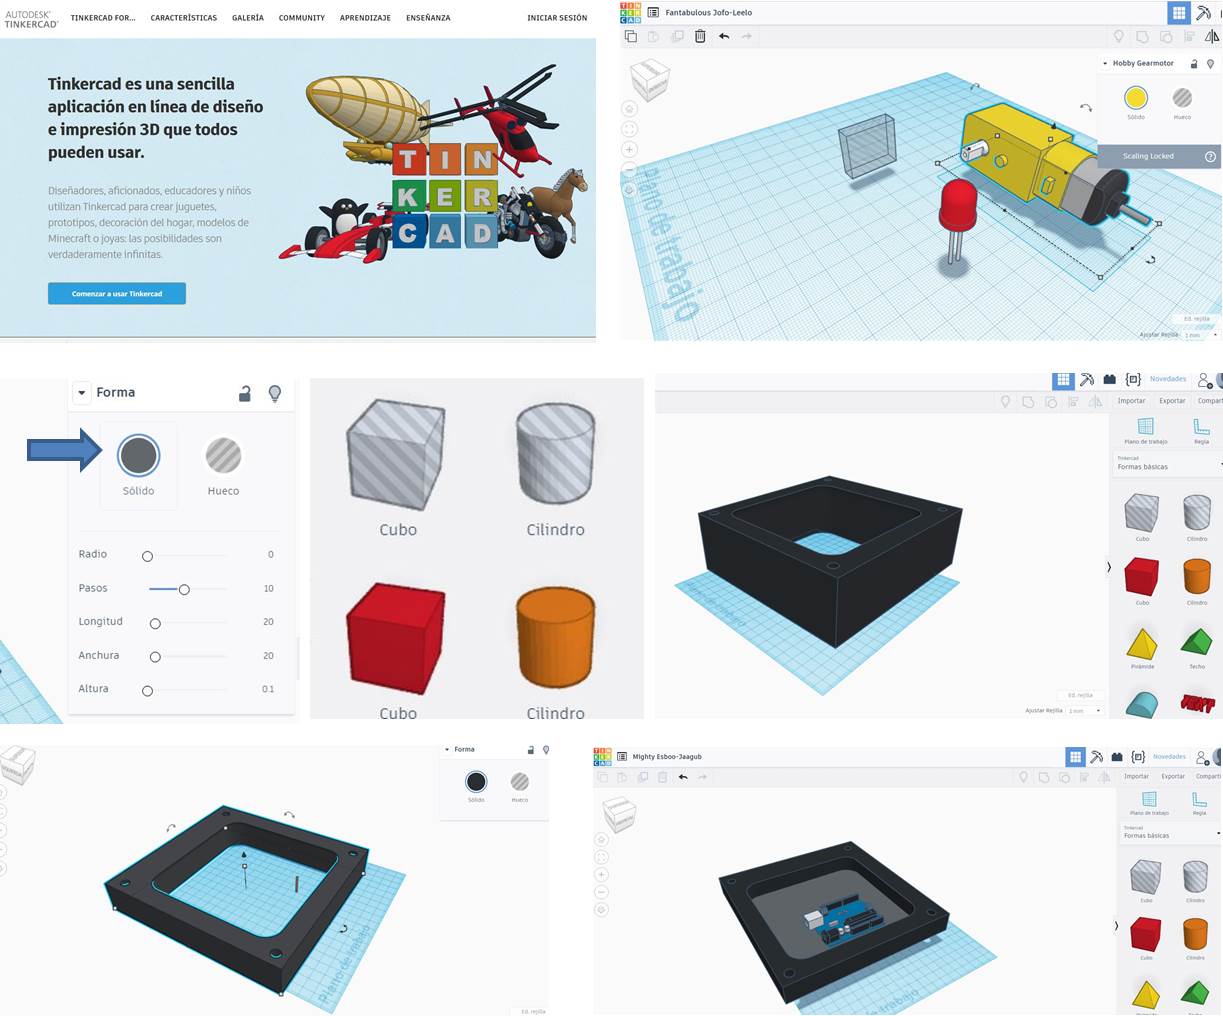
Tinkercad is an easy-to-use tool for creating digital designs that are ready to be 3D printed into physical objects. Users are guided through the 3D design process through 'Lessons', which teach the basics before moving on to more complex modeling techniques. First I decided to explore thinkercad. I had never used this program, however, I had seen its versatility in fablab's children's programs. I registered and logged in. The steps to follow were very intuitive. I did not make any specific model. I was preferred to explore the environment with the basic commands. I caught my attention from the variety of library of accessories and electronic components.
