
It is important to improve the design skills, to know many alternatives for computer-aided design, to know the power of the programs so that we look for related information and we can use the program without any problem.
The reason of this week is this, the research and development of some 2D and 3D CAD design softwares to help us when we need to design.
A sketch can be represented by a drawing, usually on a piece of paper, using a pencil, the challenge begins when we move the design from the paper to the CAD design programs.
I have some design skills
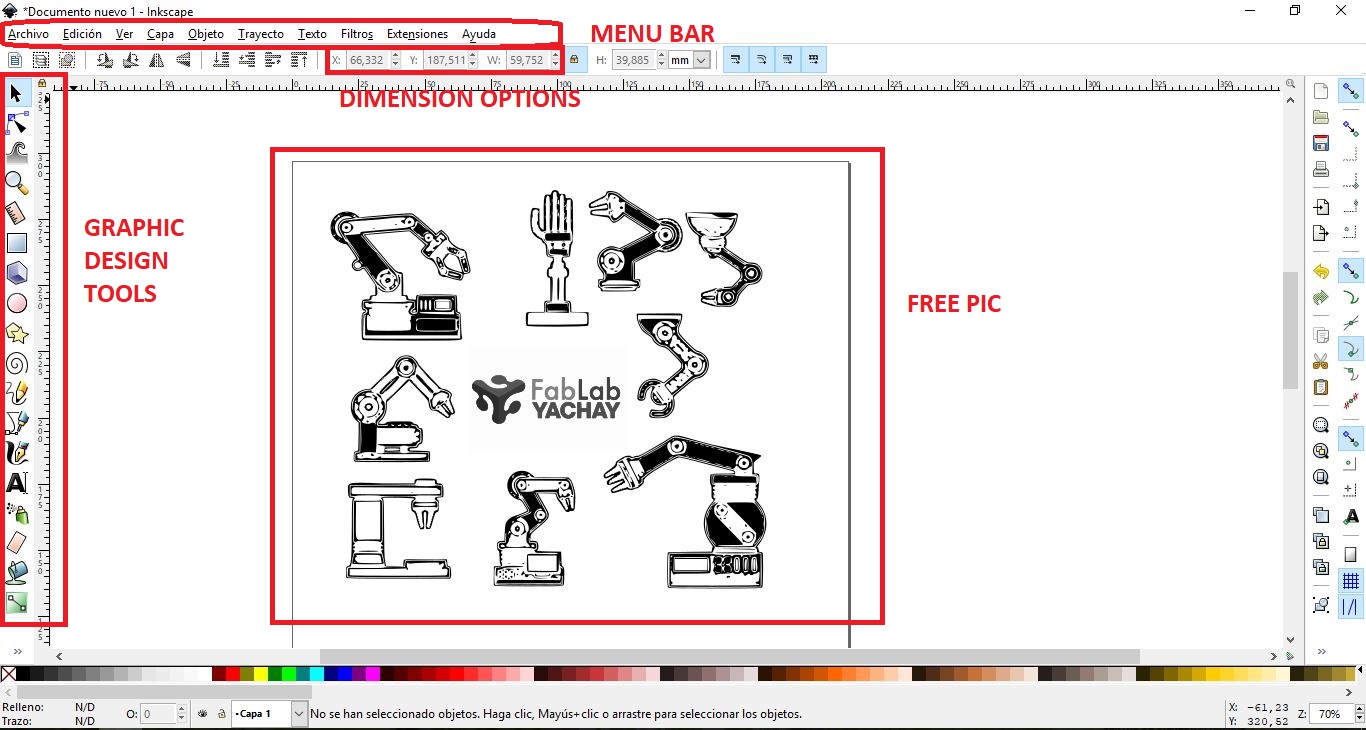
I think Inkscape is the best way to design vectors for gaphic design, it has a confusing interface when beginning, but if you practice it would be easy to use. This software can be download for free and it´s accessible from all the platforms.
You have some interesting extensions availables
You can save your projects in multiples formats
It is a strong tool to work with vectors
It has an easy design environment
The software has lot of tools for drawing (simple and complex)
I can not open multiple pages.
It is a little complex to use the program without prior knowledge.
There is no option to change units globally.
I recommend this software to use in 2D designs, preparing your vectors to cut in laser, vinyl, machining due to any machines specifications.

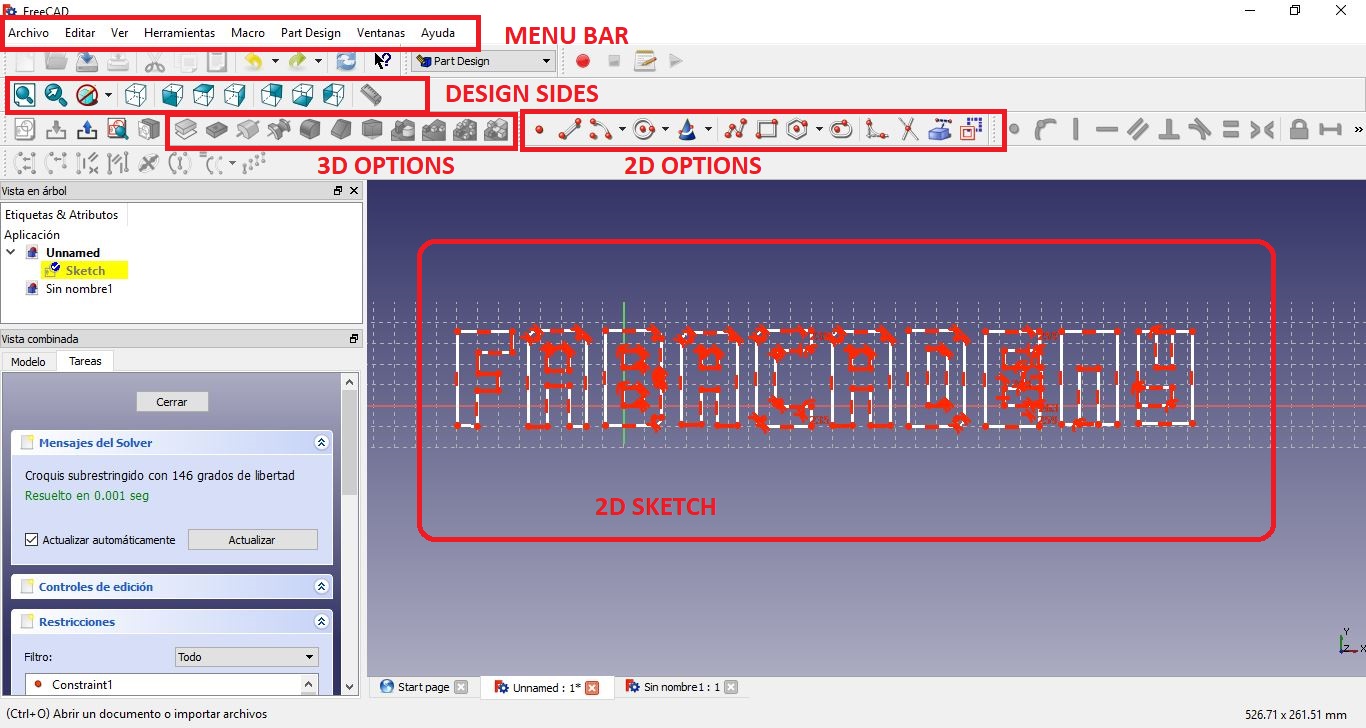
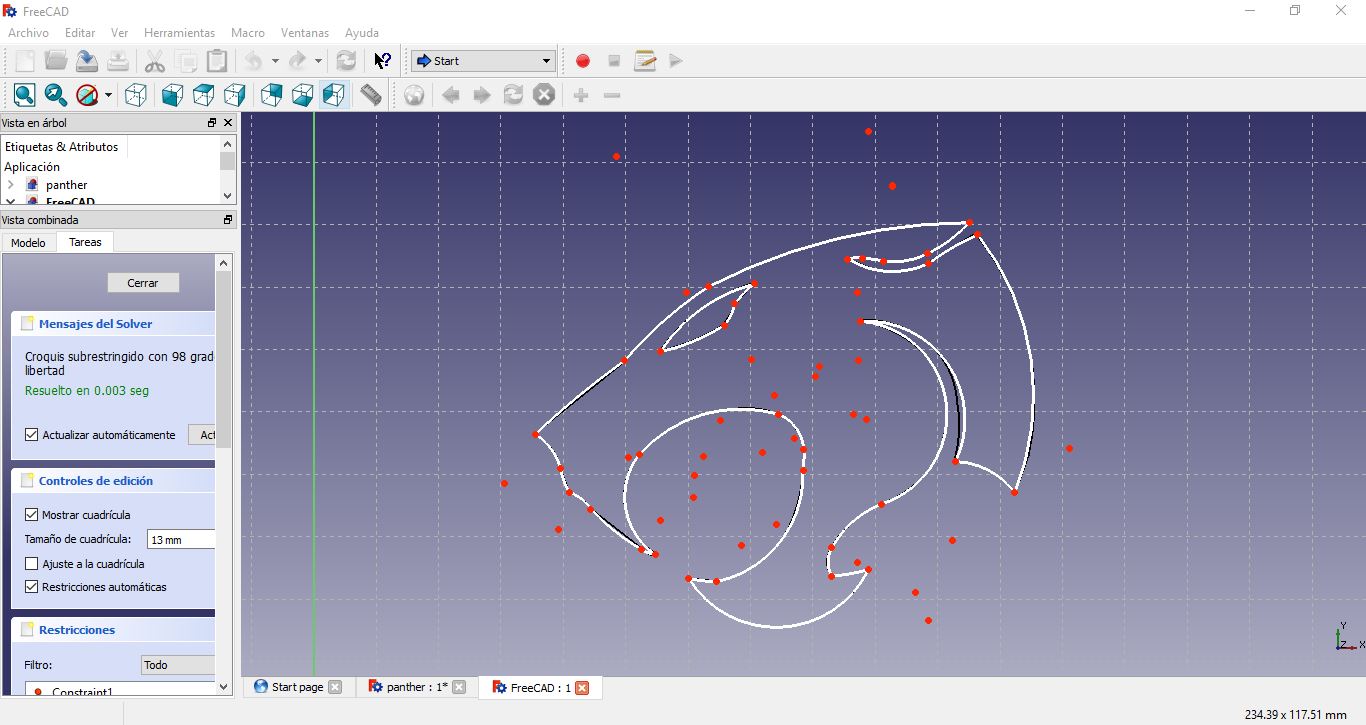
Freecad is a strong free software that lets us design in 2D, 3D, mesh, for robotics design, architecture, naval, etc. At beggining it is difficult to use all the options, you must follow some tutorials and prepare to use the program like a pro.
Open source and free.
Export to STL files that allows its manufacture with 3D printers.
It has some options to design, architecture, 2D, 3D, naval,mesh, etc
At the beginning you have some difficulty using the program
Can´t have text on the drawings
Complicated to convert 2D to 3D
Projects need to save often.
Waiting for improvements in some functions.

Adobe Illustrator is a computer application dedicated to vector drawing and design of graphic elements for almost any type of media and device, and can be used in editorial design, professional drawing, web layout, mobile graphics, web interfaces, or film designs.
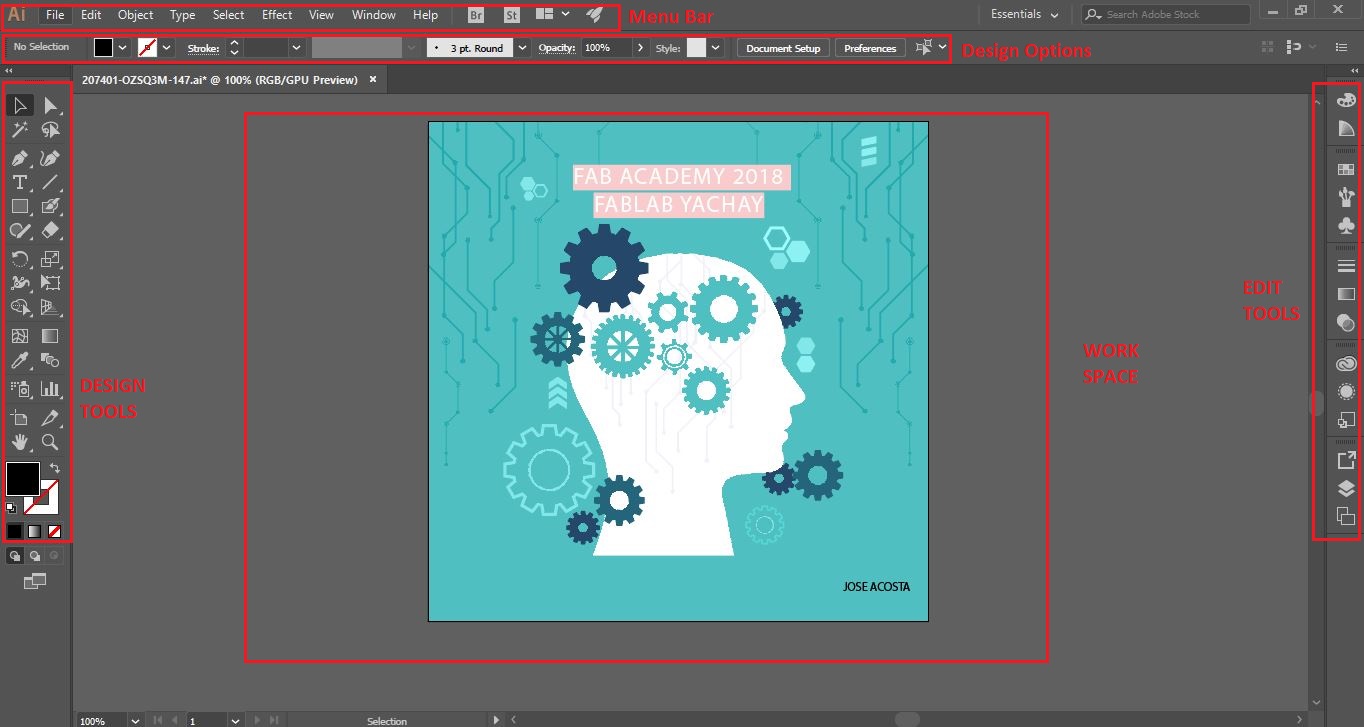
You can create designs from the beginning or simply edit the ones you have already been working with
The software allows web design
Compatible with so many image files
Tons of web support, tutorials and learning material on the web
It's a bit difficult to new users
Easy to learn
There are a lot of tools, sometimes the user need to follow a tutorial to use
It is slow when running on older machines

This software is an integrated product design, engineering and manufacturing solution that helps faster and more efficiently. This software integrates CAD/CAM/CAE process with smarter decisions.
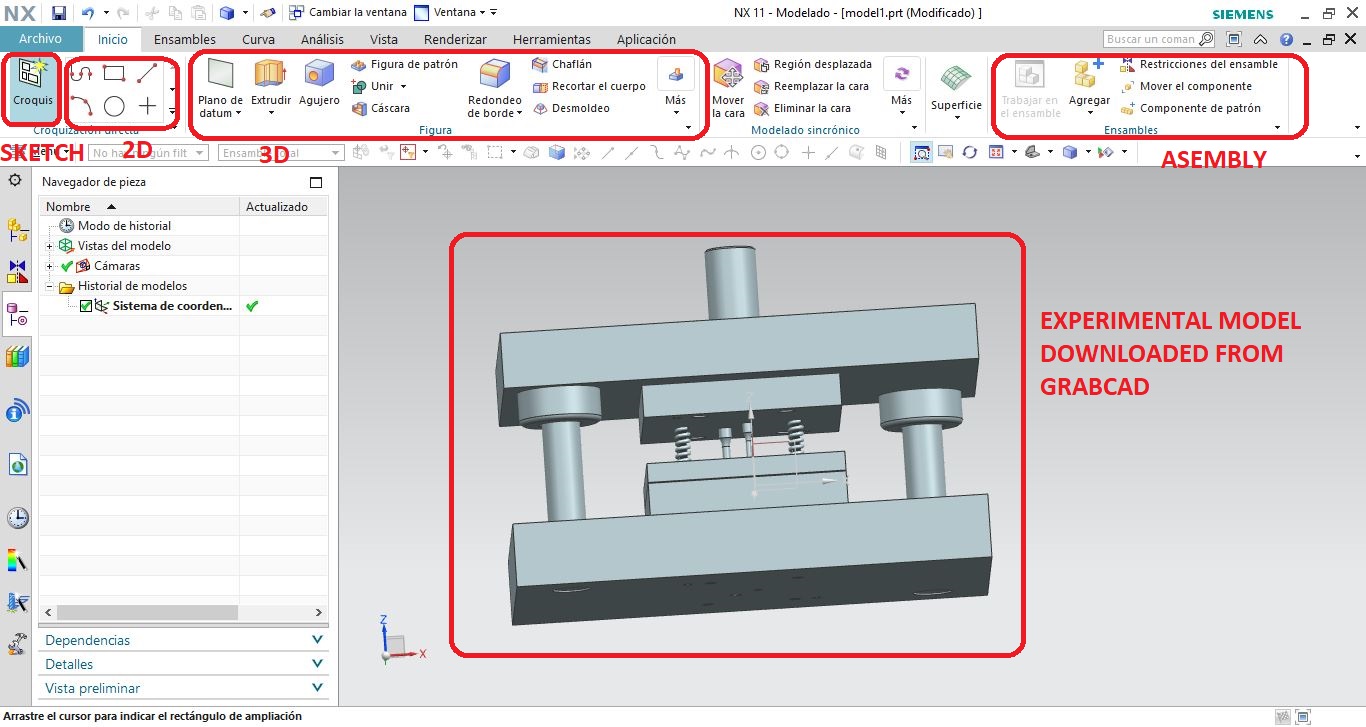
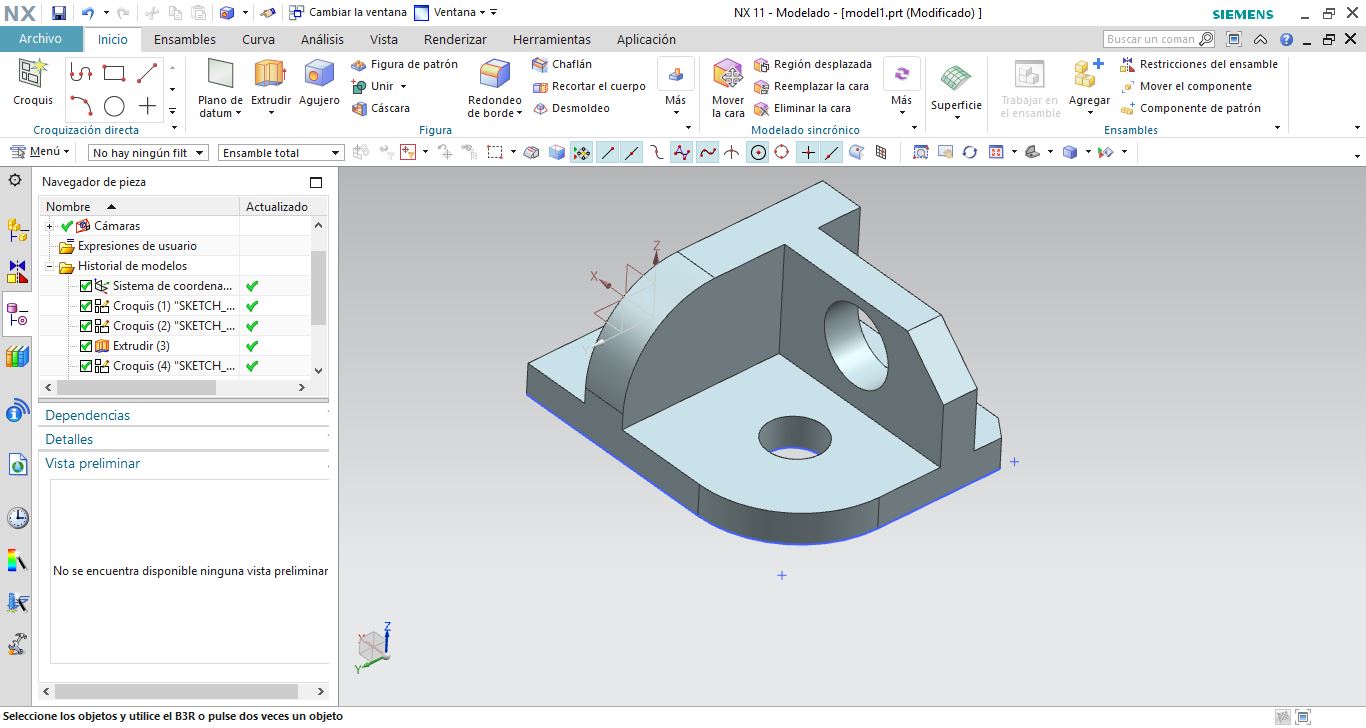
It's one of the easiest design softwares that I have used for designing models and molds
has a lot of resources provided by Siemens
You can use your designs and interact and simulate with siemens automation systems
The price of the software is too expensive
Processive time to perform activities is long

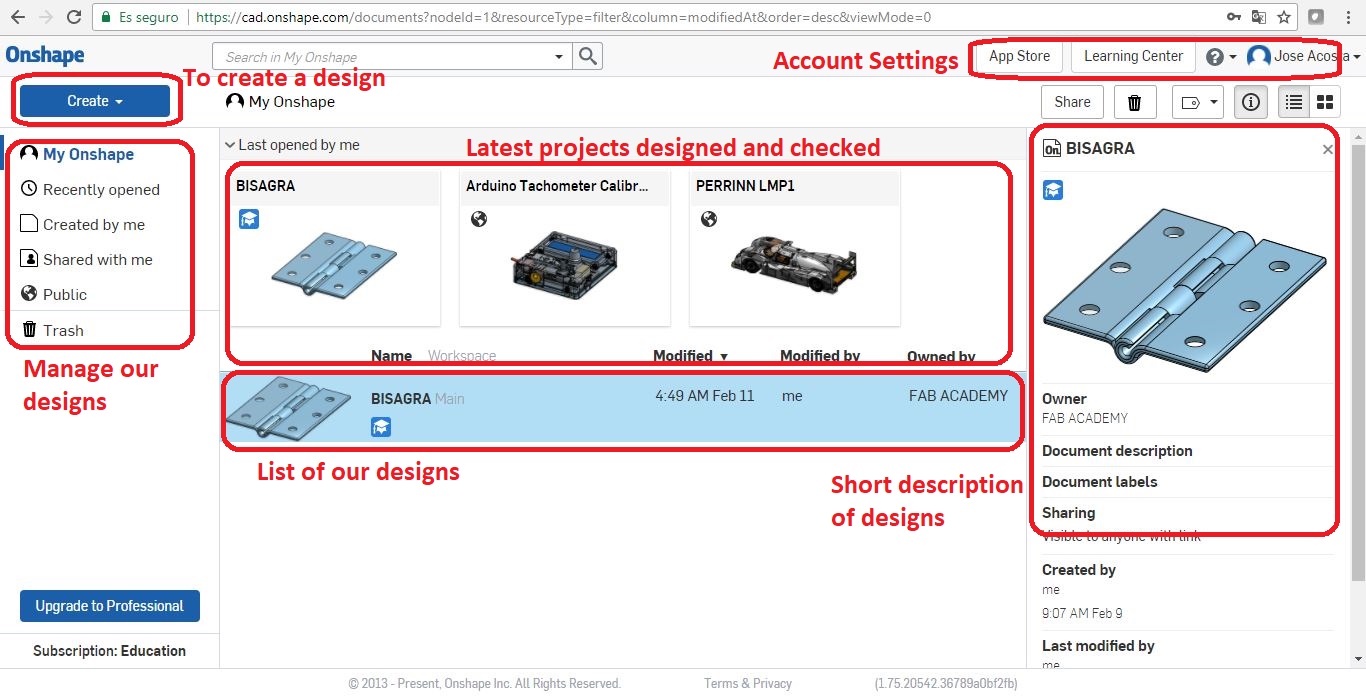
Onshape is a cloud 3D CAD system that lets everyone on a design team work together using any web browser, phone, or tablet.
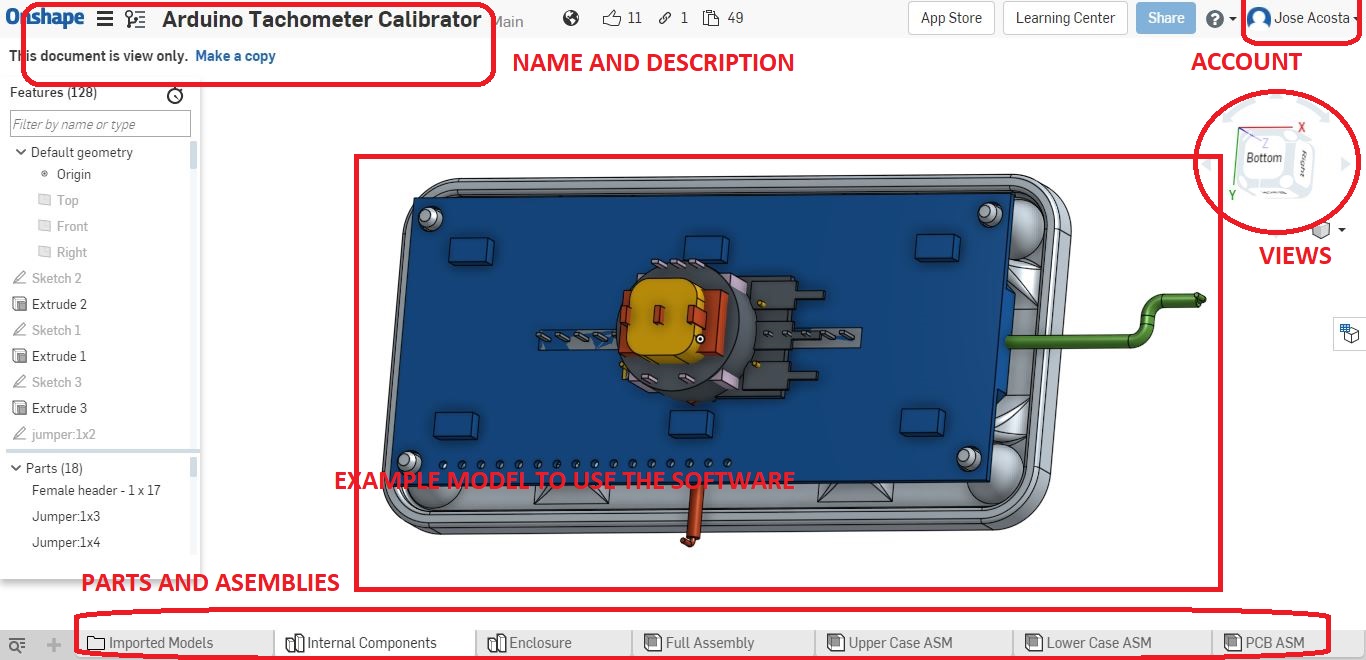
fast, stable, and provides full parametric modelling in a browser
Allows to have an ordered repository of designs
There are no duplicate copies of files, becouse it has an online repository to share your designs
Workflow with other teammates is fantastic
Depend of your internet connection
Models will take longer to load than expected
There is not people using web plattform

SolidWorks is a software CAD (computer-aided design) for mechanical modeling in 2D and 3D, which allows you to model parts, assemblies, sheet metal and obtain the necessary technical drawings from them.
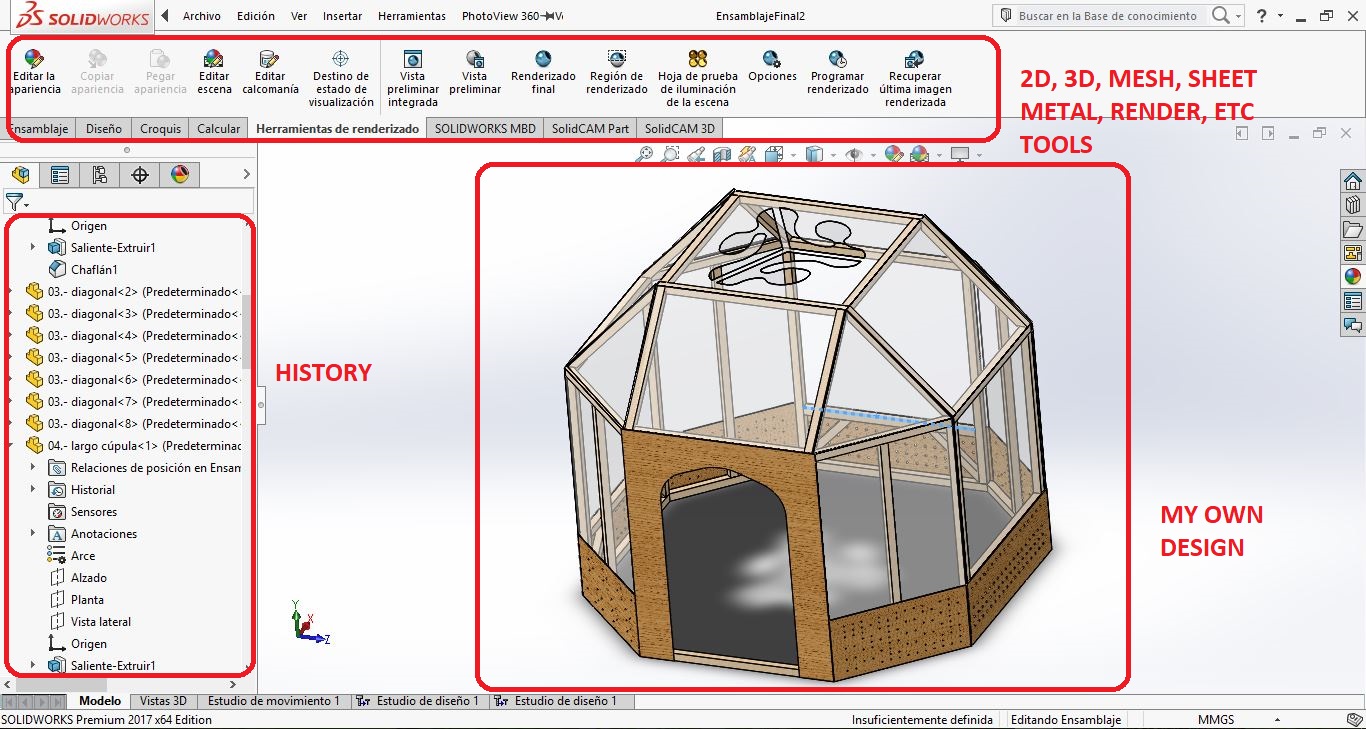
Easy to use, simple options
Cheap and vary reliable for academics and industry
Toolbar is well oriented and simple, and explains abour your
I like the overall functionality and compatibility of the software with other modeling programs
Simulations in SolidWorks are extremely advanced
A complex design needs the best resources of the machine
The memory requirements can sometimes bog down the processor.

Working in AutoCAD is more feasible and practical than if it were to be done by hand. It saves time and is simpler.
It allows exchanging information not only by paper, but by means of files, and this represents an improvement in speed and effectiveness when interpreting designs.
It has been linked to multiple platforms, with the benefit of being able to export and import files of all kinds.
It has tools so that the paper document is perfect, both in terms of aesthetics and information, since the finishing and presentation of a project or plan is important.
It is possible to draw both in 3D and in 2D: from the 2D drawing in plan, there is the possibility of generating the 3D model in a much shorter time than it is used to draw an isometric or a perspective by hand.
It has become a standard in computer design because it is very versatile, being able to expand the base program through programming.
Less work time: productivity when drawing. With tools for project management you can share information effectively and immediately.
It is used in many branches, in which stand out: architecture, civil industry, electronics, electromechanics, chemistry, oil, and technology, etc.
The program has a high cost, due to its license.
Knowing how to fully use the software requires a lot of time since there are many functions, and even that they are of little application, since they are very specific.
It requires a powerful computer to work with processing speed, and a high space on the hard drive.
To complete the week I have designed some models in 2D and 3D to improve my skills in some softwares.
I will explain the way how the designs the following designs in each selected software
SolidWorks is a mechanical design program in 3D with which you can create 3D geometry using parametric solids, the application is focused on product design, mechanical design, assemblies, and workshop drawings. SolidWorks designs in a way that leaves a history of operations so you can refer to them at any time.
SolidWorks has solutions for the industries of plastics, sheet metal, electrical, simulation and analysis by finite elements, the program includes an intelligent module for the detection of design errors and modules for sustainable design.
I like solidworks due to it has friendly user interface, has a lot of powerfull tools and has an efficient design environment to develop in 2D, 3D designs and rendering models, i will show the procedure to design an example.
To improve your skills using this software I recommend to find tutorials on Youtube, seach some interesting Moocs in Udemy or find some fanmode tutorials on the web.


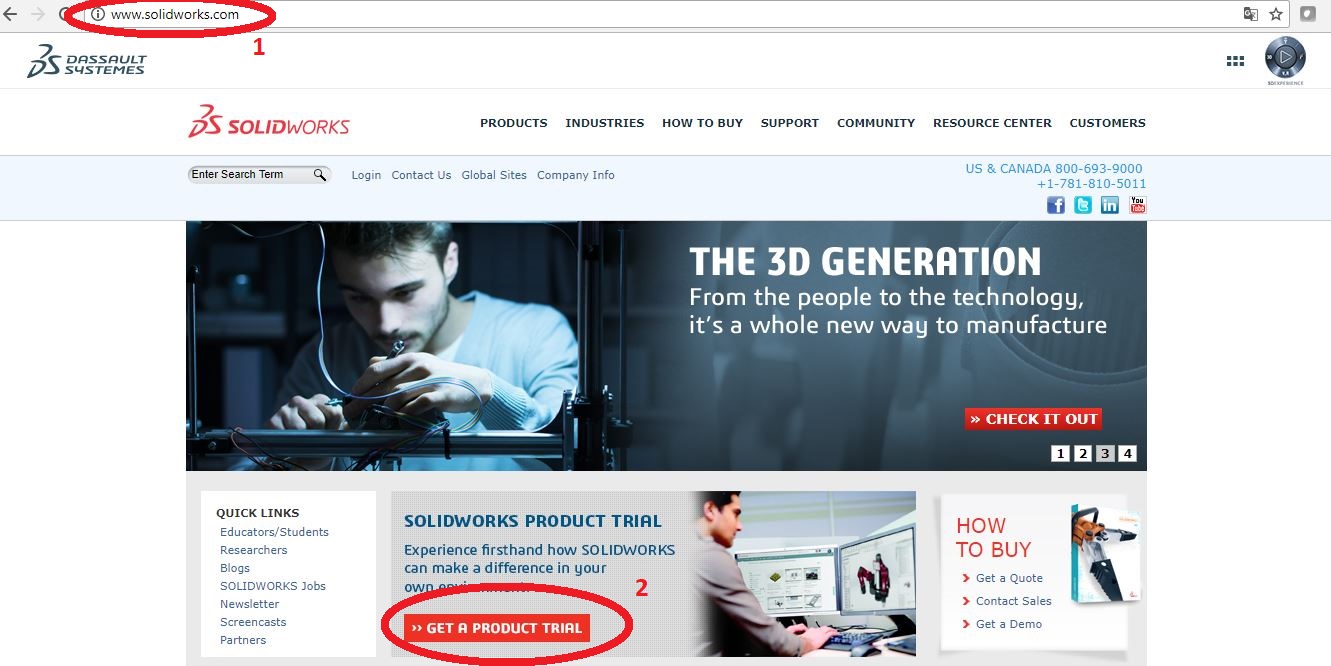
To start designing in SolidWorks it's important to download and install the software on your computer, you can do this activity, first going to their webpage and downloaging a trial evaluating version to test the software service.
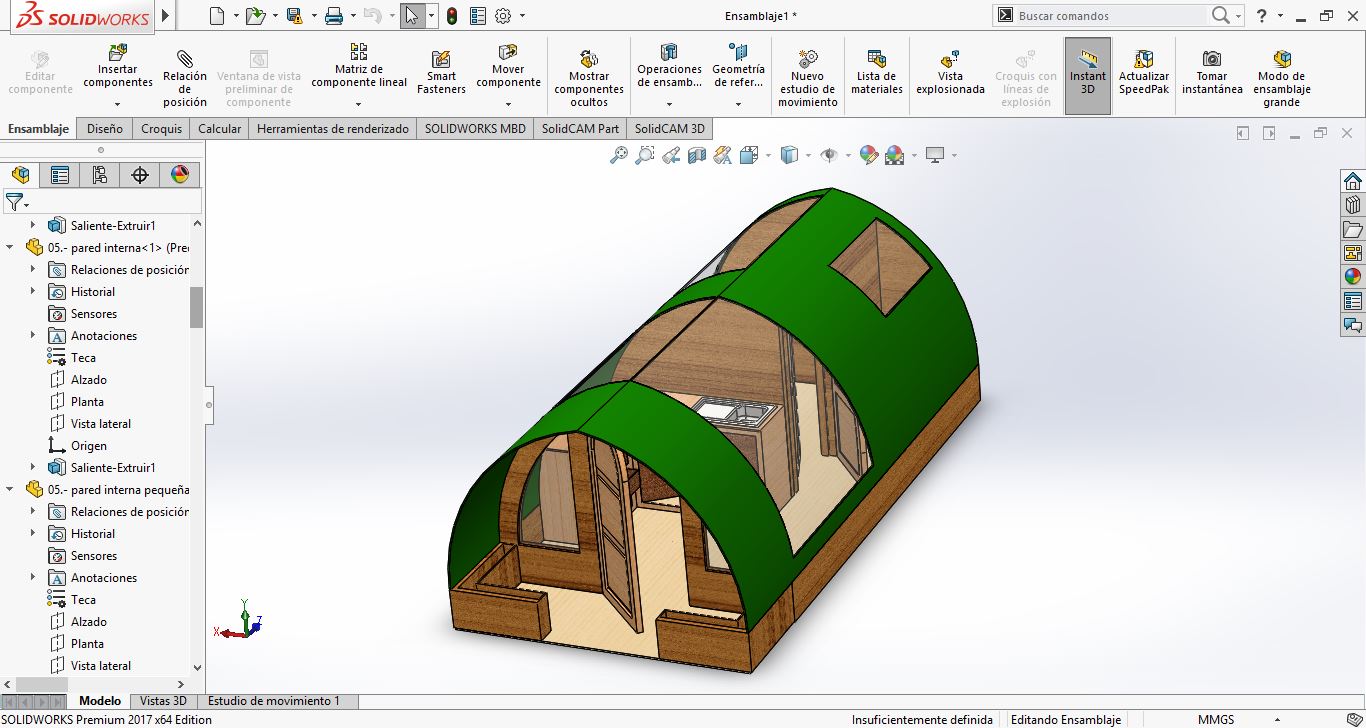
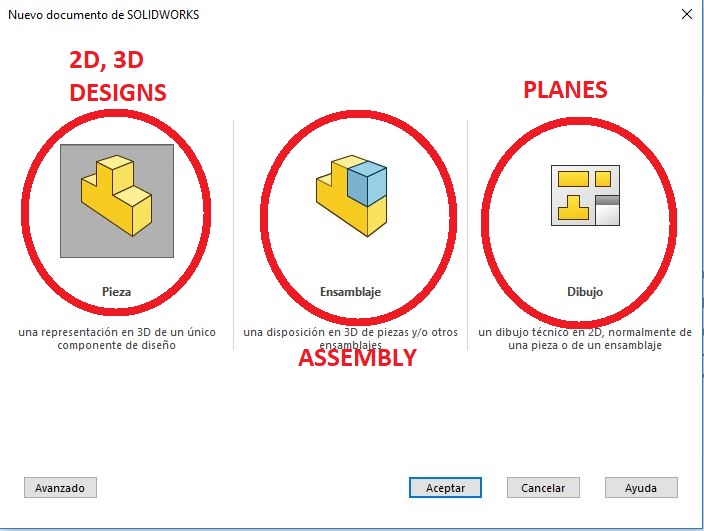
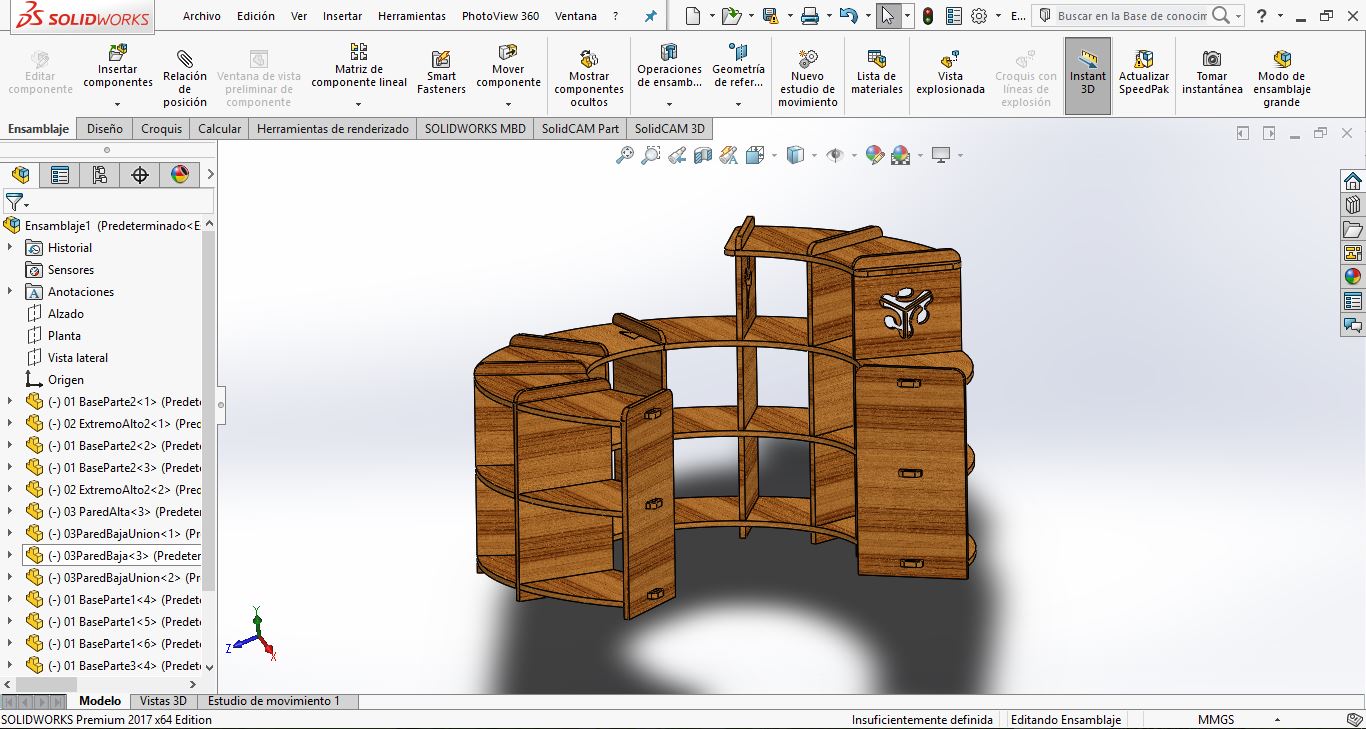
To develop the shown designs (furniture, little greenhouse, eco home and the milk cup), let's open the software, and create a sketch. e could have used pencil and paper to sketch previusly designs, in the software I'll starting designing the planes in 2D, this activity will depend on the skills, creativity and knowledge of the designer using the software.
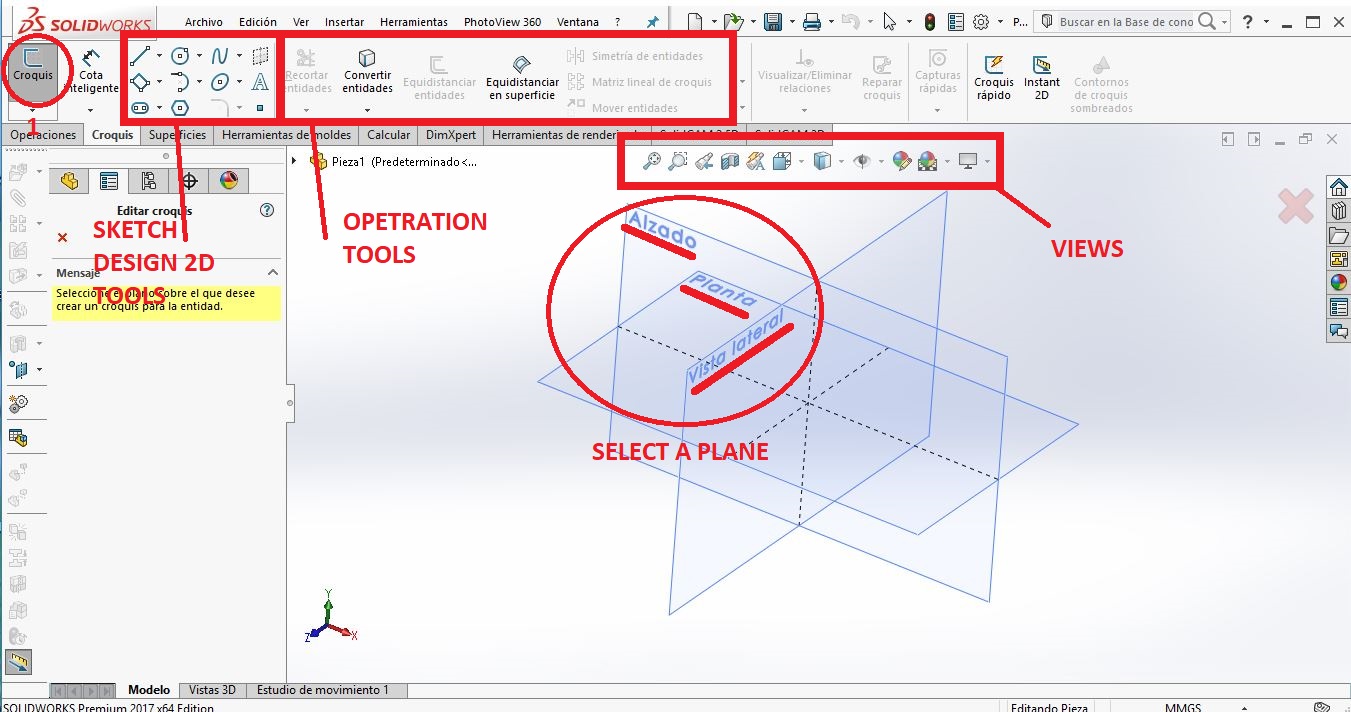
Its important to use Sketch designing tools to draw the model in 2D, there are some options like lines, curves, rectangles, cirlces, text, points, etc., some useful options to design.
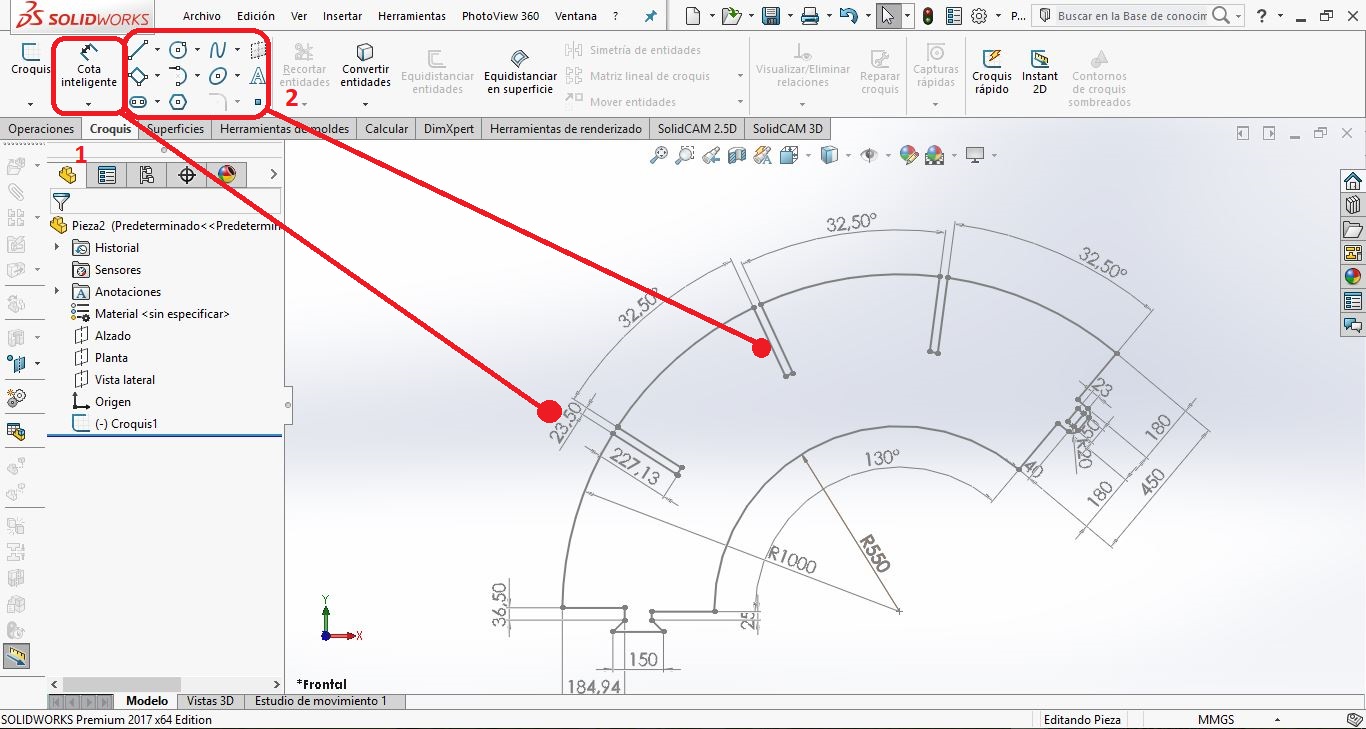
Then, let's use dimension option to personalize the design according to real values
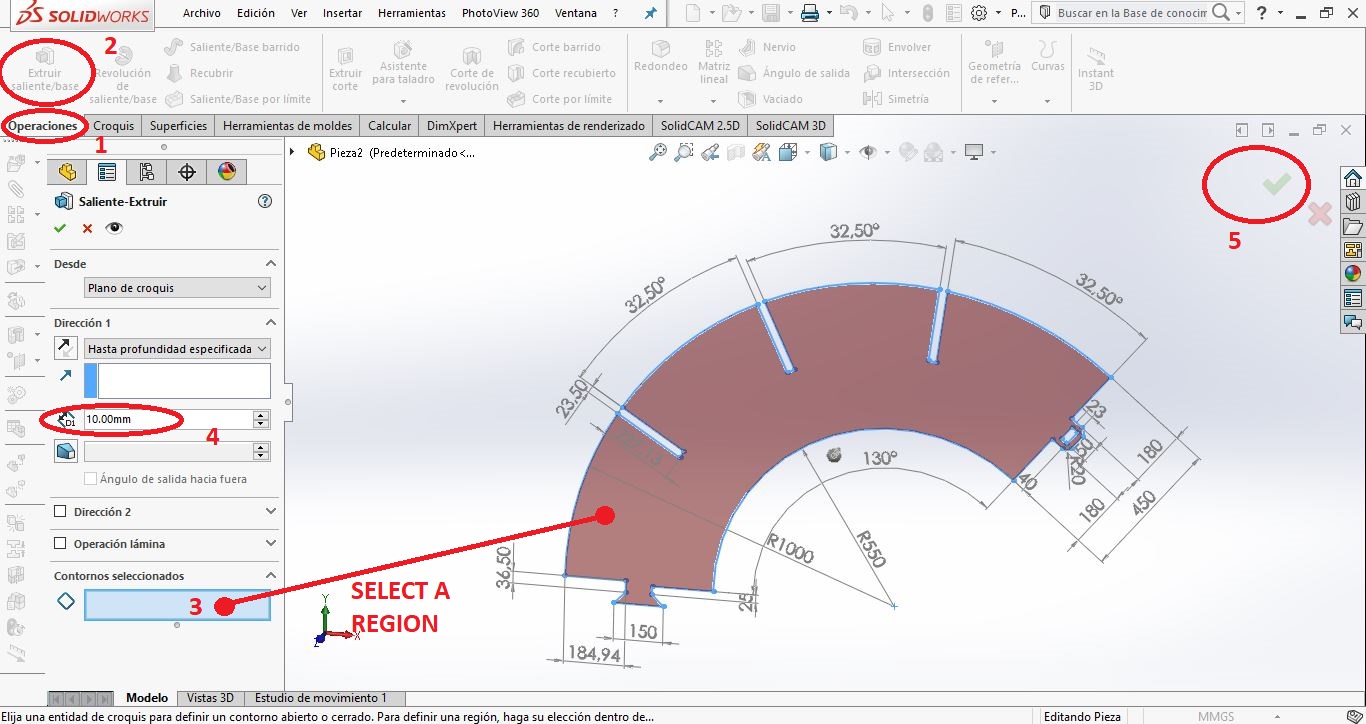
Then, it's important to extrude the designs, identify the real thickness of the material that I'm going to work with and
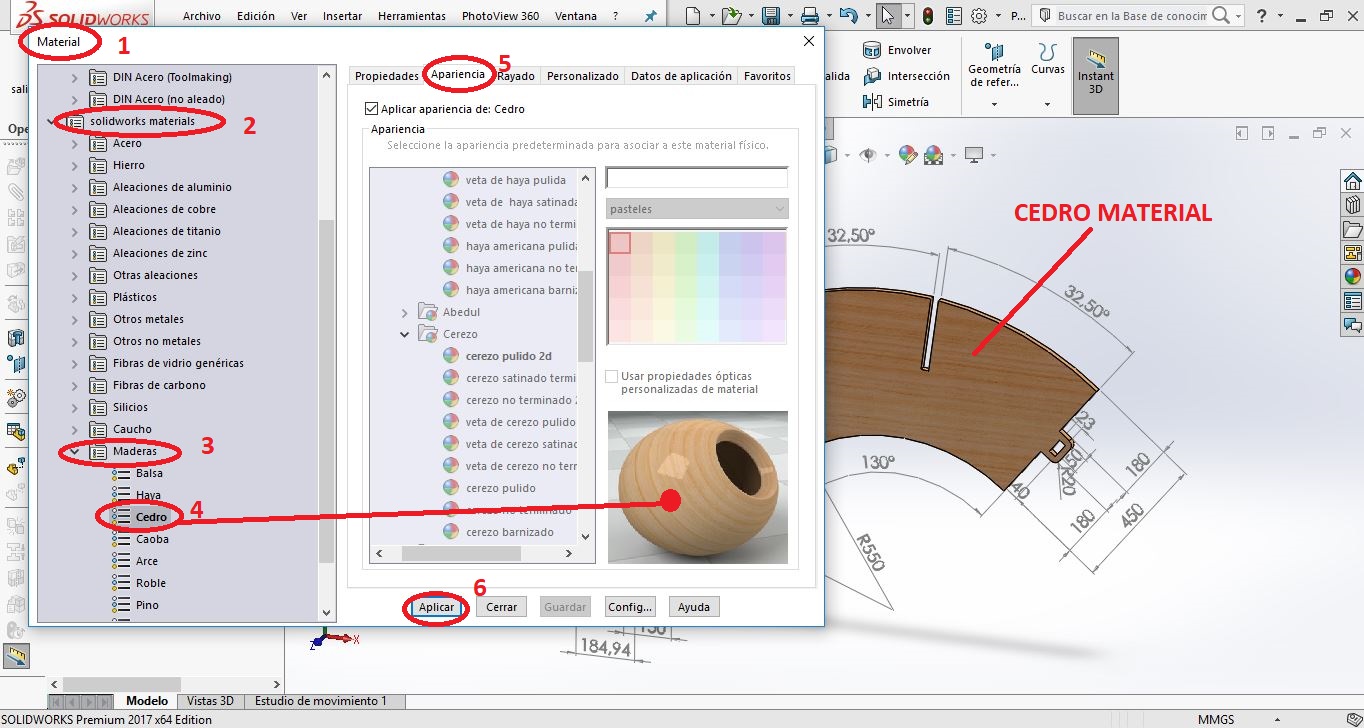
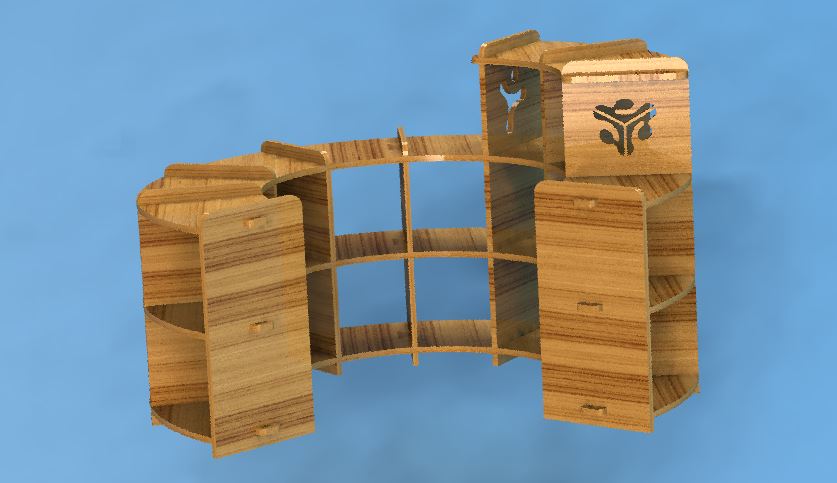
For an interesting appreciation, it is good to apply a specific material for the designs, for the design we chose the cedar as furniture material that is designed.
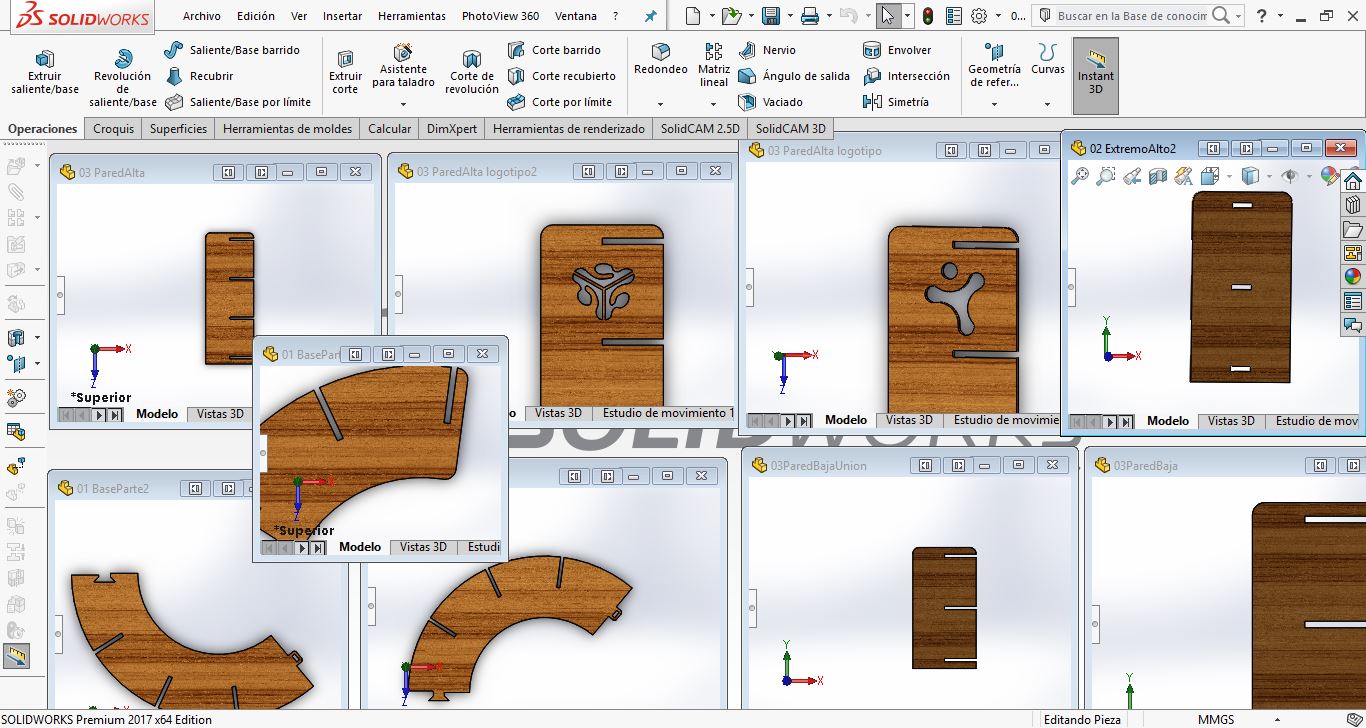
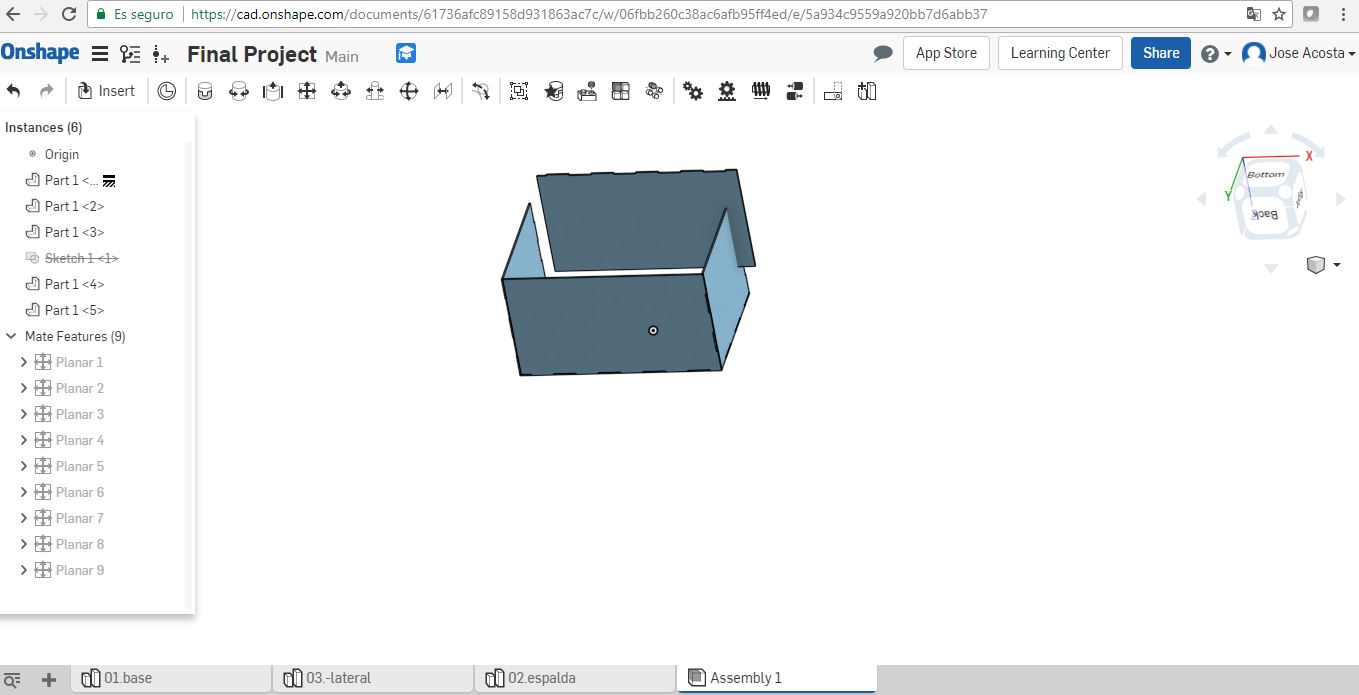
When all the parts are designed, let's start with the assembly activity.
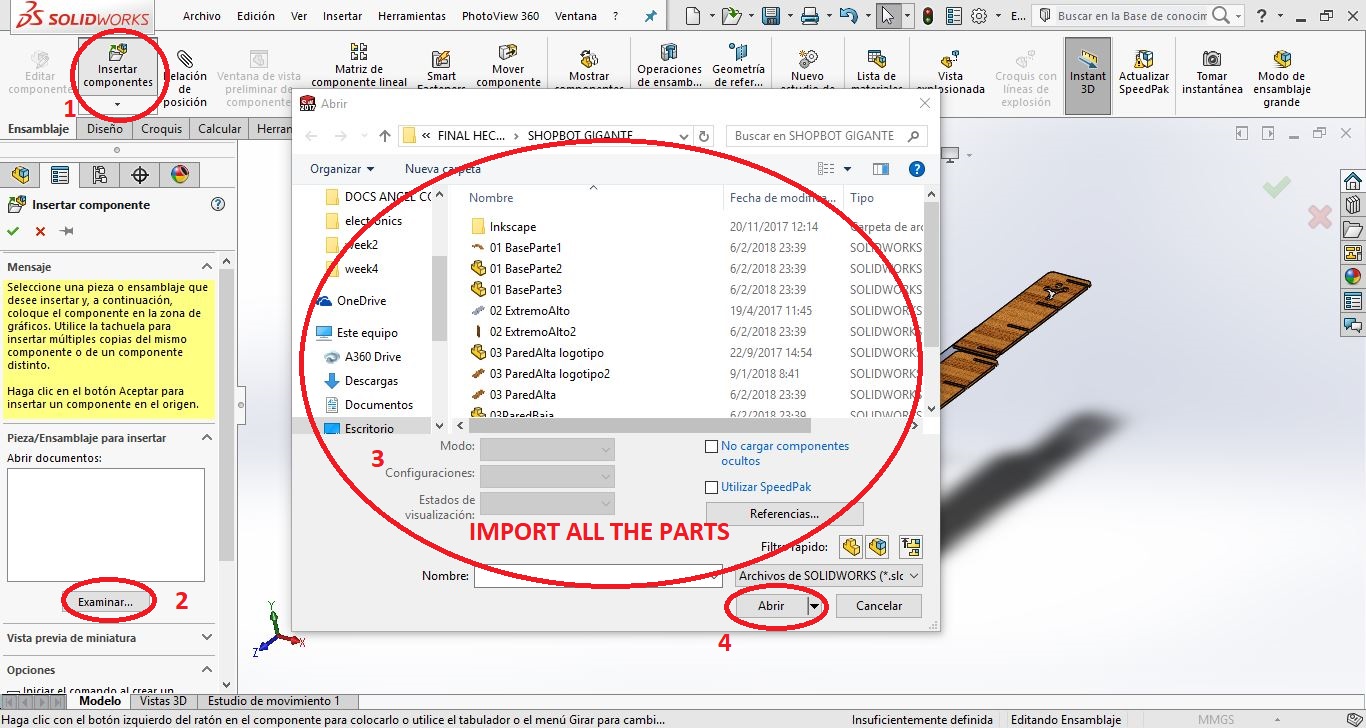
To assembly the parts of the design, we need to start another activity, but now let's select the assembling option as I show:
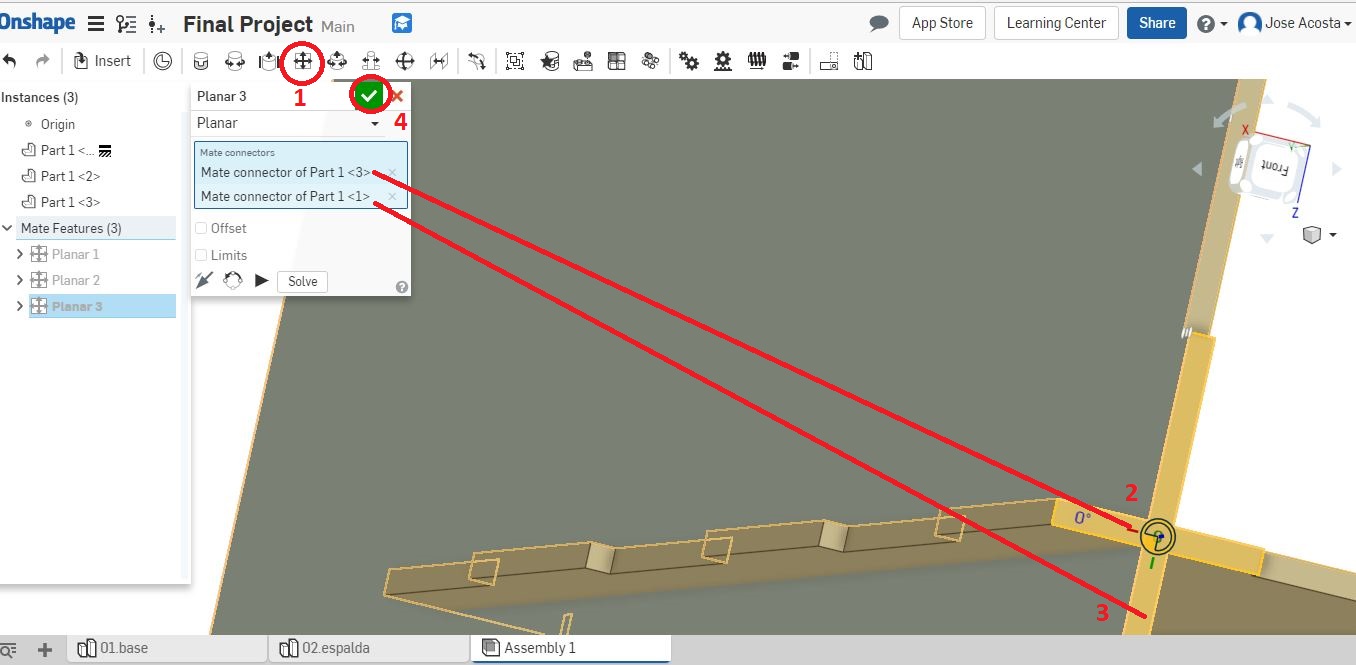
Is important to import all the parts to the workspace, then let's use some useful options to asembly the parts
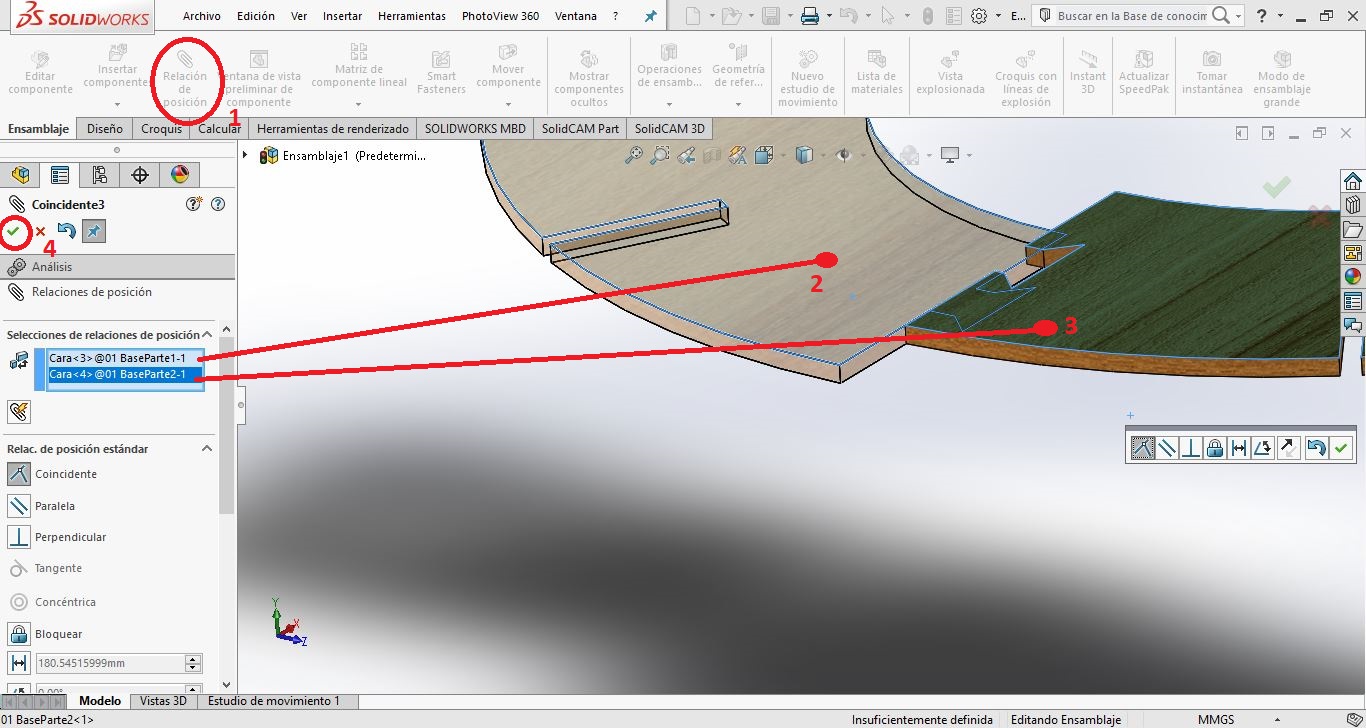
To start the assembly, I need to have all the parts ready to contact their faces and assembly the furniture.
Some faces of each part are important to compare to other faces until get the its correct place
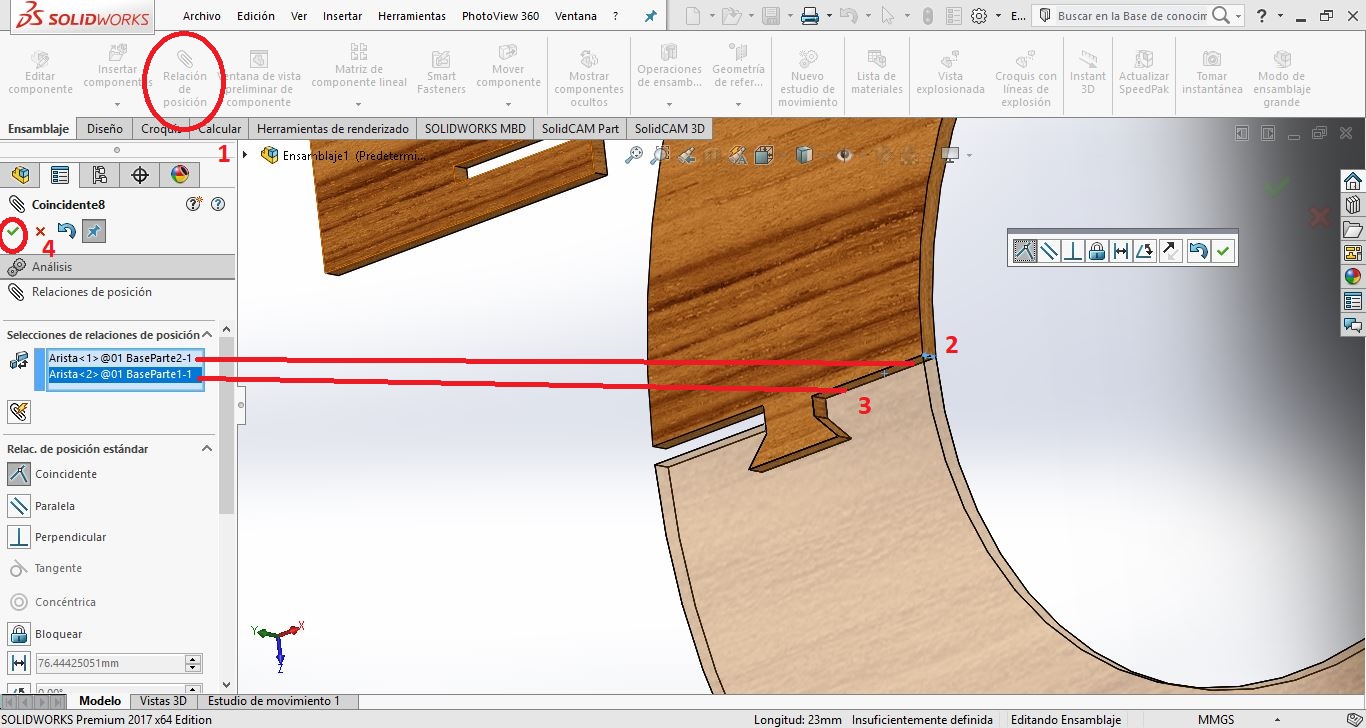
When we have finished to compare and link the faces, the furniture is designed and ready to get a render of the design to promote their use or bought.
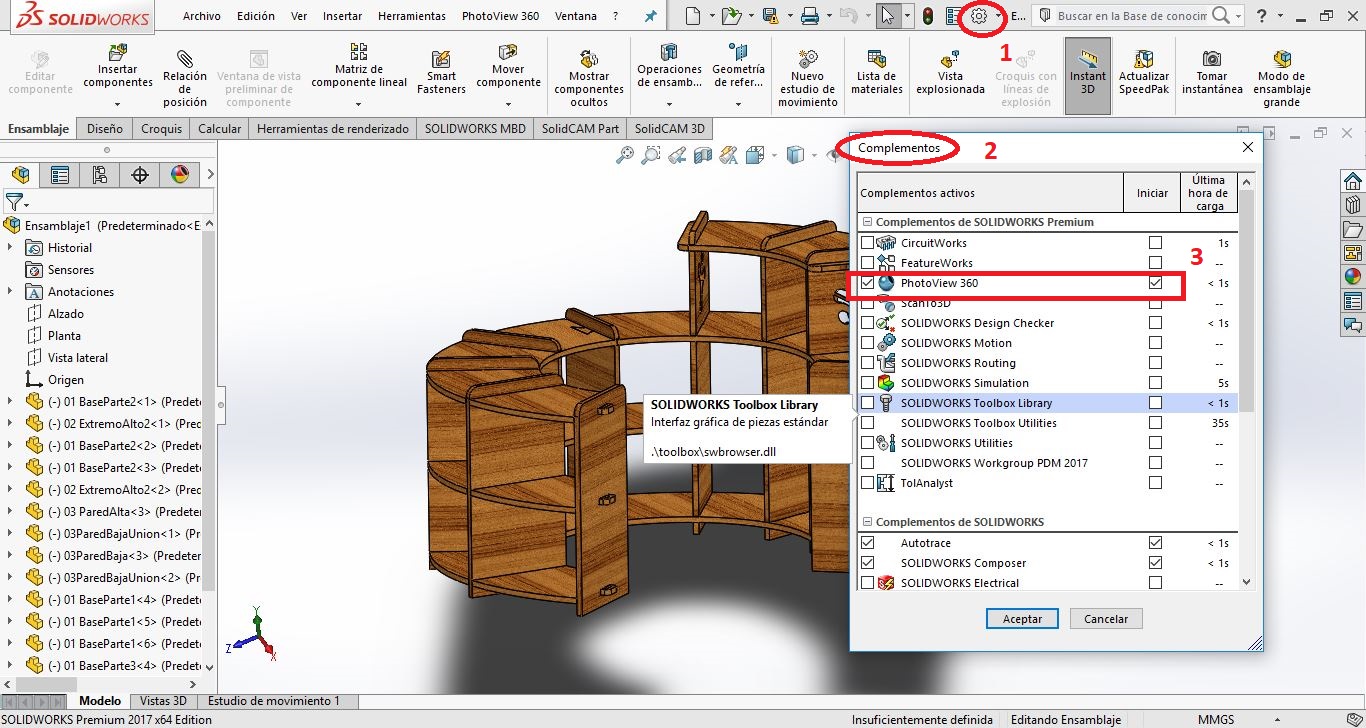
To convert the design into a render is important to turn on the render option, it's inside of the complements window, it's important to check the box to have the access to rendering
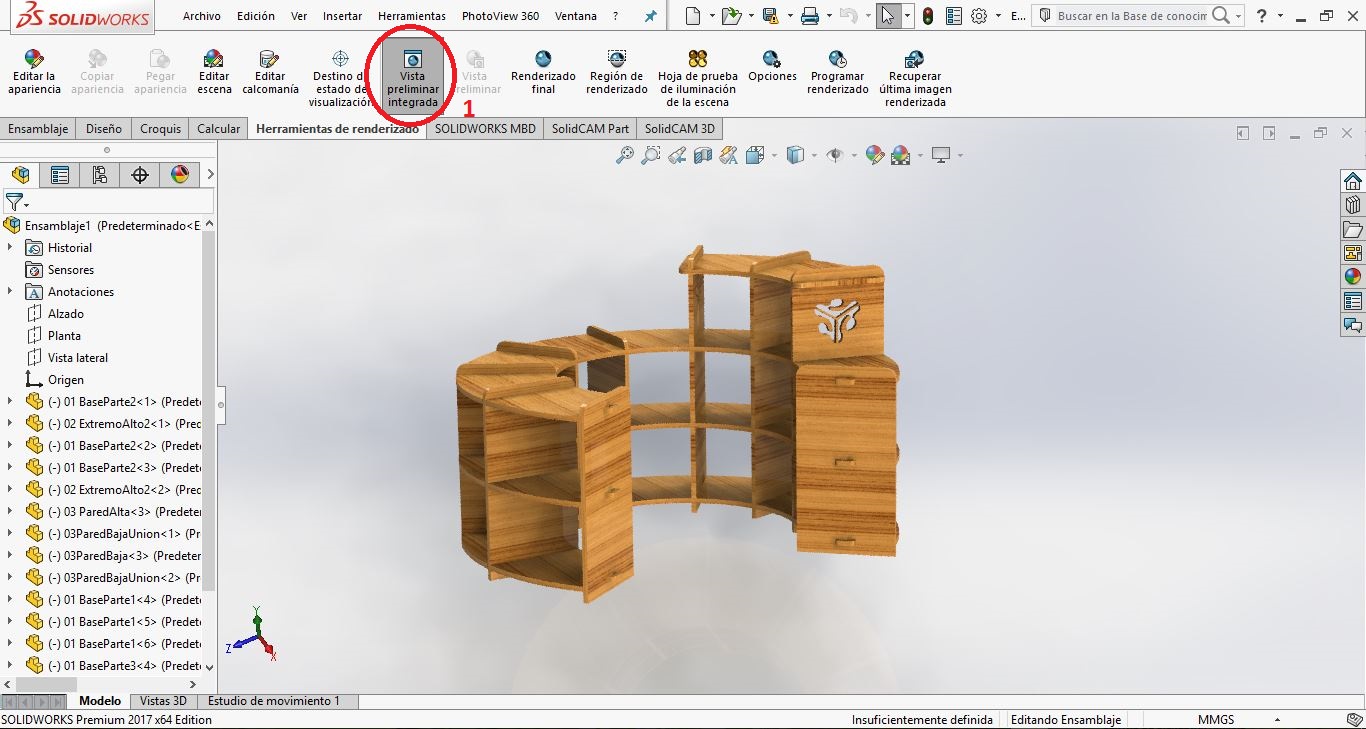
Finally, Its important to configure the render option, let's click the rendering tool tab and then the integrated preview<, finally I'll wait some minutes until the system starts the rendering of my design./p>
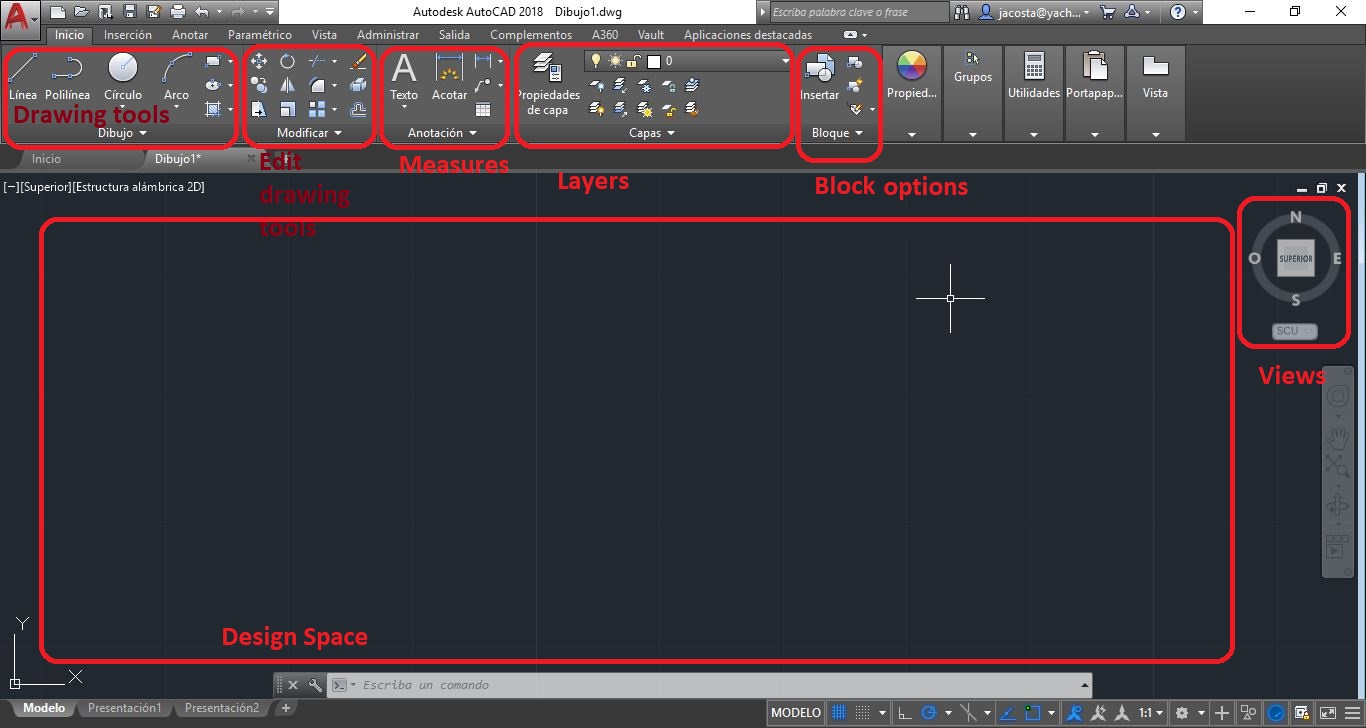
AutoCAD is a CAD 2 and 3 dimensional computer drawing program, you can create drawings or generic plans, document engineering projects, architecture, maps or geographic information systems to mention some industries and applications. The files generated by AutoCAD have the format .dwg and .dxf.
AutoCAD includes basic geometry to draw in two dimensions (lines, arcs, curves, prisms), although it is a general purpose drawing program that includes the creation of parametric sketches, it also has a library manager of different symbols such as architectural, mechanical and industrial, where you can select the figure you need and insert it into your drawing, in addition, the administration of the drawing is layered.
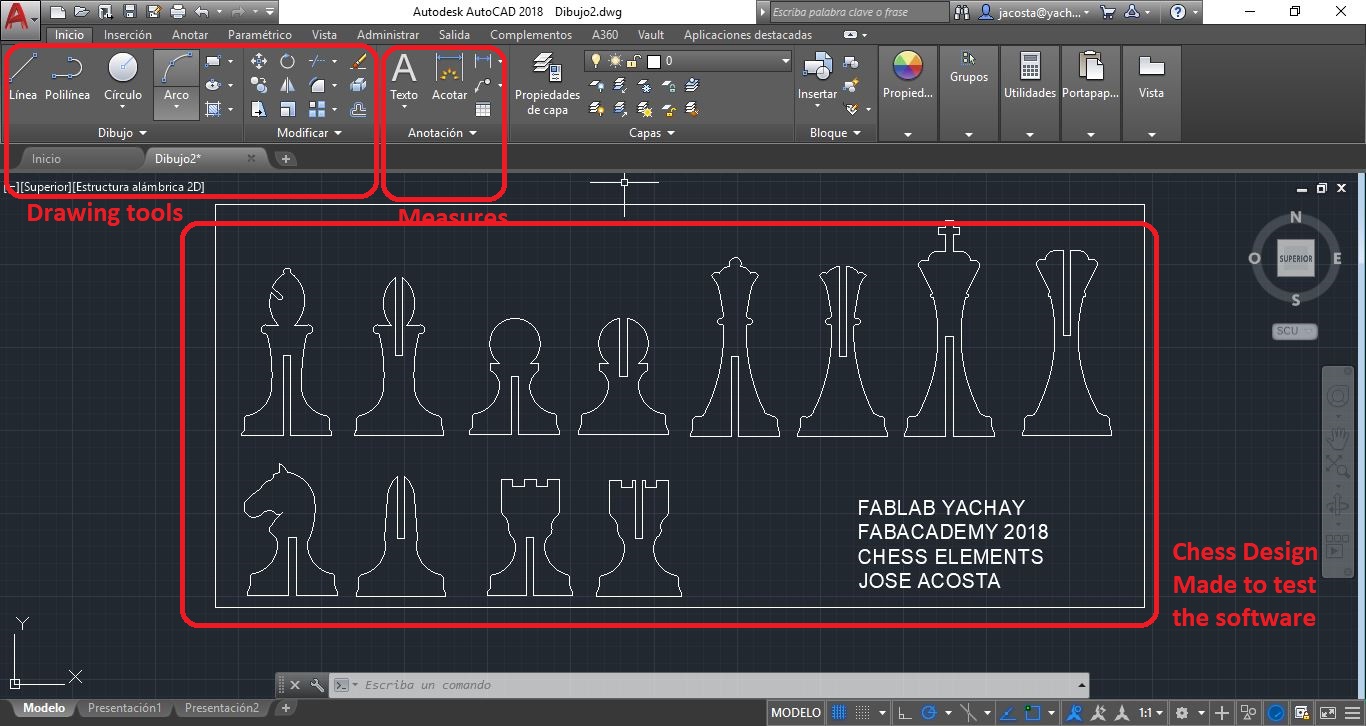
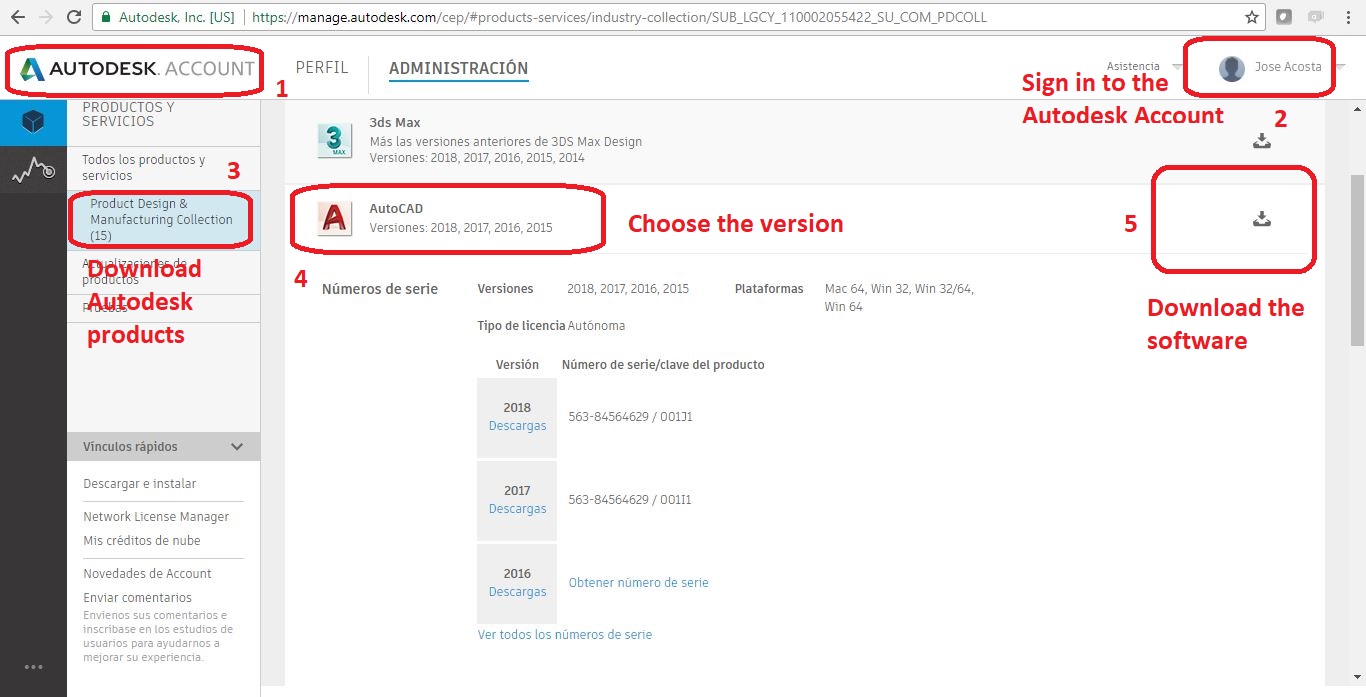
I'will use AutoCAD to design a first alternative basket for the final project usign all its the options. First is mportant to download the software, for this I have received an invitation from FabAcademy's administration with a license to use all Autodesk products.
To design this activity is important to install the software, in my case I have downloaded this software
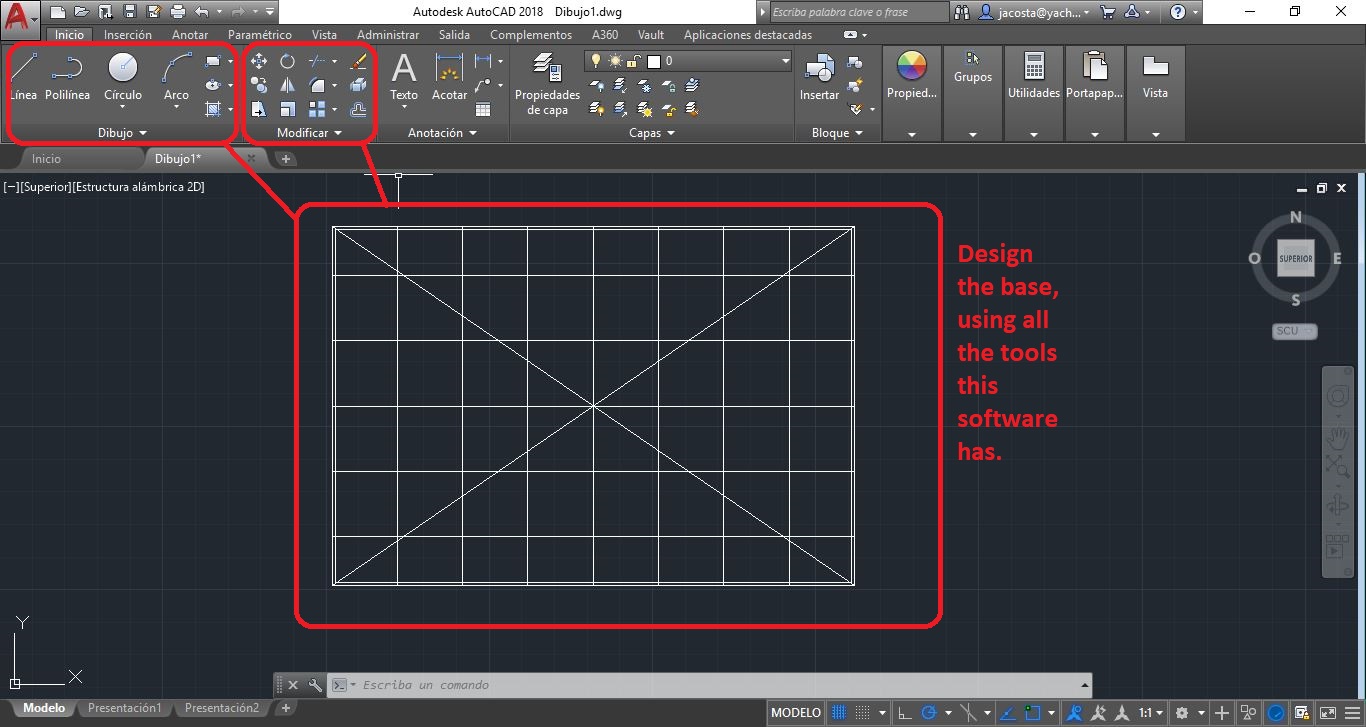
Once installed the software, let's open the software and check the design options that it has, usign the options let's design the parts of the basket

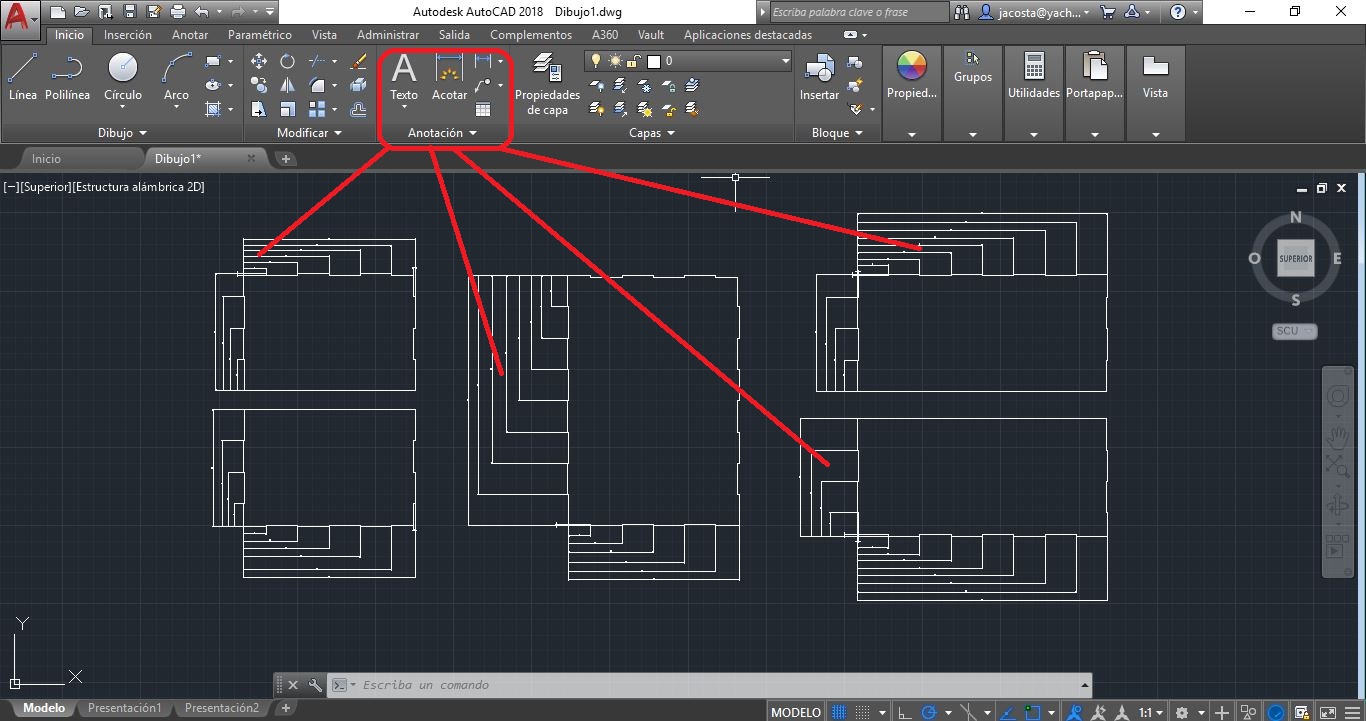
When you have finished the design, you can save the design as.dxf file and then export to mecanize
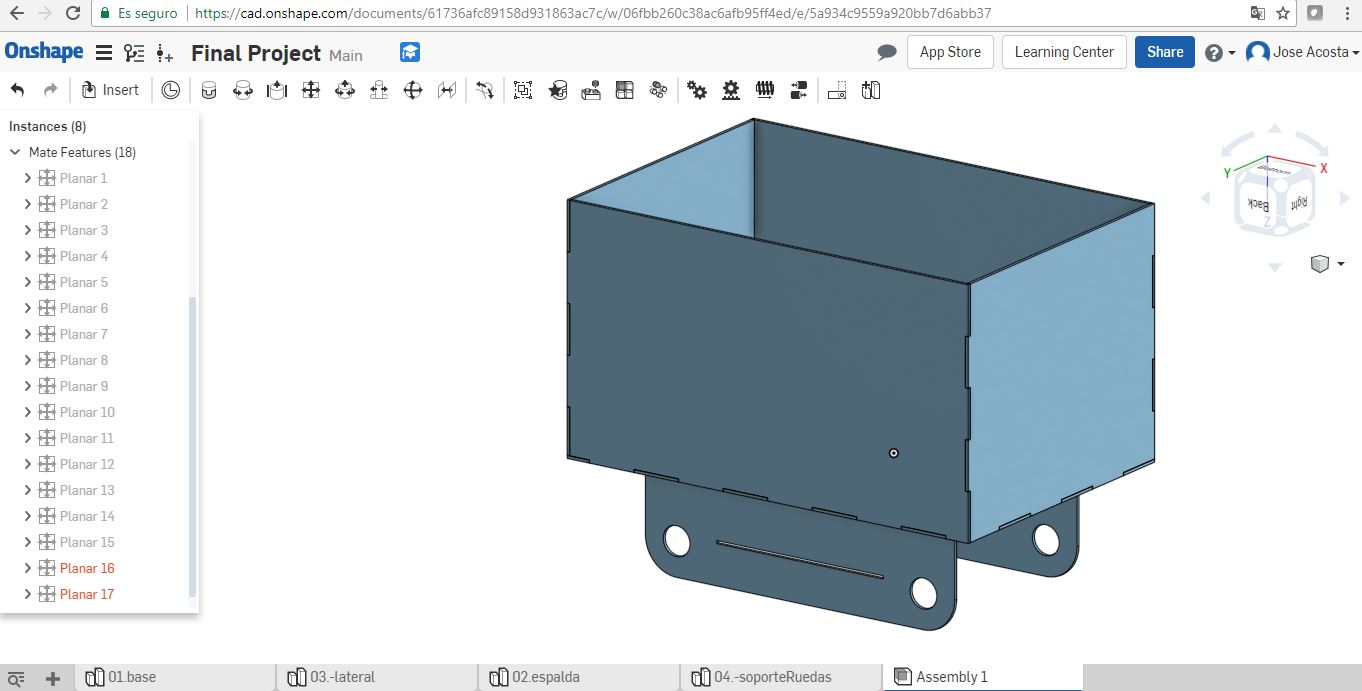
The modeling procedure is similar to the design in SolidWorks, but the advantage is that all the designs that we host in the OnShape platform are enabled for anyone in real time anywhere anyplace, this is a design advantage that can optimize the development time.
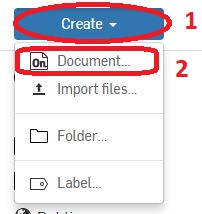
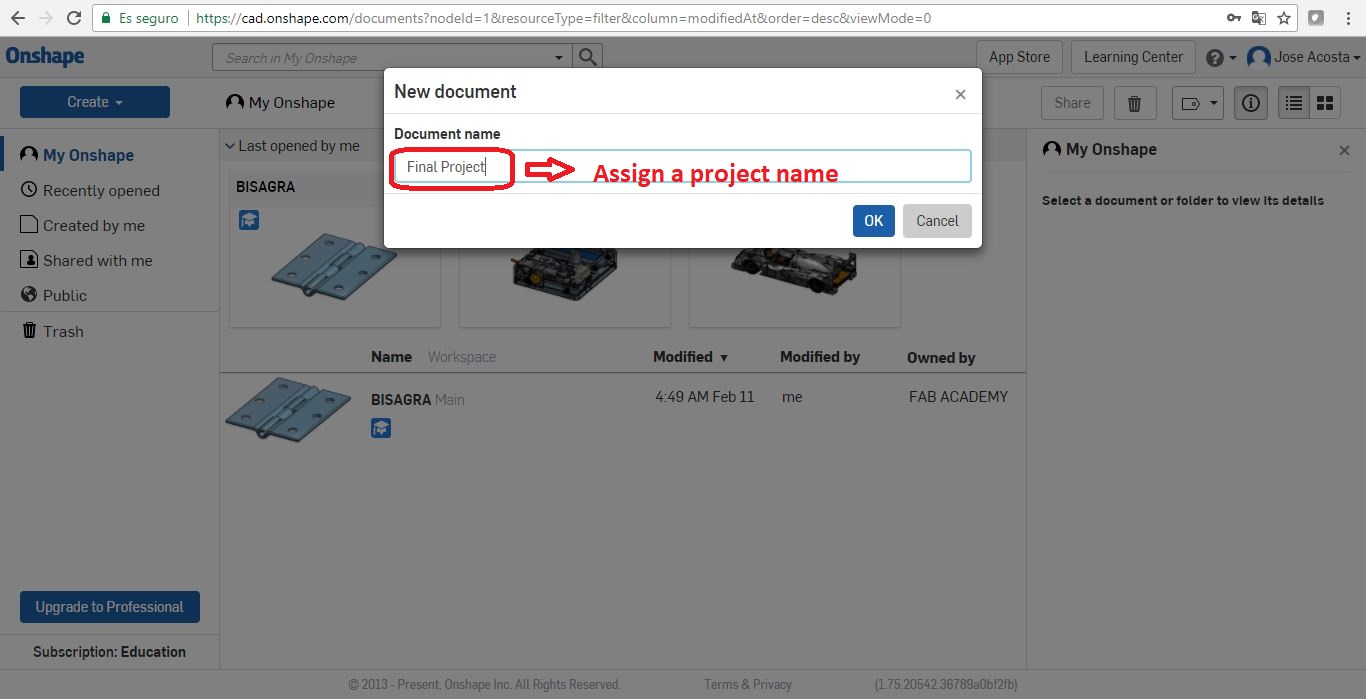
I am interested on improve my design skills in this great development platform that's why I will design almost all my final project in OnShape. To Start the project firstly I must Create a new project, so, click in "Create", then let's assign a name to the project, in my case it will be "Final project"
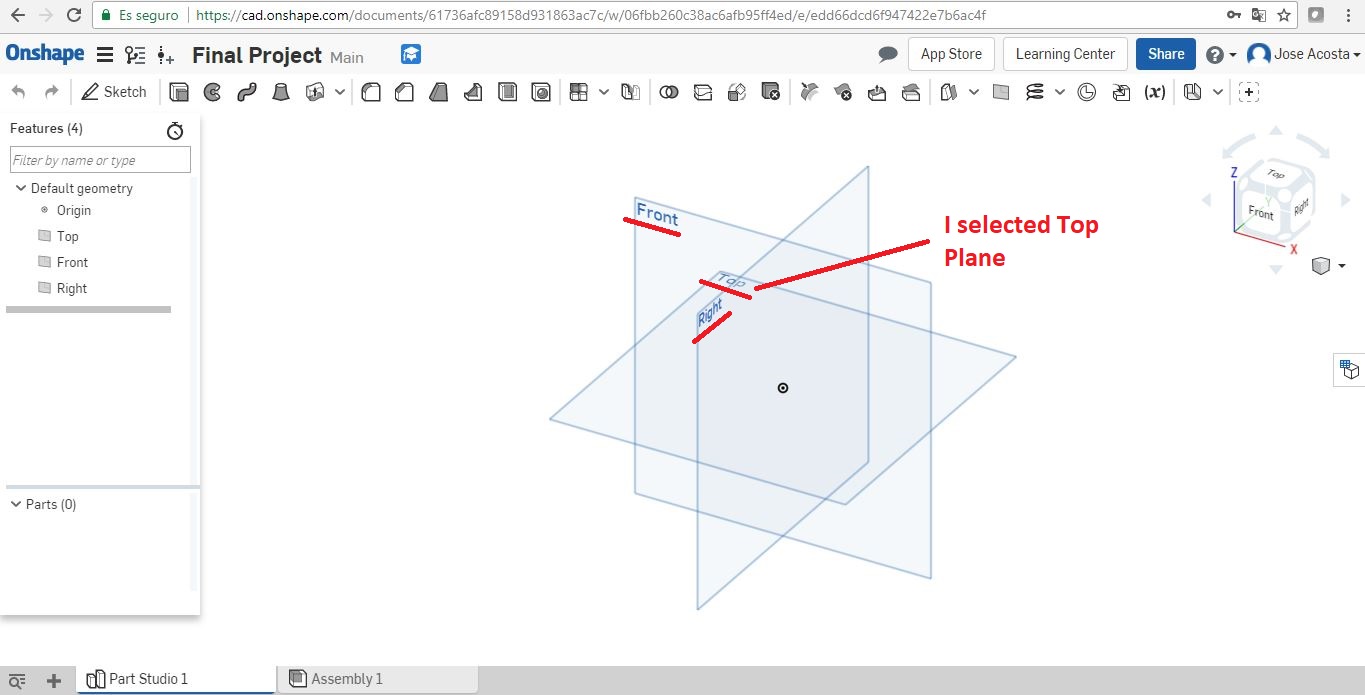
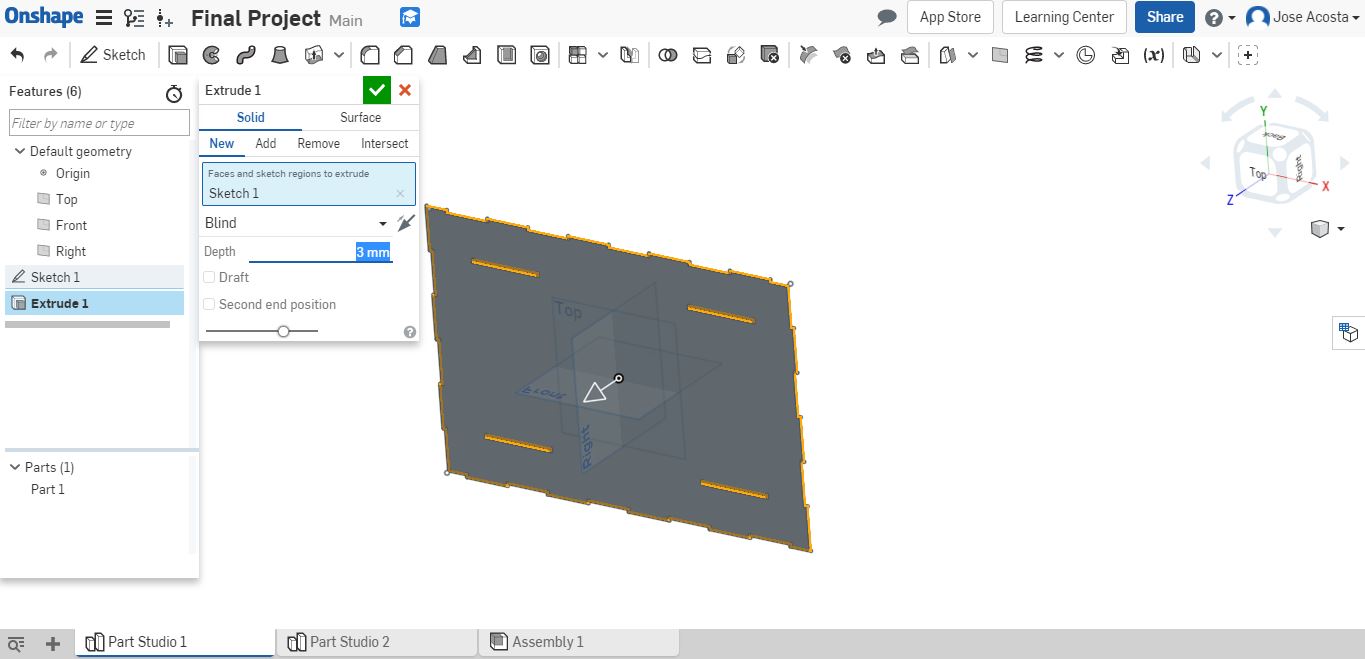
Then, i need to select a plane to start designing, i'll select top plane
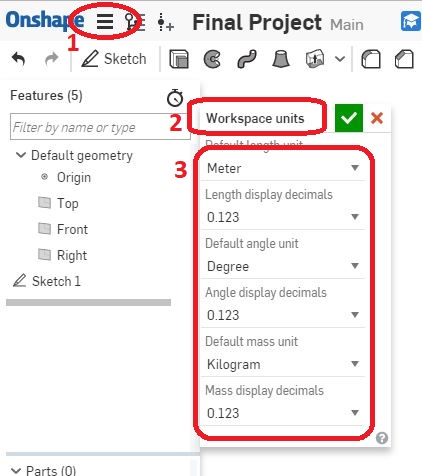
To design without problems I recommend to you configure the units to avoid dimension problems, select the specific units system according our country. In my case, in Ecuador we use International System. (mm, degrees, Kg).
Then let's start whit fun, let's design the base of the basket, I need to select the right dimensions of my design according to the Laser cutter surface. So i get this design using 2D options.
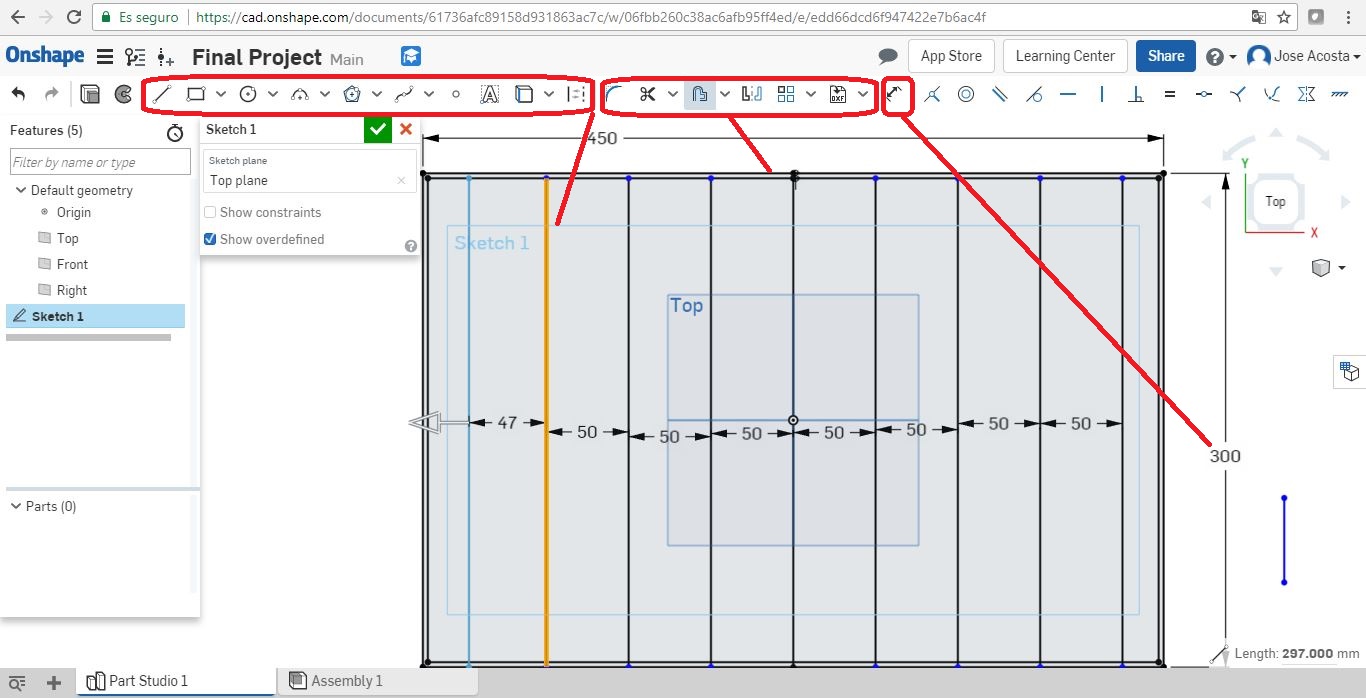
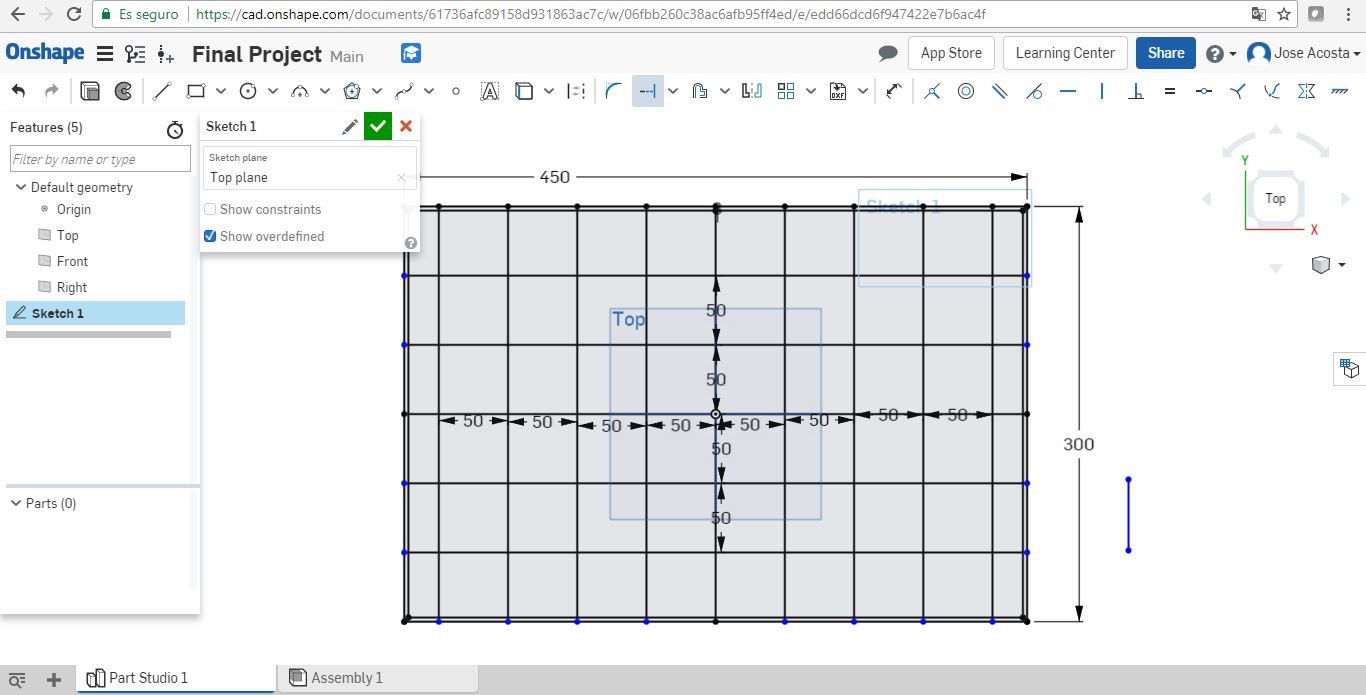
The base dimension are: 450 x 300 (mm2^2)

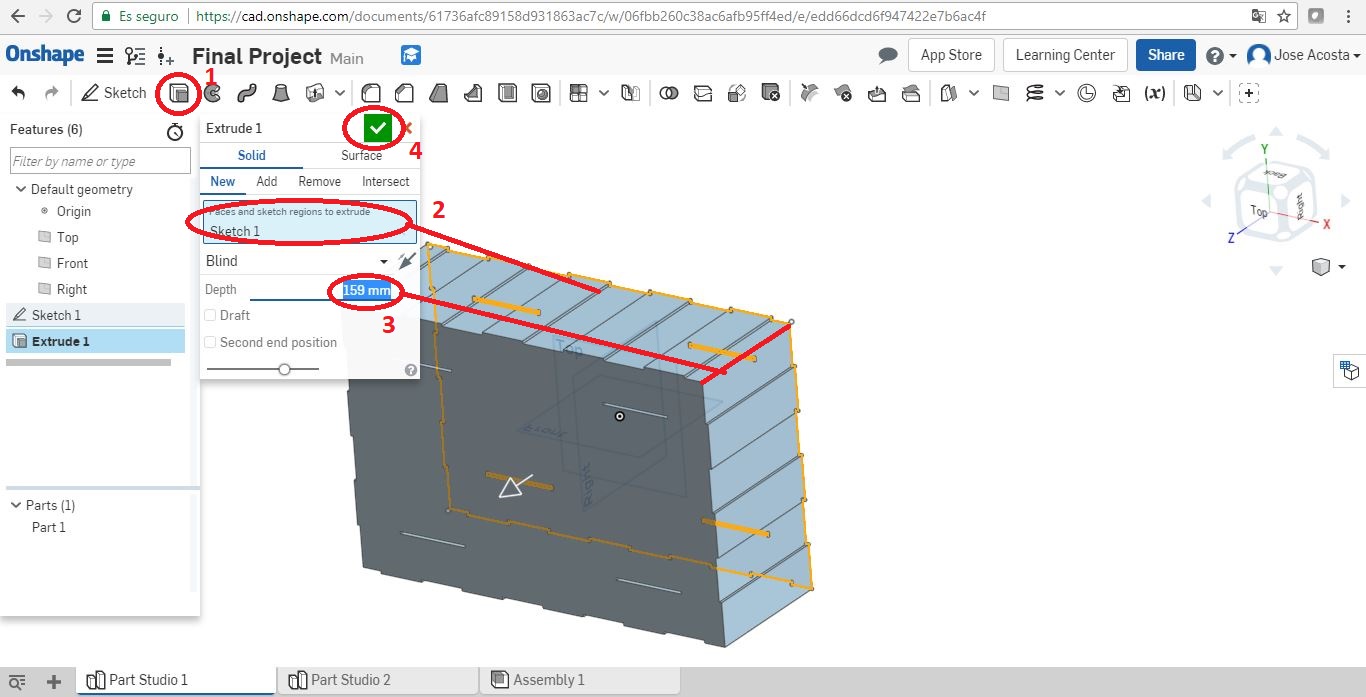
Now it's time to extrude the design, let's create another tap to create other parts or our project:
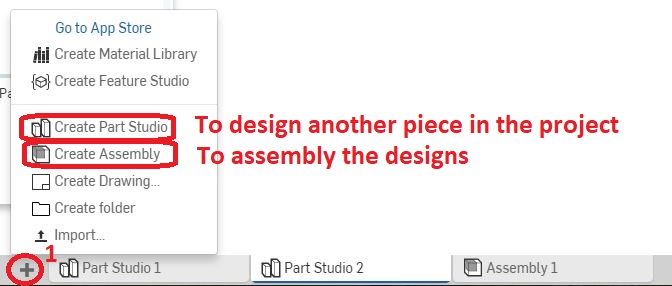
First it's important to have designed some parts to start the assembly activity, in my case i started with two, then I designed more parts when I have define the needs of new designs.
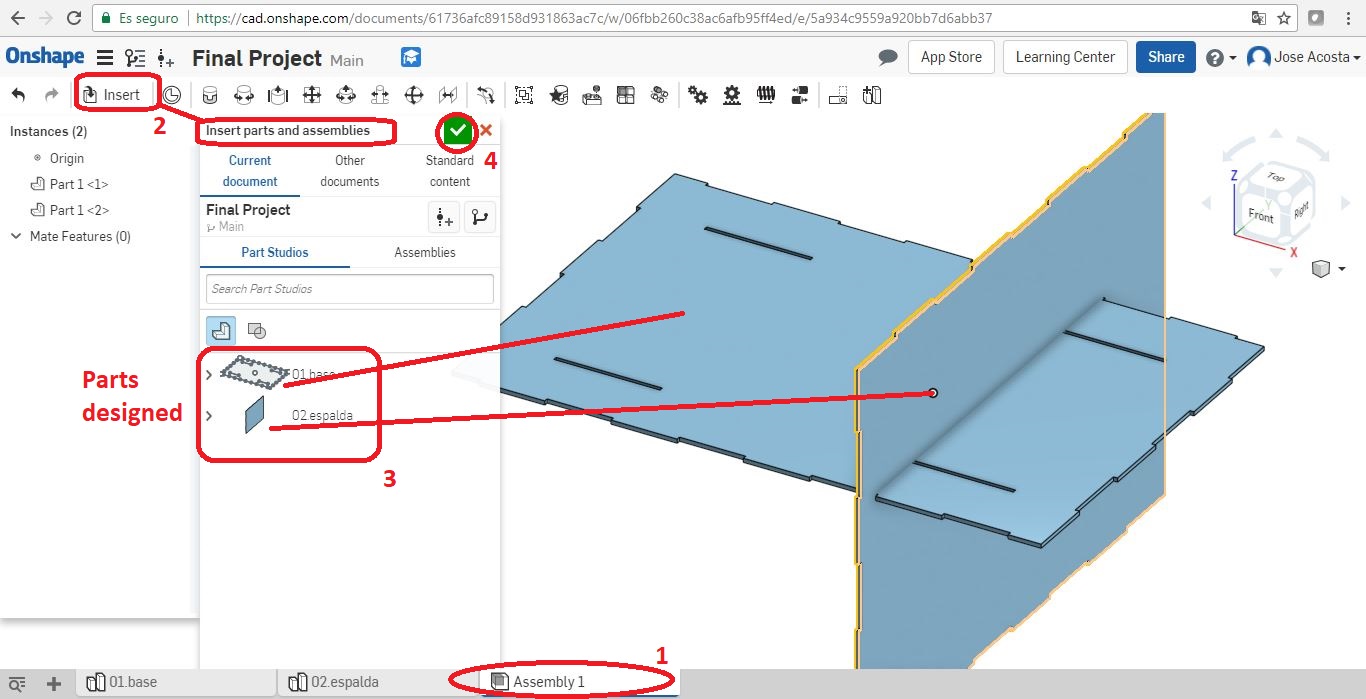
Soon I will complement the final project with the new activities of the program
SOLIDWORKS download
ONSHAPE visit my onshape repository
AutoCAD download
ILLUSTRATOR download
SIEMENS NX download
INKSCAPE download
You can get some models pre-designed in these repositories: