
For this activity I will develop two graphic interfaces, one in processing and the other in inventor app that allows me to control or interact with an electronic system created with digital manufacturing.
We start by detailing the installation and registration of each of the software mentioned and after this we will perform the operation demonstration.
Processing is a flexible software sketchbook and a language for learning how to code within the context of the visual arts. Since 2001, Processing has promoted software literacy within the visual arts and visual literacy within technology. There are tens of thousands of students, artists, designers, researchers, and hobbyists who use Processing for learning and prototyping.
If you want to start or deepen the programming in Processing, here are some links that may be of interest.
Getting Starting With Processing
And you can get some examples to check, here
To use the program you must to go to their webpage. Click here to go, once there is important to download the software (No installing need)
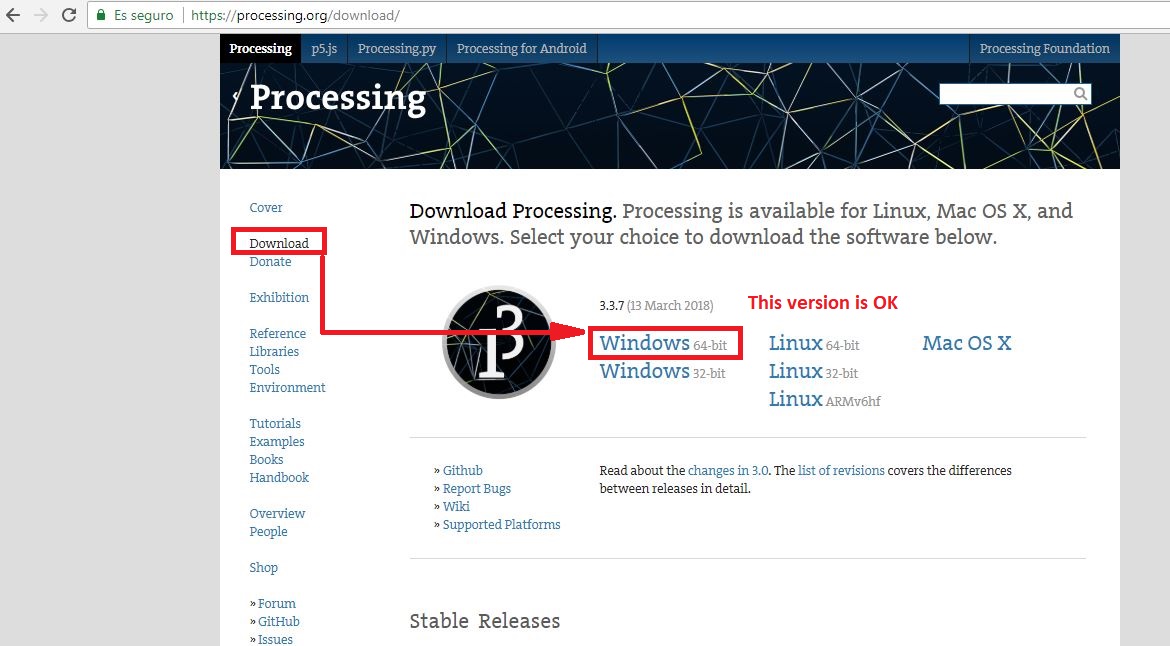
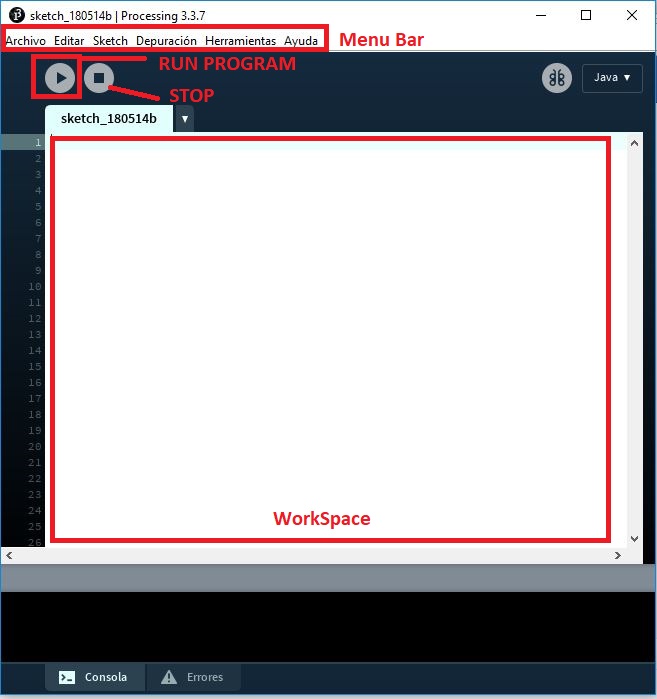
Once the compressed file has been downloaded, we unzip it in a folder created in Unit C, there is no need to install the program, simply open the executable file and we will have a window like the one shown below:
Processing is a strong program that allows to create applications and graphical interfaces that can be applied for engineering and as HMI (Human Machine Interface), this allows to complement the development of our electronic projects and allow to customize their use and operation.
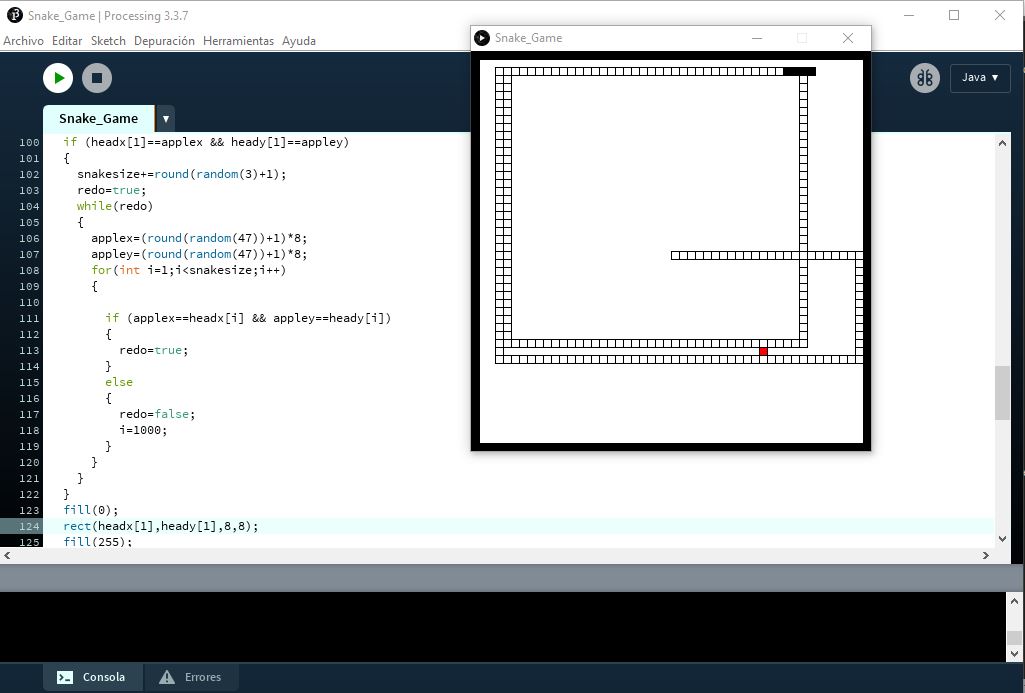
To appreciate the potential of the program, I share a game application, created by Ian151. The application consists of the classic game of the snake, the reason for the following activity is to validate the shared programming and to know the potentiality of Processing.
We proceed to copy the programming and to paste in the work area, and we click on Execute and the following window will open:

AppInventor is part of a joint idea of the Massachusetts Institute of Technology and from a Google Education team. It is a web development tool to start in the world of programming. With it applications can be made very simple, and also very elaborate, that will run on mobile devices with Android operating system. App Inventor is a programming language based on blocks (like pieces of a construction game), and event-oriented. It serves to indicate the "brain" of mobile device what we want it to do, and how. It is of course very convenient to have an Android device where you can test the programs as we are writing.
To start with this Application , you can check this PDF book
Another book is this one
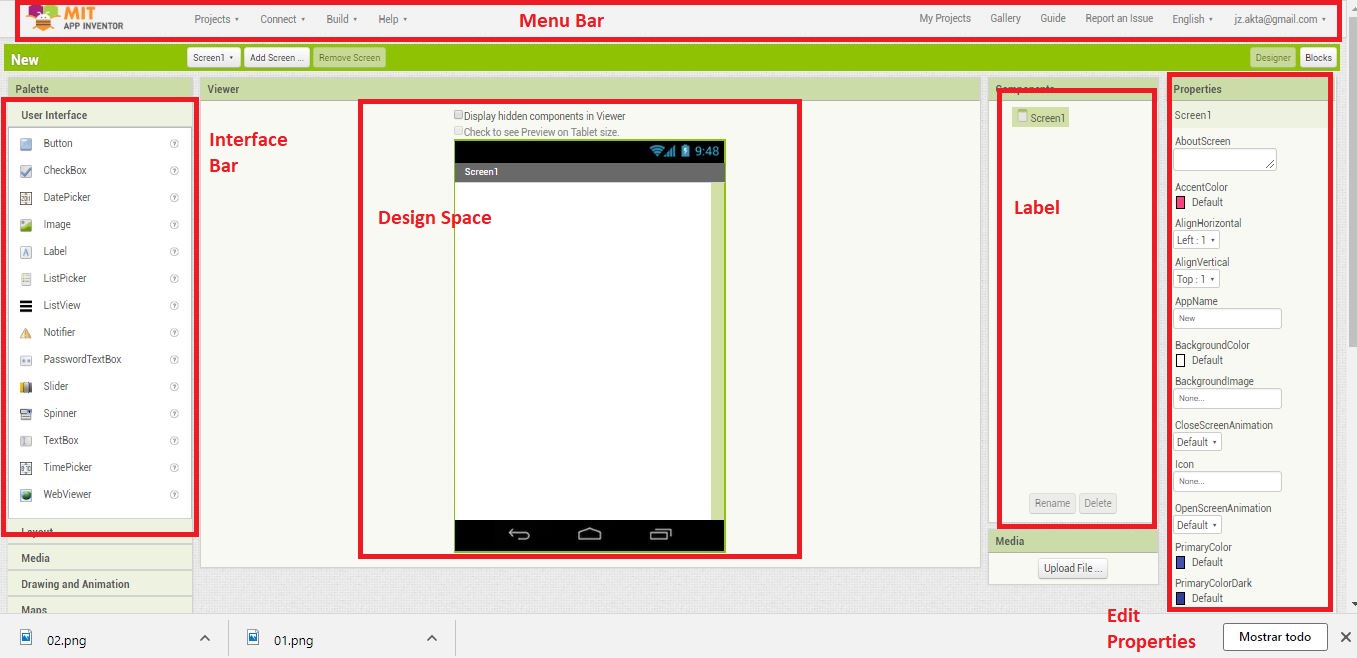
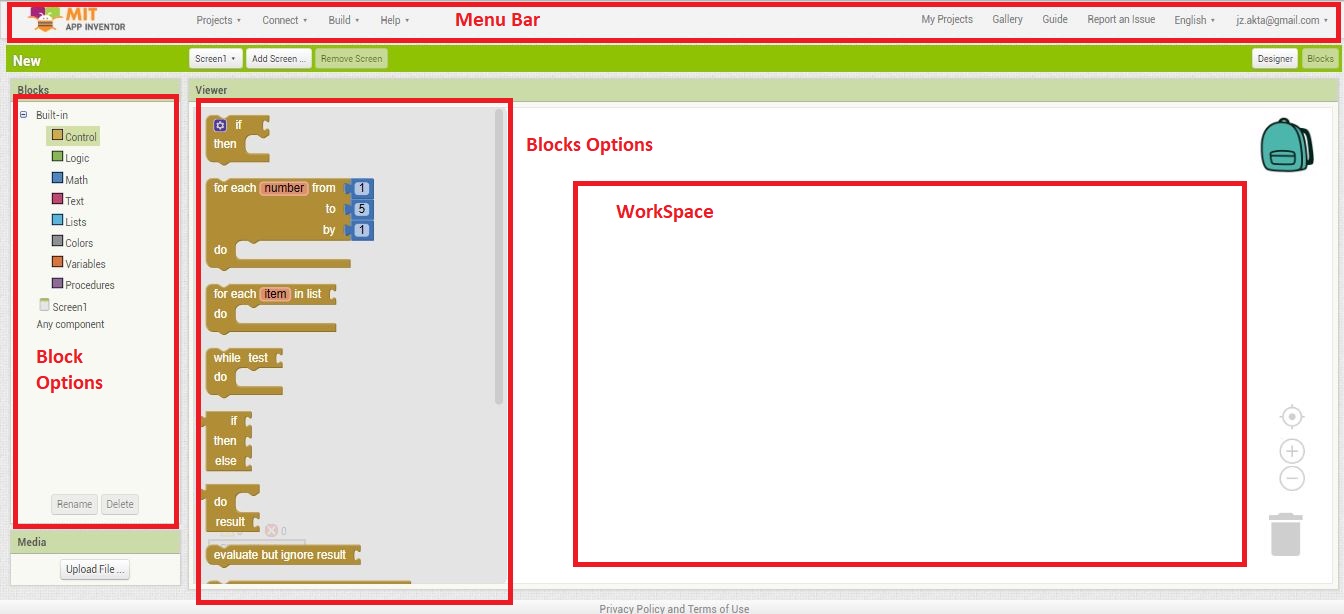
First, to start with the application is important to go to this link, you can access with a google account, once inside the program create a new project, then you have the following workspaces to start designing the app:
Processing Interface
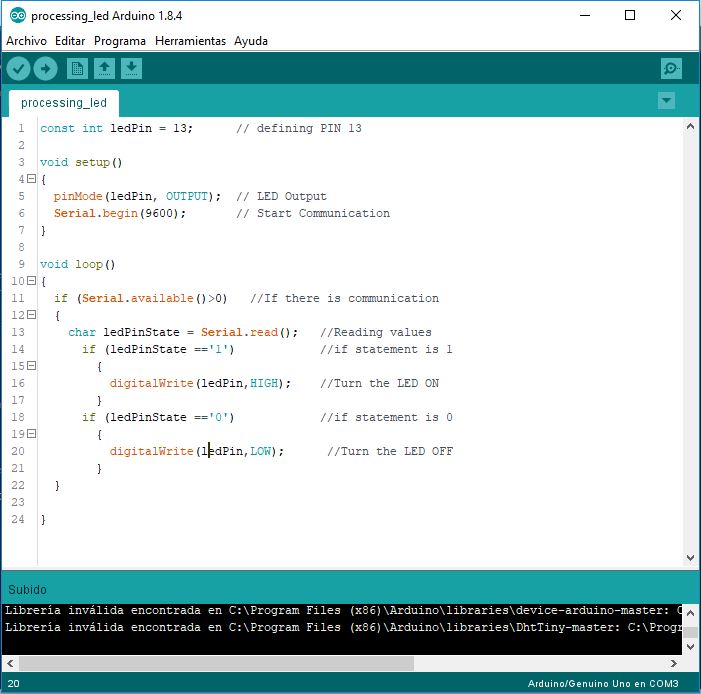
Then I made an application that links a simple programming of processing with an arduino sketch for the control of an LED, the communication will be made by the Serial port of Processing and Arduino IDE.
To begin with the activity it is important to program the following lines of code on the Arduino IDE:
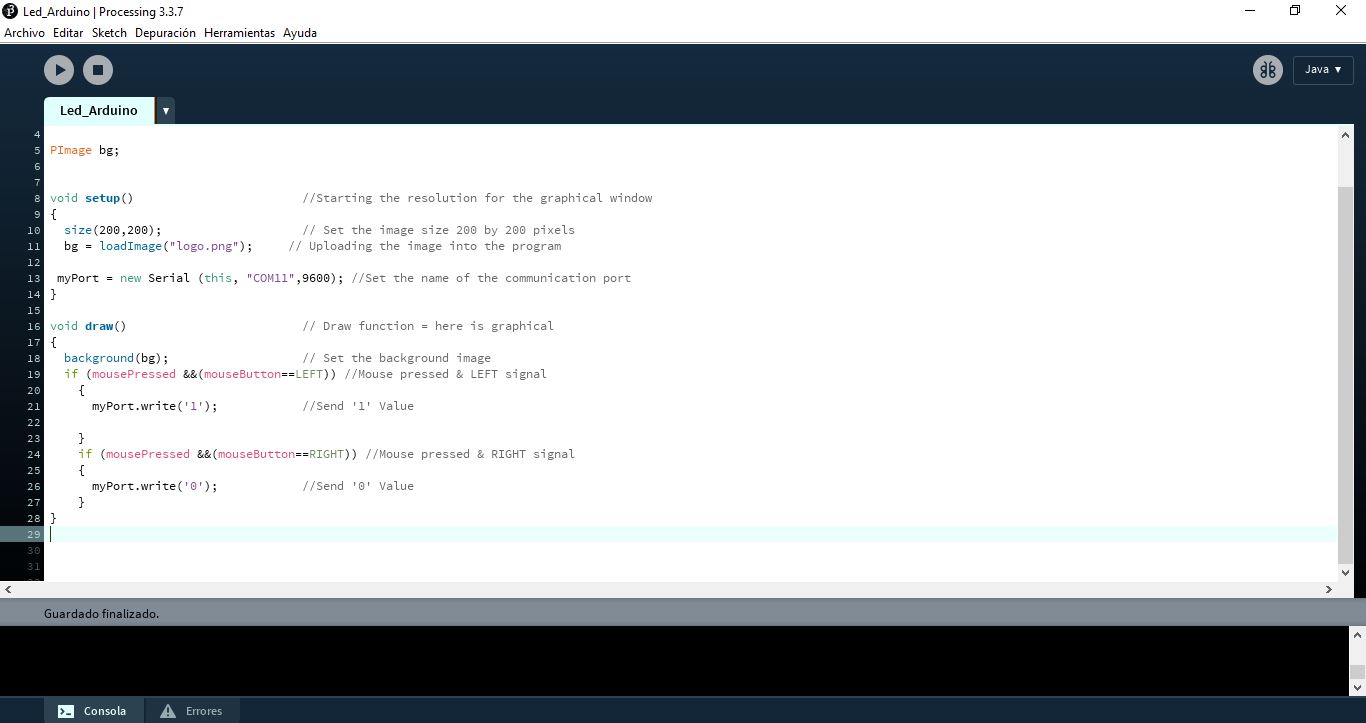
Then is important to complete the workspace, whit this program to run:
To test the program I will Use the arduino uno board, then I will charge the program to my board to check the functionality
The image used in the Processing programming must be located in the same path as the program has been saved, I use the following image to be in the interface:

Check the video, to see the functionability of the programs (with Arduino)
Check the video, to see the functionability of the programs (with my board)
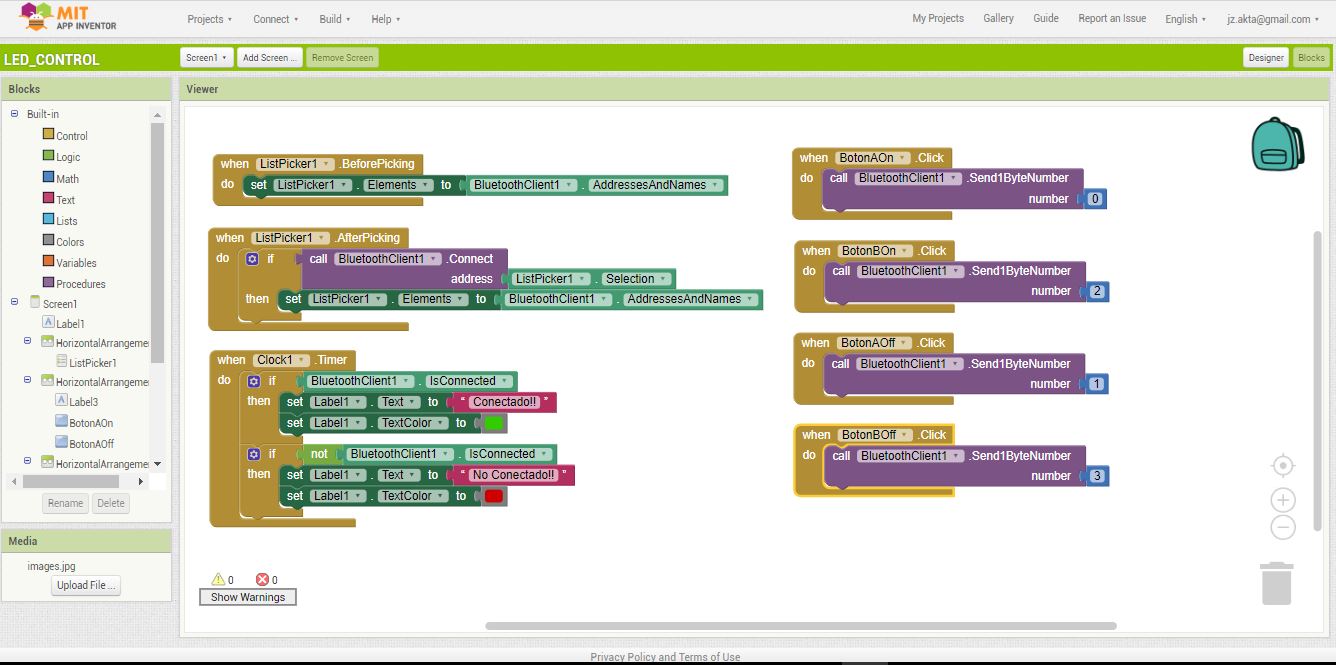
APP INVENTOR INTERFACE
Once inside the development environment, the first thing we will create is our visual interface, for this it is important to select the items that we will use, in the following case we will use:
Continuing with the development of the activity, then I show you the process of developing the visual interface in the application for the control of LEDs using my experimental board FabChay Board.
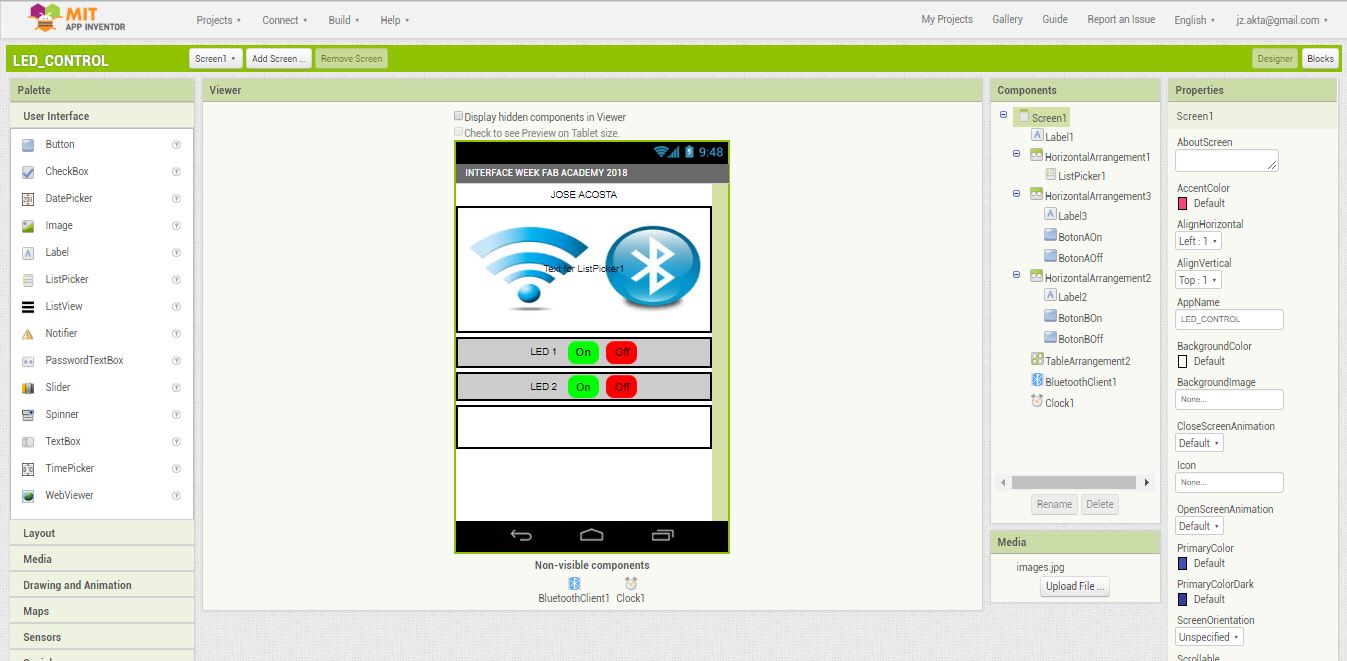
What the visual interface will do is the control of LEDs, for this it is important to realize the connectivity interface by means of a bluetooth, which will be linked by MAC, and two control buttons on and off for each led of the electronic board .
It is important to install the aiStarter program, in order to copy the application developed on the smart device, the device must have Android installed.
Here is a demonstration of the operation of the program and the visual interface
Some of the problems identified for this activity as the previous ones, which coincide with the previous activities are:
* In some of the cases it is complicated to link the microcontroller with some shields or complementary development boards, to solve this problem it is necessary to search and download the correct libraries for attiny44 microcontroller and store them inside the library folder of the programming IDE.
In some of the cases the programming plate is detached from its tracks because it has pins that are only attached with solder, it is advisable for this problem to use pins that require drilling of the vine plate that is more attached to the electronic engraving surface.