
Web design is a skill that allow us to share what me make with the world. But it is not enough. In order to colaborate with projects, or just manage your personal diary, we need a version control system. Fortunatelly, we have systems that can do that work for us. We use version control systems, especifically Git over GitLab. We might need some time to set it up and get familiar with it, but it's going to pay in the long term.
Learning outcomes:
- Explore and use website development tools.
- Identify and utilise version control protocols
Have you:
Made a website and described how you did it:
HTML
The structure of HTML language is simple, and easy to grasp. When I wrote the original document, y remember that the webpage w3schools.com was very useful.
There, you can not only learn using tutorials, but also you have resources tool always at hand. There you can learn not just HTML, but CSS, Javascript, SQL, PHP, and more.
The HTML document is composed of two kind of documents. The HTML itself, and a CSS document for formating. We are not going to use PHP, or SQL. However, I used a little javascript to give the page some eye-candy.
HTML is a markup language (Hypertext markup language, precisely). That means is used just for tagging, or ordering, the text. Something like sticking a price label in a shirt to keep track of it. The key thing here is to close all (well... there are few exceptions... we will see...) the tags that are open. Work with a sistem, and you will find the bug in place before it is harder to find.
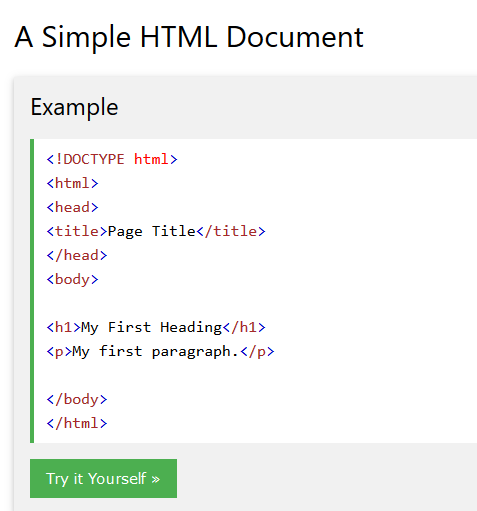
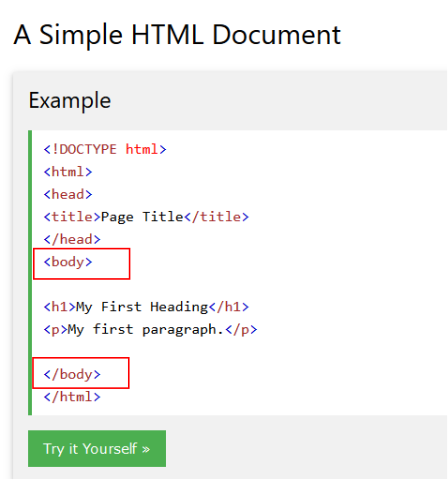
Here si an example of an HTML page:
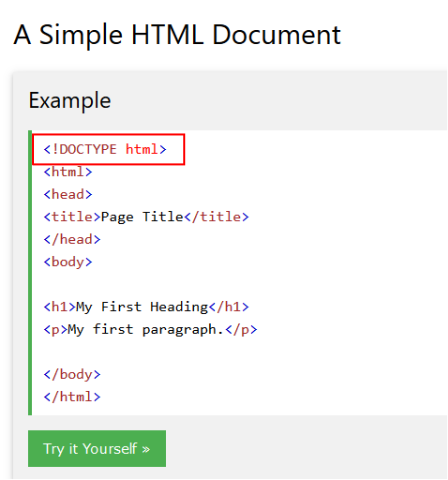
First, !DOCTYPE html declares the document as HTML5, this is an exeption, doesn't need to be closed.
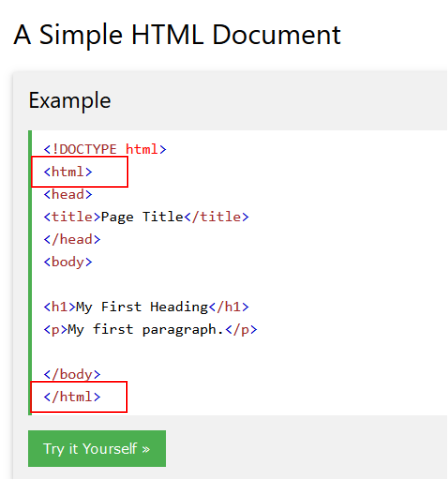
The html tag needs to be closed.
The head tag also need to be closed. Contains meta information about the document (for future use)

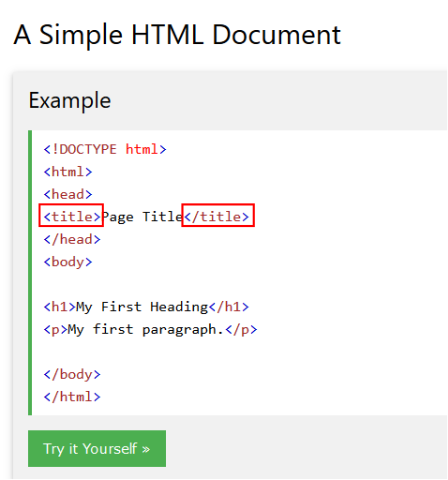
The title goes inside the head block. Here we set the page title (the text that appears on the top bar of the browser).
The body tag contains the visible page content. Here is what we are going to actually see.
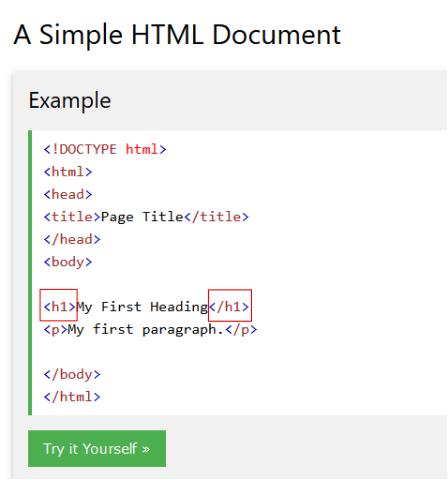
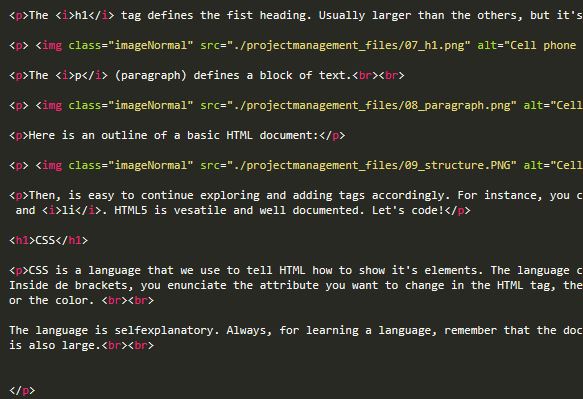
The h1 tag defines the fist heading. Usually larger than the others, but it's properties are going to be defined later.
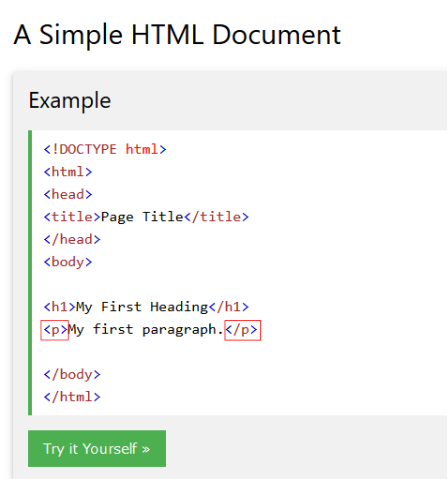
The p (paragraph) defines a block of text.
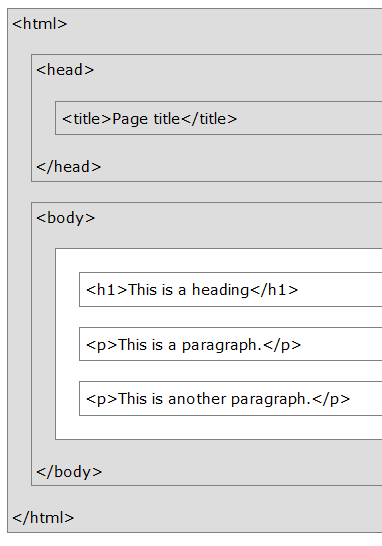
Here is an outline of a basic HTML document:
Then, is easy to continue exploring and adding tags accordingly. For instance, you can create divisions, with the tag div, or create lists, with the tabs ul and li. HTML5 is vesatile and well documented. Let's code!
For managing the HTML code, I used Sublime Text. I find it useful because it formats the text with color, and you can open not just HTML files, but CSS, Javascript, and even documents like .hex files.
This is how it looks like:
CSS
CSS is a language that we use to tell HTML how to show it's elements. The language consist in references to HTML tags (this time just declared an enclosed in brackets). Inside de brackets, you enunciate the attribute you want to change in the HTML tag, the color of the text, for instance, and state the value. For text, it could be the font or the color.
The language is selfexplanatory. Always, for learning a language, remember that the documentation is your friend. As with HTML, the documentation is vast and the community is also large.
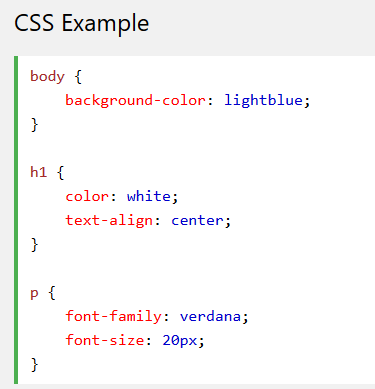
Here we can see that we want our HTML body to have a be lightblue color as a background, our headers H1 to be white in color, and the text to be aligned at the center. Our paragraphs will be shown in verdana font, and will be 20px in size.
The css document of this website can be found here.
Git
Git is a distributed version control system. It's very practical and safe. Being distributed, the information is backed up in computers around the world. This redundancy makes it reliable and, if some information is lost in one computer, can be recovered with the backup of the others.
In windows, gitbash can be downloaded here. Don't install the GUI version. We are going to do it from the old and reliable command line in gitbash.
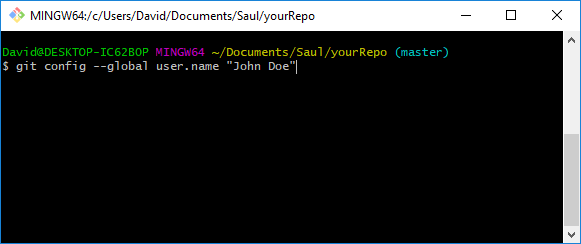
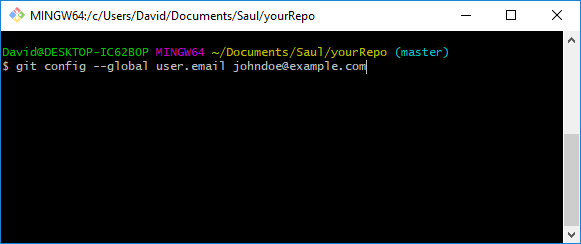
Once installed, open the gitbash and get an identity. You do so by registering a name and a valid email address. We do so by entering the commands git config -global user.name, and it config -global user.email. In the case of joining the Fab Lab 2018, this data should match the identity registered in the GilLab system. Also, this information should not be changed from the GitLab plataform. It will mess up the links. Don't do it!
Be sure that your name and email match the name and email registered in your remote repository (Fab Academy, in this case).
Then, we cloned the repository with the command git clone repository url. It worked fine. We can see now that we have downloaded (technically, cloned), the remote repository form the web to the local repository in our machine. Here is the route shown in my equipment. Inside the new folder set with the developer name (mine, in this case), we locate our files and the special index.html that will be our front page.
For cloning, this is not a problem, but for for pushing files an SHH key is needed.
I generated the keys from gitbash, following the instructions from Joyent, here. I used the part where you generate the SHH key form the Git Bash.
A pubic and private keys has been generated in the folder .ssh.
In the Gitlab webpage we proceed to paste the public key in the appropriate field. We can see then that our option to connect changed to ssh.
Then, we proceed to add files to the local repository. For testing, a text file (testFirsCommit) was added using de command git add filename, then commited with git commit and then pushed wih git push.
The command entered should look something similar to this:

And the command for the email something like this:

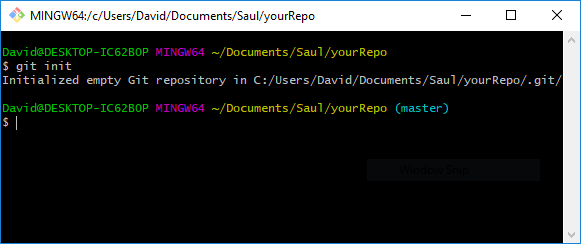
The next thing is to create a local repository. We do that just creating a folder where we are going to put all the documents we want to share to the web. Then, navigate to it using the command line, or right-clicking in the folder and choosing open Git Bash Here.
Alternativelly is possible to navigate through the file system using unix commands.The main are pwd, ls, and cd. Other commands could be found here.
Once you are in the folder you want to use as a local repository (in your machine), you can initialize the repository with the command git init.
Here is an example for the name settings for the repository.
And here an example of the email address registration.
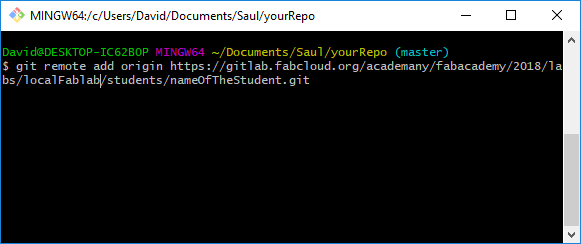
With this command we add the remote. The system will assign the name of your lab replacing "localFabLab" in the example, and nameOfTheStudent will be replaced by your name. The exact link for your repository could be found in the Git Lab portal, once you are logged in.
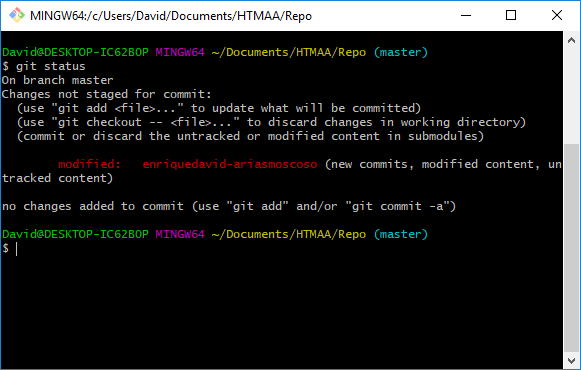
This is an example of the use of the command "git status". It shows what have been modified since the last commit.
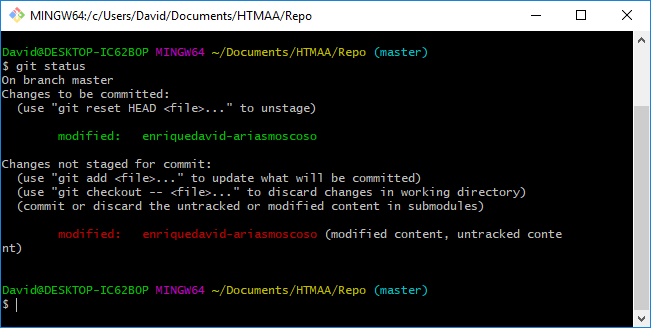
We use the command "git add" to add files to the stage. For a shortcut, I use de parameter "-A" for including all changes. There is no message in response, but our files are now staged.
This is an example of a commit with the "-m" tag, that denotes the following line with a string enclosed in quotation marks ("""").
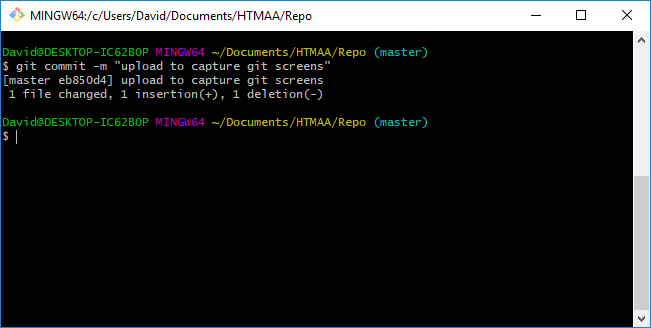
Then we proceed with the commit. We use the parameter "-m", that states for "message". It's a good practice to explain our commits, for future reference, or for colaborators use.
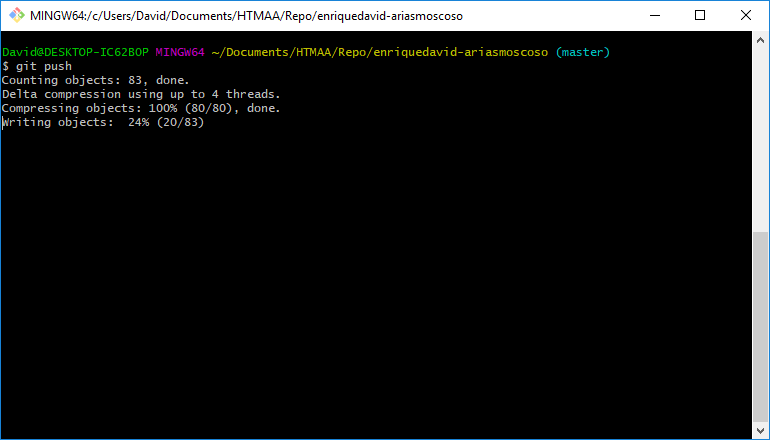
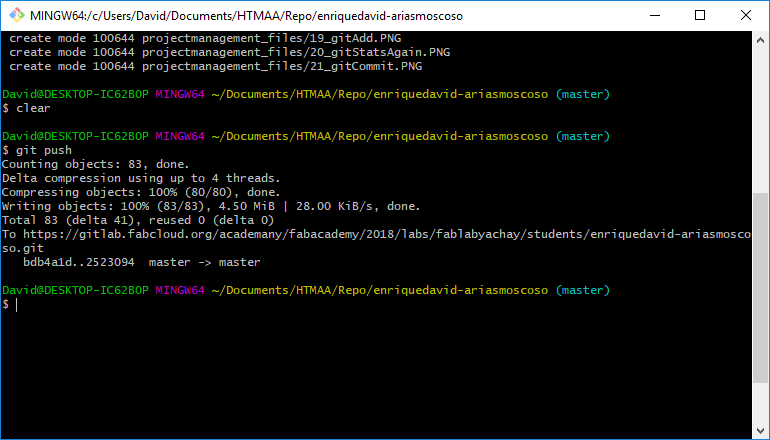
Finally, we push our commit. It is possible to use the complete command, "git push origin master", but just "git push" works fine with my system.
A resource to find git commands is Basic Git commands by Bitbucket Support.
Once this is done, it´s time to configure our gitlab-ci.yml. This feature permits to point to a file with a name "index.html" (must have that name, as a convention to the first page to be open). I set it though the web interfase. Don´t forget to create it for HTML.
Then I commited and pushed an HTML webpage I composed, and woked like charm. If it doesn't work, try git pull before proceed.
Once done, I uploaded the rest of the pages and the css text layout file.
More about version control. Comparisons.
Centralized vs distribuited.
Version control systems where developed with a goal in mind: Track changes. Initially, the aproximation to that goal started as system based on a central repository. All user had to reffer to that repository. This had some problems that distributed systems solved, for instance, the necesity to be conected to perform operations in the repository.
Examples of centralized systems are Current Version System(cvs), and Subversion (svn).
This centralized repositories were around for a while, but are loosing popularity against distrubuted systems. In this systems, all the users have copies of the repository, and use a central repository just as a reference, so all have something in common. This solve a lot of operations, security, and time eficiency problems, among others, and made descentralized version control systems very popular.
The main distributed systems are Git(git), that we already discused, and Mercurial(hg). Mercurial is a system very similar to git. It is posible to use a command line, and the commands are similat to git. For instance, you have git commit, in git, and hg commit, in Mercurial. There still discusions about wich one is better. Here is an analysis by Atlassian blog.
Introduced yourself/upload a page:
The page is online, and can be found here. There you will find a link to the presentation page.
.Project schedulle
For this project, most of the material are already available in the lab, so we didn't need to worry about delivery time. Most of the research was done during the Fab Academy schedule.
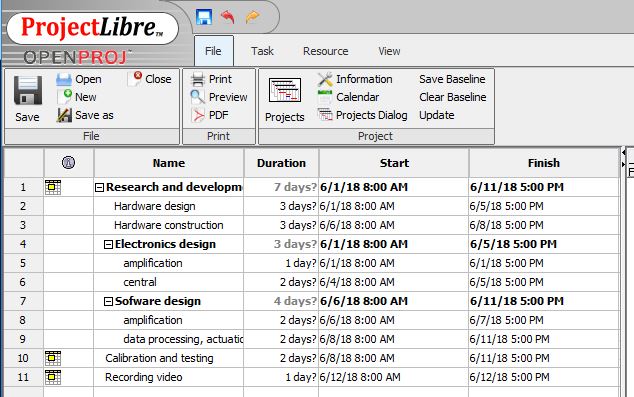
For management, I used the open-souce program ProjectLibre(TM). Here is the list of activities:
And here the Gantt chart, showing dependencies.
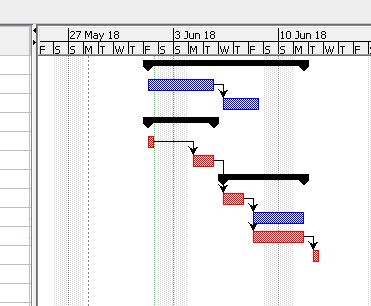
This program allow us to track the progress, manage the lagged tasks, and the resources. Here is the link to the file (you will need ProjectLibre(TM) to see it.)

This work is licensed under a Creative Commons Attribution 4.0 International License.