Tasks of this week:
The weekly assignment started with the simple tasks:
1. The development of the project.
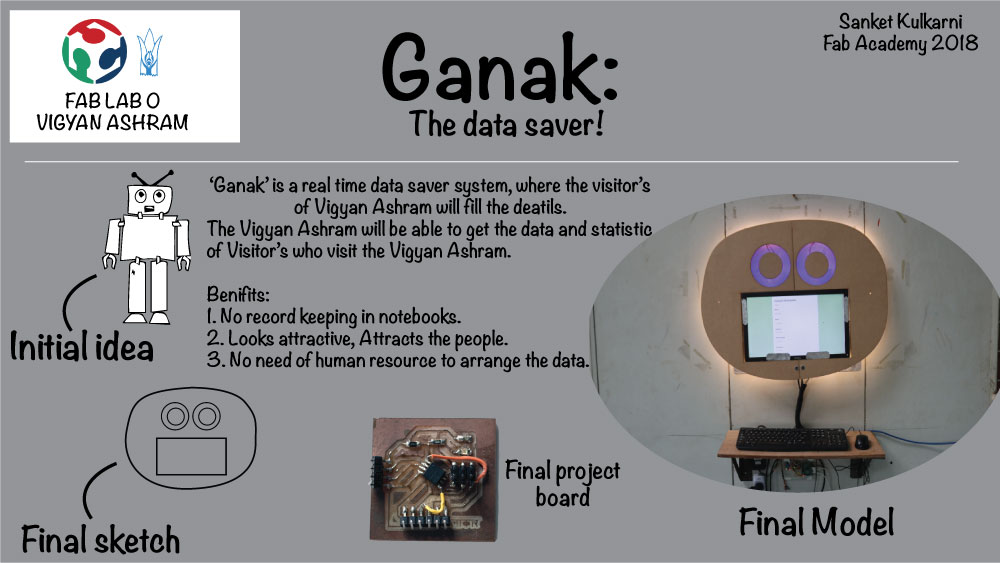
Ganak: The Data saver!!
1. Problem:
Currently 'Vigyan Ashram' has a footfall of around 8-10 visitors daily. These visitors are potential stakeholders in the development of Vigyan Ashram and they could become an effective medium to reach out to the larger society. However, at the moment, there is no method or tool to capture the data of these visitors.
2. Objective:
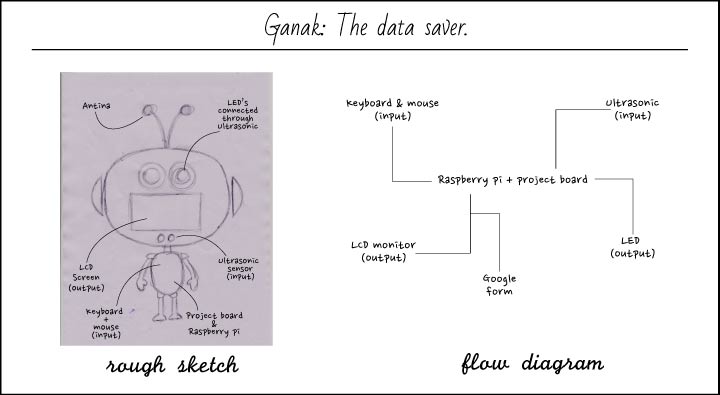
The task is to make an attractive digital system to keep the record of the visitors of the Vigyan ashram. Where the people will attract towards the structure and it will make them fill the details into the system. Here is the rough sketch.
3. Ideation:
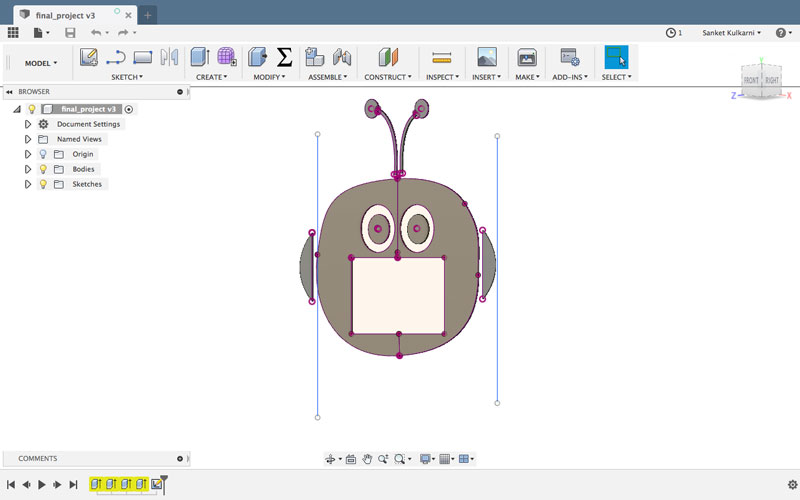
At the initial stage, I decided to make robot kind of structure because normally people attracts towards the technological things. I started working on that. I was focused on the simple, small and attractive robot structure. This is what I thought of my final design.
4.CAD modeling:
As the design was ready on paper But In actual insted of making all the body I will make the head. I started to work on CAD modeling. In the week 3
assignment, I learned the basics of Fusion 360. I designed the CAD files in Fusion 360.

5.Computer control cutting:
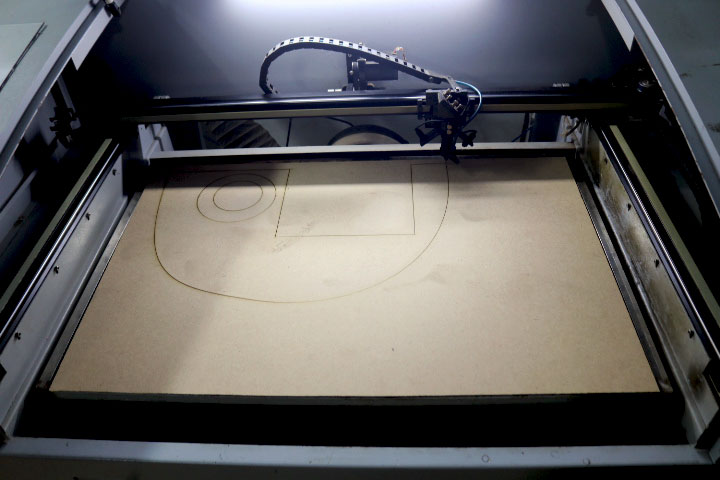
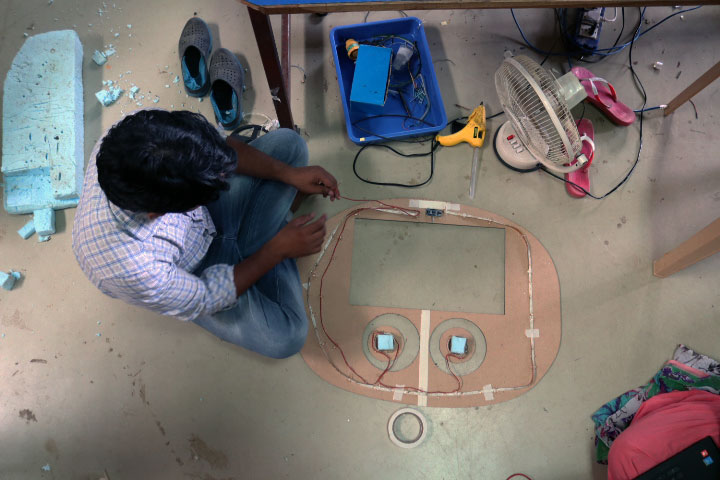
Currently, the structure which I have made is in MDF. Medium-density fiberboard (MDF) is an engineered wood product made by breaking down hardwood or softwood residuals into wood fibers, often in a defibrillator, combining it with wax and a resin binder, and forming panels by applying high temperature and pressure. MDF is generally denser than plywood. It is made up of separated fibers but can be used as a building material similar in application to plywood. It is stronger and much denser than particle board. MDF is quite cheap than acrylic. So I decided to make my structure in MDF. To cut the parts I used the laser cutter which we have in our fablab. In the Bigyan ashram, we have two types of laser cutter i.e SIL laser cutter and epilog laser cutter. Generally, we are using SIL laser or CO2 laser cutter which having 600*900mm bed area. I used SIL laser cutter because the bed size is bigger than the Epilog laser cutter. I learned the operation of the laser cutter in week 4
Here you can see the pictures.
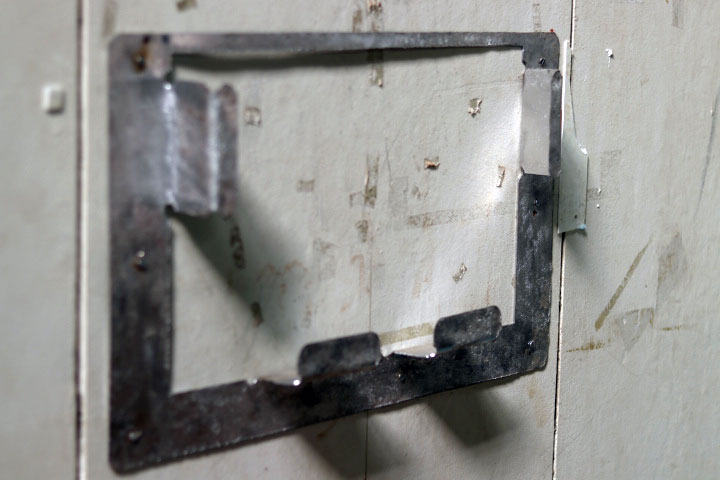
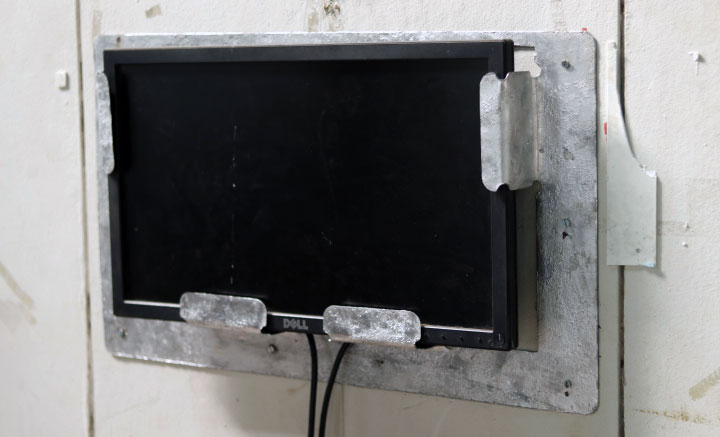
6. Mechanical part:
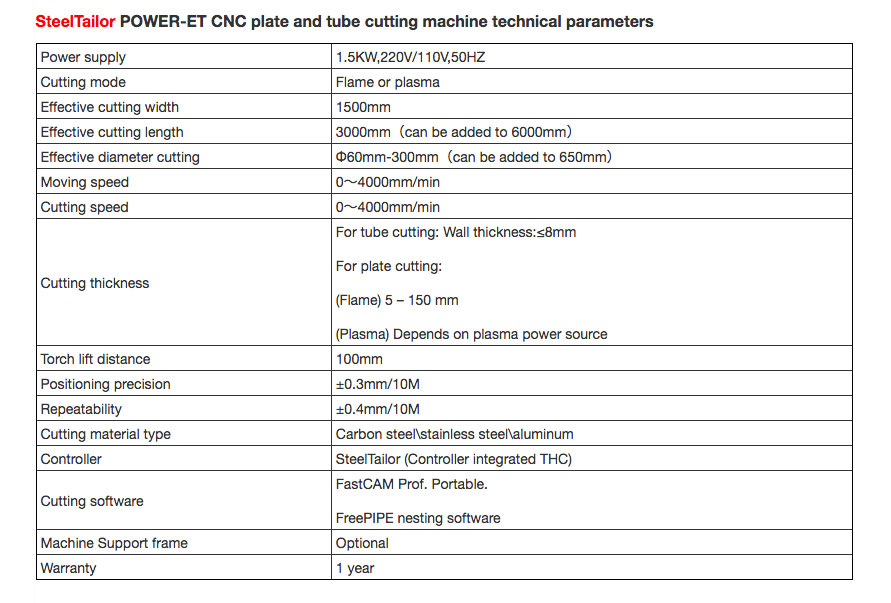
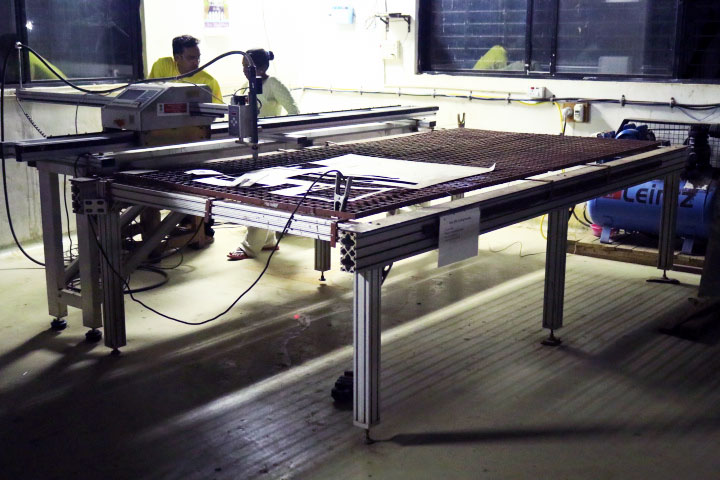
In my project, I have used a monitor as an output. I wanted to hang it to the wall because I want my robot study. I designed a wall mount for the monitor. Earlier I thought to make it in acrylic but then I realized that after sometime acrylic can get damaged and it will take some more time to bend. I have few bends in my design. So I made the stand in metal. In the Bigyan ashram we a ‘Steeltailor’ compony’s plasma cutter. To cut the stand I used the plasma cutter. The bed actual size of the plasma cutter is 5ft x 9ft but the working area/cutting bed is only of 4ft x 8ft. You can see the technical specification down below.
This is the plsama cutter
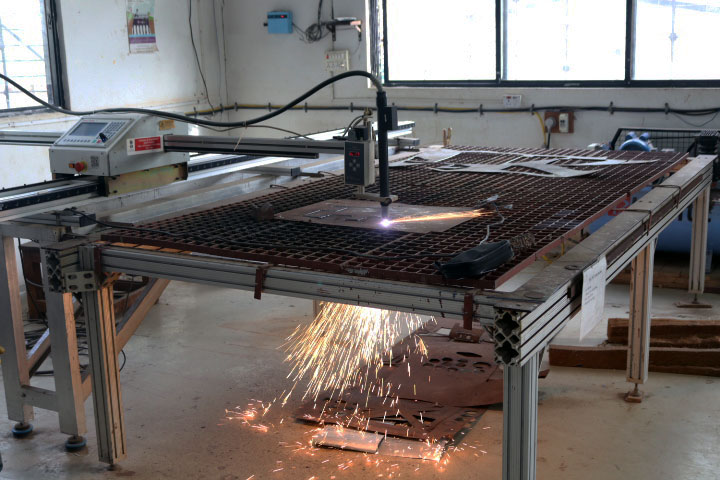
This is the main nozel of the plasama cutter. From here the laser beem comes.
This is how the plasma cutter cuts the metal parts.
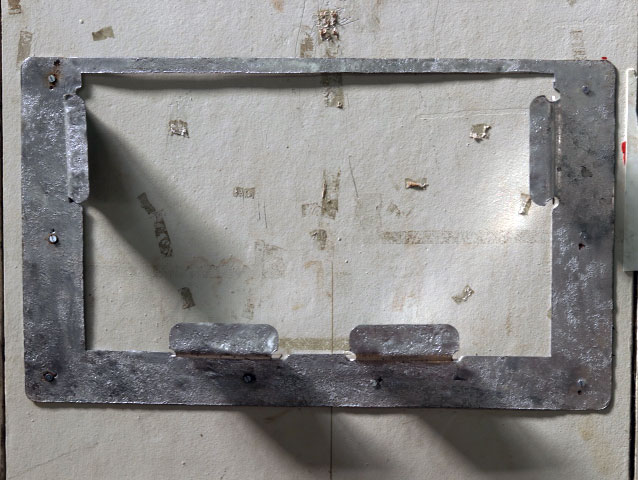
Here is the final part which I have used to hand my monitor.
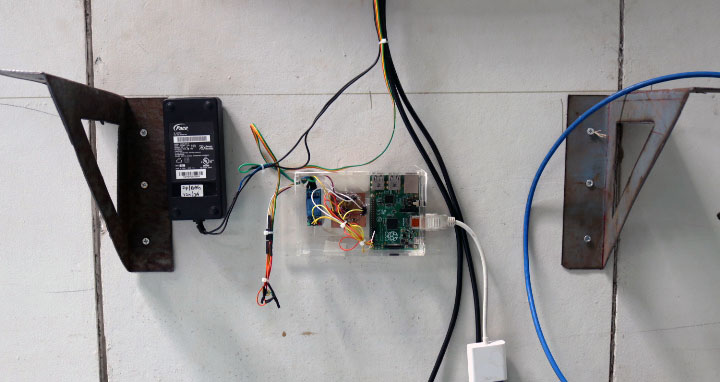
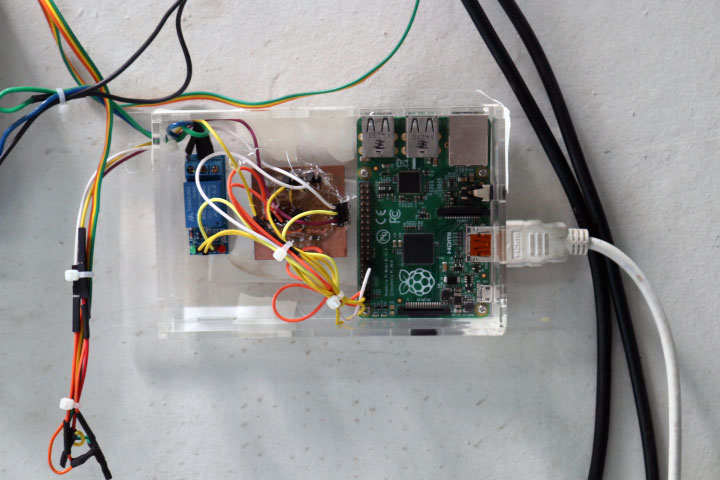
7. Electronics part:
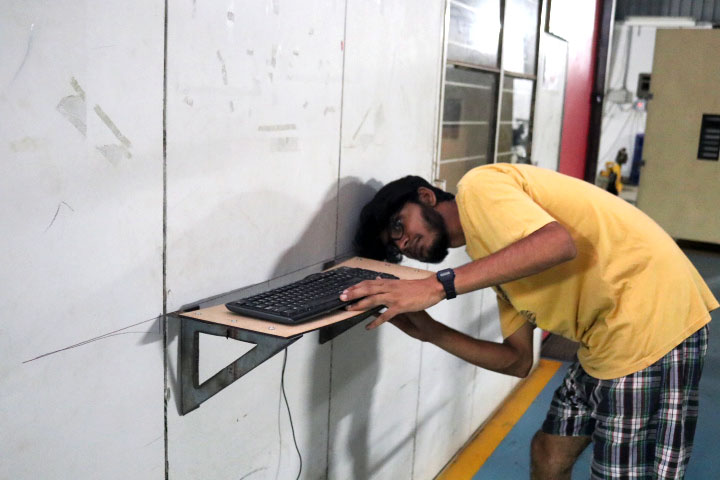
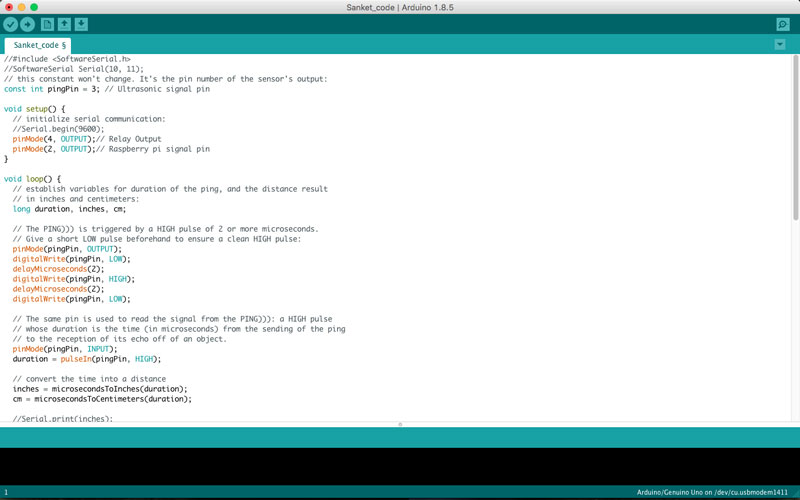
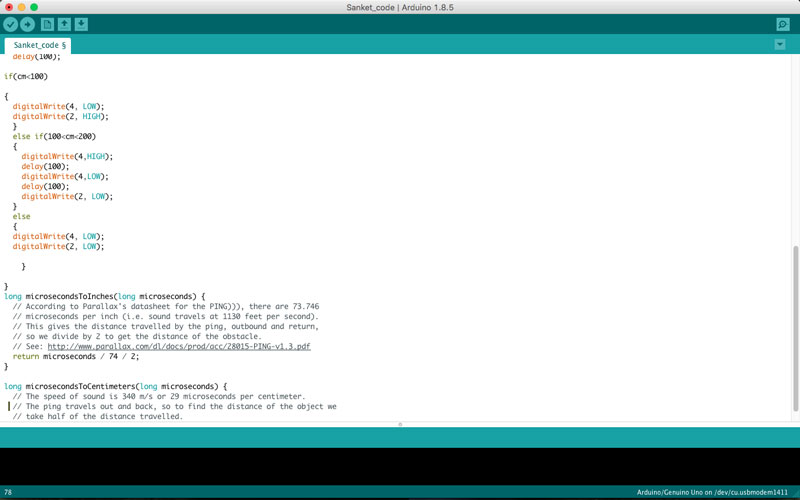
The ultrasonic sensor and Rpi is the main part of my project. Whenever someone is going to come in front of the structure the ultrasonic will send the signal to my project board/input board Input board will send the signal to micro-controller then micro-controller will send the signal to the relay and relay will be triggered to glow up the LED. Another major part of my project is the data saving. To store the data I choose google form. I choose google form because it is free. It is accessible from everywhere. The maintenance is too low. You can segregate the data as per your requirement. My main concern was towards the maintenance. Because the Vigyan ashram is in a remote place it is 60kmts away from the city area. So I wanted to make this system which will not have any big problem in future. The data will be saved on google drive. So the people can also download the data.
8.Programming:
As I have used the ultrasonic sensor I have made my own board for that. And with the help of my instructor, I wrote a code. You can download the code at the end.
9. 3D Printing:
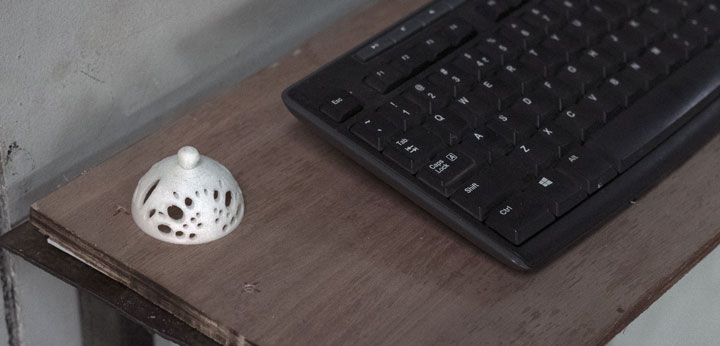
As a decoration I wanted to keep my 3D printed lamp cover to my project which I have made in my weekly assignmet. you can check it Here
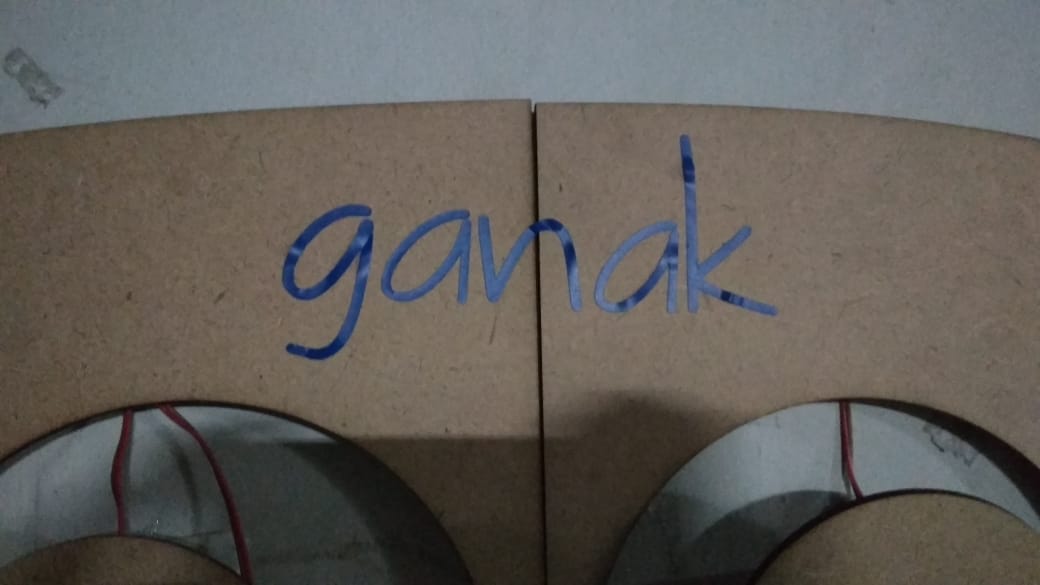
10. Vinyl Cutting:
To decorate my project I have used vinyl cutter and cuted the name of my project. I have learned about vinyl cutter in Computer Aided Design
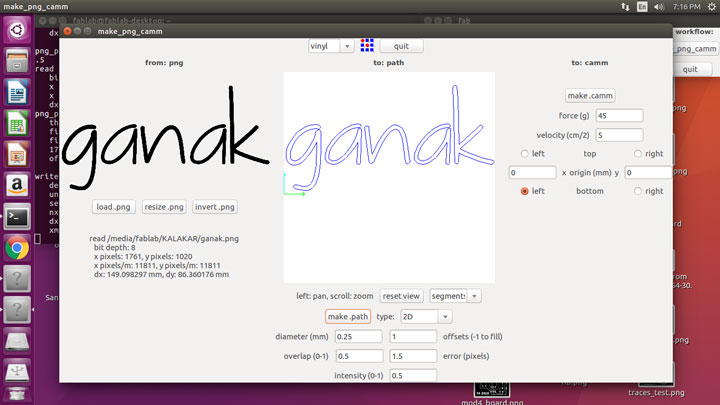
and I have pasted it on the project.
10. Bill of material:
Here is the bill of material which I have used in my final Project.
1. MDF: 300(INR)
2. 10 inch LCD: (I have used which was avilable in fablab) It costs (3000)INR
3. Keyboard: (I have used which was avilable in fablab) It costs (500)INR
4. Mouse: (I have used which was avilable in fablab) It costs (300)INR
5. LED strips: (1 meter) 150(INR)
4. Acrylic: 300(INR)
5. Jummper wires: 100(INR) (10Rs each)
6. Ultrasonic sensor: 95(INR)
7. Raspberry pi: 2699(INR)
The metal sheet and wood sheet which I have used for monitor and keyboard stand was re-used from scrap.
So The total cost of my project is 3644 INR.
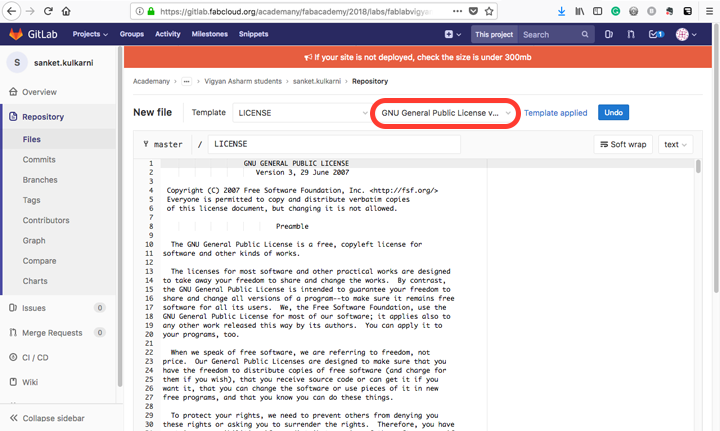
11.Project License Information:
I have chosen GNU GPLv3 for my project.
Anyone can studied it and can modify it. Copyright and license notices must be preserved. You can get more information Here
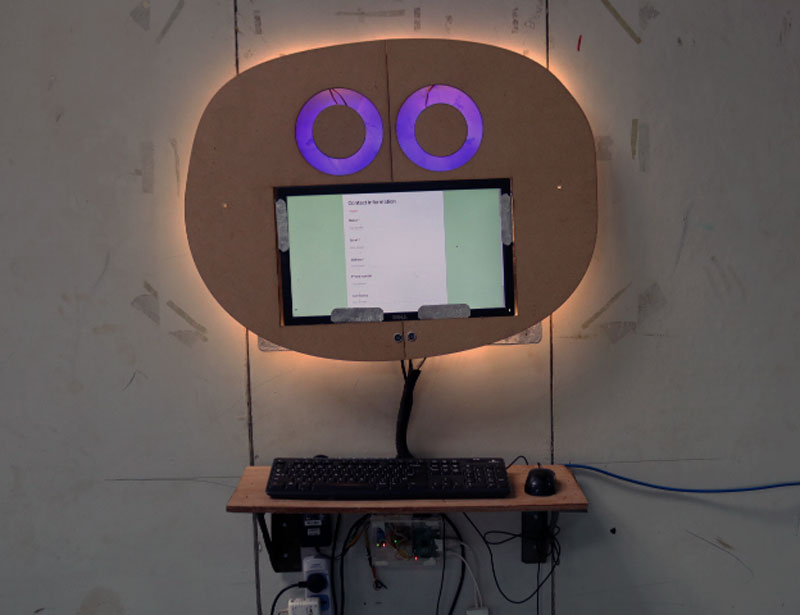
This is how my final Project look like.
This is the poster of my final project.
Here is the final video of my final project.
You can Download the Files.