Basically I wanted to let people travel while beautiful and/or nutritious plants grow in their appartments(in Lima space is scarce).
I selected hydroponics because as an Engineer I understand better if I know exactly whats happening and I find soil-less plants more intuitive.
After a bit of research I discovered in order to do so I had to control: Nutrients, PH, Temperature, Oxygen and Light.
I researched some more and found out if I changed the water of my main tank every 15 days I would only have to control Temperature, Oxygen, Light and in a smaller scale PH (Just need some acidic component to control the hydroxides made in the water over time).
So my process would be the next:
- Maintaining Temperature between 16-30 Degrees Celsius.
- Maintaining PH between 5.5-6.7.
- Constantly Oxigenating the water with an air pump.
- Represent the sun cycle with an LED: 12 hours on 12 hours off(in the future Ill be testing this to modify yield and growth speed).
The deadline is Monday June 18th 2018. It is currently a week away.
From the previous task list I've completed:
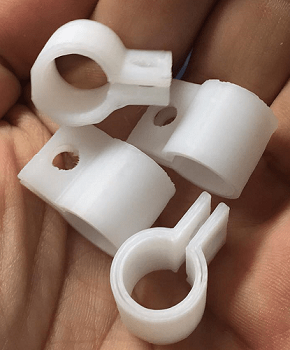
2. 3D designing and printing the tightening mechanisms for the hoses.
3. Making the supports for the Nutrient and Warm water tanks.
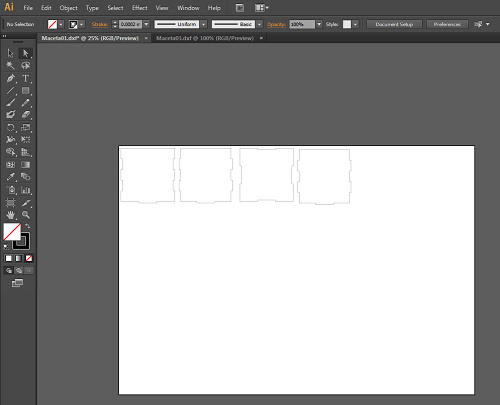
4. 2D Designing and laser cutting the Tank Lids.(Tried and failed so I 3D designed them and Printed them).
7. 3D Design and print the small pot for the germinated seedlings to be placed.
The next tasks remain:
1. Modified Satchakit Version 2.0 and 3.0 (2.0 version is finished)
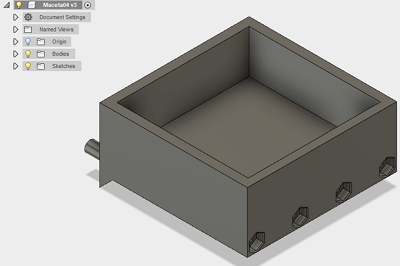
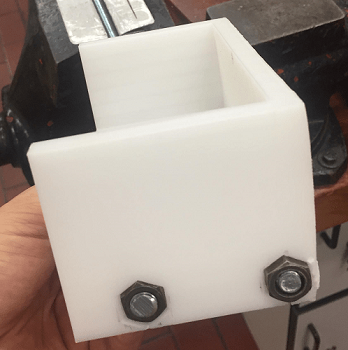
5. 2D/3D Design and print/mill a nice box for electronics.
6. Acquire acid substance to control PH, volcanic rocks and sponge.
8. Finish writing the code for the automated hydroponic grower(already 80% acomplished).
9. Assemble the project as a whole and make it work.
1. The Satchakit 3.0 needs soldering which will be done today.
5. The electronics box ill be leaving for the end, its fairly simple but I need the rest of the structure to know sizes and spaces.
6. I'll get all of them tomorrow.
8. This ill be finishing tonight.
9. As soon as the rest of the tasks are finished this one will be crossed by default.
Most of my designs have worked properly, my code is working fine although I didn't know I had to remove the plastic casing from the ORP sensor so that won't be an issue anymore.
Regarding electronics: My boards have been a hassle but through trial and error all have worked eventually.
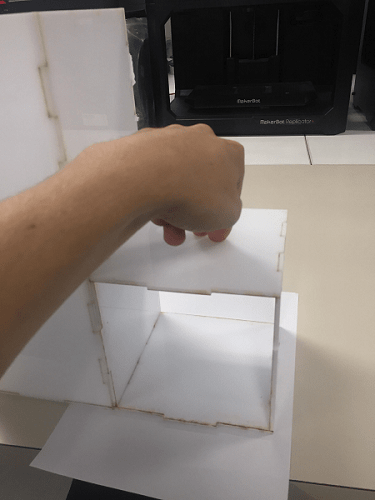
The lids I laser cut for the tanks didn't fit properly. The 3D printed supports I had to drill and sandpaper because they came out a little bent.
The ORP sensor had some problems but I figured them out.
Also, one of my motor driver boards didn't cut properly so I had to make 3 instead of 2.
Finally, the main tank I made was to big so I had to make anotherone.
Only 3:
- How much water will my lettuce consume daily.
- How much will the PH need to be adjusted.
- Which option is better for temp control:
1. Stick the temp sensor to the outside and use a mathematical algorythm to adjust temperature with the heater.
2. Calculate how long it should be on and off to maintain a water temp between 25-35 Degrees Celsius.
I've learned lots about hydroponics, I've closed some concepts regarding supports and space optimization.
Also I applied what I know from Arduino and learned how to program new sensors (temp and ORP).
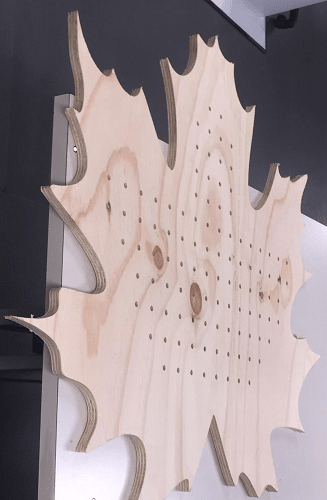
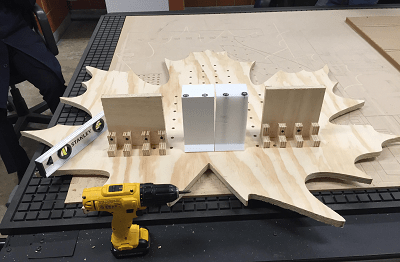
I started by designing a Huge 2D Maple Leaf on Fusion 360.
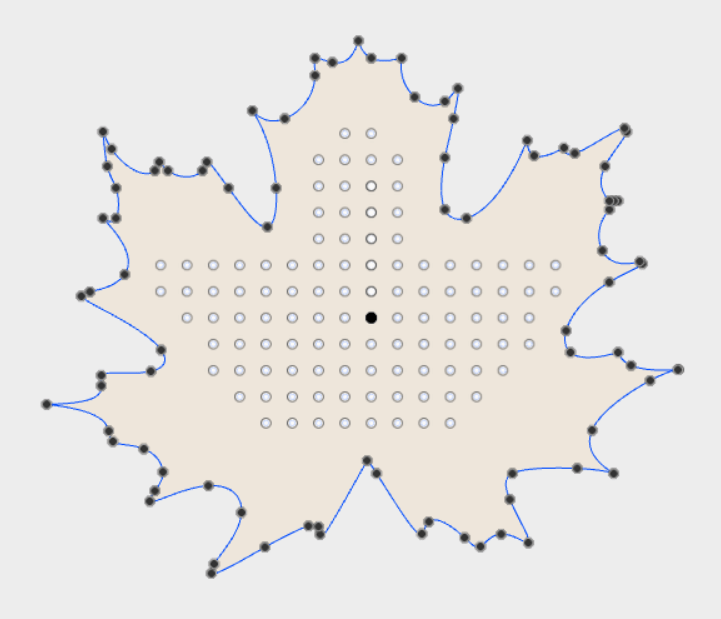
Next I milled it with the Multicam router.
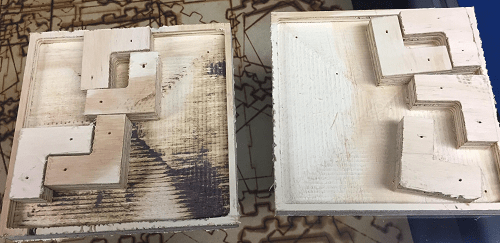
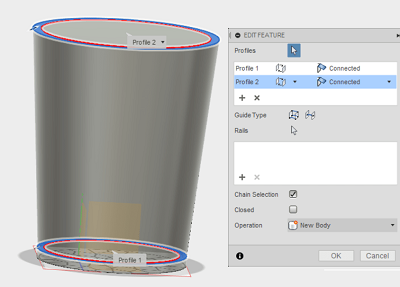
In order to make the tanks I designed 3 sketches on Fusion 360.

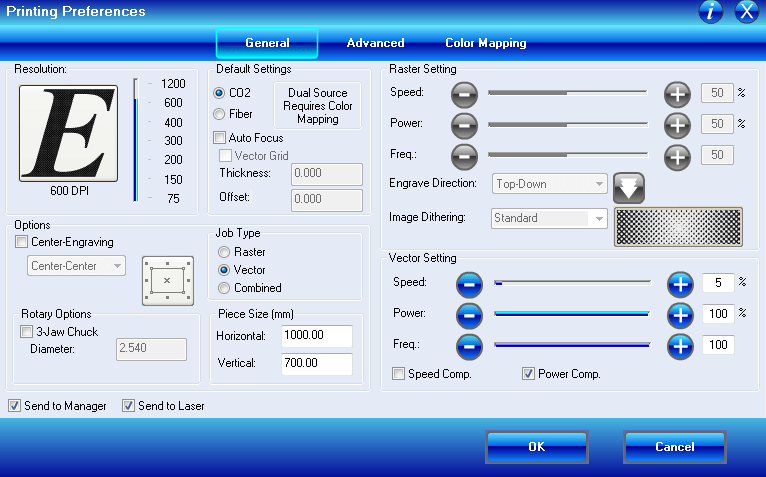
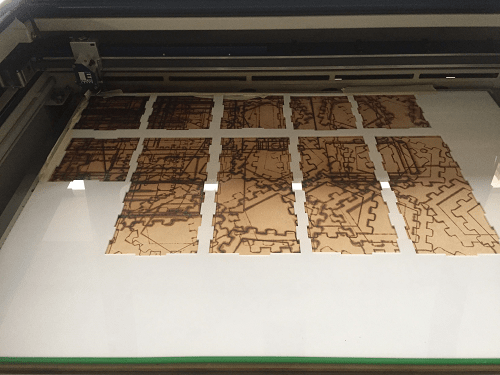
And Laser cut them on the Epilog using Ilustrator.
Next, I glued them using locktite.
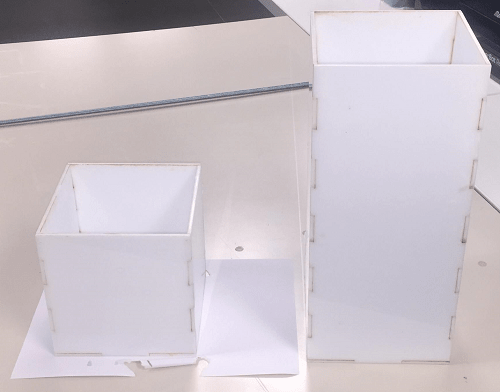
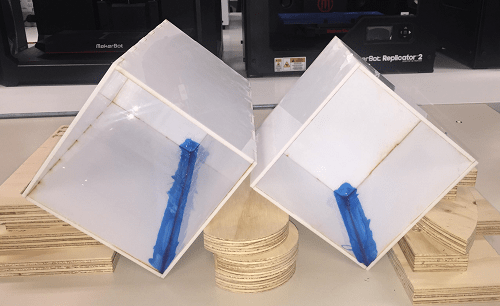
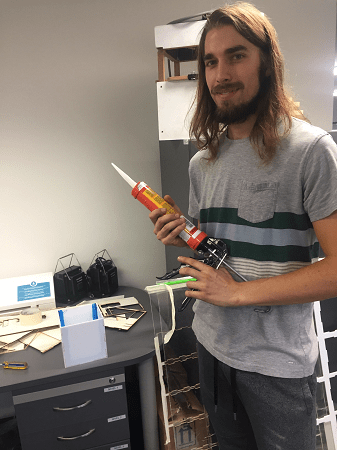
Finally, I used a blue half-cement paste to make them impermeable and also a silicone gun.
I designed the support with Fusion 360.
It was too big to print so I had to split it in half. I also had to print in both the Makerbot 2 and the 2X so I could finish in time since it was an 11 hour print. (Way too much material so I decided to make the other 2 with MDF.)
Finally, I sawed an endles screw and sanded the plastic till it fit, then added the bolts to tighten it to the structure.
I 2D designed the support and some L shaped woodent pieces to screw it to the structure.
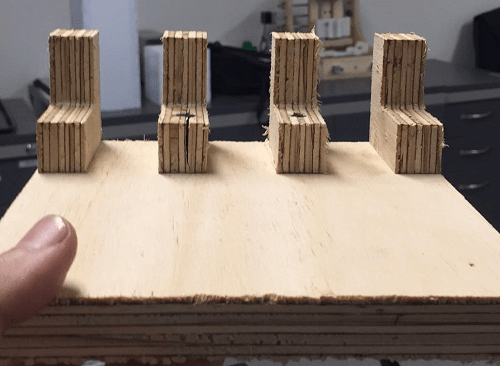
Milled it with the multicam.
And nailed it to my Maply Structure.
I designed them in Fusion 360.
And 3D printed them on a Makerbot 2X.
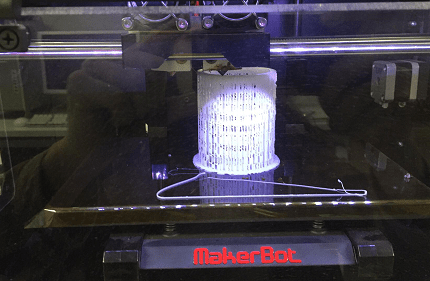
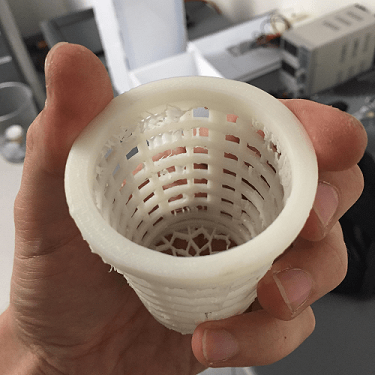
I designed it on Fusion 360.
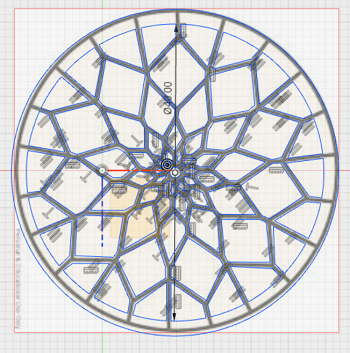
I wanted it to have a nice mandala pattern.
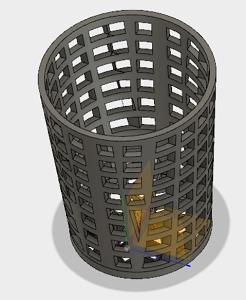
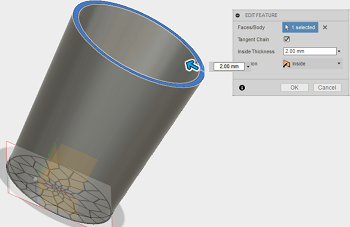
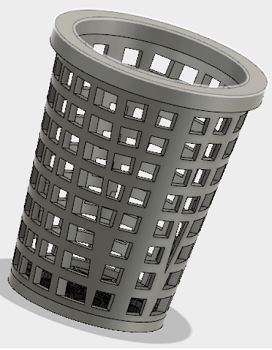
I 3D printed it on a makerbot 2X.
I bought all the following parts in Lima.

The lamp, sockets, tube, endless screw and bolts were bought in a huge hardware store near uni(Sodimac).
The LCD, Pumps, ORP Sensor, Temperature Sensors and relay were bought in the central district of Lima (a place called Paruro).
Last but not least, the air pump was bought in a pet store.
This was copied from week 13.
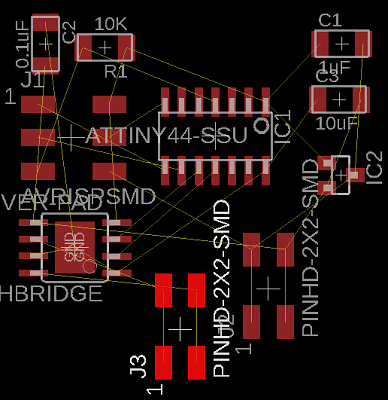
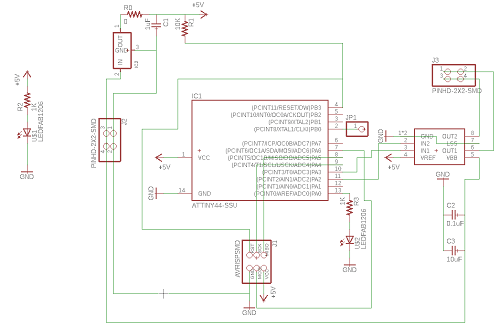
I designed my satcha kit's schematic.
Next I started routing the board.
It was hard so I added some 0 ohms resistors to use as bridges.

I finished routing.
Following, I exported the monochrome .png and passed it through fab modules.

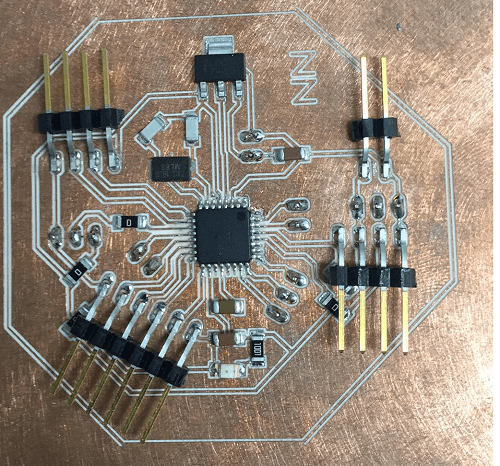
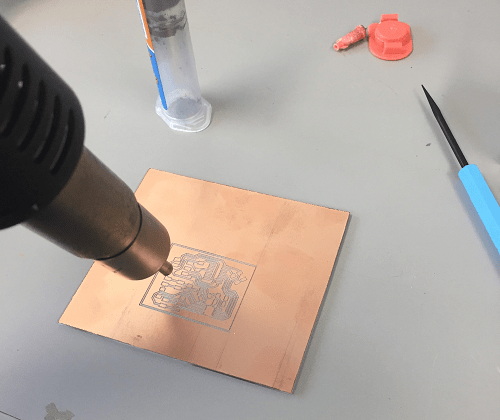
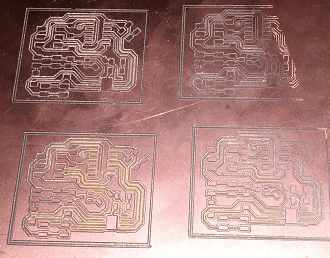
Next, I tried to mill the board but it worked on the second try.
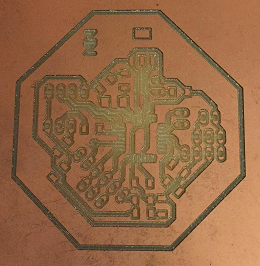
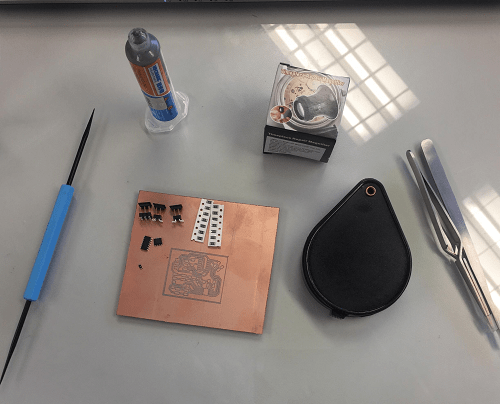
After, I soldered it with flux and drilled the through holes for my pins.

Finally, it was soldered and ready to program
Time to program my satchakit.
The bootloader burned successfully and I uploaded my arduino code (downloadable at the end of this page).
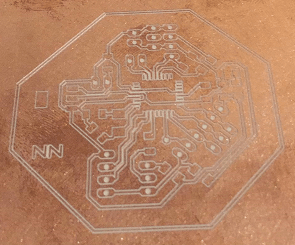
After I figured I could use some more pins so I adapted my board.
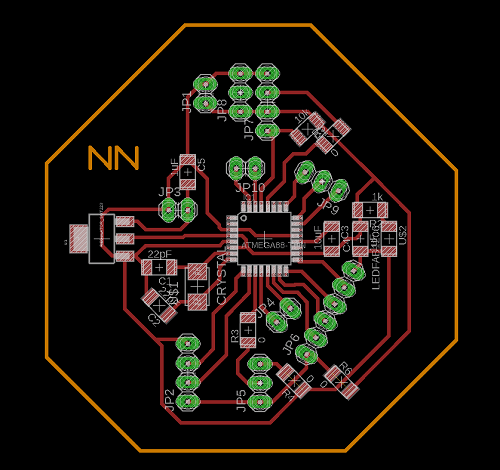
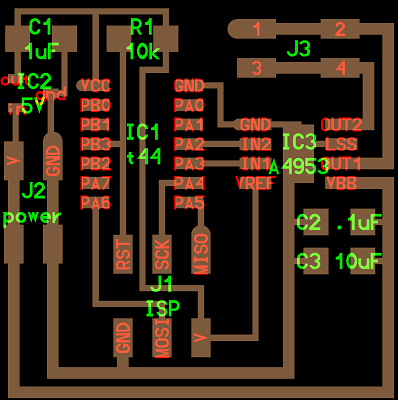
I wanted to add both a LED to be able to show programming skills for week 9 and a LED to show when the board is powered.
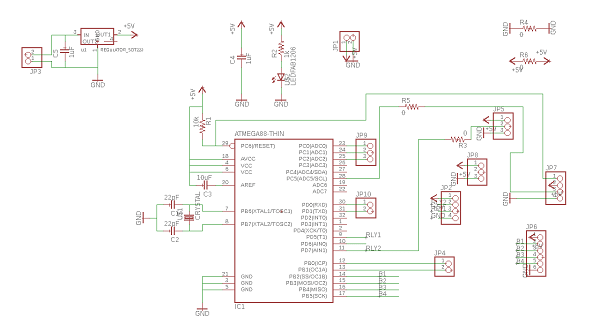
First, I downloaded the allegro-2 library for my eagle to have more component choices.

Second, I added the components I was to use.
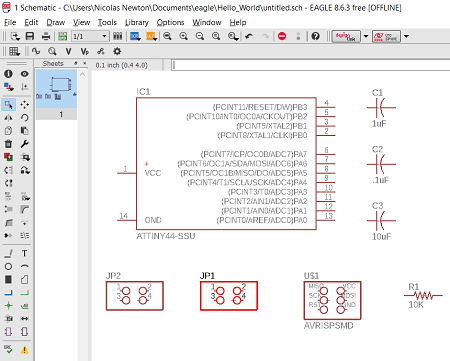
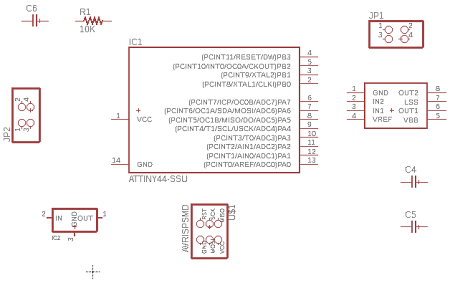
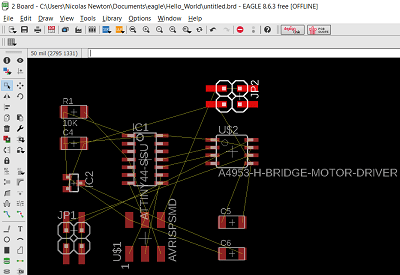
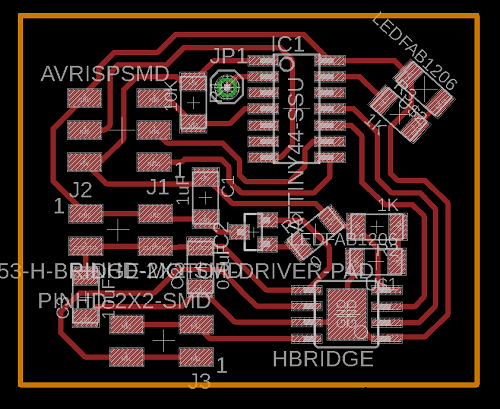
Next, I connected the paths, changed the names of some paths and checked for errors in my schematic.
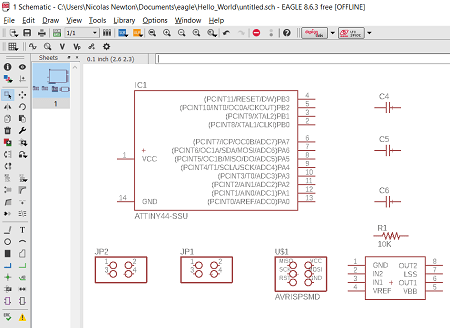
After a couple more components and connections my schematic was done.
It was time to start routing
When I start I like trying auto-route to get a general idea of where my components should be although its not as easy as it sounds.
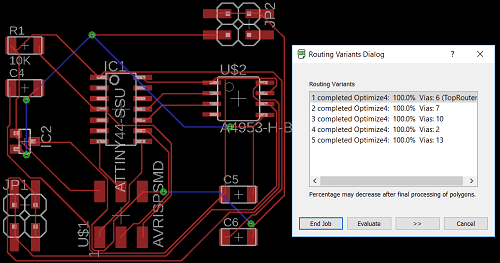
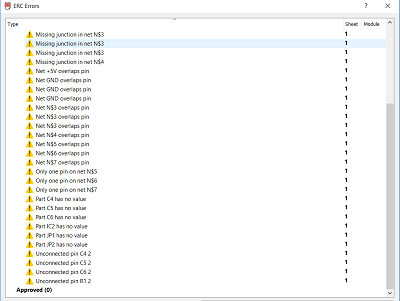
After I moved my components around and tried routing and checked for errors (Aside from the missing routes everything seemed ok).
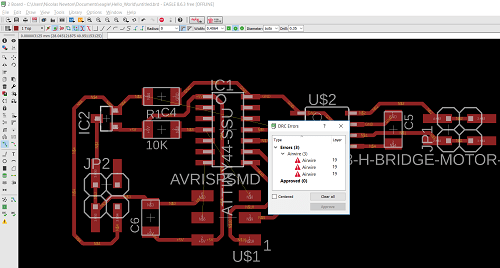
I couldnt connect all the paths. D:
So I started again.
This time I managed by using a 0 ohms resistor bridge.
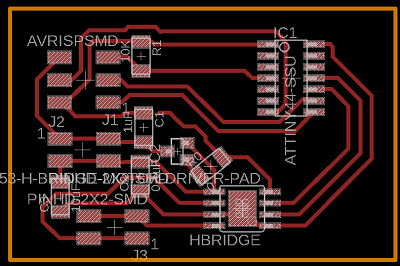
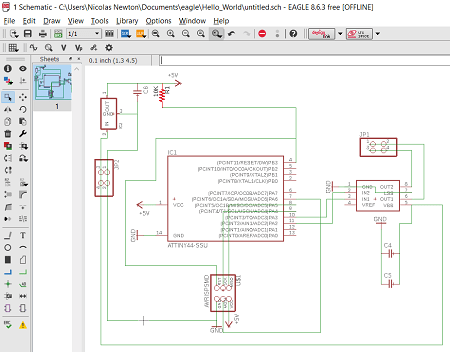
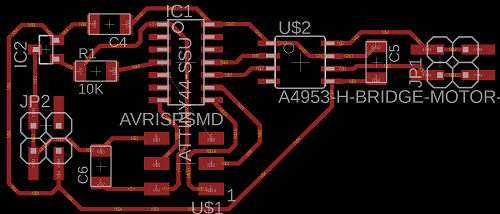
I optimized the space used and this was the result!
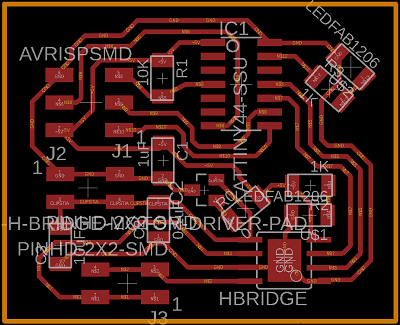
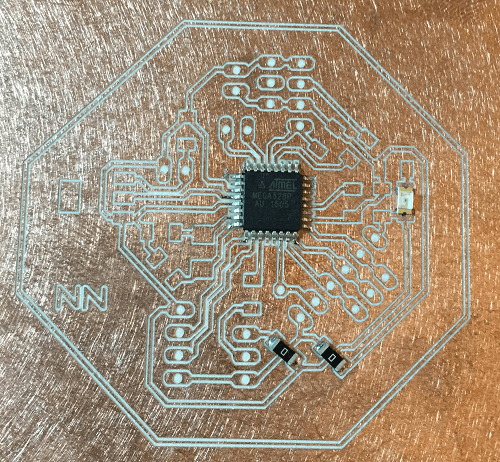
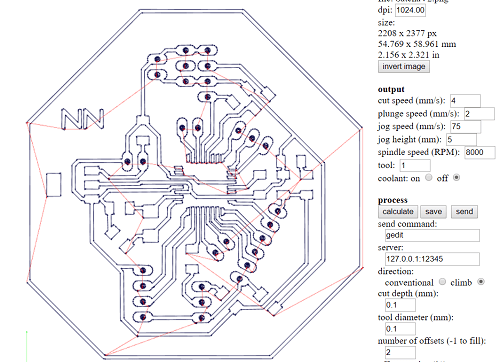
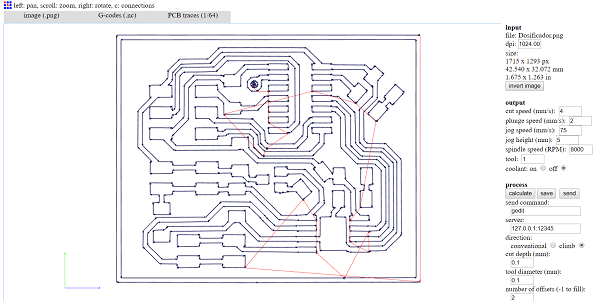
I exported the monochrome png image of my design.
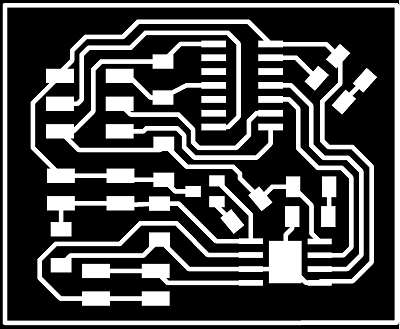
After I inserted the monochrome into FabModules to get my G-Code file (.nc).

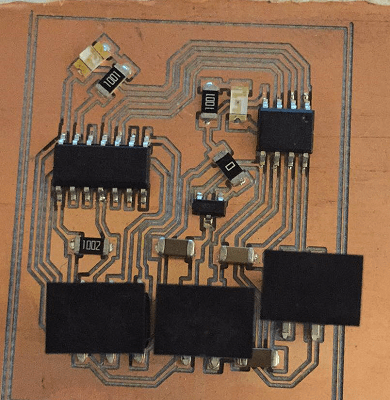
Using the Modela I milled my board and started soldering.
After about 25 minutes I was done(getting better at soldering).
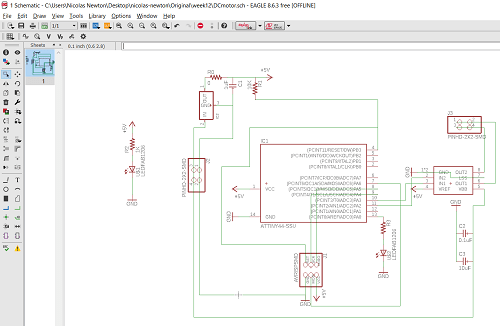
For my final project I just added a pin so I could control the DC Motors with my Satcha Kit using code.
I connected my board to my laptop using my FabISP and an FTDI cable.
Next, I started my Arduino IDE and selected the right options in the tools area.
It burnt the bootloader on the first try for both boards and right after my code uploaded succesfully for the milivolt doser and the temperature doser.
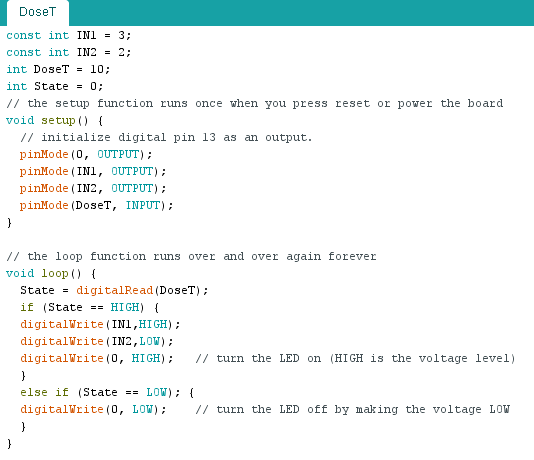
This code was really simple, I defined some variables as integers and marked my pump power pins as outputs and the digital pin connected to my satchakit as an input to be able to control the pumps.
Basically, when the satchakit sends a HIGH value through the pin the pump turns on.
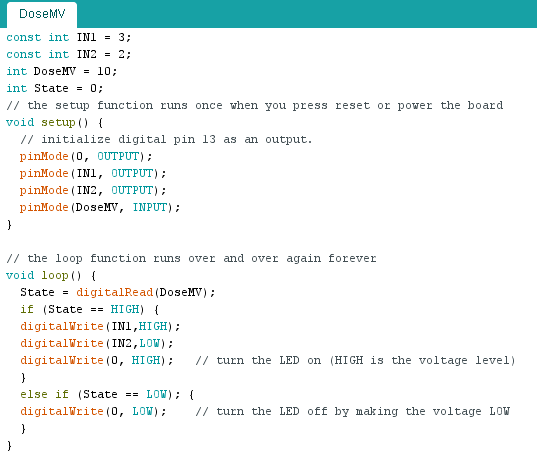
The code for my milivolt doser was basically the same thing as the logic is writen on the satchakits code.
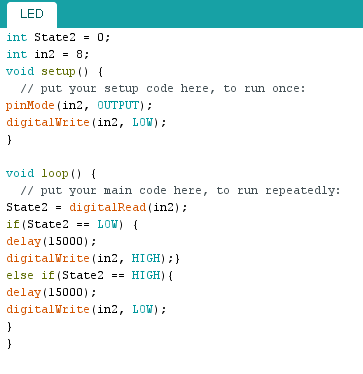
This code was a simple relay and timer so I set it up to let the 220v through for 15 sec and to block it for 15 seconds to imitate the sun cycle.
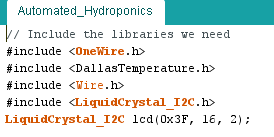
First I included the libraries I was going to need.
-OneWire.h for the thermocouples.
-DallasTemperature.h for the thermocouples.
-Wire.h for the LCD screen.
-LiquidCrystal_I2C.h for the LCD screen.
-I attempted to add the ultrasonic library but it was not working so I got the whole code.
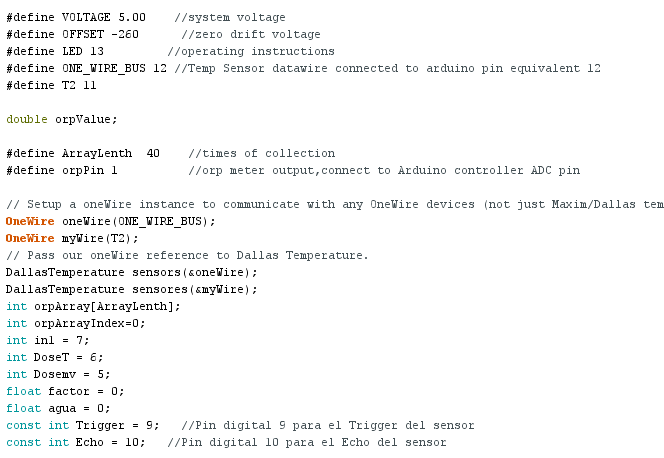
Next I defined my variables:
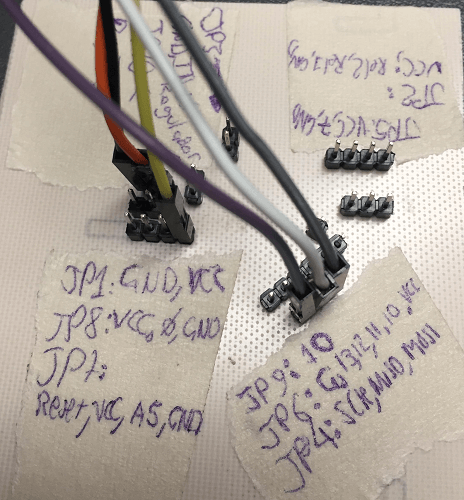
- oneWire(ONE_WIRE_BUS) was the default variable for 1 thermocouple. It was set up on pin 12
- myWire(T2) was the code for a second thermocouple which was set up on pin 11 (the T2 was decided by me so you can decide the name).
- sensors calls the temperature on thermocouple #1(main tank).
- sensores calls the temperature on thermocouple #2(temp tank).
- Orpsensor was added directly from the example(it is compulsory that you use analog pin A1).
- in1 is set up for pin 7 and controls the heater.
- DoseT is set up on pin 6 and it controls the pump with suction from the temp tank through the drivers explained previously.
- Dosemv is set up on pin 5 and it controls the pump with suction from the electrical conductivity regulation tank.
- Factor was a variable I used to regulate temperature.
- Agua was my variable to determine the amount of water in the main tank using the ultrasonic.
- Trigger and Echo were set up for pins 9 and 10 respectively.
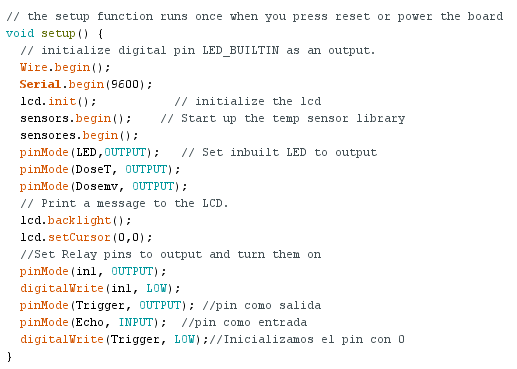
Next I started my serial at 9600 baud rate, initiated my LCD and thermocouples.
I also defined the LED and dosers as outputs, turned on the LCD backlight and set the cursor on the first space(0,0).
Following:
- I defined the Heater as output and turned it off.
- Defined the trigger and echo as output and input respectively and turned off the trigger.
First part of the code tells the ultrasonic to measure the distance between it and the solids or liquids directly infront of it.
Next part of the code was from the orp example to measure the milivolts being trnasfered from electrons moving by oxidation and reduction half-reactions.
sensors.requestTemperatures(); and sensores.requestTemperatures(); ask for the temperature from both thermocouples.
agua is using d which is the distance measured by the ultrasonic to determine the amount of water in the tank using the area of the tank.
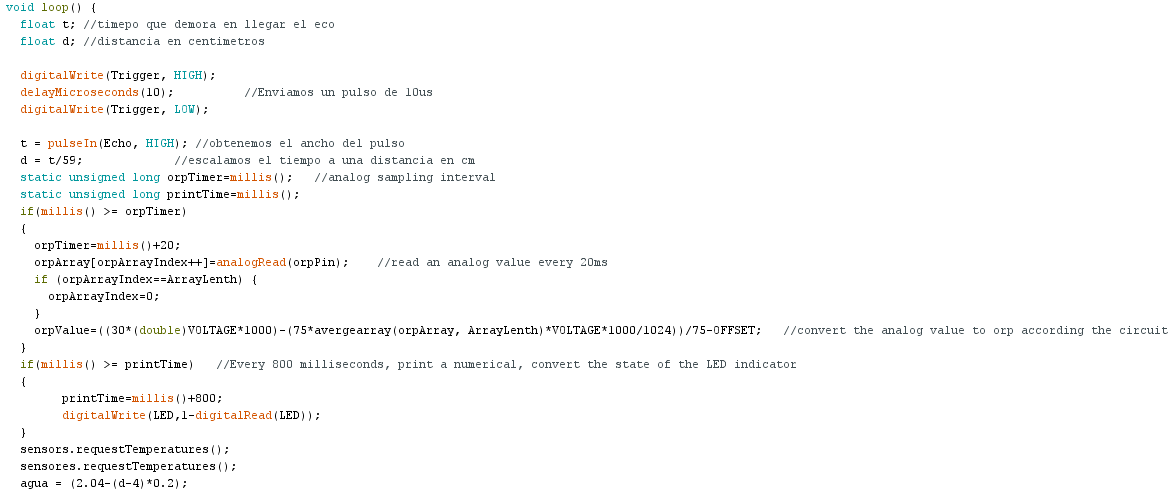
Next, I added what my LCD would show. ORP (milivolts), liters and temperature.

The following if statements control the heater, and doser pumps.
- First if determines when to turn on the heater.
- Second if determines when to dose water from the temp tank by making sure theres less water than the top to prevent the plant roots from drowning.
- Third if determines when to dose hydrogen peroxide mixed with water from the EC tank also making sure that the water level is not at the top and a small delay.
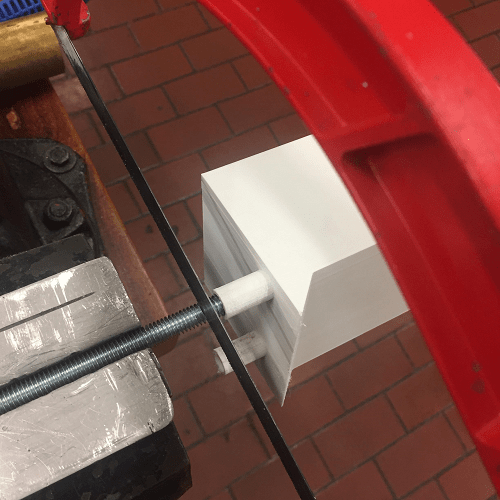
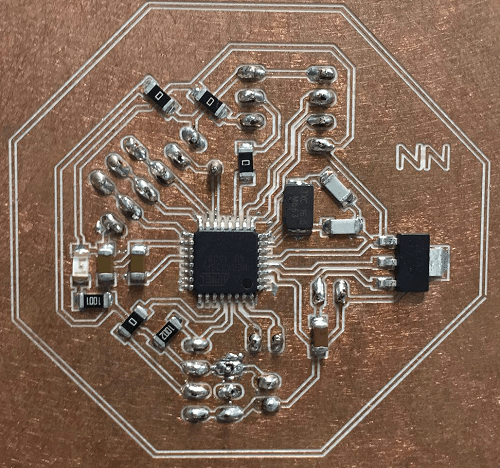
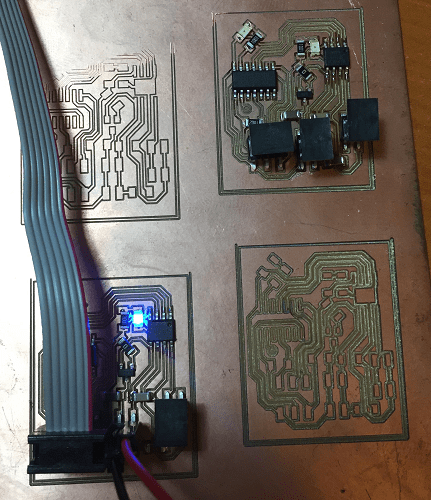
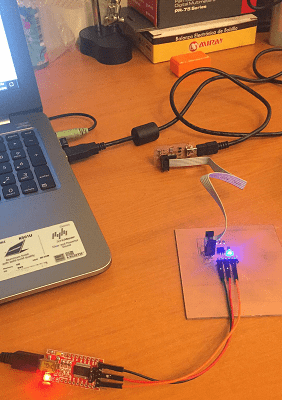
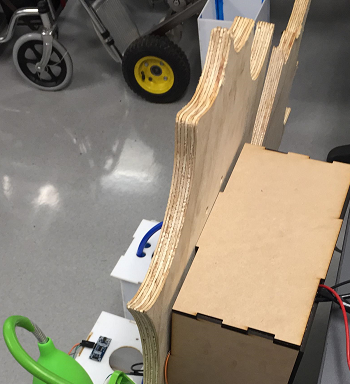
I added the electronics and an electronics box for the cables behind as shown below.
The satcha with the orange light controls the LED and the Satcha with the blue light has the main code in it.
Download the original files from the links below:
Source Code: Arduino IDE(.ino file)
Source Code for Electrical Conductivity Pump's Driver: Arduino IDE(.ino file)
Source Code for Temperature Pump's Driver: Arduino IDE(.ino file)
Motor Driver Schematic: Autodesk Eagle (.sch file)
Motor Driver Board: Autodesk Eagle (.brd file)
Motor Driver Board G-Code: FabModules (.nc file)
Modified Satchakit Schematic Final Version: Autodesk Eagle (.sch file)
Modified Satchakit Board Final Version: Autodesk Eagle (.brd file)
Modified Satchakit G-Code Final Version: FabModules (.nc file)
Maple Leaf Design: Fusion 360 (.dxf file)
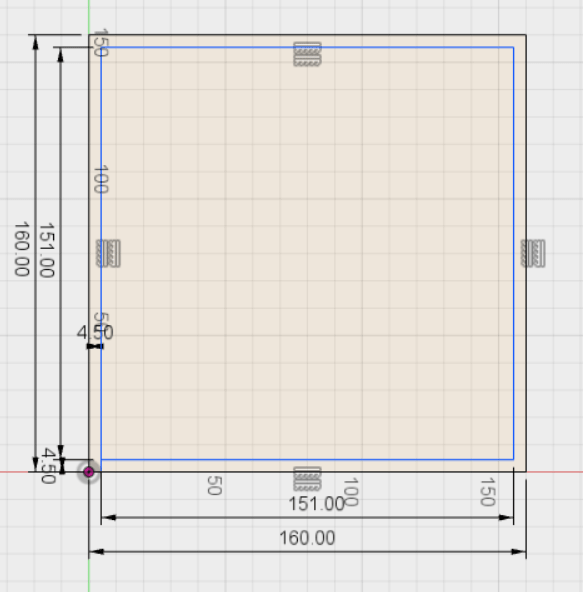
Tank Side 1: Fusion 360 (.dxf file)
Tank Side 2: Fusion 360 (.dxf file)
Tank Bottom: Fusion 360 (.dxf file)
Tank Lid: Fusion 360 (.dxf file)
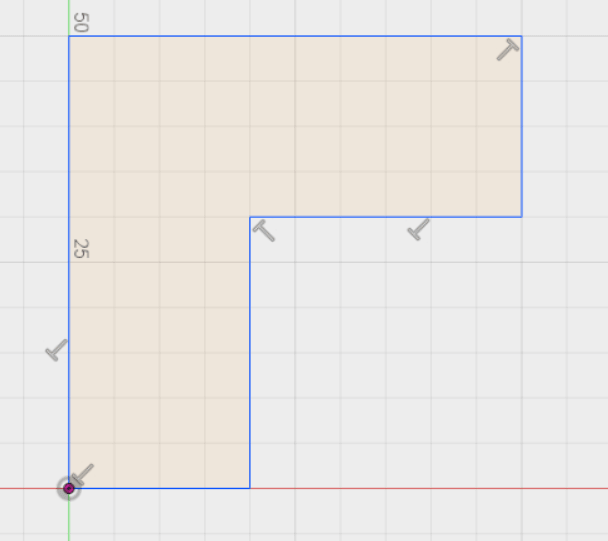
Press-Fit Electronics Box Side 1: Fusion 360 (.dxf file)
Press-Fit Electronics Box Side 2: Fusion 360 (.dxf file)
Press-Fit Electronics Box Bottom: Fusion 360 (.dxf file)
Auxiliary Tank Support: Fusion 360 (.dxf file)
MDF Corner Brace: Fusion 360 (.dxf file)
MDF Cover for LCD Screen: Fusion 360 (.dxf file)
LED's Source Code: Arduino IDE (.ino file)
3D Printed Support for Main Tank: Fusion 360(.f3d file)
3D Printed Support for Main Tank: Fusion 360(.f3d file)
Horticulture Pot for Germinated Plant: Fusion 360(.f3d file)
3D Printed Thermocouple Cover: Fusion 360(.f3d file)
3D Printed Fixing for pump tubes: Fusion 360(.f3d file)
3D Printed Support for Main Tank: Fusion 360(.f3d file)