Electronic production
week 5
ASSIGNMENT- Make an in-circuit programmer by milling the PCB
- program it, so that you can use it to program your board in Electronics Design week, and in other weeks
- Kicad
- Fusion 360
- Inkscape
LEARNING EXPERIENCE
Due to a misunderstanding of our University administration,
we didn't receive the pcb milling machine on time.
For this week, I decided to document the technique that we used to make the fab ISP before the course.
This technique uses simple machines, devices, materials, and products.
It is more close to the way I want to finalize my final project.
To complete the process, you need: a laser printer, glossy paper, an iron and chemical products for etching.
I also learned to weld, to read the circuit, understood part of it and recognized the components .
FILES
PNG file fab ISP Cut
PNG file fab ISP Traces
GROUP ASSIGNEMENT
Pcb process group page
MAKING THE PCB
The new machine came today, so we decided with Denis, my instructor to mil another fab ISP in the coming weeks.
For this assignment, I used of the "iron technique"(see explanation below),.
A few words about what needs to be done for evacuating the 2 dangerous products involved.
For the disposal of chemical waste, Nicolas who showed me this technique of PCB manufacturing uses the services of Proxy chimik mobile.
He labels the products with a sticker so that the treatment is adequate to the product.
And that's what he did when evacuating ferric chloride and hydrochloric acid.
Back to production of the pcb ...
I downloaded the png files.
One for the contour of the fab ISP,one for the circuit, from this website.
Those files are coming from a
tutorial to make a fab ISP

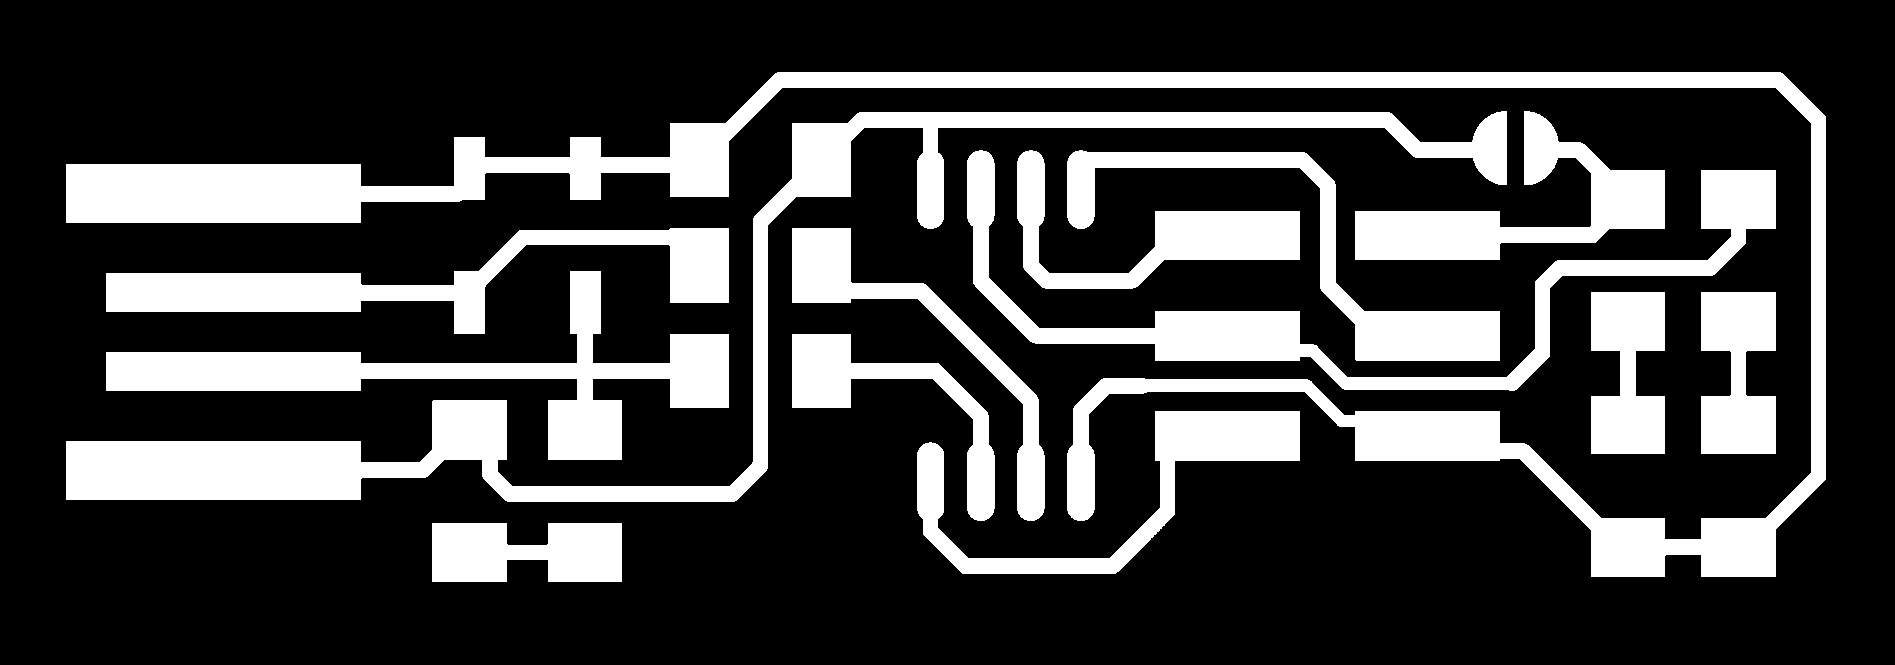
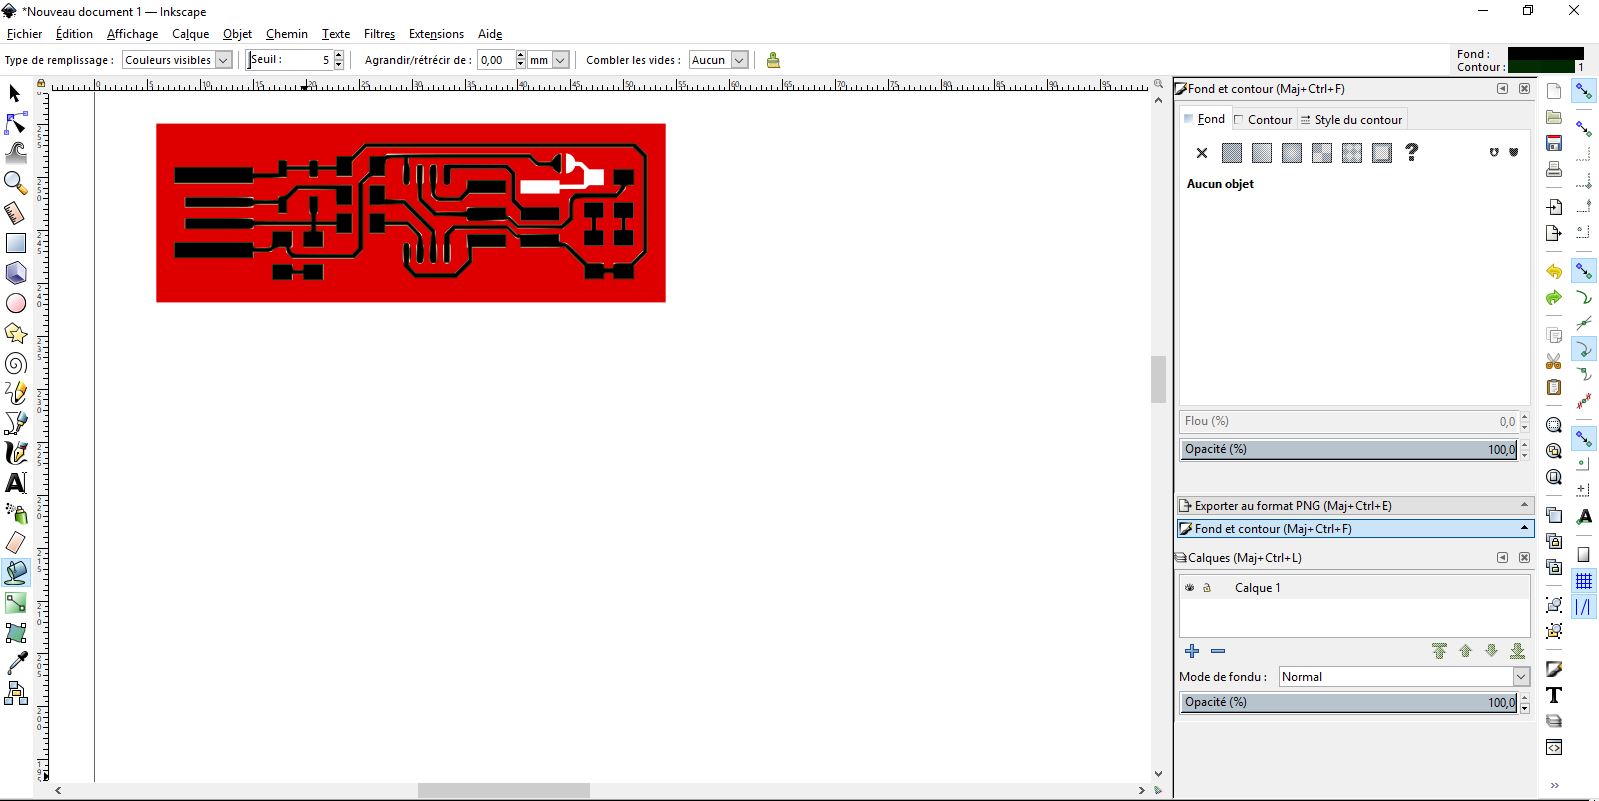
I had to invert the circuit to have the path from white to black.
I did it on Inskape, using the fill tool after transforming the png in vector(see process on week 3: Vinyl cutting)
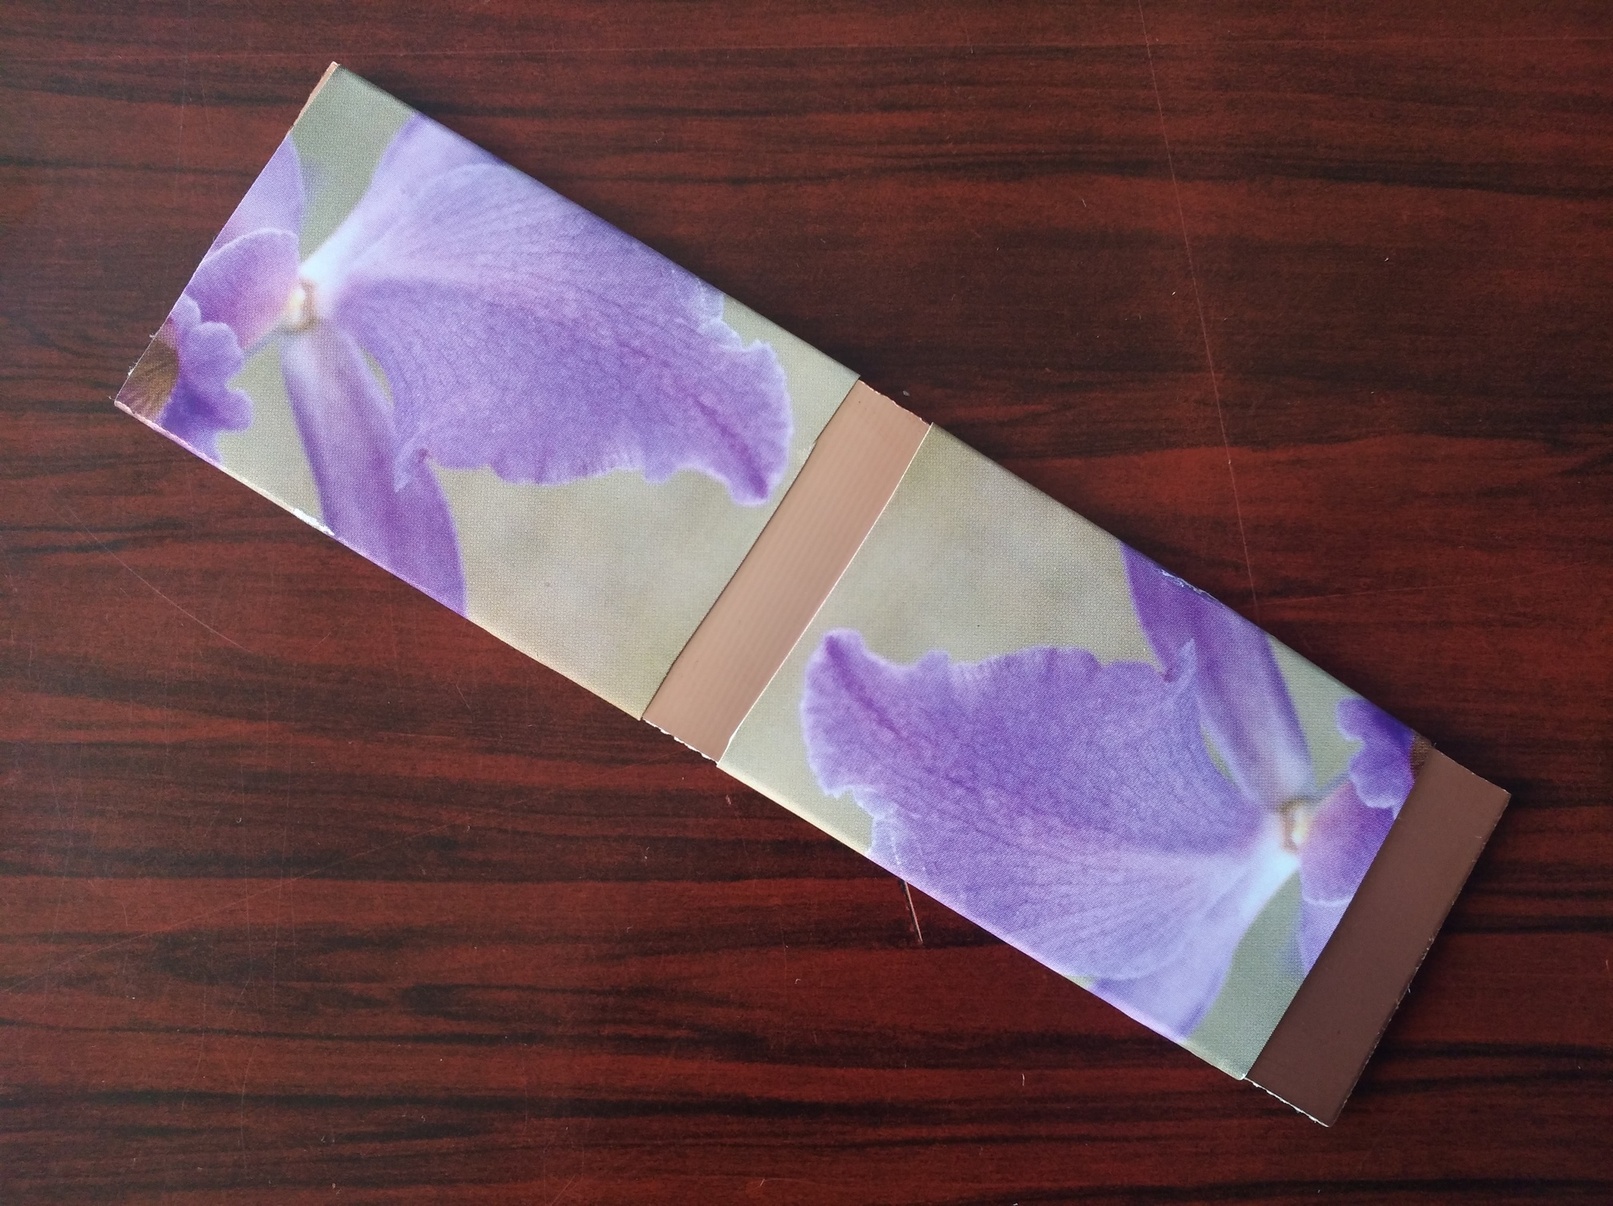
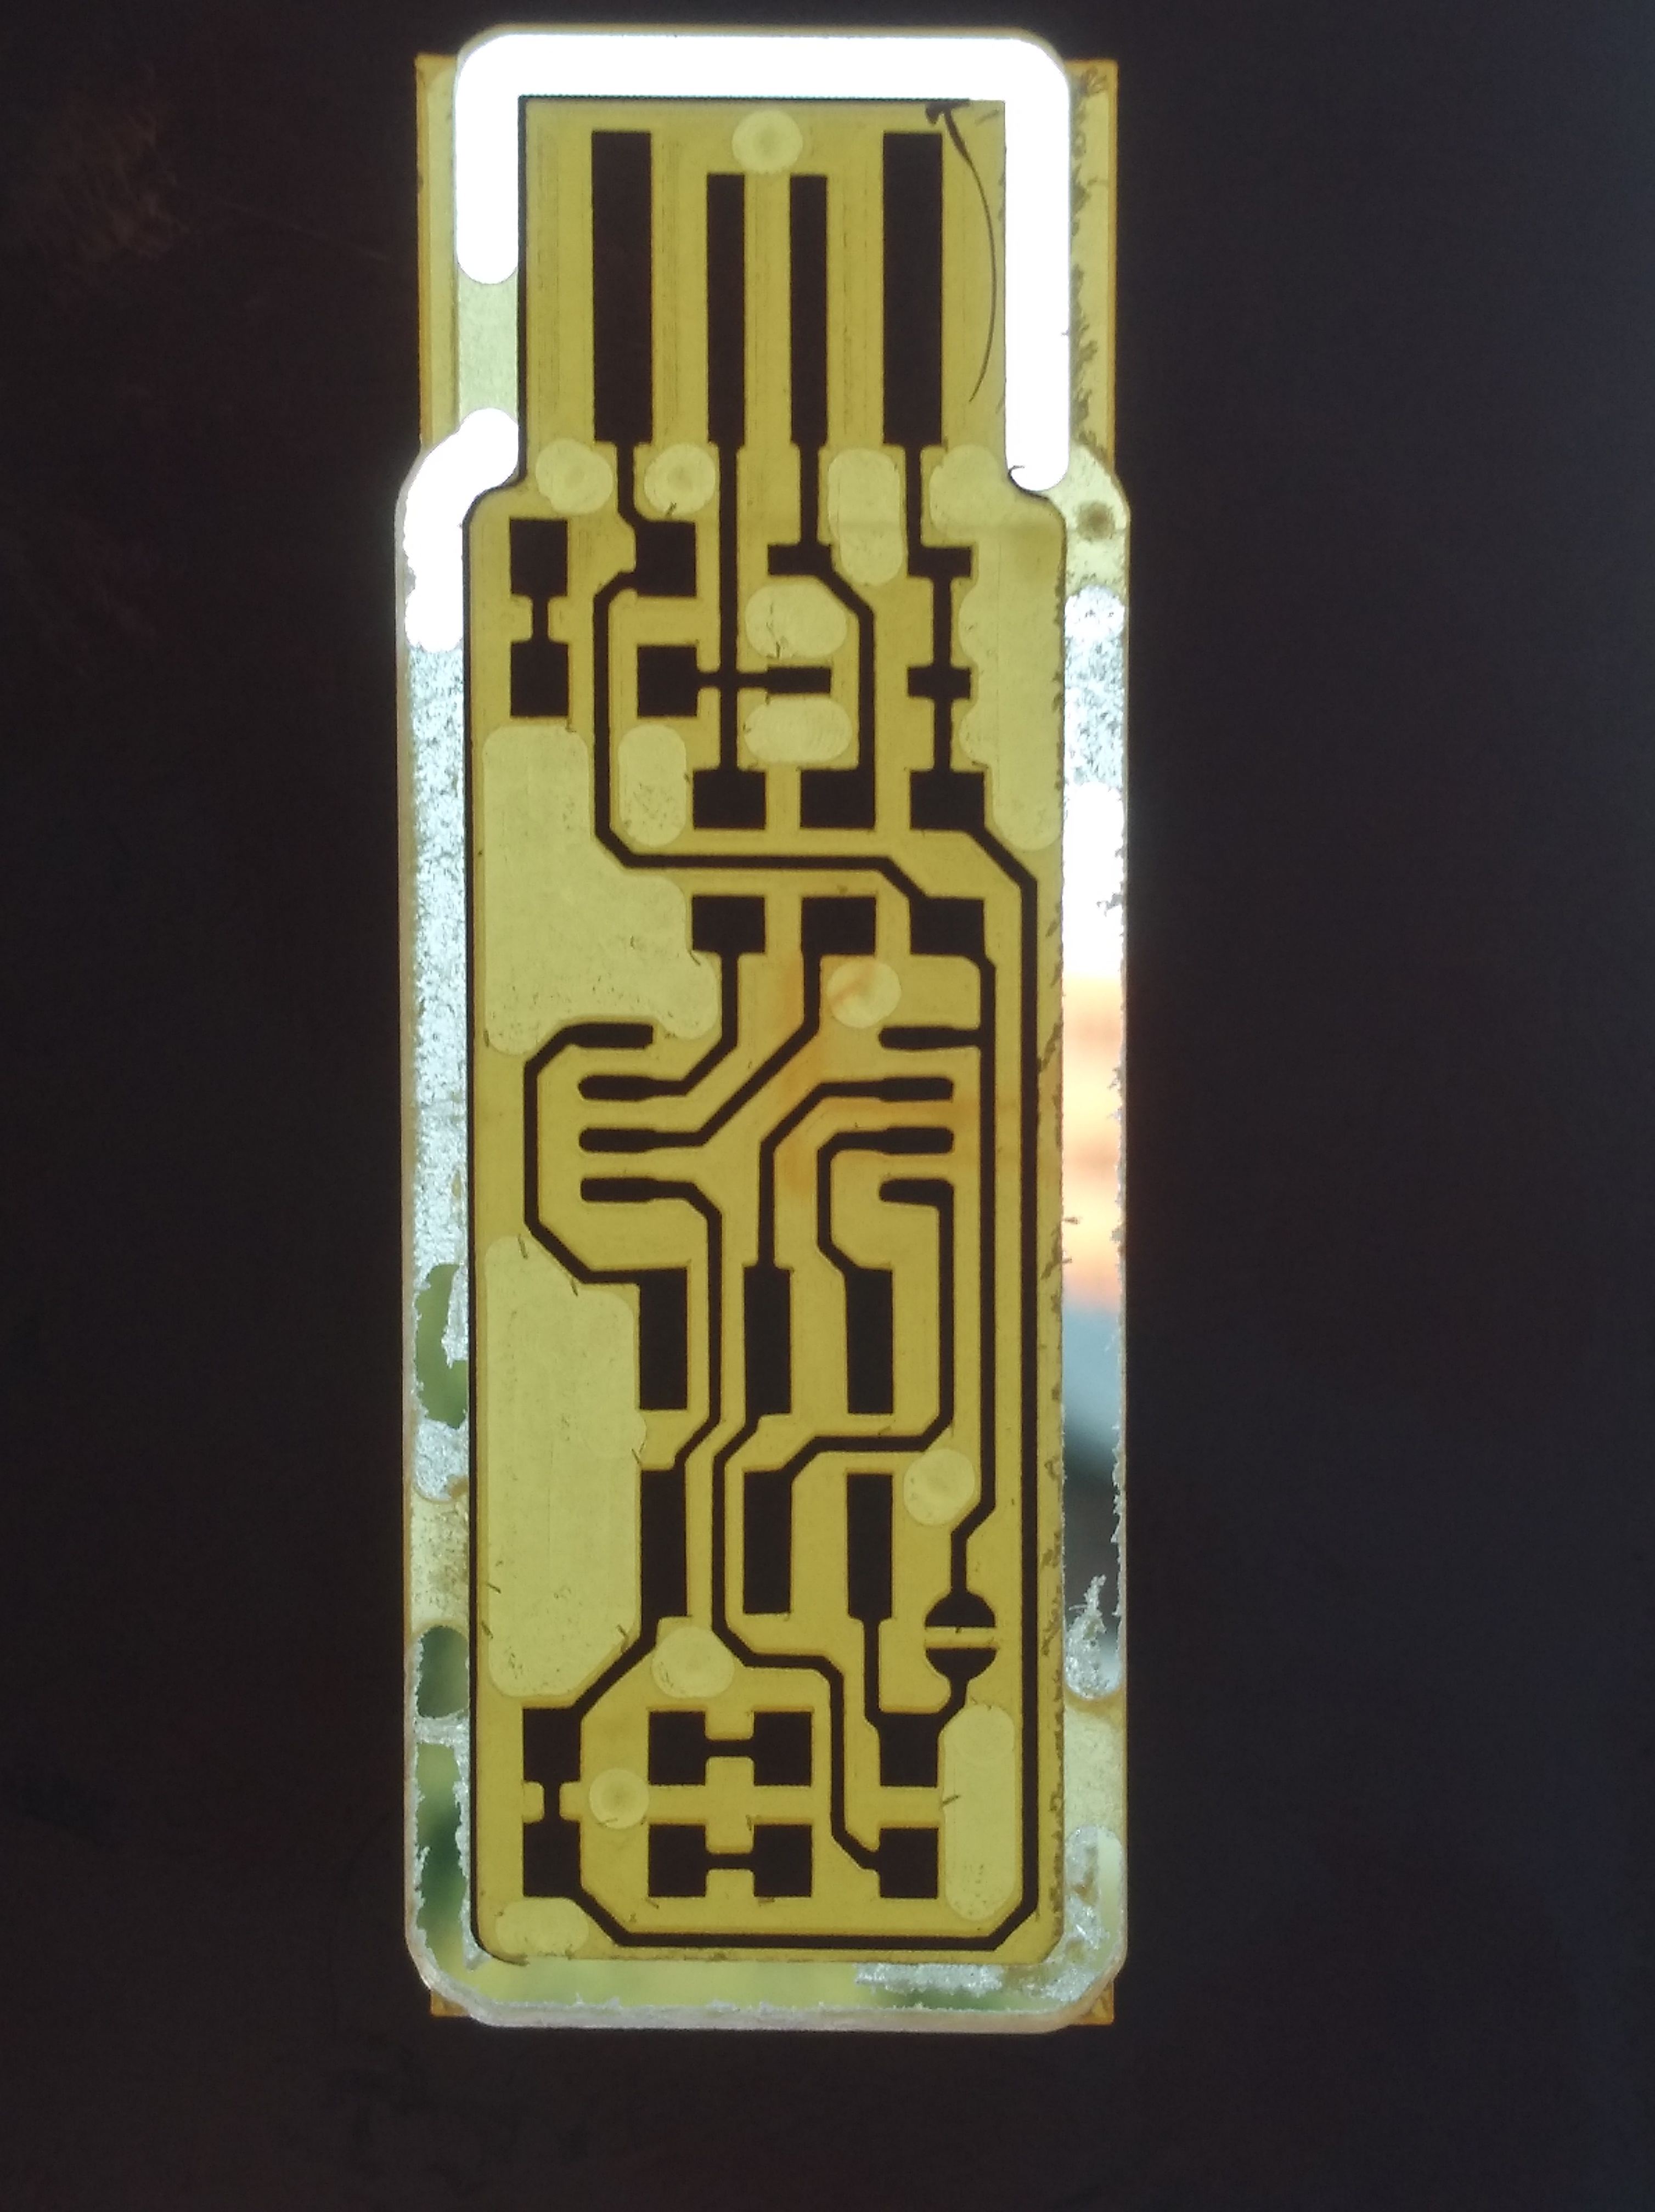
The circuit was printed on glossy paper using a laser printer

The paper was cut and glued on the copper plate
I ironed it with the highest temperature possible
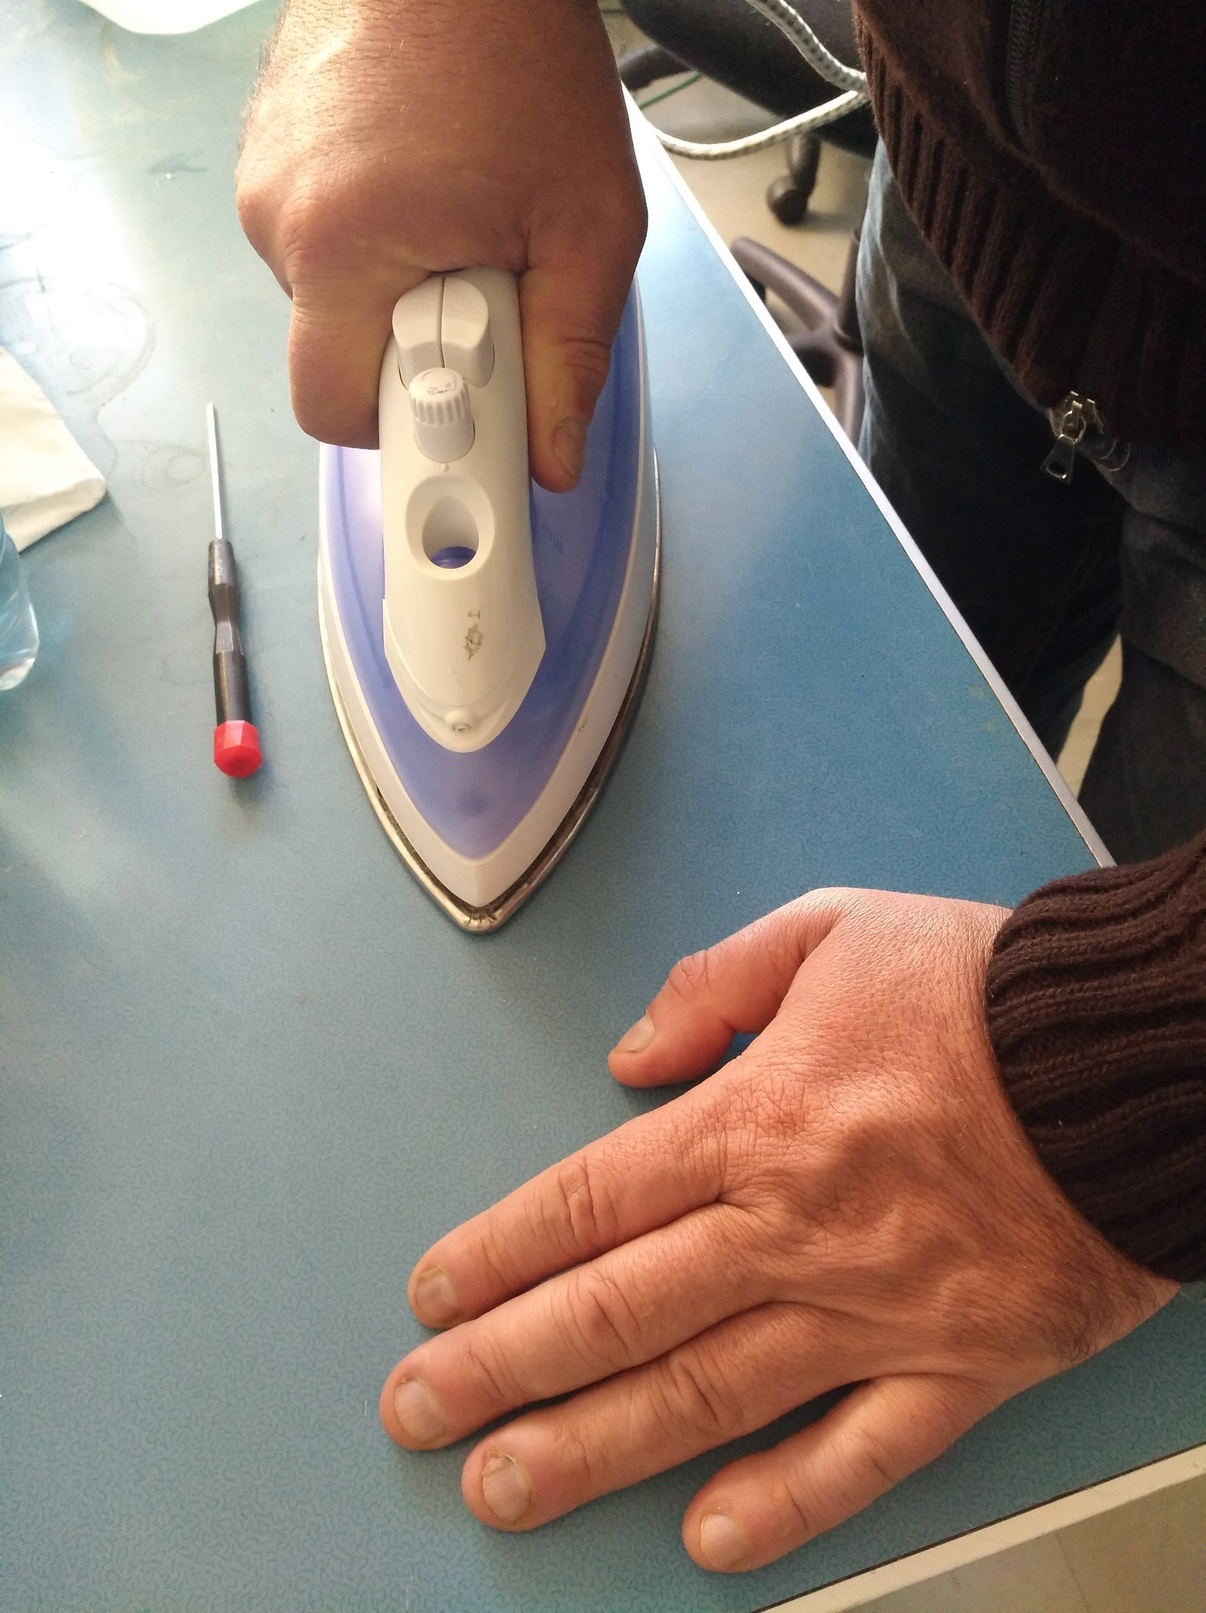
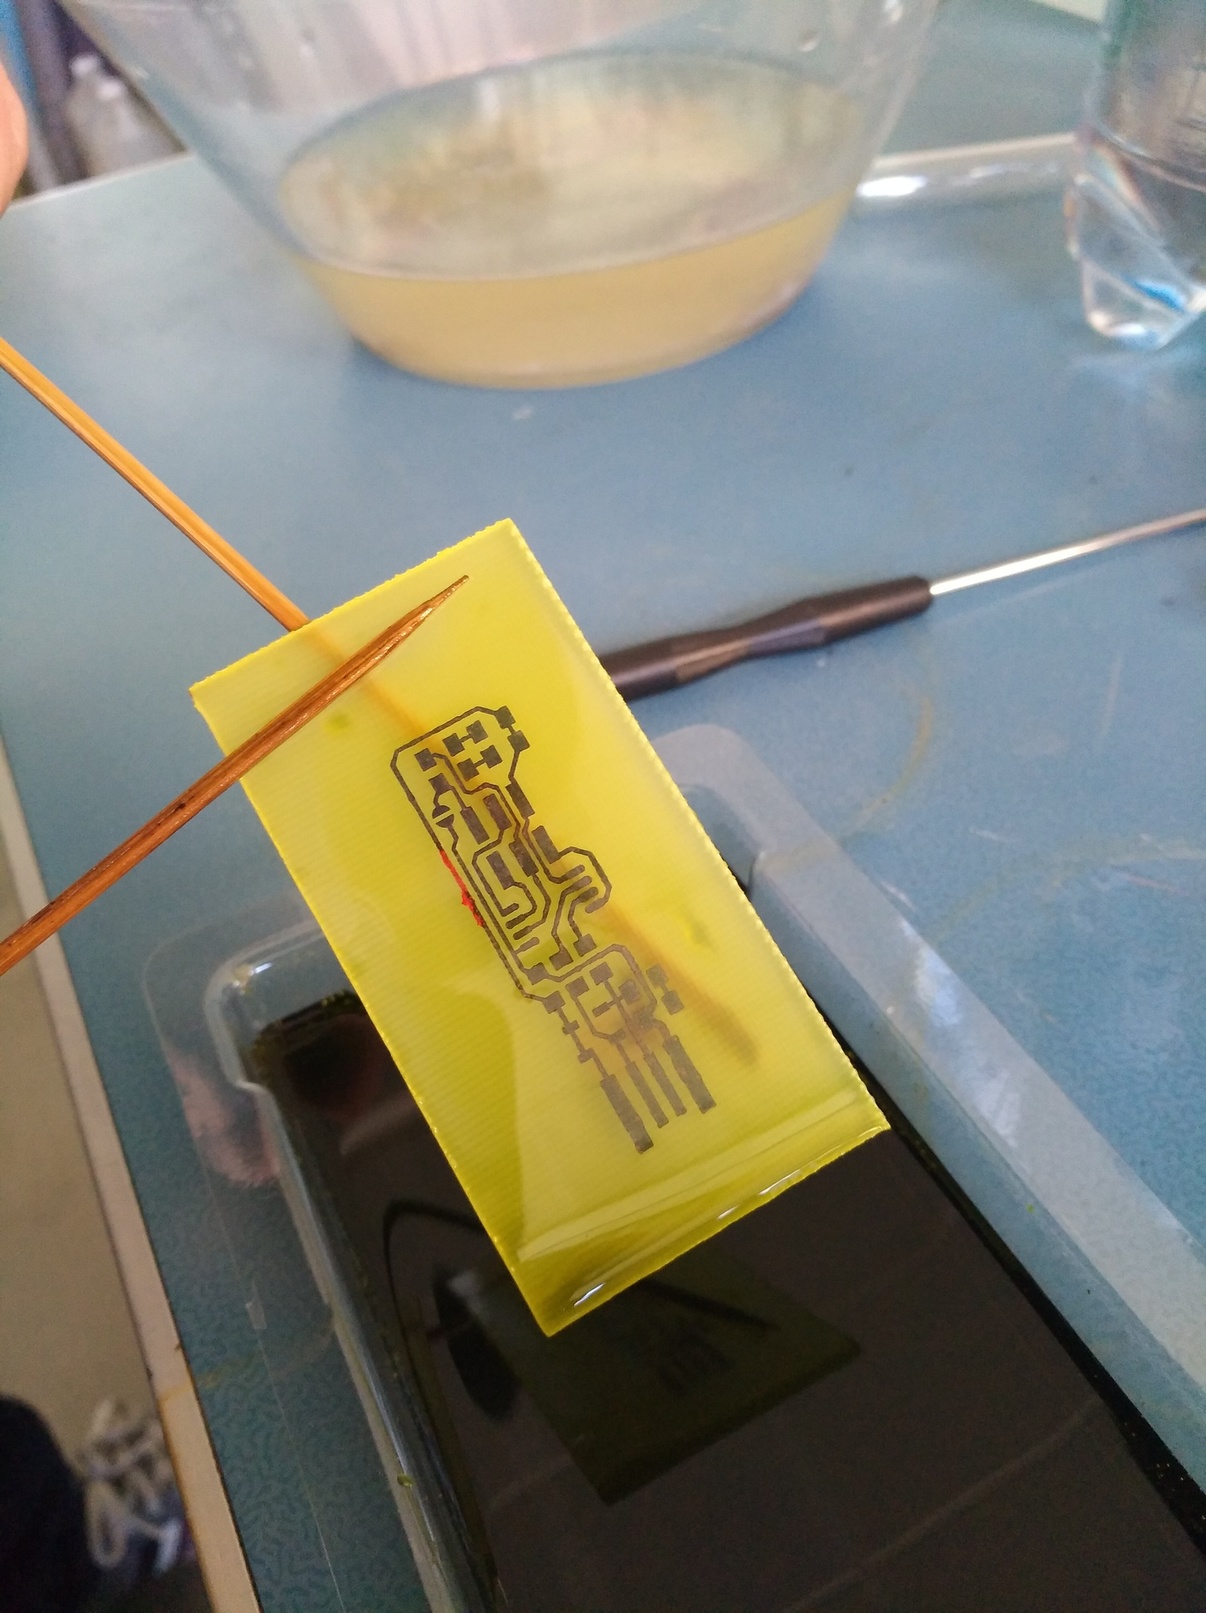
The paper was removed from the copper plate in clear water
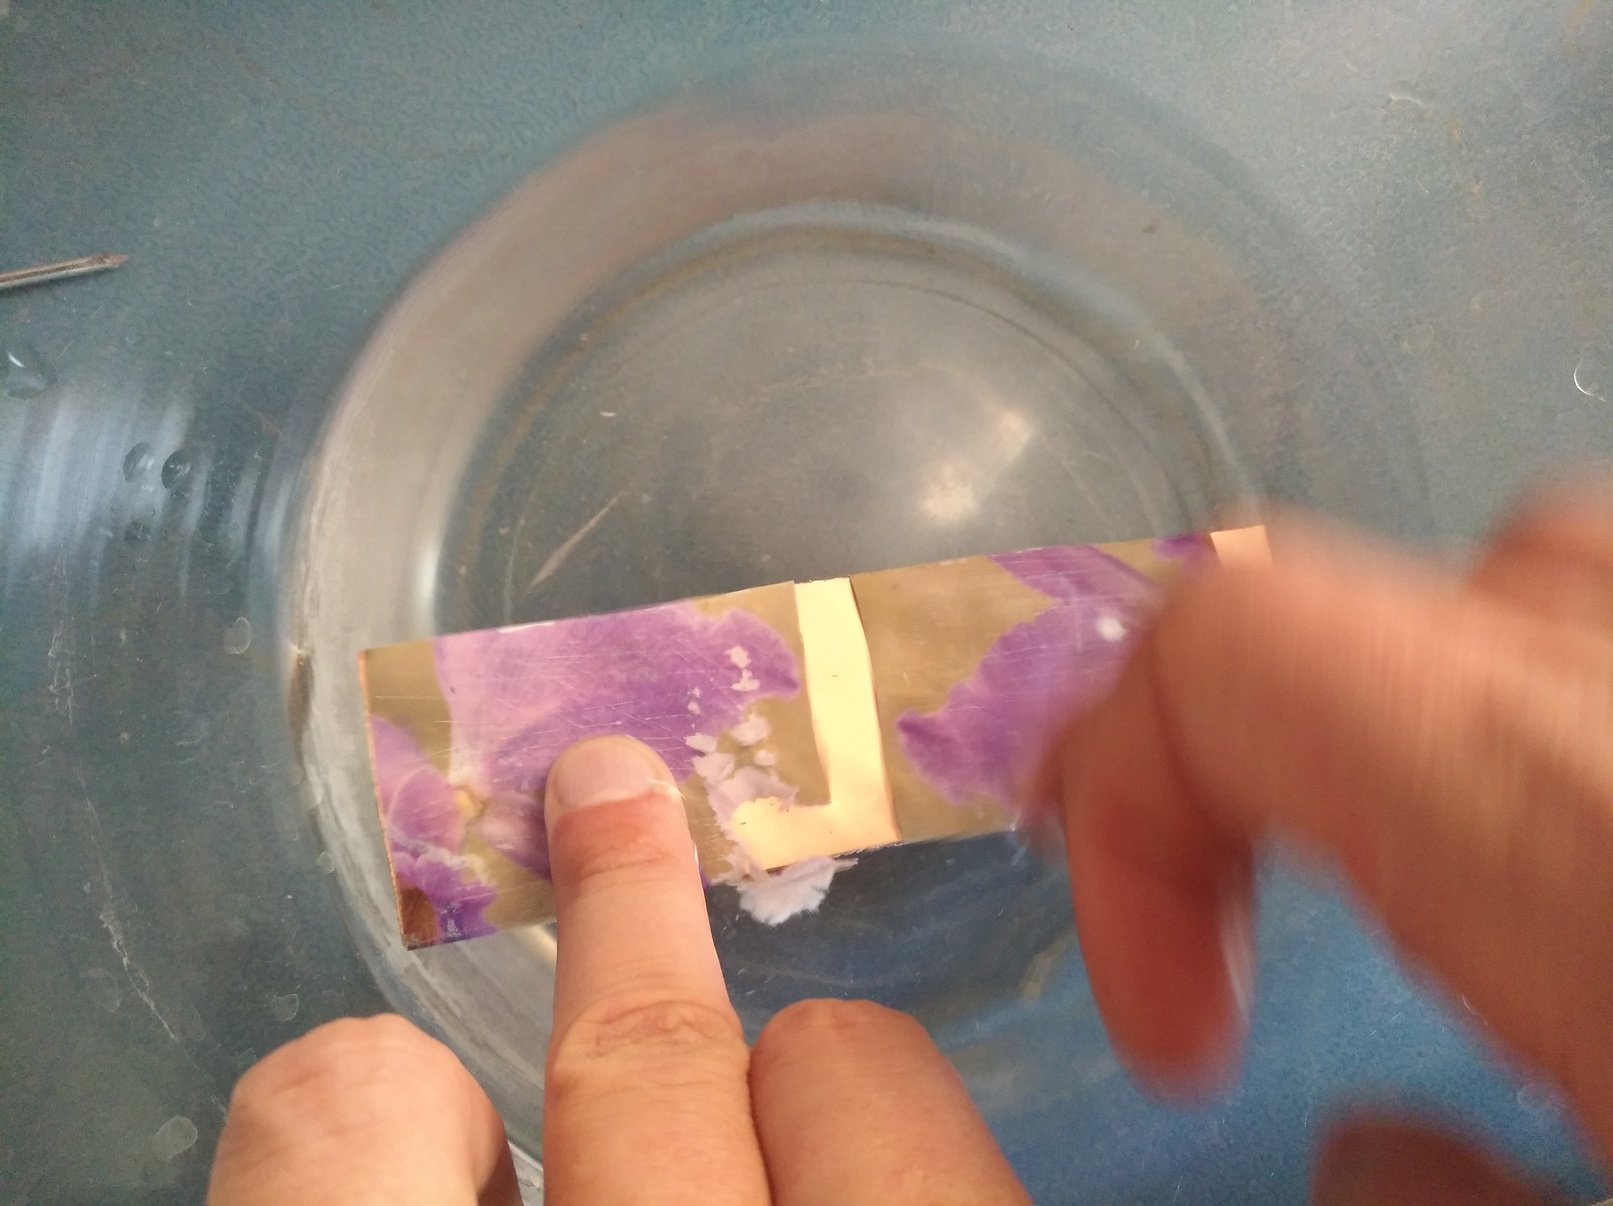
I took all the paper away, after 5 minutes in the water.
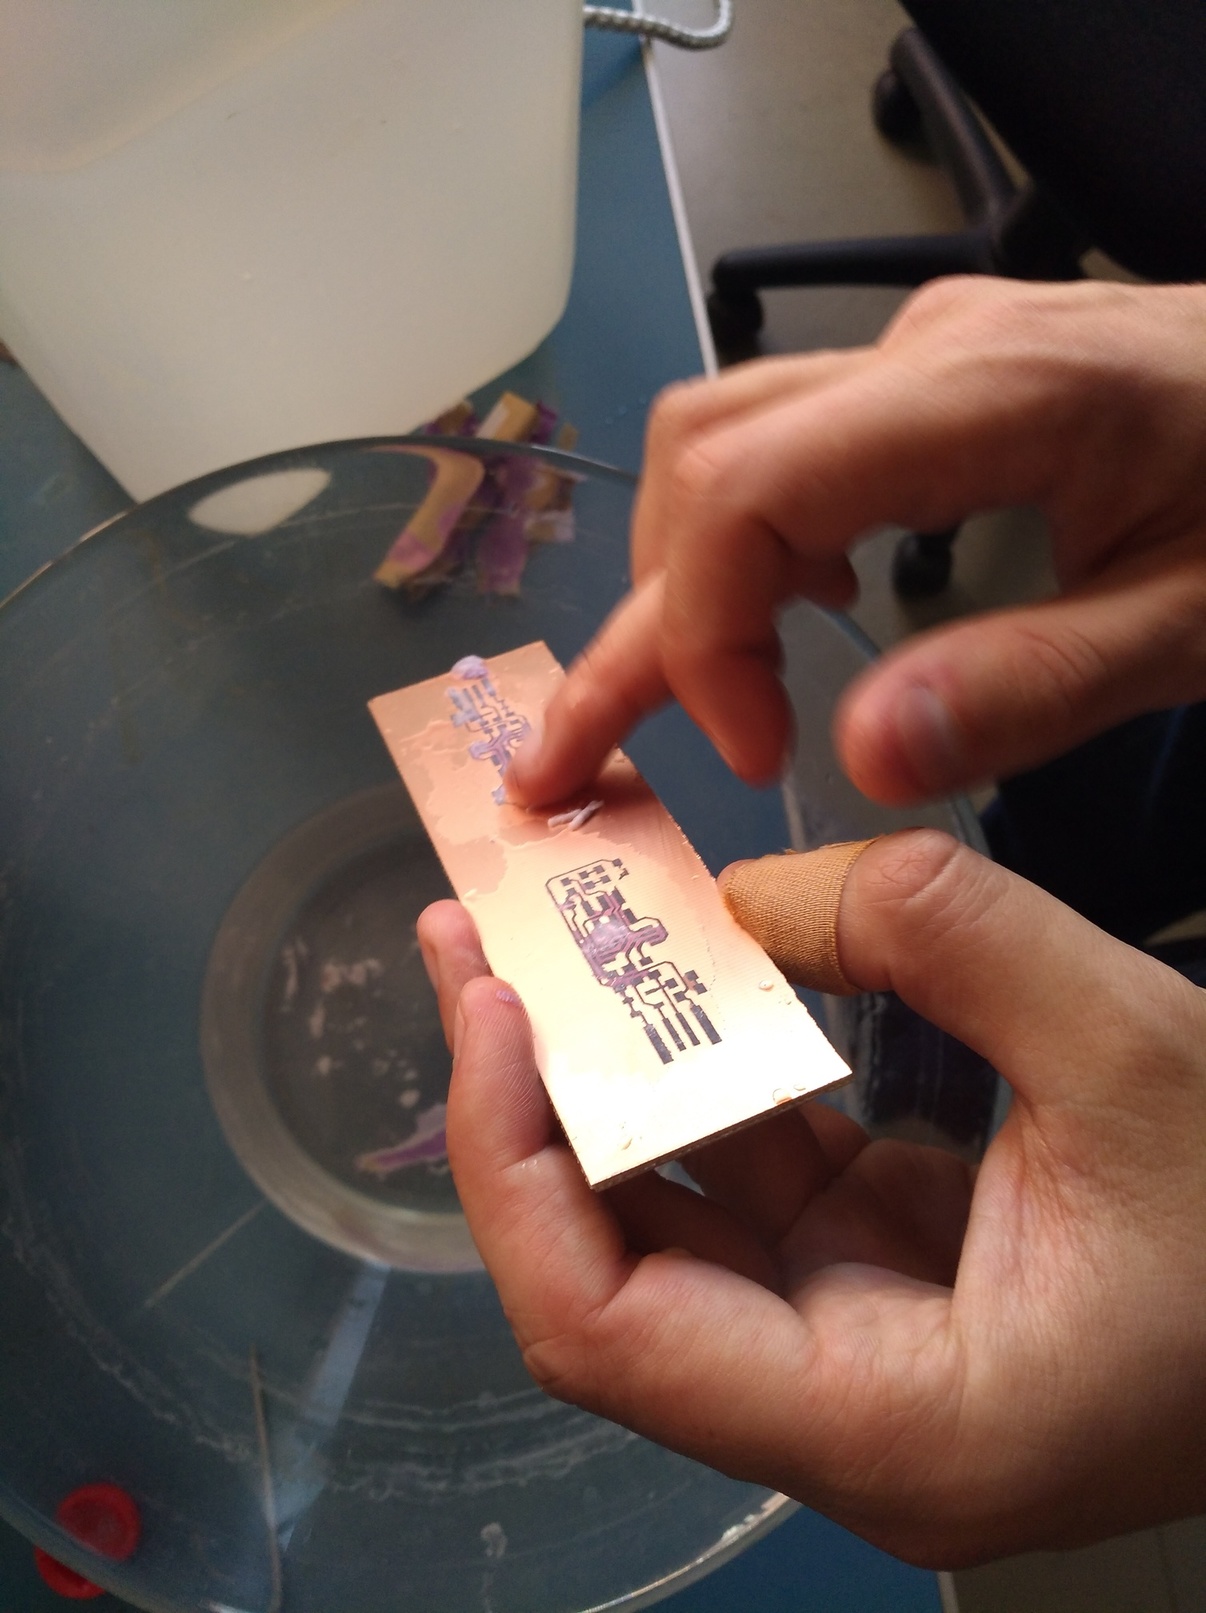
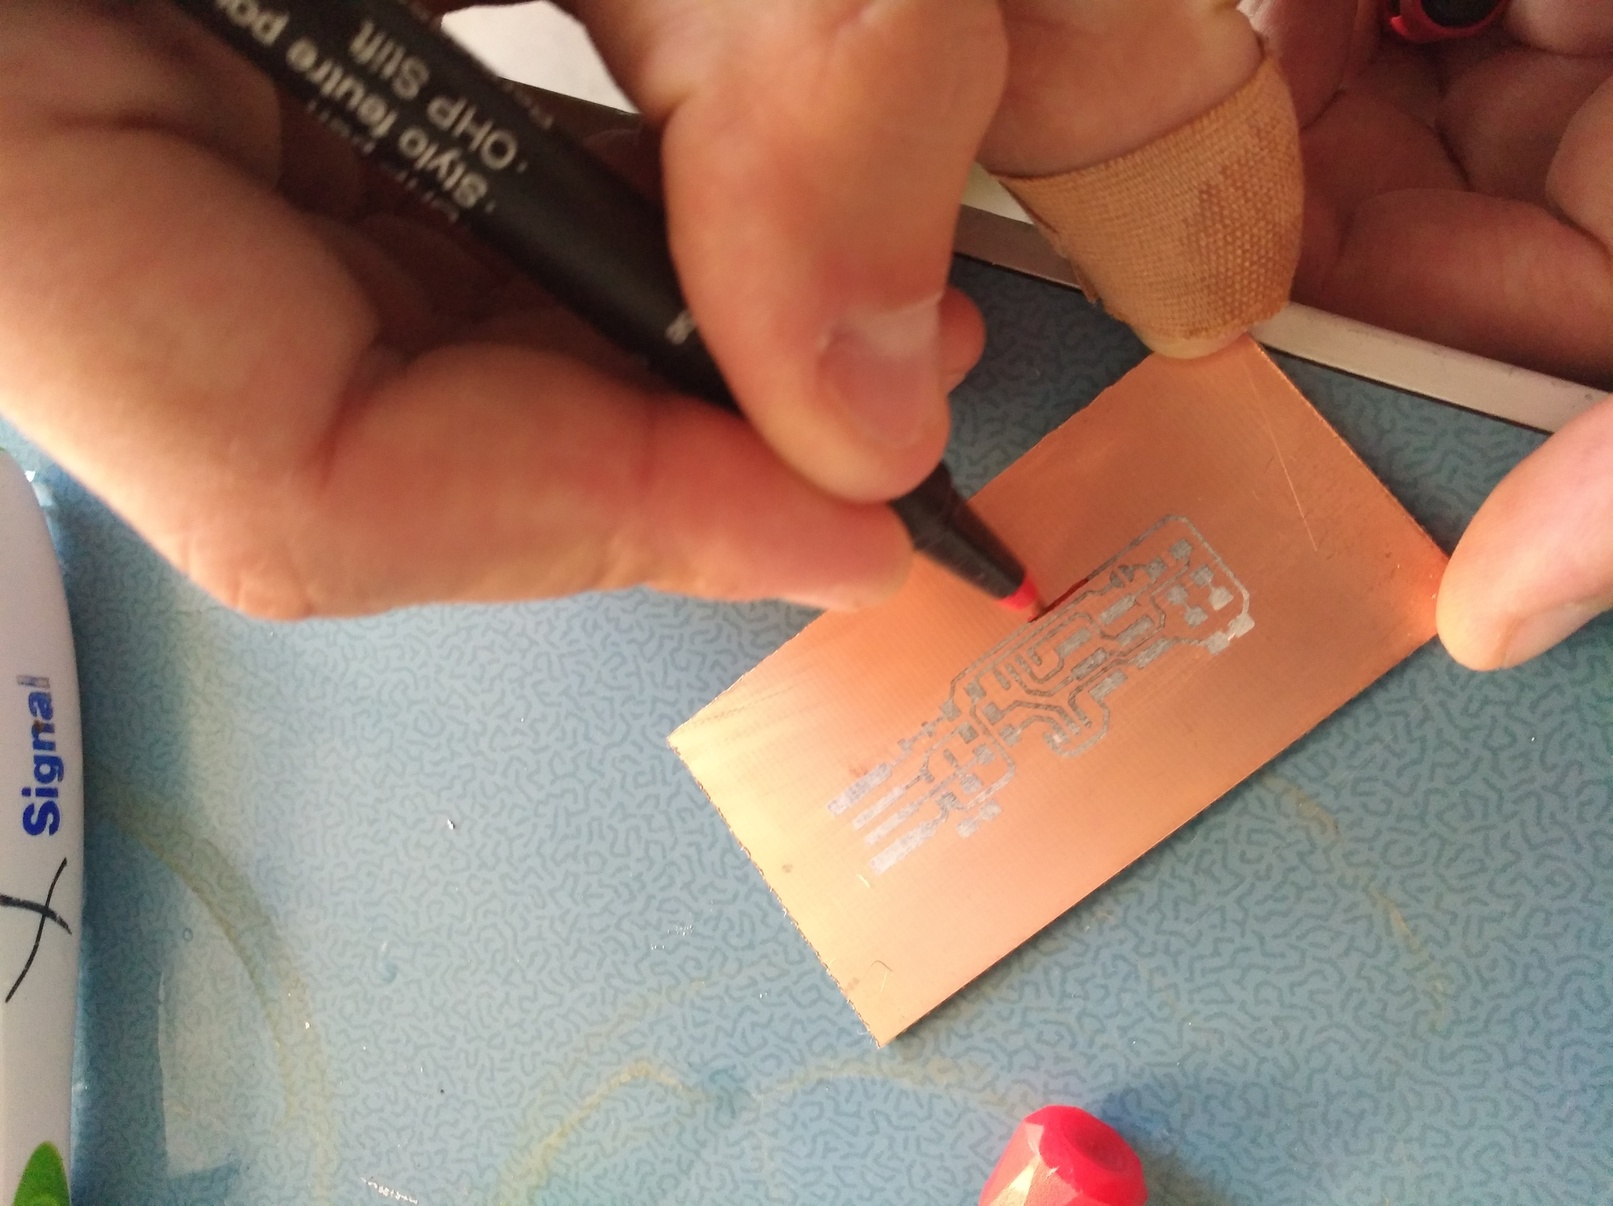
I had to put some permanent marker on a part of the electronic circuit.
Because a small parts of the circuits was away
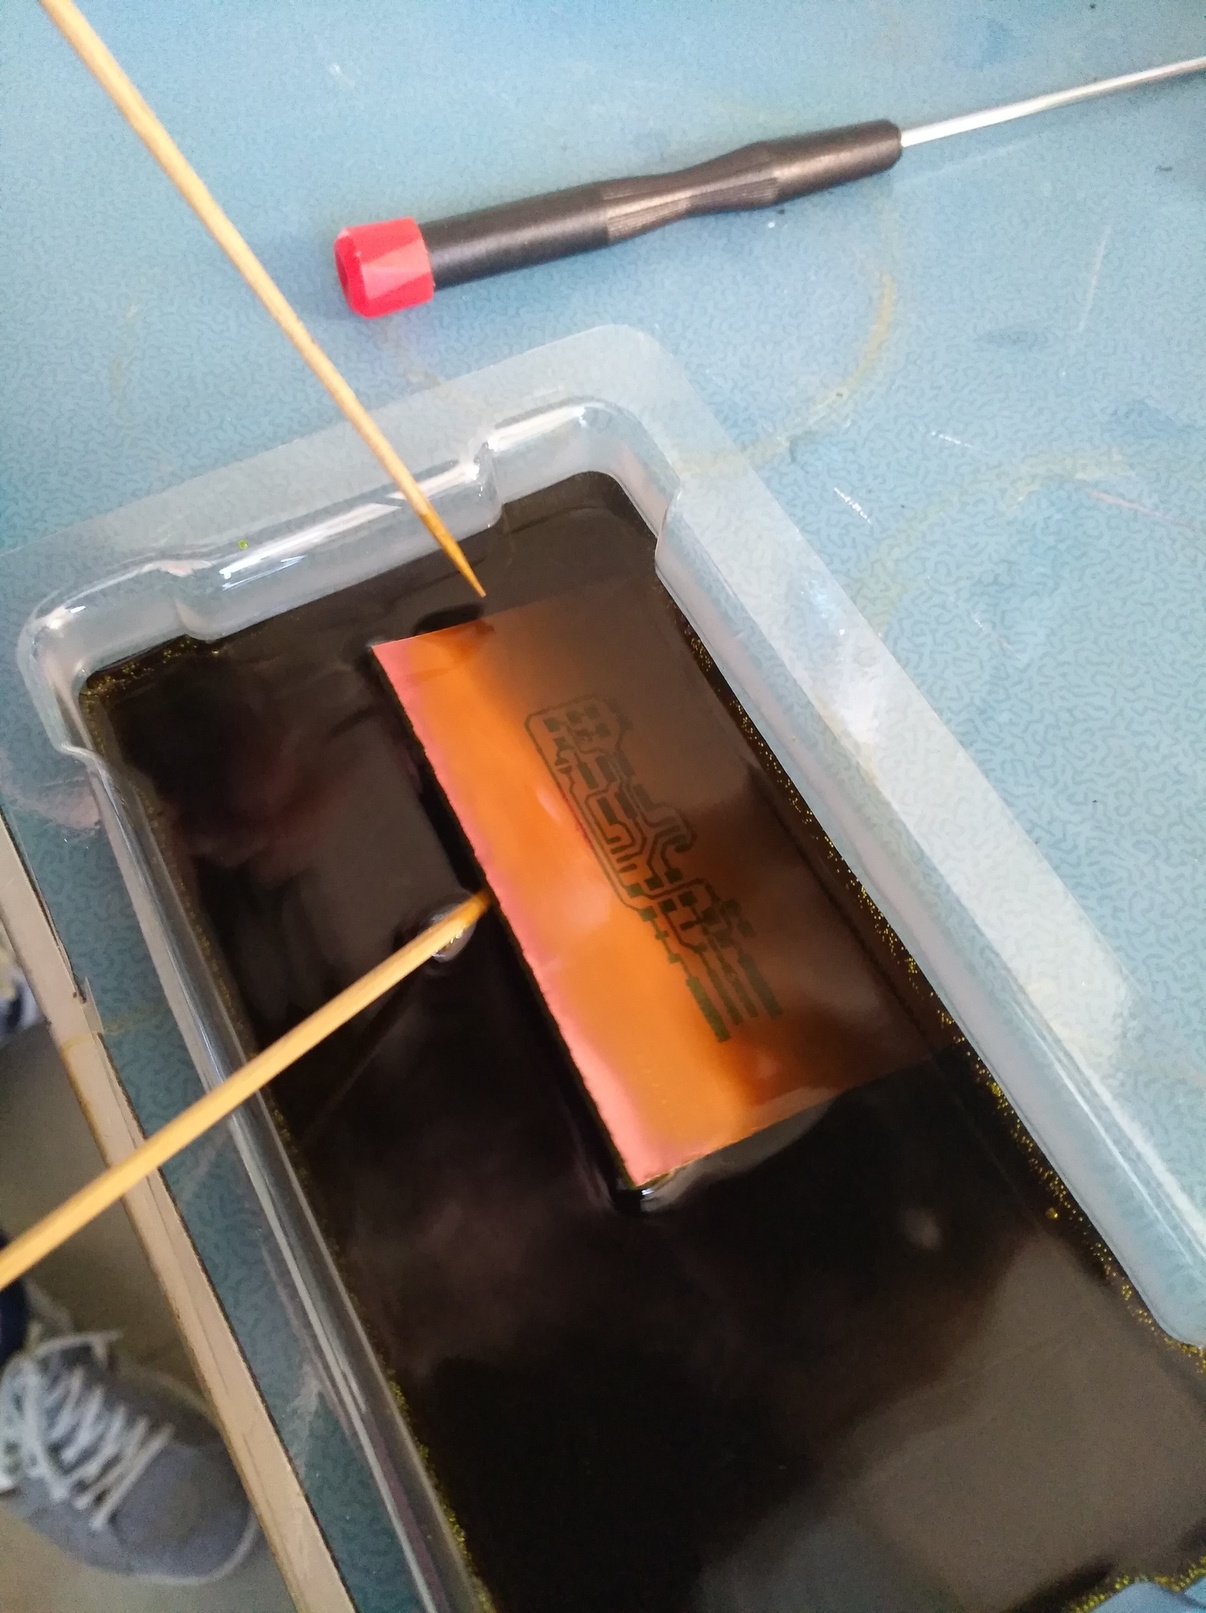
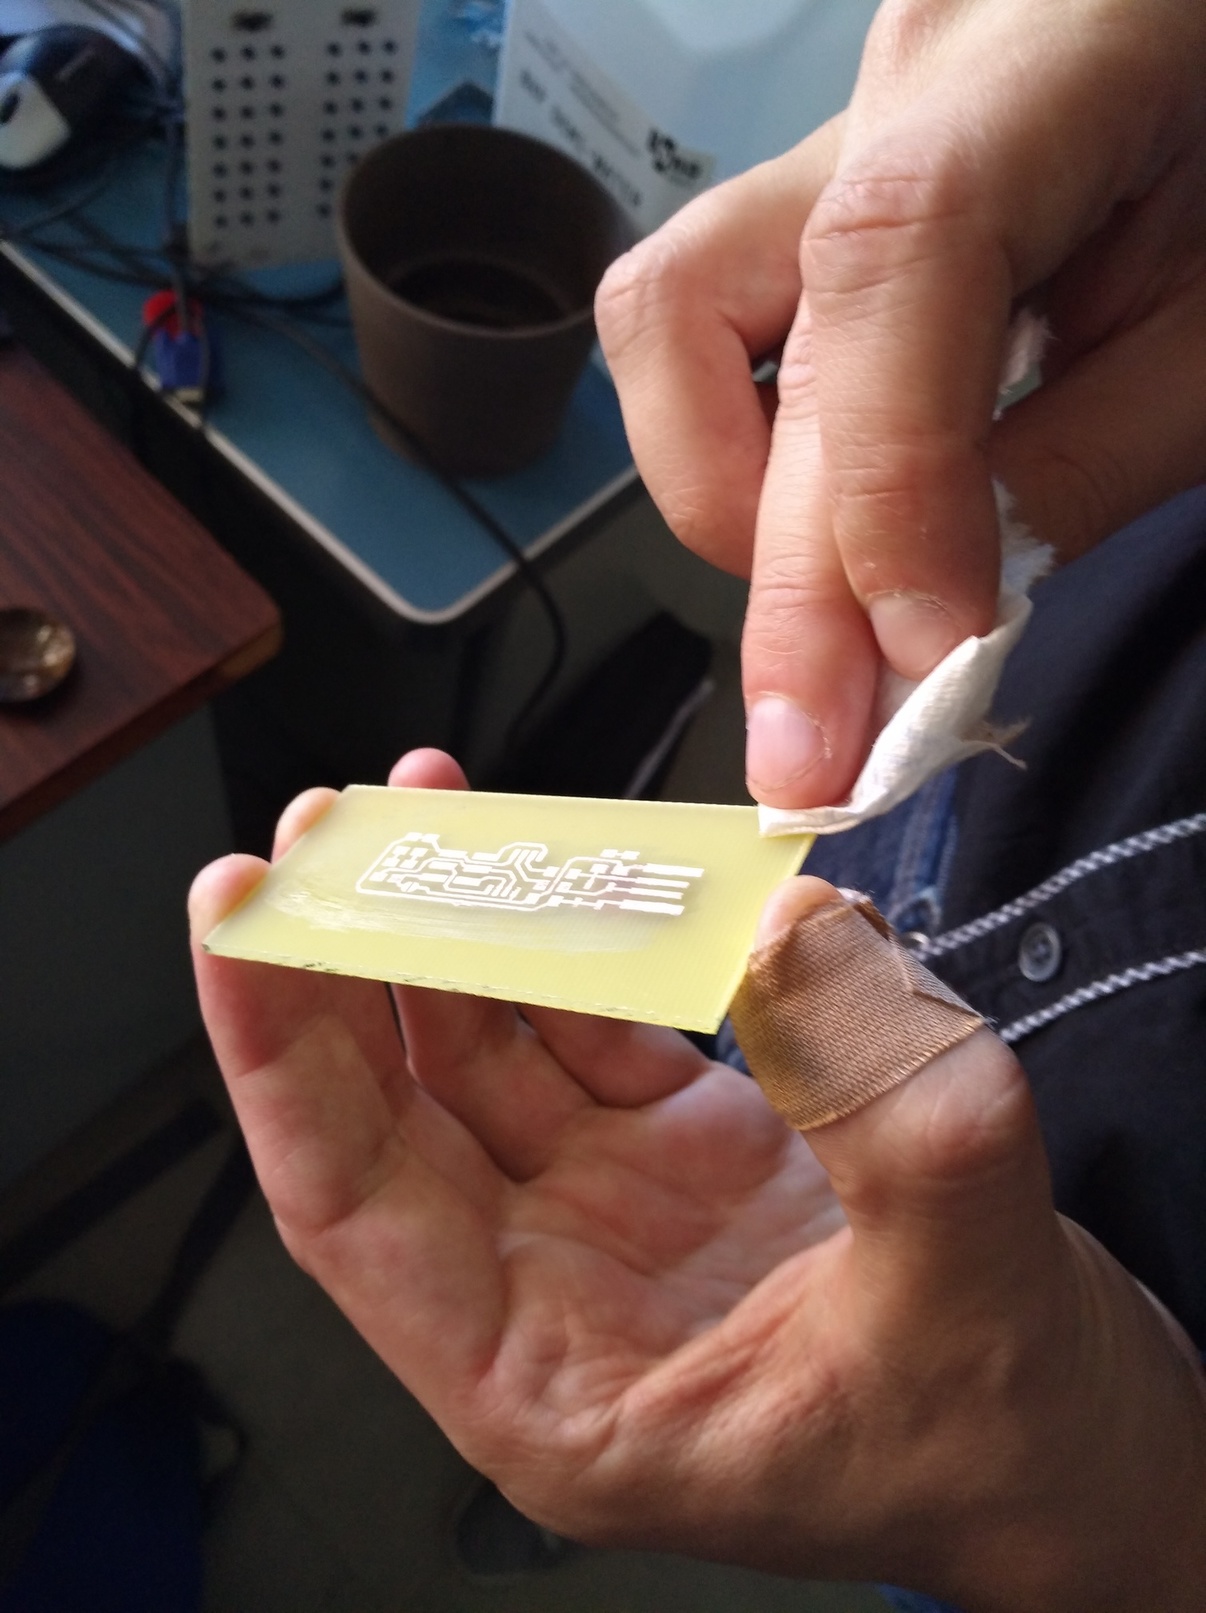
I put the board in a solution of ferric chloride and hydrochloric acid
It took 15 minutes to take away the copper, not protected by the laser ink.
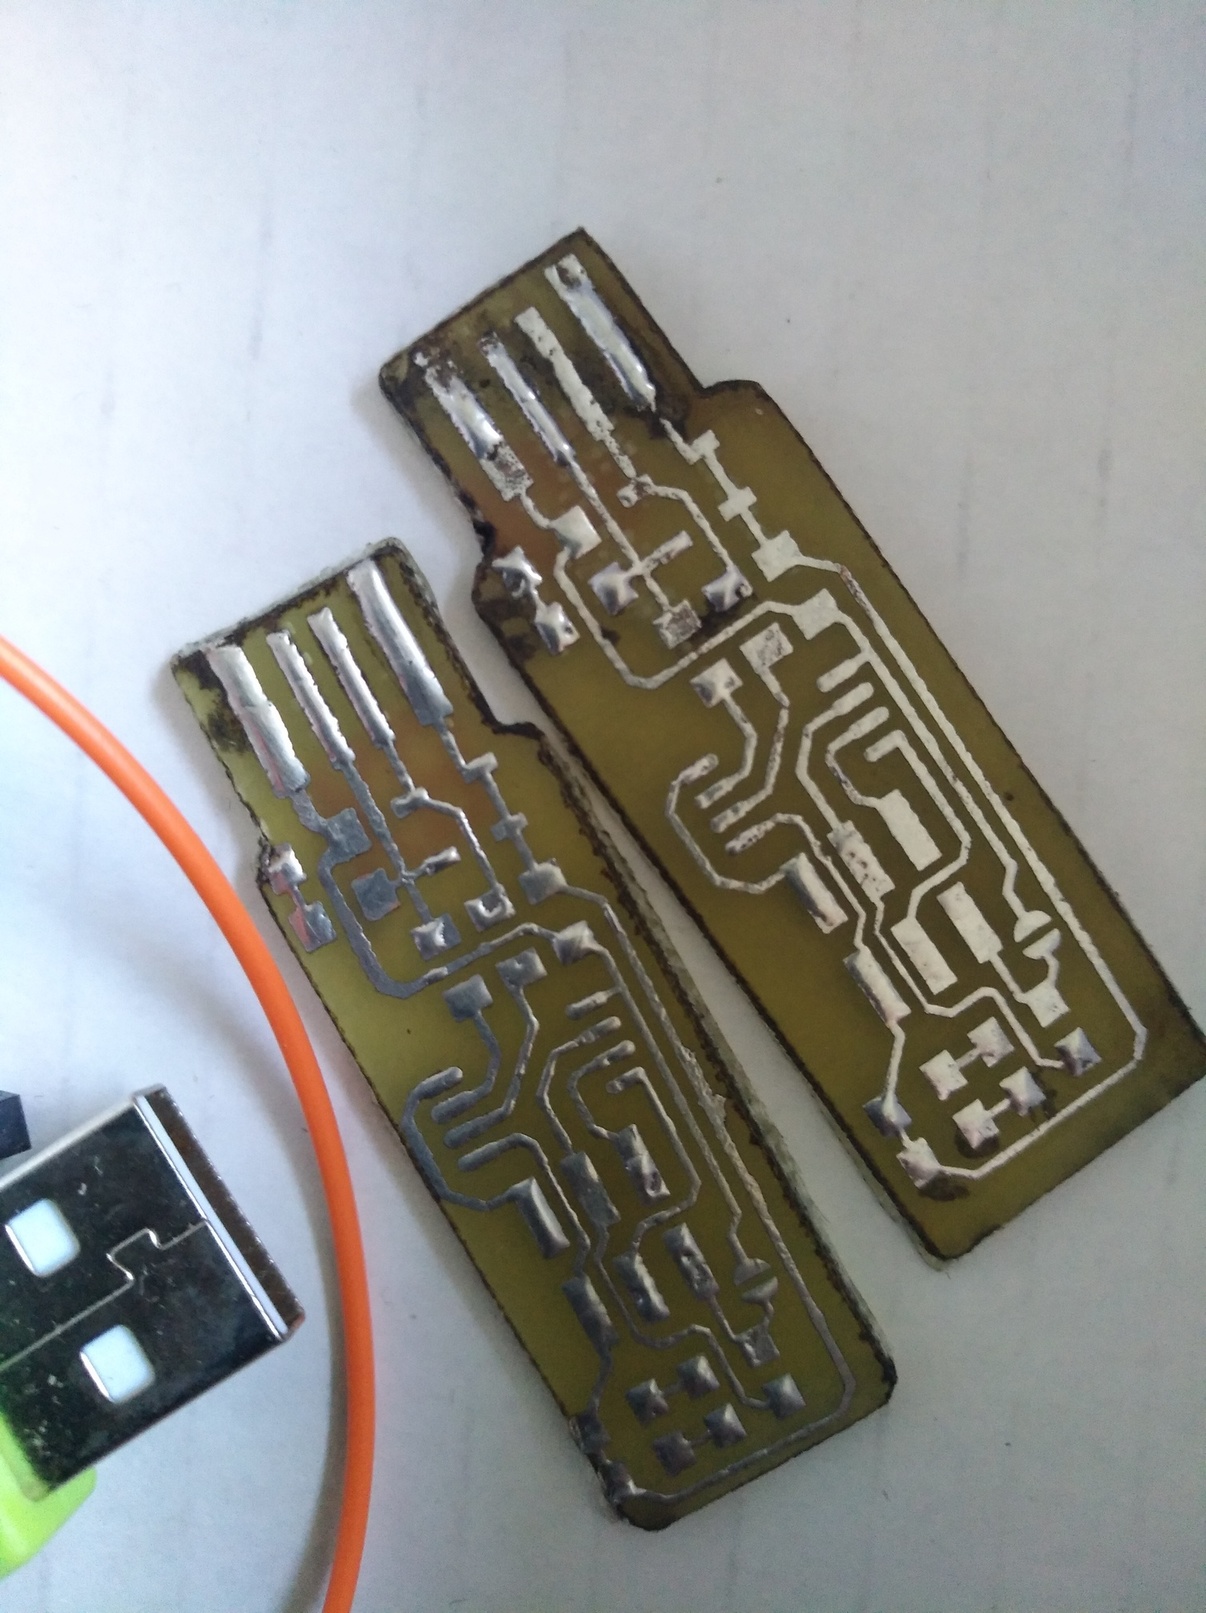
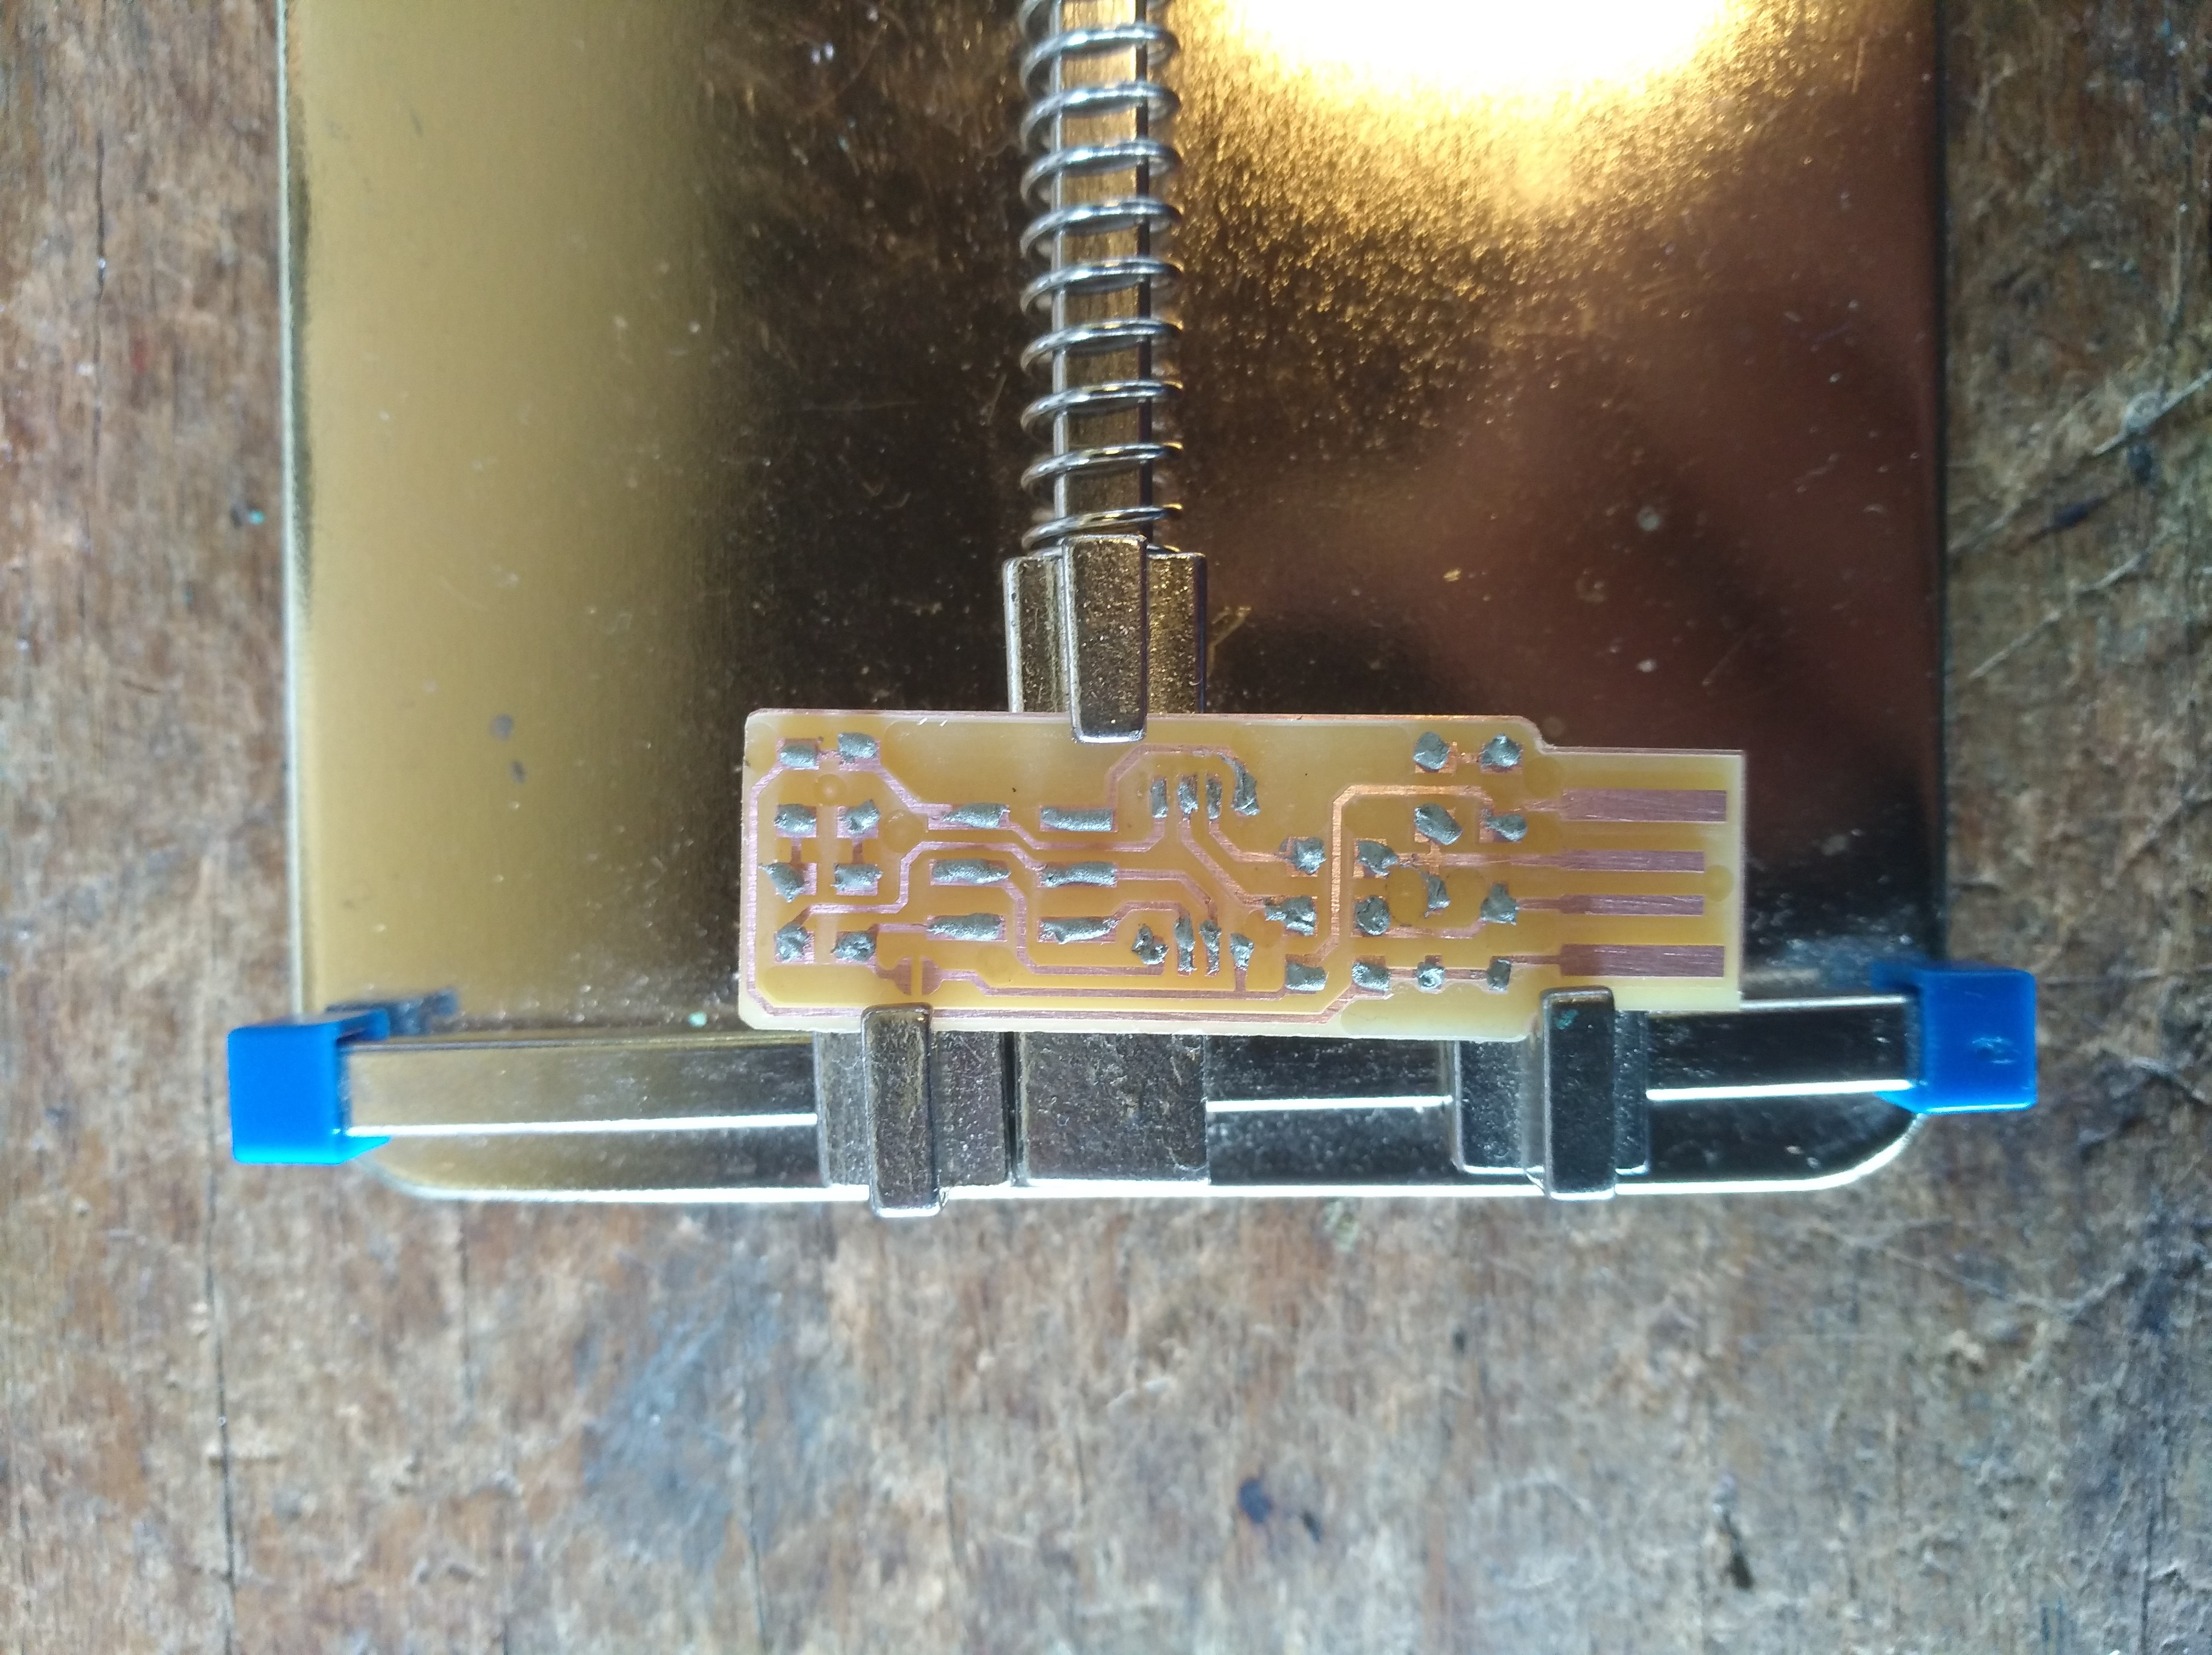
And there it was...
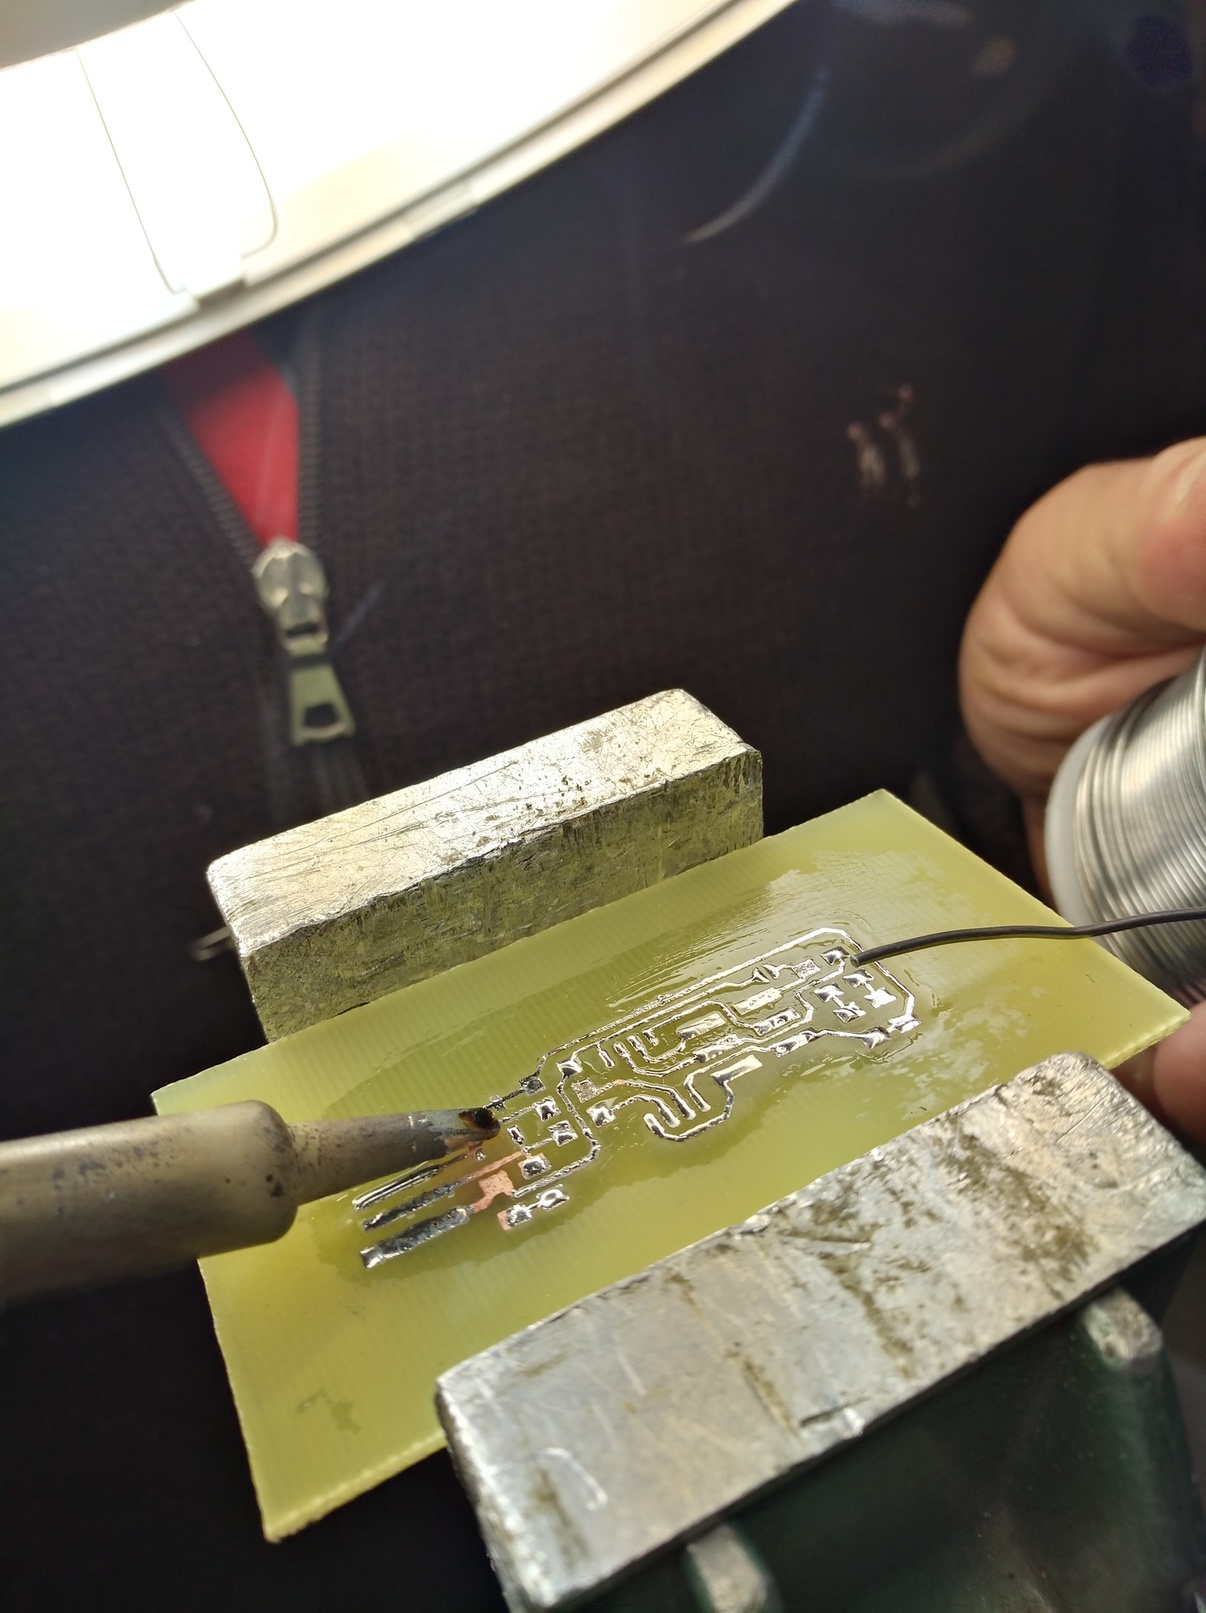
I cleaned the ink with acetone
After putting some flux on the circuit
I put welding on the circuit to protect it
To cut the fab ISP, I first traced the cut contour on a piece of cardboard.
By transparency I could place the circuit to be cut.
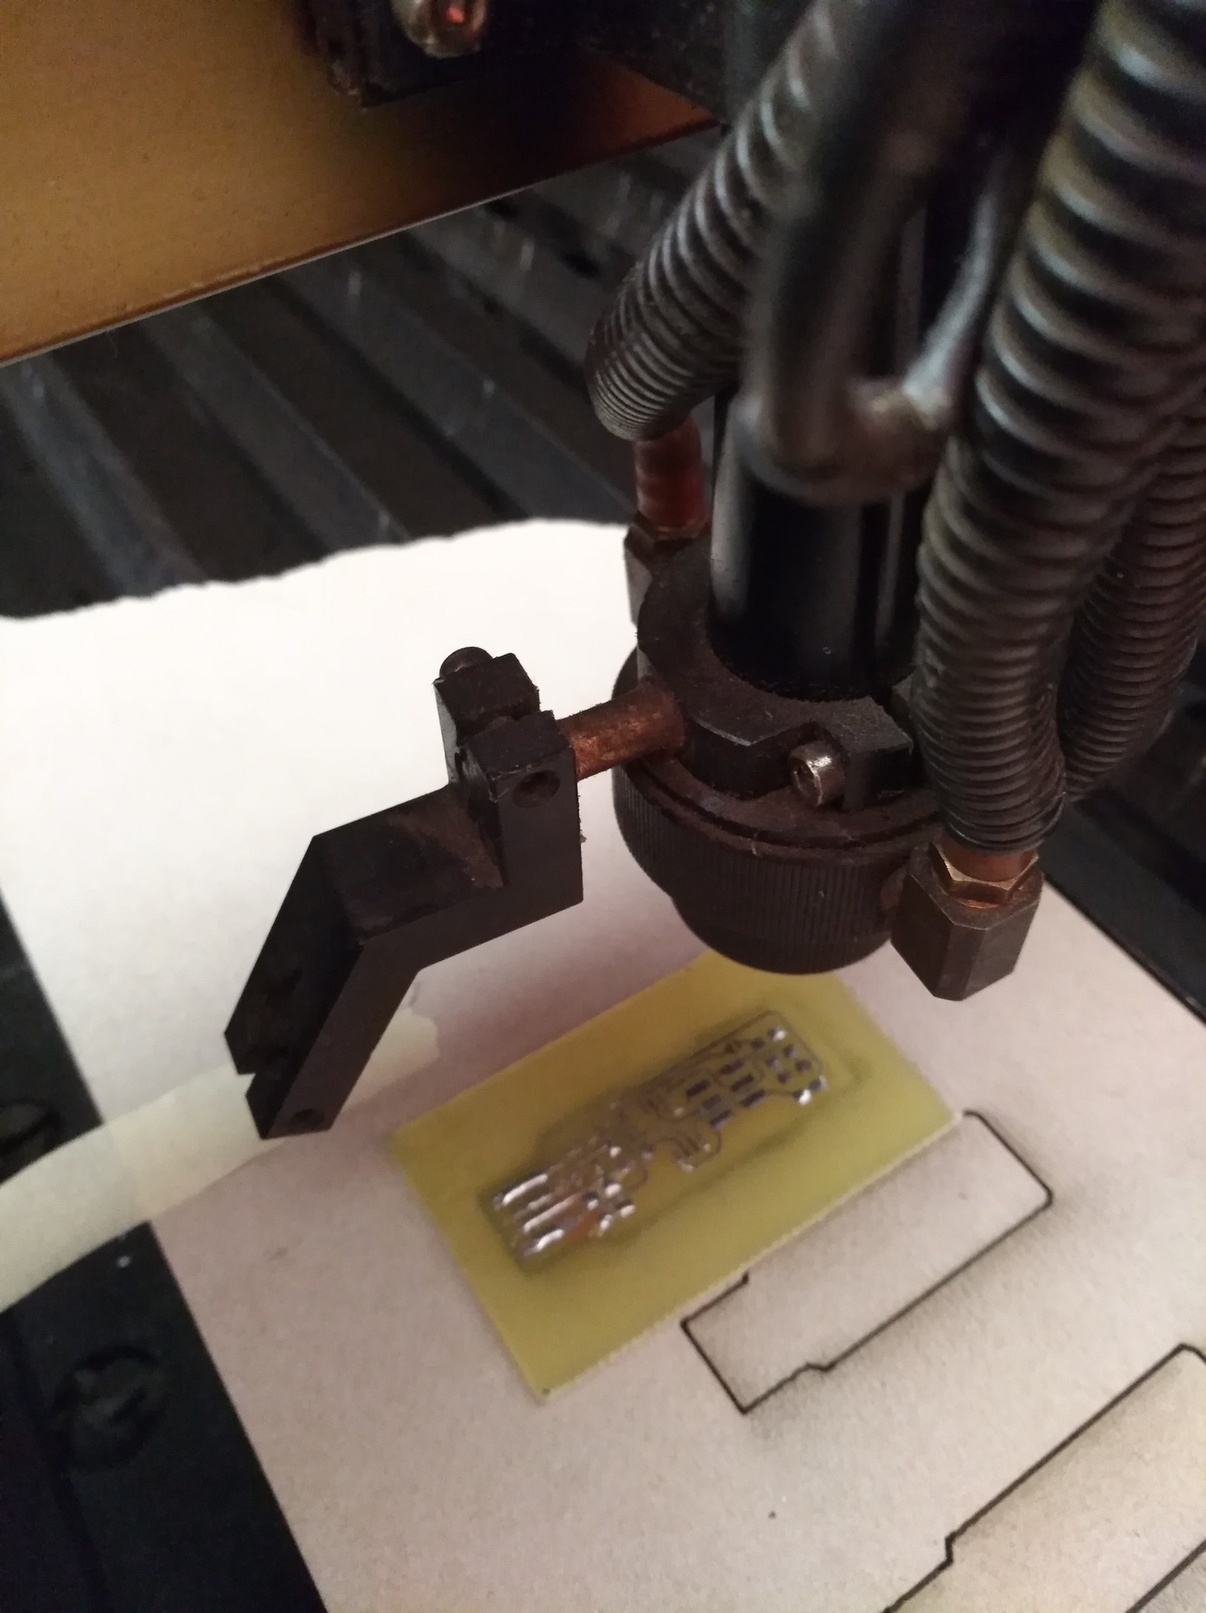
Fortunately I made 2 circuits, one of them was wrongly placed when I cut it with the laser cutter.
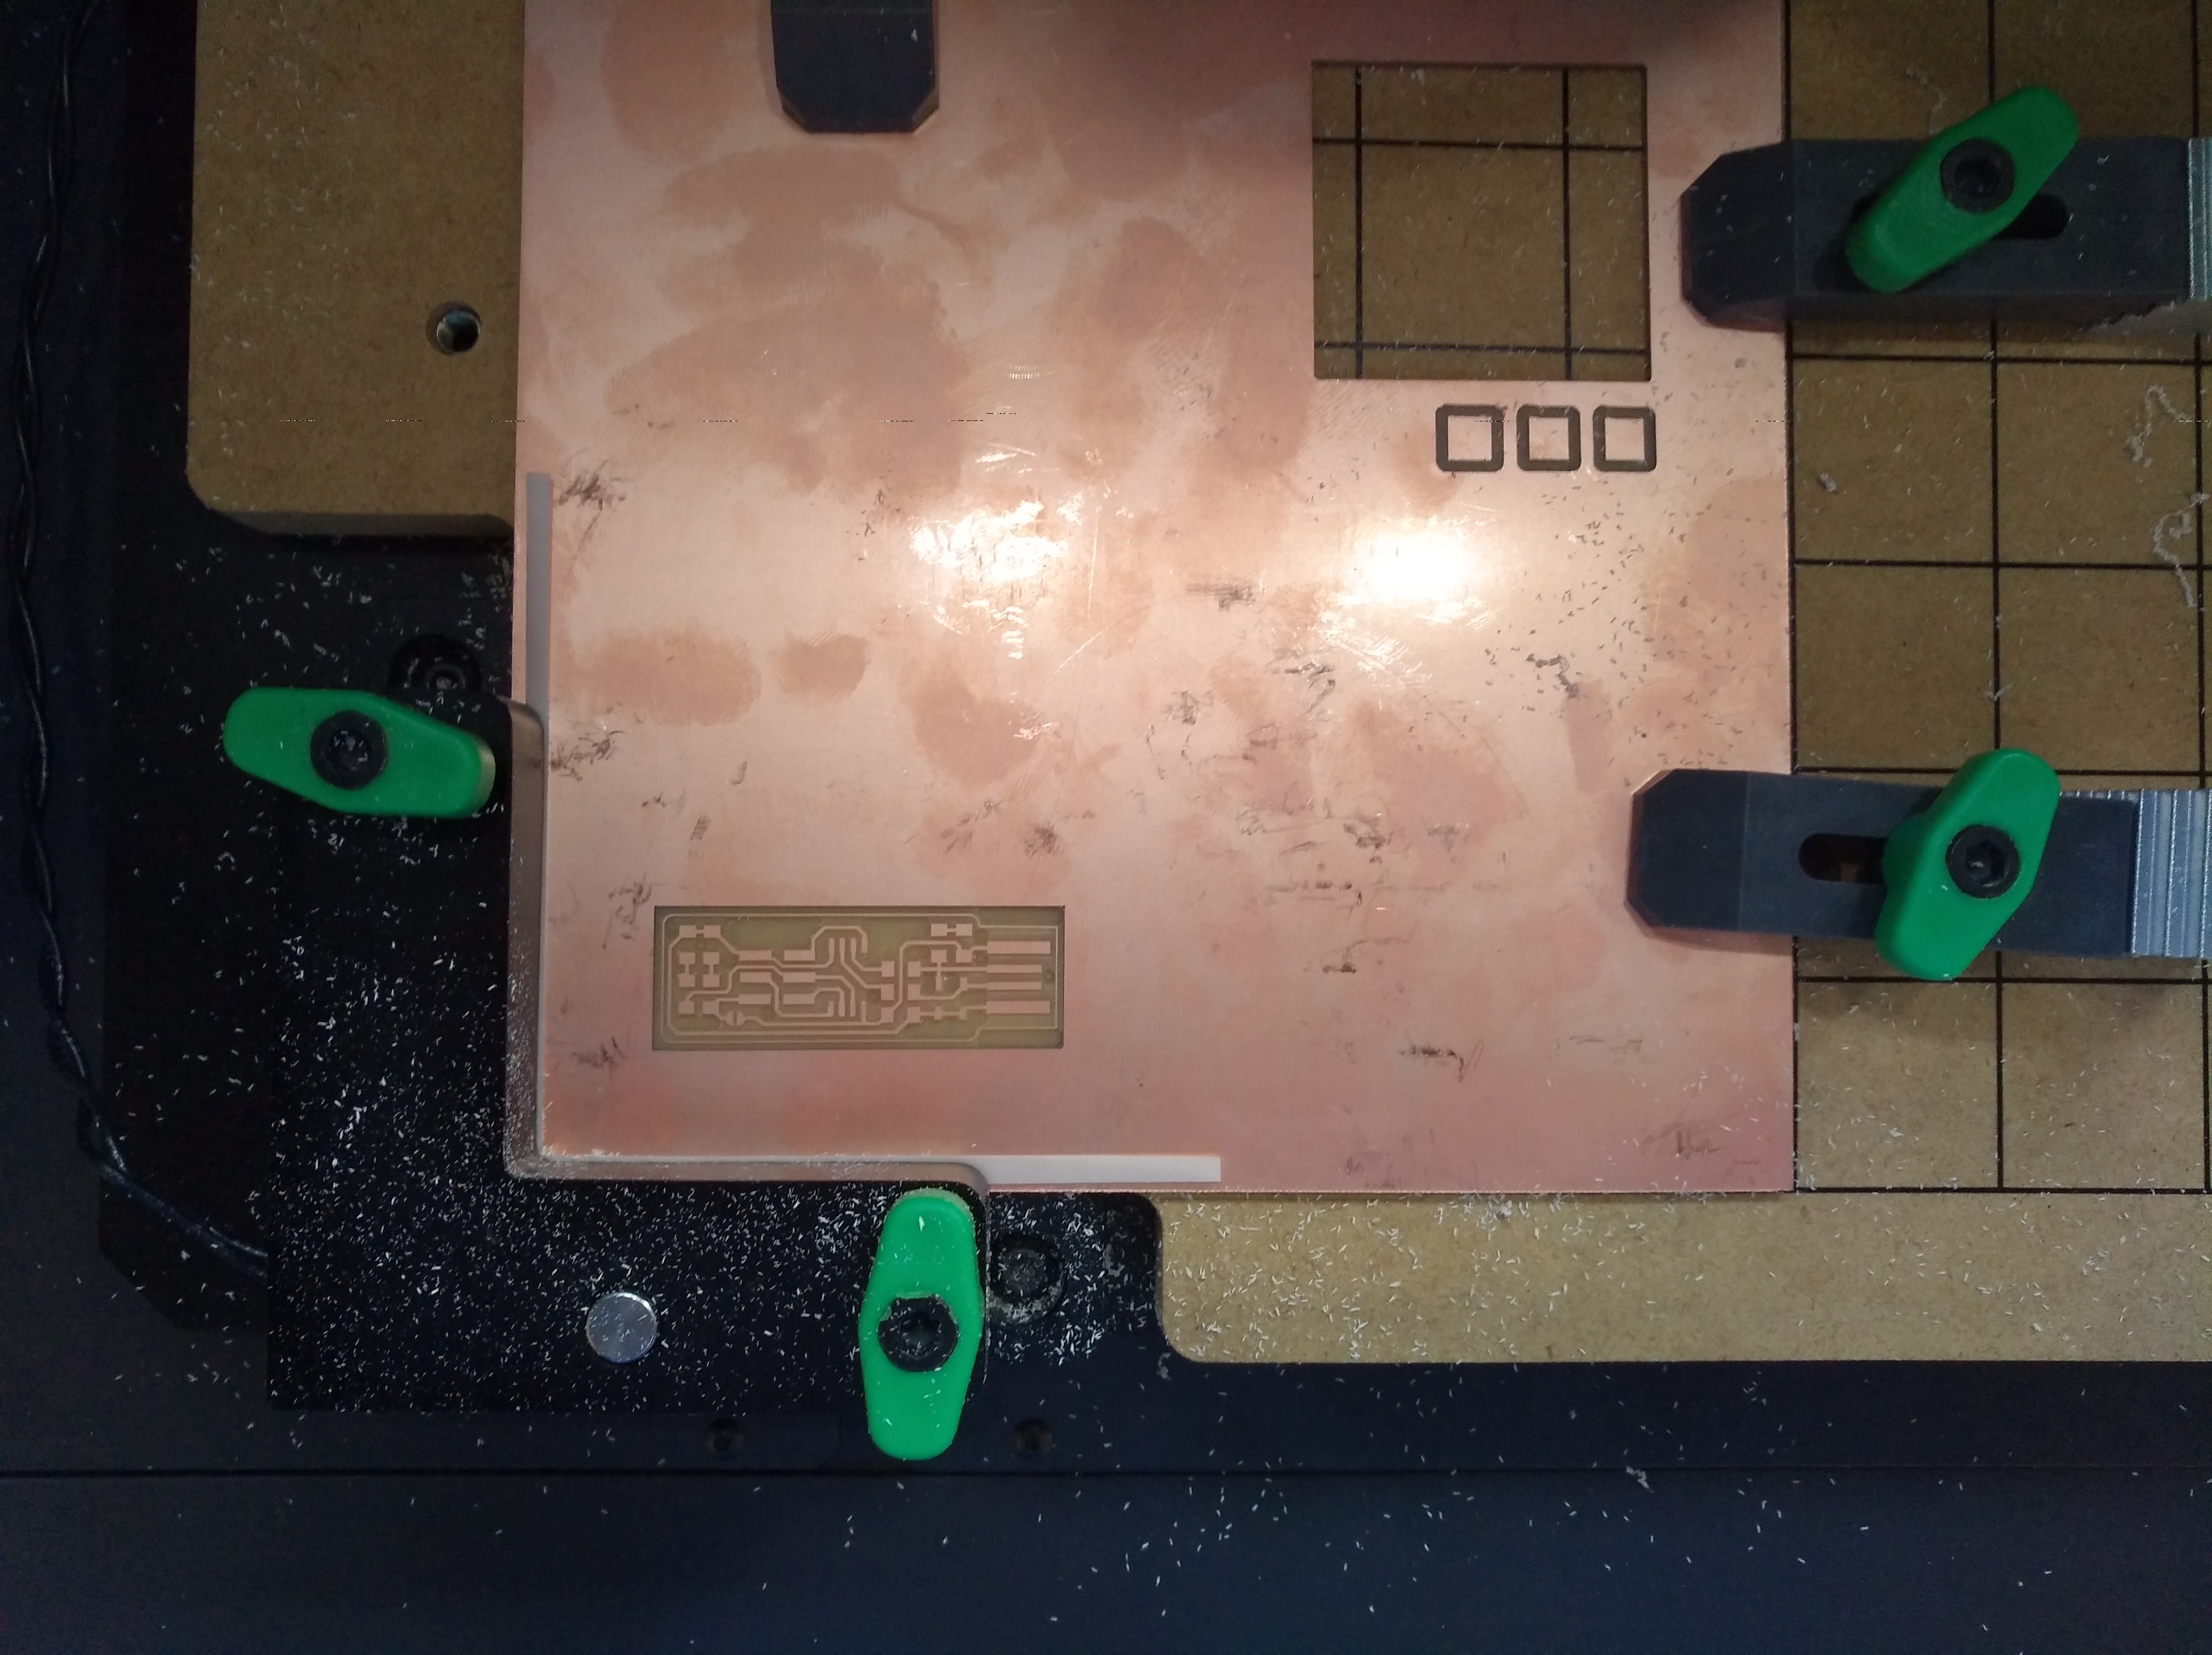
I finally decided to redo the fab ISP with the CNC we received.
I used the same documents for the manufacture of the one described above.
I had to transform the files into SVG so that Easel could read them.
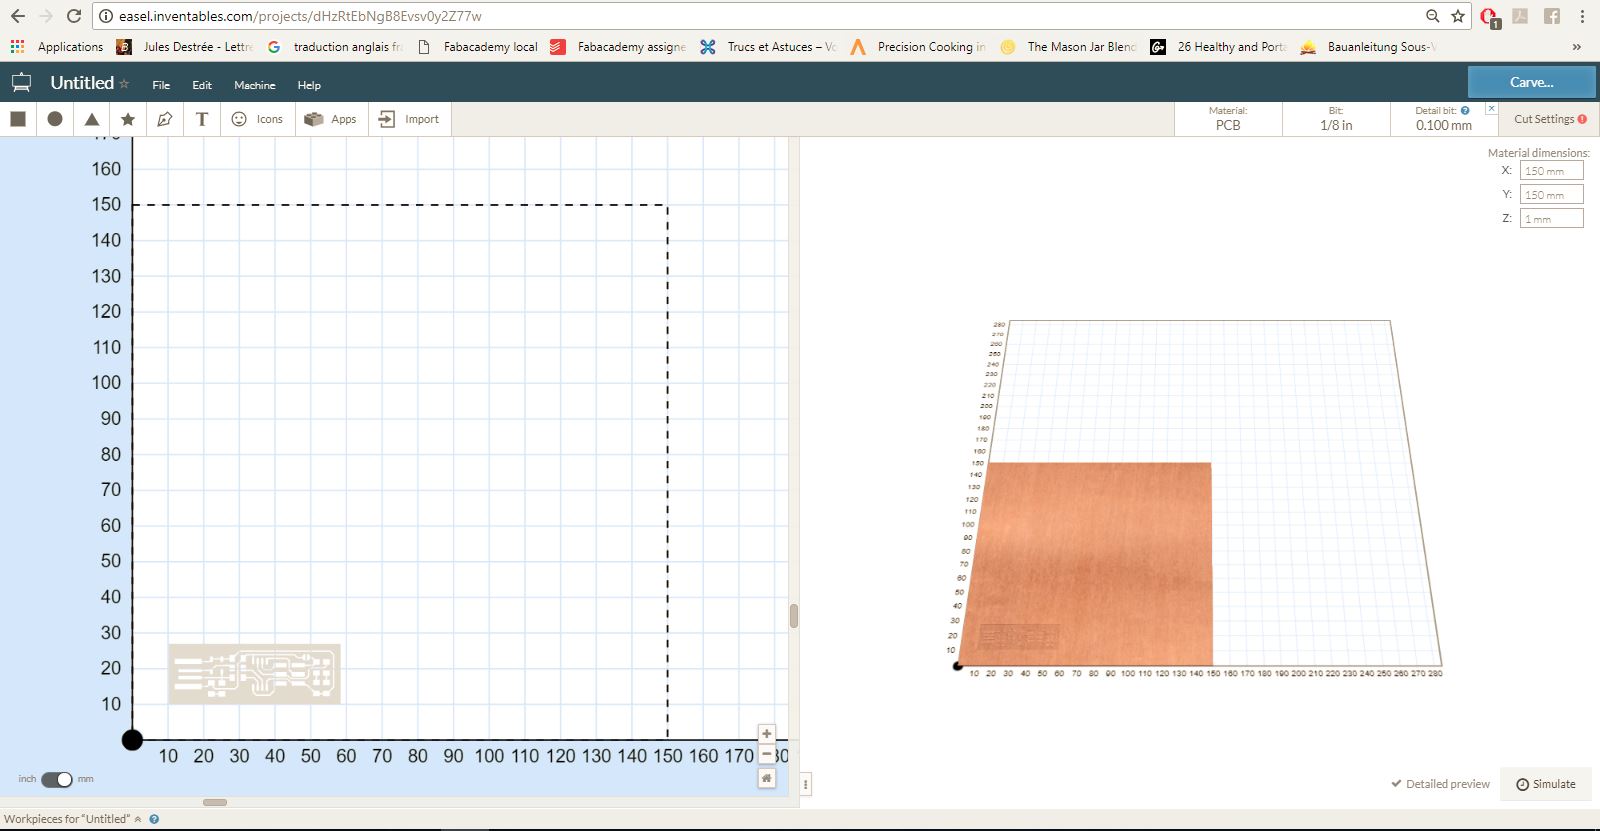
For this you have to open them in Inscape and vectorized them.
The procedure is described in the week of the final project.


PROGRAMMING THE fab ISP
My laptop is in windows 10.
It seems very difficult to install the fab ISP firmware with that OS.
So I decided to work with my apple computer using the procedure
that Roman(from Woma) and Denis(my instructor),followed.
see Denis'swebsite and Romain's website
I first made the procedure to use an arduino UNO as ISP to programme the fab ISP.
See procedure here
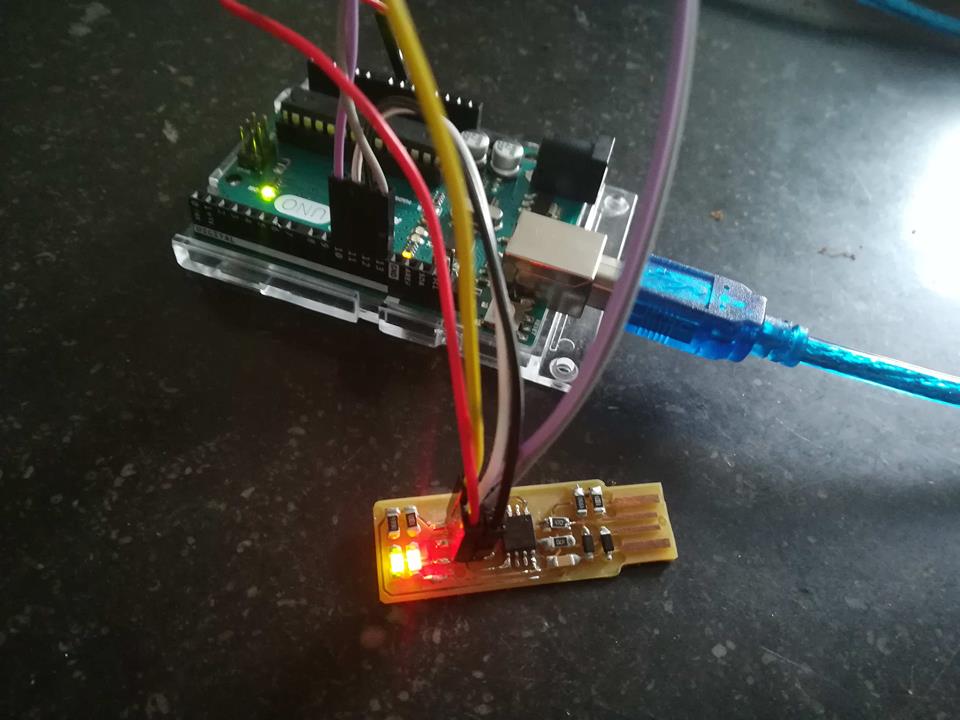
Then I connected the fab ISP with the arduino connecting the pin the following way using the ISP pinout:
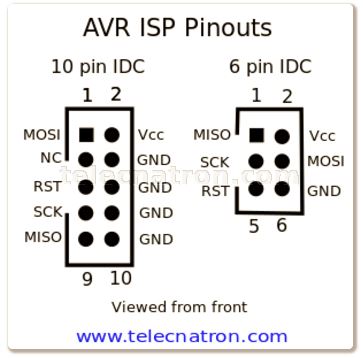
- GND = GND
- VCC=VCC
- MOSI=11
- MISO=12
- SCK=13
- RST=10
I installed Homebrew following the procedure on the Homebrew website
It is a complement to Mac OS that will add the necessary elements to an AVR processor programmer.
I typed the following command to load Homebrew on my computer:
/ usr / bin / ruby -e "$ (curl -fsSL https://raw.githubusercontent.com/Homebrew/install/master/install)"
The installation took several minutes and finally succeeded ...
I have also installed Crosspack AVR
It is a development environment for Atmel AVR micro controllers running on Mac OS X.
I then loaded the following link to load the firmware
I unzipped it ,and then opened the terminal and went to the directory where the firmware is.
cd /users/victorlevy/documents/fab ISP_0.8.2_firmware
I changed in the Makefile the programmer to arduino and the processor to Attiny45
    MCU = attiny45
    PROGRAMMER ?= arduino
I created the .hex file using the command
$ make
On the terminal:

iMac-de-Victor:documents victorlevy$ cd /users/victorlevy/documents/fts_firmware_bdm_v1
iMac-de-Victor:fts_firmware_bdm_v1 victorlevy$ pwd
/users/victorlevy/documents/fts_firmware_bdm_v1
iMac-de-Victor:fts_firmware_bdm_v1 victorlevy$ make clean
rm -f usbdrv/*.o
rm -f *.hex *.elf *.o
iMac-de-Victor:fts_firmware_bdm_v1 victorlevy$ make
avr-gcc -mmcu=attiny45 -Wall -DF_CPU=16500000UL -I. -funsigned-char -funsigned-bitfields -fpack-struct -fshort-enums -Os -Iusbdrv -c main.c -o main.o
main.c:109:13: warning: always_inline function might not be inlinable [-Wattributes]
 static void delay ( void )
             ^
avr-gcc -mmcu=attiny45 -Wall -DF_CPU=16500000UL -I. -funsigned-char -funsigned-bitfields -fpack-struct -fshort-enums -Os -Iusbdrv -c usbdrv/usbdrv.c -o usbdrv/usbdrv.o
avr-gcc -mmcu=attiny45 -Wall -DF_CPU=16500000UL -I. -funsigned-char -funsigned-bitfields -fpack-struct -fshort-enums -Os -Iusbdrv -c usbdrv/oddebug.c -o usbdrv/oddebug.o
avr-gcc -x assembler-with-cpp -mmcu=attiny45 -Wall -DF_CPU=16500000UL -I. -funsigned-char -funsigned-bitfields -fpack-struct -fshort-enums -Os -Iusbdrv -c usbdrv/usbdrvasm.S -o usbdrv/usbdrvasm.o
avr-gcc -mmcu=attiny45 -o fts_firmware.elf main.o usbdrv/usbdrv.o usbdrv/oddebug.o usbdrv/usbdrvasm.o
avr-size -C --mcu=attiny45 fts_firmware.elf
AVR Memory Usage
----------------
Device: attiny45

Program:    2488 bytes (60.7% Full)
(.text + .data + .bootloader)

Data:         75 bytes (29.3% Full)
(.data + .bss + .noinit)


avr-objcopy -j .text -j .data -O ihex fts_firmware.elf fts_firmware.hex
iMac-de-Victor:fts_firmware_bdm_v1 victorlevy$ make flash
avrdude  -p attiny45 -c arduino -P usb e \
		-U /dev/cu.usbmodem1421
avrdude: ser_open(): can't open device "usb": No such file or directory
ioctl("TIOCMGET"): Inappropriate ioctl for device

avrdude done.  Thank you.

make: * [flash] Error 1
iMac-de-Victor:fts_firmware_bdm_v1 victorlevy$ make clean
rm -f usbdrv/*.o
rm -f *.hex *.elf *.o
iMac-de-Victor:fts_firmware_bdm_v1 victorlevy$ make
avr-gcc -mmcu=attiny45 -Wall -DF_CPU=16500000UL -I. -funsigned-char -funsigned-bitfields -fpack-struct -fshort-enums -Os -Iusbdrv -c main.c -o main.o
main.c:109:13: warning: always_inline function might not be inlinable [-Wattributes]
 static void delay ( void )
             ^
avr-gcc -mmcu=attiny45 -Wall -DF_CPU=16500000UL -I. -funsigned-char -funsigned-bitfields -fpack-struct -fshort-enums -Os -Iusbdrv -c usbdrv/usbdrv.c -o usbdrv/usbdrv.o
avr-gcc -mmcu=attiny45 -Wall -DF_CPU=16500000UL -I. -funsigned-char -funsigned-bitfields -fpack-struct -fshort-enums -Os -Iusbdrv -c usbdrv/oddebug.c -o usbdrv/oddebug.o
avr-gcc -x assembler-with-cpp -mmcu=attiny45 -Wall -DF_CPU=16500000UL -I. -funsigned-char -funsigned-bitfields -fpack-struct -fshort-enums -Os -Iusbdrv -c usbdrv/usbdrvasm.S -o usbdrv/usbdrvasm.o
avr-gcc -mmcu=attiny45 -o fts_firmware.elf main.o usbdrv/usbdrv.o usbdrv/oddebug.o usbdrv/usbdrvasm.o
avr-size -C --mcu=attiny45 fts_firmware.elf
AVR Memory Usage
----------------
Device: attiny45

Program:    2488 bytes (60.7% Full)
(.text + .data + .bootloader)

Data:         75 bytes (29.3% Full)
(.data + .bss + .noinit)
Until then everything has been correctly.
I tried to load the firmware using the command.
$ make flash
It did'nt work, I made some research and looked at the fabacademy tutorials 2018
I opened the Makefile and changed the line AVRDUDE = avrdude by the following command,
after changing the address of the USB after reading it on Arduino IDE.
AVRDUDE = avrdude -c stk500v1 -b19200 -P /dev/cu.usbmodem1421 -p $ (DEVICE)
The problem seems to be the USB serial communication.
Arduino as ISP is emulated, no idea of the problem, so far ...
I think it would be better to work with an usbtiny ISP to program the fab ISP.
That was Denis's solution...
iMac-de-Victor:fts_firmware_bdm_v1 victorlevy$ make flash
avrdude  -p attiny45 -c arduino -P usb e \
-U /dev/cu.usbmodem1421
avrdude: ser_open(): can't open device "usb": No such file or directory
ioctl("TIOCMGET"): Inappropriate ioctl for device
avrdude done.  Thank you.
make: * [flash] Error 1

iMac-de-Victor:fts_firmware_bdm_v1 victorlevy$ make clean
rm -f usbdrv/*.o
rm -f *.hex *.elf *.o
iMac-de-Victor:fts_firmware_bdm_v1 victorlevy$ make flash

      avrdude  -p attiny45 -c arduino -P usb e \
-U
avrdude: ser_open(): can't open device "usb": No such file or directory
ioctl("TIOCMGET"): Inappropriate ioctl for device
avrdude done.  Thank you.
make: * [flash] Error 1
iMac-de-Victor:fts_firmware_bdm_v1 victorlevy$
Finally I couldn't make it work and was was graduated with the condition to finalised the fab ISP..
FAB ISP FINAL
Back from vacation after an interresting FAb 14 in Toulouse...
I decided to start from scratch and made a new fab ISP.
I tested with Axel the circuits with the ohmetre to be sure of the connections
They were all OK
I then did the procedure for windows 10 of this tutorial and loaded the fab ISP firmware
Edited the MAKEFILE
Changed the CPU to attiny 45
And changed the speed of the clock at 16.5 MHZ, still didn't work, bloody hell ... !!!
I looked at Denis'website and saw that the tutorial and the firmware he used was different.
Last final trial ...
Here are the tutorial and the firmware I finally used.
I edited the MAKEFILE to change the CPU type, clock frequency and followed the procedure provided at the beginning of the file.
# 'make' builds the .hex file.
# 'make flash' uses the programmer to load it onto the target chip.
# 'make fuses' programs the fuse bits on the target chip.
# 'make rstdisbl' blows the reset fuse.
And here is the result ...It finally worked ...
C:\Users\Administrateur\Desktop\fts_firmware_bdm_v1>make hex
make: *** No rule to make target `hex'.  Stop.

C:\Users\Administrateur\Desktop\fts_firmware_bdm_v1>make flash
avrdude -p attiny45 -c usbtiny -P usb -e \
                -U flash:w:fts_firmware.hex

avrdude: AVR device initialized and ready to accept instructions

Reading | ################################################## | 100% 0.01s

avrdude: Device signature = 0x1e9206
avrdude: erasing chip
avrdude: reading input file "fts_firmware.hex"
avrdude: input file fts_firmware.hex auto detected as Intel Hex
avrdude: writing flash (2534 bytes):

Writing | ################################################## | 100% 4.62s


avrdude: 2534 bytes of flash written
avrdude: verifying flash memory against fts_firmware.hex:
avrdude: load data flash data from input file fts_firmware.hex:
avrdude: input file fts_firmware.hex auto detected as Intel Hex
avrdude: input file fts_firmware.hex contains 2534 bytes
avrdude: reading on-chip flash data:

Reading | ################################################## | 100% 2.63s


avrdude: verifying ...
avrdude: 2534 bytes of flash verified

avrdude: safemode: Fuses OK

avrdude done.  Thank you.
C:\Users\Administrateur\Desktop\fts_firmware_bdm_v1>make fuses
avrdude -p attiny45 -c usbtiny -P usb \
                -U lfuse:w:0xE1:m -U hfuse:w:0xDD:m \
                -U efuse:w:0xFF:m

avrdude: AVR device initialized and ready to accept instructions

Reading | ################################################## | 100% 0.02s

avrdude: Device signature = 0x1e9206
avrdude: reading input file "0xE1"
avrdude: writing lfuse (1 bytes):

Writing | ################################################## | 100% 0.03s

avrdude: 1 bytes of lfuse written
avrdude: verifying lfuse memory against 0xE1:
avrdude: load data lfuse data from input file 0xE1:
avrdude: input file 0xE1 contains 1 bytes
avrdude: reading on-chip lfuse data:

Reading | ################################################## | 100% 0.01s

avrdude: verifying ...
avrdude: 1 bytes of lfuse verified
avrdude: reading input file "0xDD"
avrdude: writing hfuse (1 bytes):

Writing | ################################################## | 100% 0.02s

avrdude: 1 bytes of hfuse written
avrdude: verifying hfuse memory against 0xDD:
avrdude: load data hfuse data from input file 0xDD:
avrdude: input file 0xDD contains 1 bytes
avrdude: reading on-chip hfuse data:

Reading | ################################################## | 100% 0.00s

avrdude: verifying ...
avrdude: 1 bytes of hfuse verified
avrdude: reading input file "0xFF"
avrdude: writing efuse (1 bytes):

Writing | ################################################## | 100% 0.00s

avrdude: 1 bytes of efuse written
avrdude: verifying efuse memory against 0xFF:
avrdude: load data efuse data from input file 0xFF:
avrdude: input file 0xFF contains 1 bytes
avrdude: reading on-chip efuse data:

Reading | ################################################## | 100% 0.00s

avrdude: verifying ...
avrdude: 1 bytes of efuse verified

avrdude: safemode: Fuses OK

avrdude done.  Thank you.
C:\Users\Administrateur\Desktop\fts_firmware_bdm_v1>make rstdisbl
avrdude -p attiny45 -c usbtiny -P usb \
                -U lfuse:w:0xE1:m -U hfuse:w:0x5D:m \
                -U efuse:w:0xFF:m

avrdude: AVR device initialized and ready to accept instructions

Reading | ################################################## | 100% 0.02s

avrdude: Device signature = 0x1e9206
avrdude: reading input file "0xE1"
avrdude: writing lfuse (1 bytes):

Writing | ################################################## | 100% 0.01s

avrdude: 1 bytes of lfuse written
avrdude: verifying lfuse memory against 0xE1:
avrdude: load data lfuse data from input file 0xE1:
avrdude: input file 0xE1 contains 1 bytes
avrdude: reading on-chip lfuse data:

Reading | ################################################## | 100% 0.01s

avrdude: verifying ...
avrdude: 1 bytes of lfuse verified
avrdude: reading input file "0x5D"
avrdude: writing hfuse (1 bytes):

Writing | ################################################## | 100% 0.02s

avrdude: 1 bytes of hfuse written
avrdude: verifying hfuse memory against 0x5D:
avrdude: load data hfuse data from input file 0x5D:
avrdude: input file 0x5D contains 1 bytes
avrdude: reading on-chip hfuse data:

Reading | ################################################## | 100% 0.00s

avrdude: verifying ...
avrdude: 1 bytes of hfuse verified
avrdude: reading input file "0xFF"
avrdude: writing efuse (1 bytes):

Writing | ################################################## | 100% 0.01s

avrdude: 1 bytes of efuse written
avrdude: verifying efuse memory against 0xFF:
avrdude: load data efuse data from input file 0xFF:
avrdude: input file 0xFF contains 1 bytes
avrdude: reading on-chip efuse data:

Reading | ################################################## | 100% 0.01s

avrdude: verifying ...
avrdude: 1 bytes of efuse verified

avrdude: safemode: Fuses OK

avrdude done.  Thank you.


C:\Users\Administrateur\Desktop\fts_firmware_bdm_v1>
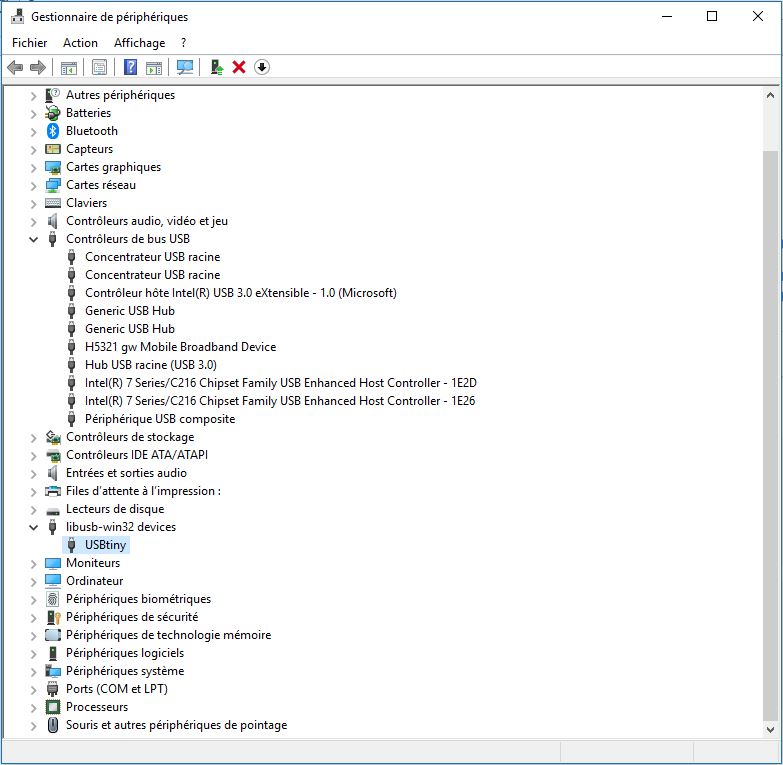
Final check : I checked on my computer to see if the fab ISP was recognized. and there it was ...
HOME