Machine Design - DXB Plotter
may 09 - may 16

● Follow the LINK to the group page to know more.
● The goal for this week was to work ahead on the xy plotter machine that our group at the lab designed and assembled, in terms of movable xy axis by hand. Now is the time to digitize it and integrate the set up.
● My responsibility was to get some good amount of research done and accordingly work on different aspects of the machine such as connecting the stepper to the arduino using shield, to download the GRBL library for arduino, to install Universal Gcode sender software and download an extension for provision of saving gcode files in inkscape.
● For me personally, everything is pretty new in terms of digitizing the machine and I had a great time learning of all the above topics. It made me more aware about the components and their applications as well connections.
Getting Started
my role and responsibilities
● Research about the Stepper Motor.
● Know more about the CNC Shield with Heat Sink and their connection layout.
● Download and steps to copy the GRBL Library for Arduino IDE.
● Test, verify and upload the example skecth for GRBL.
● Download the Universal G-code sender.
● Test the Stepper movement through manual control in the Universal G-code sender software connected to the GRBL firmware.
● Add a plug-in for saving (.gcode) file in Inkscape.
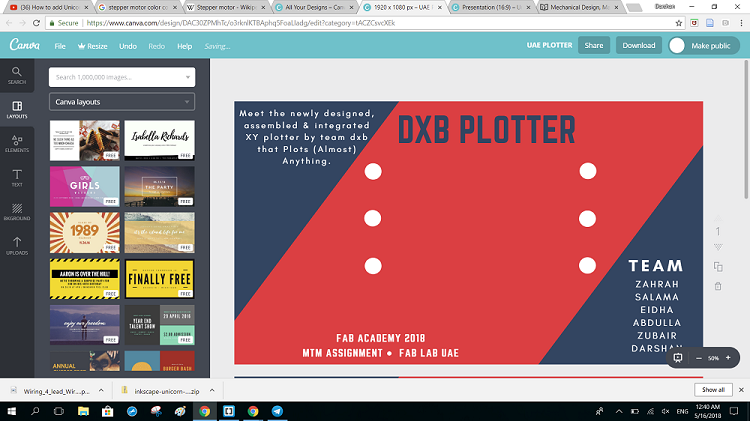
● Craete a Slide for the Group Page as per specifications.
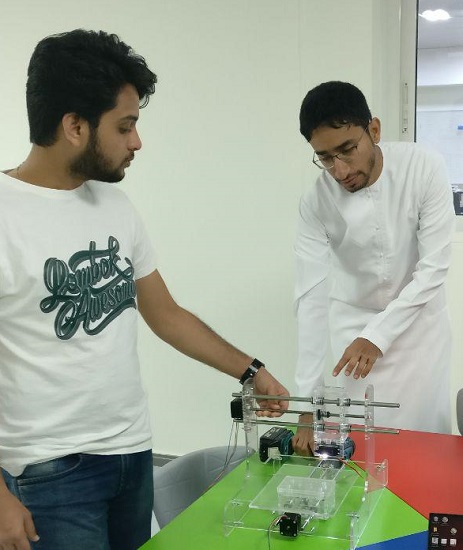
● The below image shows the final design of our plotting machine which is built out of 6mm transparent acrylic, contains 2 stepper motors for x y axis and servo motor for minimal z axis movement.
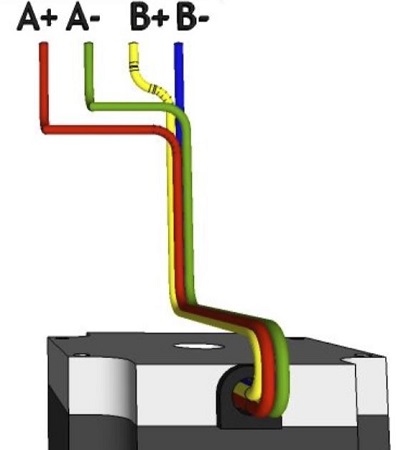
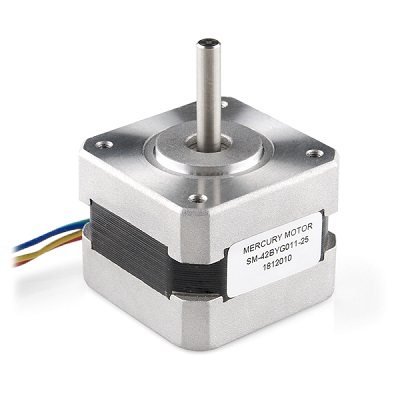
● The following image shows the color code of the bipolar NEMA 17 stepper which I am using for motion of the bed and the plotting pen.
● What are stepper motors good for?
This is the LINK I referred to for all the information about stepper motors.
● Stepper motors
- The stepper motor is an electromagnetic device that converts digital pulses into mechanical shaft rotation. Advantages of step motors are low cost, high reliability, high torque at low speeds and a simple, rugged construction that operates in almost any environment. The main disadvantages in using a stepper motor is the resonance effect often exhibited at low speeds and decreasing torque with increasing speed.
● The following image shows the major components which are be used, this includes a CNC shield for arduino, driver with heat sink and mechanical limit switch.
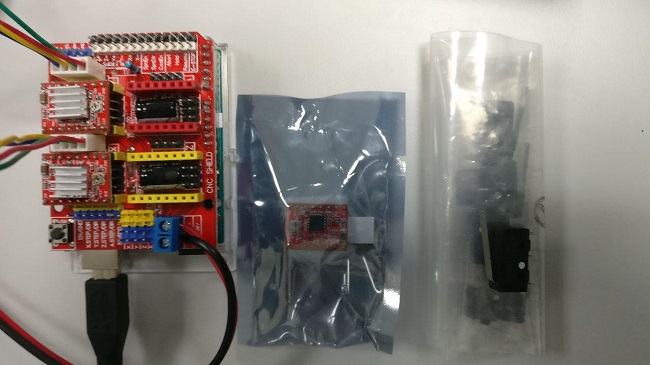
● Indexers
● The indexer (or controller) is a microprocessor capable of generating step pulses and direction signals for the driver. In addition, the indexer is typically required to perform many other sophisticated command functions. Drivers
● The driver (or amplifier) converts the indexer command signals into the power necessary to energize the motor windings. There are numerous types of drivers, with different voltage and current ratings and construction technology. Not all drivers are suitable to run all motors, so when designing a motion control system the driver selection process is critical.
● CNC Shield Board:
● Latest CNC Shield Version 3.0 for Arduino.
● GRBL 0.9 compatible. (Open source firmware that runs on an UNO for Arduino that turns G-code commands into stepper signals)
● PWM Spindle and direction pins
● 4-Axis support (X, Y, Z , A-Can duplicate X,Y,Z or do a full 4th axis with custom firmware using pins D12 and D13)
● 2 x End stops for each axis (6 in total)
● Coolant enable
● Uses removable A4988 or DRV8825 compatible stepper drivers
● Jumpers to set the Micro-Stepping for the stepper drivers. (Some drivers like the DRV8825 can do up to 1/32 microstepping )
● Compact design.
● Stepper Motors can be connected with 4 pin molex connectors or soldered in place.
● Runs on 12-36V DC.
● I downloaded the below image from this LINK
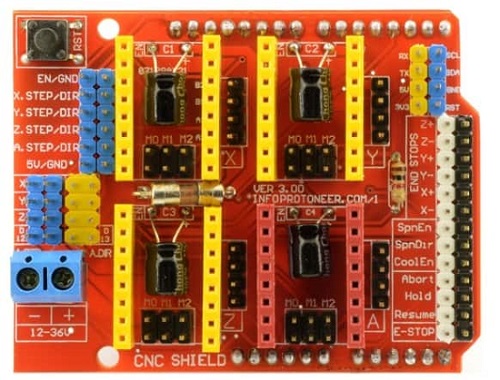
The above picture has been downloaded from this LINK
CNC Shield Board: Package Includes: ●1 x CNC Shield Board
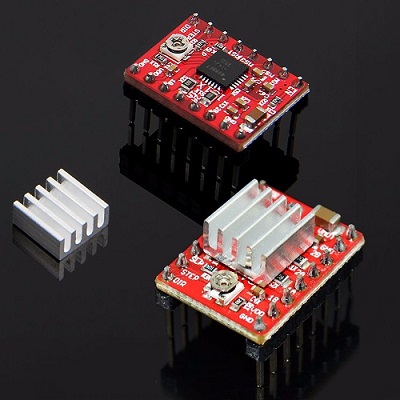
●4 x A4988 Stepper Motor Driver
●4 x Heat Sink
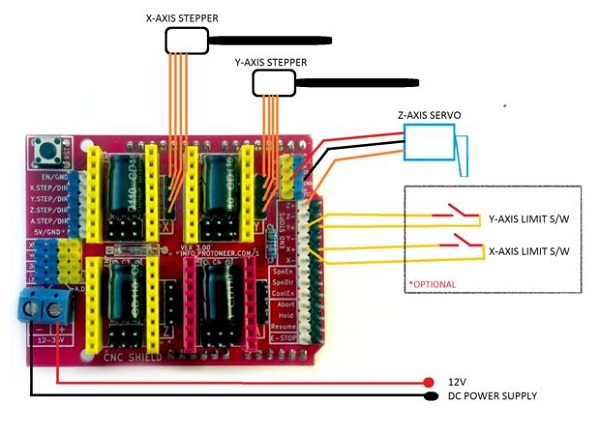
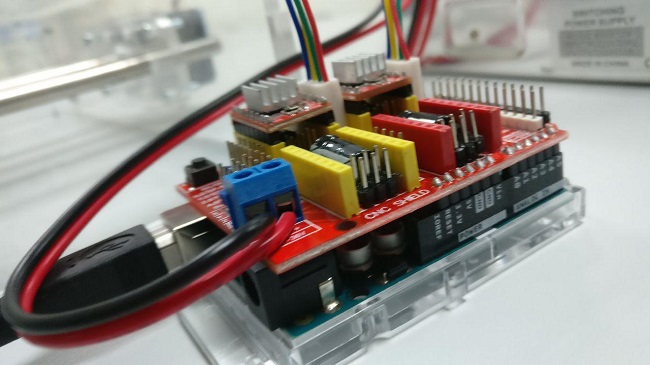
● Since the machine requires only 2 stepper motors, the following image shows the connection of the same with the drivers on shield.
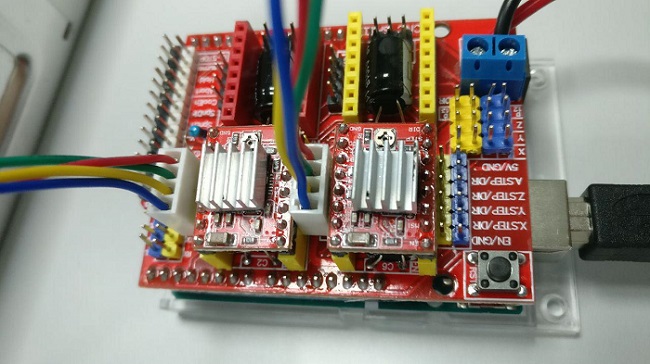
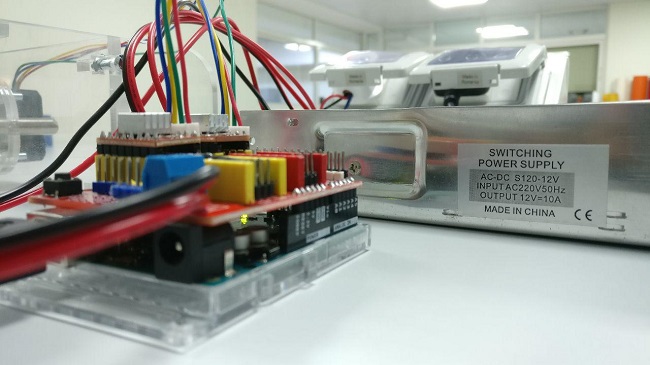
● Also the stepper requires power of 12V, so I connected an external power supply to the shield as well.
● In order to communicate with the stepper motor using arduino, I download the following essential tools, softwares and extensions.
● Grbl is a free, open source, high performance software for controlling the motion of machines that move, that make things, or that make things move, and will run on a straight Arduino.
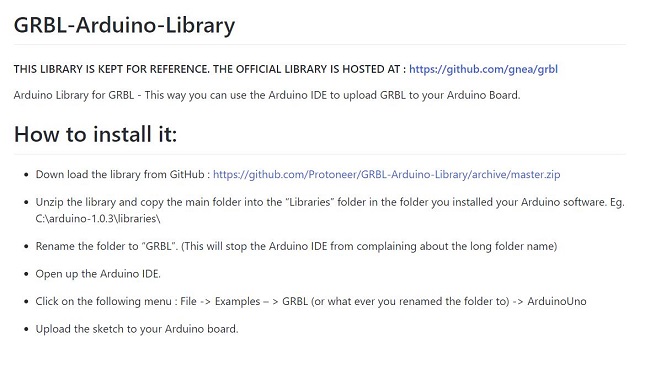
● This is the LINK I visited that helped me download GRBL library for arduinoa and understand the same.
●Grbl Controller is software that is designed to send GCode to CNC machines, such as 3D milling machines. It isn't super smart, it just needs to give the user a nice way to get commands down to whatever controller they are using. Version 3.0 is has been optimized for the Arduino to control Grbl shields.
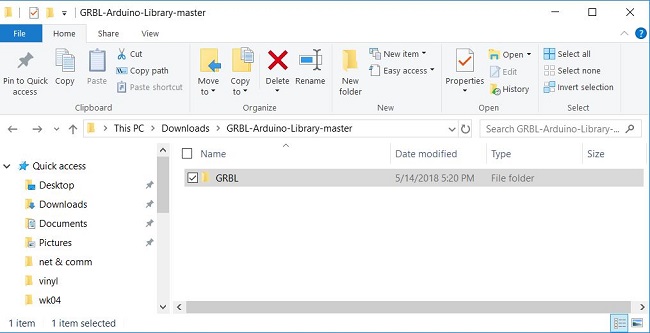
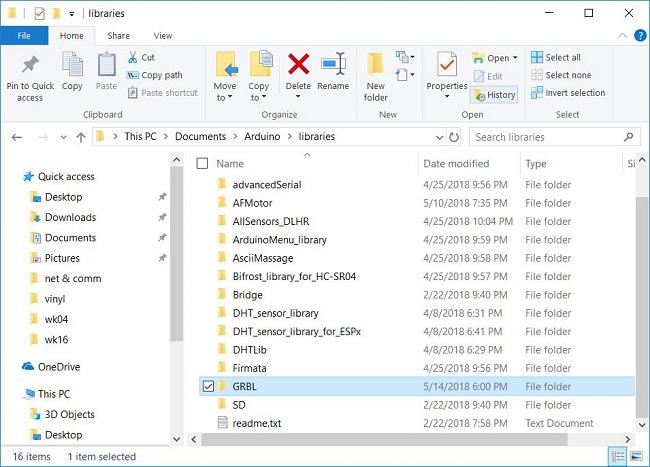
● In order to copy the GRBL files, I first extract all file and choose the folder inside the main downloaded folder and copy the same to the Arduino libraries as show in the image below.
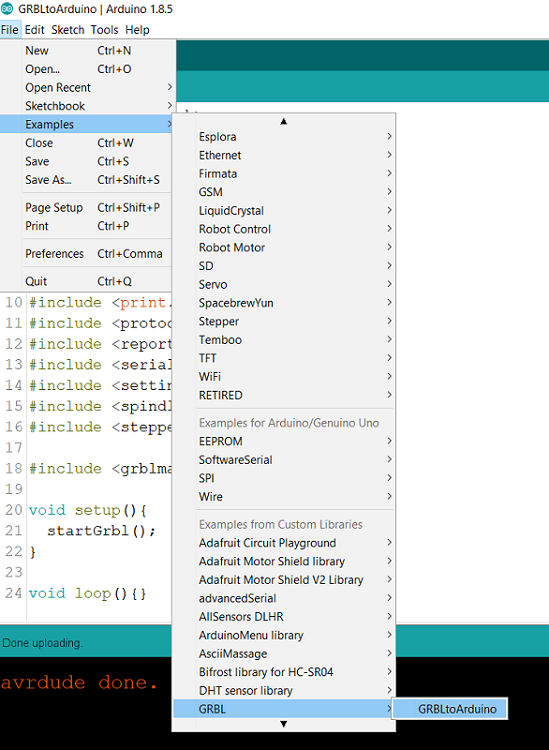
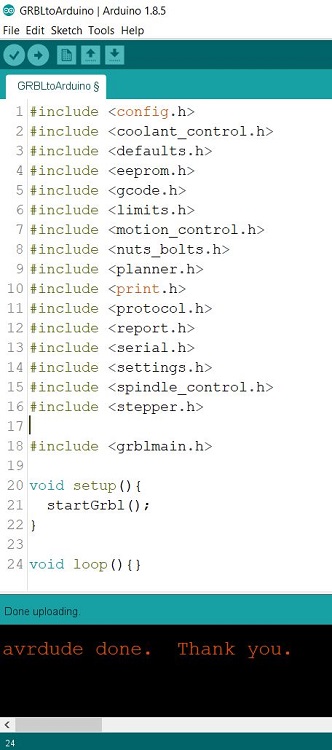
● I chose the example option and open the GRBL/ GRBL to Arduino to obtain the code.
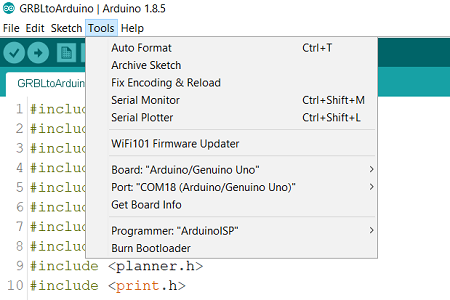
● The following image shows that I selected the Arduino Uno board and ArduinoISP to upload the sketch.
● The following is the code I used from the GRBL to Arduino library, used to program the arduino with shield in order to communicate with the motors through GRBL and universal gcode sender.
● This is the LINK I visited which guided me to download Universal G code sender software.
● This is how the software look like once I connected to the port and using firmware GRBL to communicate with the stepper motors.
● Here I can choose options such as command and edit them as per the stepper motor and project requirement, also control the motors with the help of machine control.

● I need to have a java script to run the above software. This is the LINK to download Java script to run the universal gcode sender software.
● Driving Stepper poem
Step in time, step in time
Come on, mateys, step in time
Step in time
Step in time, step in time
Step in time, step in time
Never need a reason, never need a rhyme
We step in time, we step in time
"Step In Time"
Robert B. Sherman and Richard M. Sherman
i also tested the stepper movements
MOVING ON TO G-codes
● G-codes, also called preparatory codes, are any word in a CNC program that begins with the letter G. Generally it is a code telling the machine tool what type of action to perform, such as: Rapid movement (transport the tool as quickly as possible in between cuts)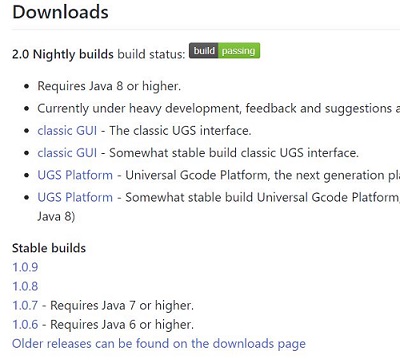
● This is the LINK which helped me guide through the process to download extension for gcode in inkscape.
● The following image shows the poster I have been preparing for our group project page, as per the specifications of 1920x1080. It's been quite a good progress in terms of the testing and integration part of the project. Th group showed great amount of passion to achieve the results in the given time.