It's been a busy week for us catching up on everything. It's was amazing and challenging for us to participate in mini maker faire and hackathon beside doing our week assignment and we successfully done it and we are proud of what we did. The thing that helped us was we did the group assignment in the first week. I don’t know how our mentor Wendy feels that we will straggle in this from week one. We did the 3D scanning as a group as well.
Firstly, we downloaded a torture test from Thingiverse, which has a Creative Commons Attribution license. Thanks for making and sharing that file, MAKE! We used the 'default settings' for these printers Ultimaker3 Extended, Ultimaker2, Zortrax, Form2 to begin with.
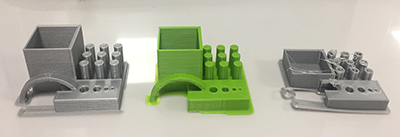
After that, we changed layer height so we could see the effect. We experimented with print speed. We mostly worked in Cura, but also used Zsuite and Preform slicing software. The materials we printed in were PLA, ABS & photopolymer resin. We measured and looked at each print and compared them.
Secondly, we summarized the function of the setting in CURA and how we understood it although each one has different background.Some of the text below is summarized from the Ultimaker website, but is based on what we did.
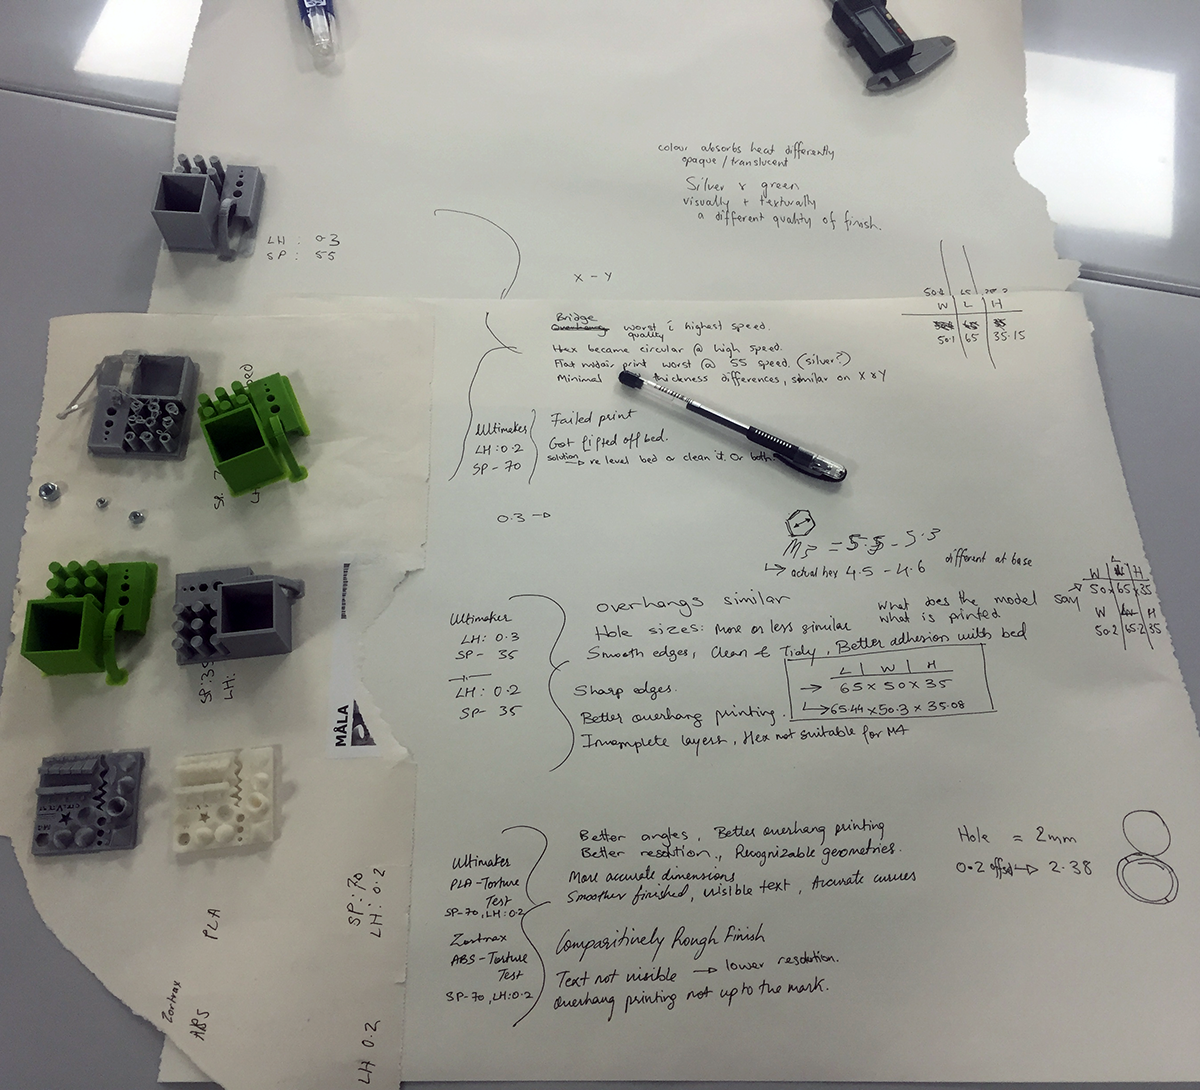
Based on this model, we decided that the best settings for a test print in PLA on Ultimaker3 Extended were: 0.3mm layer height, 50mm/s speed
We decided that the best settings for a final print in PLA on Ultimaker3 Extended were: 0.1mm layer height, 35mm/s speed
We decided that the best settings for a test print in ABS on the Zortrax were: 0.2mm layer, 70mm/s speed
We decided that the best settings for a final print in ABS on Zortrax were: print it on another printer
We decided that the best settings for a test print in Photopolymer on Form2 were: 0.1mm layer height (we recommend highly that the model is oriented on a 35 - 45% angle, never flat on the bed)
We decided that the best settings for a final print in Photopolymer on Form2 were: 0.05mm layer height
Infill - CarlInfill settings range from 0% - 100% and define the internal structure of the print. You can also pick different patterns such as grid, triangles, hexagon and concentric. Less infill means a lighter part and faster print, because it prints less material, however it does cause flimsy parts and top surfaces are more likely to fail at low infill settings. High infill settings can be heavy but stronger, and can take a very long time to print. 0% infill is a shell, and 100% infill is a solid (but has the potential to overflow with material if you have too much over extrude).
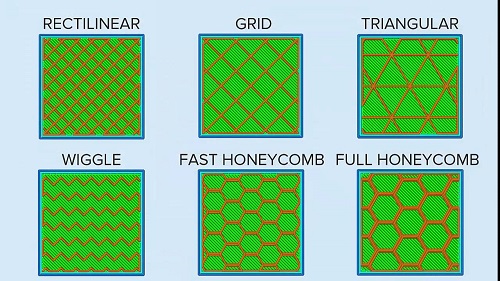
Types Of Infill - DarshanCura allows you to change the pattern of the printed infill structure, which could be beneficial in some cases. There are 8 options available:
Cura allows you to change the pattern of the printed infill structure, which could be beneficial in some cases. There are 8 options available:
Grid: A grid shaped infill, with lines in both diagonal directions on each layer.
Lines: Creates a grid shaped infill, printing in one diagonal direction per layer.
Triangles: Creates a triangular shaped infill pattern.
Cubic: A 3D infill of tilted cubes.
Tetrahedral: A 3D infill of pyramid shapes.
Concentric: The infill prints from the outside towards the center of the model. This way infill lines won’t be visible through the walls of the print.
Concentric 3D : The infill prints from the outside towards the center of the model, with an incline over the entire print.
Zig Zag: A grid shaped infill, printing continuously in one diagonal direction.
We used the GRID pattern infill for each torture test print, and we will be using different patterns in the coming weeks to compare.
 Build plate Adhesion - Darshan
Brim: Brim adds a single layer flat area around the base of the model to prevent warping. The brim is connected to the model and will thus make the bottom surface area bigger. This means that it can better stick to the build plate and in case of warping the corners of the model are less likely to curl up because of the brim attached to it. We majorly used brim type adhesion for torture test, for best results.
Raft: A raft adds a thick grid with a roof between the model and the build plate. This can especially be useful when the bottom surface of a model is not completely flat or has little adhesion to the build plate. With a raft you make sure that the model will stick better to the build plate in this case. The raft options in Cura are quite overwhelming, since the raft is divided into 3 parts: Top layers, middle layer and base layer.
Skirt: A skirt is a line printed around the object on the first layer, but not connected to the object. This helps priming the extrusion and can also be a good check for bed leveling before the print starts.
Shell - AlzubairWall Thickness:Thickness to the wall that adds more strength to the wall, could be used to make the inside waterproof for example, or could reduce it to save material costs and weight.
Top/Bottom Thickness: Top/Bottom layers thickness gives a firm product and a better feel, leaves no gaps, but makes the time increase.
Layer height - ZahrahIf you use small layer heights like 0.1 or 1 you will have a better chance of maintaining the surface quality of your print. But if your part or object does not have a great deal of details, you can choose around 0.3+ for a larger layer height. Also, if you are not sure about how the layers will be inside the object, then you can look at the layer view and see if the smallest detail shows up in the layer view and if it is clear you are good to print.
Speed - salamaThere are two generic speed settings in basic CURA, or you can tweak them more in custom settings.
Print speed: Print speed describes at which speed (in mm/s) the print head moves while printing. High speed cause short printing time. If you increase the speed you might have to increase the temperature beside its can affect the infill strength of your print. Usually the outer wall printed slower a bit to get smooth surface.
Travel speed: the print head is moving from one point to another. A higher travel speed decreases the chance of thread leaking from the nozzle, to get a cleaner object. On the other hand, a too high-speed means that the nozzle can hit a printed part so that it might damage the model by the hot nozzle. This can be prevented by using Z-hop when retracting though.
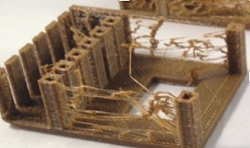
Enable retraction- EidhaThis feature help you to retract the material when the nozzle travel if you didn't select it your object will have a lot of wires because of the nozzle dribbling when it travel from point to point. Llike below.
Printing your 3D scan was optional. Although we did it as group each one had scan their own object.
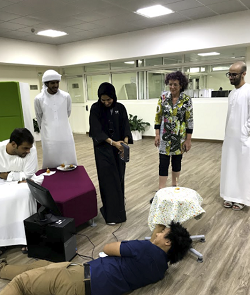
we would like to share with you about what we did in the hackathon and maker faire There was a booth for us to introduce the fab academy for visitor. To show them what we did and what we will do beside present machines like the leaser cutting and 3d printer.