This week, assignment is that to, read the material safety data sheet (MSDS) and technical data sheet (TDS) for the resins that you're using and to design and make a 3D mould (~ft2 /30x30cm), and produce a fibre composite part in it.
Composites consist of Combination of two or more materials :–
Composite = matrix + fiber (filler)
Matrix:
material component that surrounds the fiber.
Usually a ductile, or tough, material w/ low density
Strength usually = 1/10 (or less) than that of fiber
Examples include: thermoplastic or thermoset
Thermoset most common (epoxy, pheneolic)
Serves to hold the fiber (filler) in a favorable orientation.
Fiber aka reinforcing material aka Filler:
Materials that are strong with low densities
Examples include glass, carbon or particles.
It is designed to display a combination of the best characteristics of each material i.e. fiberglass acquires strength from glass and flexibility from the polymer.Finally, matrix and filler bonded together (adhesive) or mechanically locked together!
Designing mould
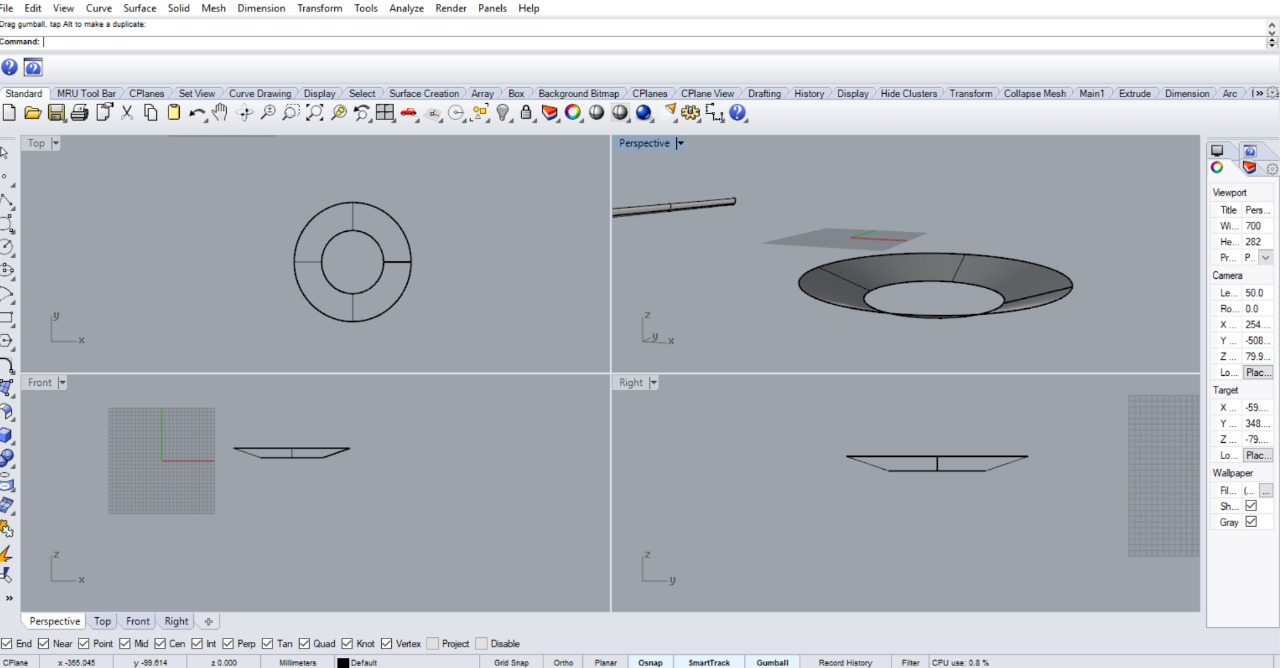
So for now, what I thought was that to make a multipurpose tray, which is having more number of portions in it so that more dishes can be served in it at the same time it should ne weight less. As we were instructed to do a sloppy or curvy outer thickness than that of the other models, I thought doing it and add an edgy shape which I could get the difference between both of it in later.
So for this structure, the important portion that is to be included is that a saucer like structure to keep the saucers and similar structure plates. Here I can check how the sloppy finish will get in the composite. I've made this structure using two different sized circles combing each other making the centre the same. Then for the base, took a sphere and boolean difference with the previously made object.
The next is about the other structure. For that I actually made a box like struture, a box with one side open and a handle like stucture. So the boxe and saucer like structure was made boolean difference with the large box and the structure was obtained. Next is that, the handles. For that a structure was made and added with the parent structure. Mirror of it was placed on the other face. And hence my 3D design was got over.
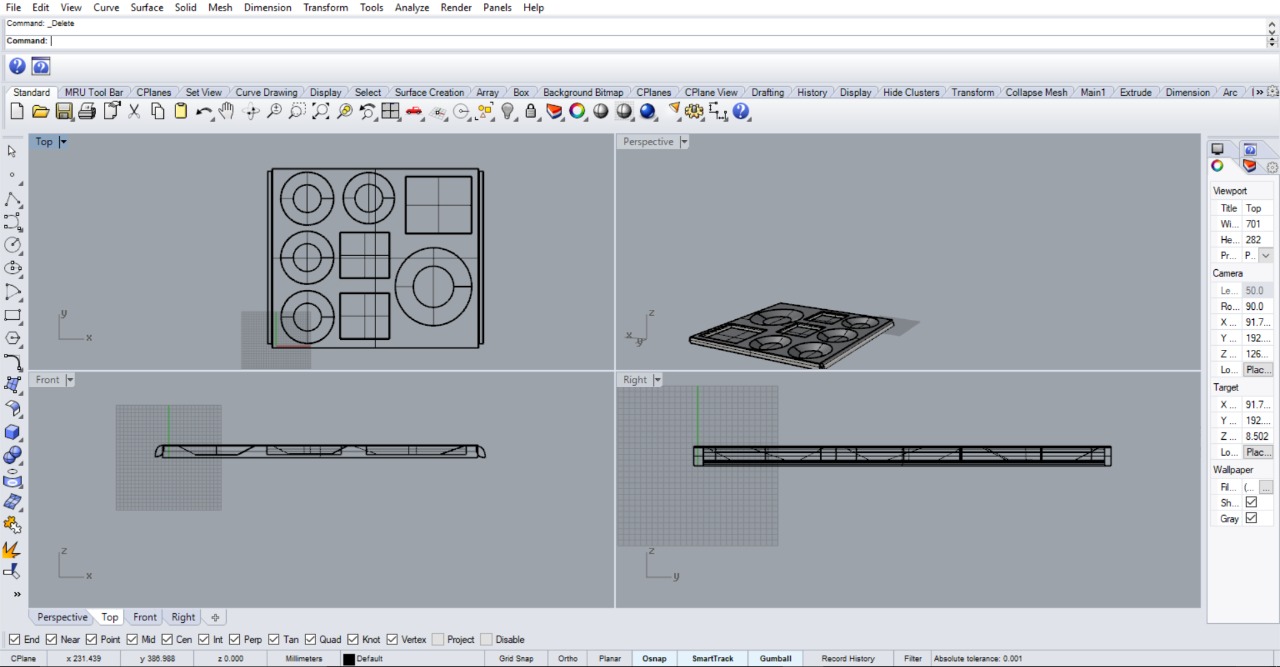
Next I exported my file to .stl and opened it in Partworks3D software. Then set the orientation of the design in it. Set the material thickness and fit to material. My material thickness was 18mm.
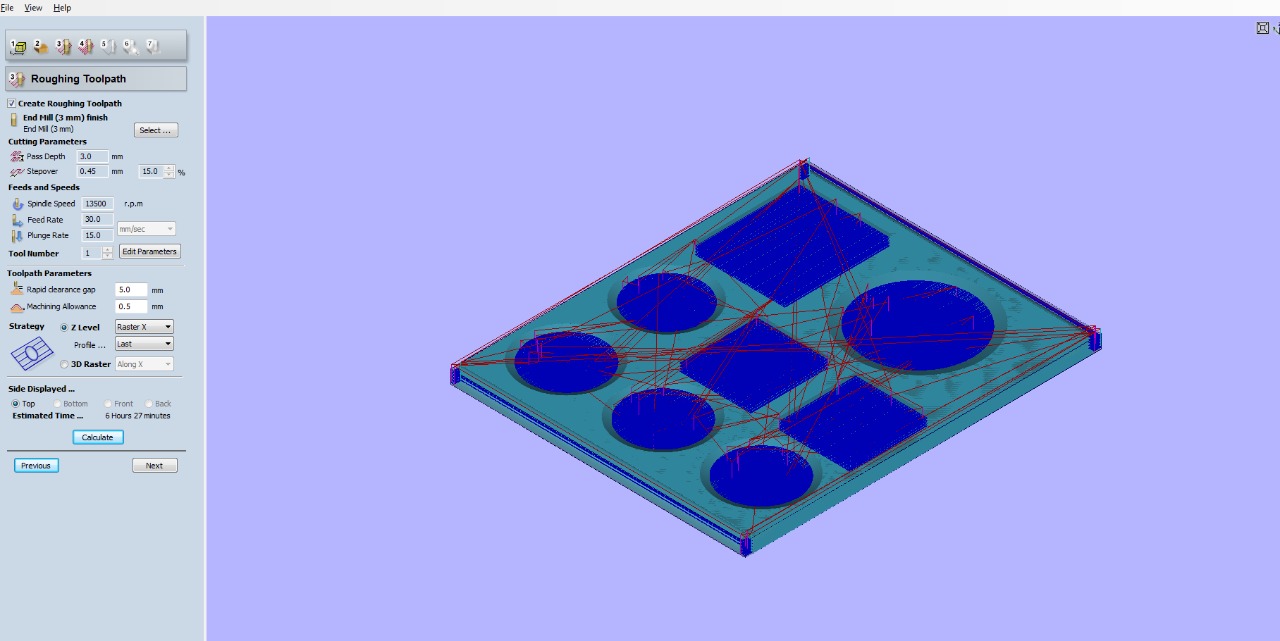
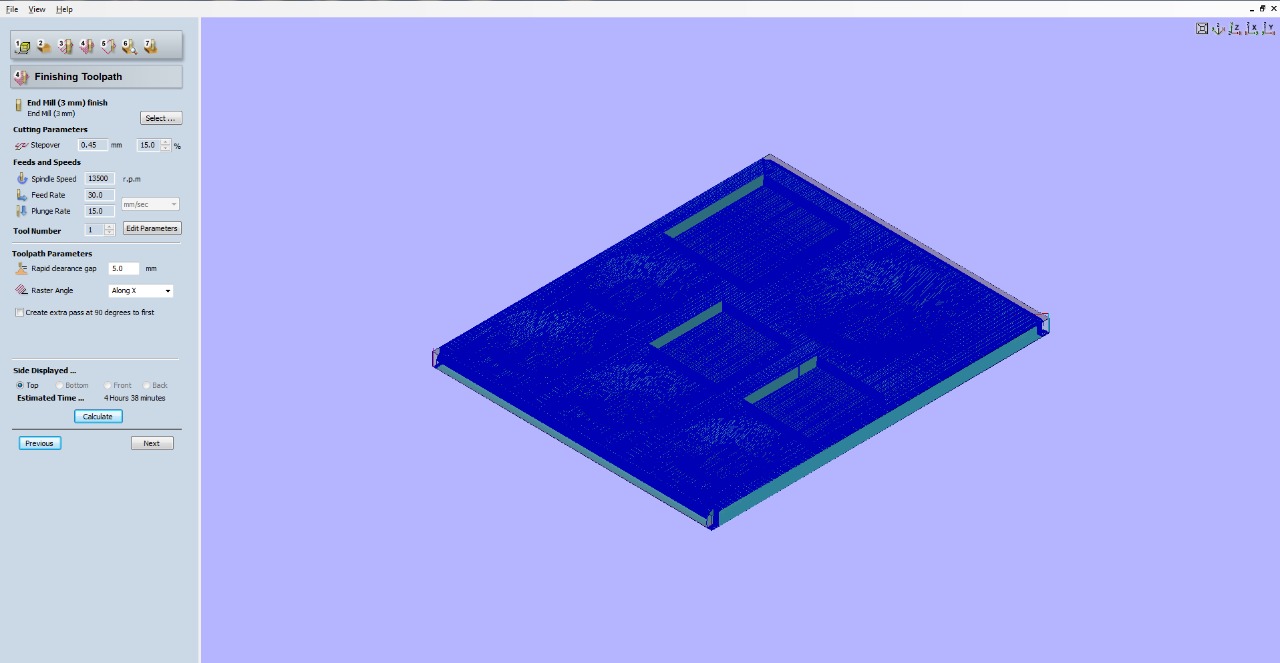
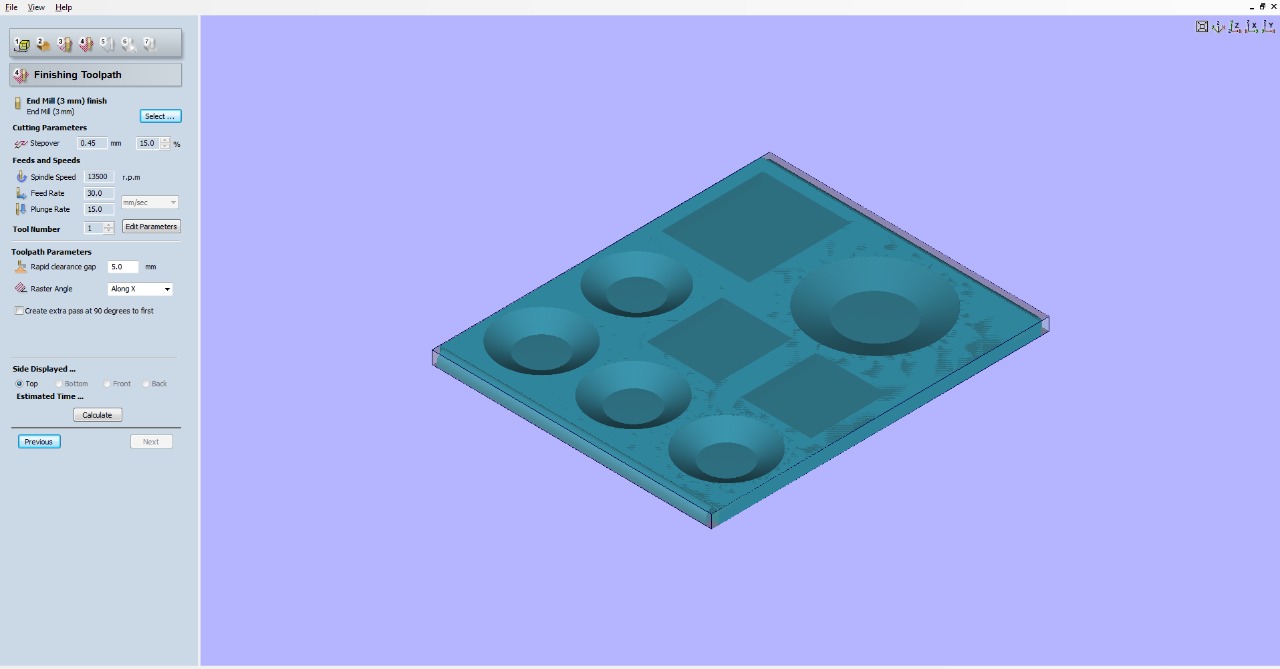
Next is the roughing toolpath creation, In this step we can select the bits we are going to use in my case i have selected a 6mm flat end mill for doing roughing. we can directly change the tool parameters and other stratergies from this window. After setting the parameters we can simulate the profile to know about the time estimate. We can jump to the next step by just clicking the next button also we can go back to a previous step by pressing the previous button.
Select the tool for the finishing cut. Rohit 3mm ball end milling bit was selected. Click calculate to create the rought cut path. Check the time required for the rough cut and then click next.Select the tool for the cut out path. Rohit 6mm ball flat milling bit was selected. Click calculate to create the rought cut path. Check the time required for the rough cut and then click next.
In this window we can see the simulations of each profiles, we can check and if necessary we can go back and do the modifications in each profiles. After the check you can click next so that the final window will appear and from that we can save the individual shopbot files in .sbp format so that we can process in shopbot.
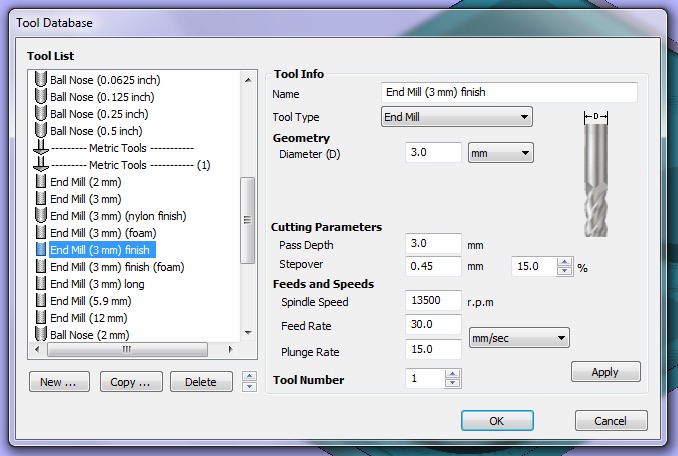
Tooldatabase window will show the details of the bit that we need to choose.
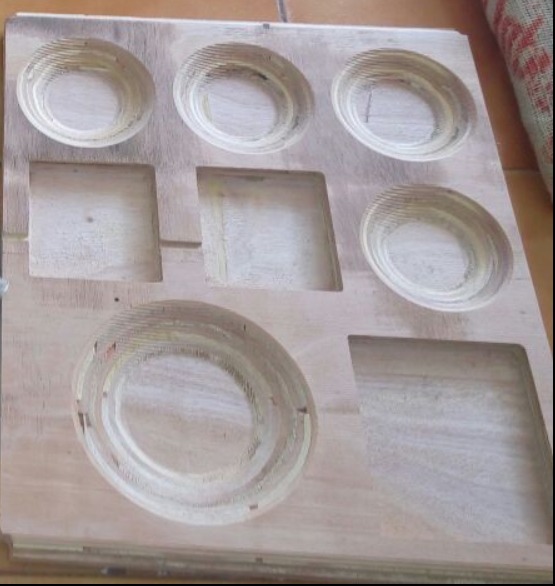
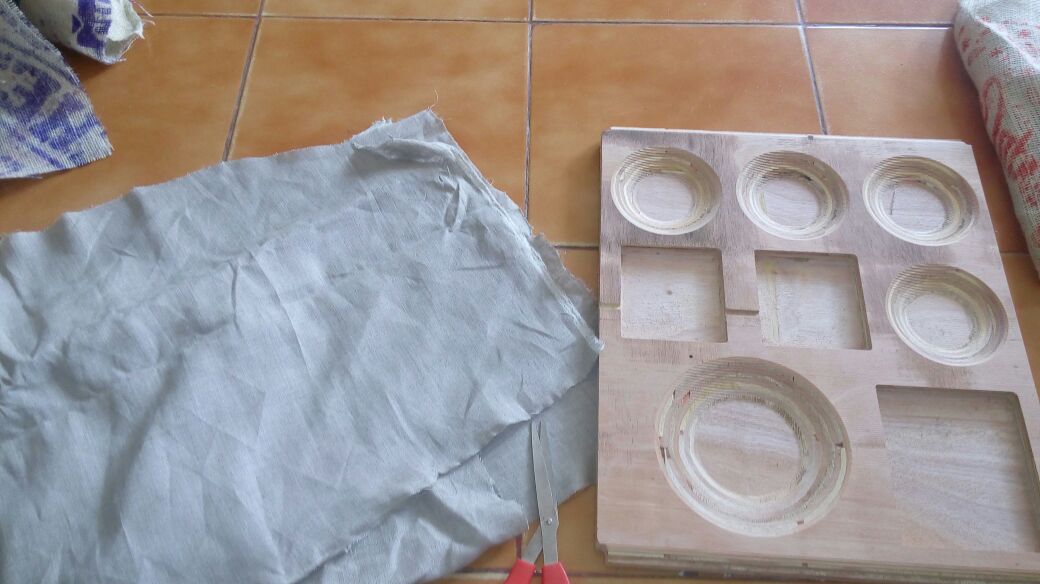
This how I obtained my structure. It looked fine. The slopy structure have obtained in a pretty good manner. Both the edgy and sloppy structure is clearly obtained so that I can analyse the difference of both in the composite structure.
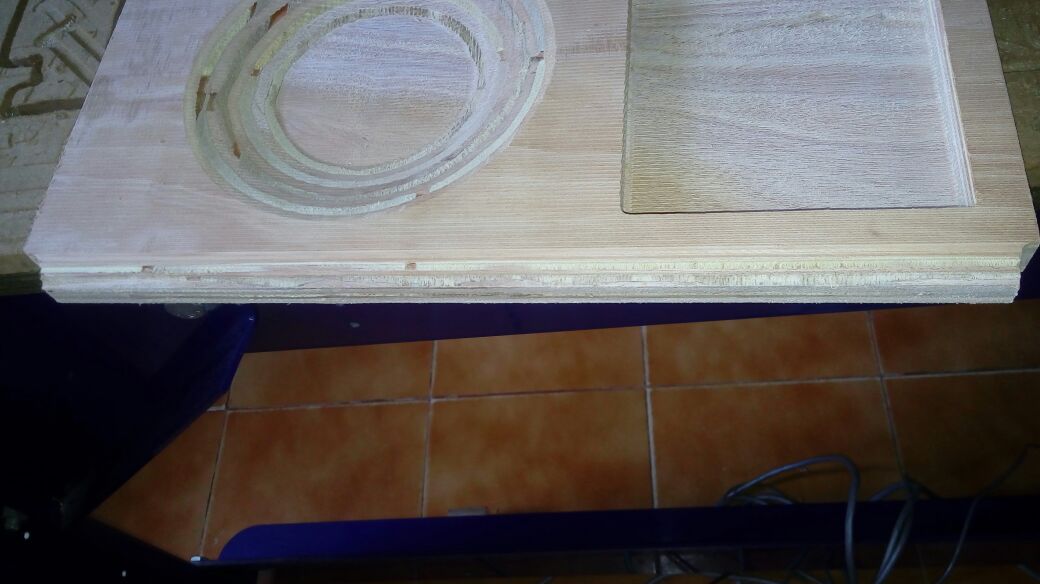
The slopes of the saucer structure and the handle is clearly visible.
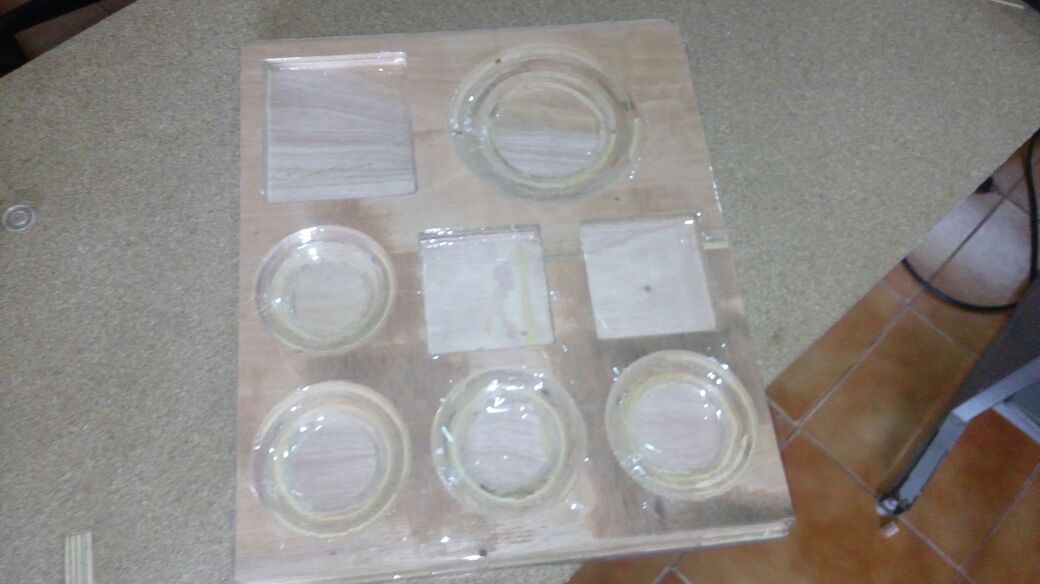
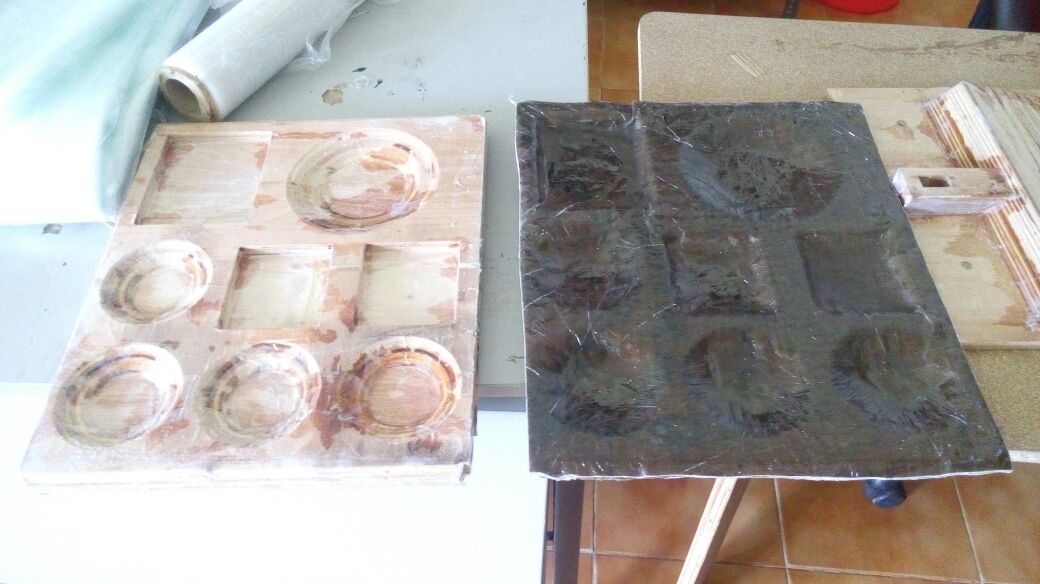
So mould is ready. The mould has to be covered using adhessive tape or polytheen sheets in order to avoid the resin from sticking on it.Otherwise resin may stickon to the mould.I covered my mould with the transparent sheet.
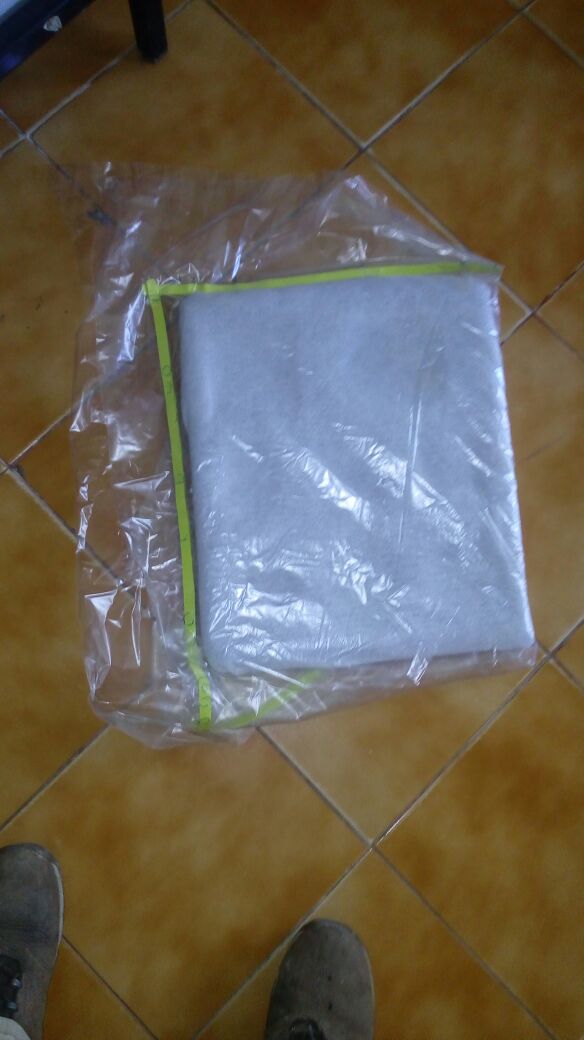
I used burlaps purchased from market as Fiber reinforcement.I am planning 5 layers of composite. Shaped burlaps in the required shape as shown below using the knief. Burlap is a very porous fabric, this is good if it is used as the middle layer but not so good as the first or the last layer.
For the top and bottom layer I used cotton lint cloths available in our lab as fabinventory.
Here I used Easy cast epoxy 33 resin available in the lab is used for making the composite.The resin is actually a combination of two parts A and B,each of them are somewhat transparent. The resin was locally purchased and I have gone through the specifications fro internet . some of the characteristics of the resin is given below.
Specially created Epoxy Resin to make transparent Statues, Murties etc
Very less viscosity like water.
Can Cure in 30 minutes if heated at 65 degree centigrade and poured.
Will cure at room temp in 24 hours.
Non - Yellowing
Shore hardness: ~ 80 shore
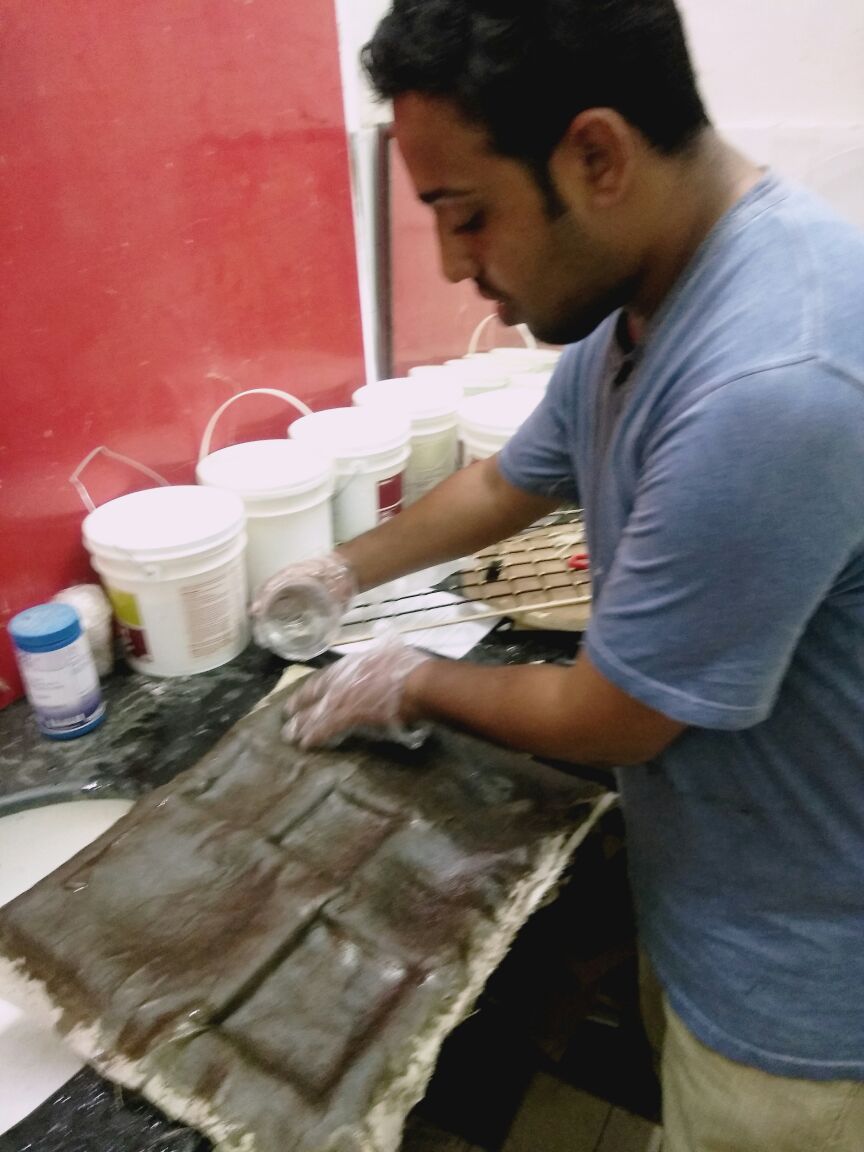
Next is to mix both the materials. The mixing proportion of the material is 100:50, I had taken 200 grams of epoxy A part and 100 grams of epoxyB part in a plastic glass and mixed it very well with the wooden stirrers. We have to take the safety precausions while using the epoxy.
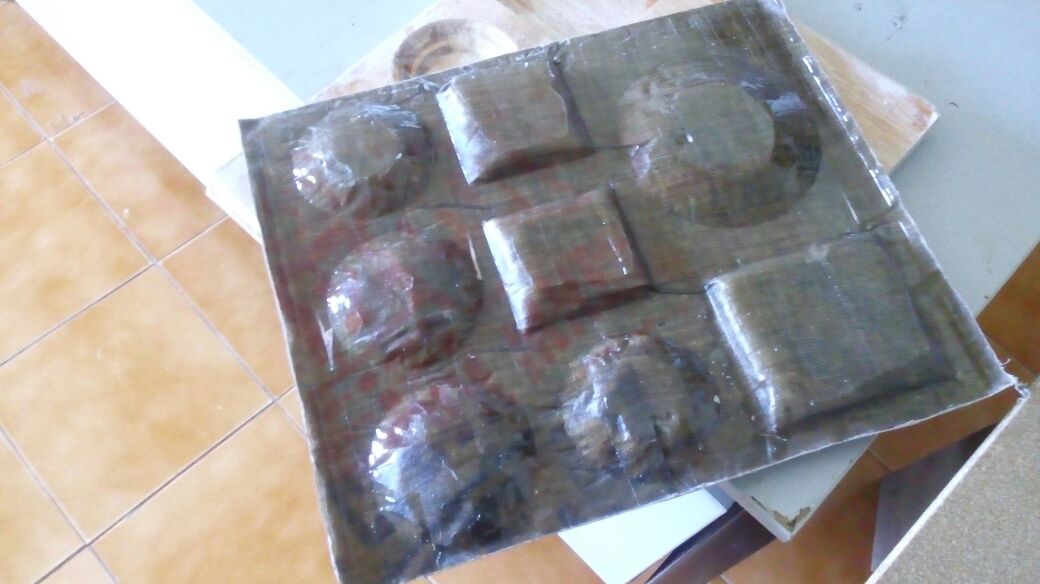
Next I have dipped the burlap into the mixed matrix and placed over the mould one by one .
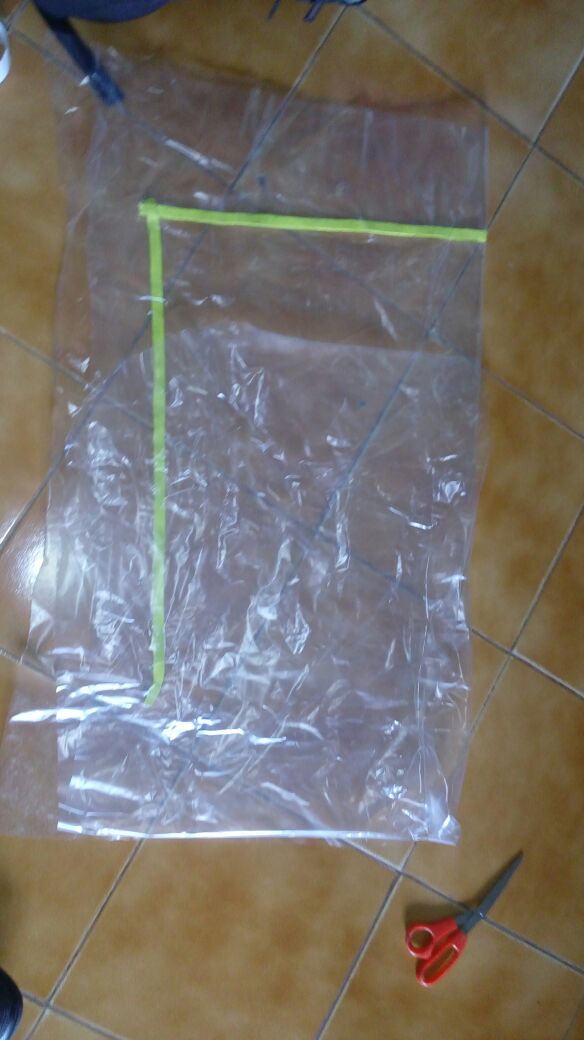
Once all layers are laid the set up is enclosed in a vacuum bag. Vaccum bagging uses a vaccum pump to extract air from inside of the polythene bag where the casted composite mold is placed and compress the part under atmospheric pressure inorder for the compacting and hardening process to takes place. I made the vaccum bag with polythene bleeder release bag and vaccum sealing tape. Required dimension of bag sheet are cut using scissors and made the bag by sticked the sides using vaccum seal.
After completing the procedure the entire mould was covered with breather fabric .Then the whole material is placed inside the vaccum bag. In order to maintain proper shape the whole part has to be kept in the vaccum bag which is prepared previously and after that a vaccum is created inside using Shopvac 6.5HP vaccum cleaner available in our lab.
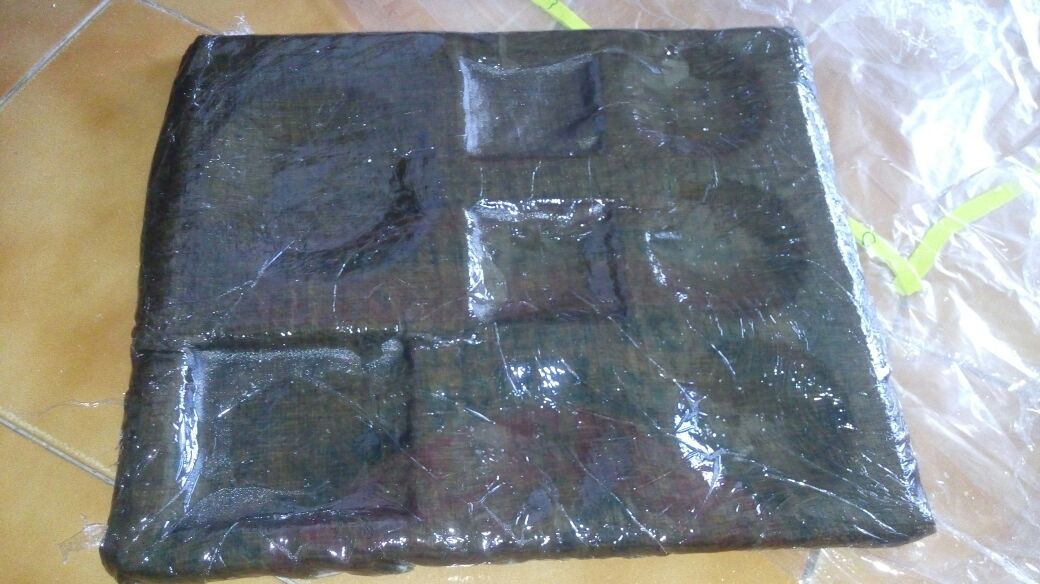
After 24 hours I opened the vaccum bag and took my material out.
The composite was actually set perfectly alright. But the problem is that the curves are not so finished and the sharp square edges has changed to another type of slopy edges itself. Since the epoxy can be applied to the material in a sharp manner, it results only in such a way.
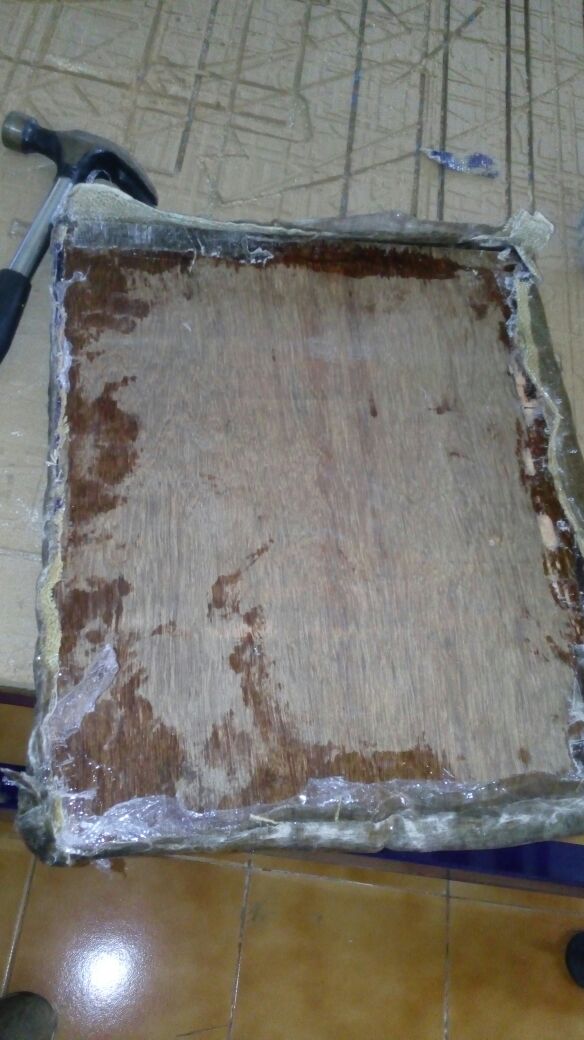
Another problem is that, to the end of the mixing, what I did was that, applied the whole material in the edges and made the fiber to stick the wood. Now it become so hard that cannot be easily detached. I never had thought this to be so rigid and strong.
So I cut the edges using the saw. So the handle design what I gave didn't get. I should have given that design much more bigger.
Now I got my composite. Its actually ok.
Turning it around its clearly visible the difference between the finish of various structures I've given. For the large portion it came much better than that of the others. Also the box type structure also didnt get well. but this methode can clearly be used in places where high strength, but weightless material is needed.