BACK
Week 2: Project management - Learning HTML and Gitlab
After receiving the mail to login to Fabcloud, I tried to create and edit a text file in the Gitlab web interface. :D Of course, it didn't work. I fumbled and faltered around, trying to figure out git for myself.
I listened to Fiore's recitation on 'Version control'. It sounded so cool. I took a 'Gitlab for dummies' tutorial.
With the help of the instructors at Fablab, I managed to finally push my webpage into the Fabcloud. I had to follow the steps as described below.
I am using an old Macbook pro with OSX 10.6.8 . I had to install an old version of Git -1.8.4.2 .

I had to create a gitlab-ci.yml file in my fabcloud account from the Gitlab web interface.

I followed the steps listed on the Gitlab settings page to generate the SSH key.
The following command had to be used :
ssh-keygen -t rsa -C "akilas@nish.ac.in" -b 4096
Two files were generated in my PC - one of them with the extension .pub. I added the .pub file to my Gitlab profile.
Then I added the other file to SSH key manager with SSH-add filename

This was followed by these commands to configure my profile:
git config_global user.name
git config_global user.email
I then copied the link provided for SSH to clone and pasted it after git clone.
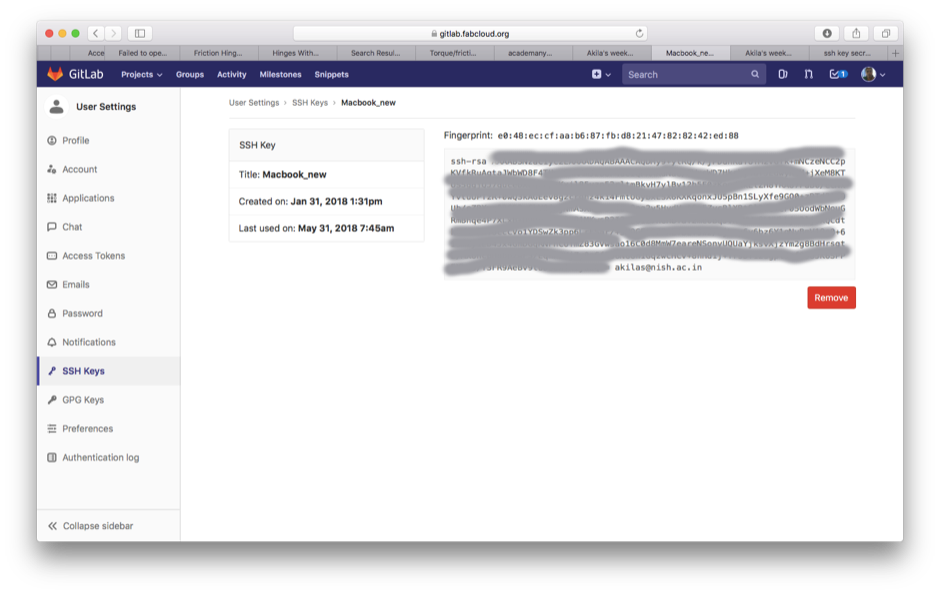
I had already created a HTML file for my webpage in my git profile folder. It was easy - I just followed a web tutorial. Then I just did the following :
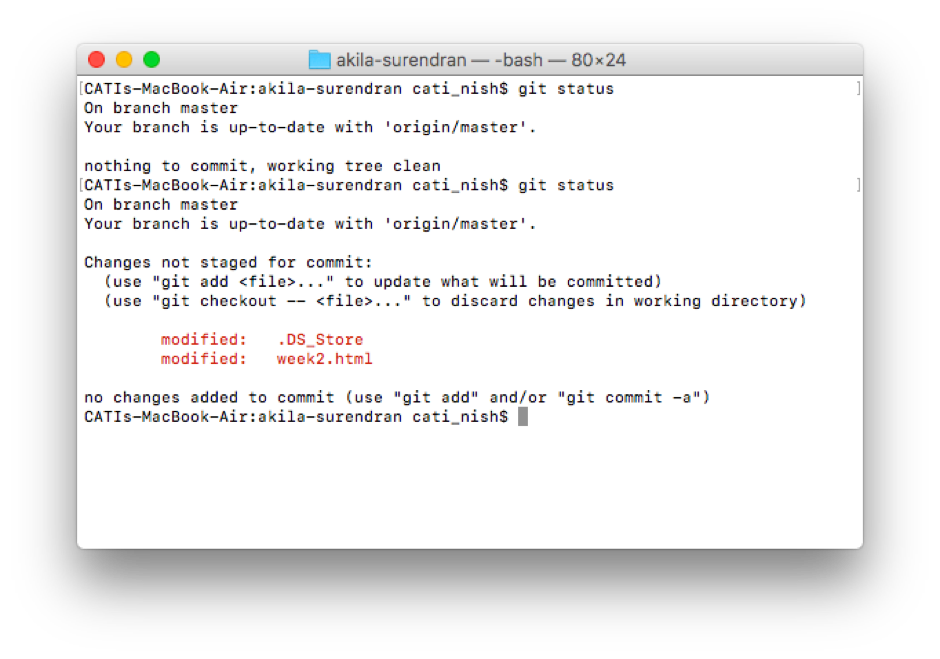
git status
to check the status of my Gitlab repository. The red font indicates the files that have been changed in my PC and are yet to be uploaded to the repository.
git add --all
to update the Gitlab repository, adding or deleting files, to sync with the folder in my PC.
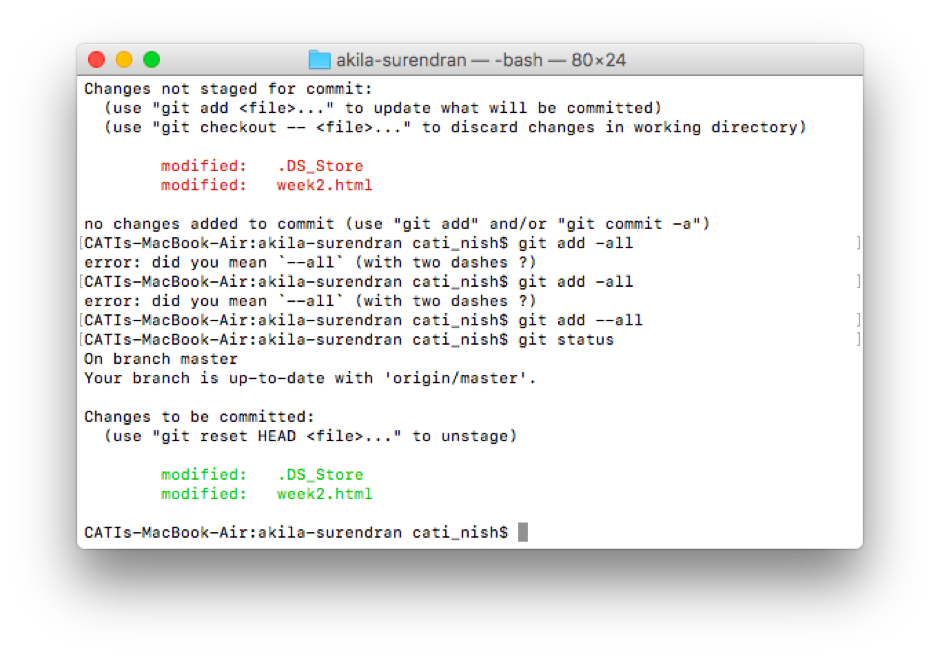
The green font indicates the files that have been added or changed.
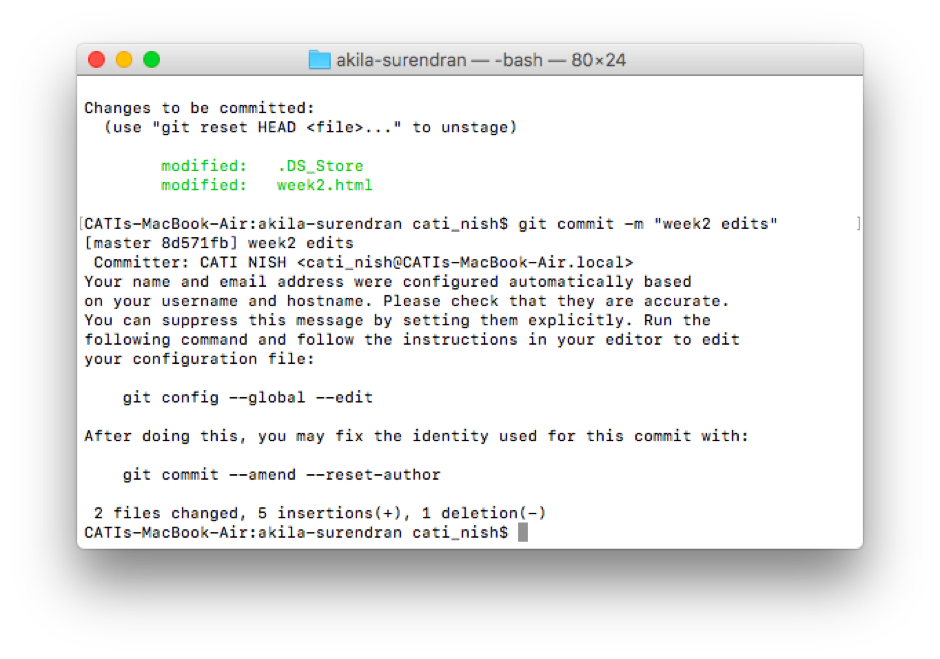
git commit -m "any message"
to commit the changes, along with a message.
git push-u origin master
to push the committed changes to the online repository.
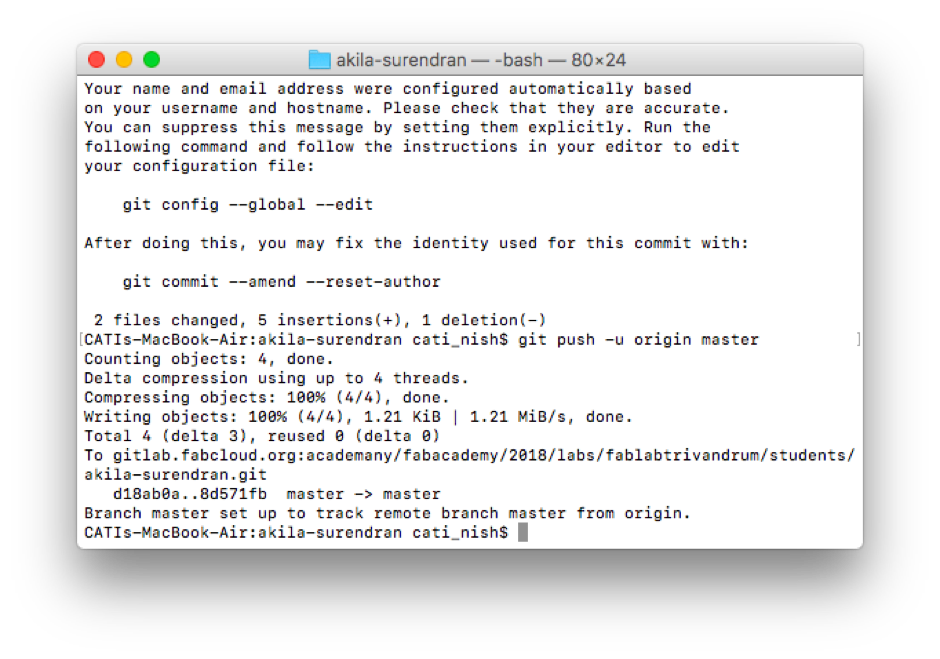
And there was my rudimentary webpage on Fab academy website. I felt so proud and accomplished! :D
I am doing the further edits to the webpage from the Gitlab web interface itself. It works and saves a lot of hassle because I can work from any computer.
Learning HTML
I went through the w3schools' HTML tutorial to learn the basic HTML commands.
For my weekly assignments, I wanted to have some kind of an image gallery, with the description below each image. I looked for free templates and got one that I liked from this website. For the main page, I found one that was a timeline. I thought that would be perfect for 'my journey from using towards making', with each assignment link as a milestone :).
It took a brief while to figure out how to edit the template files and customize my webpage. A few online HTML tutorials helped.
BACK


