Objectives
Make something big (on a CNC machine).
ShopBot
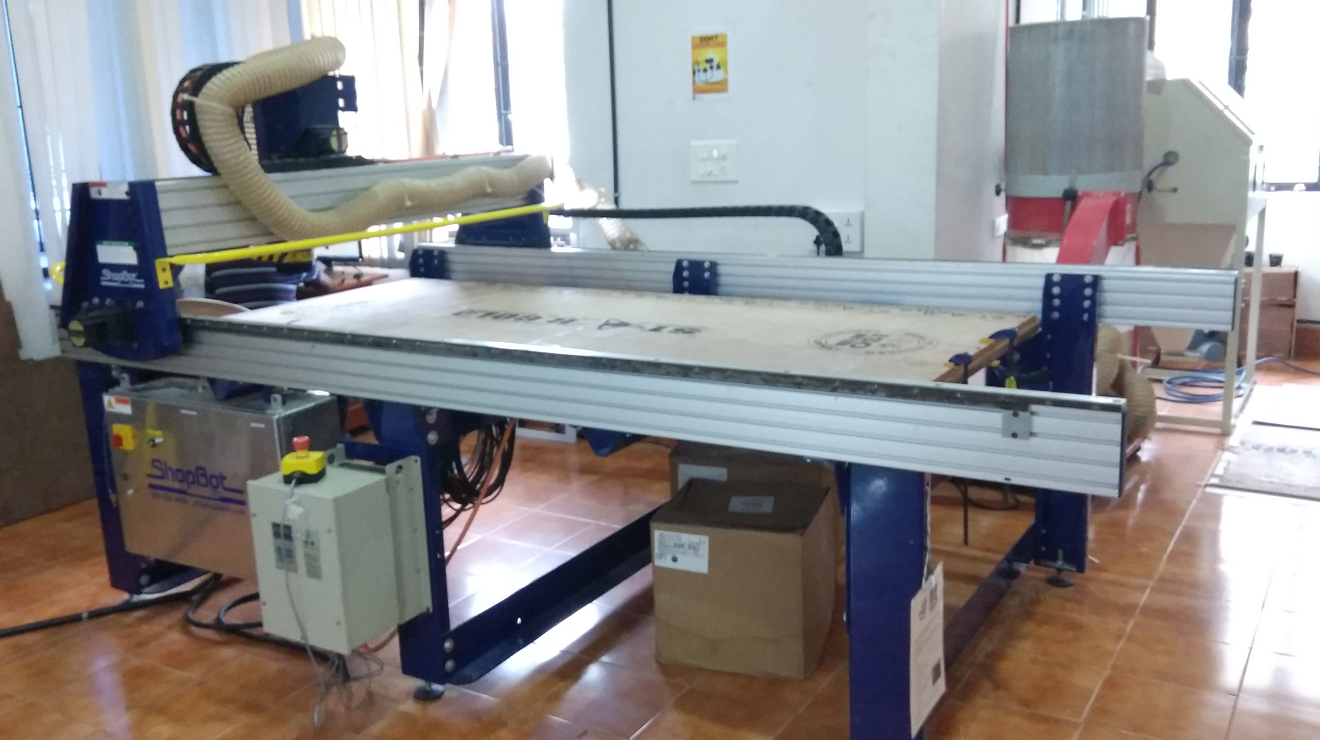
ShopBotis a large milling machine with a bed size of 8 x 4 feet which can mill wood. The base bed of the CNC machine is fixed and the tool head is mounted on a beam like railing on the X-axis and both ends of this railing is mounted to another railing which is on the Y-axis. So this helps the tool to move in X and Y coordinates. Again the tool head is capable to move up and down, hence Z coordinate also.


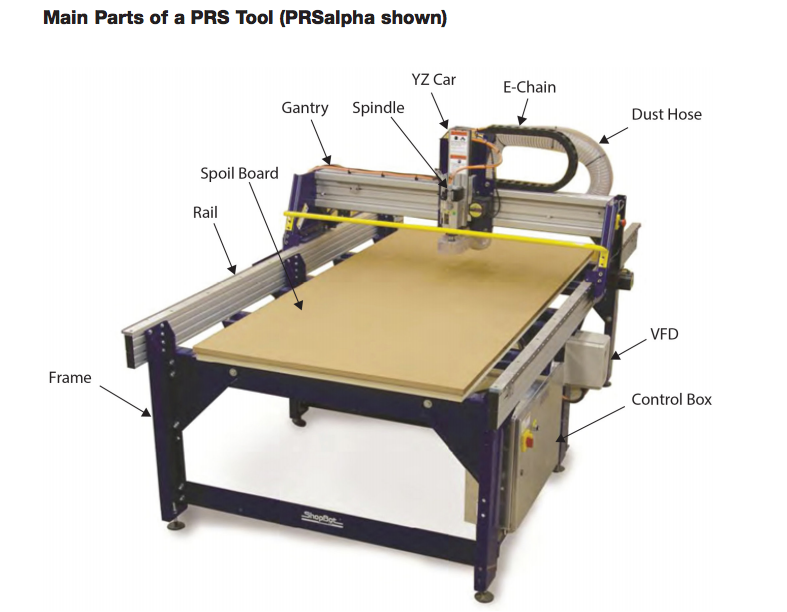
Parts of a ShopBot
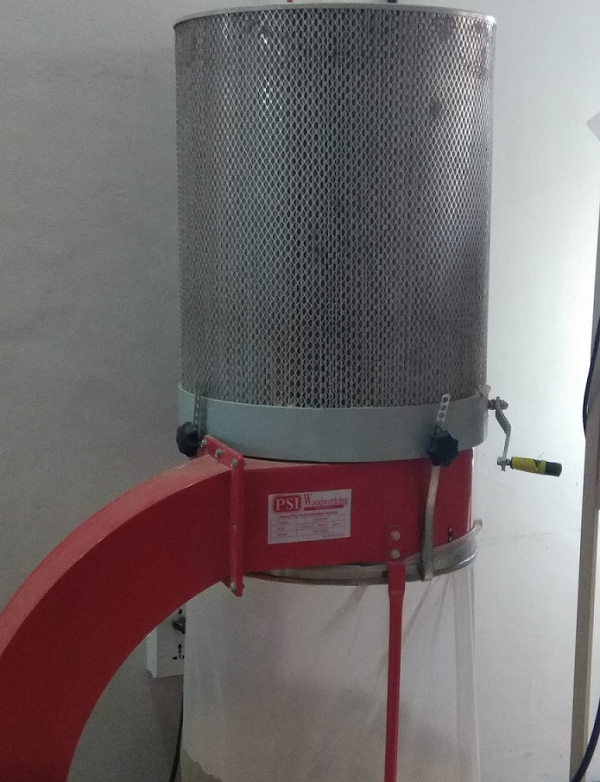
Dust Collector which collects the wood waste , which works with the help of an air-compressor
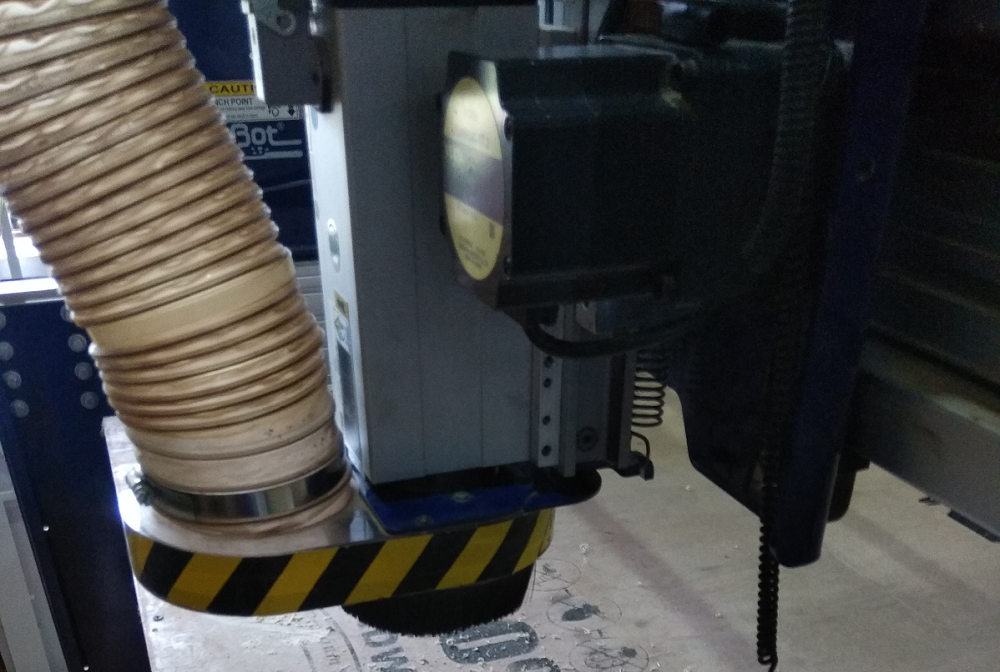
The Tool Head
Tool Bit
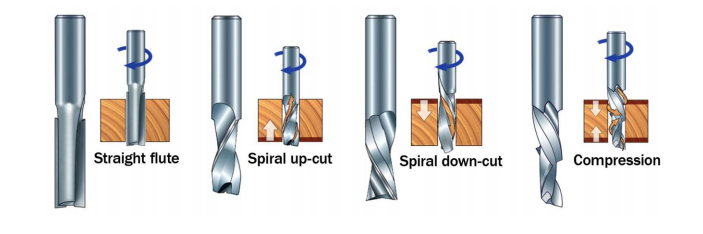
Drill bit vs End mill
Flutes
Center cutting and Non-center cutting
Up/Down Cut
Flat/Ball end
Safety
While machining, the bits spinning at high speeds can scatter and harm your body and eyes, also the noise of the machining can damage your ears.
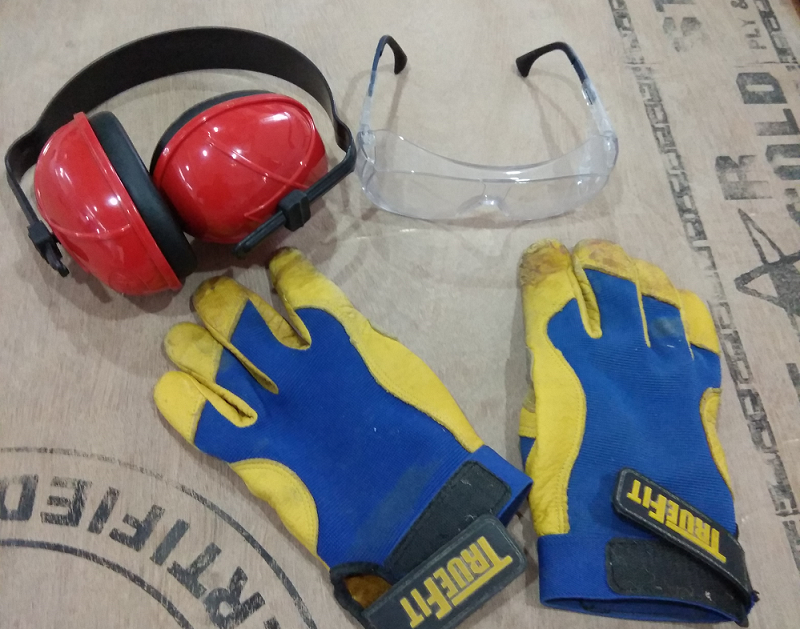
So we must have the safety precautions while machining - safety glasses, ear piece , gloves and safety shoes.
Group Assignment
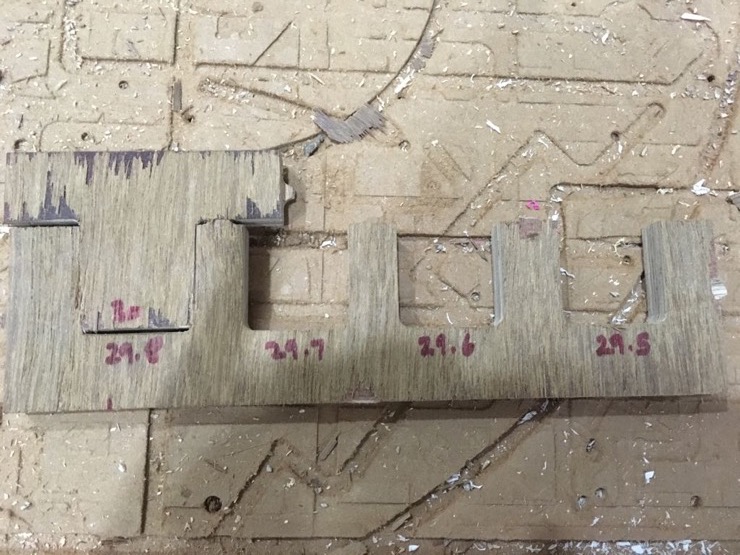
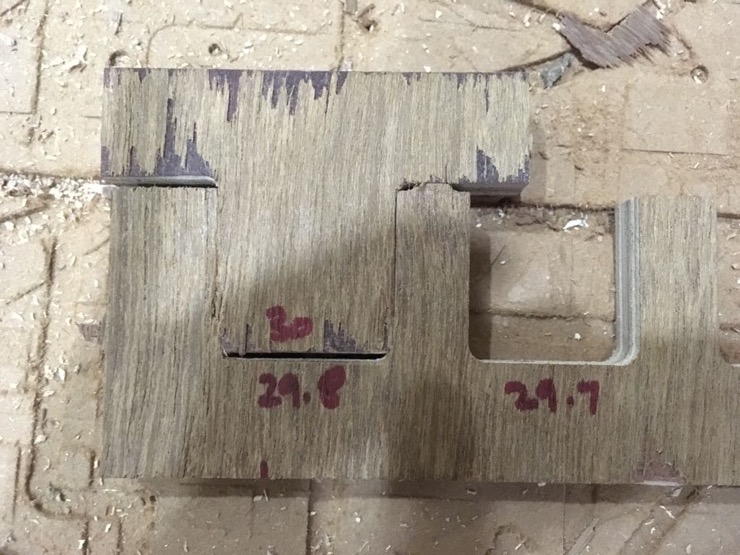
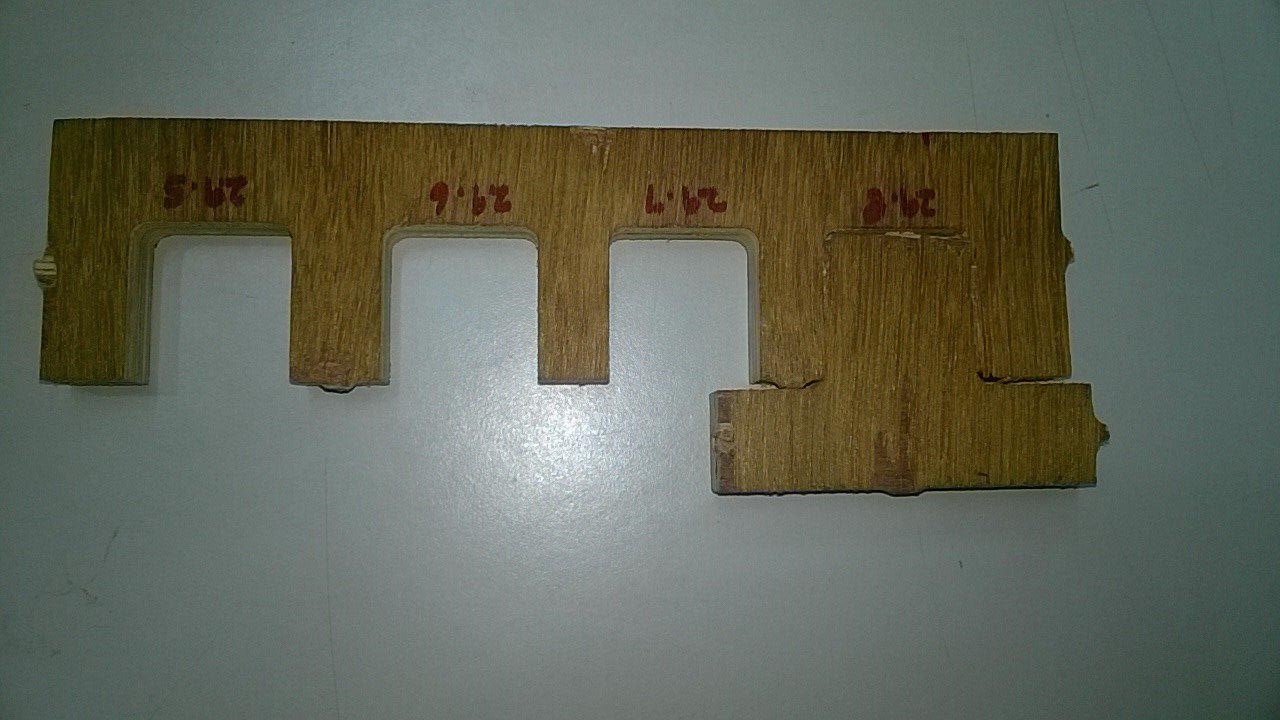
For a 3o mm male slot , the 29.8 mm was female was the right fit and we conclude the tolerance should be given is 0.2mm
Group Assignment
Firstly we were given a class about the tools,profiling pocketing and the other settings in the software as well as shopbot by our instructors Yadu and lancy felix.
Design
In our Fablab, there is a big floor height difference to enter our projector area, the space where we sit for our reviews have less floor height compared to the rest of the Fablab, so a small Stair was always a need. So I decided to make a two Step Stair Case for this week.
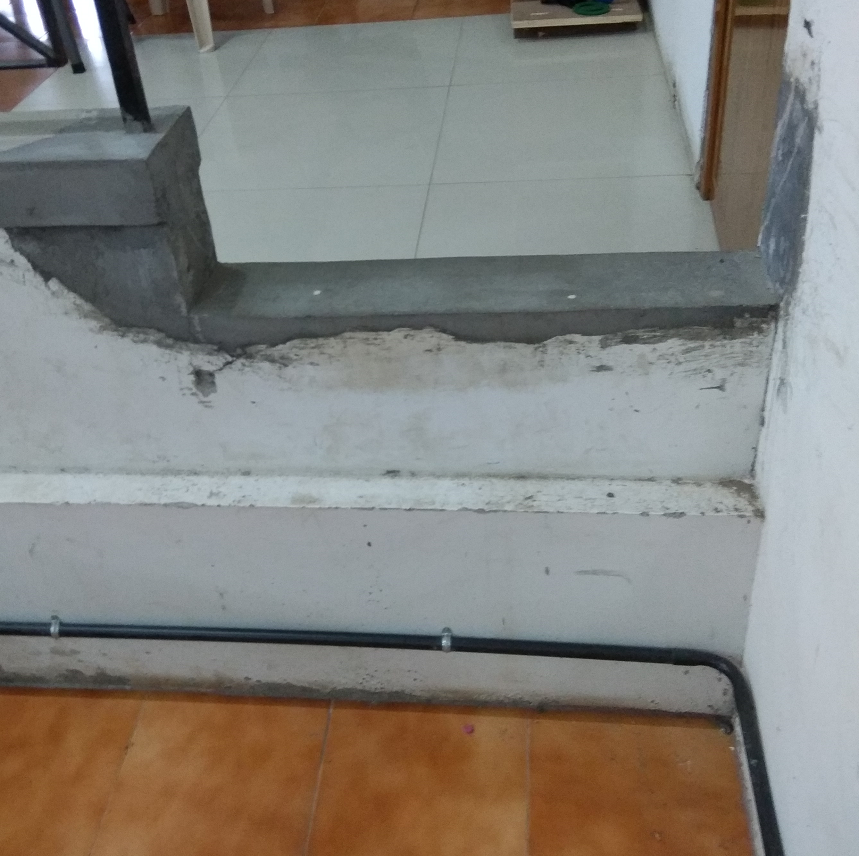
The floor height difference
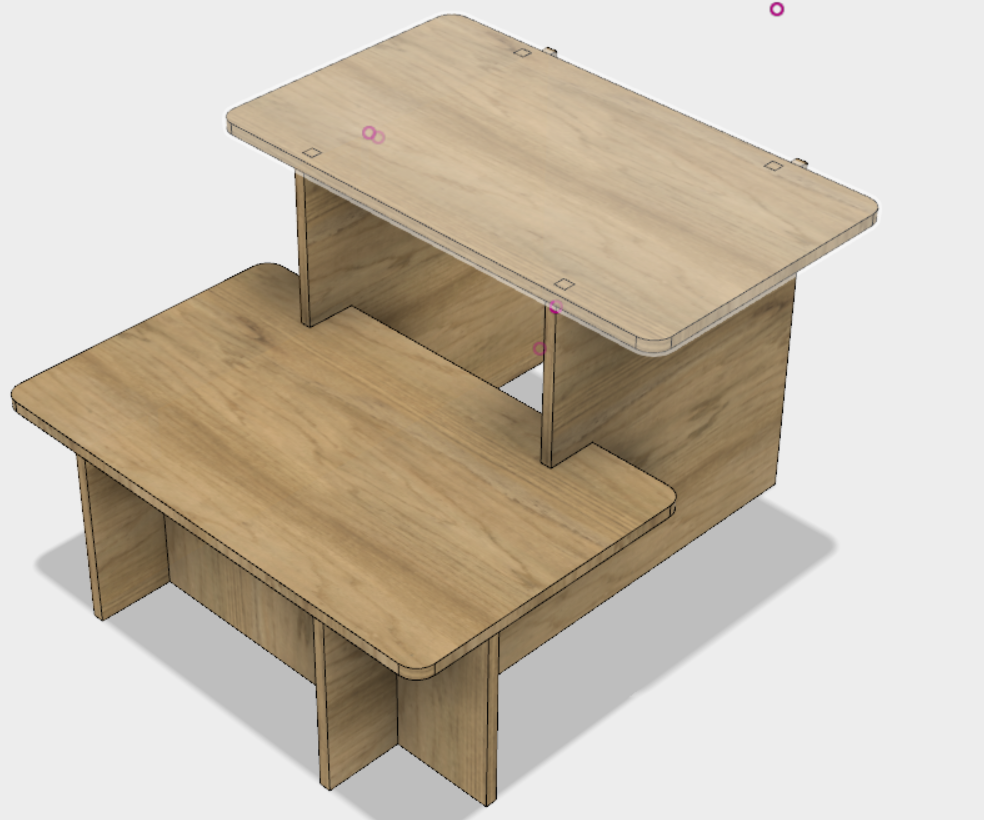
The Stair Design
I took the required measurements for the stair.
I started designing the Stair on Fusion 360
I have designed this stair for my FabLAb (Trivandrum), this will be milled in the shopbot and placed on the way to our 3D printing space which have less floor height compared to all other rooms of Fablab.
Download Original All Design files
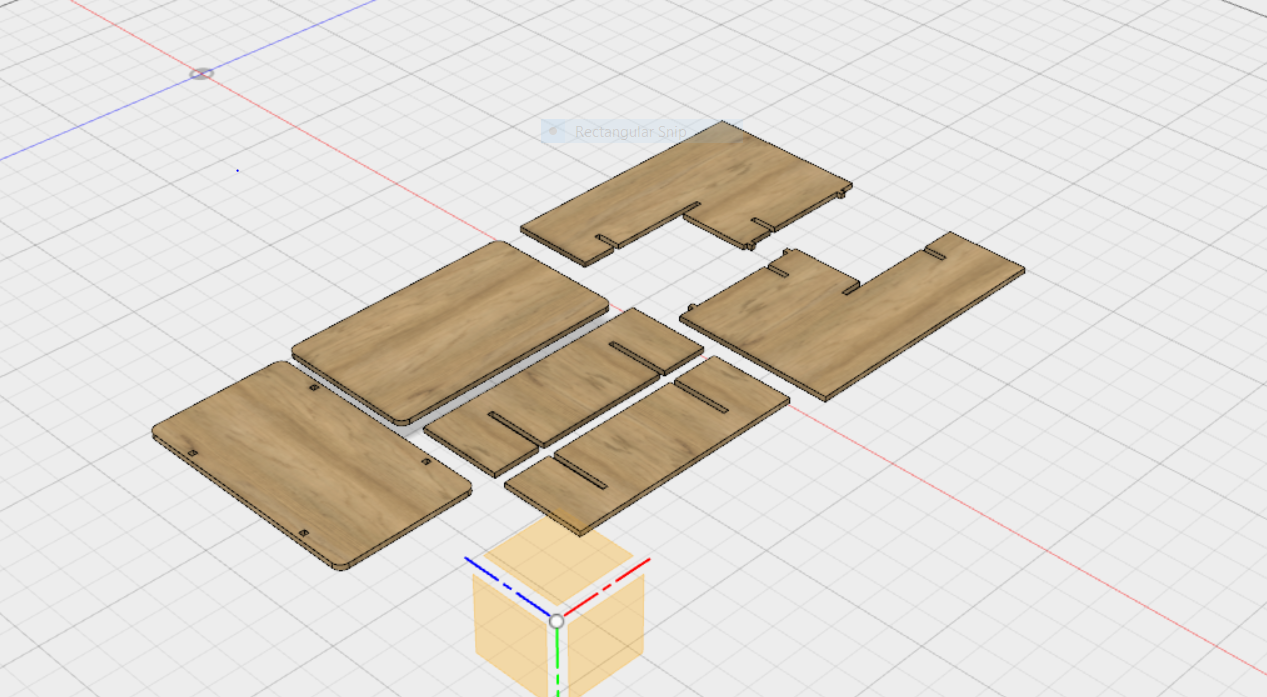
Please see below gif showing how i assembled the components in it for the Milling process
V-Carve

V-Carve Pro is a software for CNC routing, sign making and engraving. We use this software for generating the G-code for the Shopbot. While the software can import your designs from other designing programs, it also contains a complete all the tools needed to create your designs right in the program.
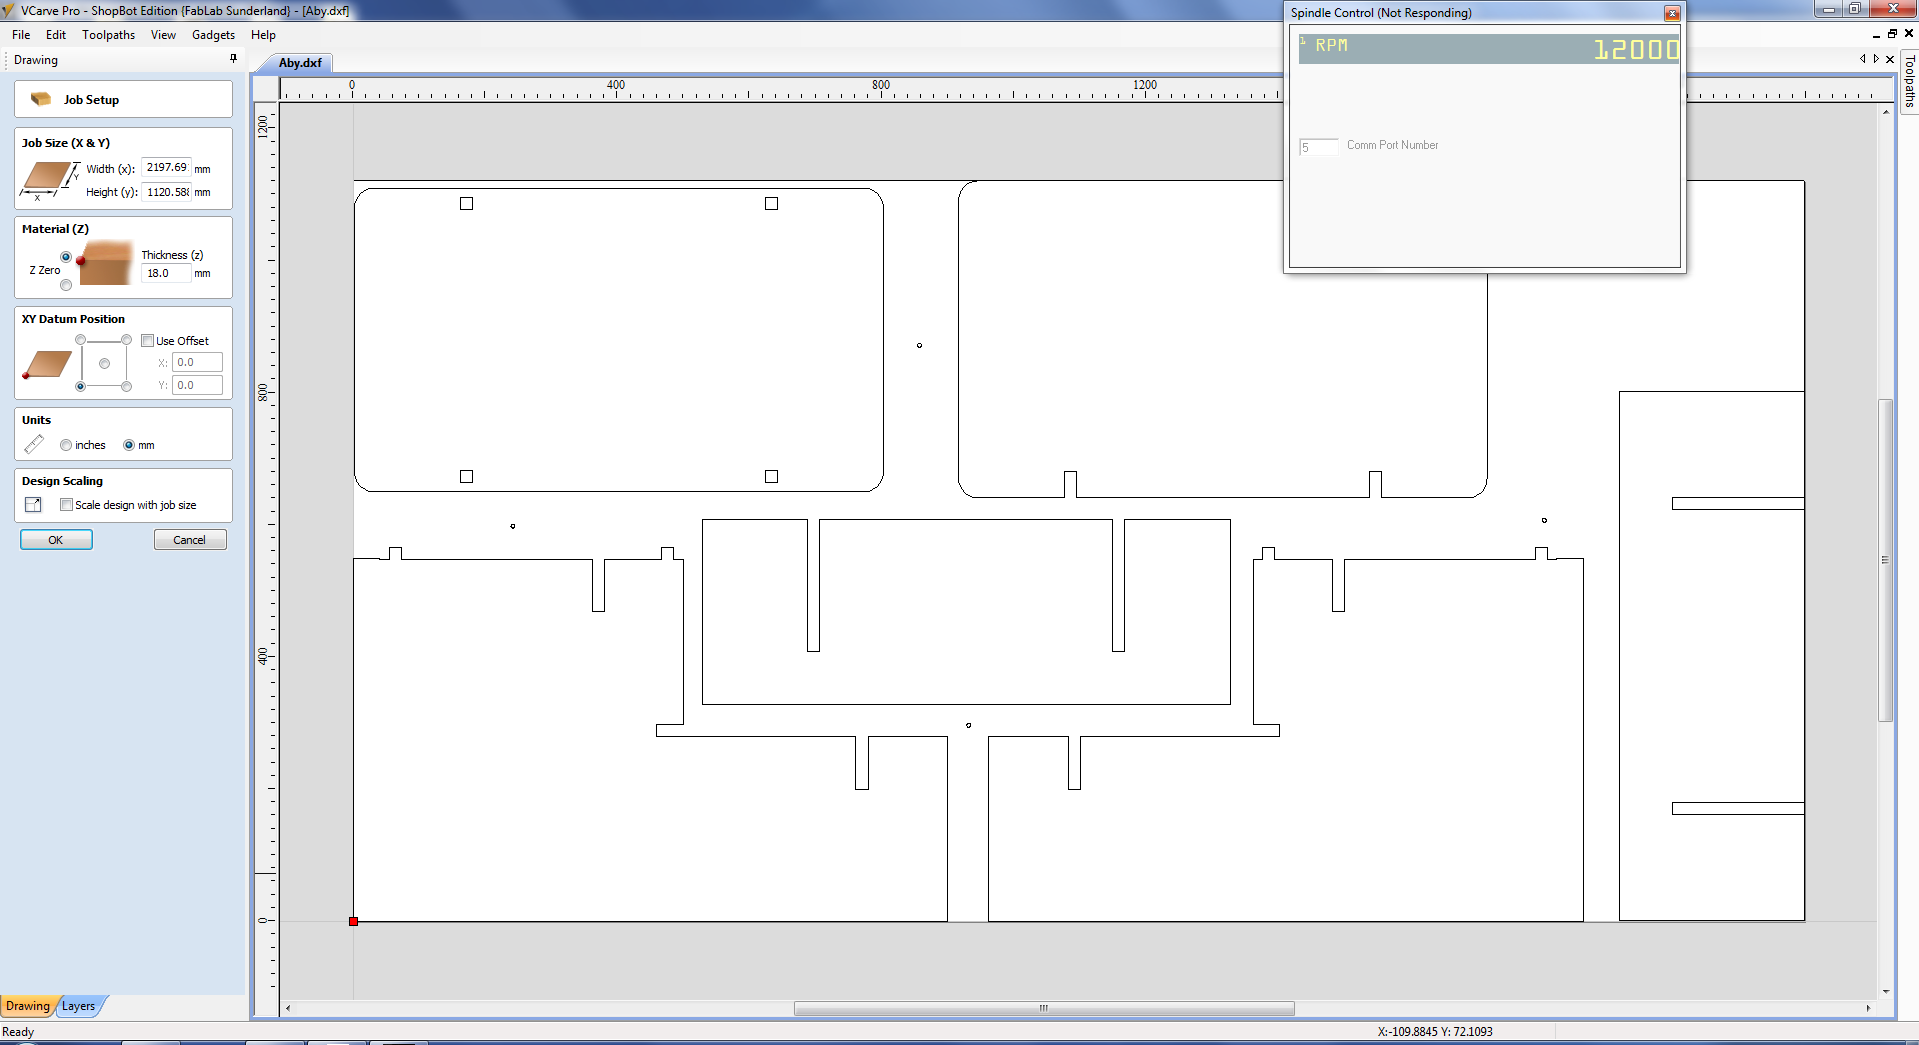
See Below, My Job opened on the V-Carve.
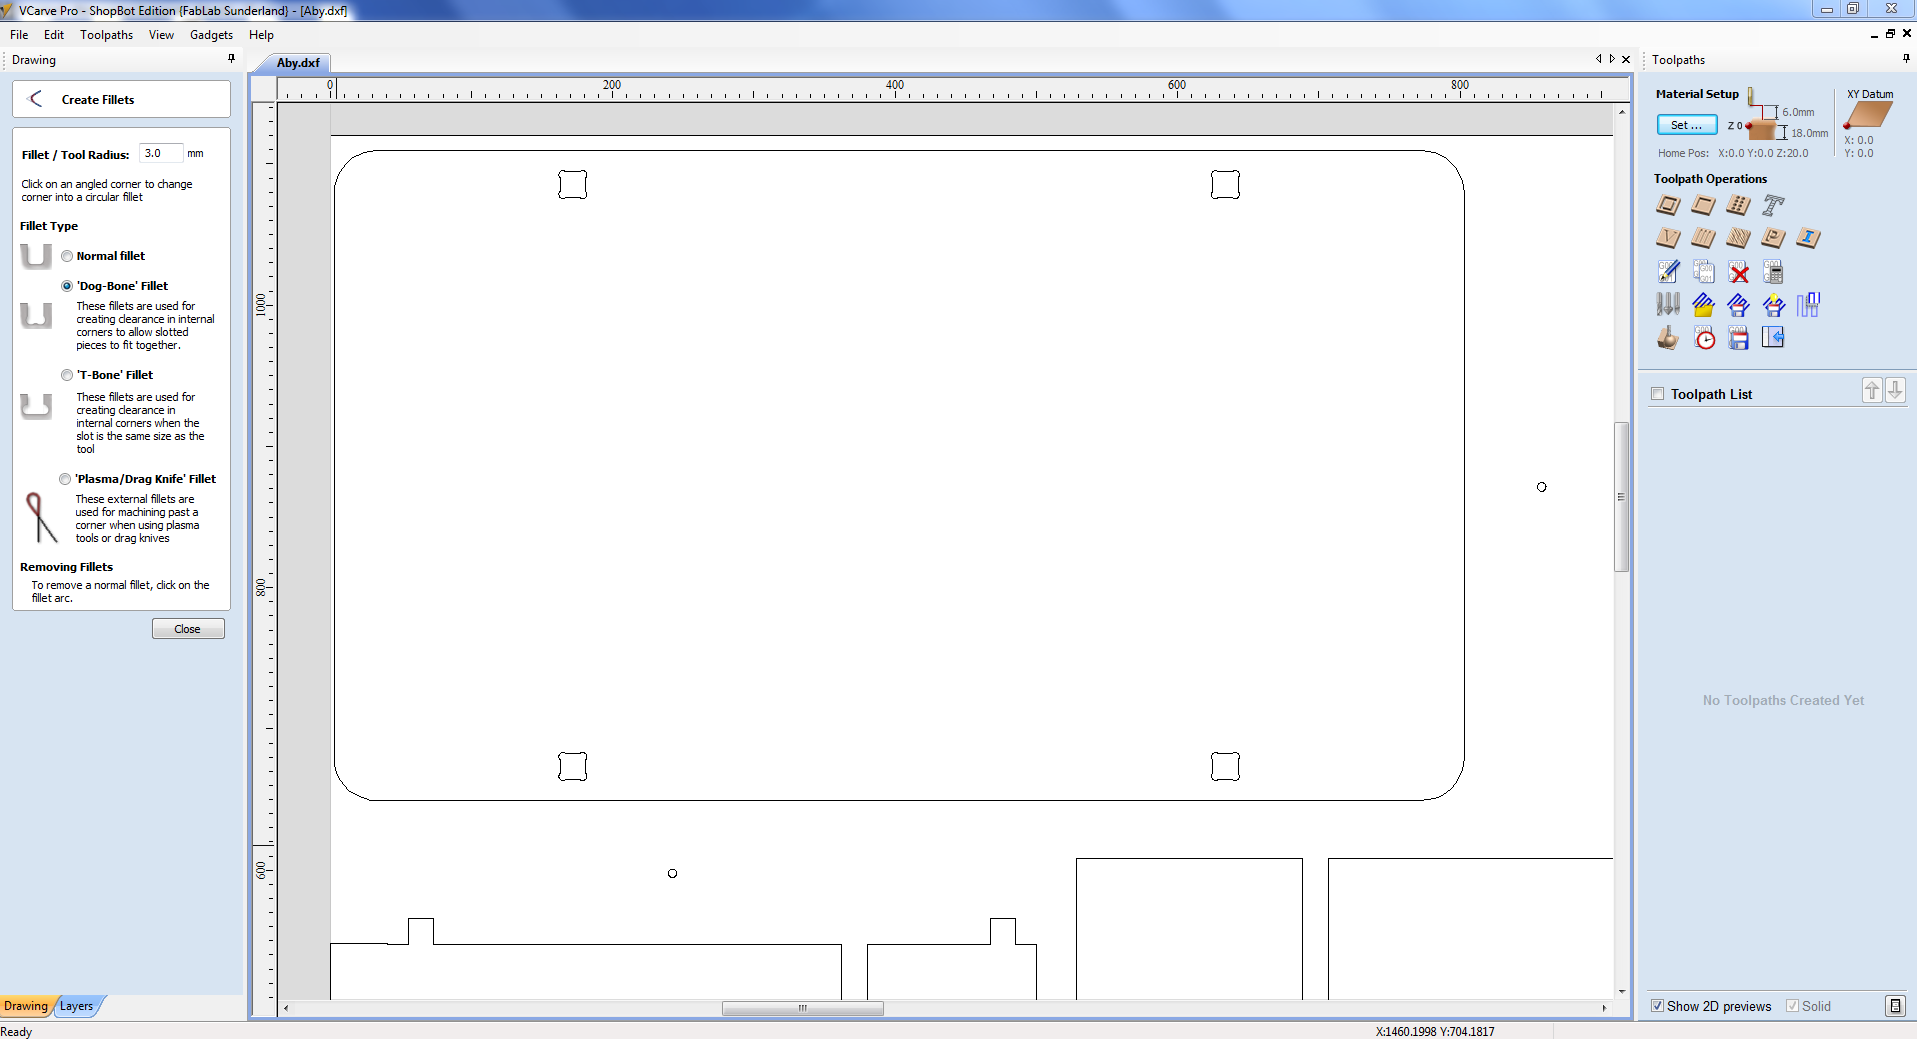
Adding the Dogbone fillet to the inner cuts which are not curvy.
See below the drilling tool settings i gave for the screw points
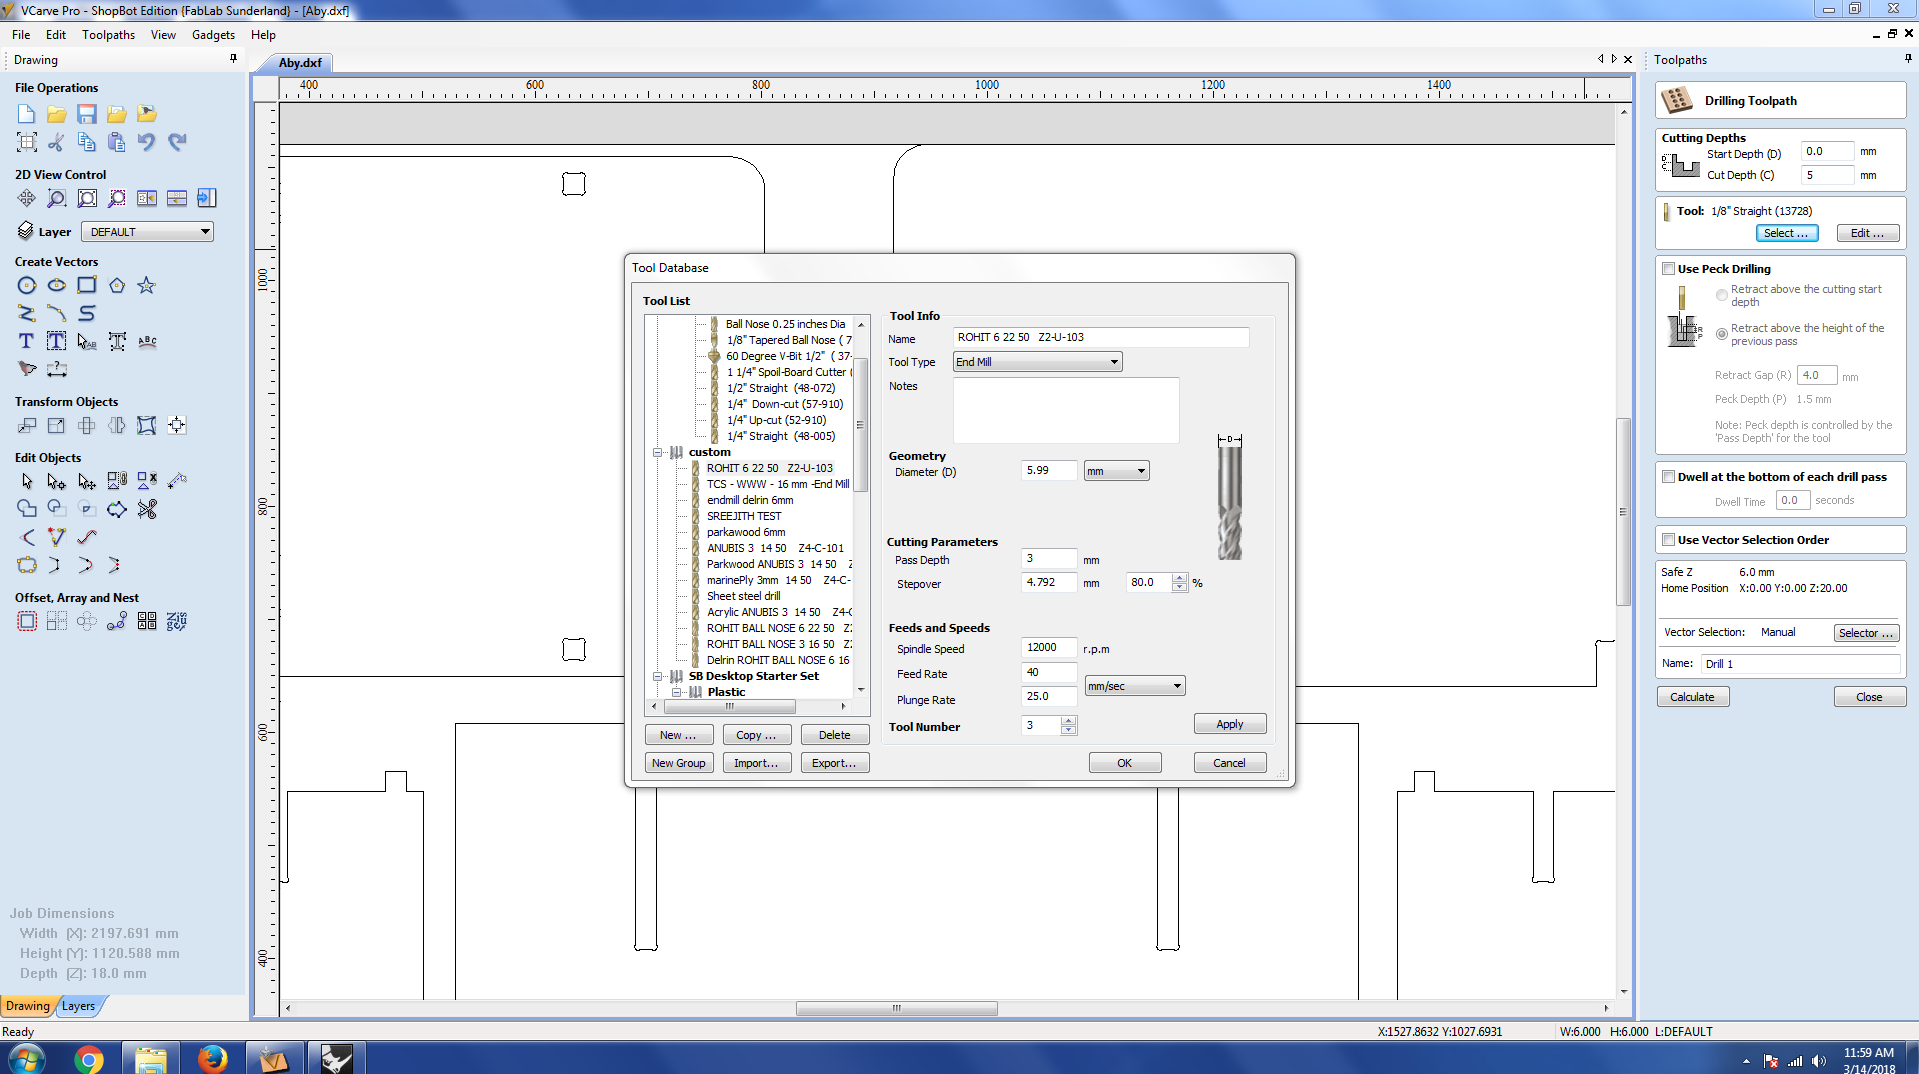
I first drilled four 5 mm screw points just to screw the plywood to the bed.
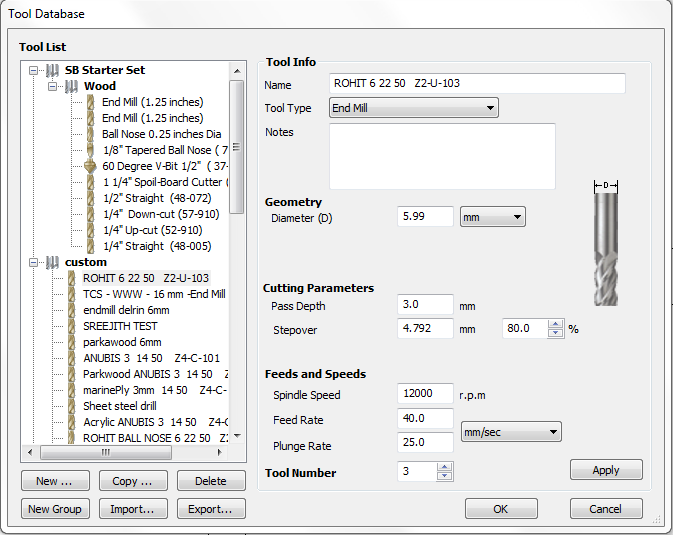
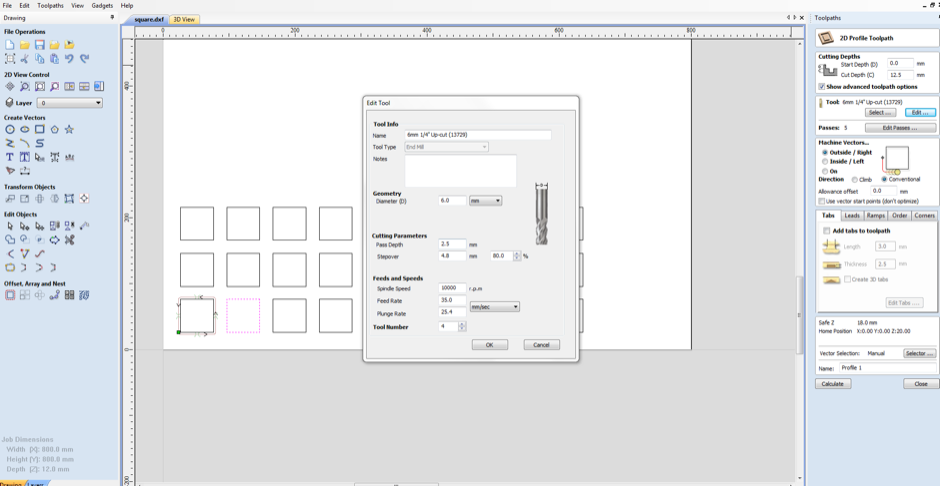
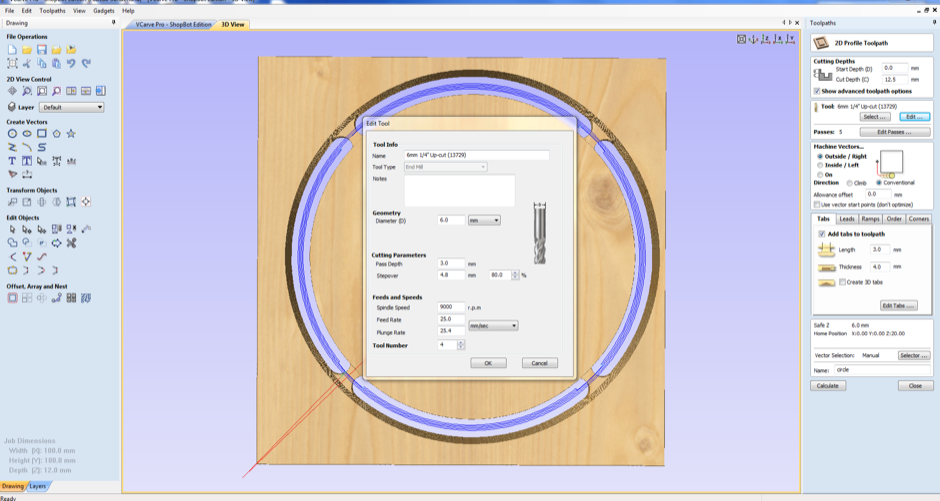
Tool settings - Eventhough the plywood is 18mm thick, it could vary from 18 to 19 mm due to manufacturing errors, so I gave the cut depth 19mm inorder to make sure my material is cut to its full depth. See below image for the tool settings i gave for the pockets and the tool profiles.
I planned to machine with three steps, first drill the screw points to check for the finish of my cut. I gave a cut depth 5 mm for it and it was good.
Then I decided to machine just a component that had the pockets( Profile 1 and Pockets), just to make sure the quality of the cut.
Atlast i gave the rest of the profile (profile 2)
See Below image for the tool path list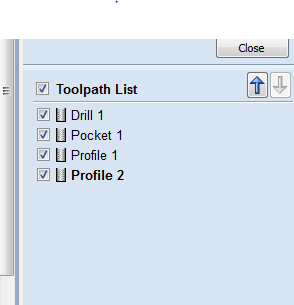
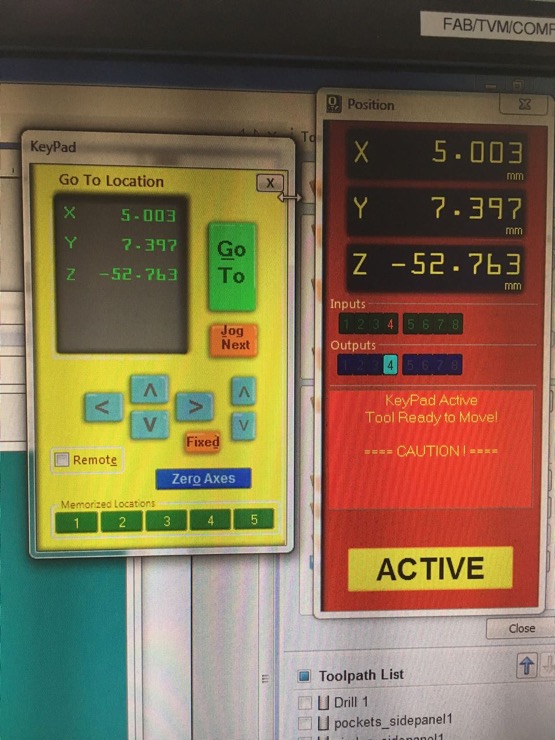
Below Image is the command console which shows the activity of the ShopBot
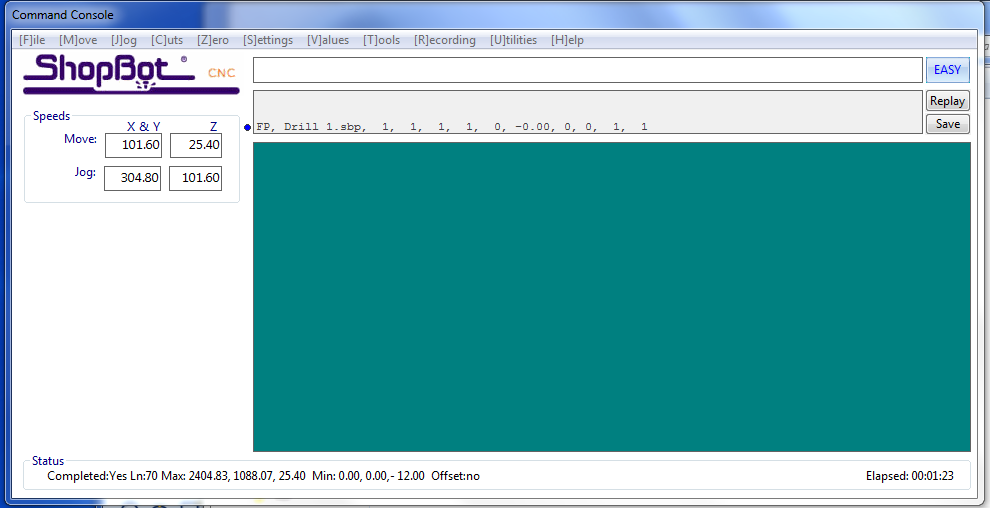
We have to set the origin of the X,Y,Z axes.
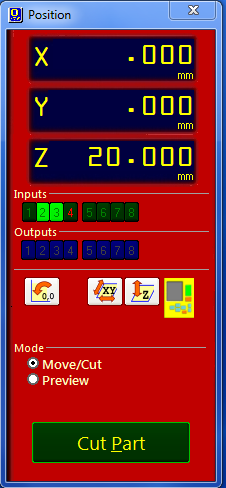
The Coordinate controls of the Shopbot
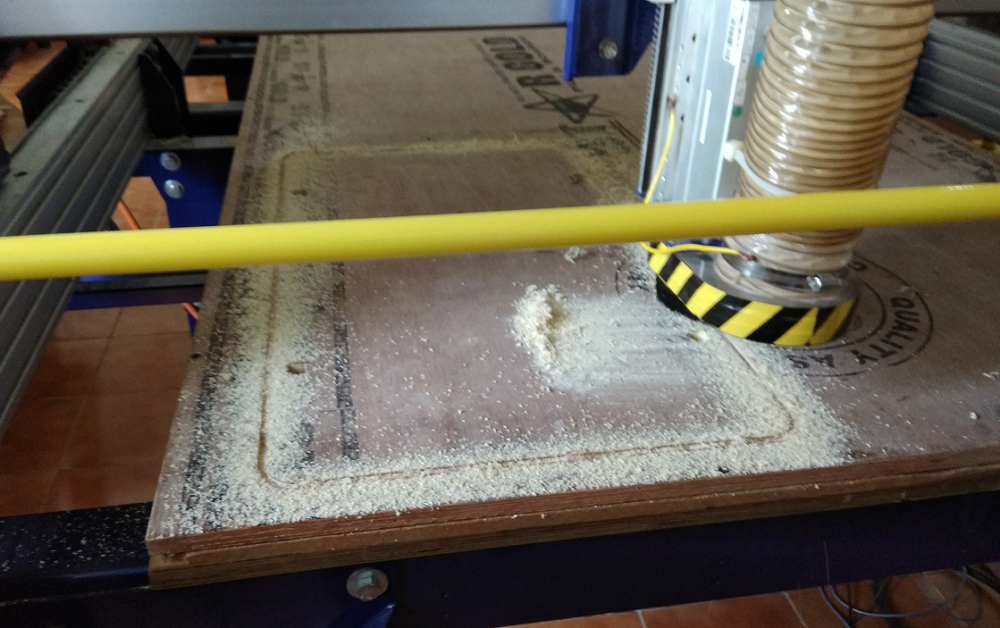
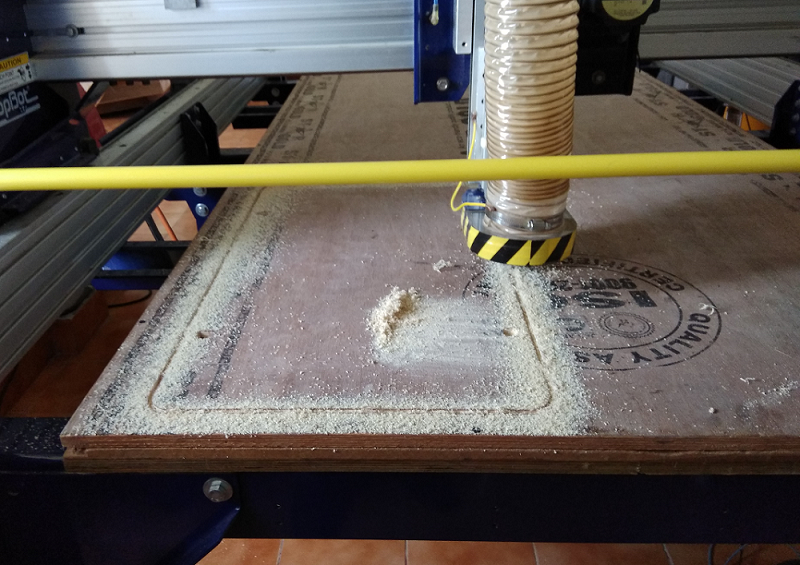
Machining
See below Shots during the maching process.
Our Fablab Instructor Lancy on the top railing
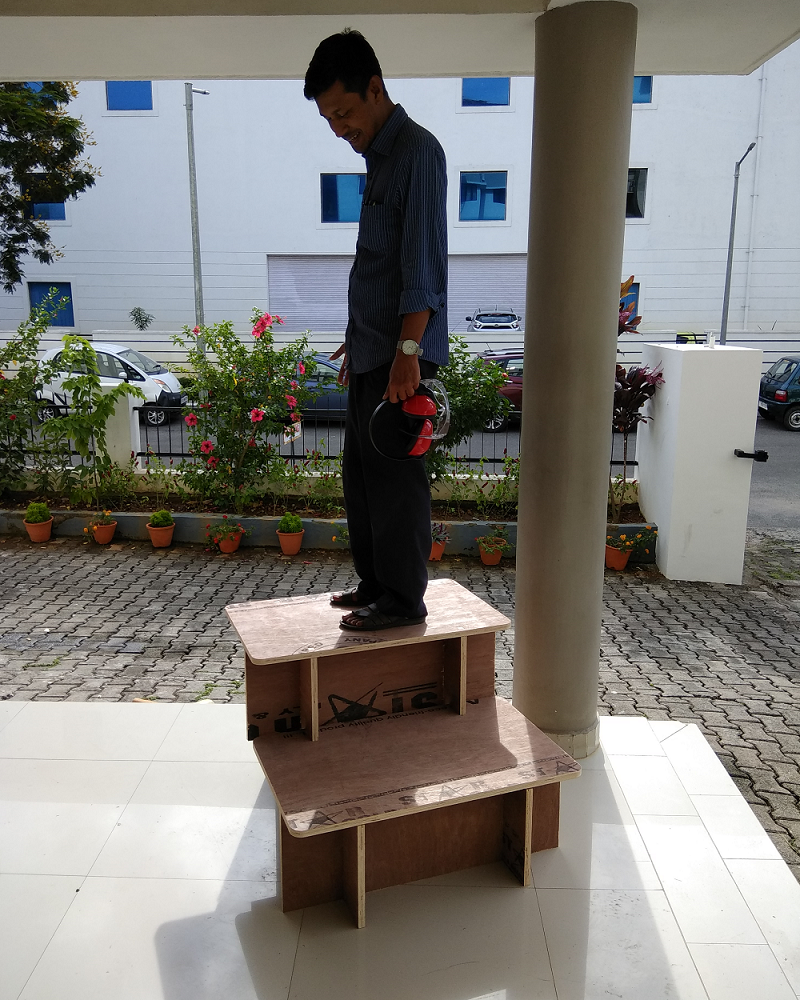
I used a hammer to fix the joints and the fit was perfectly tight. The stair was absolutely strong and stable, and I am happy that I build something useful.
The Stair is ready
Download Original All Design files
Group assignment
Firstly we were given a class about the tools,profiling pocketing and the other settings in the software as well as shopbot
by our instructors Yadu and lancy felix.
Tolerance test
As a part of our Group assignment we decided to have a test cut to find the tolerance of the
material.We created a comb design for 30 mm block ranging from 29.8mm to 29.5 mm ,it was tight for 29.8mm and could fit in
Tolerance cut
Test for spindle speed,runout,toolpath,Alignment, Speeds and Feeds of SHOPBOT
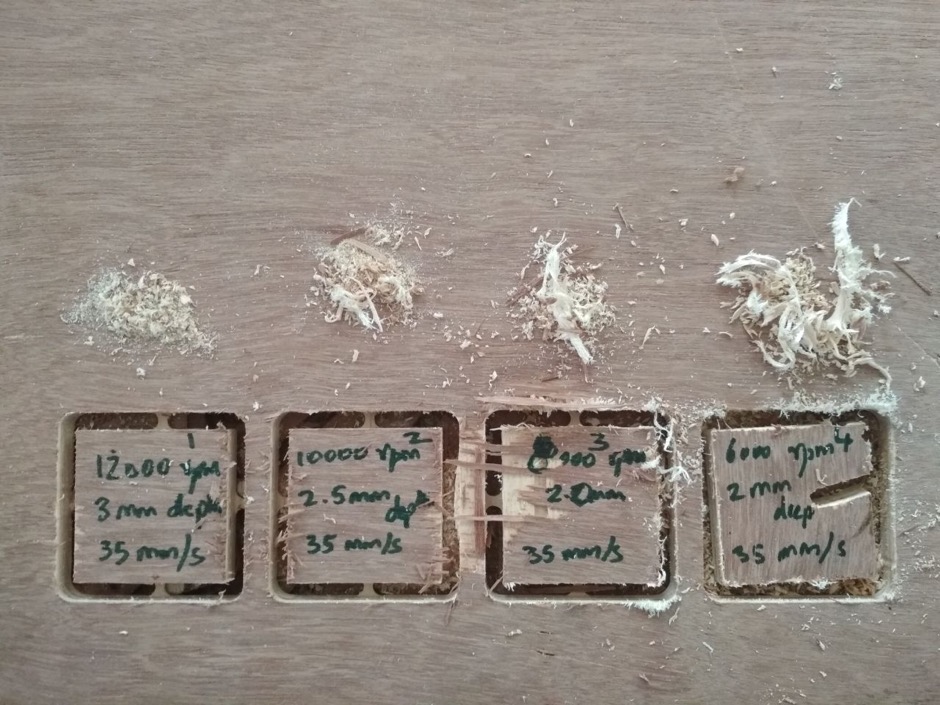
For testing this we cut small square shapes at varying spindle speed,feed rate and depth.Shapes with similar rpm were
clubbed together to create the toolpath.
The first test was for the RPM with varying feed rate and depth.It was found out that 12000 rpm and 10000 rpm gave a good cut
of which 12000 rpm was finer.
RPM testing
The first test was for the RPM with varying feed rate and depth.It was found out that 12000 rpm and 10000 rpm gave a good cut
of which 12000 rpm was finer and at 6000 rpm the tool got stuck and loosened.So when Rpm is decreased the quality is getting decreased
The next check was for the feedrate we choose 12000rpm for testing and found out that at higher feedrate high frequency noise was heard.
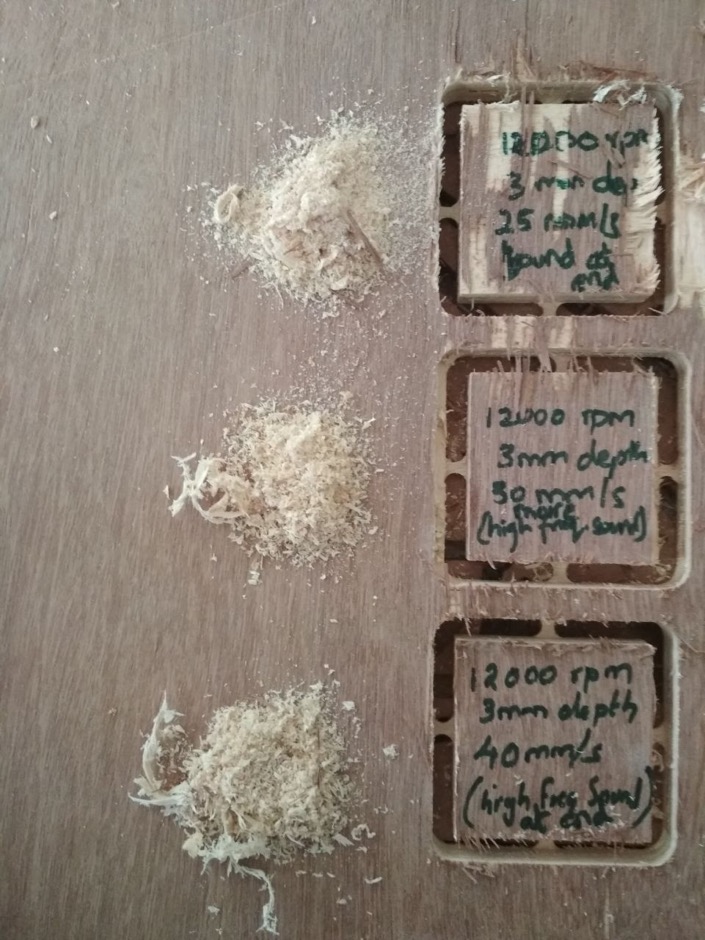
feed rate testing
So after discussing with our instructor we decided to have a final test with 9000 rpm at varying feedrate and we got the best result
for 9000 Rpm,25 mm/sec feed rate and 3mm depth.It was also having the normal sound amoung these.
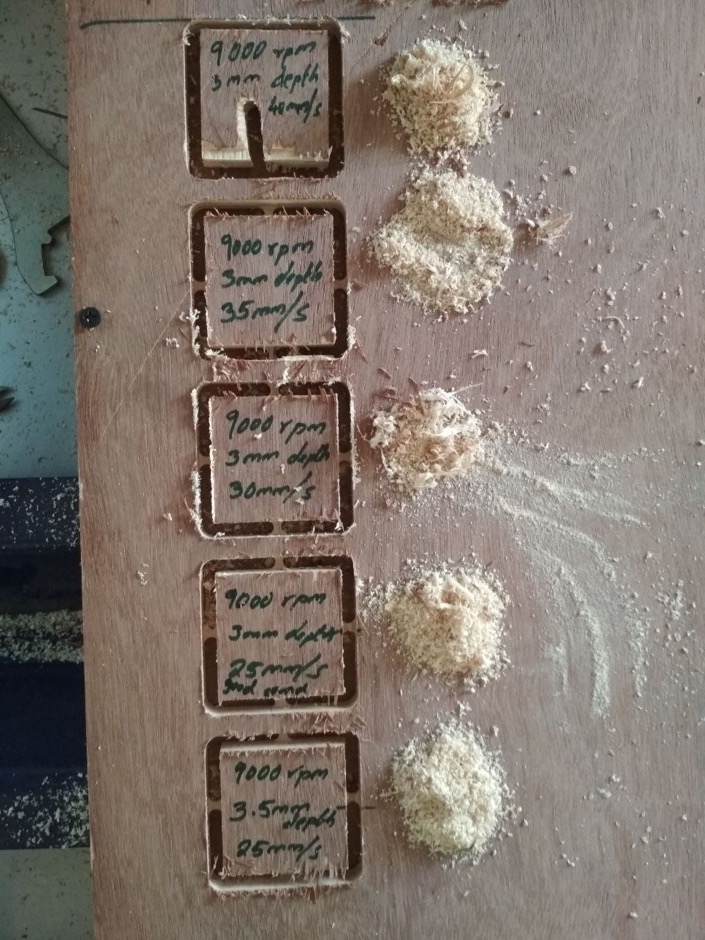
final testing
ForRunout a circle was cut and the measurements were taken at different points.Runout happens due to the inaccuracy of the
rotary system (tool diverting slightly from the axis).This may be due to the problem with tighting the tool,wear and tear of the assembly,vibrations etc.Runout is
calculated as the average of the maximum and minimum measurements we get
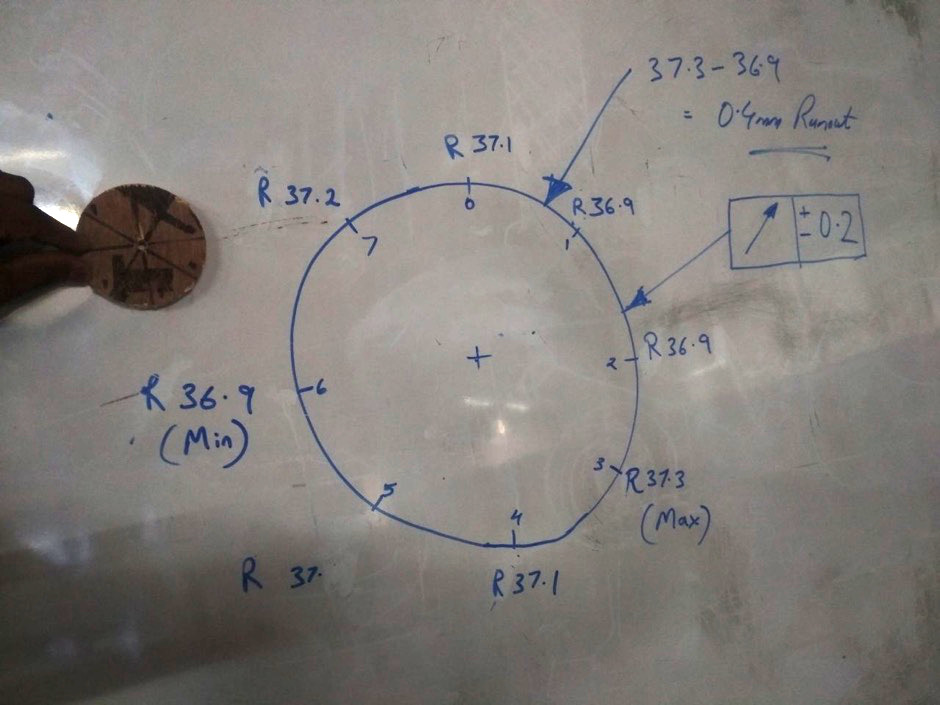
The runout was calculated to be 0.2 mm
What I learned
This work by Aby Michael is licensed under a Creative Commons Attribution-NonCommercial-ShareAlike 4.0 International License.
