Bluetooth Controlled Belt Driven DC motor Car
Objectives
Objectives
To make an all terrain Car with bluetooth interface on Masters phone , that could give motion feedbacks to the Master
Acknowledgement
As going through these last days of the Fab Academy Course I would like to thank all who helped me in learning and going through this journey.
I made this project with my ever increasing love for moving machines and cars and I have integrated the skills and lessons learned in each week to make this project.
Different Steps of the Journey
1. Mechanical Design
2. Electronics Design
3. Programming
What I Purchased?
What I made?
Designing the Chassis and other parts of the Car
Design of Wheels
I have first designed a wheel and 3d printed them.

But Later on I thought of a belt driven Car aso i never used this in my project.
I designed a Gear wheel so I could bound it to a belt
I purchased a 600mm lenth closed belt from a Sewing machine repair shop(it is a belt used in sewing machine).
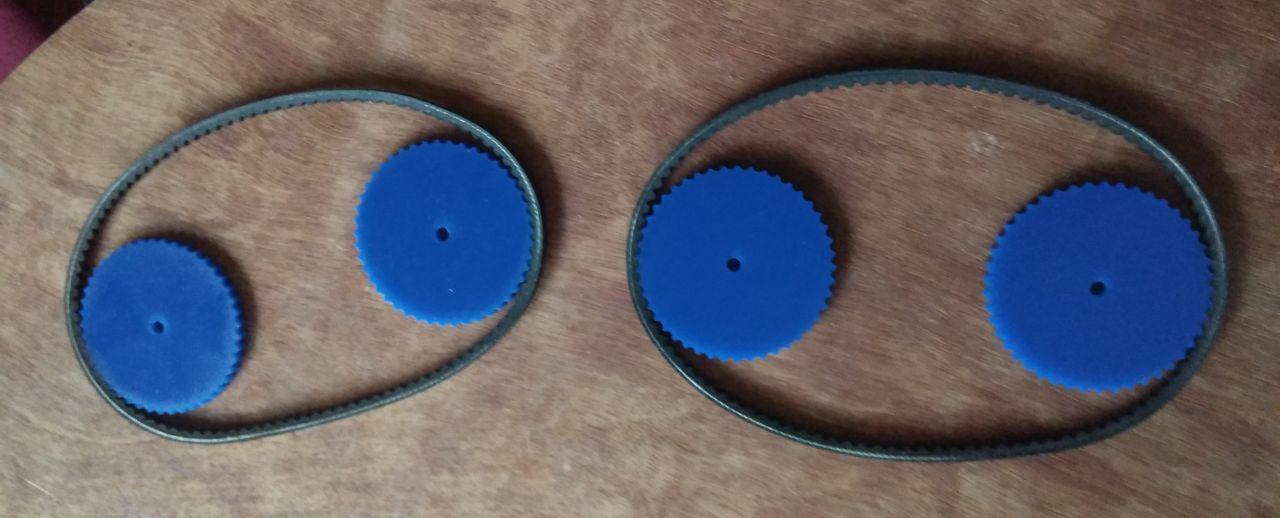
I designed the gears in such a way that the teeth of the belt goes in mesh with the Gear wheel teeth.
i tried different teeth numbers to fix the correct design of the gear wheel

I selected the teeth number 45 which was the correct mesh when arranged with the belt.
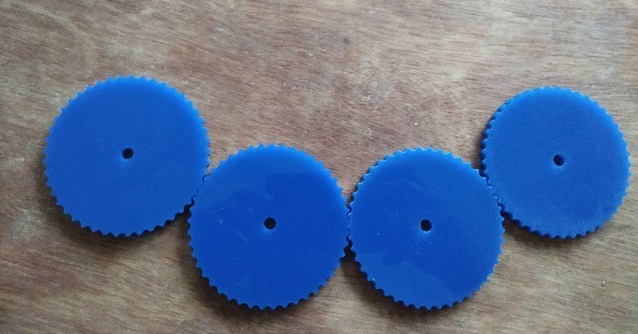
I cut the outer wheels with diameter 80mm, ( the gear wheels will be placed between these outer wheels such that the belt doesn't slip out from the Gearwheels.)
Design of the Base, motor holder and rod holder pressfit.
I have done by designs on the Solidworks software.
As you can see the the design screen shots below
I took a black coloured Acrylic Sheet of 5mm thickness for the cutting.
The kerf for Acrylic is 0.5mm as we found in the Computer Cutting Week, so i gave +0.5mm clearance for press fit female slots and -0.5 mm to male slots.
Base
I designed the base, motorholders, and rod holder press fit in Solidworks. The idea was to make the whole chassis a big press fit to make sure the motors at front wheel and the axle rod at back wheel, all stays intacta and aligned without vibration.

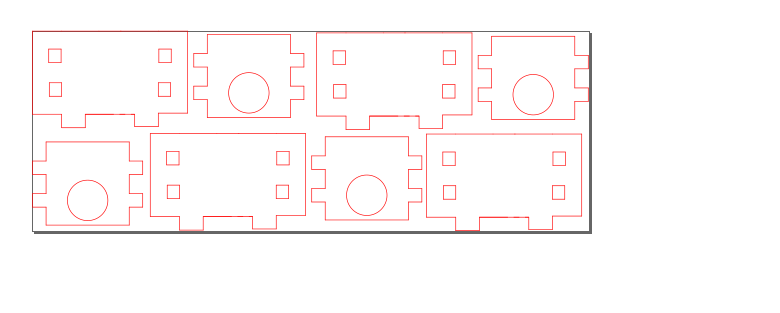
I edited the design in inkscape, first i decided to cut the base.
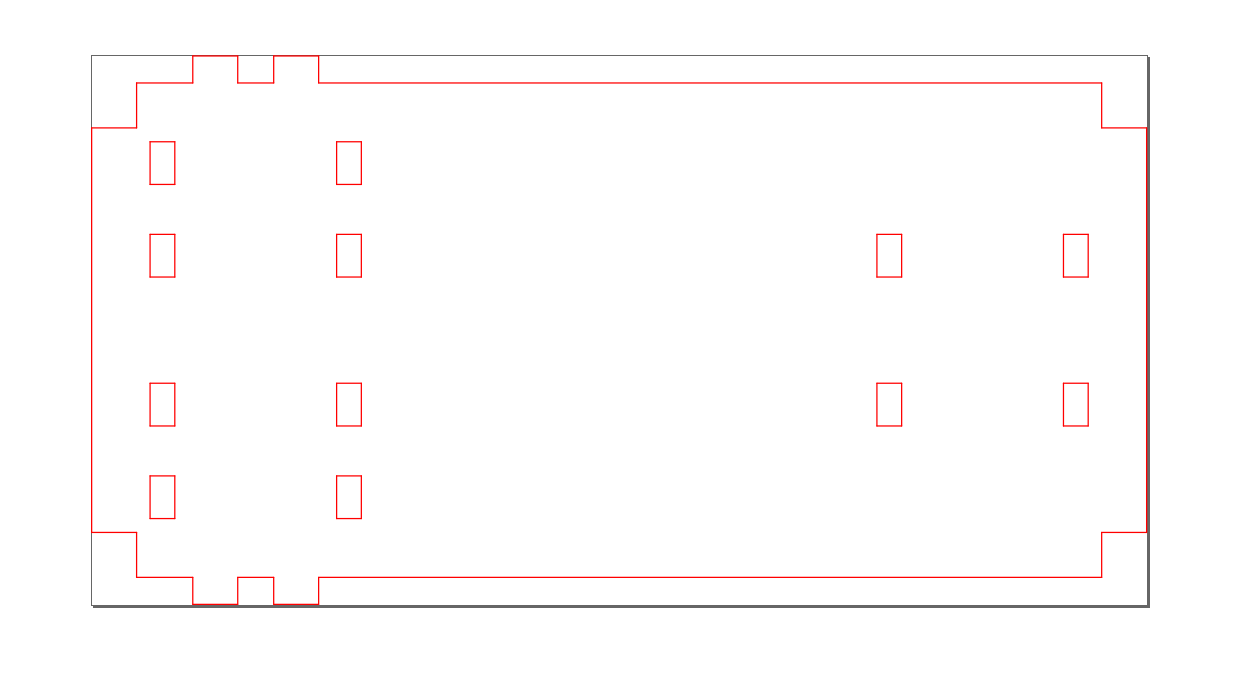
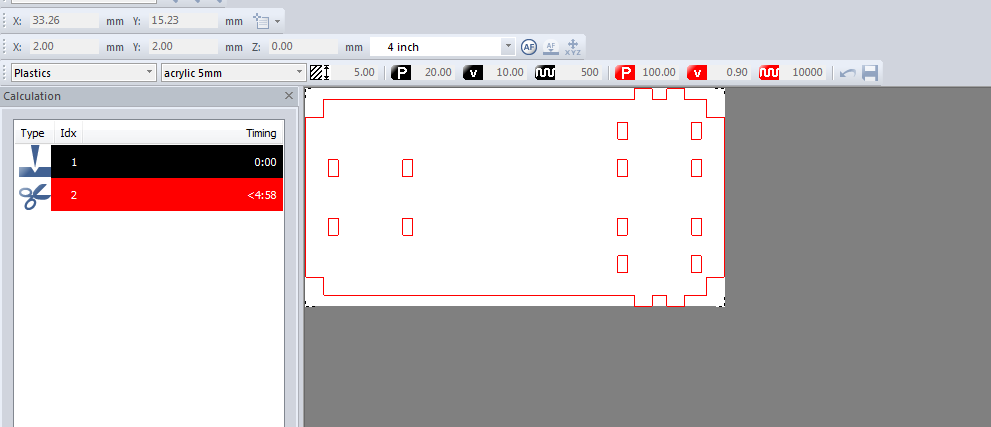
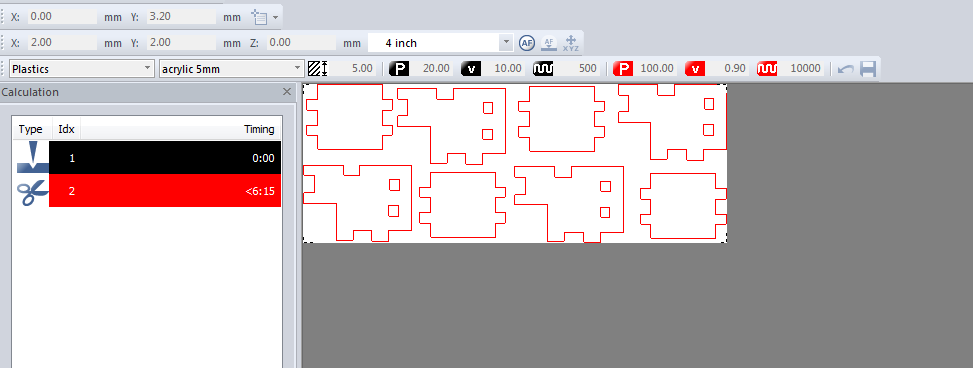
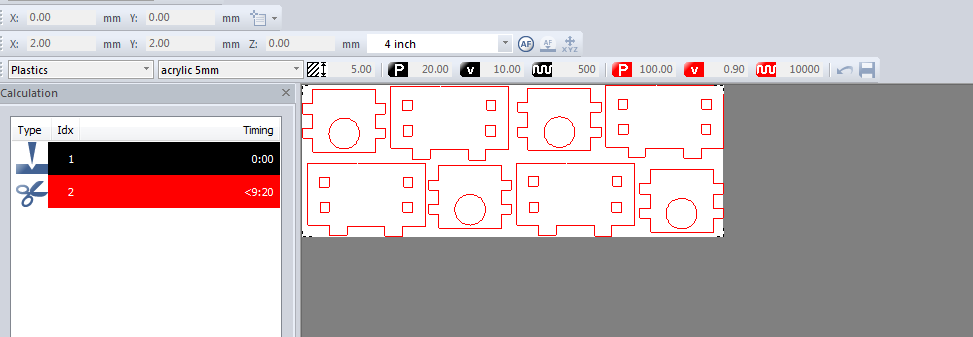
In the laser cutter I gave the settings for 5mm acrylic - Power 100 W and Velocity 0.9 mm/sec
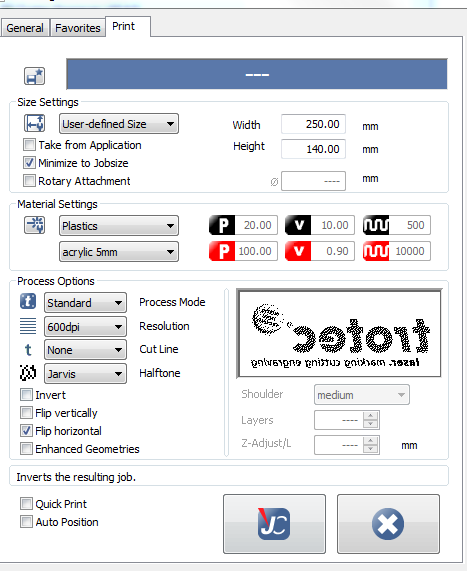
The laser cutting screenshot is below
Motor Holder
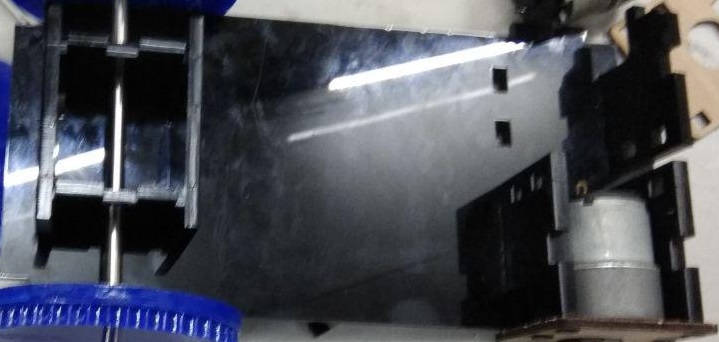
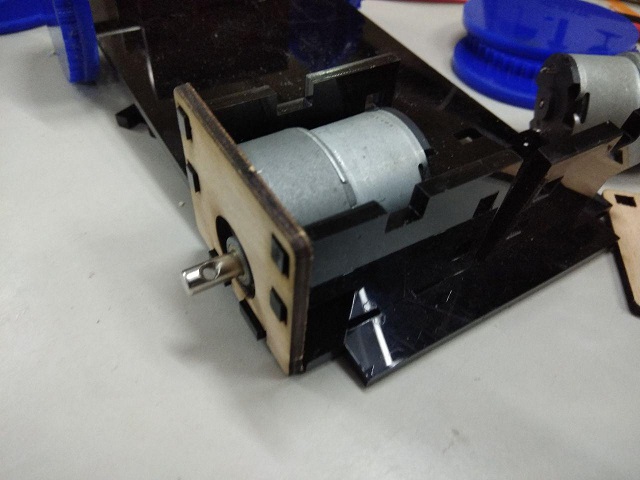
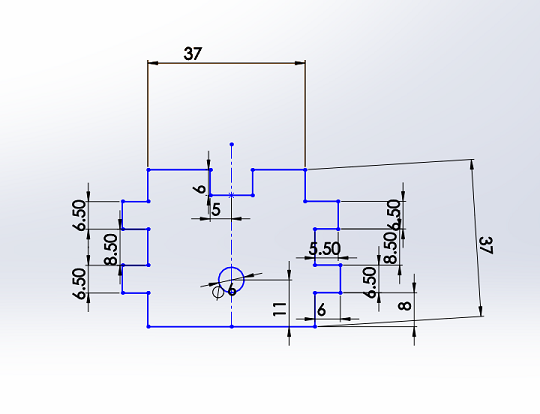
The below three images shows the motor holder pressfit which fits into the base also

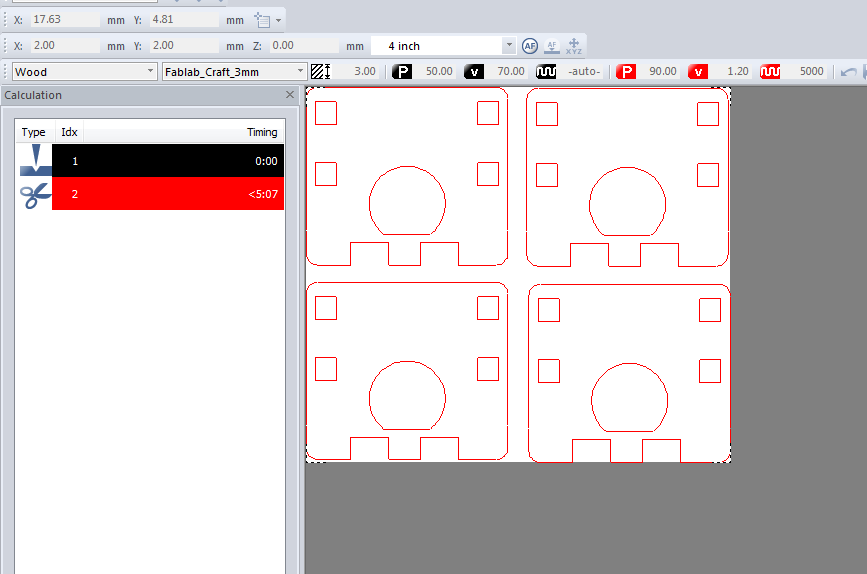
The motor holder cut file
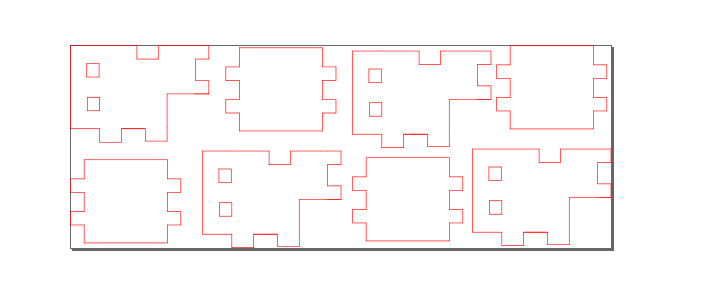
In the laser cutter I gave the settings for 5mm acrylic - Power 100 W and Velocity 0.9 mm/sec

The laser cutting screenshot is below


In the laser cutter I gave the settings for Fablab Craftwood 3mm - Power 90 W and Velocity 1.2 mm/sec
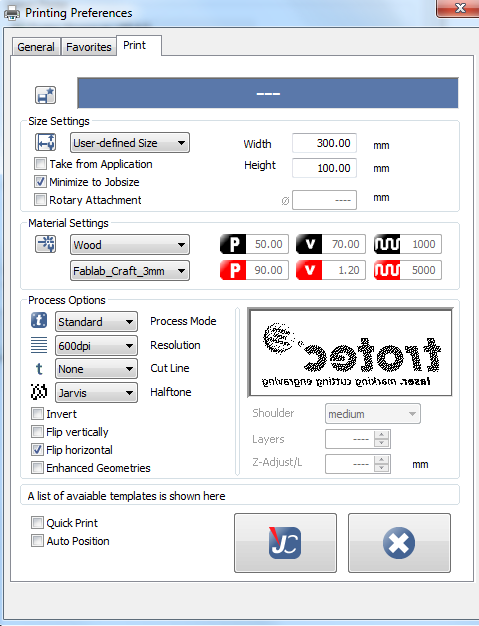
The laser cutting screenshot is below
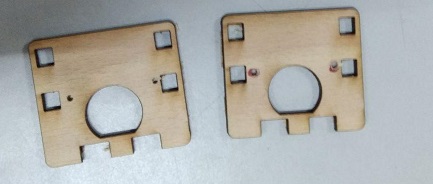
As you can see below the pressfit is holding the motor stiffly without any vibration. I still applied some glue to make sure it doesnt get damaged on hardhittings.
Rod Holder
The below is the Rod holding pressfit which holds the Axle rod on the back the wheels and this is to make sure that the belt and gear wheels stay tight and fit enough.
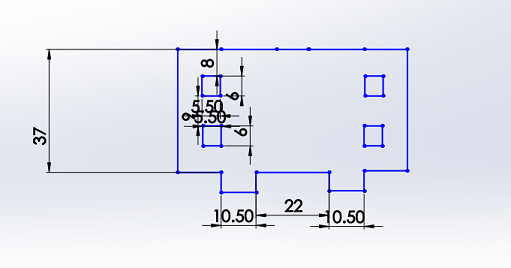
Power Settings same as the base and motor holders
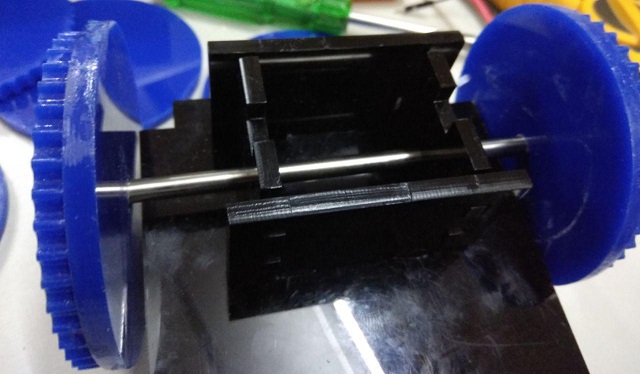
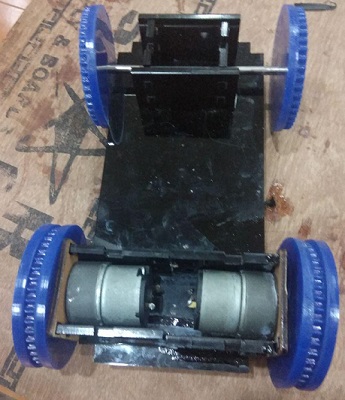
The below image is the status of the vehicle after all these were assembled together
Designing the Board Holder.
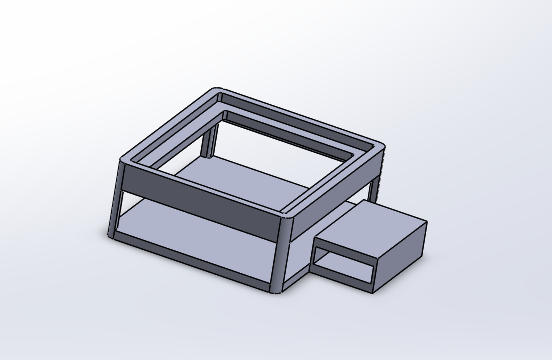
I designed a board holder to keep my Atmega 328p and motor driver and bluetooth sensor intact.
I designed this in Solidworks, in such a way that the motor driver shall be placed on the bottom shelf,
my microcontroller board on the top shelf,
I made a side slot to insert the bluetooth sensor
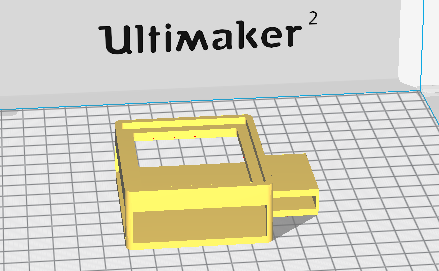
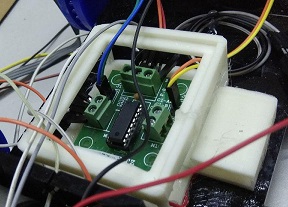
Designing the Front Cover
Then I thought to design a front/back cover , so i started designing it on Solidworks.
It was designed in such a way that it just covers the front portion and could give my vehicle a Tanker like appearance as it is already a belt driven one.
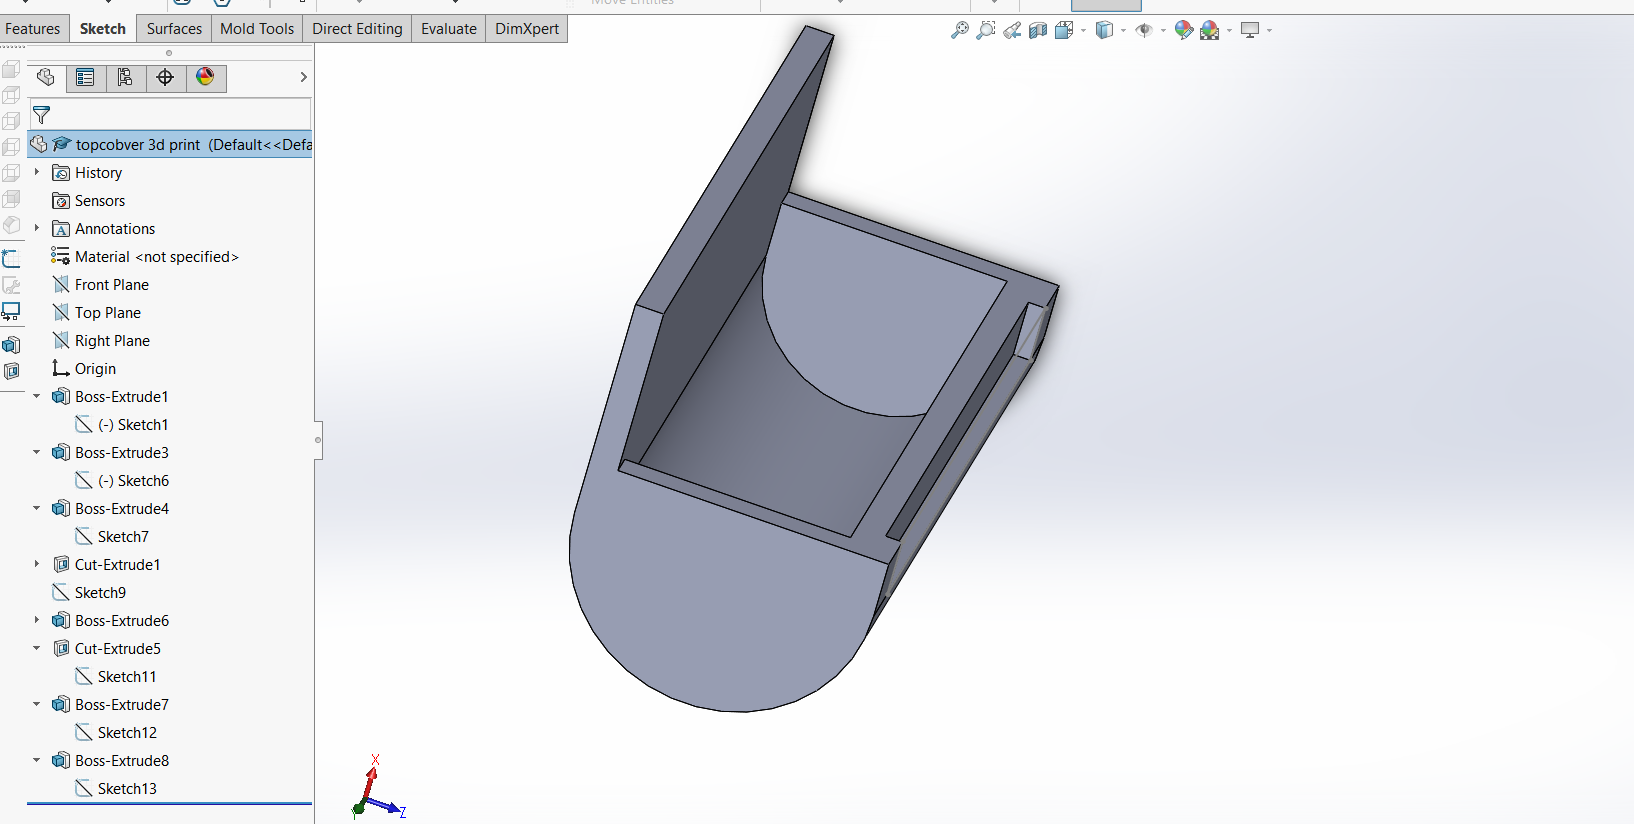
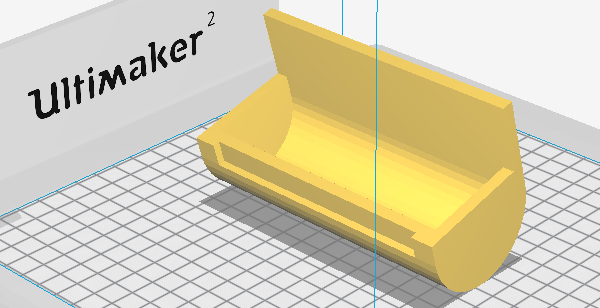

Designing the Top Cover
I decided to do the Kerf Bending for the top Cover of my Car
I love the Kerf pattern, and it was my intention to use and try this one once
I used the most simple and effective kerf bending pattern
Kerf thickness given was 1.4mm
I left the portion which falls on the middle top of the vehicle without kerfs and the back-top was kerf bended so i could bend it and glue it to the acrylic.
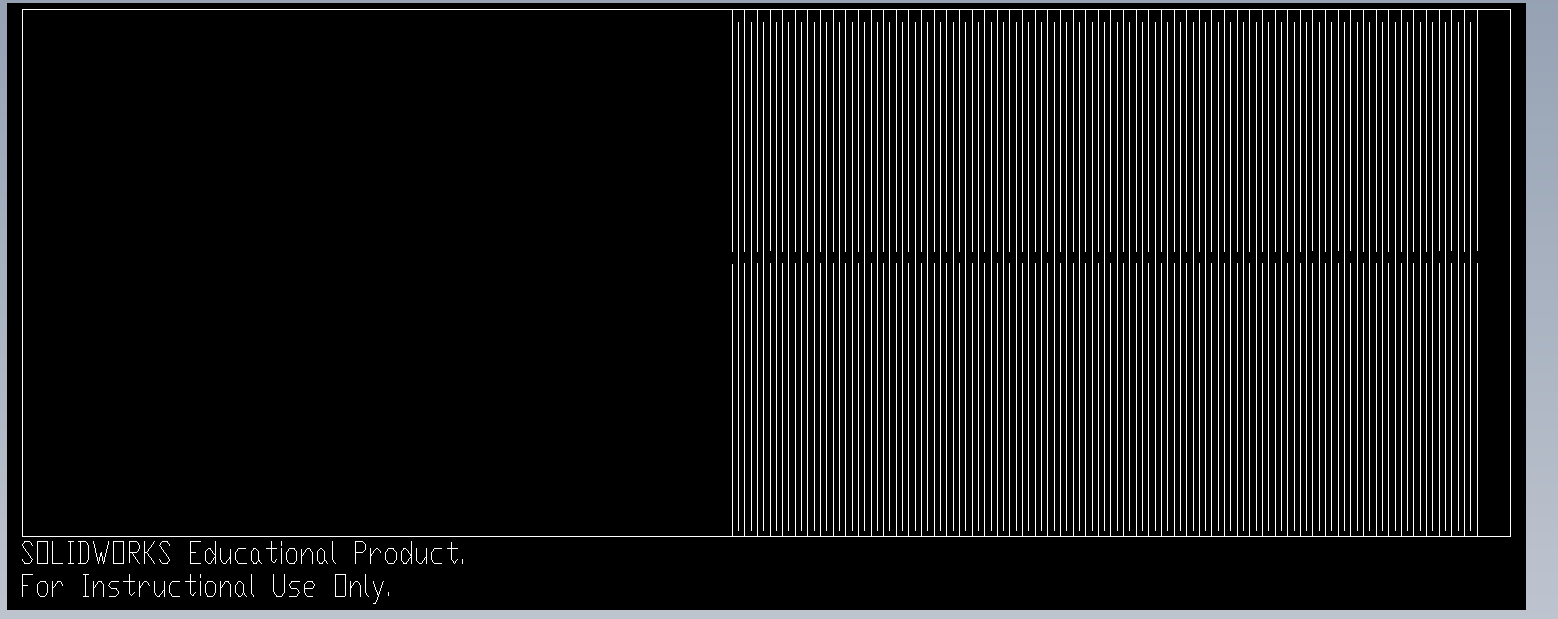
The cut file in inkscape that has to be printed in laser machine

The kerf bend was to be cut on the 4mm craftwood and the Power given was 100 W and Velocity 0.8 mm/sec
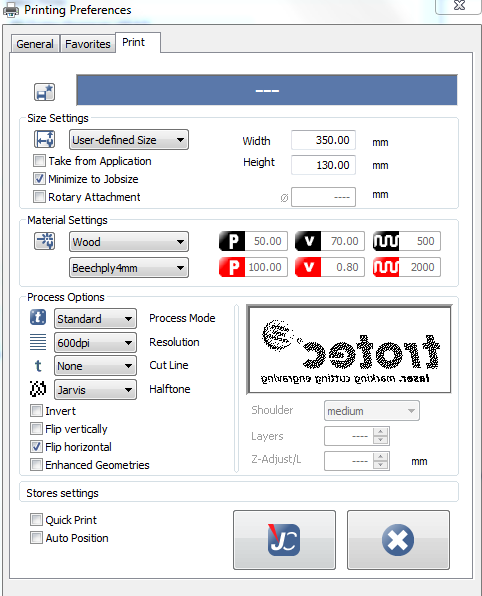
Laser cutting Screenshot


Assembly
As I first added the motors and screwd them to the holders
Then the belts were connected on both sides of the vehicle and the belts were of the correct fit
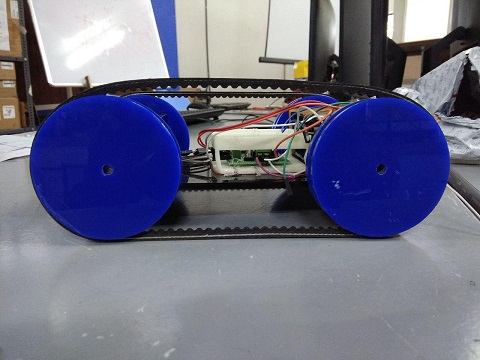
Then I glued the board holder on the centre spot of base
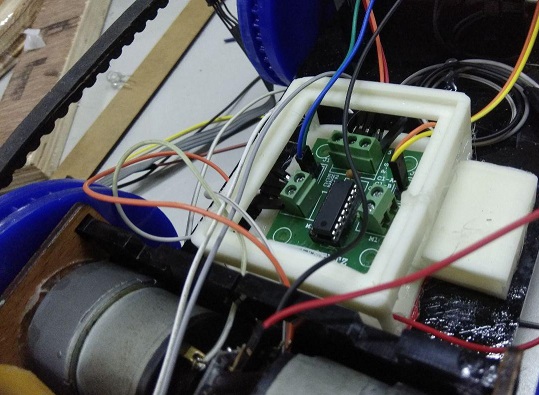
Arranged the boards on the board holder and connected the wires and soldered the motor pins.
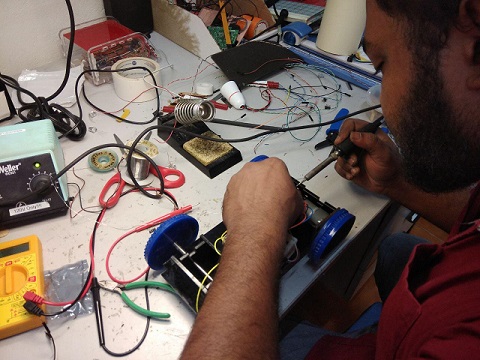
And now It is ready for some action.
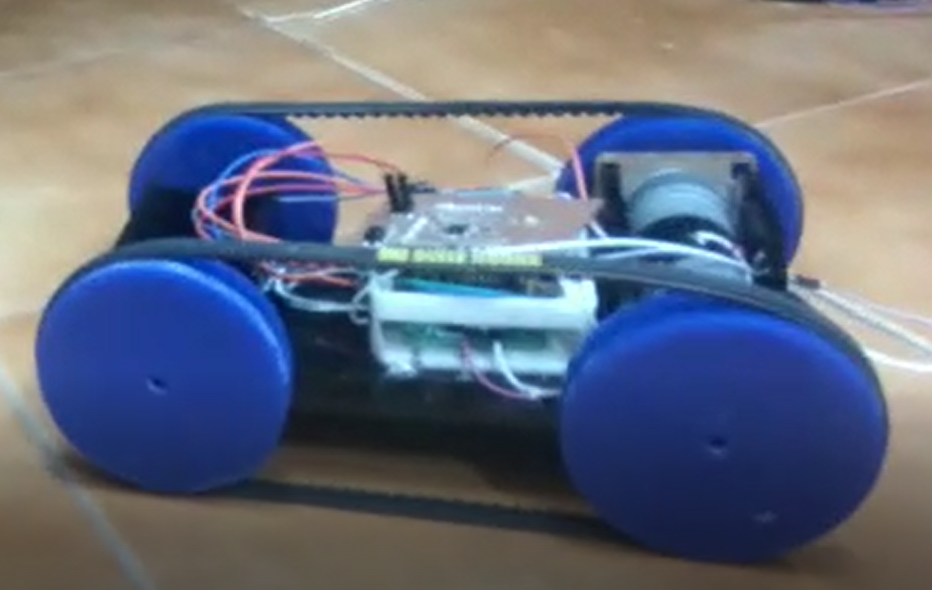
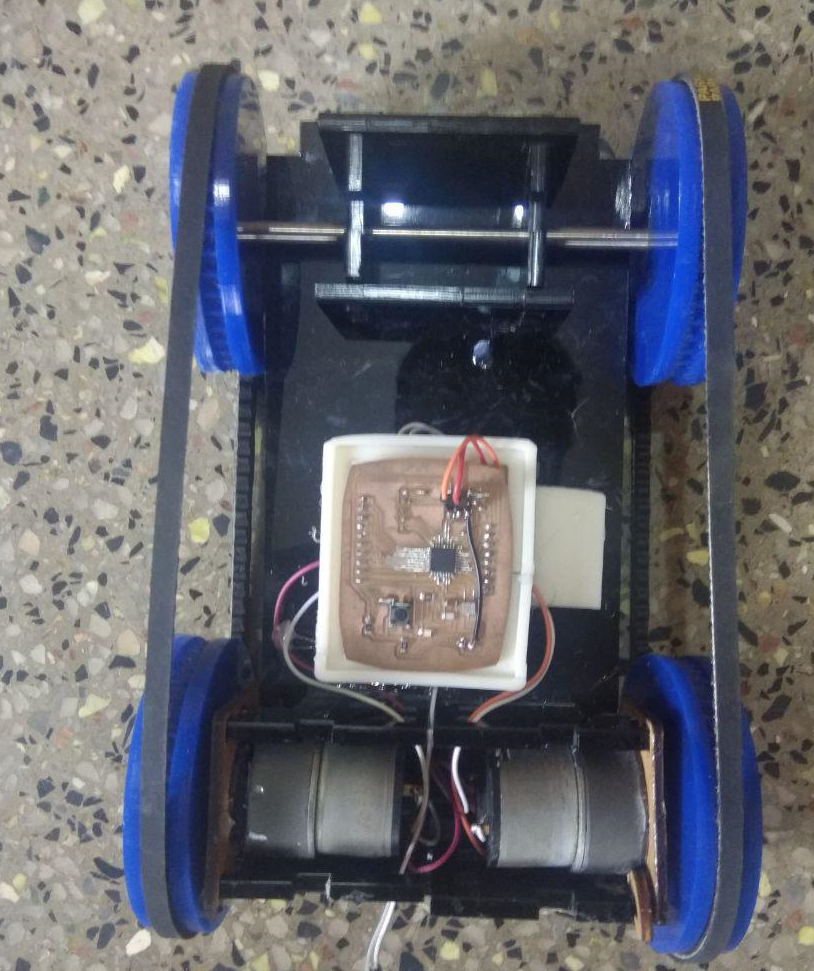
And finishing the mechanical design added the top and front covers to the car.
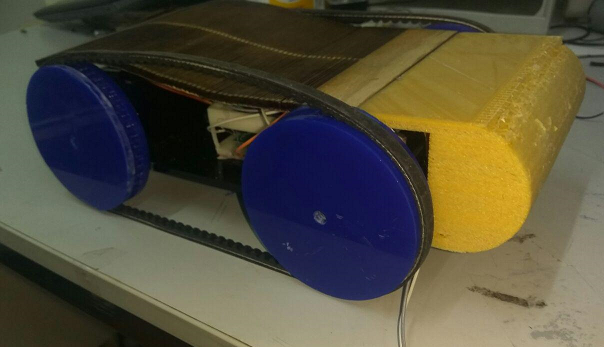
Download All Mechanical Design Files with names Click Here
Electronics Design
Design the board
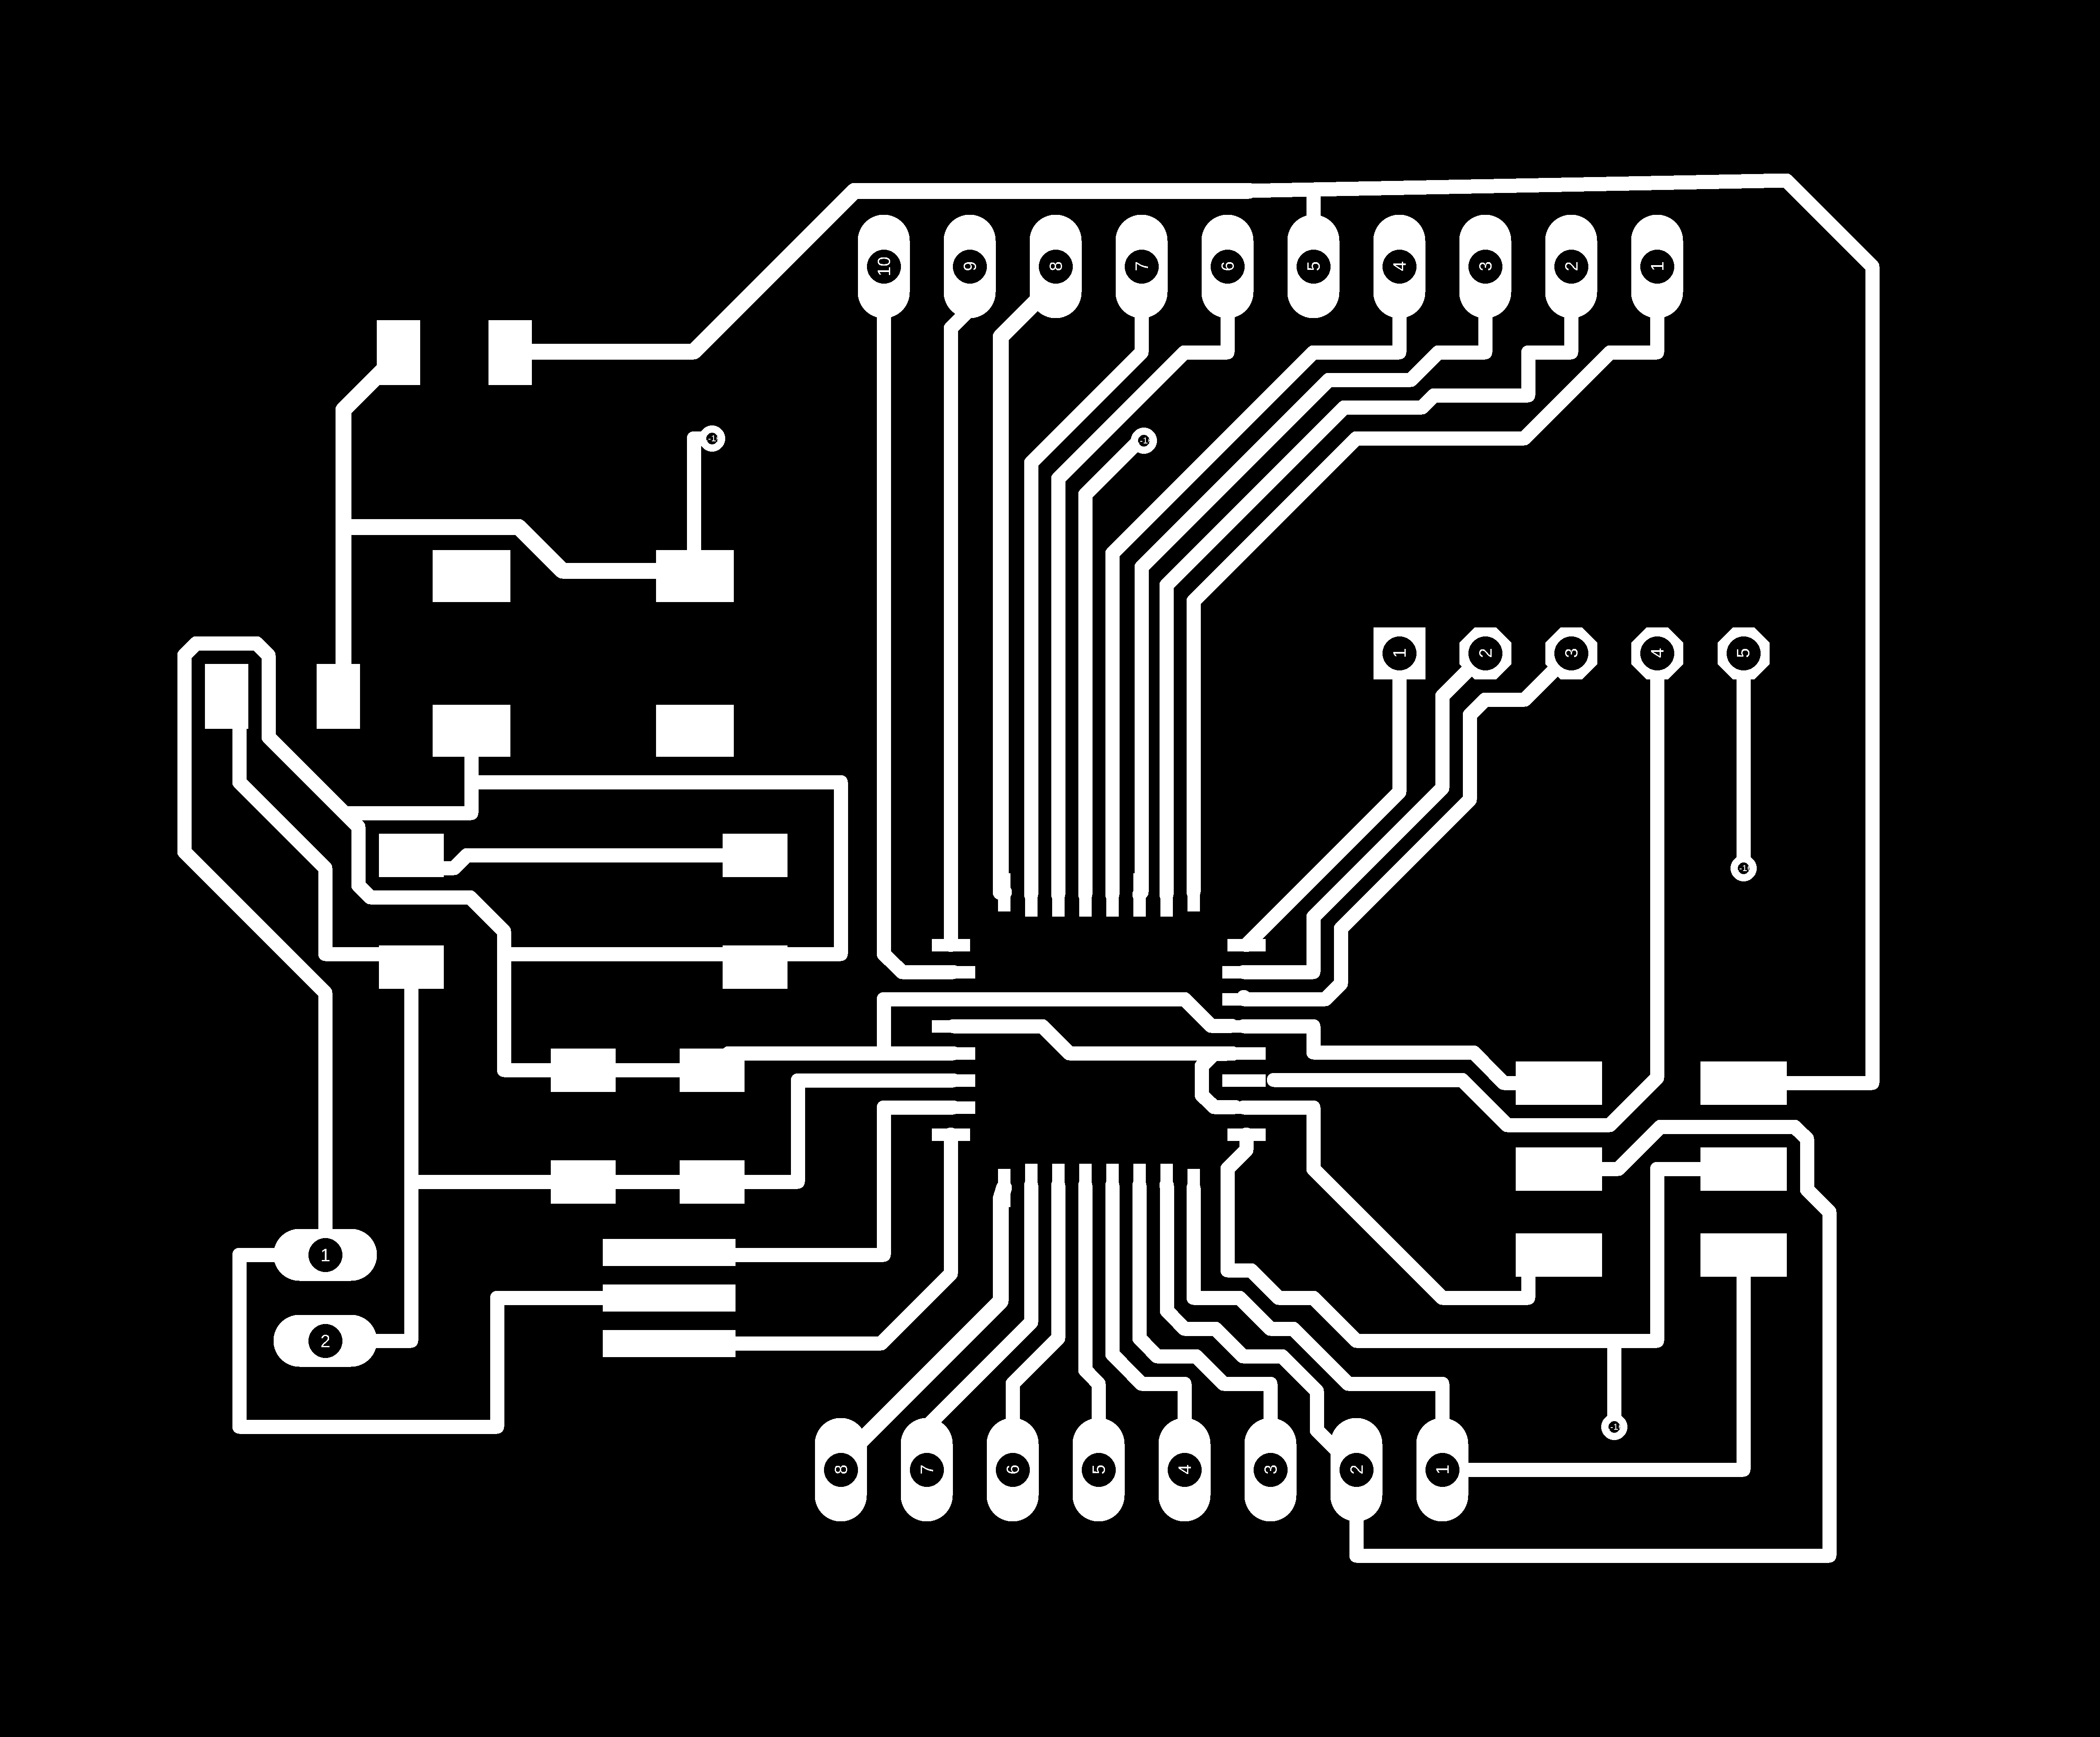
I have designed a board with ATtiny44 microcontroller with pins allocated for the motors, bluetooth and the Sensors. Designing was done on the Eagle software and see below the schematic diagram.

See below the Board view.

to Download the Design Files Click Here
Milling the board
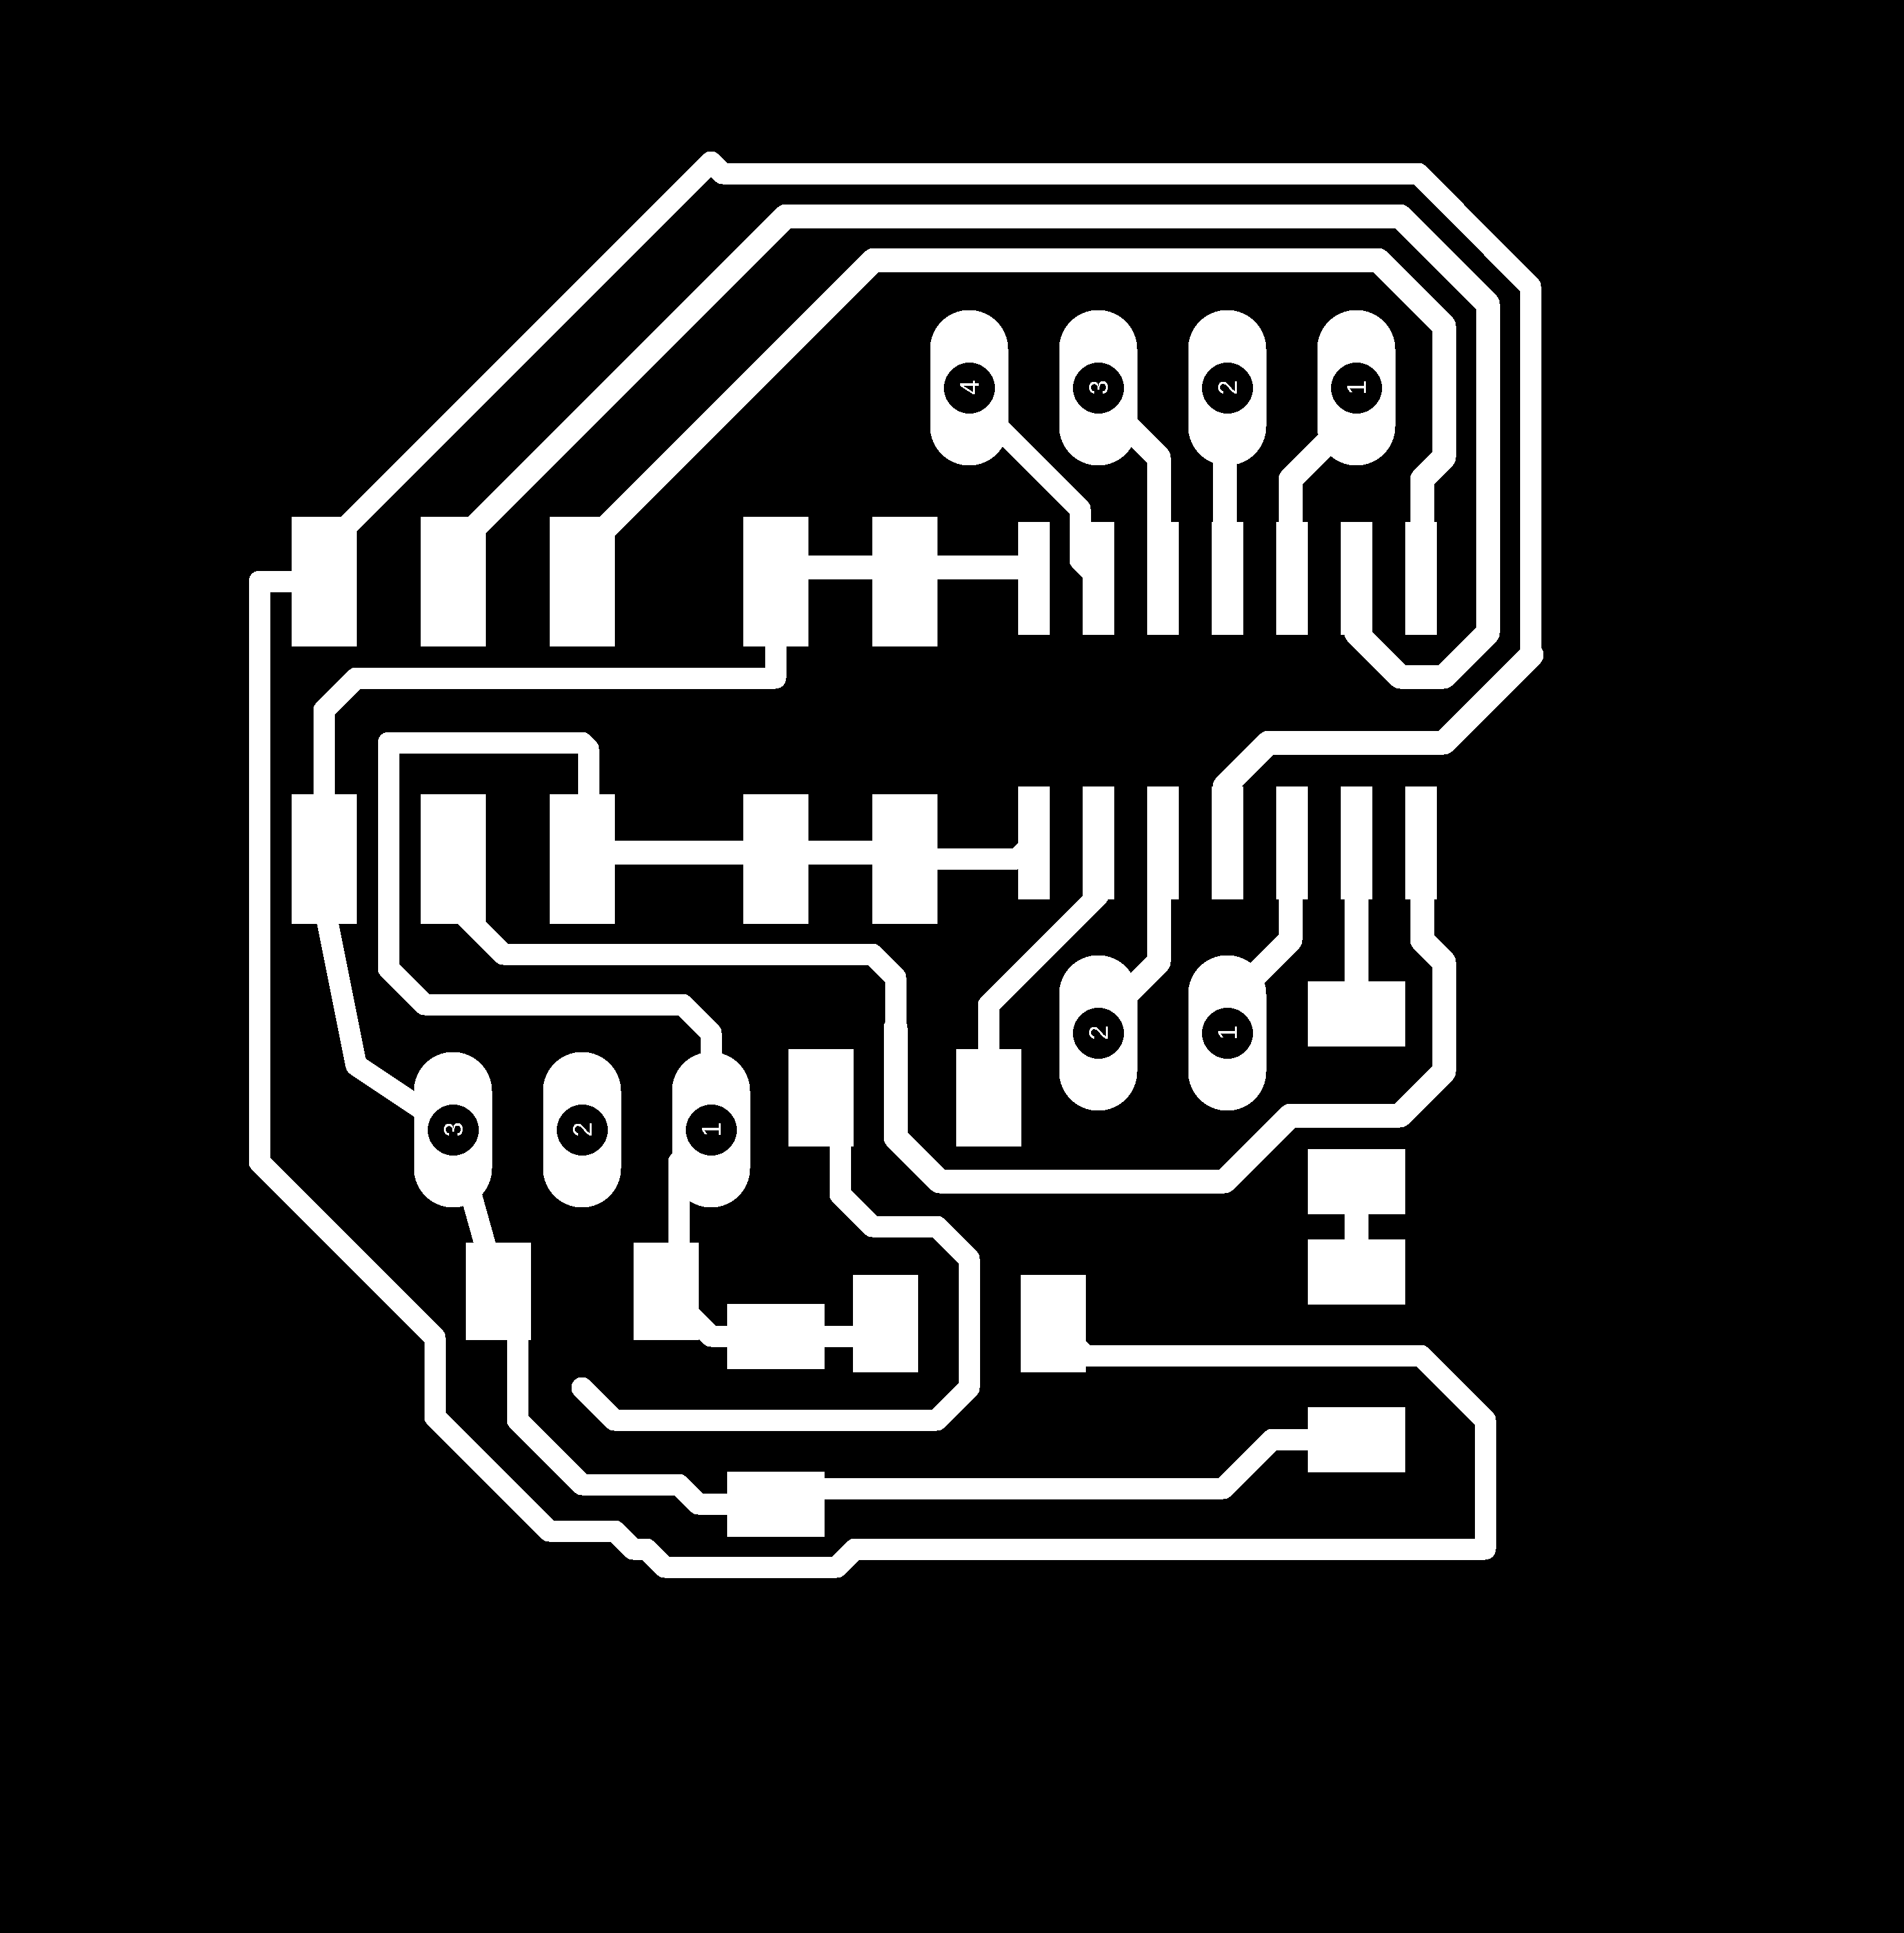
The trace image

The cut image
to Download the Mill Files Click Here
The board was ready and it is working , See below image
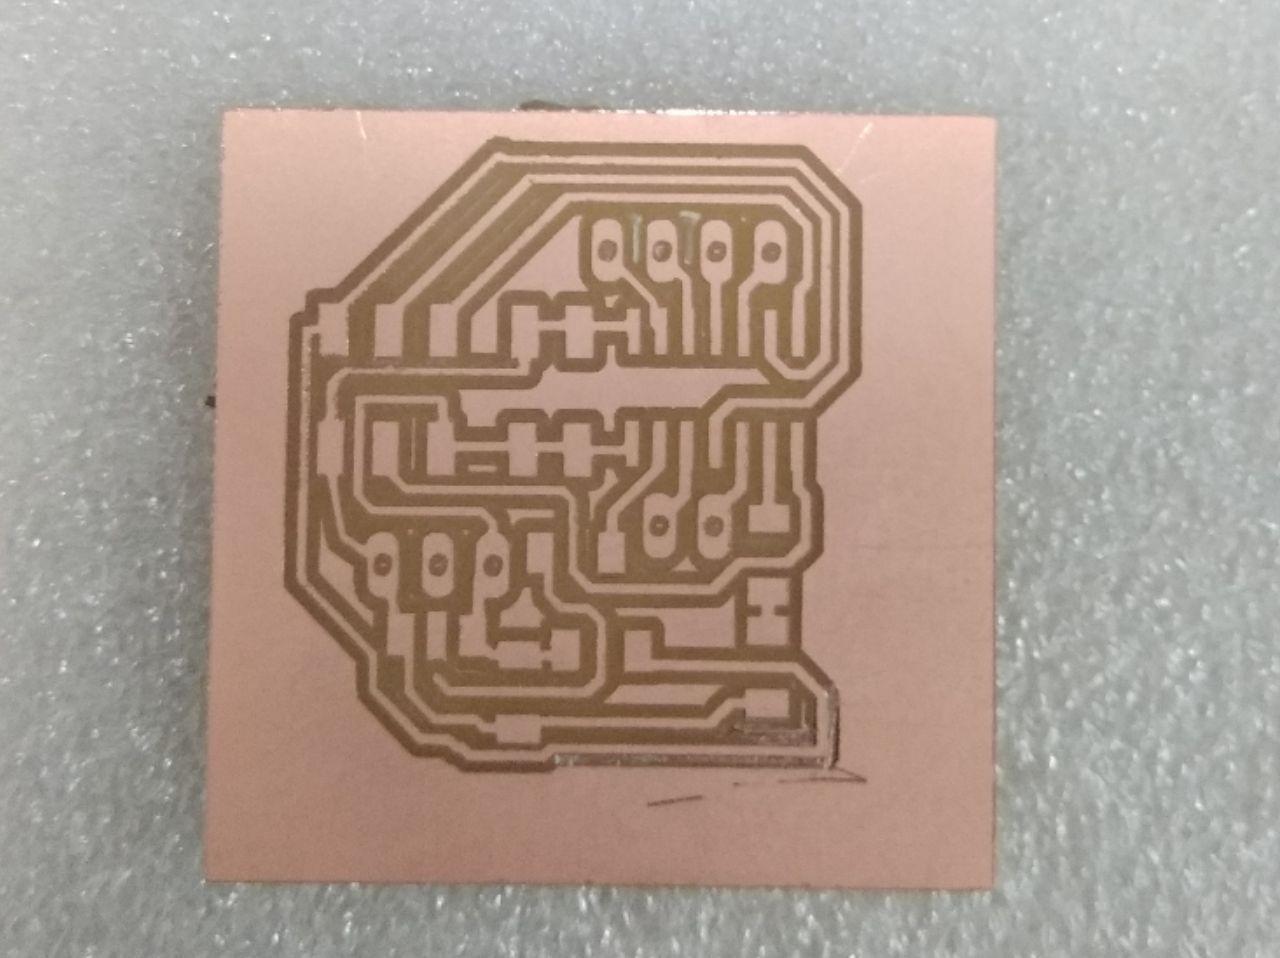
The board before soldering

The list of components used in making the board
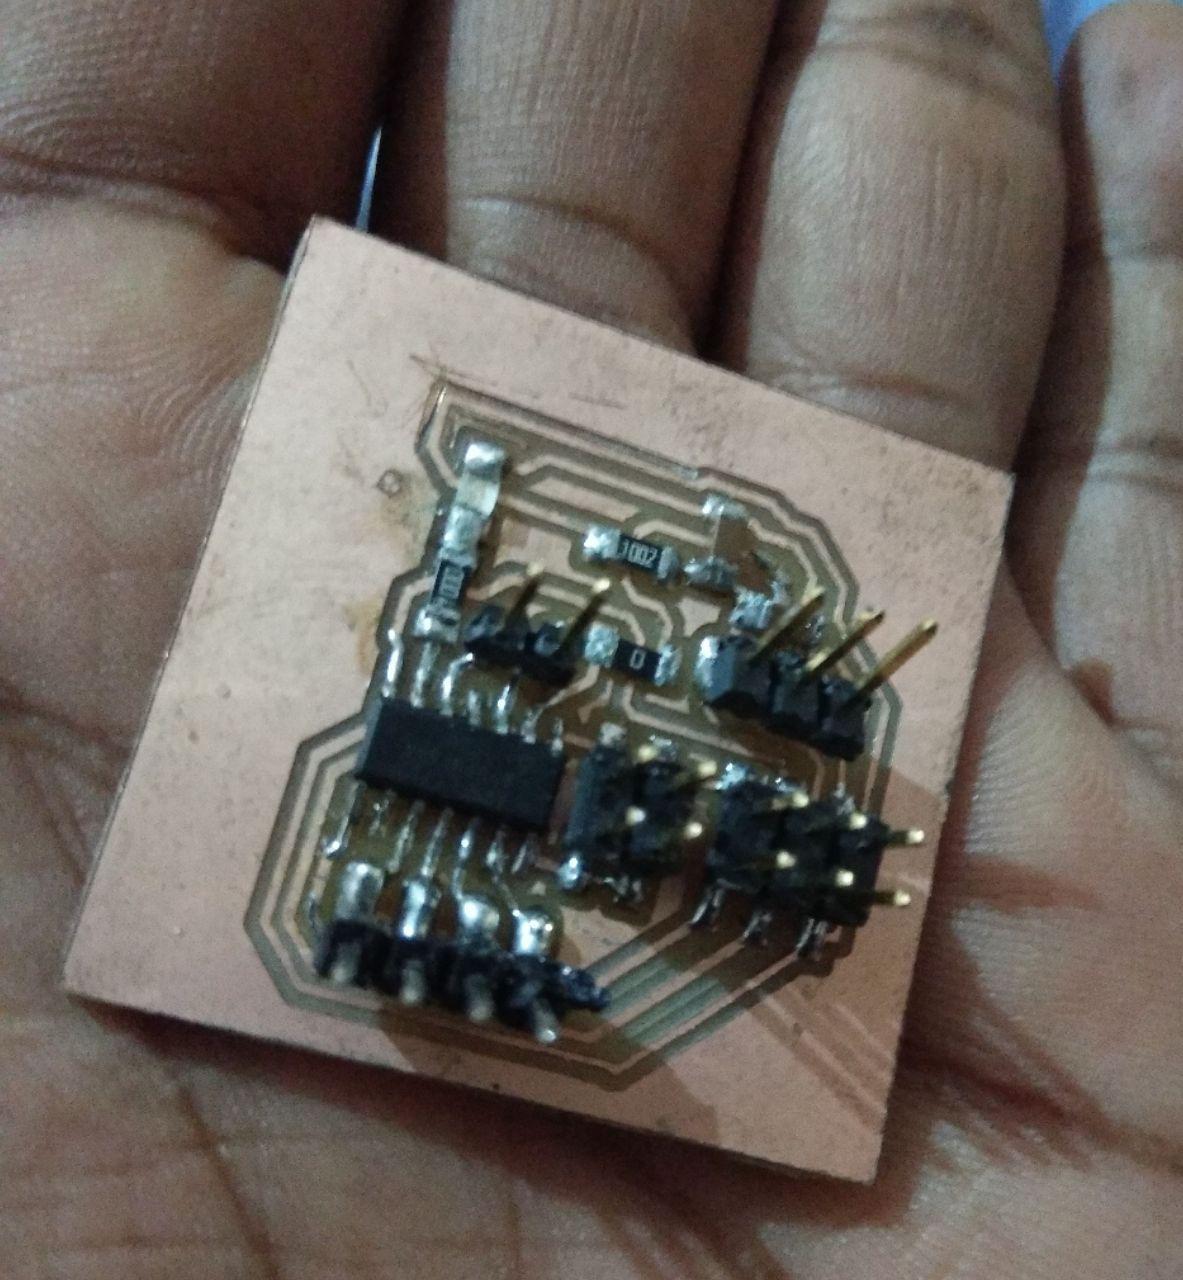
The finished board
I have tested the board by using it for the Networking week, and it was working good.
See below image to see the PINs I left to use in this project
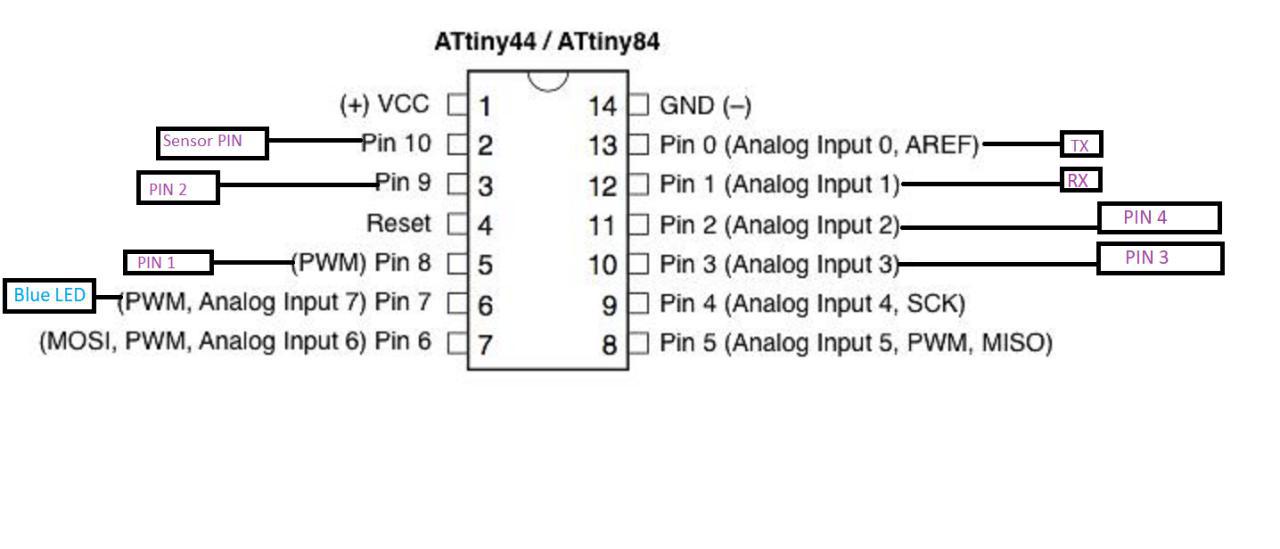
Changing the board
Later I changed to Atmega 328p board because when multiple conditions were used data was not transferring correctly in Attiny board.
I used the board from my Input Week for the project.
Go to Input Week to see the board details
Download Eagle Schematic

Download Eagle Board

Testing the motors
The Motors I am using are 9 Volt DC motor.

I decided to use motor driver module to make sure that the motors could get the correct voltage necessary to drive
So I purchased a motor driver module equipped with L293D.
L293D is a dual motor driver integrated circuit (IC).
Microprocessors operate at low voltages and require a small amount of current to operate while the motors require a relatively higher voltage and current.
This current cannot be supplied to the motors from the microprocessor. This is the primary need for the motor driver IC.
L239D motor driver is a small Current Amplifier IC whose function is to take a low-current control signal and then turn it into a higher-current signal that can drive a motor
data sheet for L293D
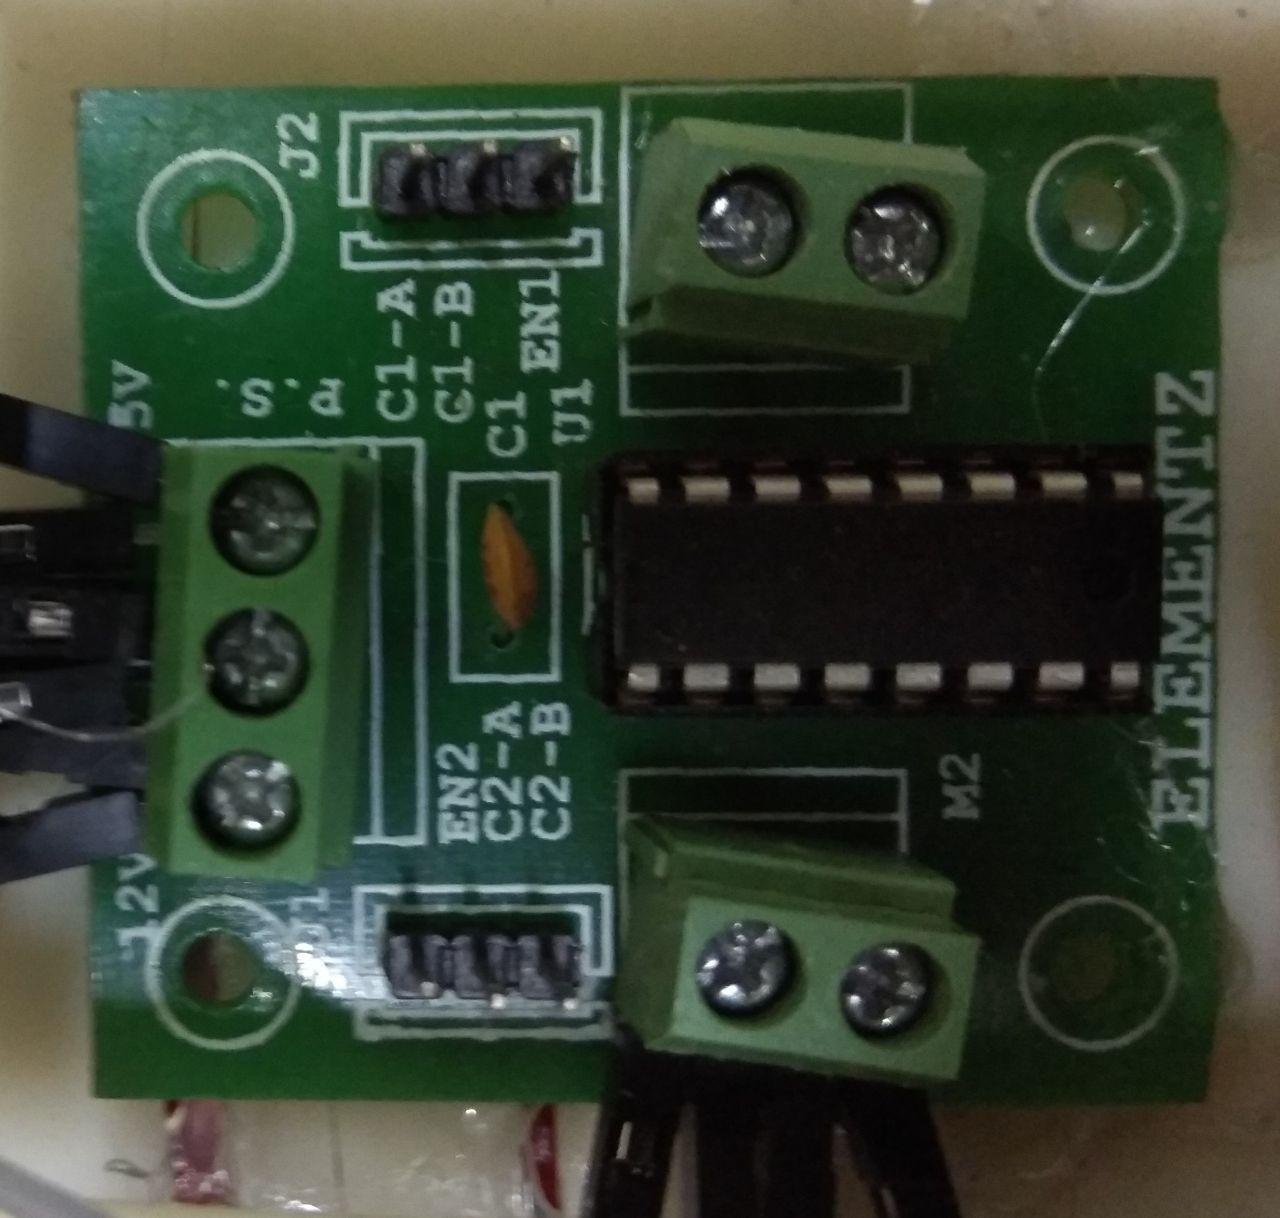
I gave the PD3 and PD4 pins of Atmega to C1-A and C1-B pins of Motor Driver,
and the PD5 and PD6 pins of Atmega C2-A and C2-B pins of Motor Driver.
Enable pins werent used , as it was working without it.
I bought a 9V battery and tried giving voltage to the 12V pin in motor driver for driving the motors, but those were not working. This was because the motor needed 1 to 1.5 ampheres to work
So 12 V and 5V voltage was given through SMPC( Switched mode Power Supply) through wires to the respective Vcc pins and Ground pin was also connected.
Bluetooth module HC-05
I bought a Bluetooth module HC-05 from online.
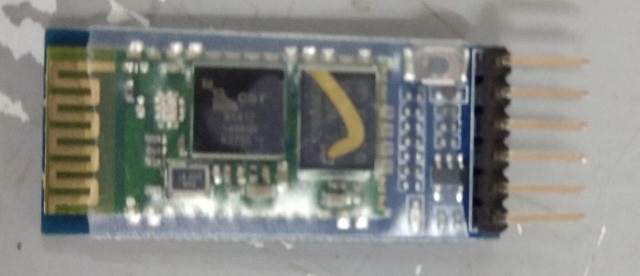
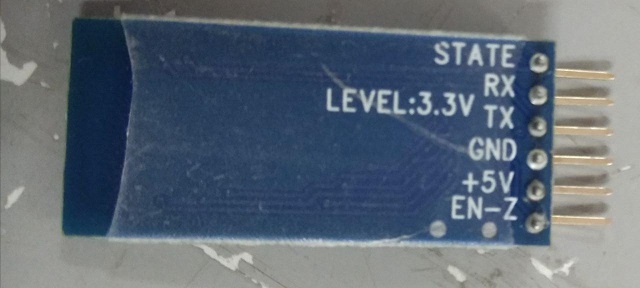
Data sheet of HC-05 Bluetooth Module
HC-05 Technical Specifications
- Serial Bluetooth module for Arduino and other microcontrollers
- Operating Voltage: 4V to 6V (Typically +5V)
- Operating Current: 30mA
- Range: <100m
- Works with Serial communication (USART) and TTL compatible
- Follows IEEE 802.15.1 standardized protocol
- Uses Frequency-Hopping Spread spectrum (FHSS)
- Can operate in Master, Slave or Master/Slave mode
- Can be easily interfaced with Laptop or Mobile phones with Bluetooth
- Supported baud rate: 9600,19200,38400,57600,115200,230400,460800.
Enable / Key - This pin is used to toggle between Data Mode (set low) and AT command mode (set high). By default it is in Data mode
Vcc - Powers the module. Connect to +5V Supply voltage
Ground - Ground pin of module
TX -Transmitter -Transmits Serial Data. Everything received via Bluetooth will be given out by this pin as serial data.
RX - Receiver - Receive Serial Data. Every serial data given to this pin will be broadcasted via Bluetooth
State - The state pin is connected to on board LED, it can be used as a feedback to check if Bluetooth is working properly.
LED - Indicates the status of Module
Programming the board
I first tried a Software Serial program as I was using the ATtiny 44 board,( later I changed to Atmega 328p because when multiple conditions were used data was not transferring correctly in Attiny).
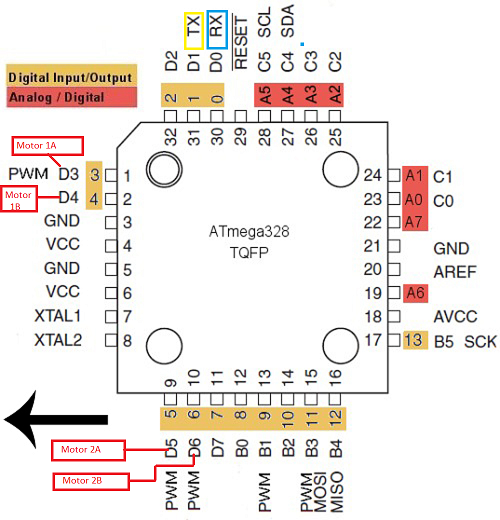
I used the board form my Input Week for the project.
Go to Input Week to see the board details In my Program, I have defined the Rx and TX pins for Serial Communication PD0 and PD1 pins of Atmega 328p
The Motor 1 pins are PD3 and PD4.
The Motor 2 pins are PD5 and PD6.
By testing with the arduino serial communication examples I found that the Serial transmission baudrates are 57600 and 9600.
I defined the Software Serial command as "bluetooth"
bluetooth.begins sets the data rate in bits per second (baud) for serial data transmission.
bluetooth.available is used for getting the number of bytes (characters) available for reading from the serial port.
bluetooth.read reads incoming serial data. I defined my bluetooth.read as character toSend for easy purpose.
bluetooth.write writes binary data to the serial port. I added bluetooth.write to every condition in the program to
verify the data transfer and later tested the program in Serial Monitor.


Download the first program Click Here
Here in the below program I have used Flag variables as I have seen those in many motor driven programs
Flag variables are used to indicate a single state. Like an LED that needs to be ON or OFF. And these Variables are used in situations were we have to get in and out of states as fast as possible.
Using Flag Variable is to give temporary states to pins when serial commands are given through Bluetooth.
I tested the serial communication with serial monitor
Simplifying the program
I found that atmega 328p is a powerful chip and it doesnt require software serial for serial communication.
So I removed the software serial commands and added the Serial. commands which are hardware serial.
Now the Serial communication was much more easy.
Also I removed the Flag statements and the OR conditions for different motor movements.
I made the conditions more simpler by just making five conditions as follows:
'0' for stop,
'1' for forward motion of both motors
'2' for reverse motion of both motors
'3' for forward motion of Motor 2 and reverse motion of Motor 1, ie; Car gets right movement.
'4' for reverse motion of Motor 1 and forward motion of Motor 2, ie; Car gets left movement.


Download the final program Click Here
Improvements
Adding the Ultrasonic sensor to the front of the Car
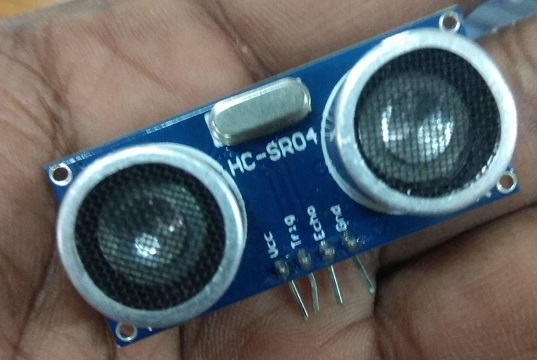
I added an extra if-else condition outside the Bluetooth conditions,
so that if any obstacles comes in front of the Car inside 10 cm the all Motor pins go to Low state and stops the movement and gives '5' as Serial.write.
I added the ultrasonic sensor trig and echo pins to pins PD2 and PD7 of Atmega 328p.


Download the program Click Here
Building the Android App
I used MIT app Inventor 2 for making the android app to interface with bluetooth sensor
Firstly, I added the basic blockfunctions for connecting the bluetooth device

Then I added the Forward , Reverse , Right, Left and Stop buttons and their block functions.

Then added the Bluetooth Connection Status block functions

After that added the Feedback message that would be recieved via bluetooth.ie; when some thing comes inside 10 cm the text 'Obstacle in Front' shows or else 'Going In' shows in the text box.


I have also added a Text box for feedback message, which normally shows 'Ready to Go' or else the feedback message shows.

Download the Android Application Click Here
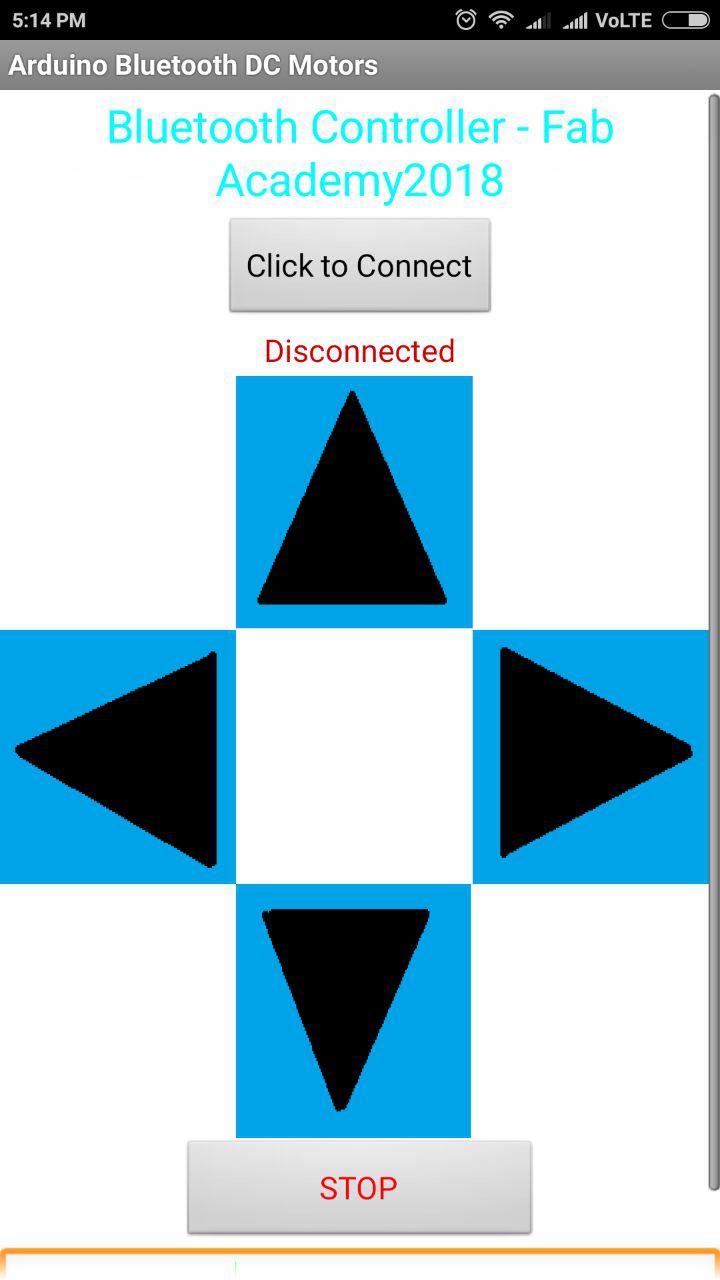
App opened in phone
Bill Of Materials
Total Purchase Cost including Fab Components is 29.93 USD

Final Project Presentation
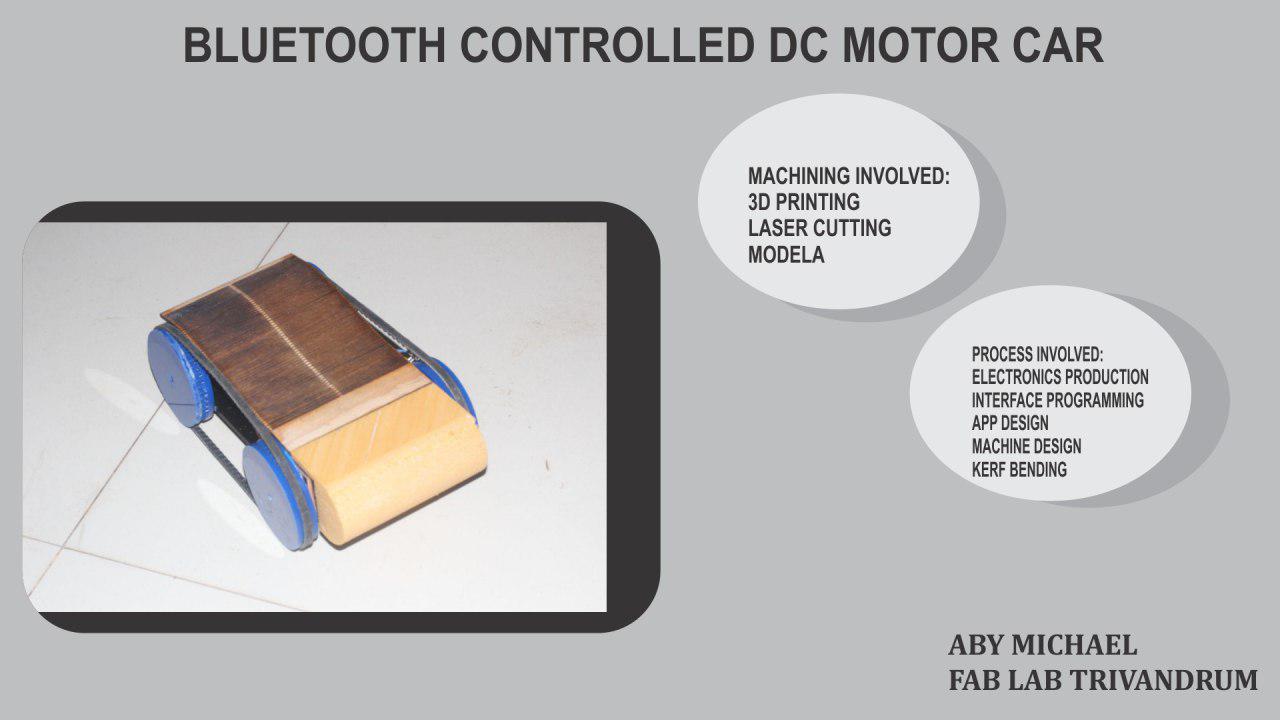
Slide 1

Slide 2 - Presentation image
This work by Aby Michael is licensed under a Creative Commons Attribution-NonCommercial-ShareAlike 4.0 International License.
