This week was the study of something very different and new to me .I am very exited to listen Neil's class because he points all the things very new to me and develope an application seems very interesting
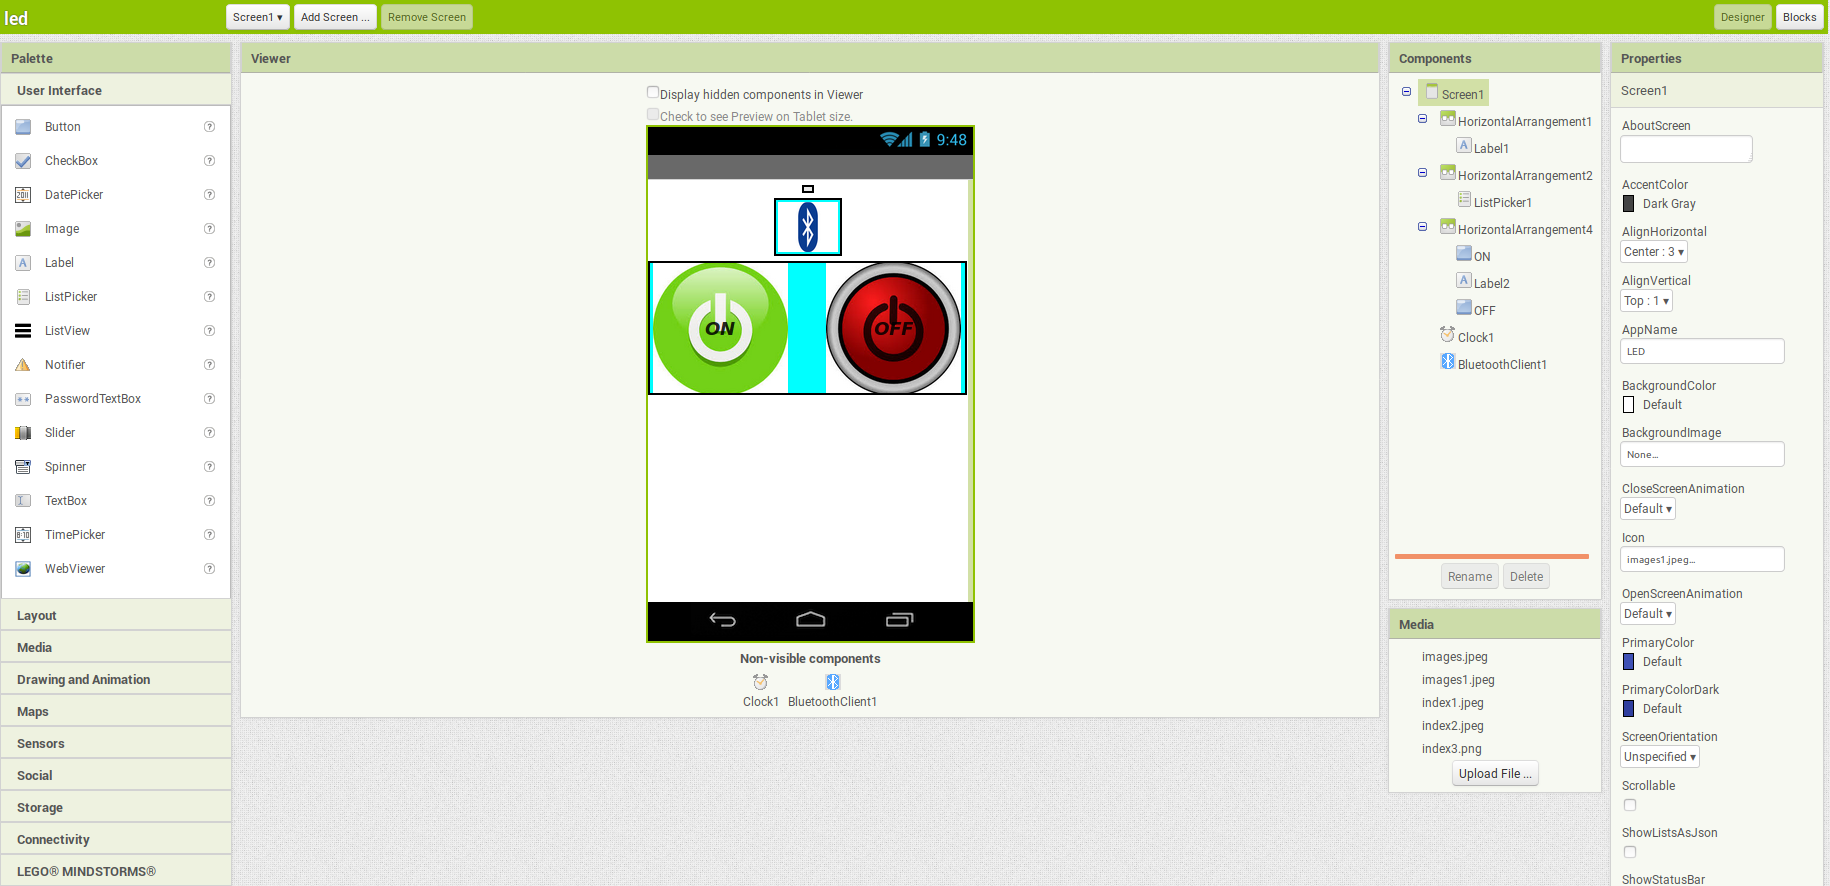
This week Assignment was to make a application or GUI programme that can communicate with microcontroller . Here I decided to go forward with the Board that I made In the input week ,Here I planed to make an App and controls using Bluetooth module HC-05 ,Here my Idea make into real using "MIT app inventor" through this I wrote my programme ,I dont have any Idea of using this so I seeks the help from youtbe videos
Group Assignment
App inventor is just a block-based programming tool to create Android applications. It is just a starting programming language for beginners
and not for advanced purpose. Python is typing programming language. It doesn't rely on blocks
for programming; Python is a much harder programming language than App Inventor.
Apps created using App Inventor can be downloaded to your Android phone or,
if you don't have an Android, you can download an emulator from the website, but Python does not require the use of either an emulator or a phone.
Python Tkinter Vs game
Tkinter is one of the best GUI toolkits for Python and mostly it is used for utility
applications. But pygame is used to create games and are not comparable.
It all depends on the application you want to write. The choice of the right
tool is usually something significant
1.MIT App Inventor
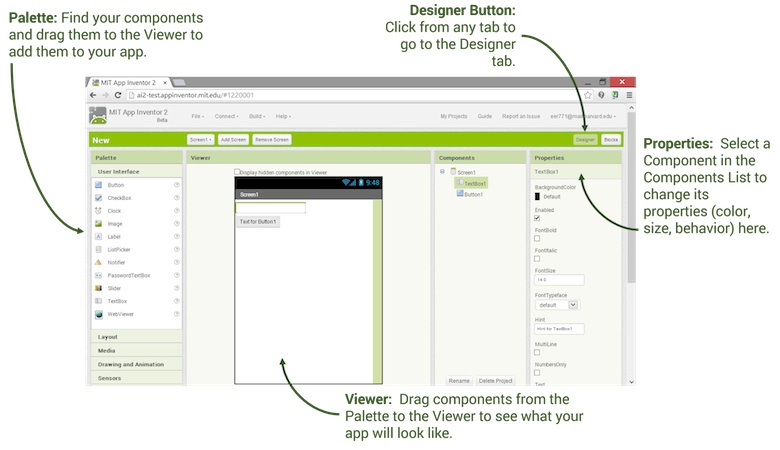
MIT app inventor is a open source platform to creat mobile application and it can be use via online .It seems very simple to creat an simple application to a beginner also in first we want to select a new project and name that then we can make our application easly .
In this Two sections are there "DESIGNING sectionn and BLOCK section " at first we want make a desinging section,Here we can add the components that we want to make our App after adding at the left side there was the properties section here we can change properties ,colours ,text,can add image ..
I followed these tools for making my App and also add images for studying then changed the properties looks very easy to make the outlook of a aplication ,Here I dragged the components to the viewer and finally I made my viewer that what my app look like
In "BLOCK section "Programme the app's behavior by putting blocks together. Here there is a large viewer we can drag the blockes to it after that there is a "Built-in-Drawers" you can find blocks with general behaviors that you want to add your app
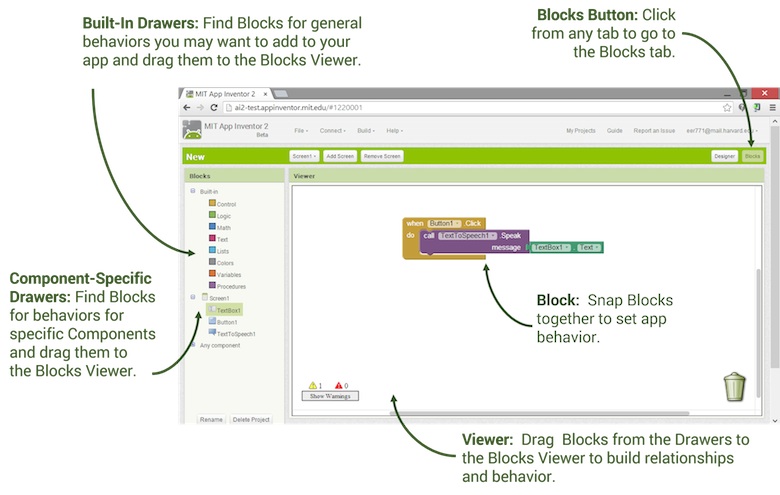
Here I find the blockes for specific components and drag to the block viewer here each blocks consist of a function followed by Bluetooth section and also we can add any extra text ,colour ,clock section using Built-in Drawers

After fining the block section and desinging section also you can install this to any android device the this .apk file here you can download my file also
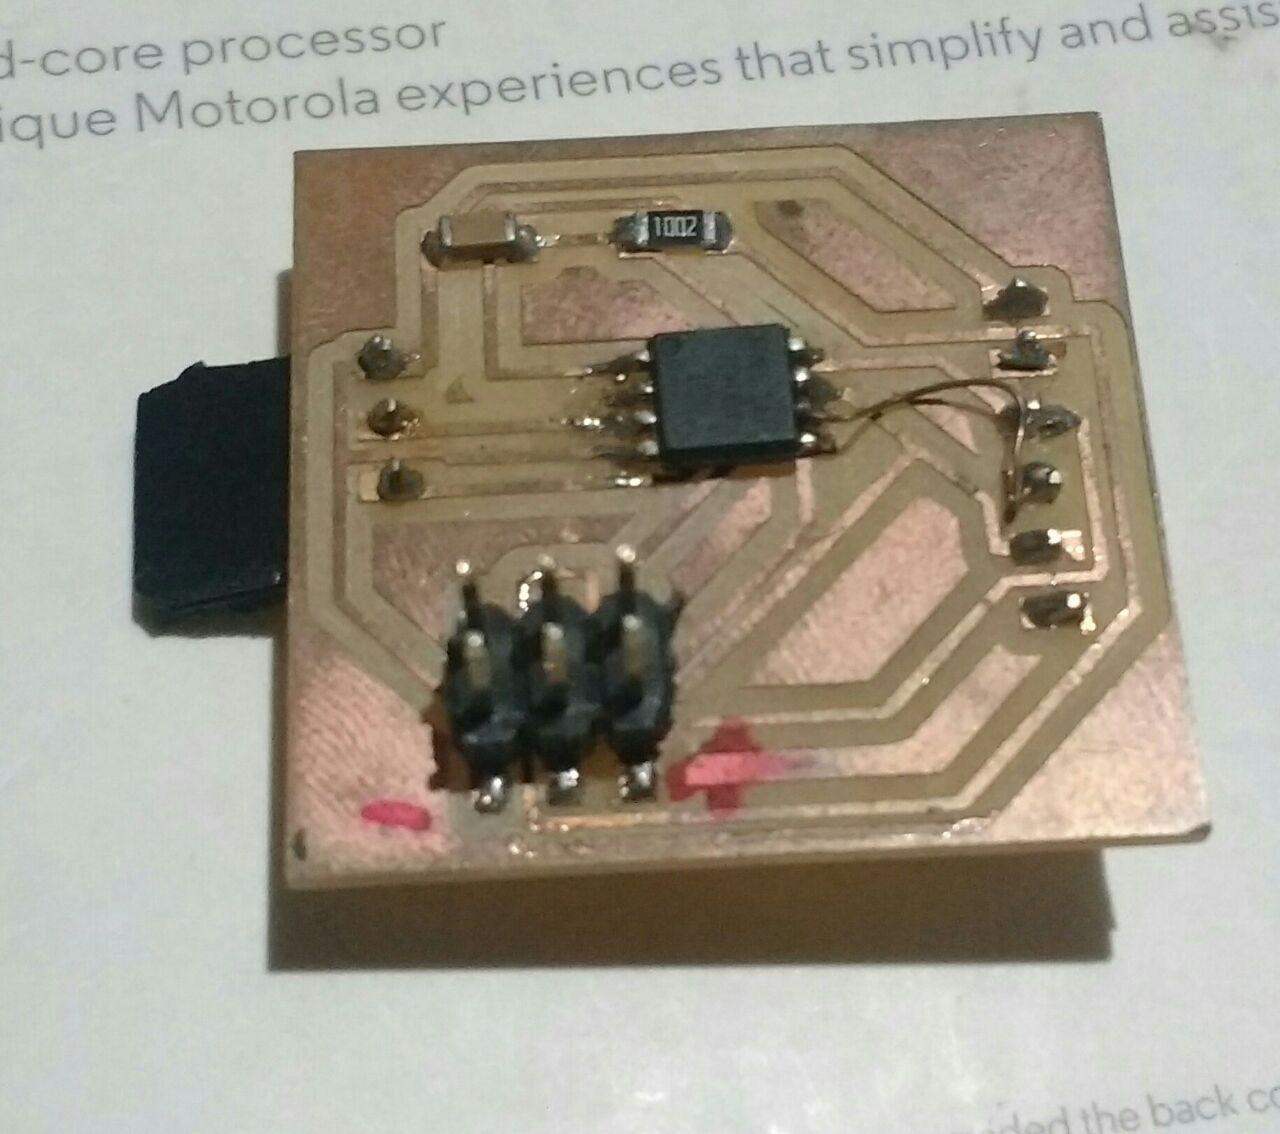
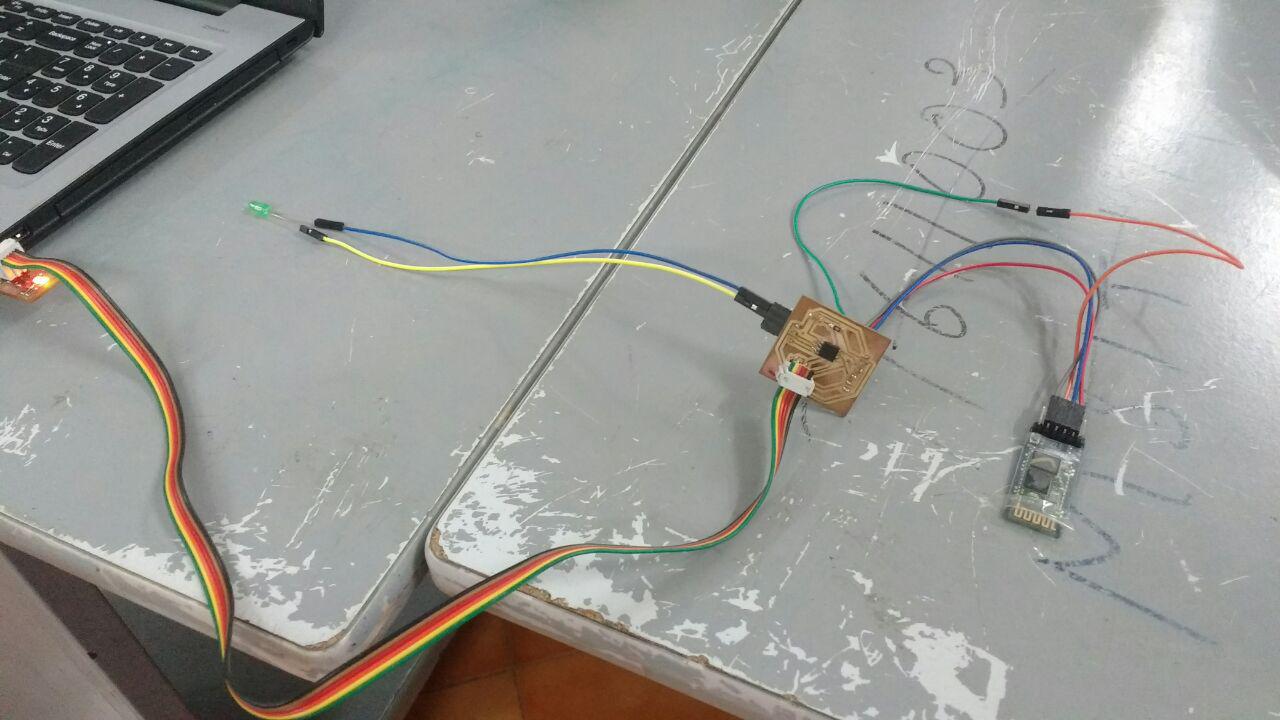
My Board
I used the board that I made in the Input week for this week ,This board is With ATtiny 45 and In Input week I conencted the PIR sensor by taking pin outs so here I can connect led to show the Interface in this week
Here I used ATtiny45
FTDI pin
2*3 Header pin
10k ohm Resistor
1mF capacitor
Additionally add 3 slots for adding sensor module to board ,here the 3 slots are connected to vcc,GND,and out from the sensor "insted of PIR here I can connect the LED with GND
 input board
2.Arduino programme For App
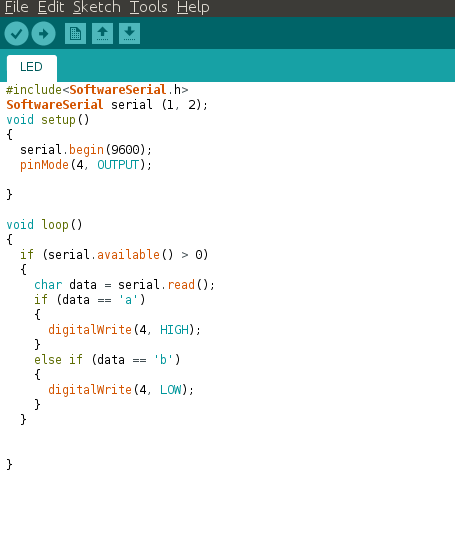
Here I go forward with Arduino for the programming of the board for working with the application ,Here we want write a serial communication with the app and the Bluetooth. I already mentiond that about the using Board was that I maked in the "Input week" in that I use the microcontroller ATtiny44 with that I wrote my programme in arduino here you can download my programme
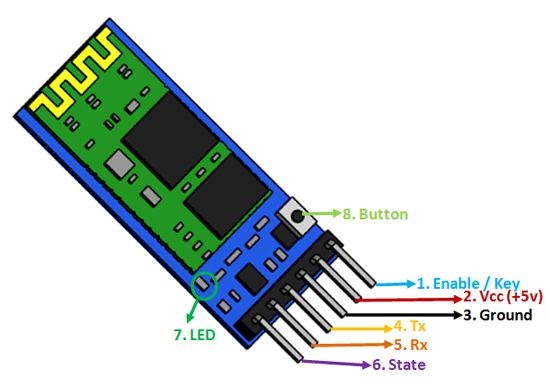
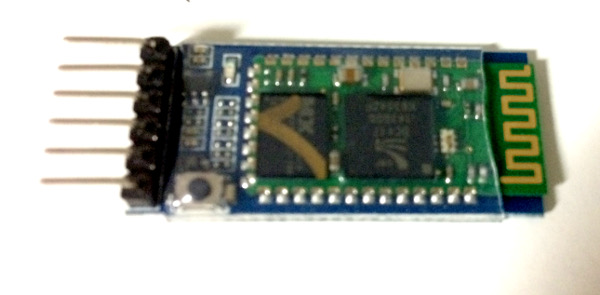
3.Bluetooth module HC-05
In our lab we have Bluetooth module HC-05 ,This device that we are using to communicate between the app and the board you can download the data sheet from here .
.Serial Bluetooth module for Arduino and other microcontrollers
.Operating Voltage: 4V to 6V (Typically +5V)
.Operating Current: 30mA
.Range: <100m
.Works with Serial communication (USART) and TTL compatible
.Follows IEEE 802.15.1 standardized protocol
.Uses Frequency-Hopping Spread spectrum (FHSS)
.Can operate in Master, Slave or Master/Slave mode
.Can be easily interfaced with Laptop or Mobile phones with Bluetooth
4.Installing Application to the Android Device
Here I installed the App to my phone by saving the project in the app inventor as .apk file to my pc ,then I sent that into my phone the open it with app installer then Opened it with that ,throught that I got the install option via that I installed it into my phone ,It is very simple to install an app to our android device that we are experienced to use many years so it seems very easier
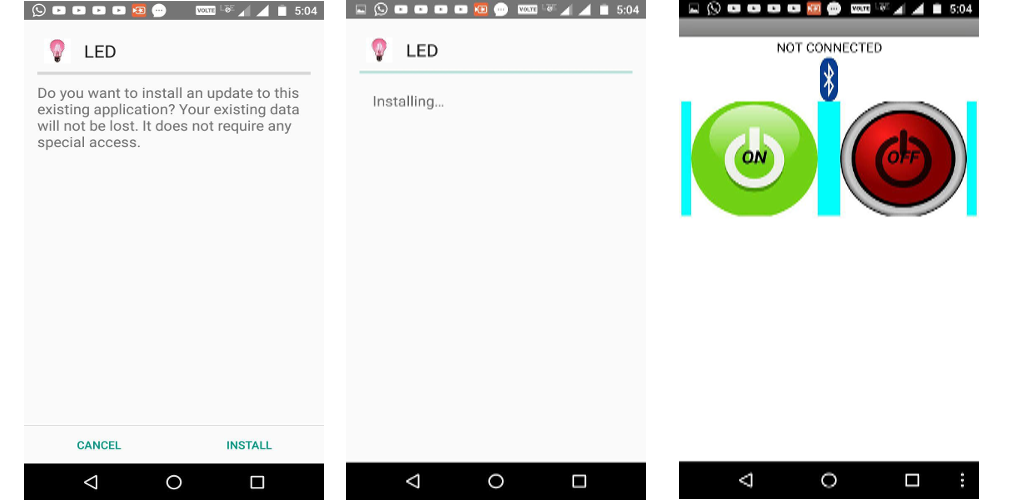 installing to my android phone
5.Connection & Working
Here I connencted the bluetooth module RX and Tx to the FTDI's pins also the GND and vcc then I gave the voltage via ISP cable ,I connected the the LED in the input pin of the sensor this was the connection ,I just checked the connection by Arduino serial display the connection was good then I go forward with that, Here below you can see the connection that I gave with my board and bluetooth module and also working video
Problem Faced and Fixed
Here I realy faced the problem of making the app I am vry new to this app inventory
but MIT app inventor Realy help me make the app easly ,I got somany Tutorials from youtube and all for make it perfect,
programming part and connecting parts I felt bit more experienced because a person like me studying completely different things
and making progress in it