3D printing/scanning
3D printing is one the most effective technique to prototype an idea. 3d printer uses different techniques such FDM,SLA and SLS. Currently at our lab we only have FDM printers and SLA printers. FDM (fused filament fabrication) thermoplastic filament, which is heated to its melting point and then extruded, layer by layer, to create a three dimensional object. However; SLA (stereolithography) method is an additive manufacturing process that works by focusing an ultraviolet (UV) laser on to a vat of photopolymer resin to solidify it and create a 3d object. The technologies that build 3D objects by adding layer-upon-layer of material is called Additive Manufacturing (AM). In additive manufacturing, a designer would have the freedom of design however some of the main limitations are the size of the product, cost and and the slow build rate.
Assignment
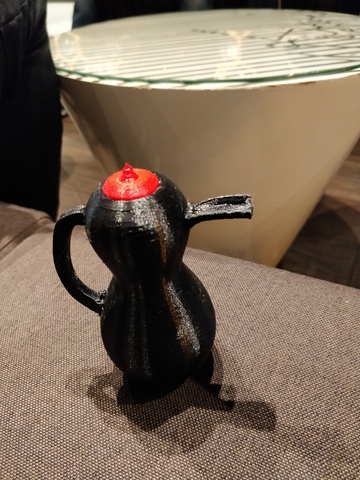
I extremely love coffee specially our famous Arabic coffee, thus for my assignment this week I ll design and print an Arabic coffee pot (Dallah).
Design
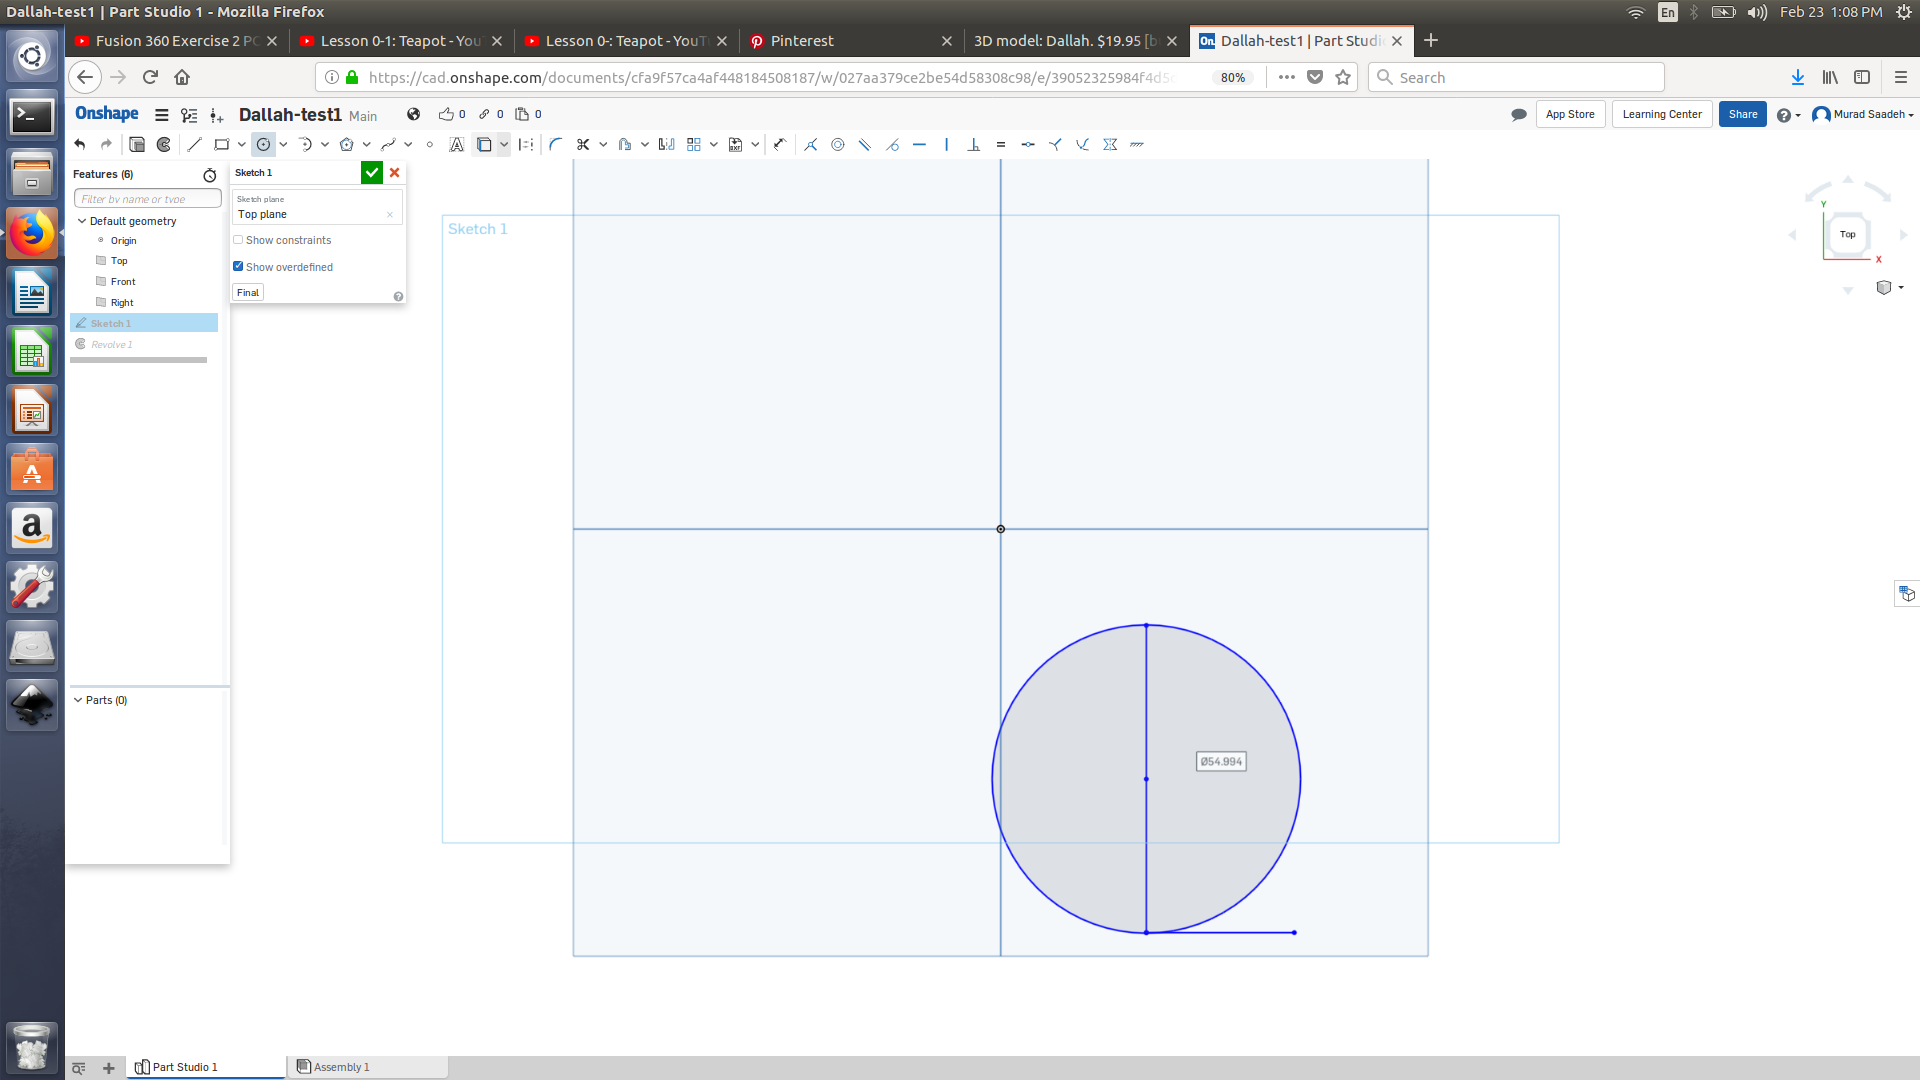
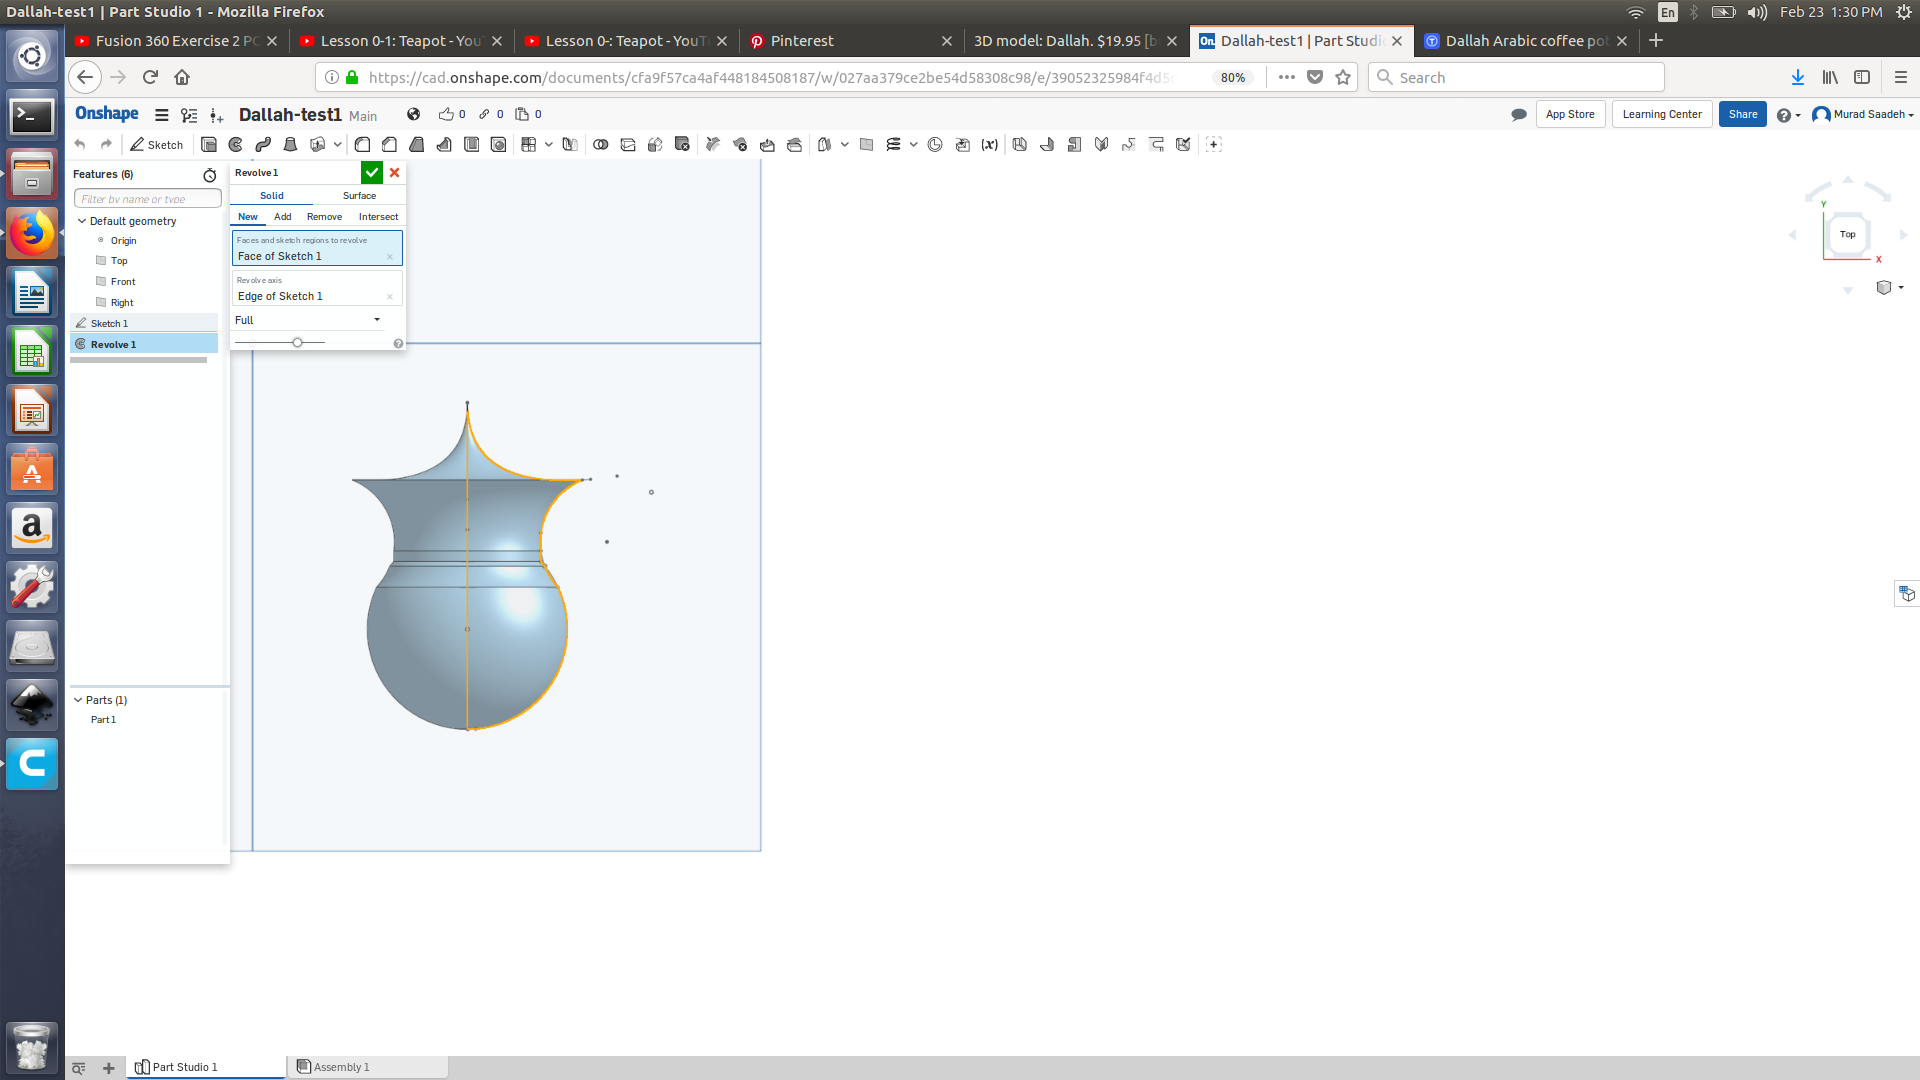
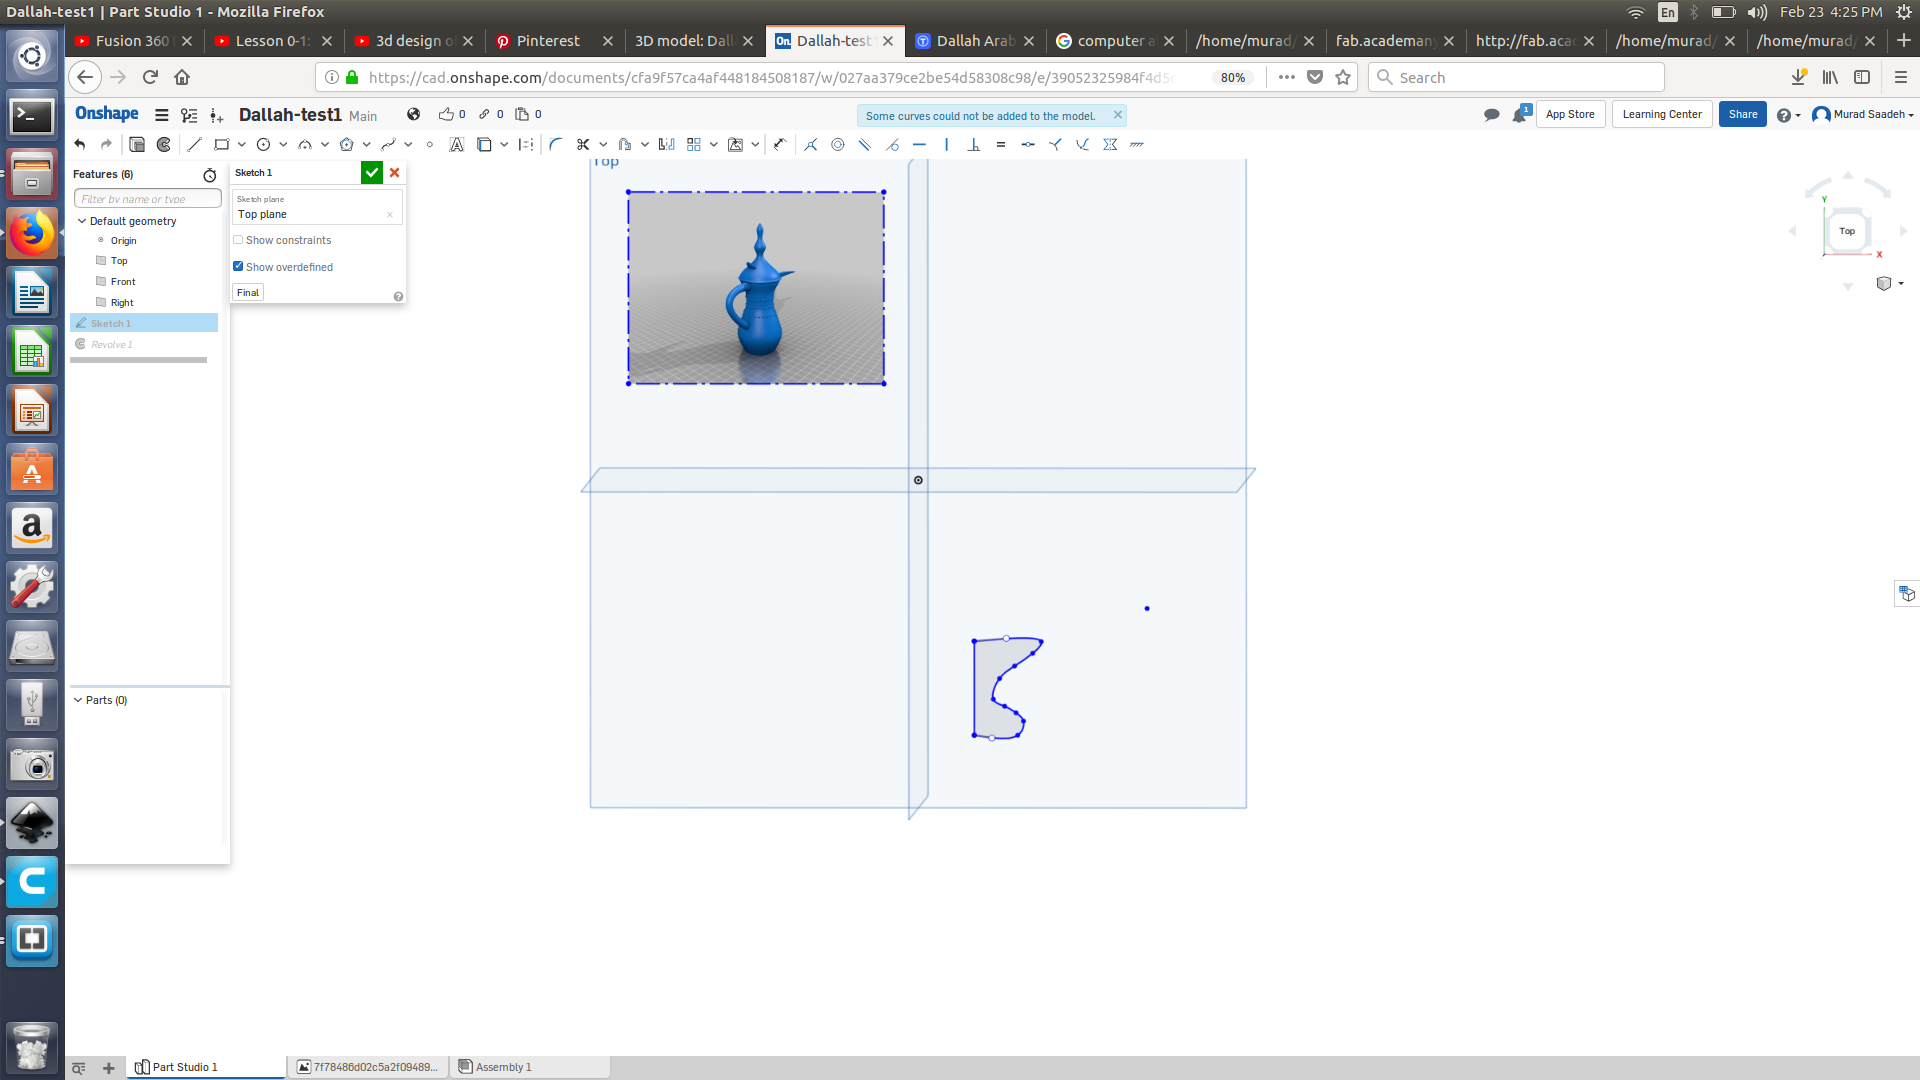
I ll try to make the design using on-shape, I began by just imagining the shape in my head in order to draw a 2d design and then revolve. This wasn’t as easy as I thought (Check the images below), and the final sketch was not even relevant.
I then decided to import the actual image to Inkscape and draw a 2d sketch and copy paste it to on-shape, but on-shape didn’t allow me to paste that.
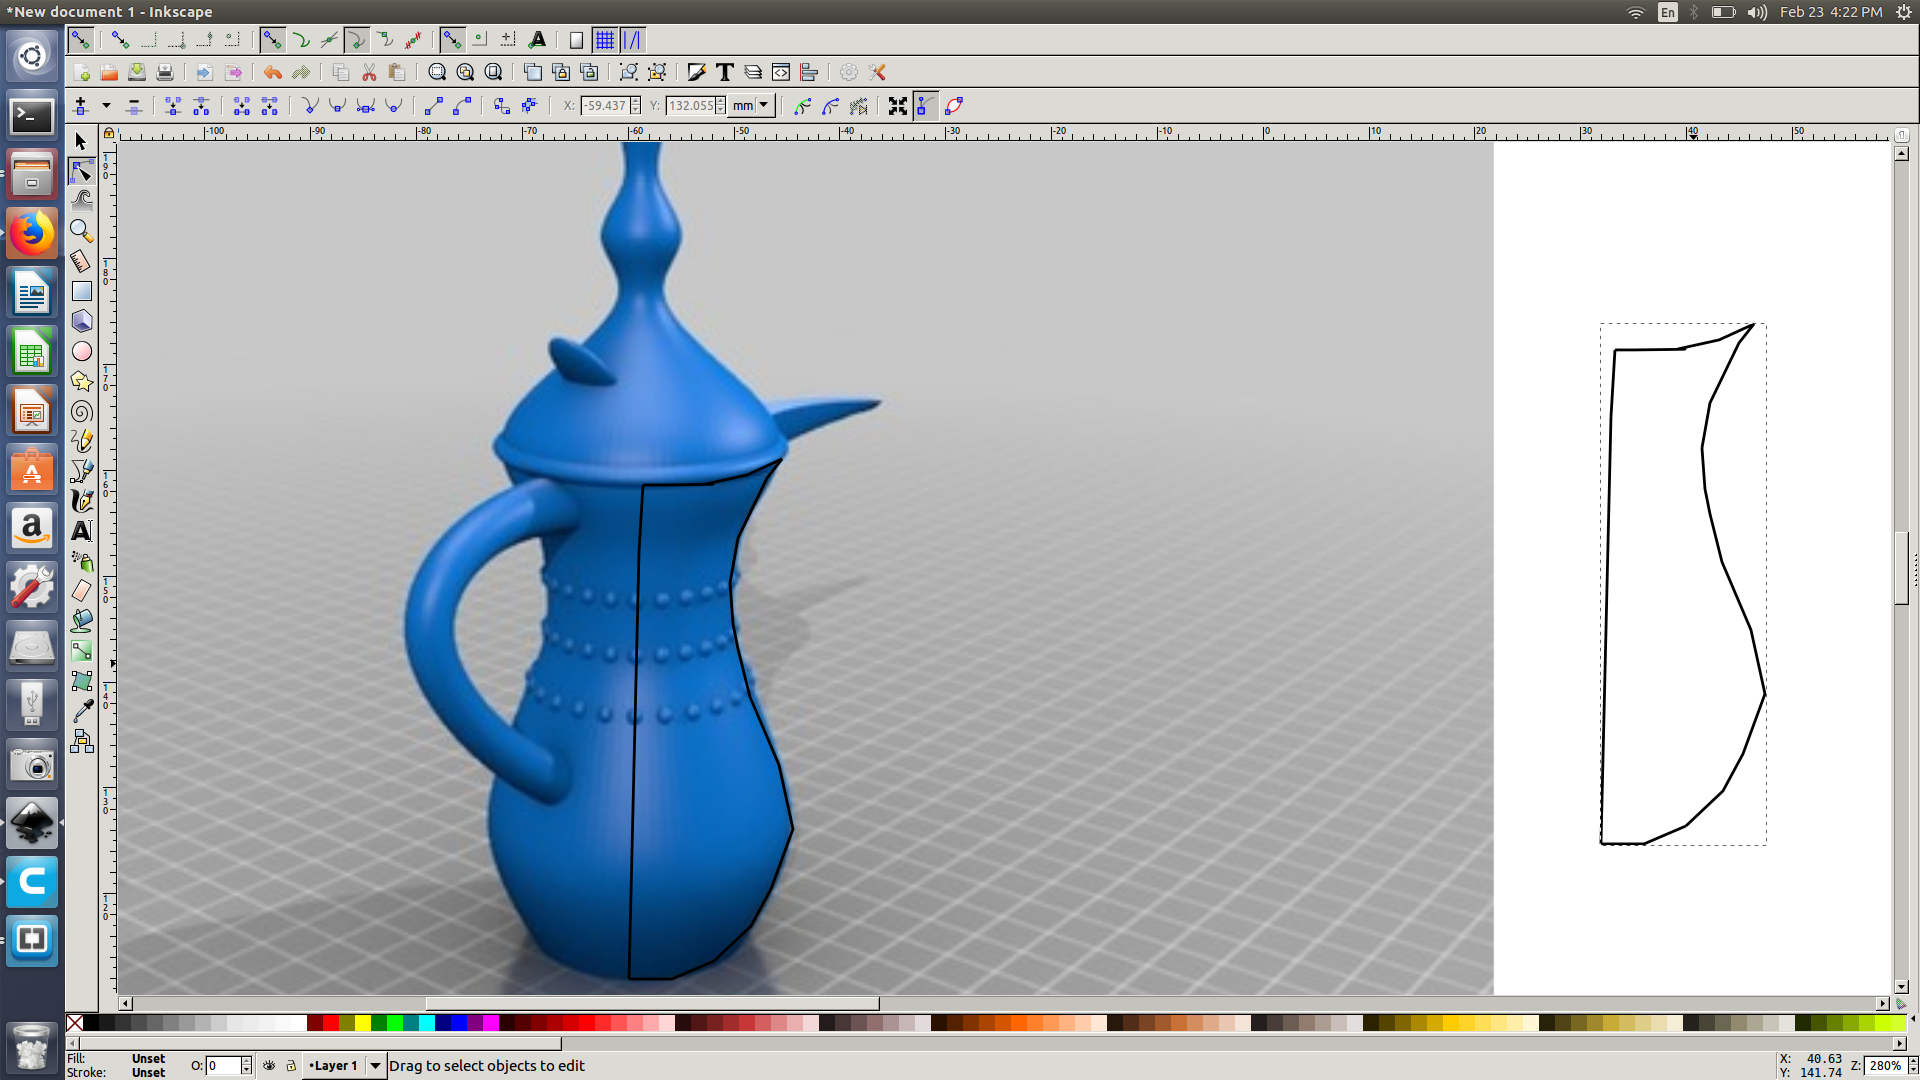
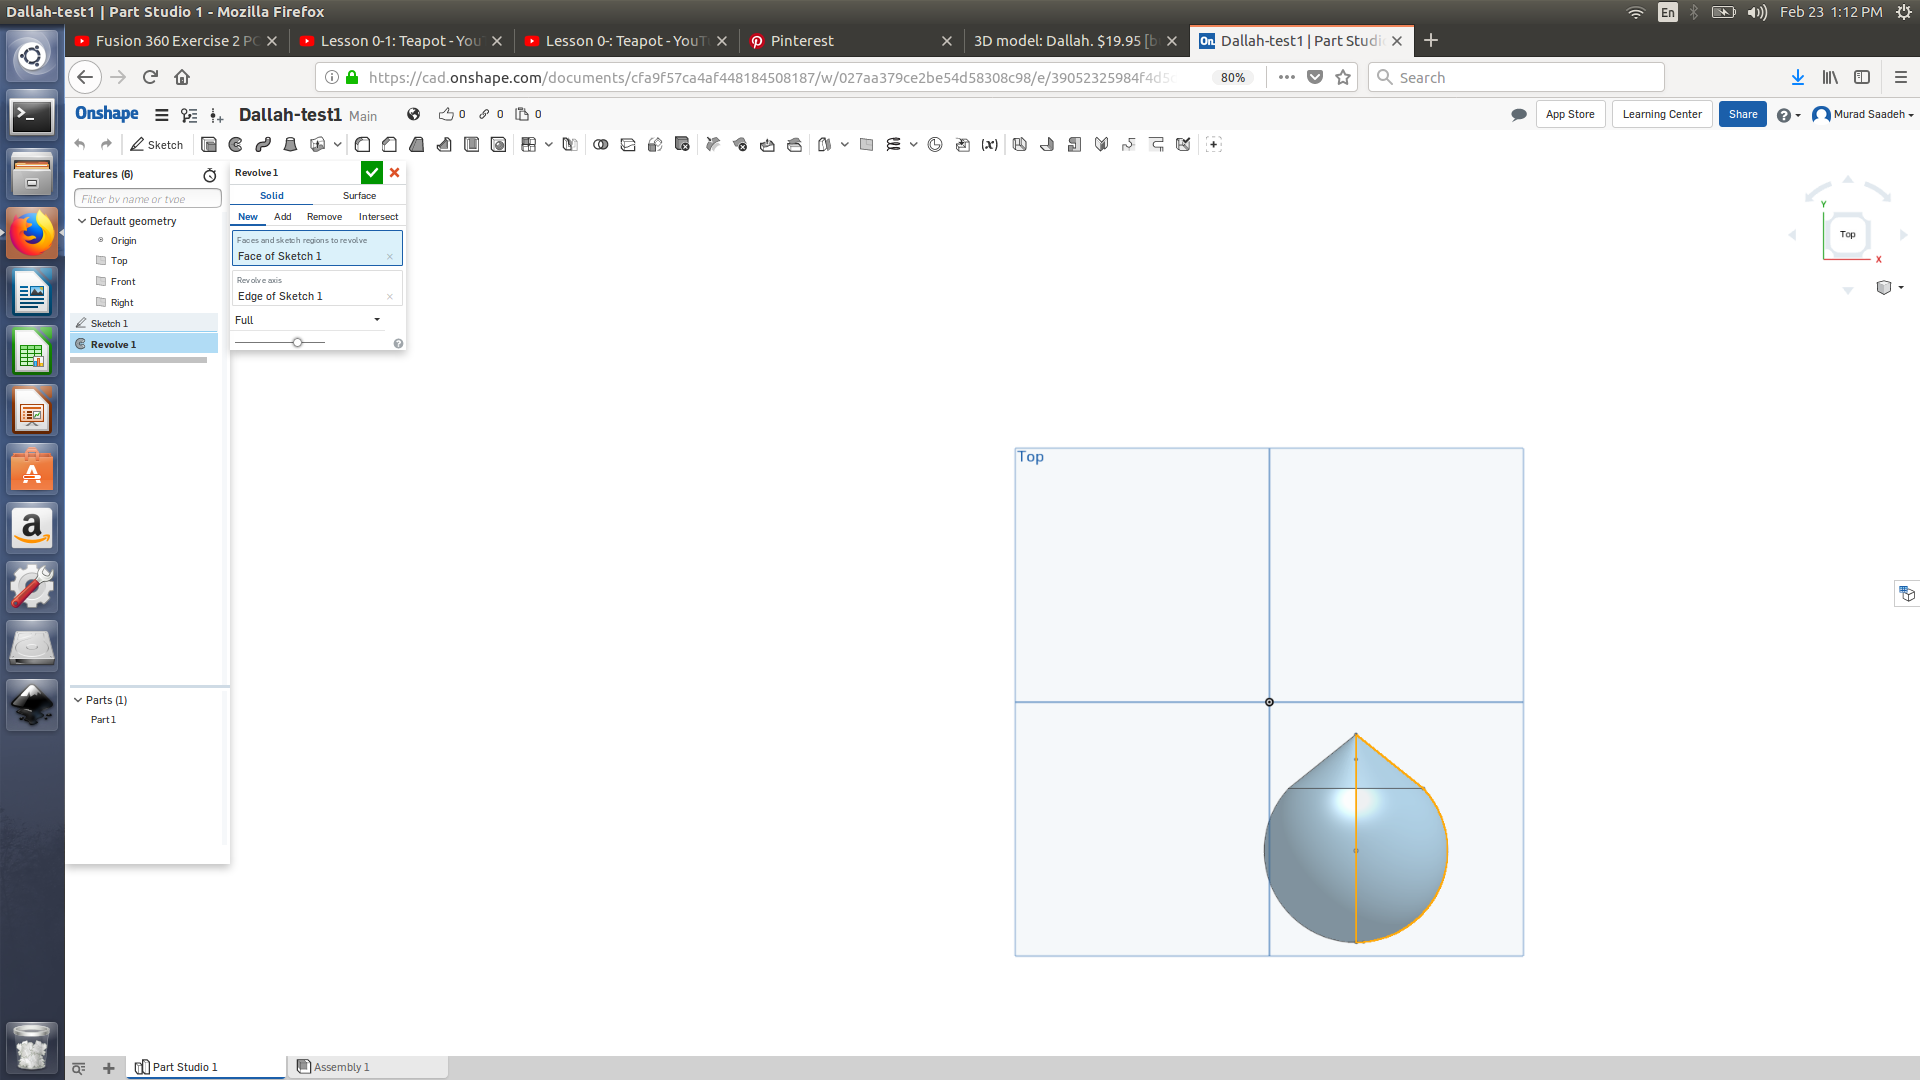
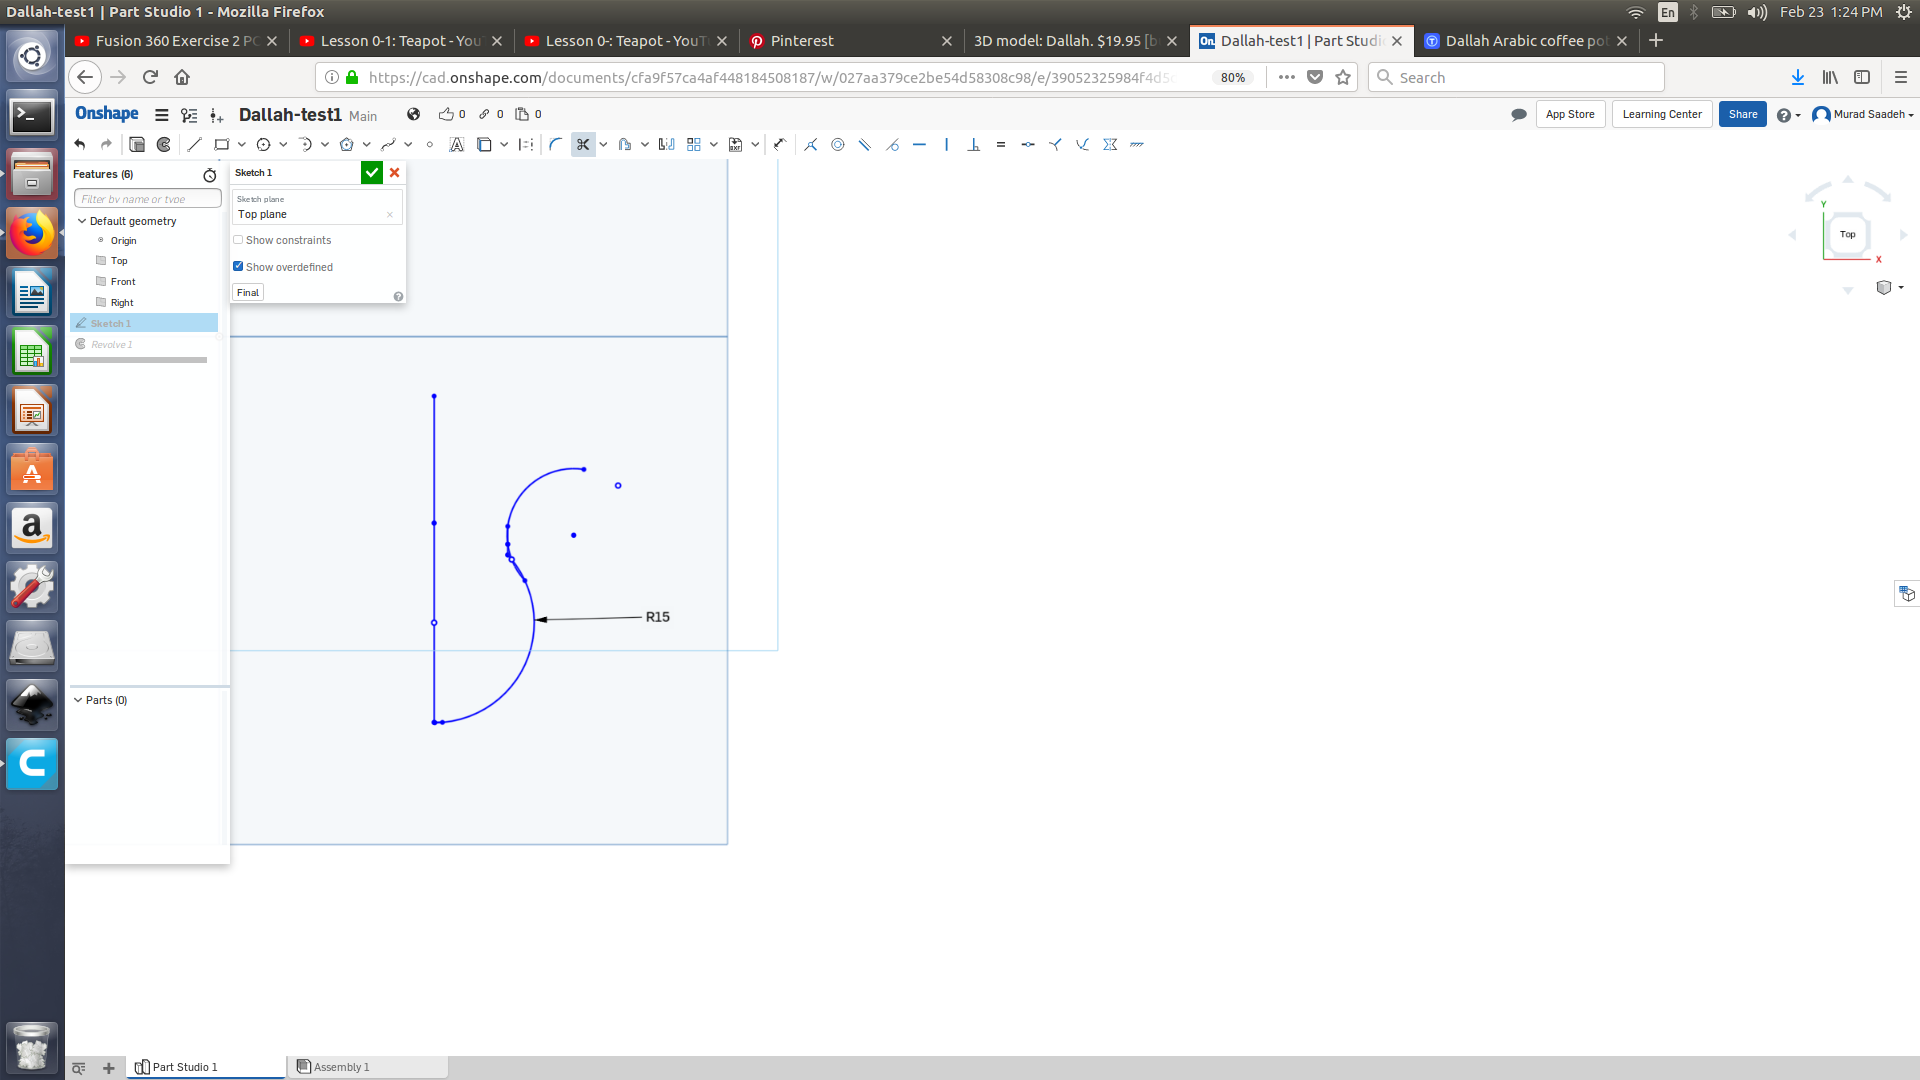
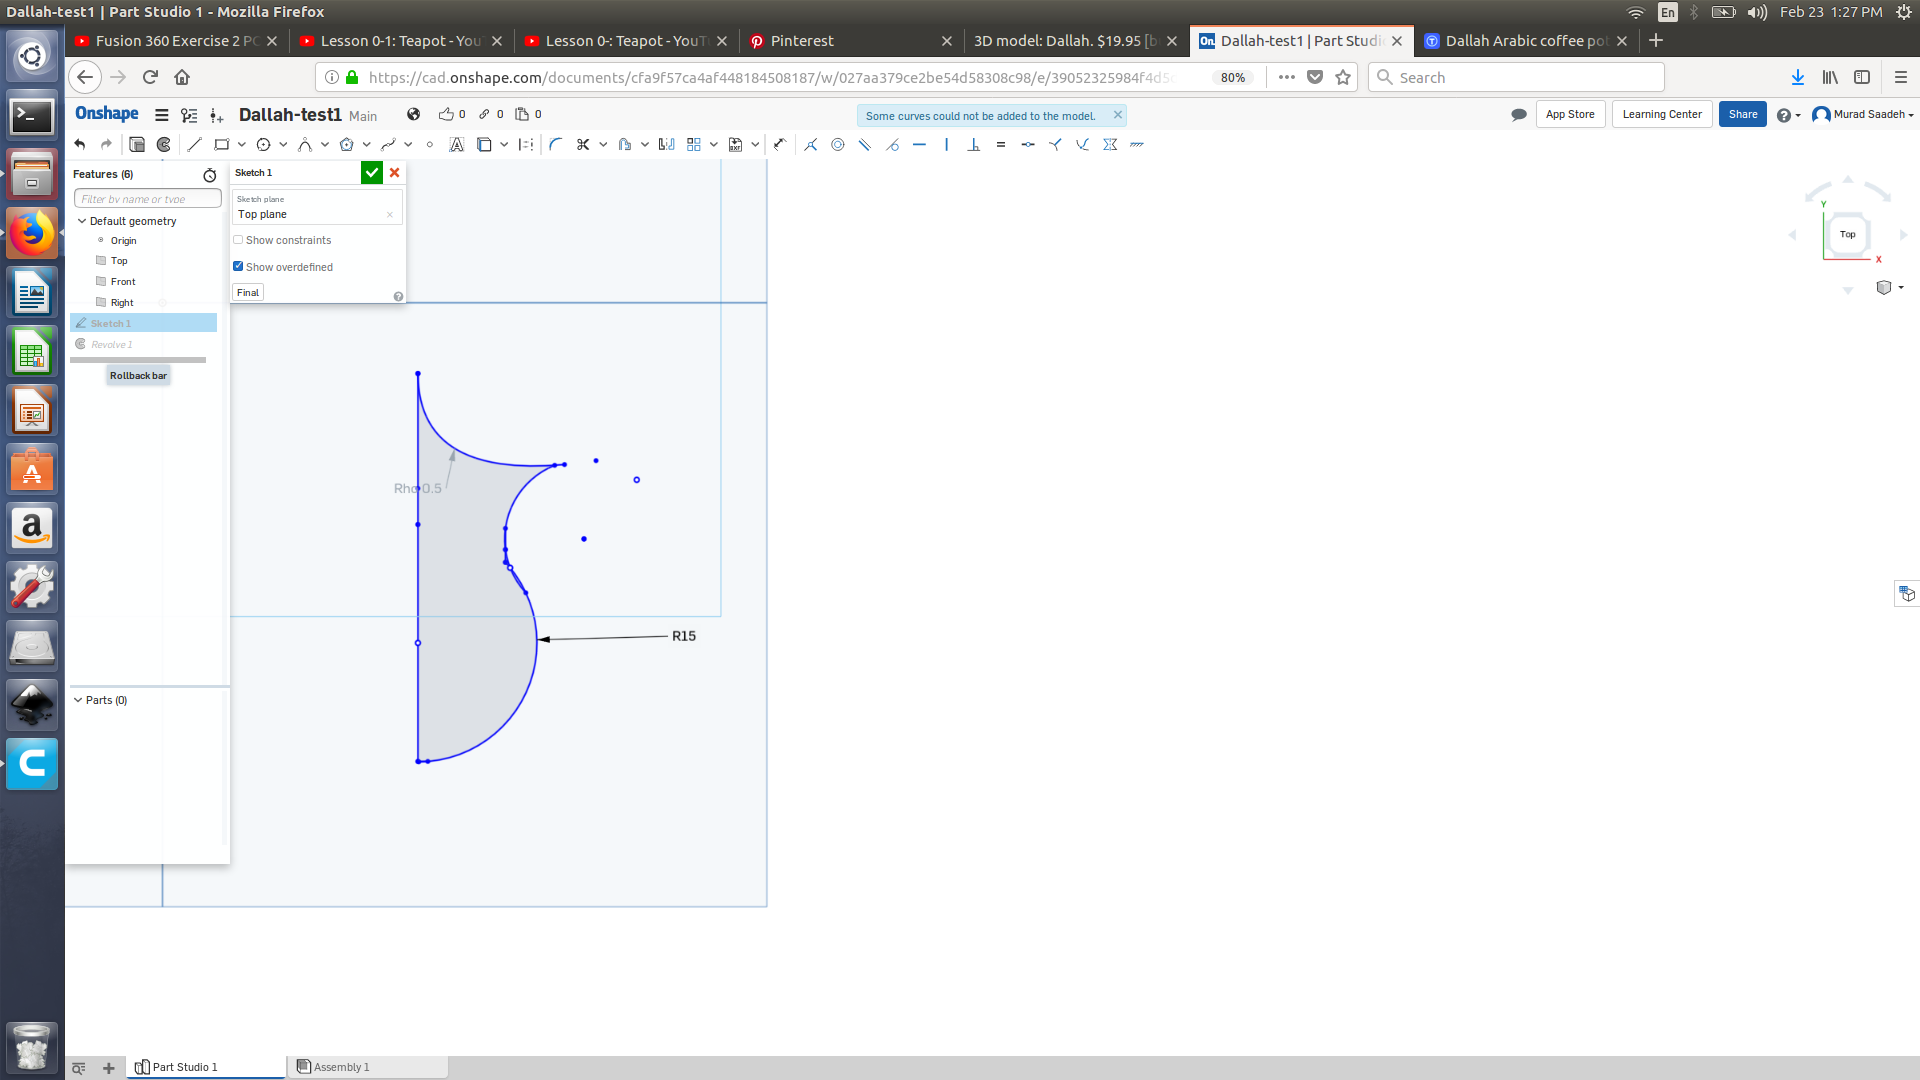
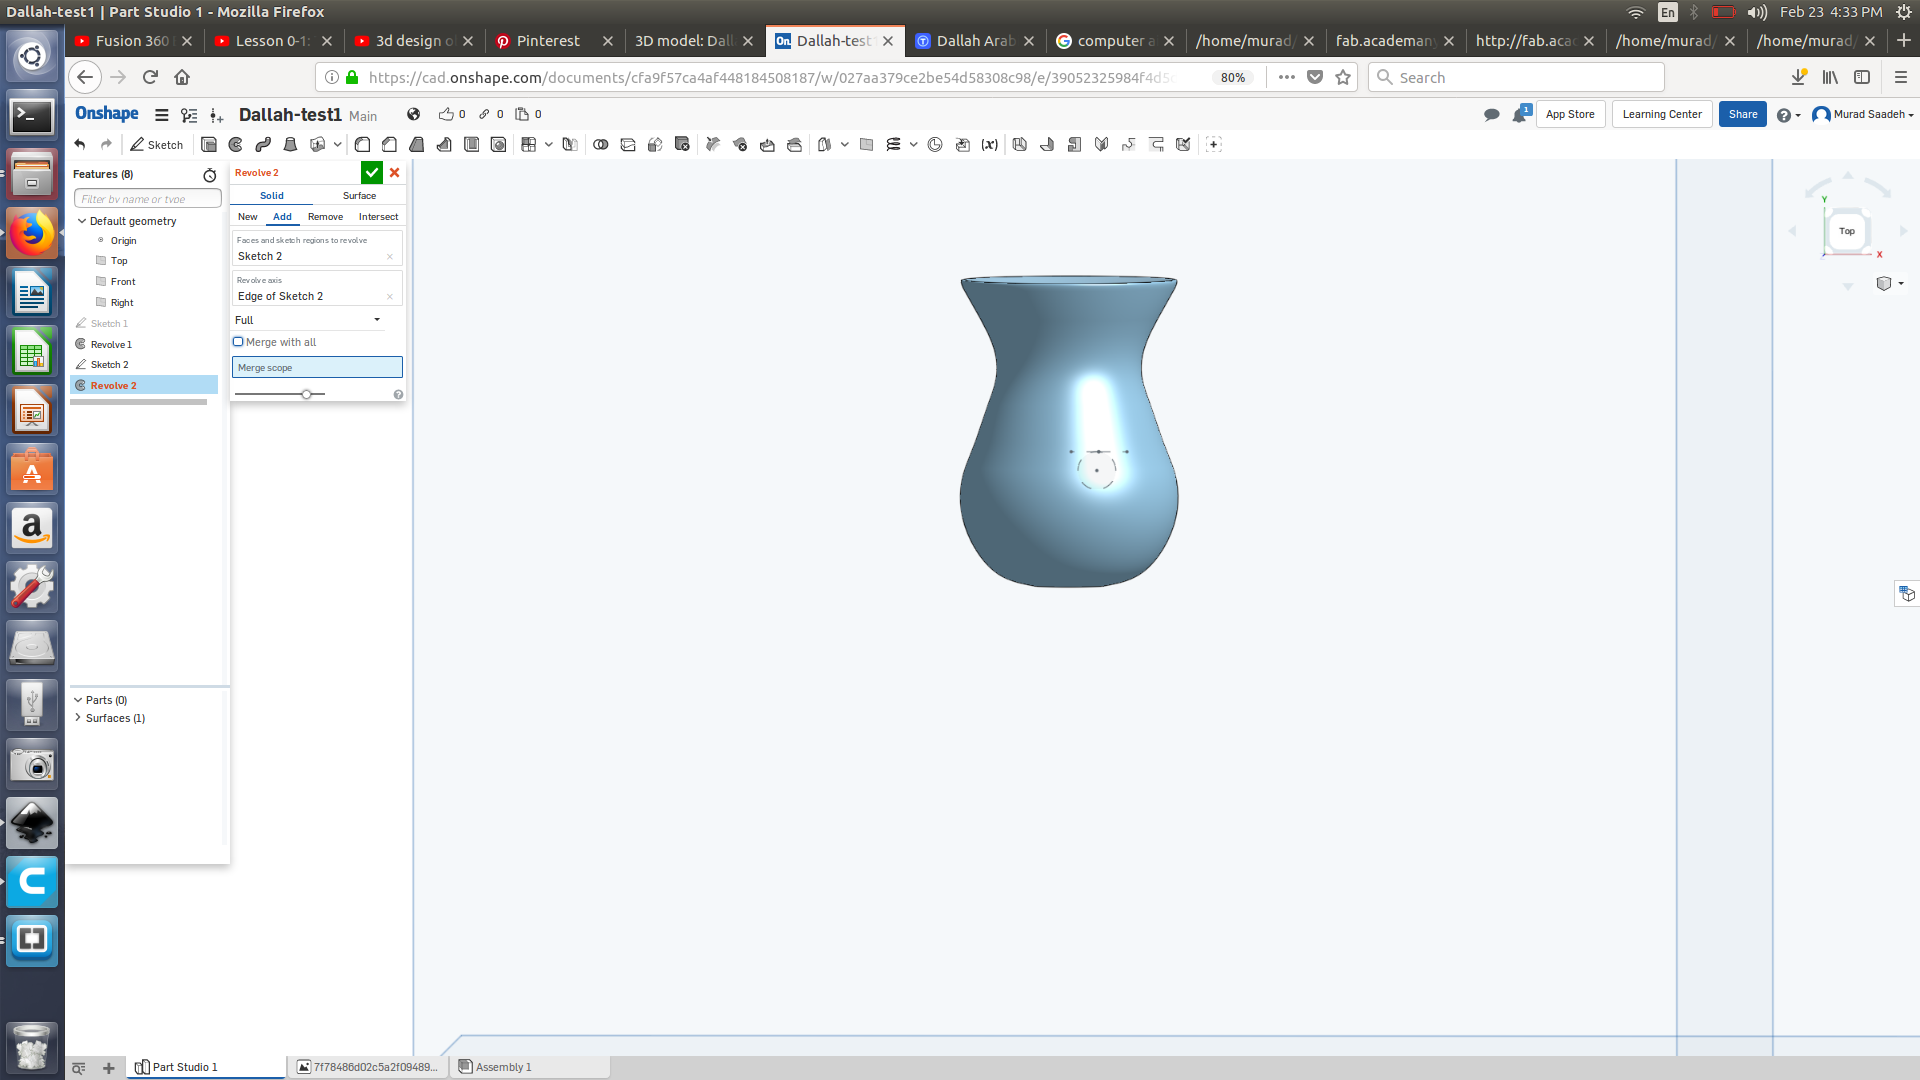
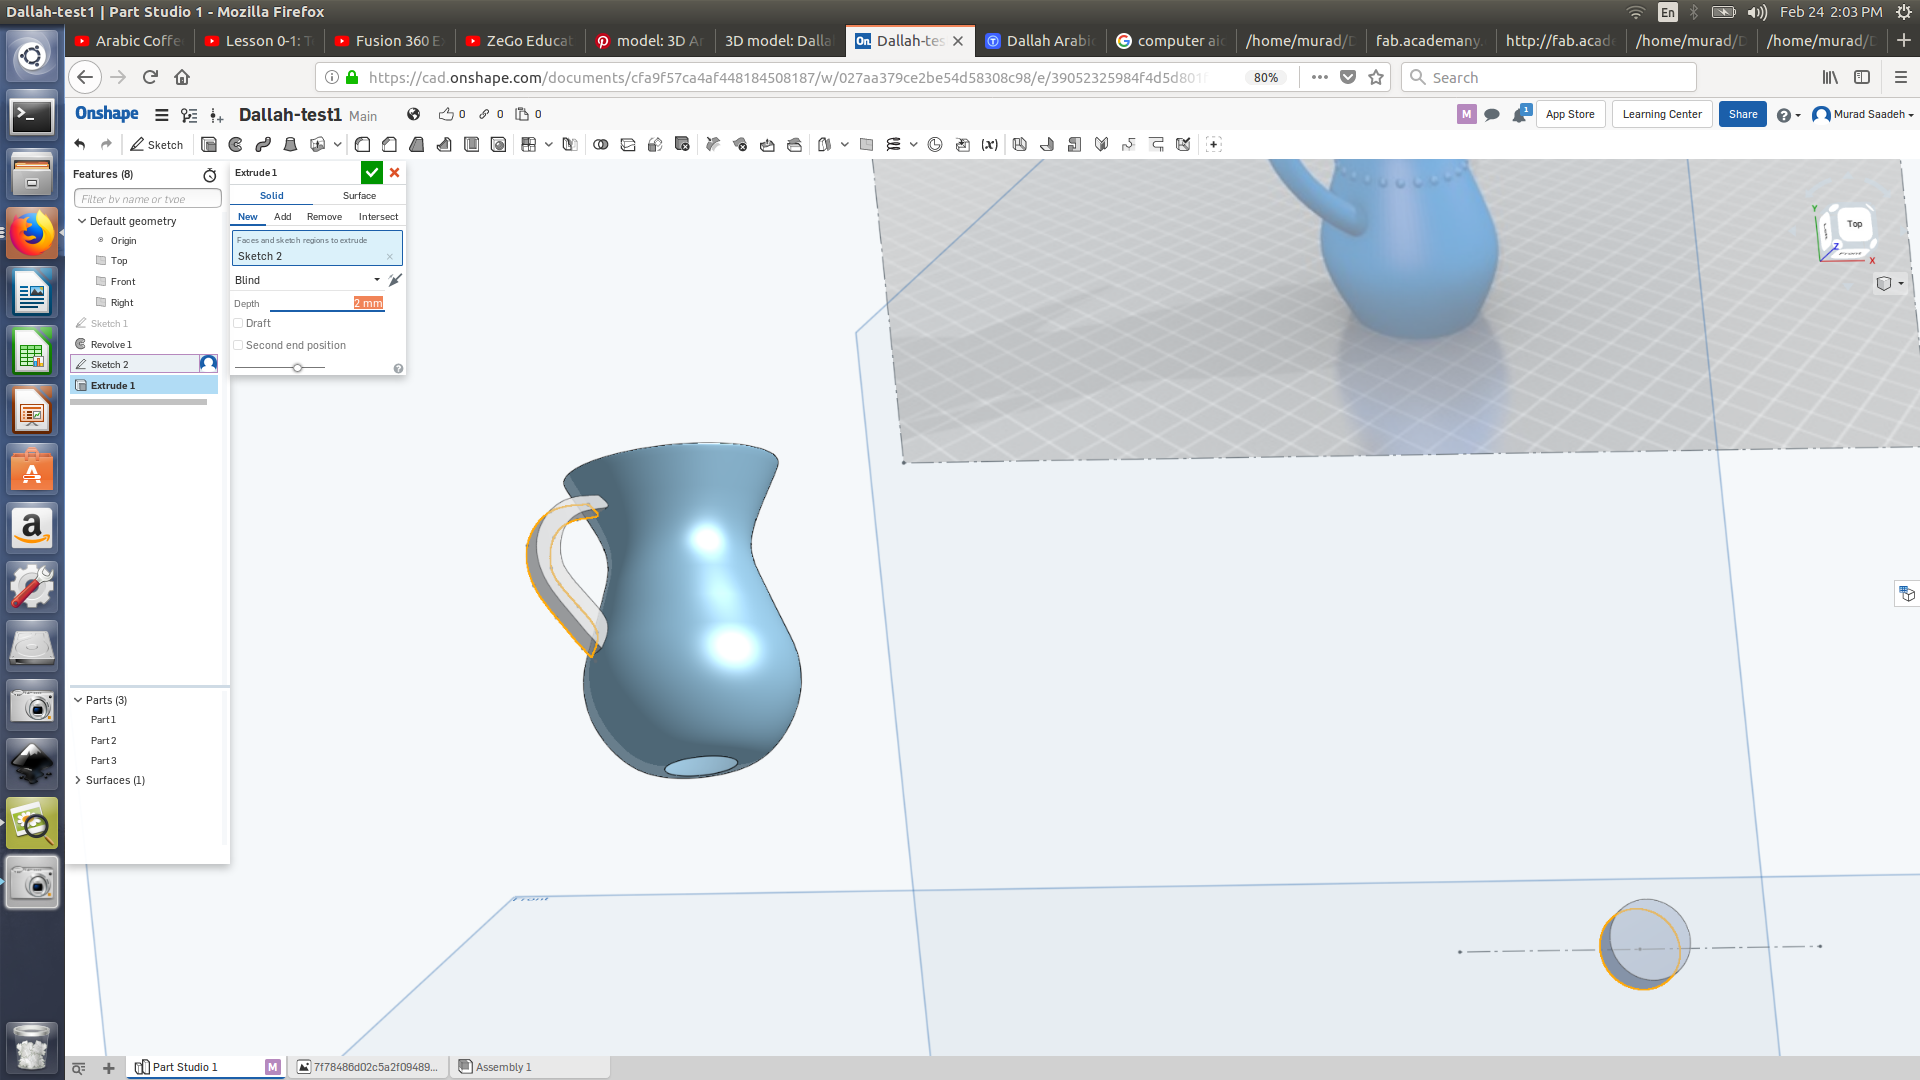
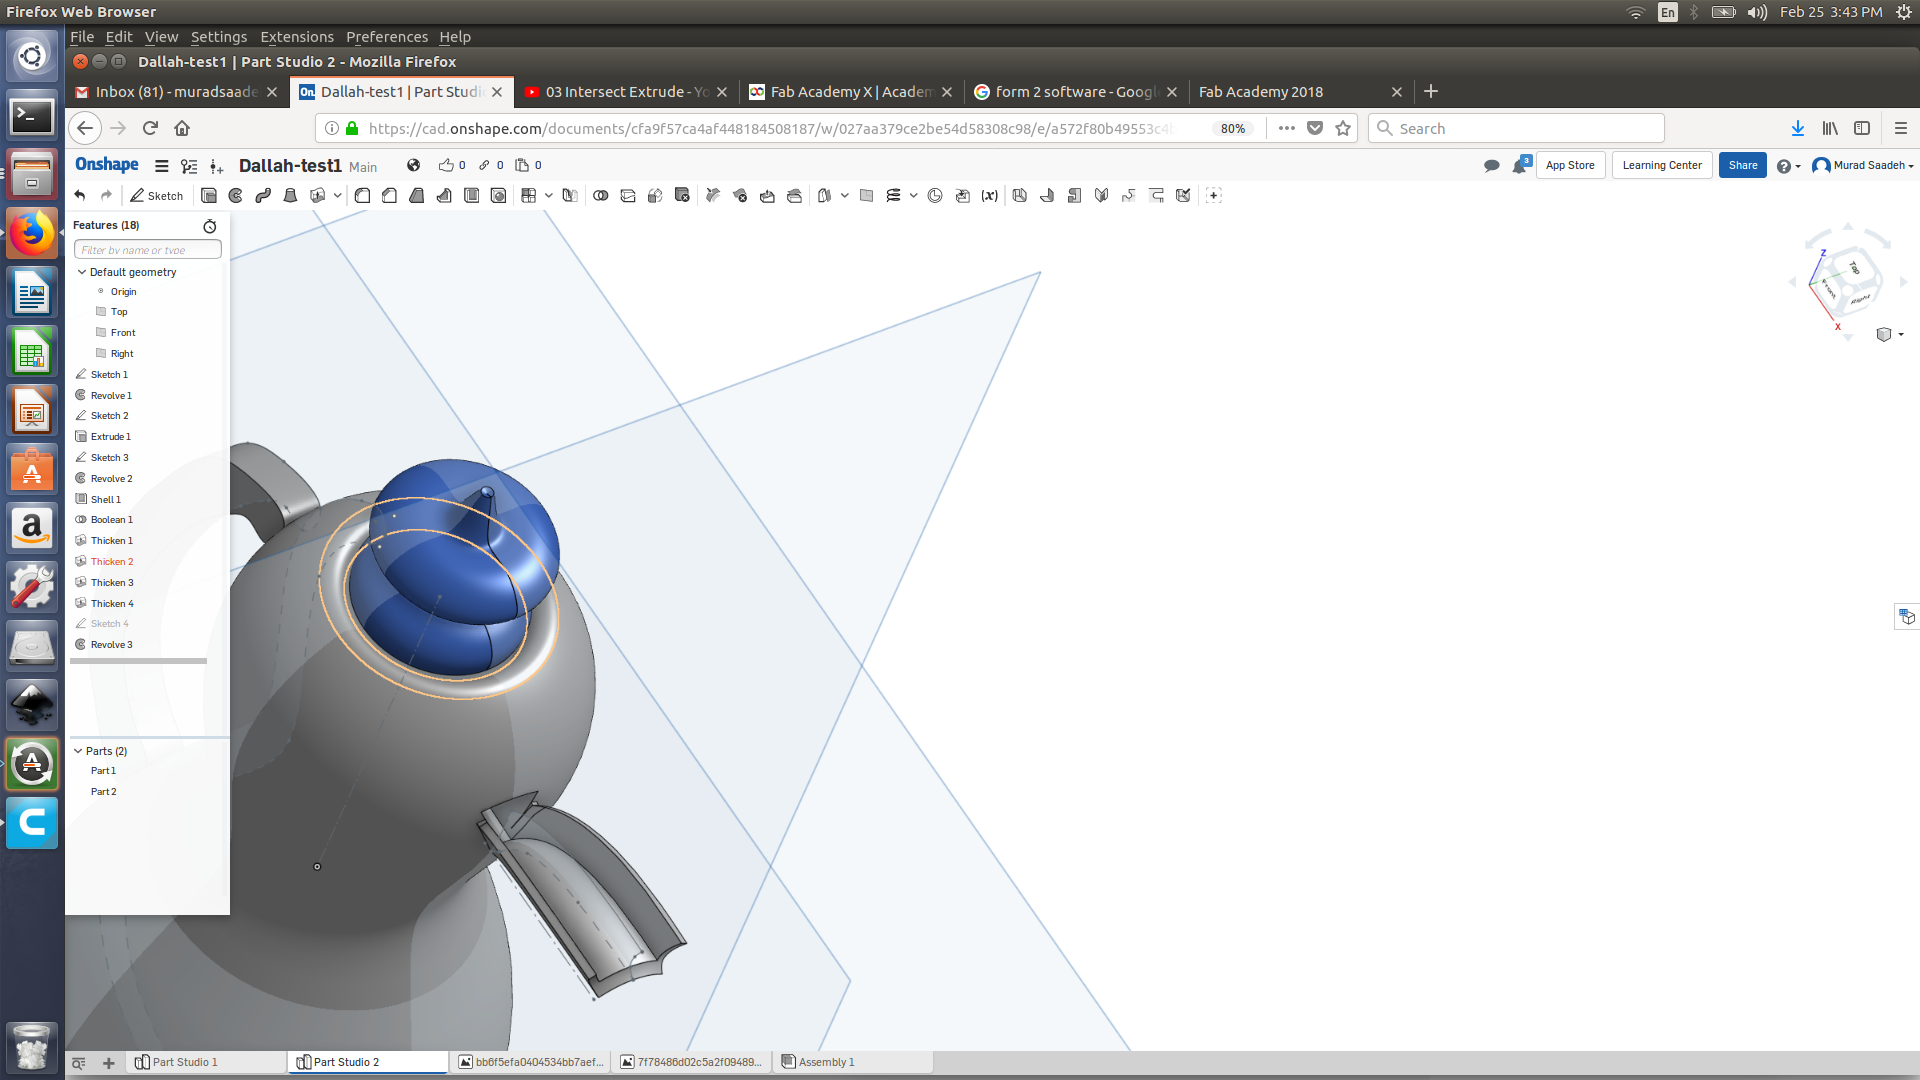
I remembered that importing an image could be done on-shape so I imported it draw the 2d sketch. I did that using line and the tool spline I then revolved it around its line. It kinda look better now. Draw the Dallah holder was extremely difficult, I watched this video on how to make tea pot using fusion 360 link , it was very useful as I came to know that it would only be applicable if I use sweep I am facing a problem now which is that I cant draw similar sketch in order to sweep as the sketch in the video, I tried using extrude and it did work fine for me. I used the same method to create the spout ( Check the images below).
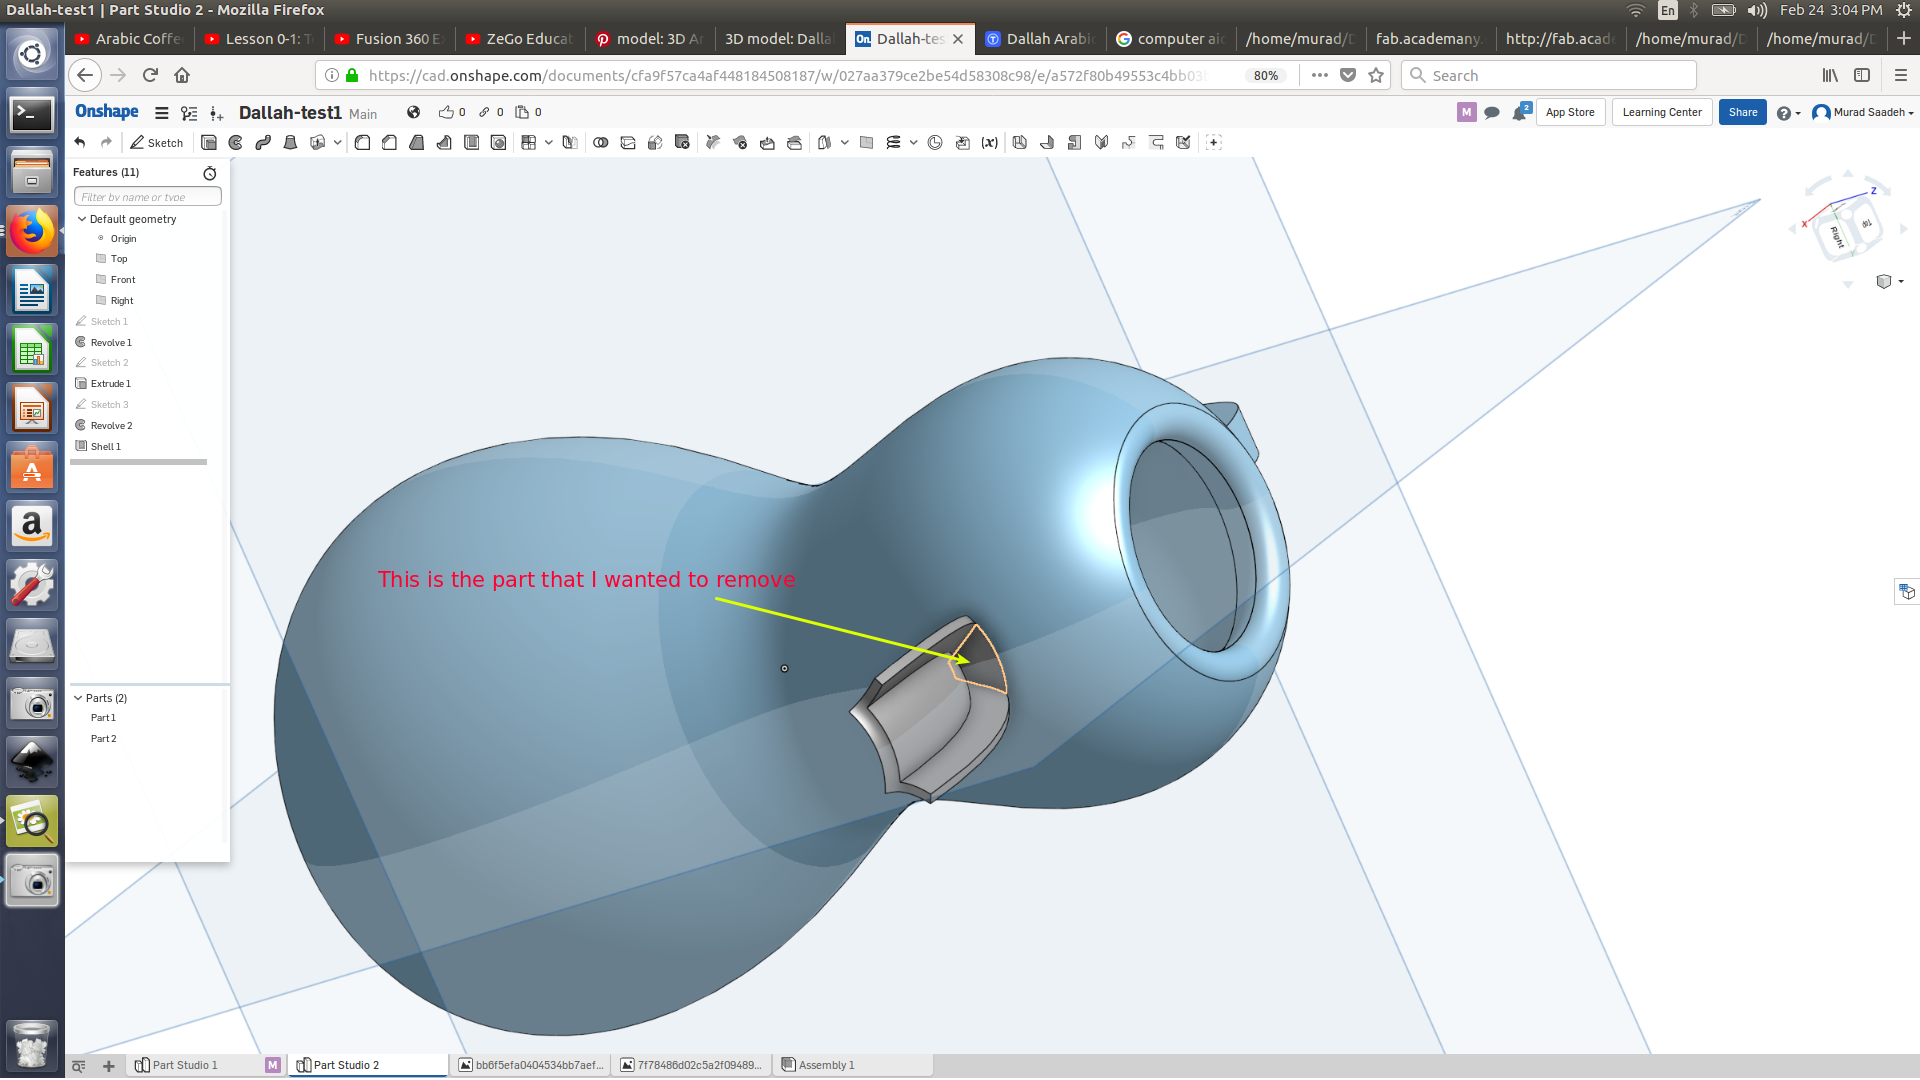
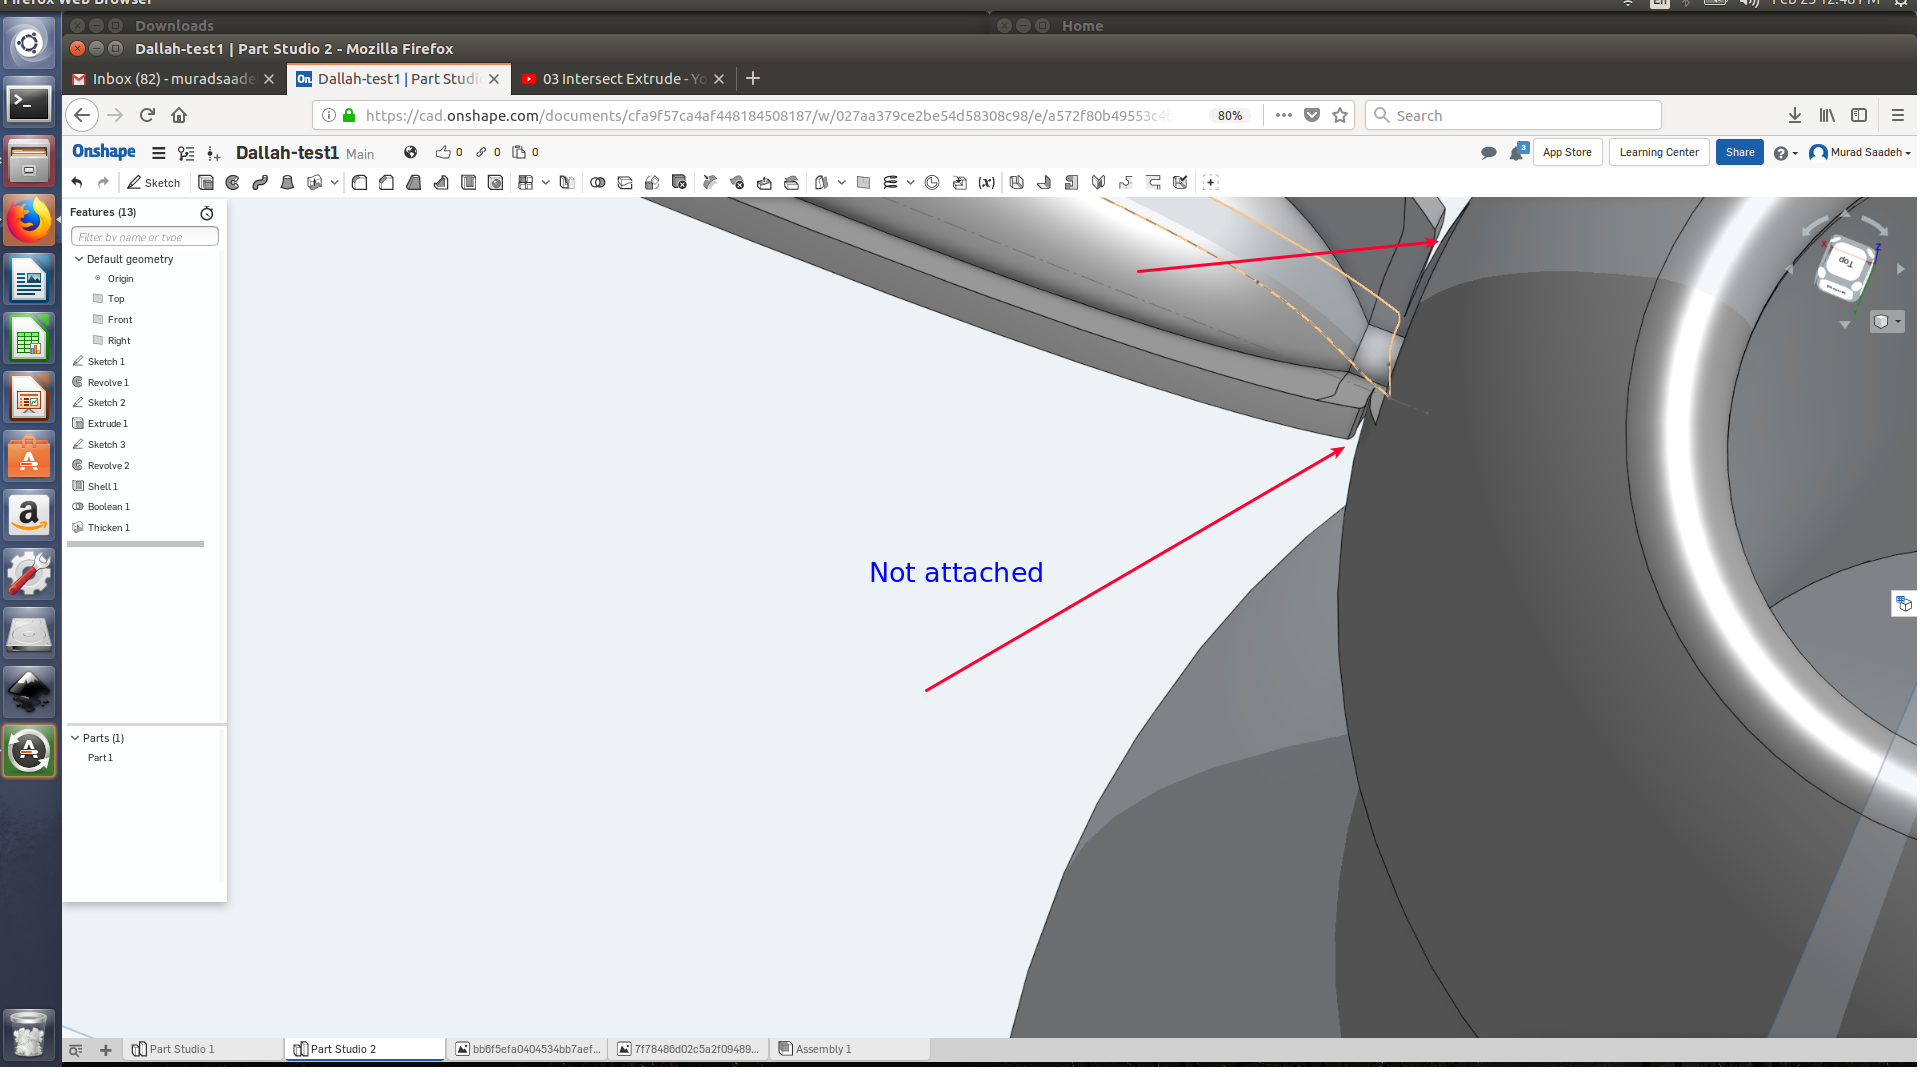
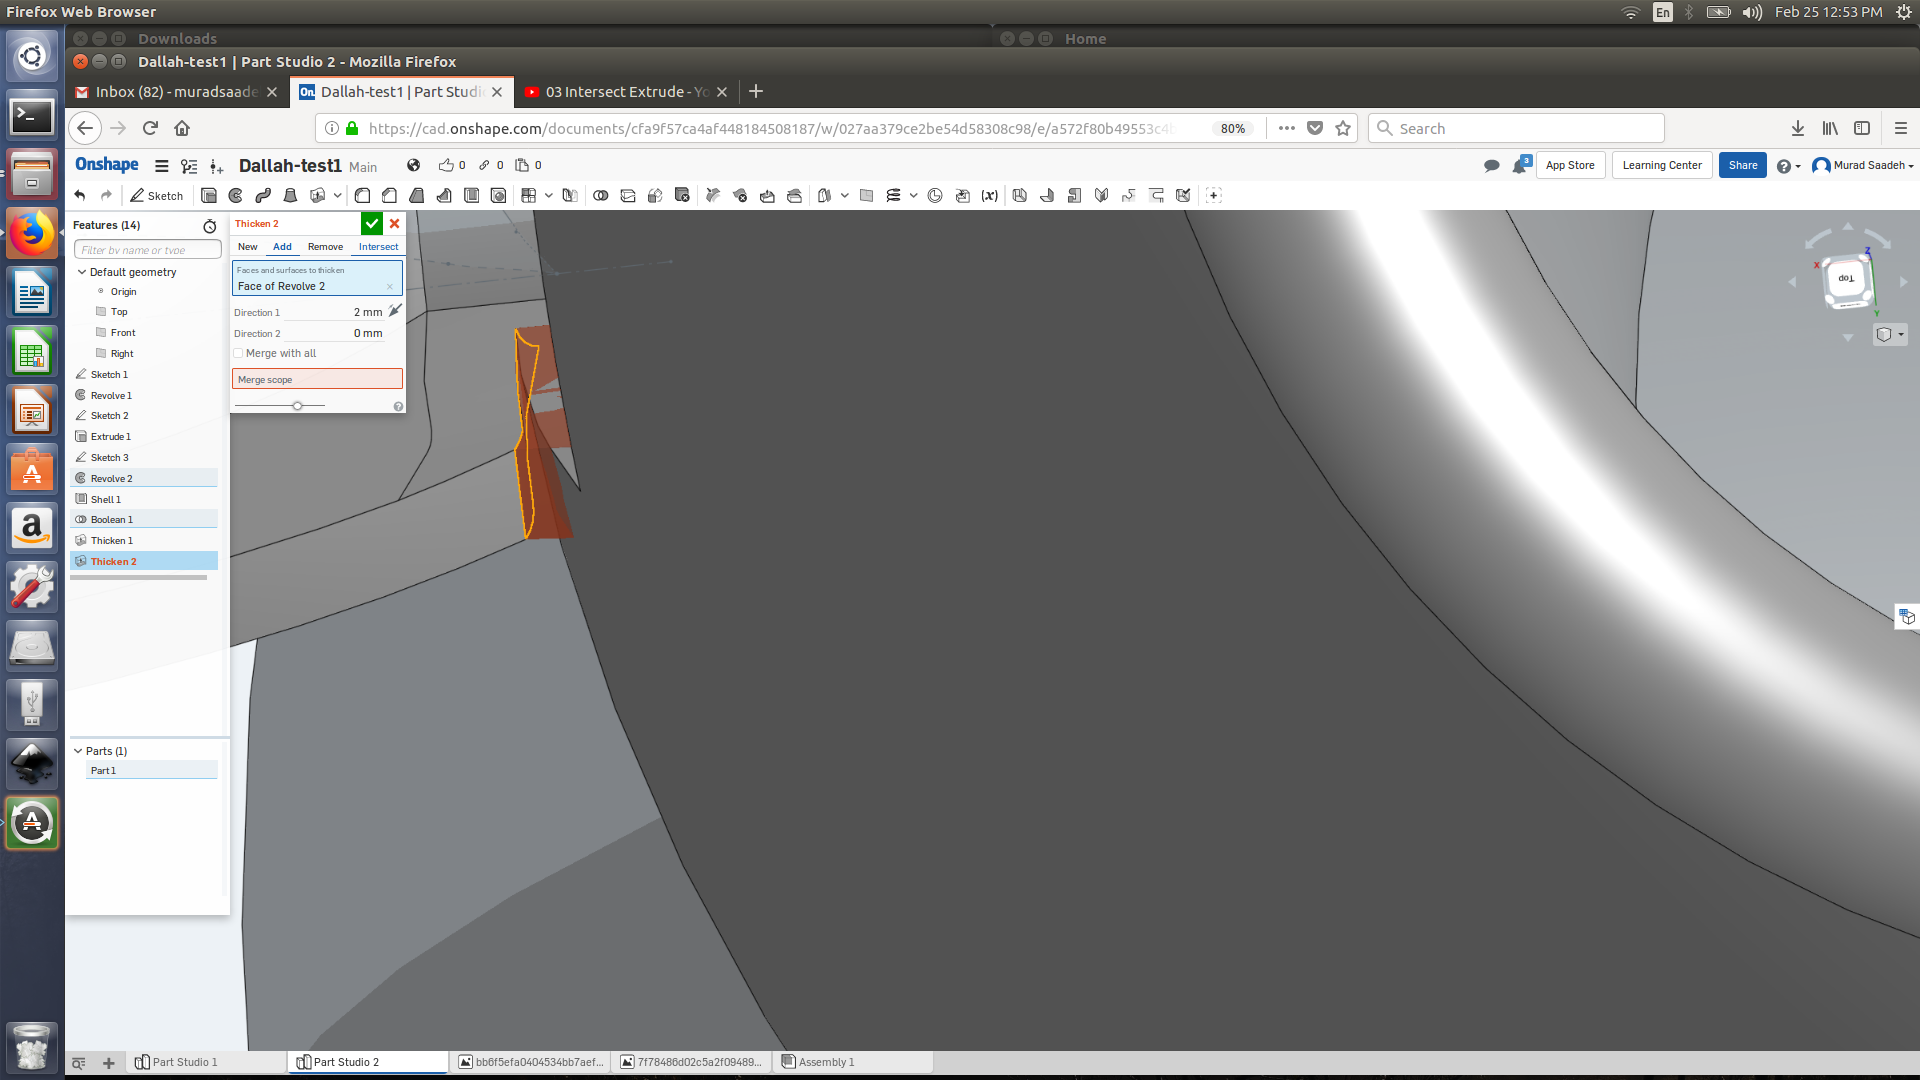
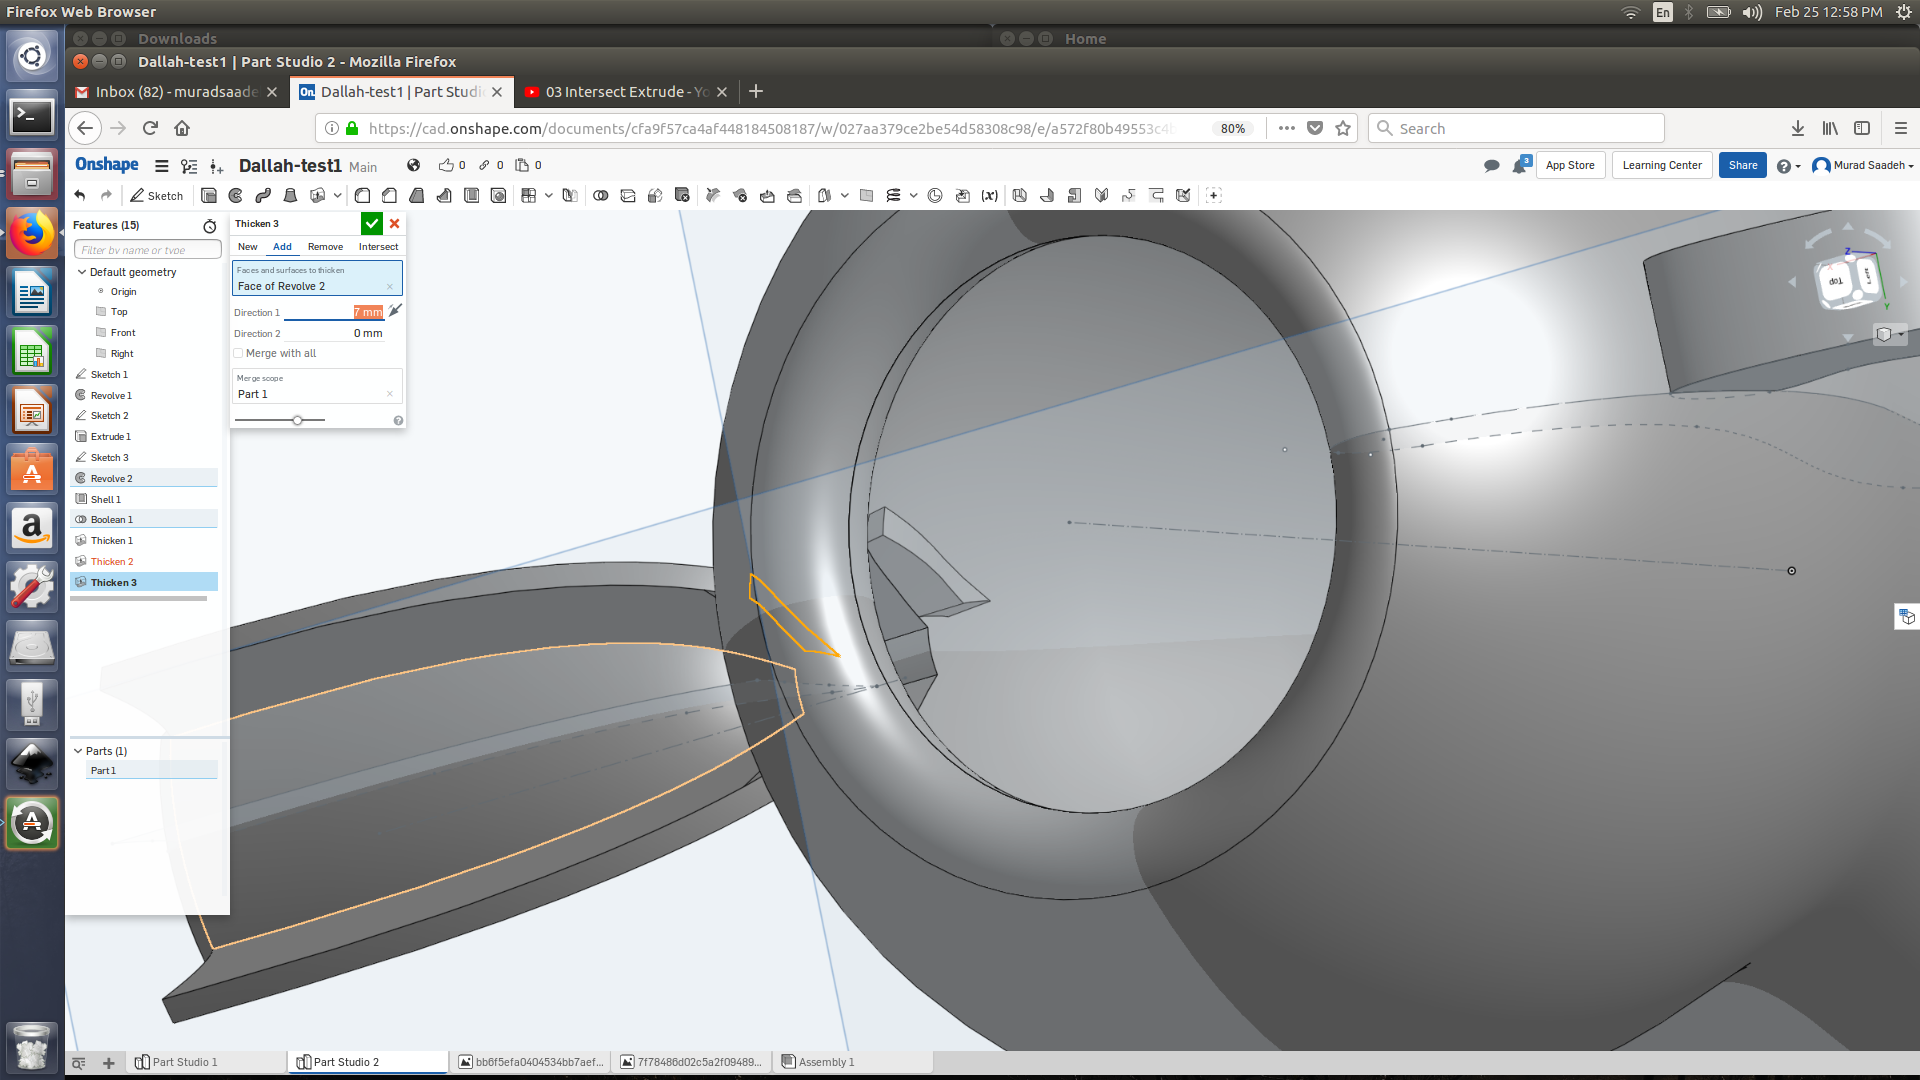
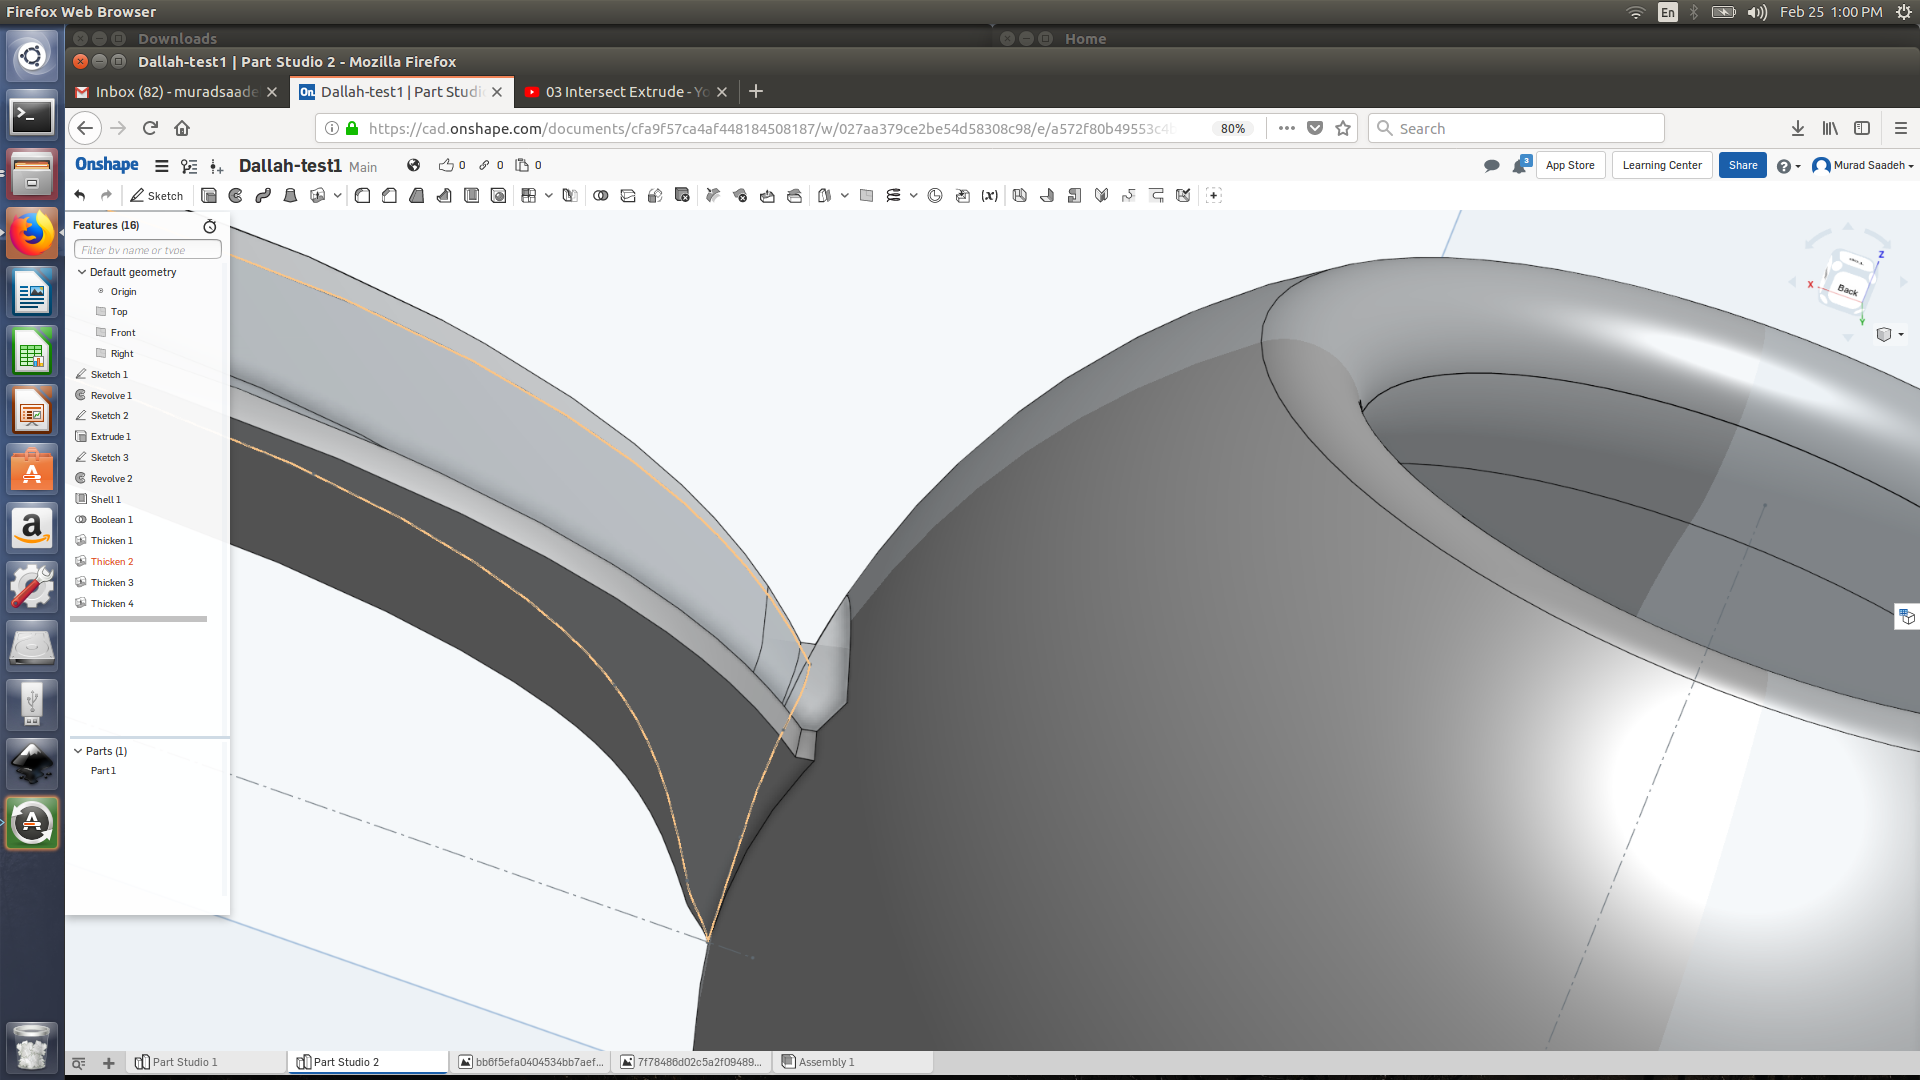
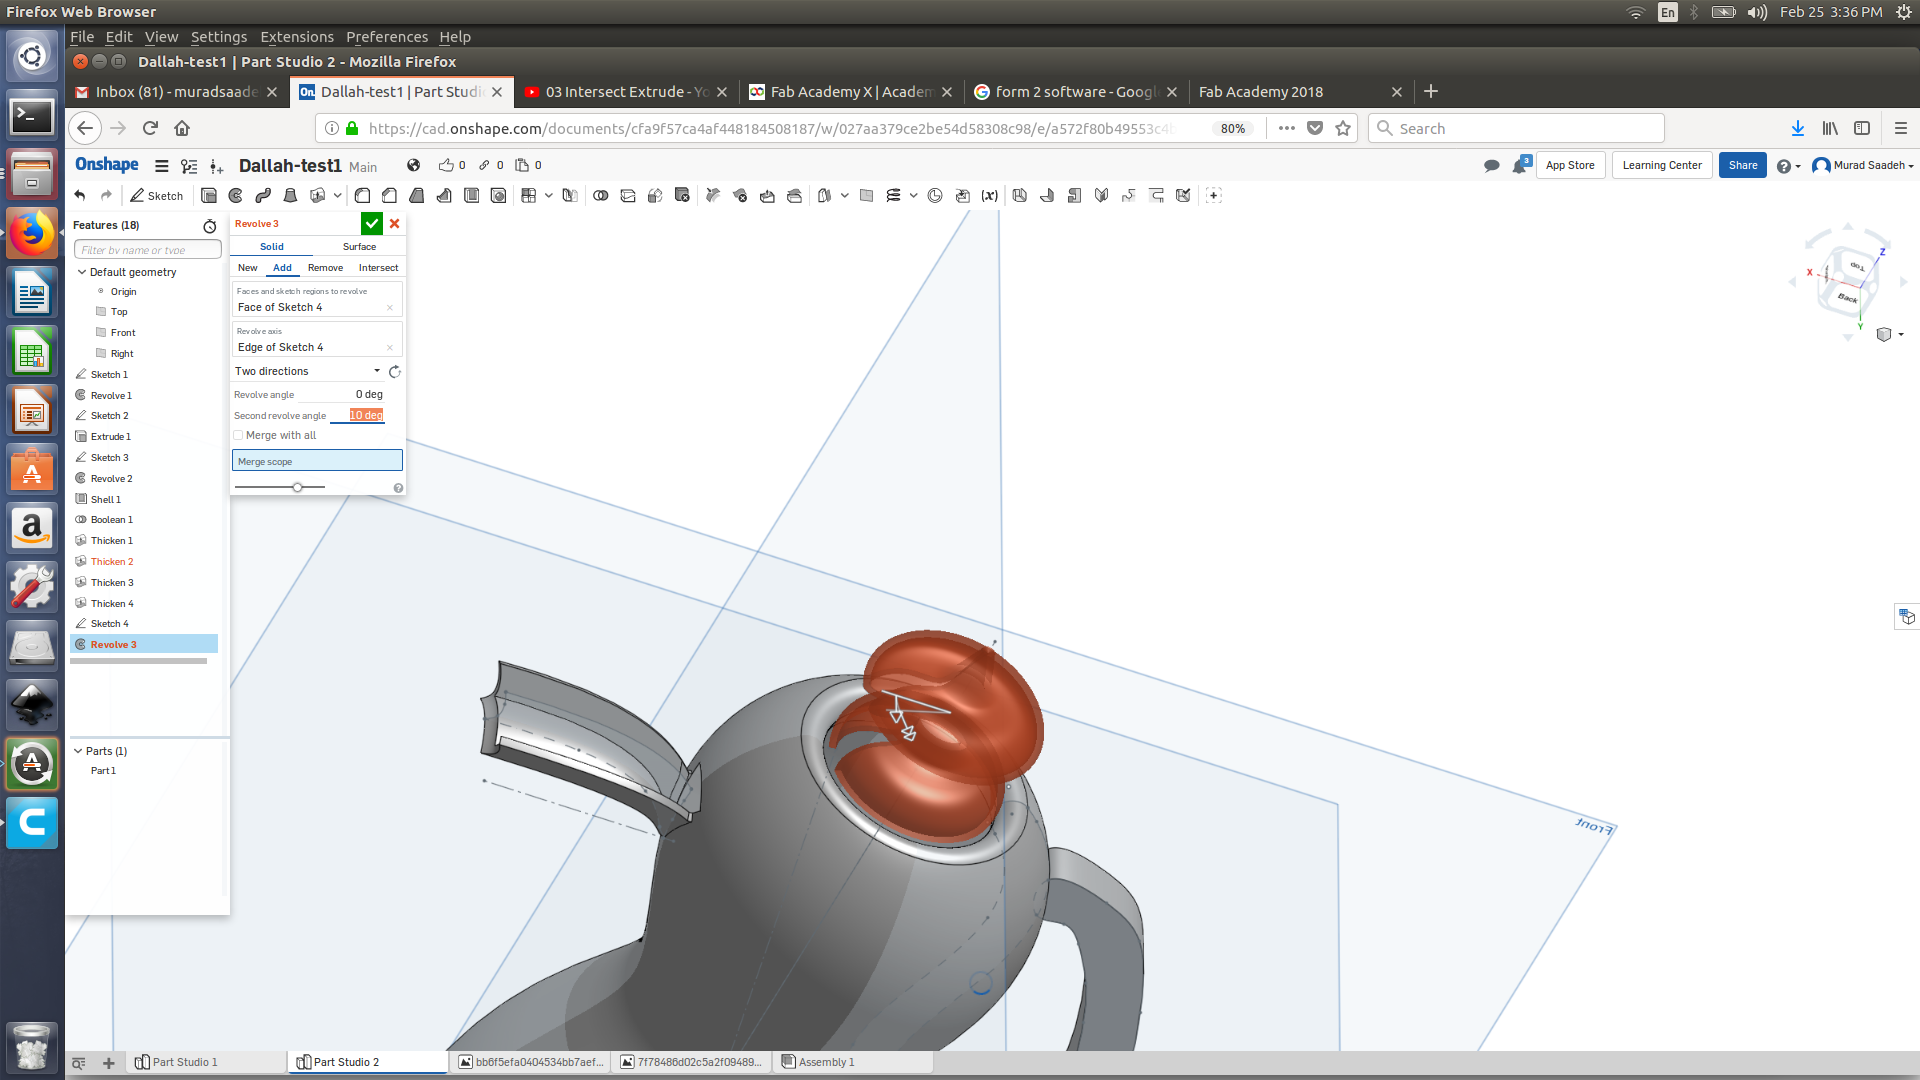
The main issue that I encountered was trying to empty space between the spout and main frame in order to pore the coffee. Essentially I thought it could be done using extrude or shell but this didn’t work, as on-shape didn’t allow me to choose that exact part to extrude or shell it. After several trials, I decided to click on that part and check which tool would allow me to edit that specific, the tool I used was thicken.
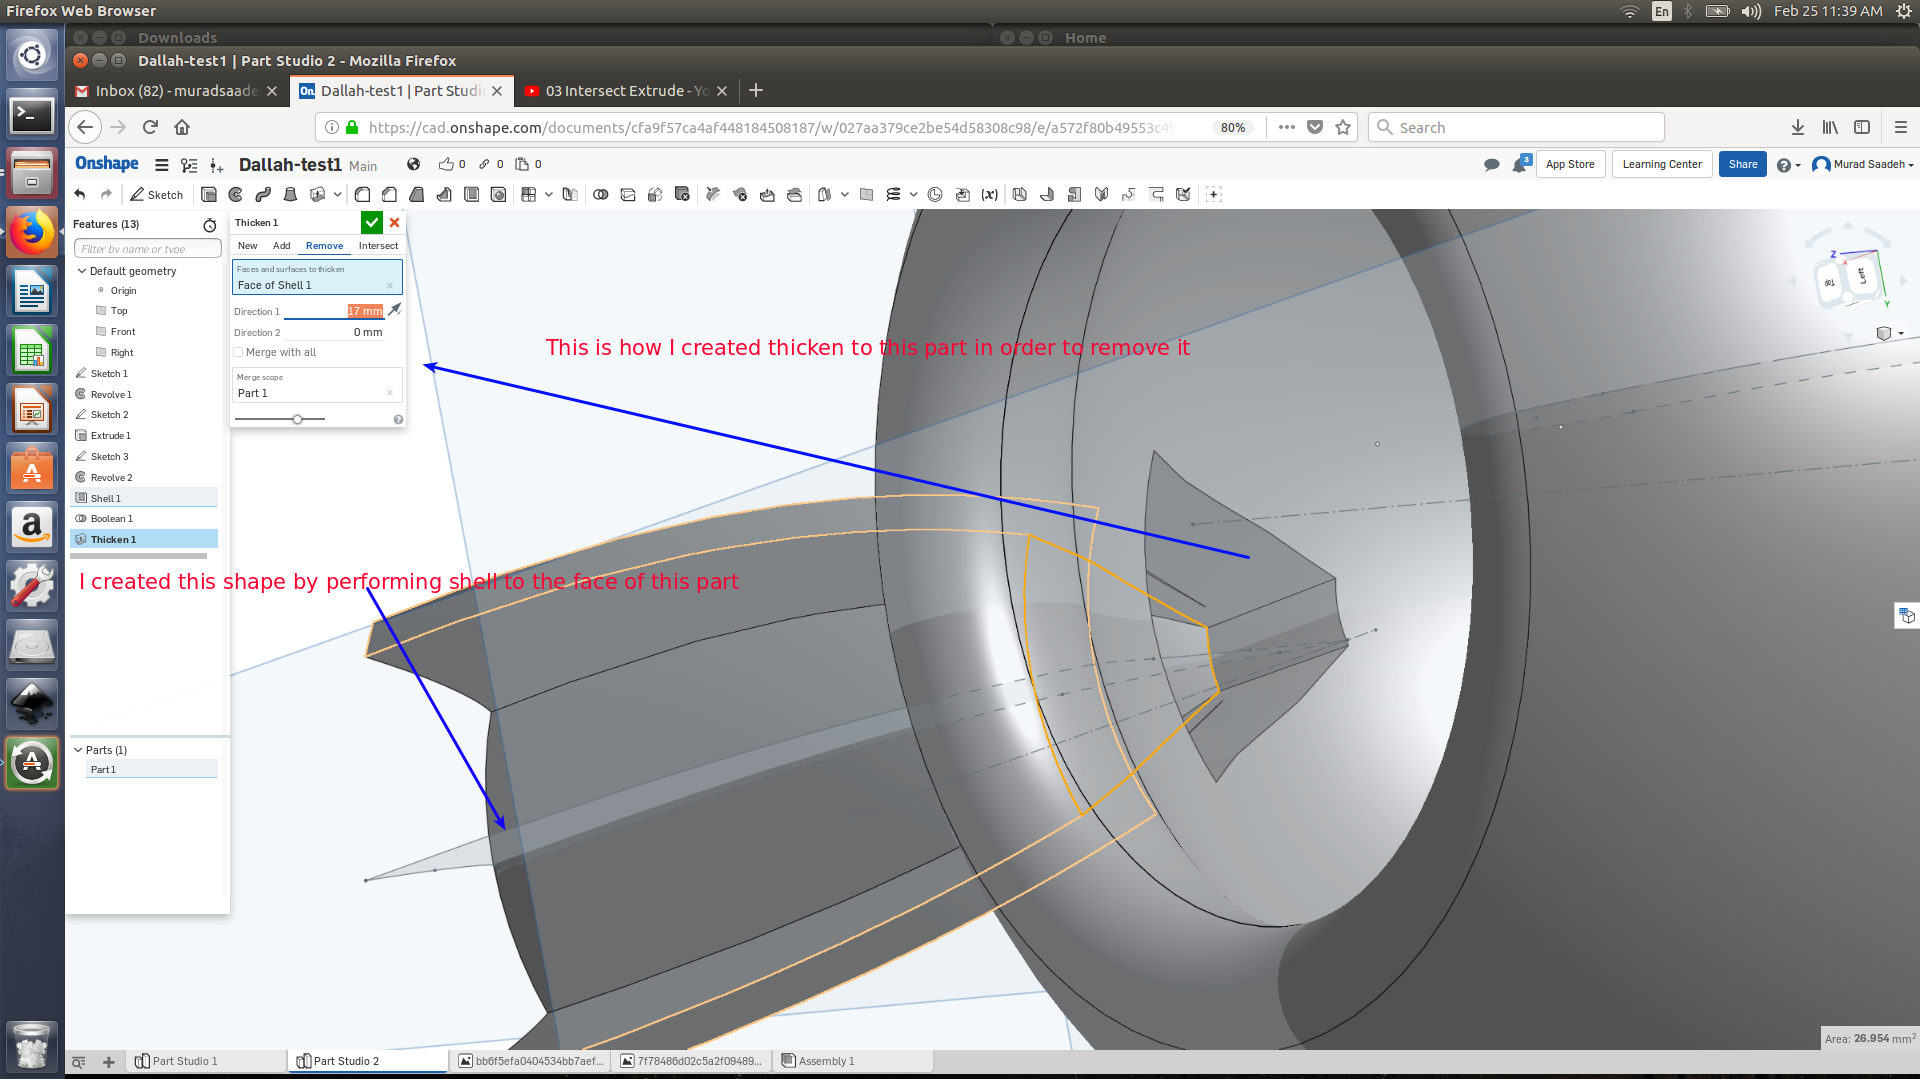
After editing the spout, the spout wasn’t not fully attached to the main body (as shown in the image below) even though I have already performed boolean (intersect) to attach both objects together. Again thicken tool has saved me again in solving that issue.
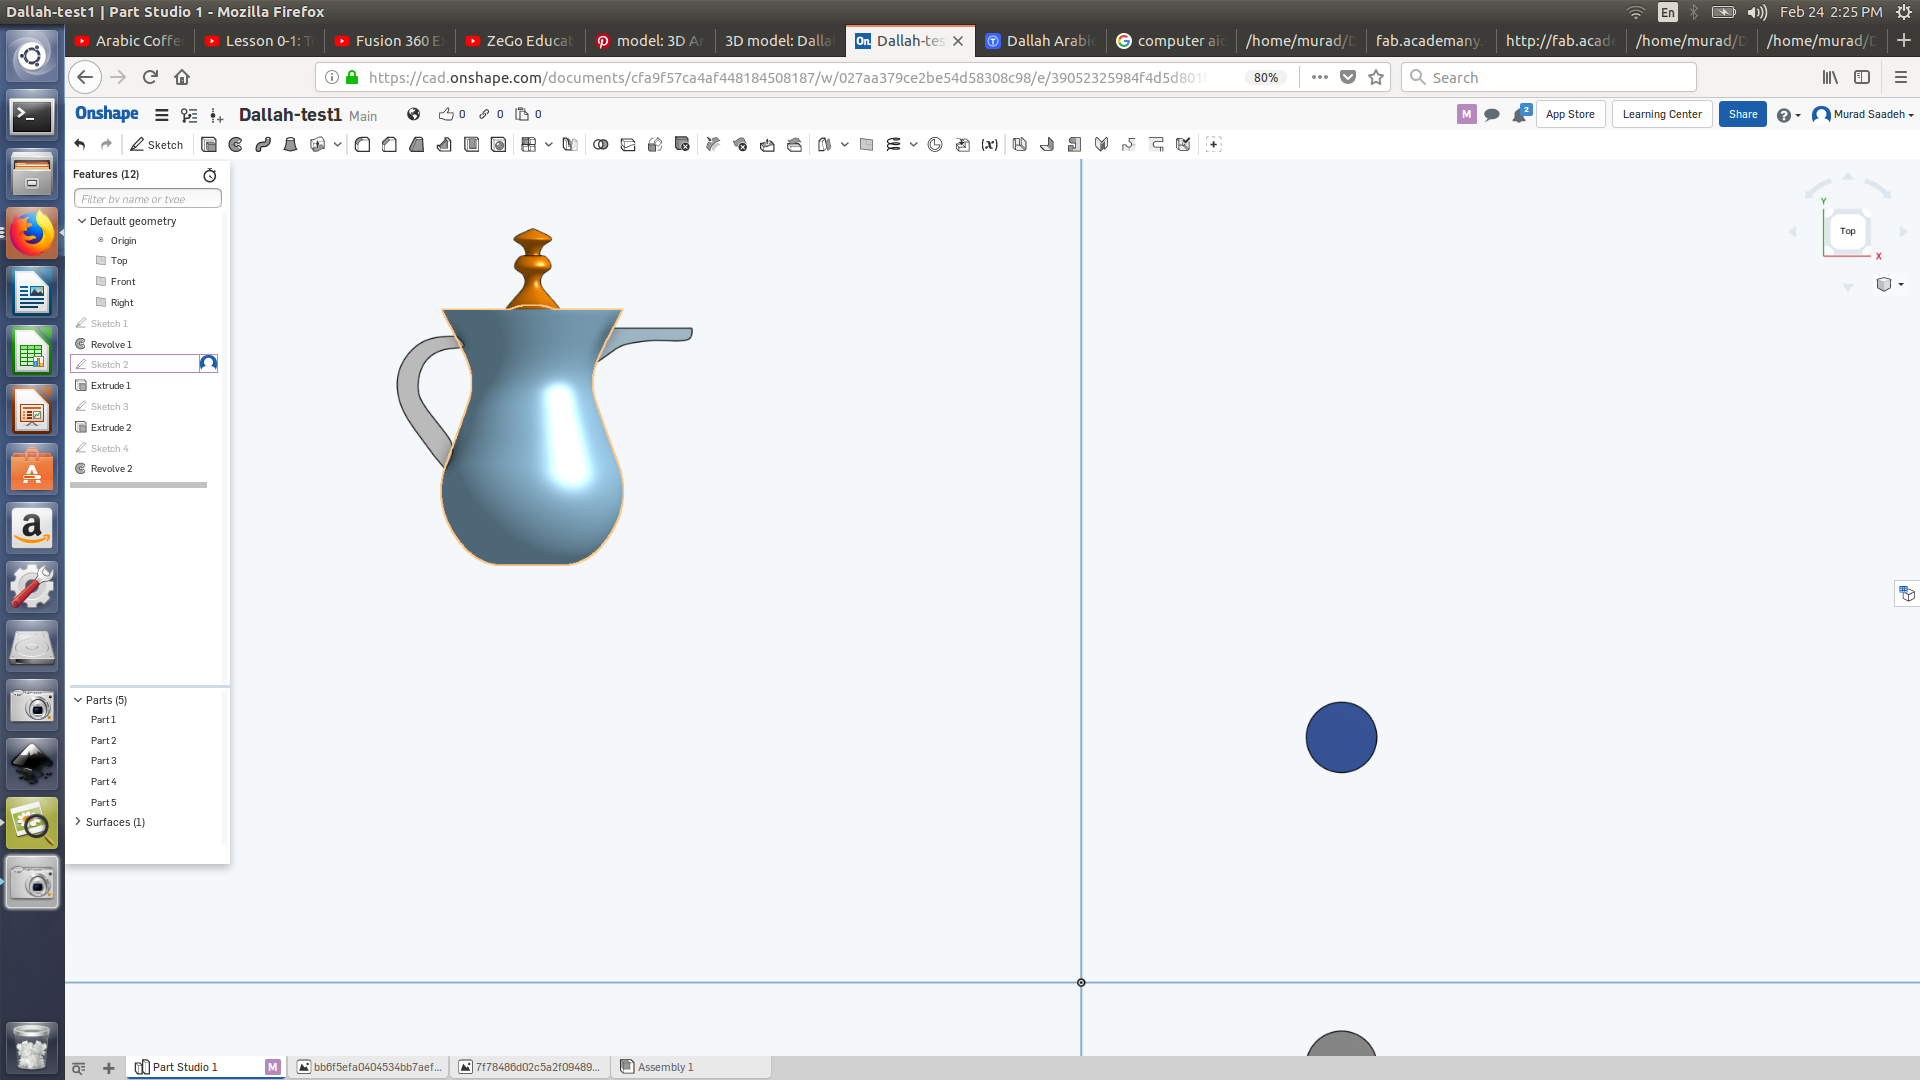
I then created the top cover using revolve, the same way I designed the body and I also created the Arabic coffee cup.
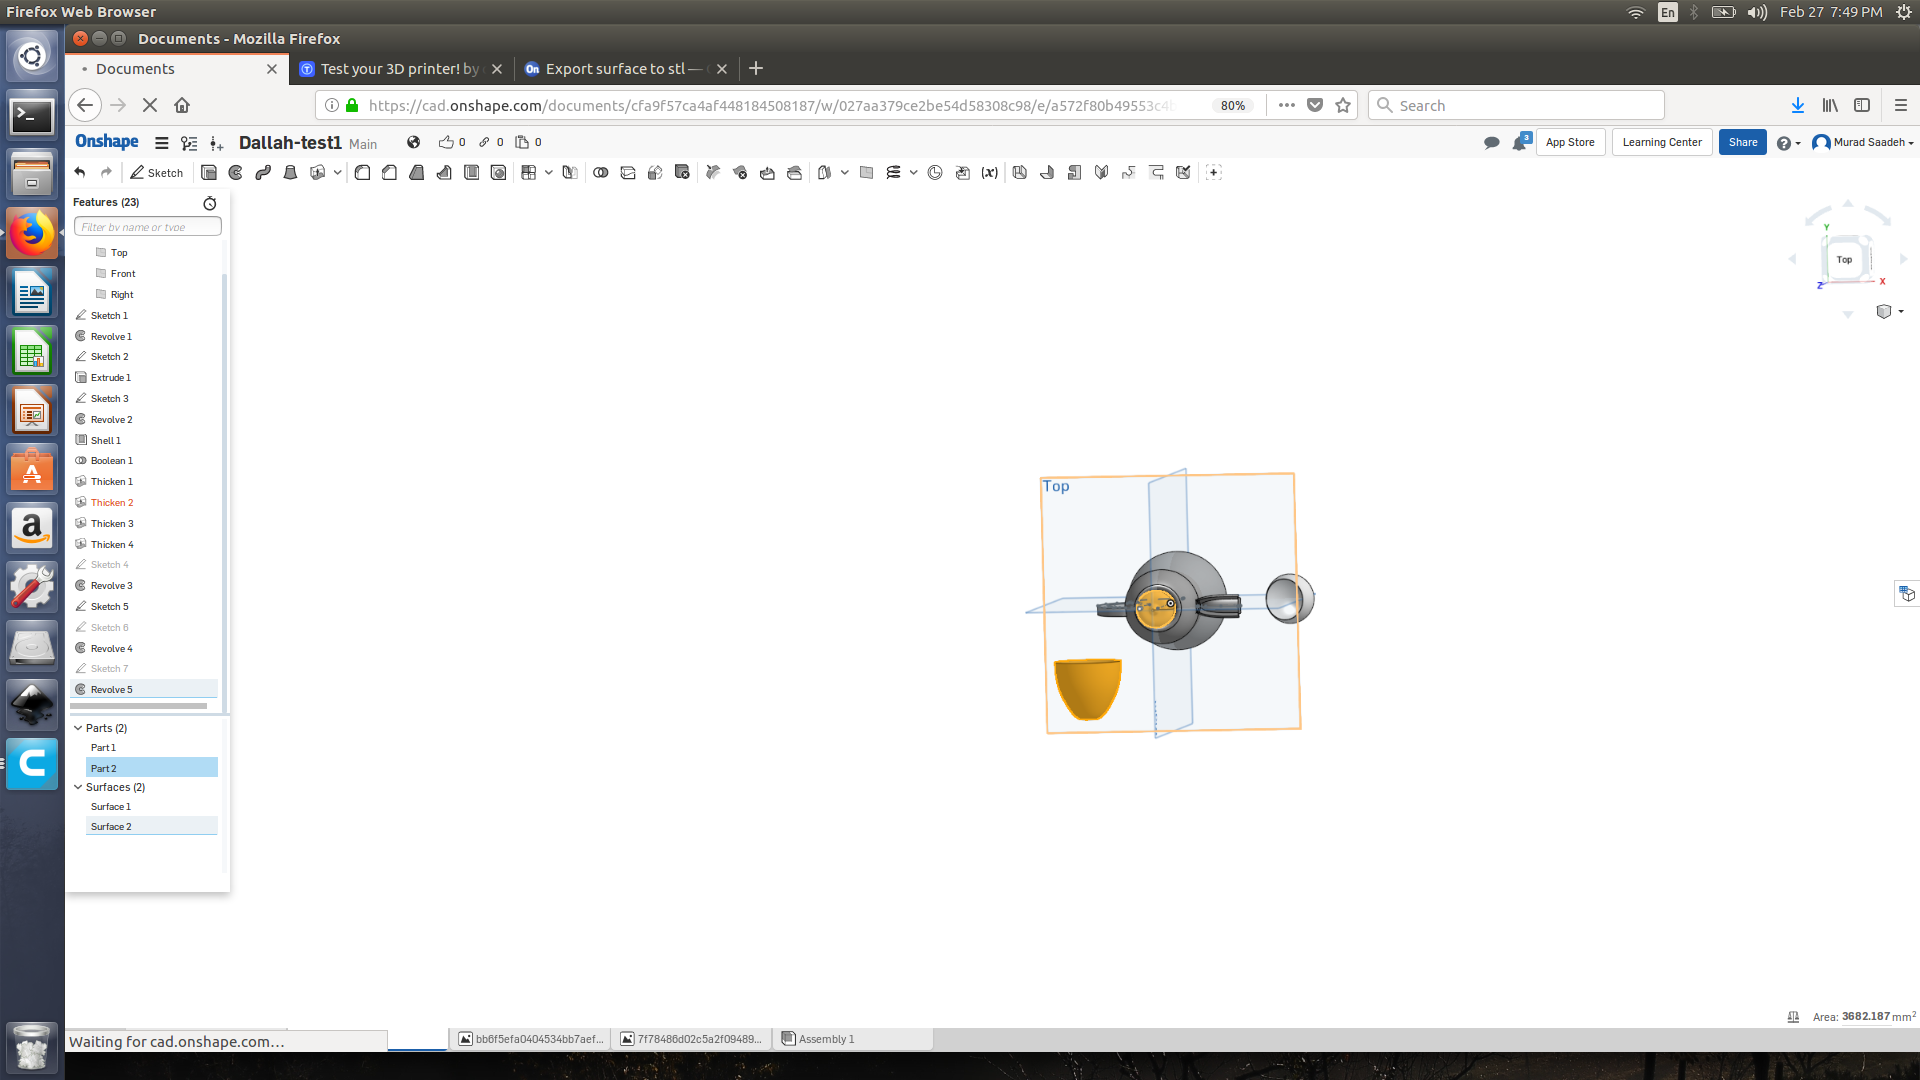
The coffee cup could not be exported as stl, this was because it was not a part and it was a surface which means it has no actual volume. To solve this I have created an offset before revolving the cup of coffee.
On-shape source file Click for the source file
download coffee pot rhino file
3D printing my object:
I will be using FDM 3d printing method to print my object (Dallah). I really like the precision and smoothness of the Zortrax M300, thus I will be using this machine to print the actual object.
If you haven’t used Zortrax before, the slicing software for Zortrax is called Z-suite (You need the machine serial number to download it)
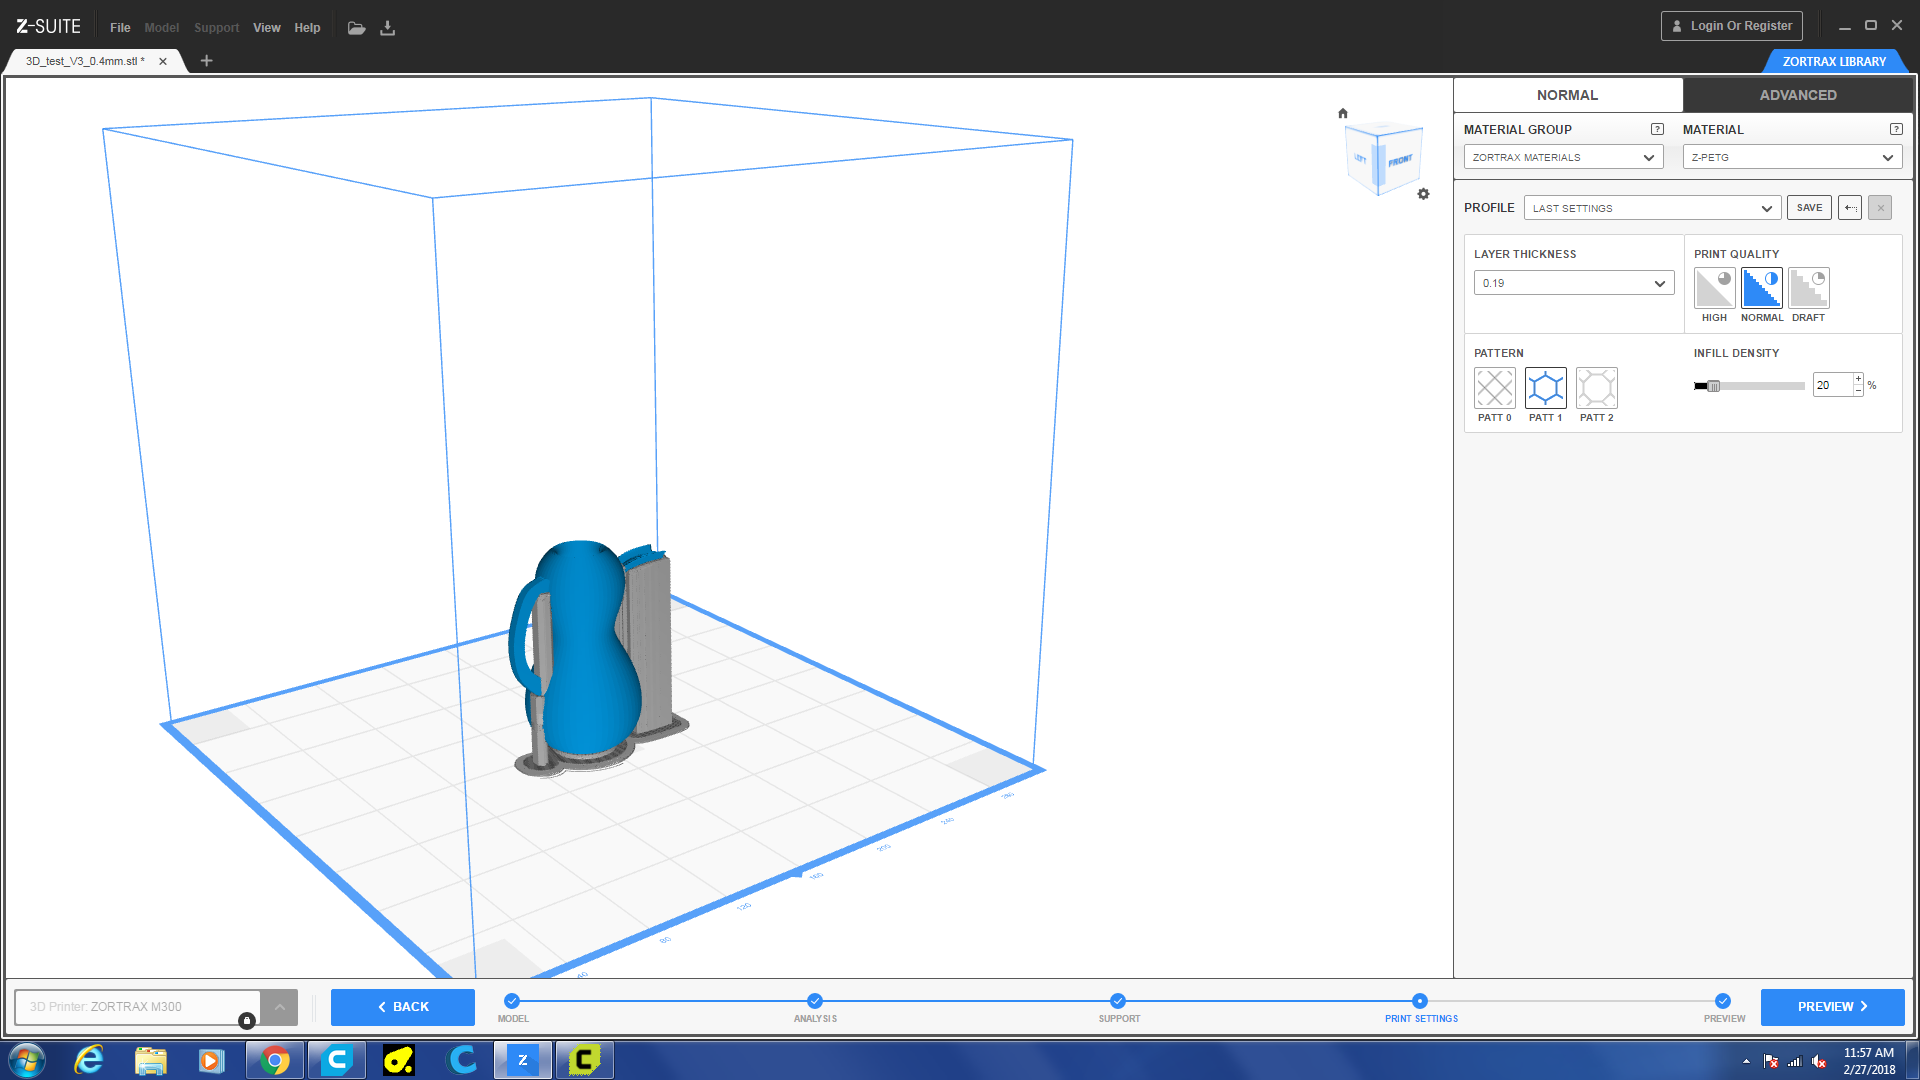

The material I used is Z-PETG, which is s a kind of copolymer which is the result of replacing ethylene glycol with cyclohexane dimethanol in one of the backbones of the substance commonly known as PET. In practice, this means that the modified substance changes its properties and its melting temperature. That simply makes the substance perfect for manufacturing processes like injection molding, thermoforming and additive manufacturing(Zortrax website).
In order to reduce the print time, I changed the recommended setting 50% infill to 20% infill.
Issues:
-
My first print was not completed as Sibu noticed that filament was placed outside of the spool and got stuck which didn’t allow the extrude to extrude more material. We removed material and re-arranged the filament back to the spool.
-
After re-loading the material, I calibrated the Zortrax as that the bed was not aligned. The Zortax would perform auto-calibration and guide you which screw to tighten.
-
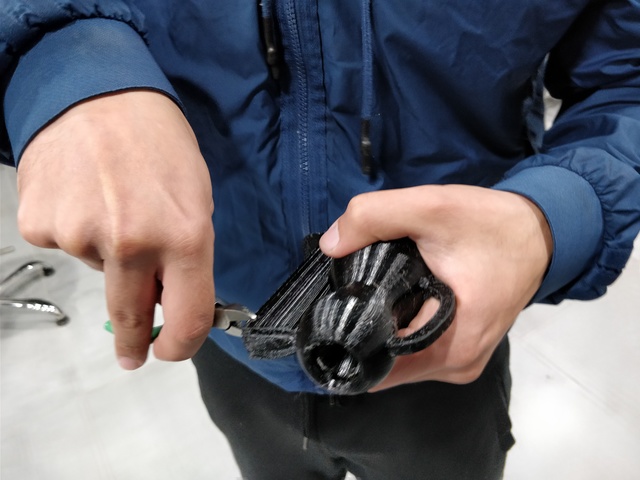
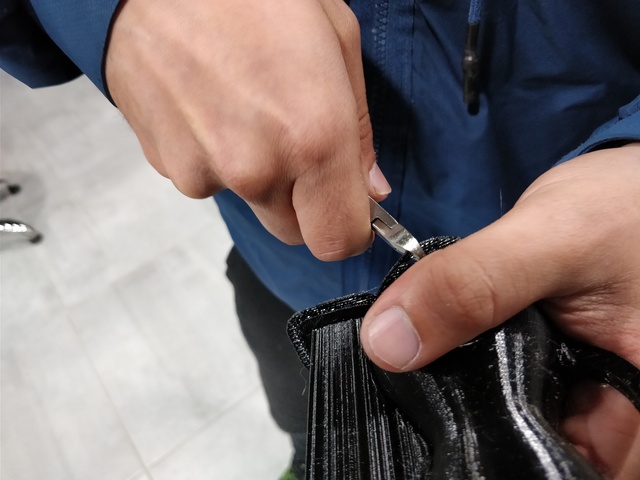
The empty area between the spout was filled with support which made it extremely difficult for me to remove.
-
For the Dallah top cover, I used the ultimaker 2 to print it. As our nozzles were very U-shaped as those printers were worn out by printing using carbon fiber, I had to tune the print and decrease the speed of the print to 50%.


Group assignment:
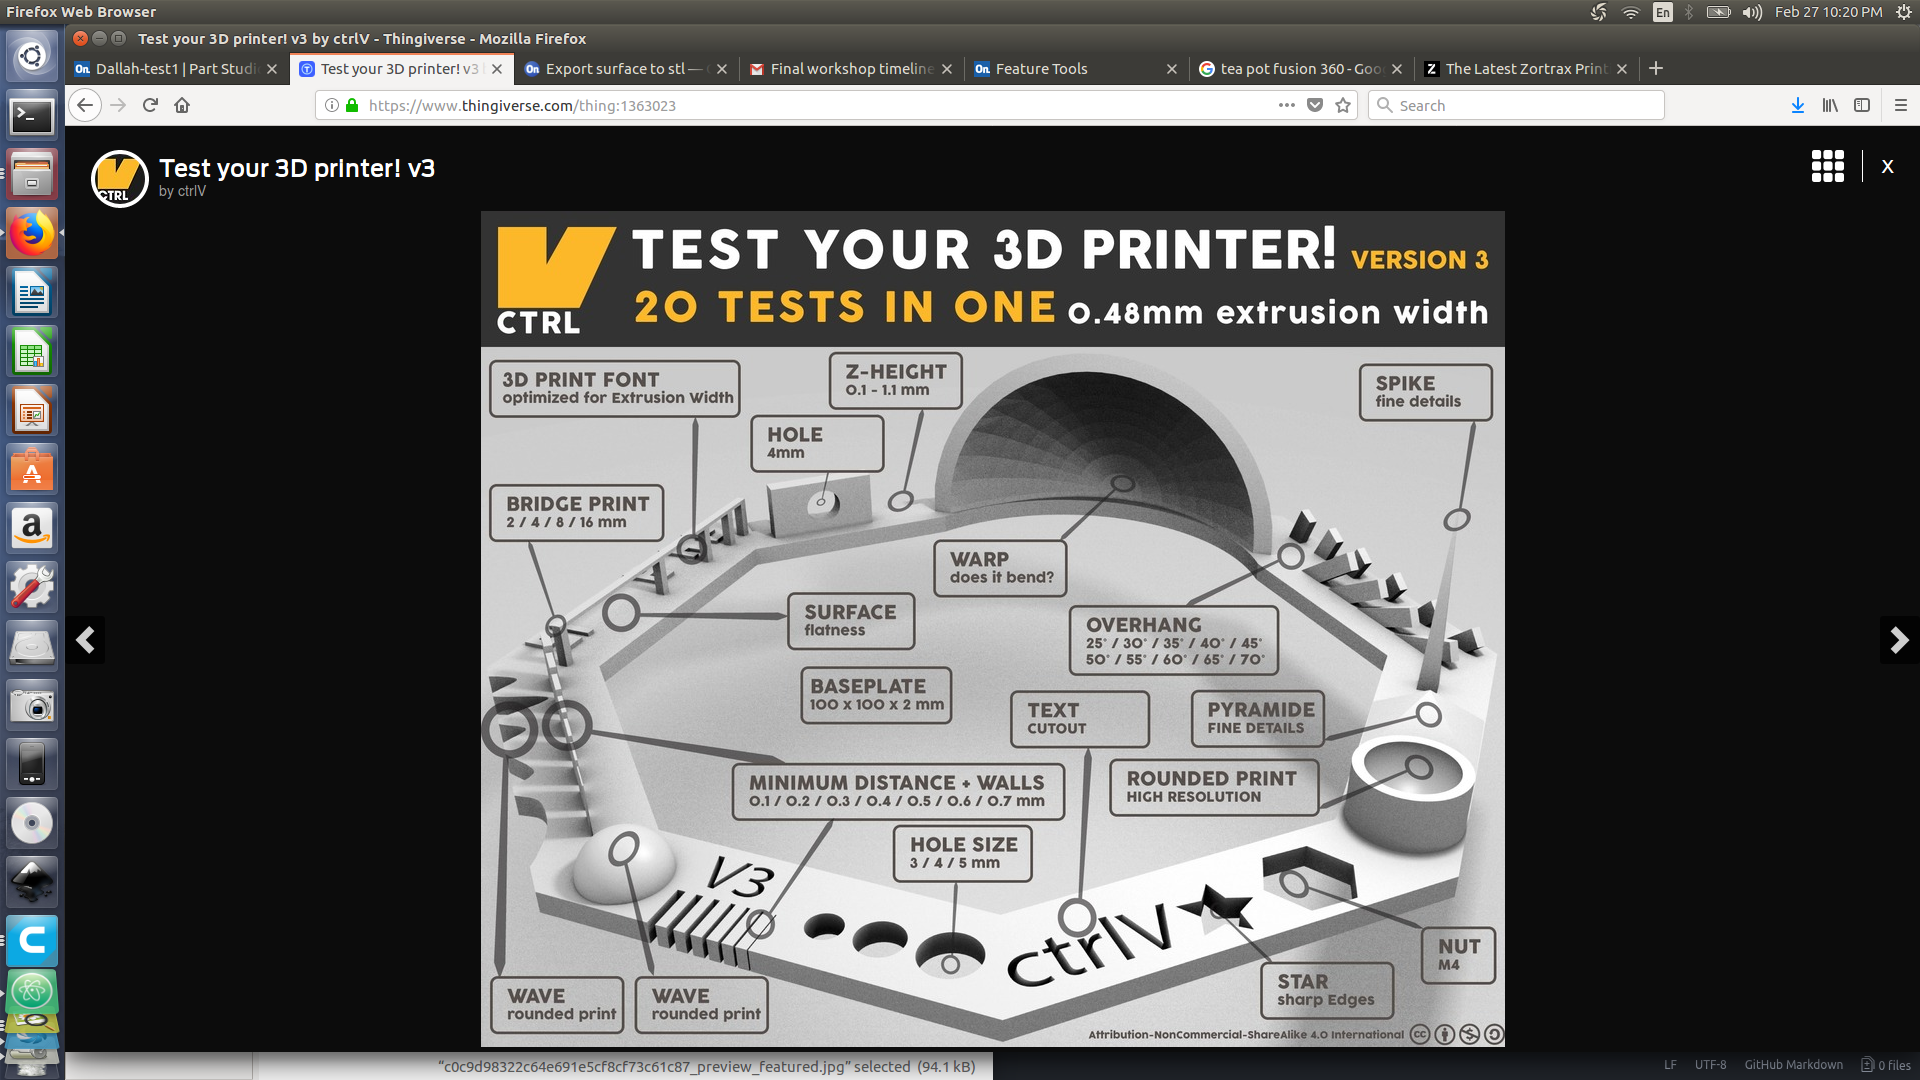
We have plenty of 3d printers available at our Fab Lab, We have Ultimaker 2, Ultimaker 3 , Form 2, Lulzbot taz 6, Witbox, Zortrax and delta WASP 3mt. This week group assignment is very interesting as we could actually test most printer and define would project would better suit. We browsed the Internet for 3d printer test print, we choose this Link. We printed this file on Ultimaker2, Ultimaker 3, Zortrax and Form 2. * Make sure to use the 0.4 stl file*
Problem Faced:
- One of the ultimaker 2 extruding wasnt moving out material as the filament was blocking it.
- Ultimaker 2, I decreased the speed to 60% for a better print as due to speed the spaces between print wasnt showing (Picture availabe at the group page)
- Ultimaker 2, Decreased the infill density to 85%
- Ultimaker 2, Some dust was on the build plate, thus the print wasn’t sticking.
- Form 2, Support use a lot of resin and increase the print time. ( Sibu was confident enough to try printing the same model without support, We challenged him that the print would fail) fortunately, the print was a success.
- Dr.Musa has noticed that 3d test object printed by form is smaller that the actual object. ( because when we tried to rotate the object, it scalled it down bymistake)
Printers review
Zortrax
I have printed the Dallah (coffee pot) on the zortrax, Zortrax do give perfect finish precise finish of the object, however I faced some diffuclties trying to remove the support specially the support inside the coffee pot. Moreover z-suit (zortrax software) do give the flexibiltiy for the user to change alot of setting to improve the quality of the print.
Ultimaker 2
For the coffee pot cap I used the ultimaker 2, however the final product quality wasnt good, the ultimaker 2 available at our lab their nozzle are weared off thus to print on them I had to reduce the speed.
Form 2
The form 2 is great with giving high quality for printing fine details. Its actually amazing for printing fine positives, but it not as good printing fine negative such as holes. Another thing that I faced is that I can not drill hole or modify my object once it prited by form, it will just break immidietly. Moreover the resin is pretty dirty so after the print is done, the print must placed in alchool and then UV light to be ready
3D scanning
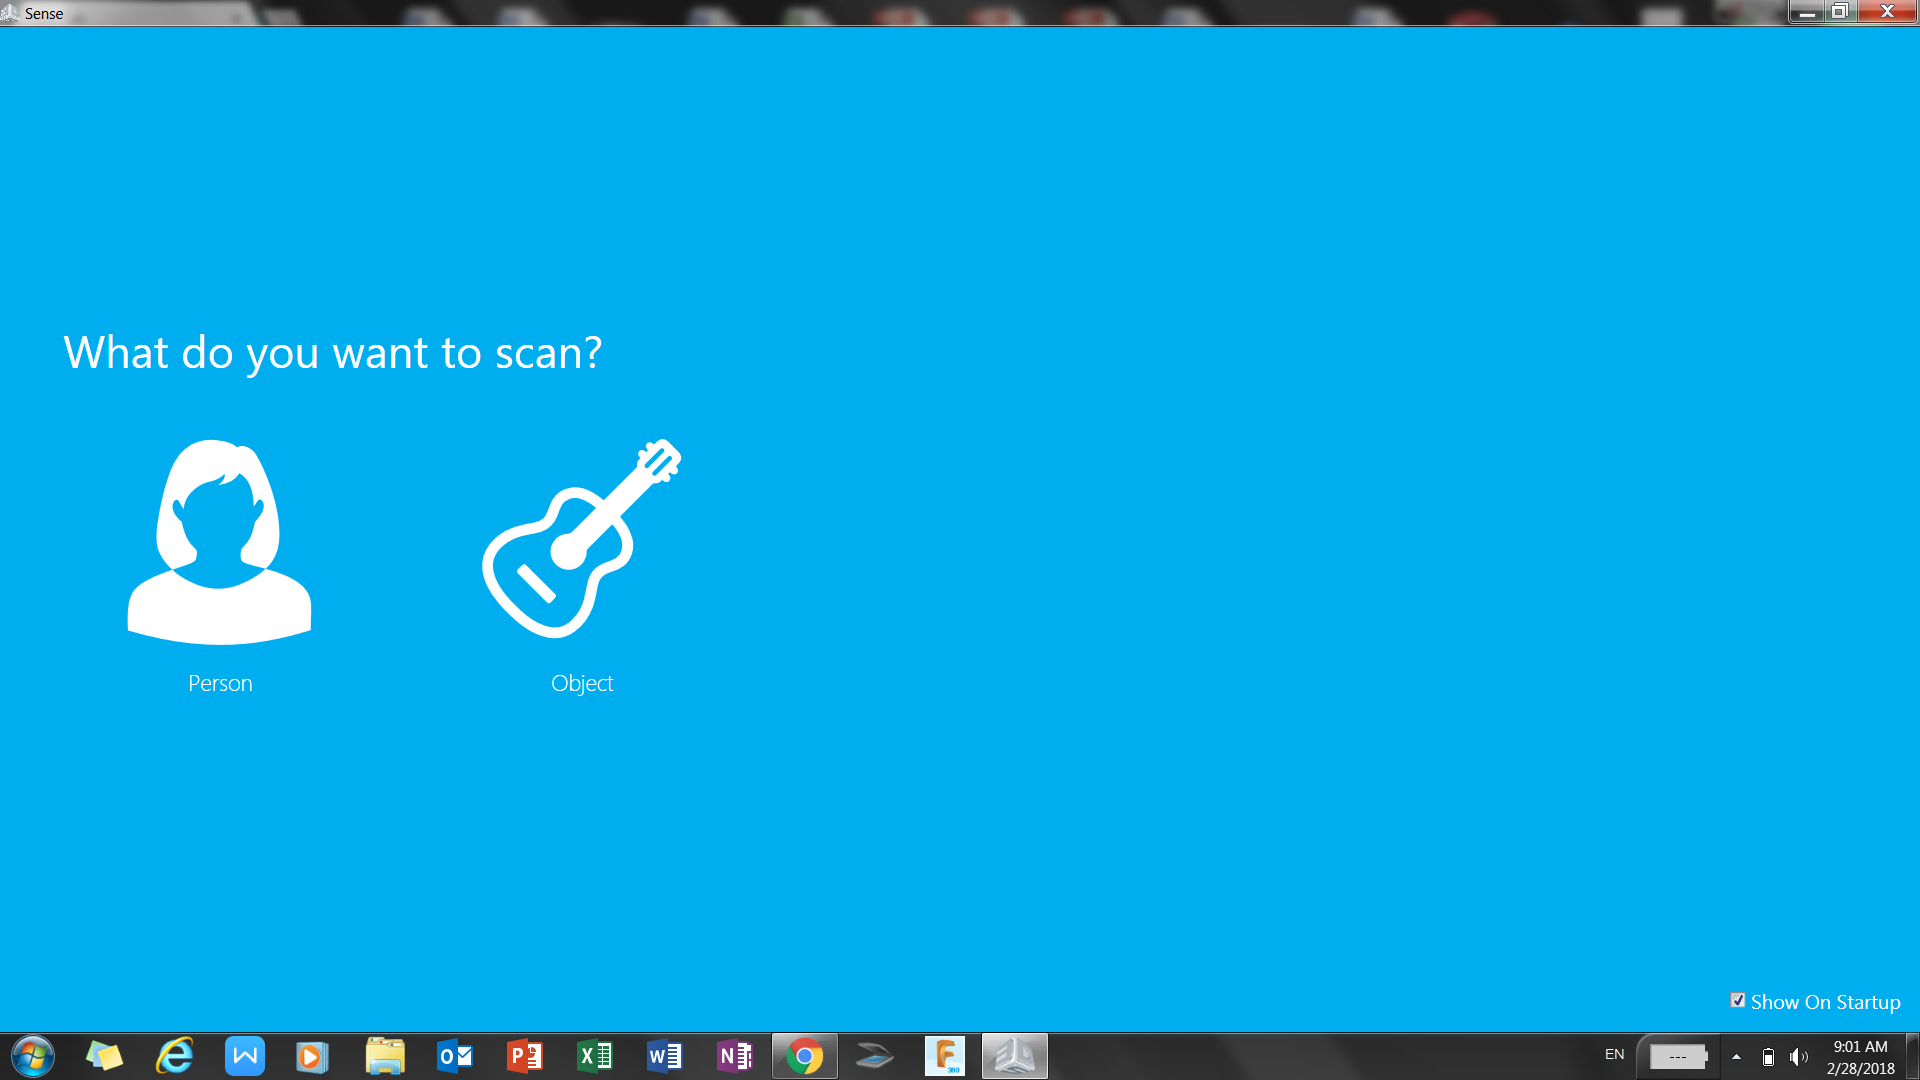
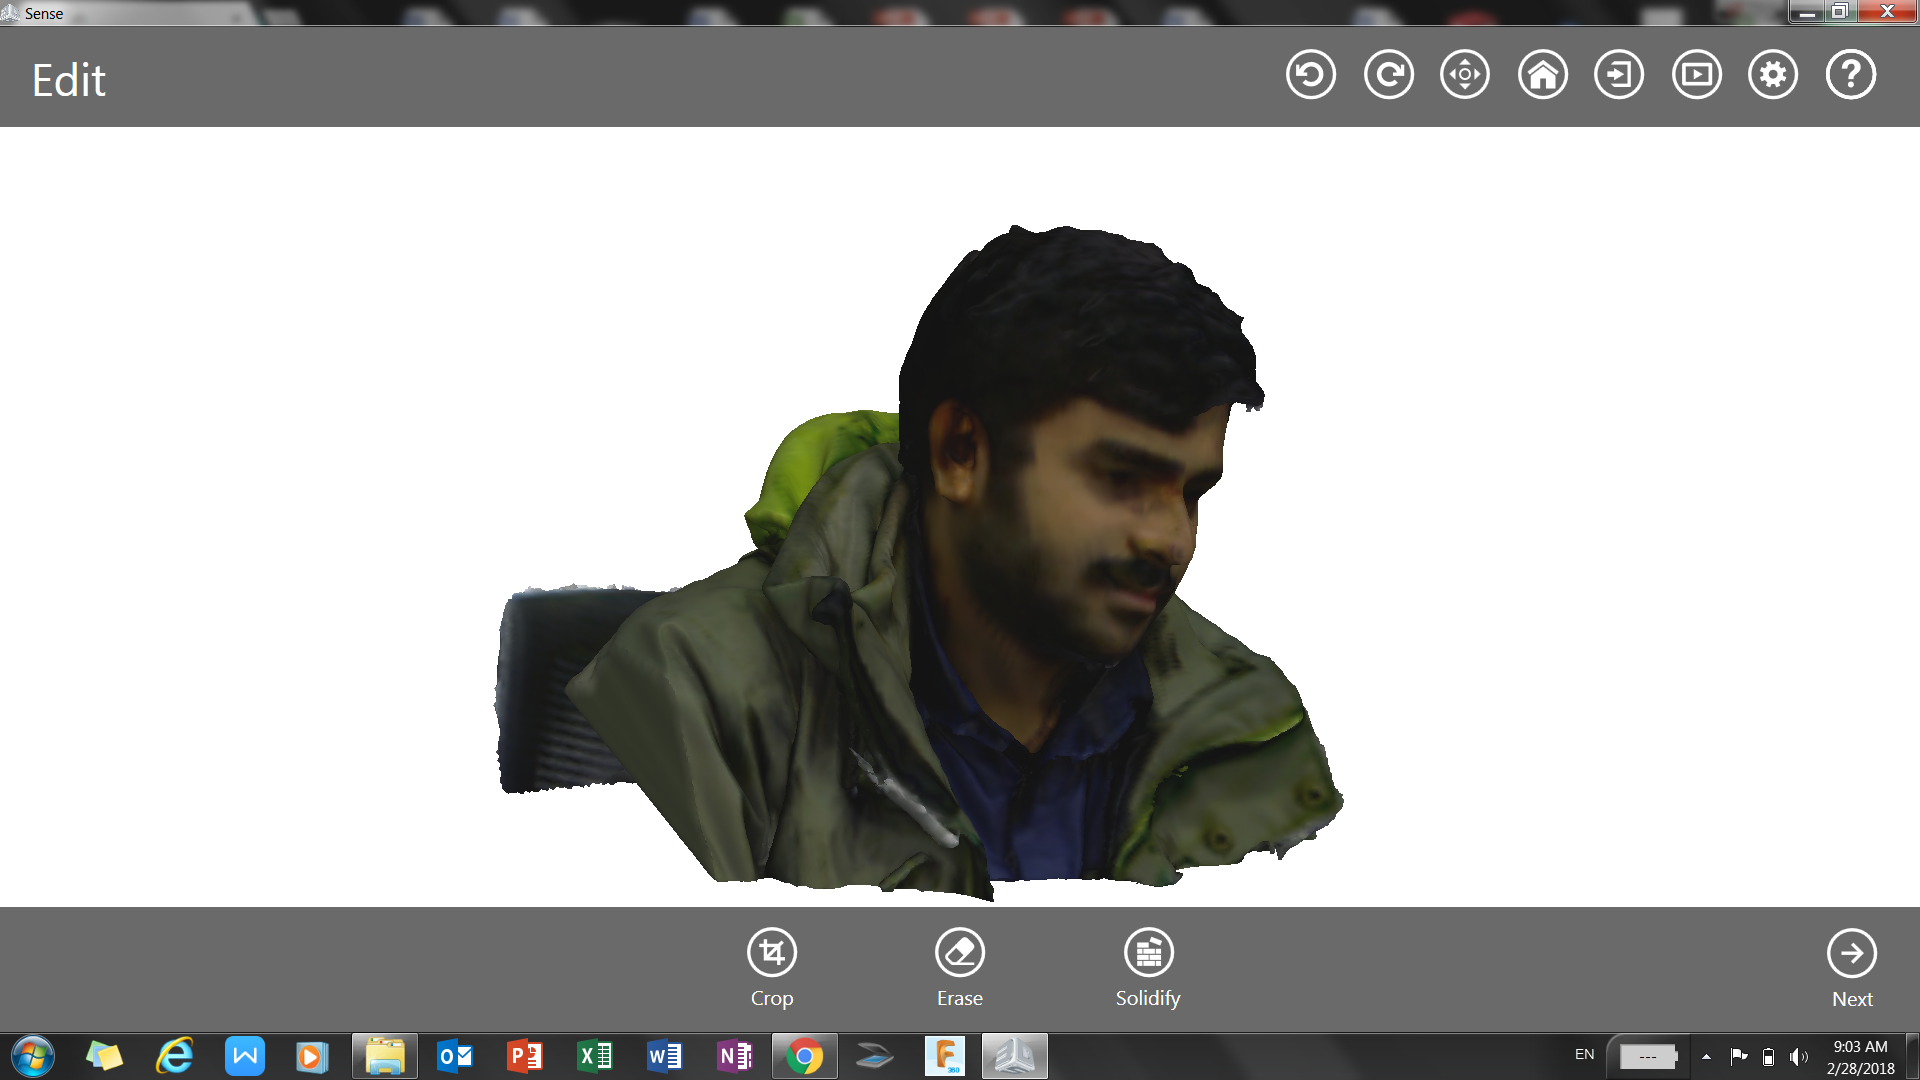
3D scanner is used to scan and 3D draw objects. The 3D scanner we are using is the Sense first generation, it has one optical camera to capture texture and one infrared camera to detect the shape. I have previously tried using it. it was very sensitive to my hand movement and honestly my hand shake a bit so it was kinda a disaster. This time I have tried scanning small objects (Pepsi can) it was not successful at all as the scanner kept loosing track of the object. We have tried different method me and friend Sanad, were rotated the object around the scanner, but none have worked fine. We finally did a scan for our instructor Sibu where he was sitting on a rotating chair and I was holding the scanner and moving up and down while he rotate (This was a success). Dr Musa has an Isense on his Ipad scanning using the I-sense give better results compared to our first generation sense scanner.
For the molding and casting and for composite week I did 3d scanning of my leg and then used it to create a cast using the shop-bot to create a football shin gaurd. As 3d scanning would help acheieve a real press fit shin guard that would be annoying while playing football due to the perfect size. I did that by selecting to scan a meduim object from isense softwatre, Then I stood still and Sibu carefully did move scanner around my leg. Please refer for my composite week (wild card) to check the final product.
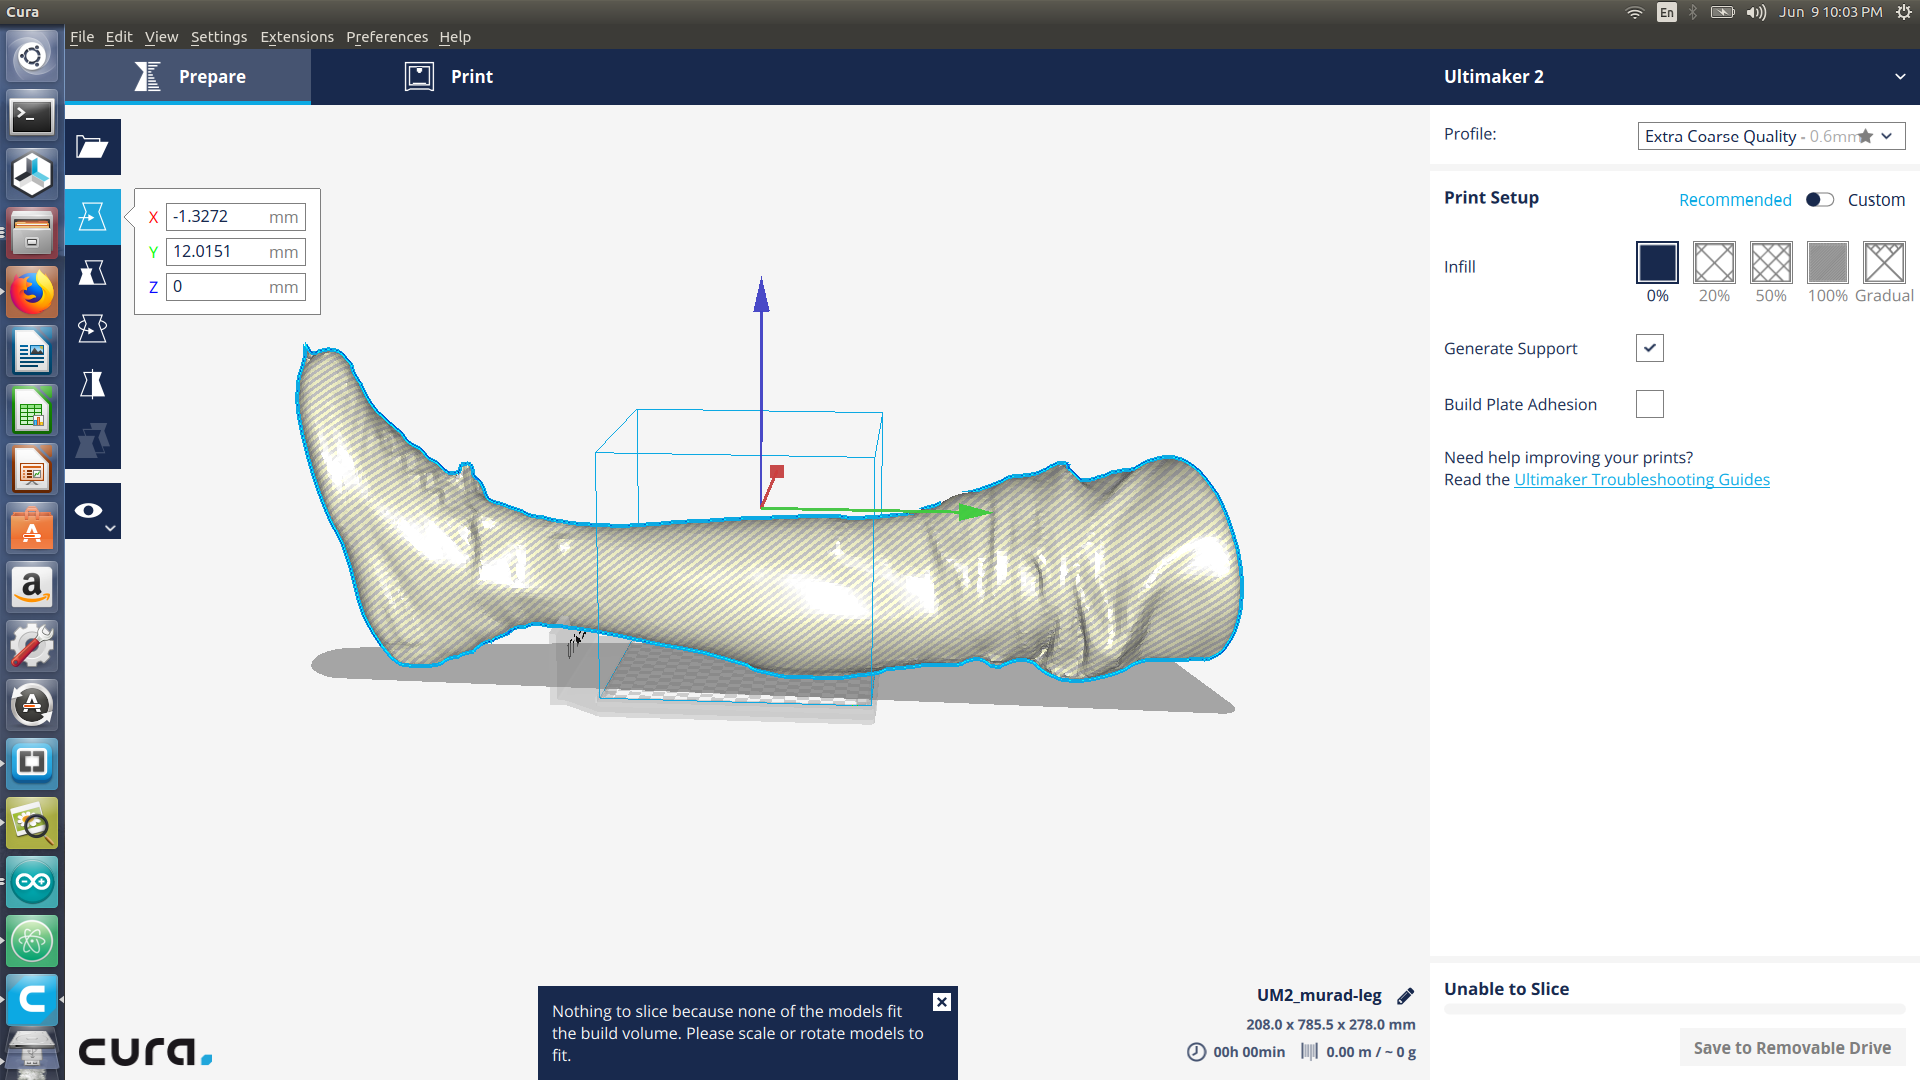
Check the 3d scan file download stl file
Ultimaker 2
During the Pre-fab academy almost none of the Ultimaker 2 we have were working properly, I ll add the cleaning and troubleshooting procedure below. in addition to how to operate the machine and Cura.
ext step was to set the Ultimaker to be ready to print. As we are using heavily pre-used printer more time was spent on training and fixing the printers. All printers were exteremly dirty, some glass plates were broken due to the usage of glue, and one of the printers nozzle was full with filament melt and stuck around the nozzle.
-
Cleaning
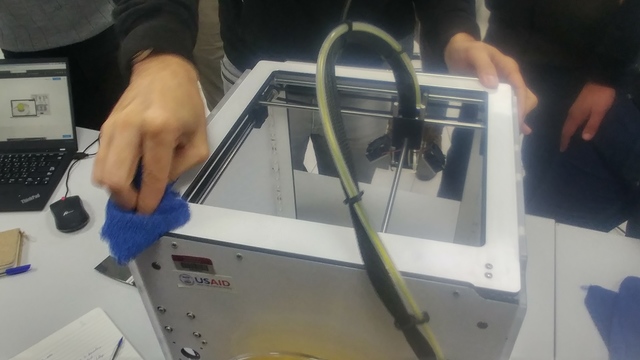
image 1:cleaning the exterior
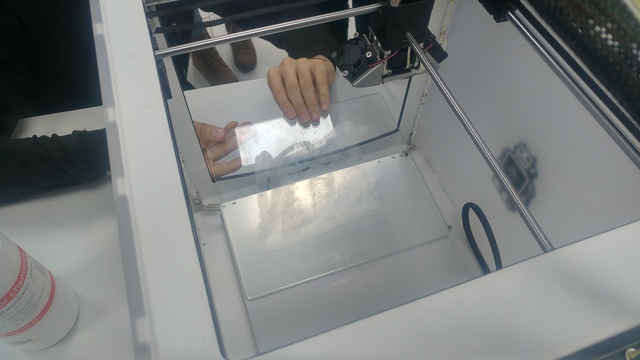
image 2: Removing glass plate
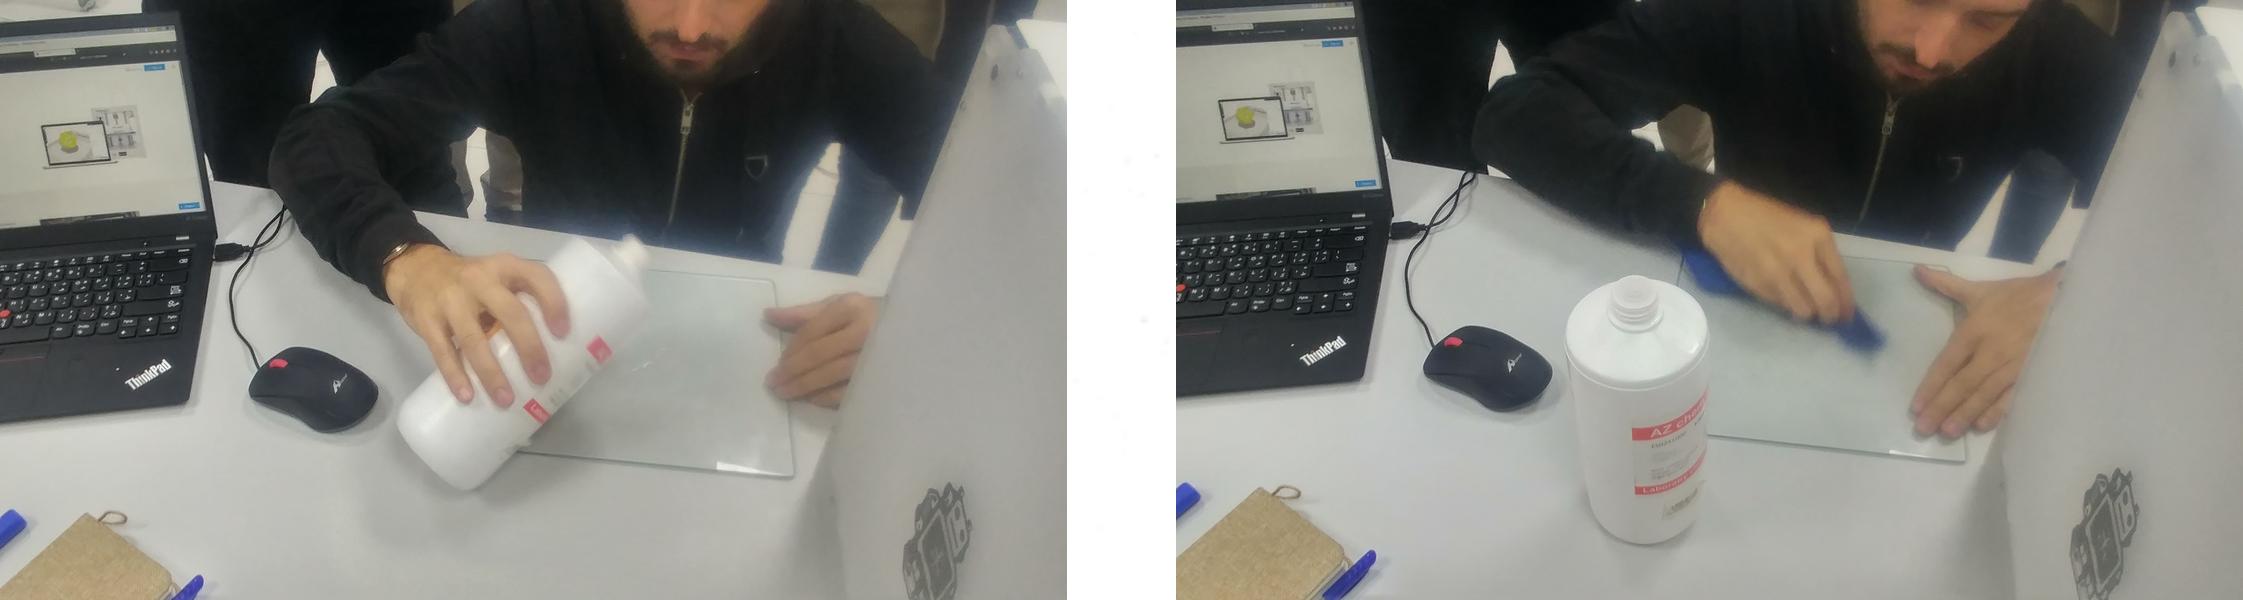
image 3:Cleaning glass plate
we Should always ensure to keep 3D printer clean. The glass bed is cleaned by opening the clips (image 2) then removing the glass, the glass is then wept with alcohol (image 3). in addition to that always do ensure to clean the feeder motor as dust do affect the filament.
-
Pre printing procedures
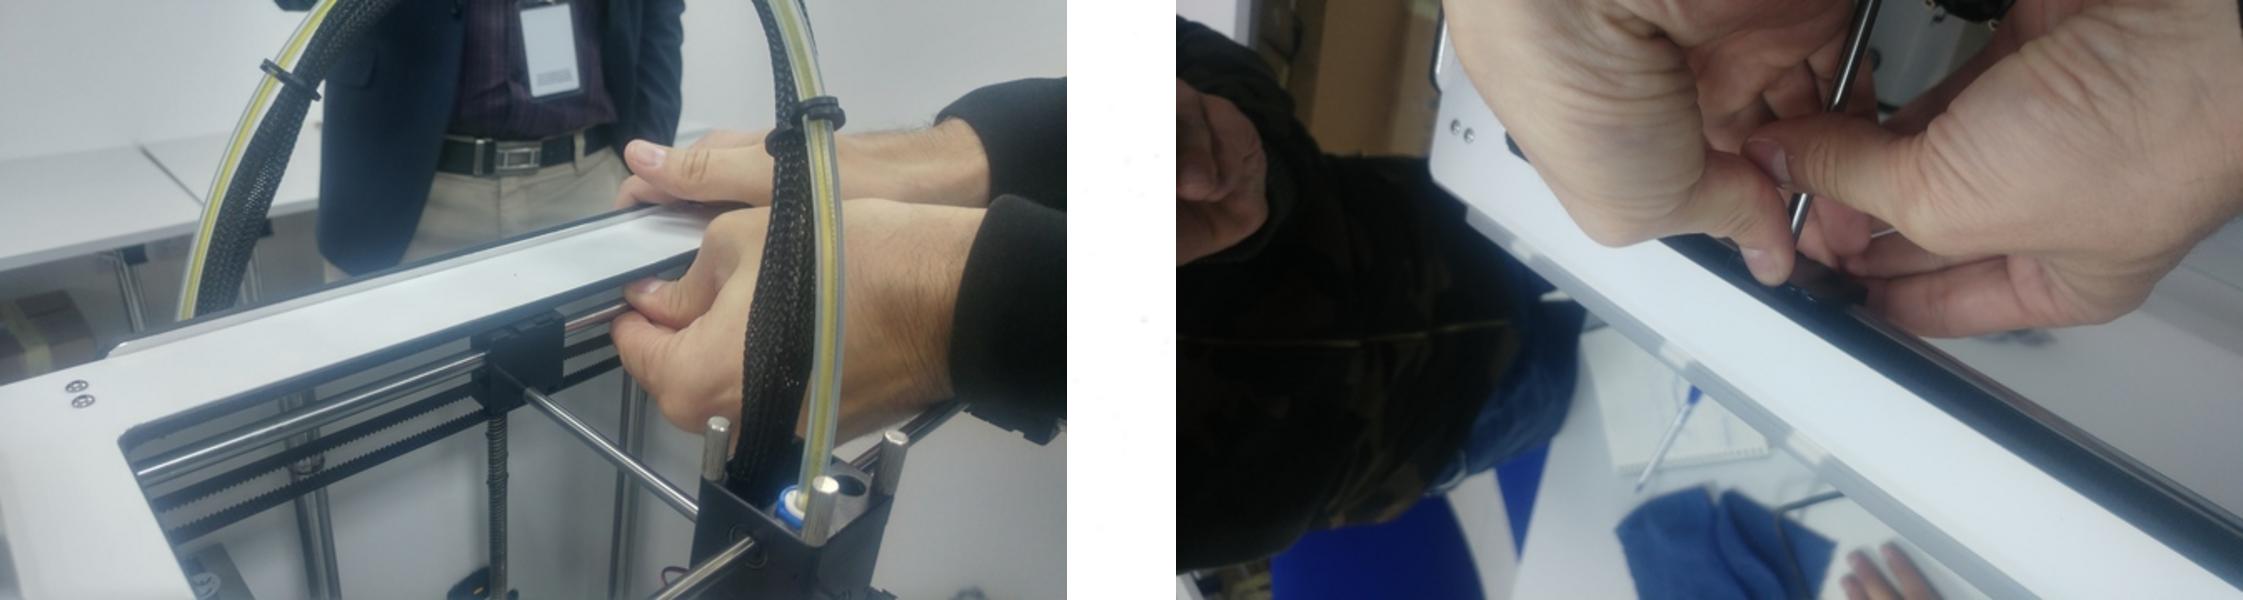 image 4: checking the rods

image 5: Checking the belt
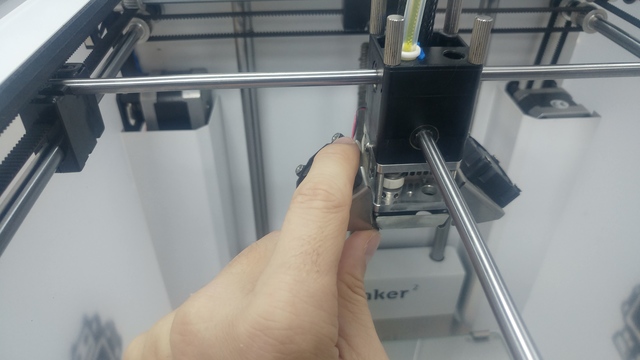
image 6: checking fans
prior to cleaning the printer, check the printer status. This is done by making sure the 4 rods (image 4) are not moving, The black belt is stable (image 5), Check the fan location(image 6).
-
Printing
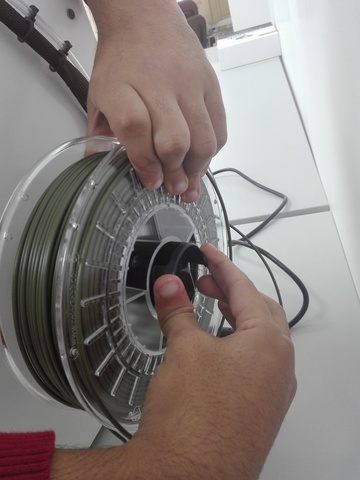
image 7: placing filament
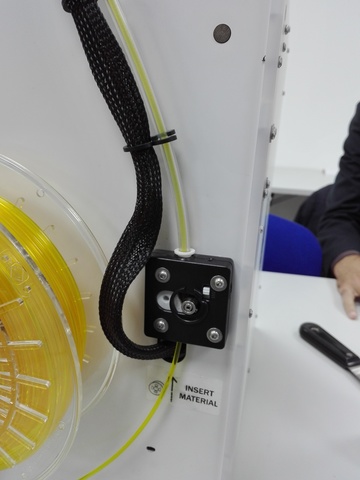
image 8: placing filament in the extruder

image 9: move material
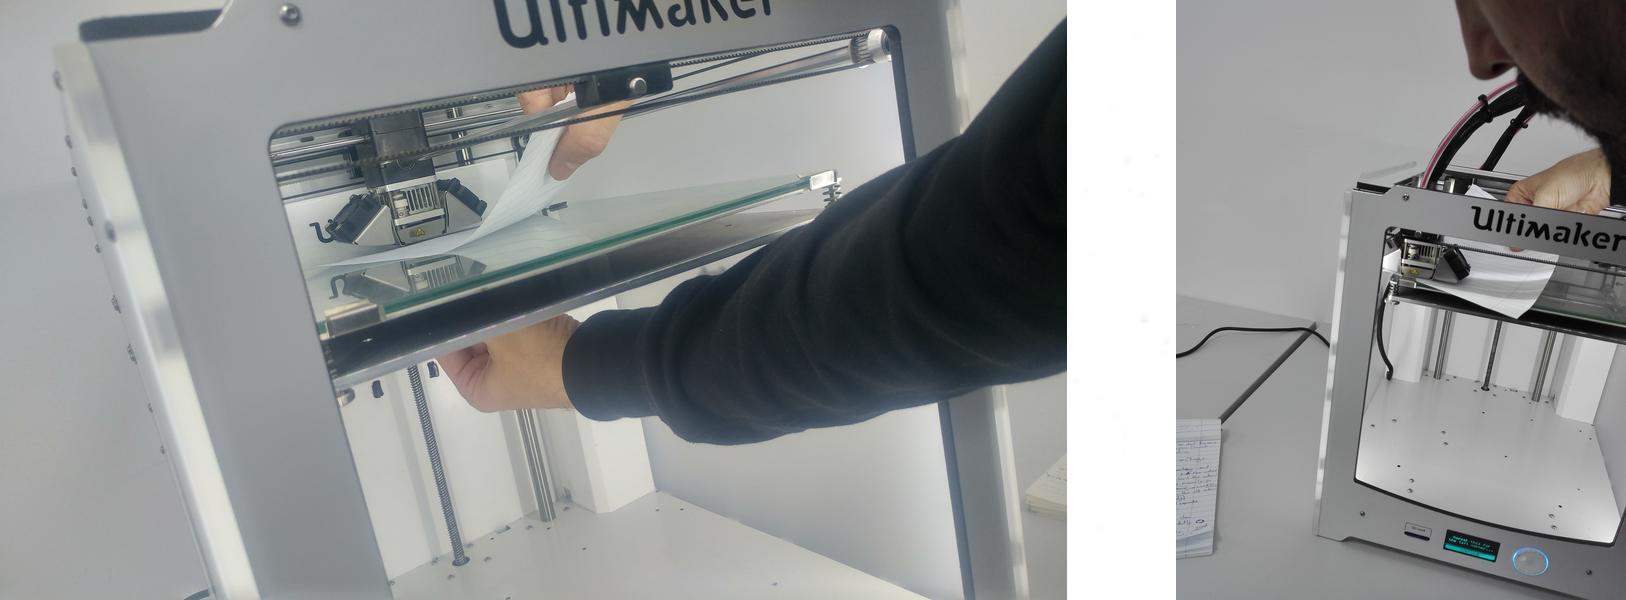
image 10: leveling built plate
We Start by placing the filament to the ultimaker (image 7), then insert the filament to the extruder motor (image 8) and choose insert materials option from the ultimaker monitor.Before you print always check the filament specially if it has been used before, to do that access maintenance from the ultimaker monitor then press on move filament. ( * this step should be done every time you change the material or if you abort a job ). Once the filament is all set, access maintence option and choose leveling to start leveling the build plate as the distance between the nozzle and the build plate should not exceed the thickness of a paper. To do that properly you must use the leveling card that comes with the ultimaker, however it was lost thus we used a 0.1 m thickness paper.
-
Problem faced
As the printer filament were used before we faced a problem extruding the filament from the nozzle this was because the filament was melted and reshaped inside the nozzle, thus we had to remove the filament(image 11) and cut it(image 12) in order to fix this issue.

image 11: removing/cutting filament end
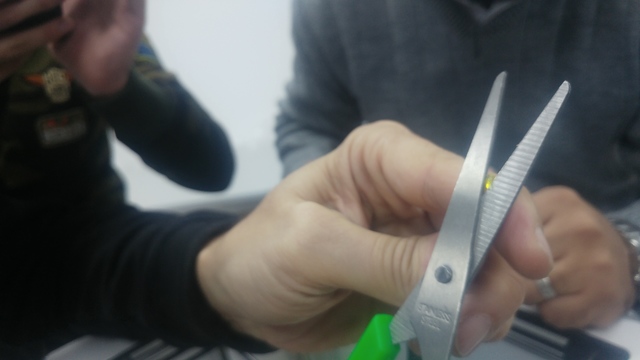
image 12: cutting filament
Printer stopped while printer and this message was shown on the ultimaker display build plate Temperature sensor error. The build plate temperature sensor is below the build plate. To fix this issue we removed the build plate and checked the sensor wires, some of the sensor wires were a bit loose thus we tightened them up and re placed the sensor back.
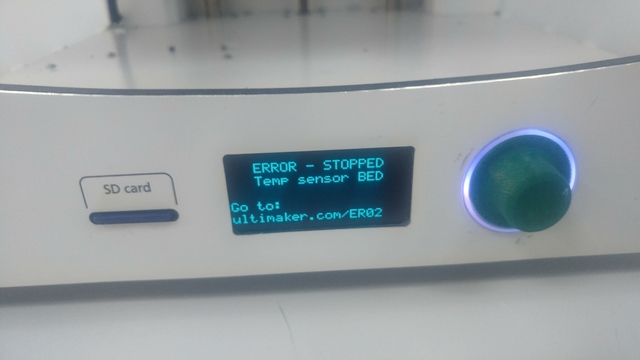
image 13: error message

image 14: removing build plate

image 15: tightening temperature sensor
Cura:
Cura is a 3d printer slicing software mainly designed for Ultimaker but it could be used for other printers.
Printing Ultimaker 2 knob:
- Open the downloaded stl file
- Choose the infill to be 20%
- If you are printing a tall object usually tick build plate adhesion and generate support
- Save the file to a SD card
Printing:
- Place the SD card inside the printer
- Access you file and print
Notes:
- Do not glue the build bed
- Filaments diameter is 2.85 mm, where the filament cover is a bit bigger however its smaller than 2.95mm
- High humidity affect the filament and could increase its diameter to more than 2.95 ( if this happens put the filament in the oven for half an hour at a temp of 40 Celsius)
- Do always break the filament, do not pull it after it comes out of the nozzle
- Sometimes the extruder spring push the filament very hard in a way the motor will start to eat the filament which will cause it to stuck. In this case loosen up the spring by rotating the screw found above the extruder.
- Do not use carbon fiber filament unless you need a very strong object ( It will destroy the nozzle)
- To check whats wrong with your Ultimaker go to [Ultimaker trouble shooting]
- you can print objects with a maximuim 45 degrees without the need of support
- You can never print a pointy design using Ultimaker 2
- Always watch the first layers to ensure everything is smooth
- The building plate should be 0.1 mm away from the nozzle ( This is done by accessing going to maintenance then bed leveling and following steps)