This week I am using my hello board made in the electronic production week to write some code.
For language, I chose Arduino IDE because I have been using arduino for a long time and I also learned C myself. Also, there are plentiful examples about using arduino IDE to program a new board.
LOAD ATTINY LIBRARY
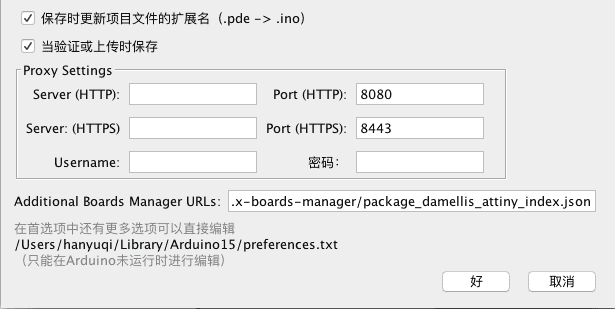
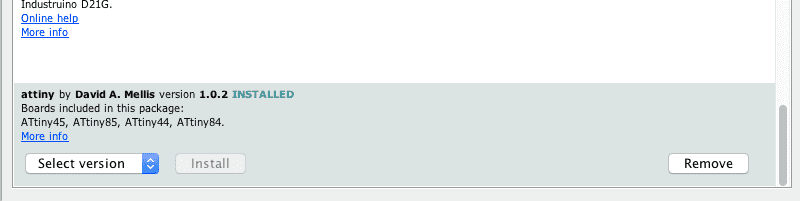
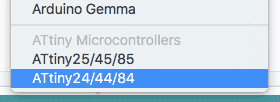
At the starter you do not have an Attiny Board library that you cannot select the board you want at "tools" or program the board. So we have to add the url manually at "settings" and install the Attiny library at boards manager.
BURN YOUR BOARD
The next step is to burn the bootloader, which is an initial program for your board that allows your initially innocent board to learn to recognize the language of arduino. But before we burn the board, we have to know how to connect the icsp port.
PROGRAM WITH ARDUINO AS ISP
In fact, we we use Arduino Uno as an ISP if we do not have a usbtiny ISP or Fab ISP. Here is the instruction.
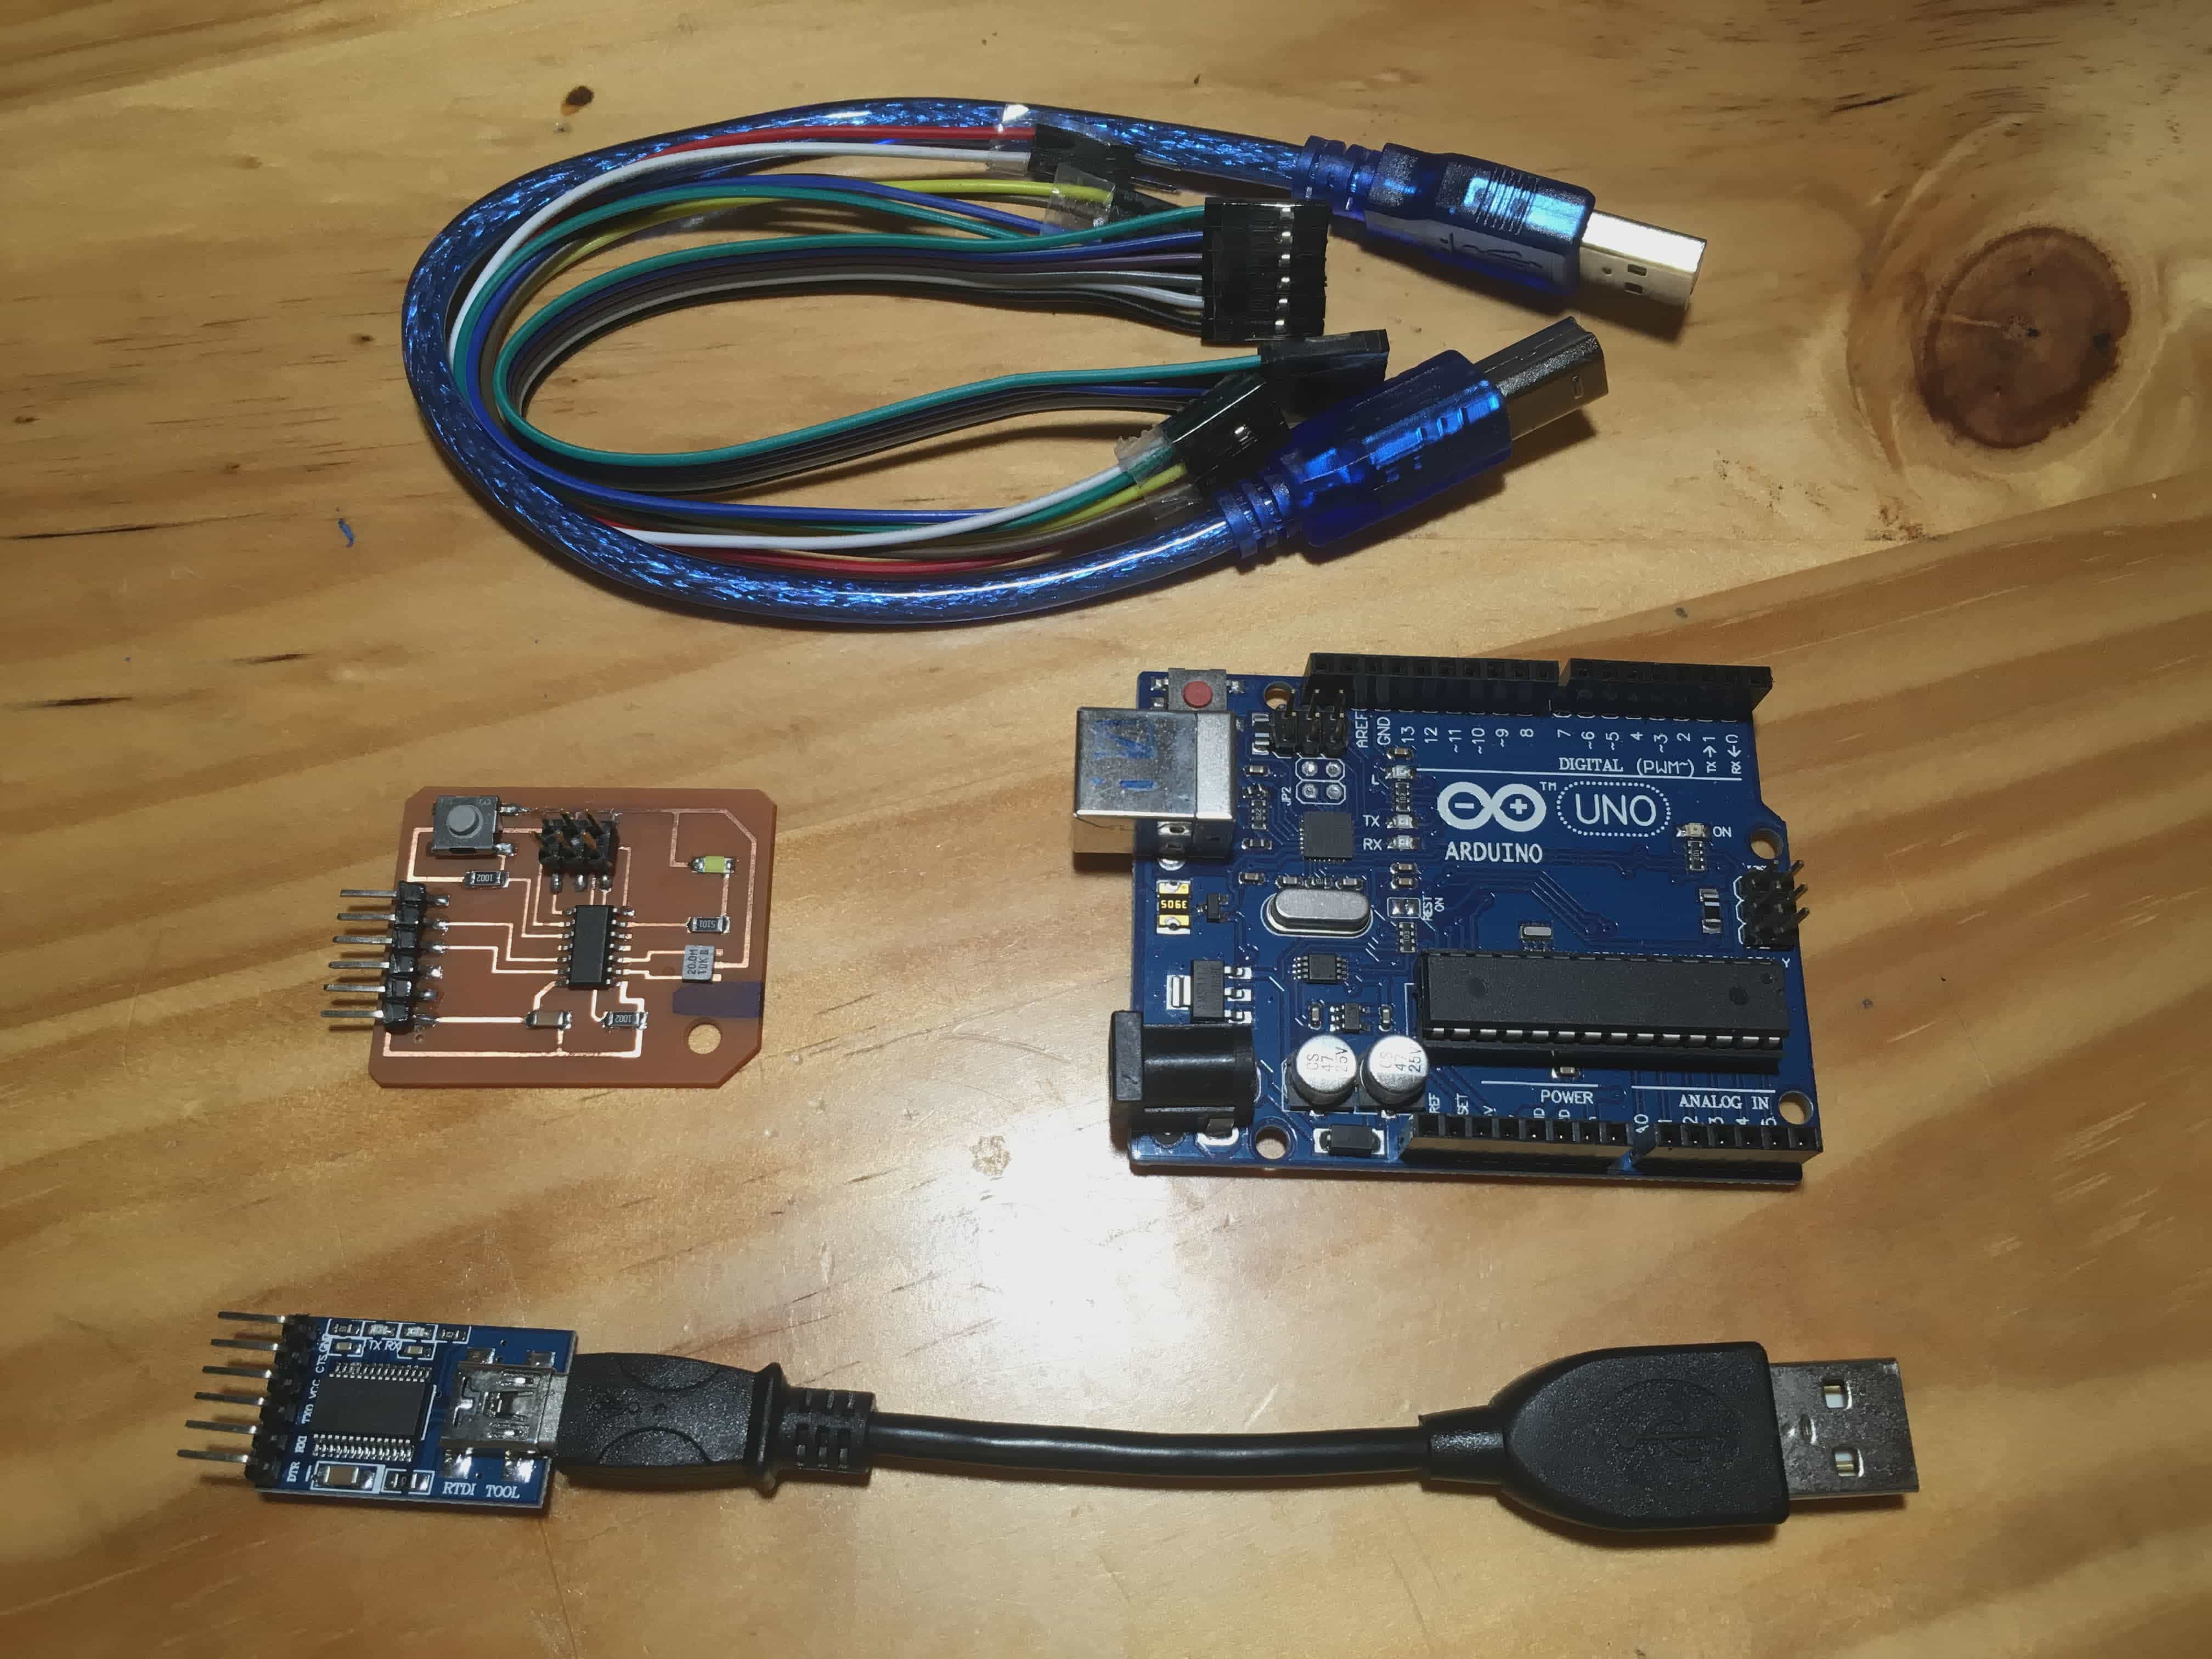
Here are what we get: hello board, arduino uno as isp, ftdi serial, and some wires.
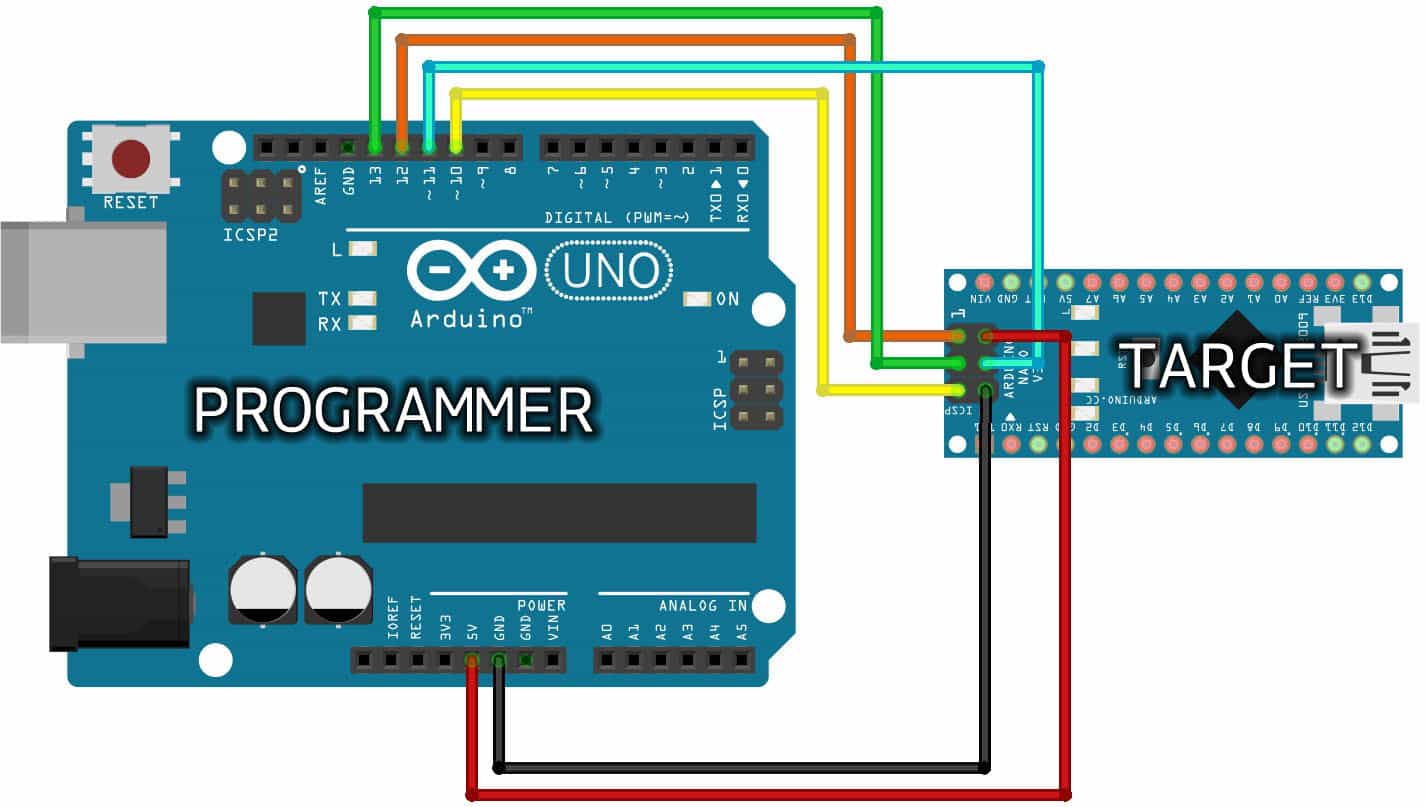
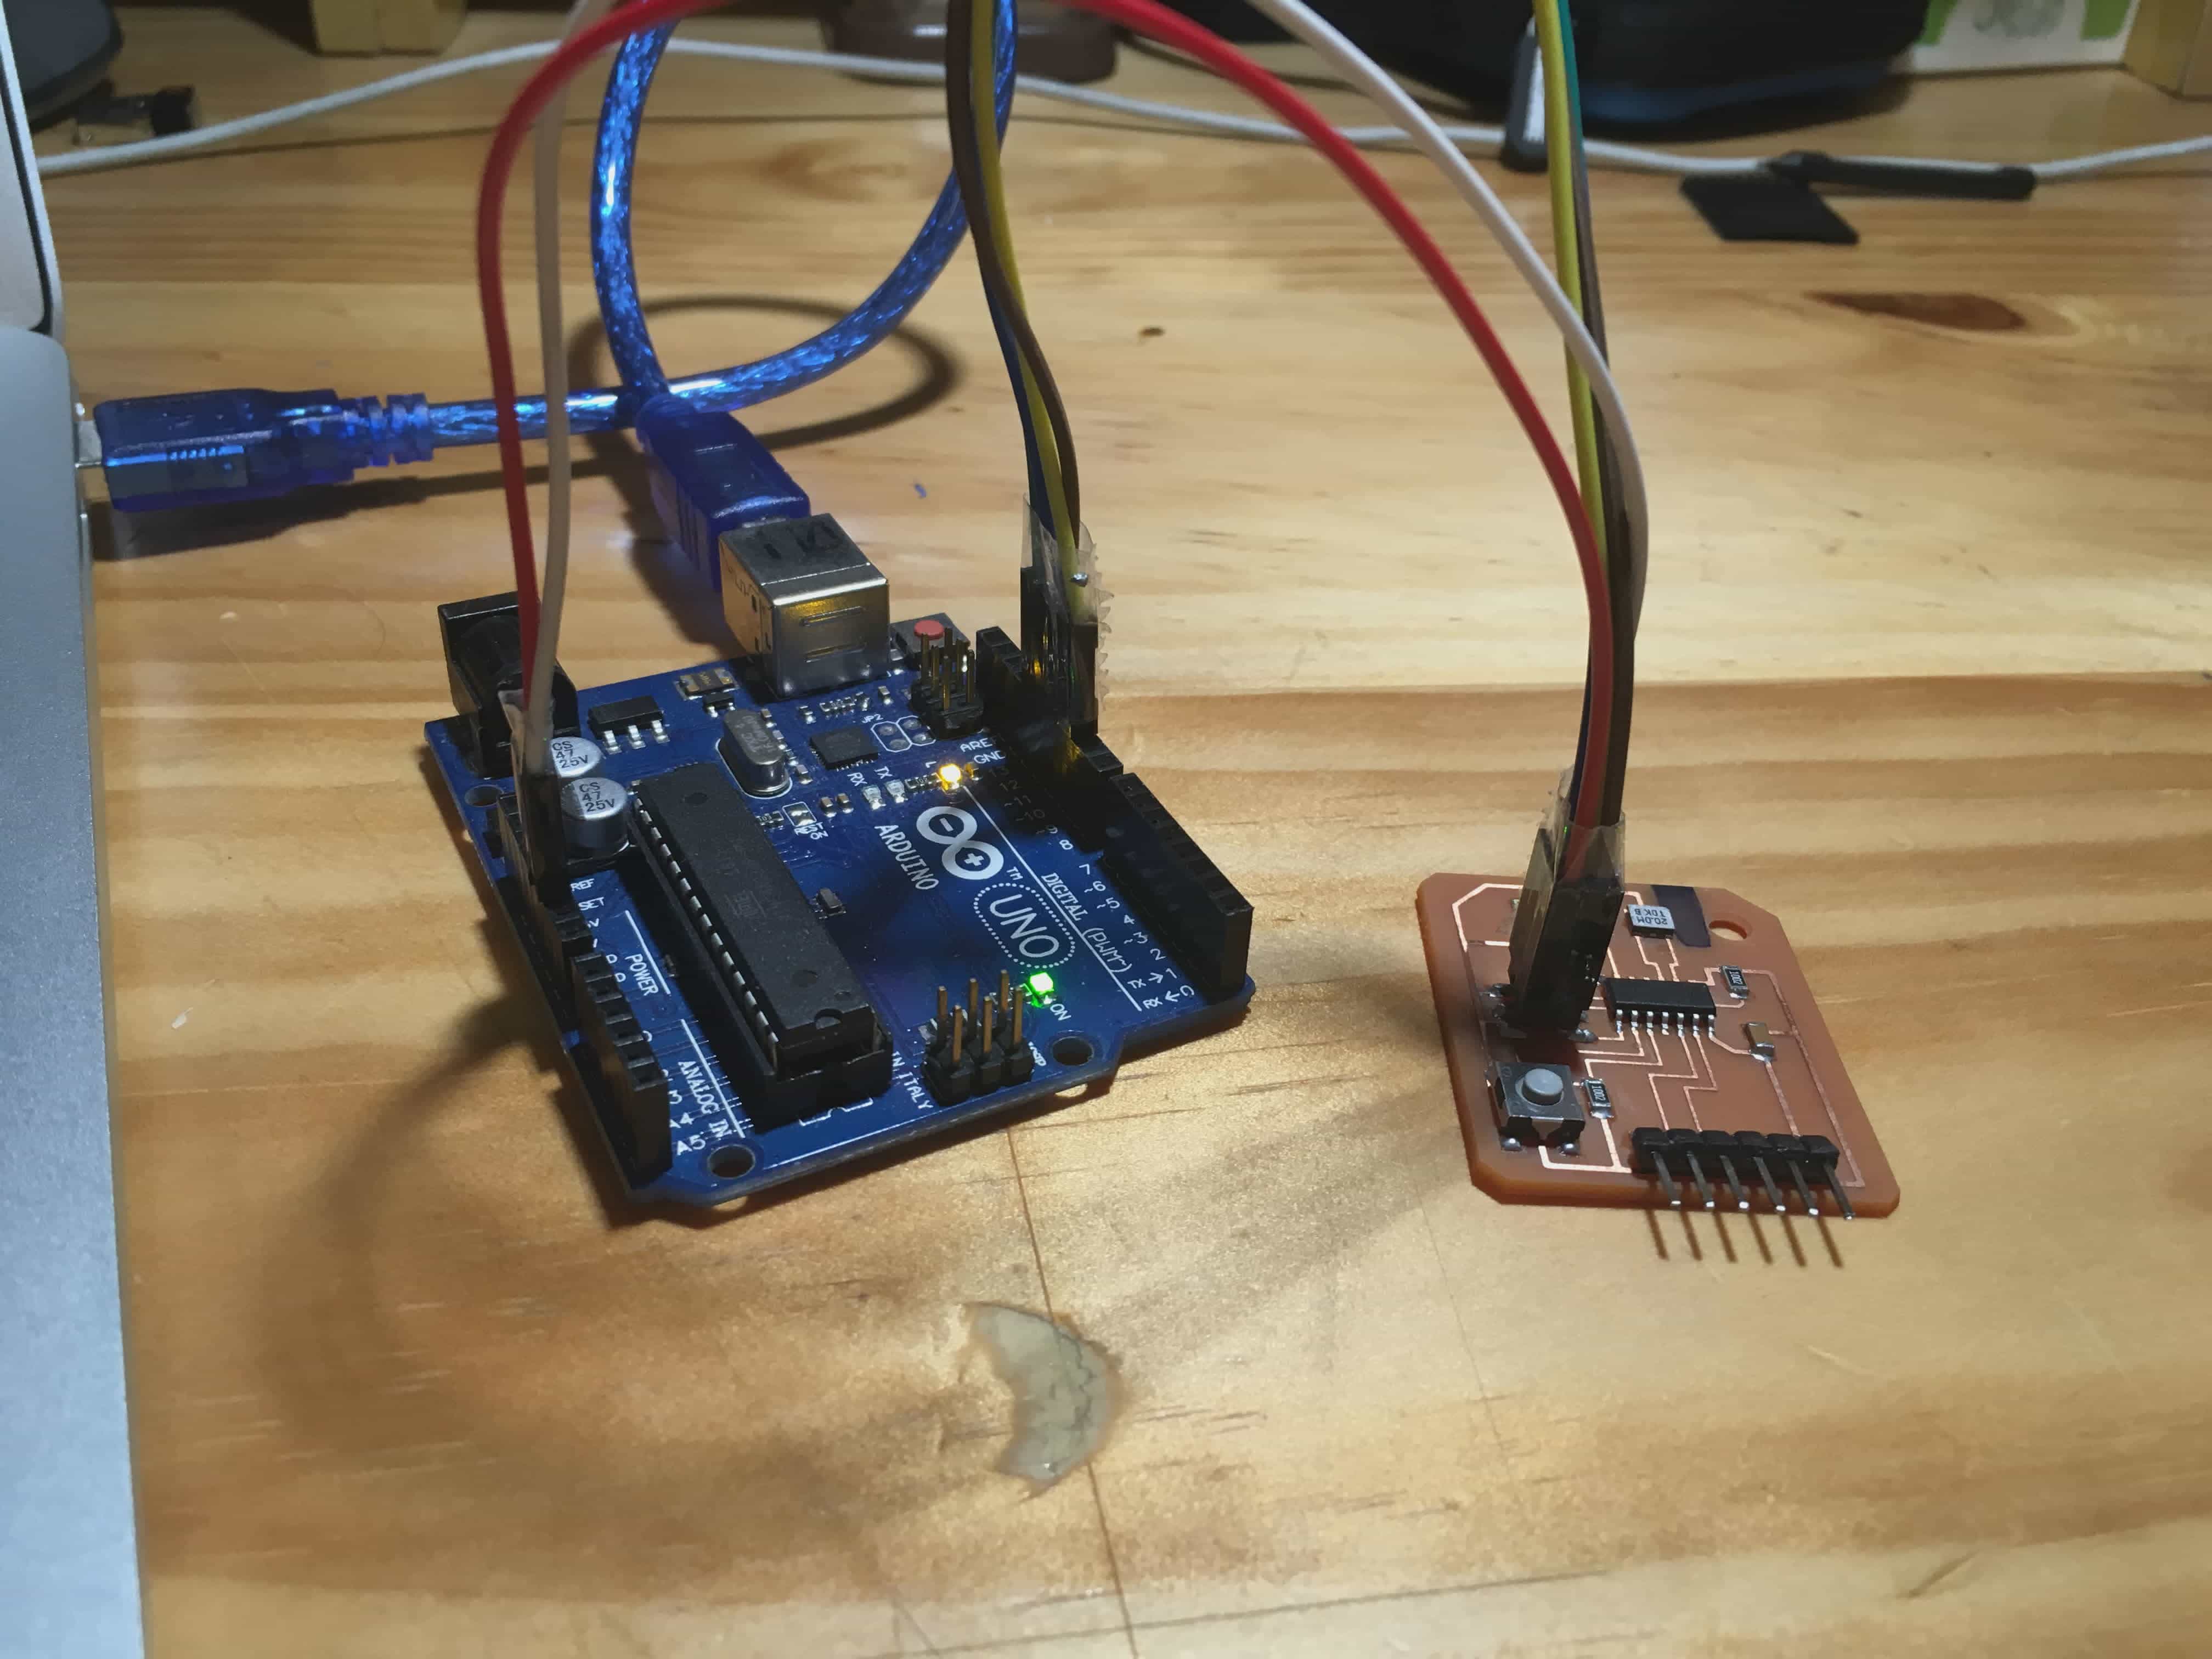
Connect the Wires and Pins correctly.
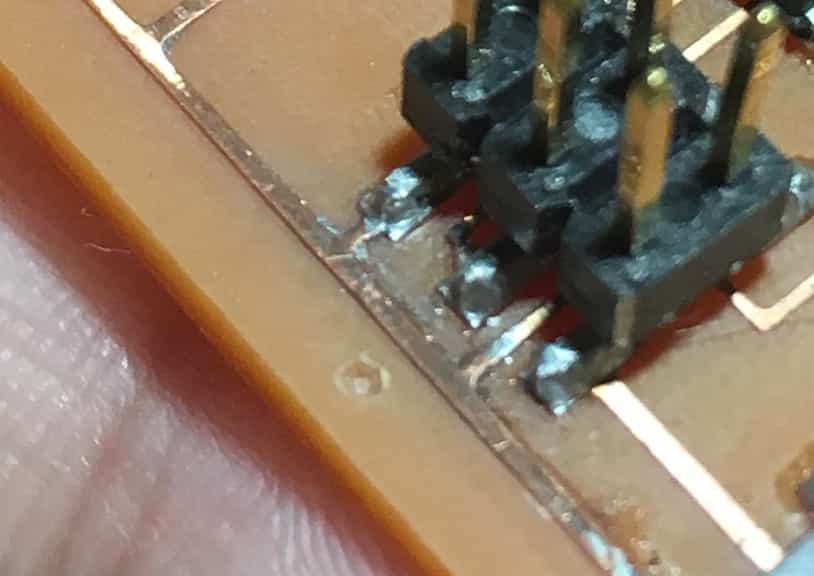
To distinguish the direction of the icsp port, I drilled a hole on the side of GND and VCC to remind me of that.
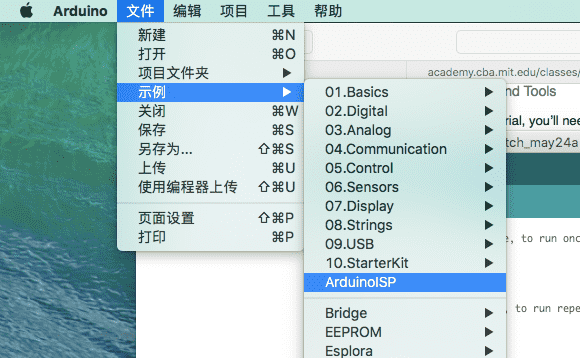
Wait. To use arduino uno as an ISP, we should first upload an example code called "arduino ISP" to an Arduino Uno. After that, your Uno will become a ICSP board.
Choose ATtiny 44 board, External 20 MHZ clock (we choose this because we have already designed an external crystal on the board), usb port, and Arduino as ISP.
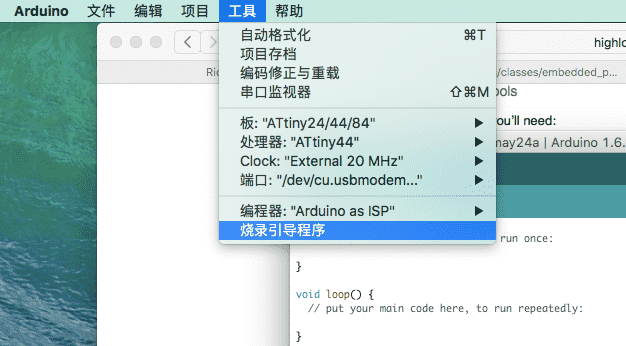
Now, burn the bootloader.
PROGRAM WITH FAB ISP (USBTINY ISP)
We can also use Fab ISP we made in the electronic production week.
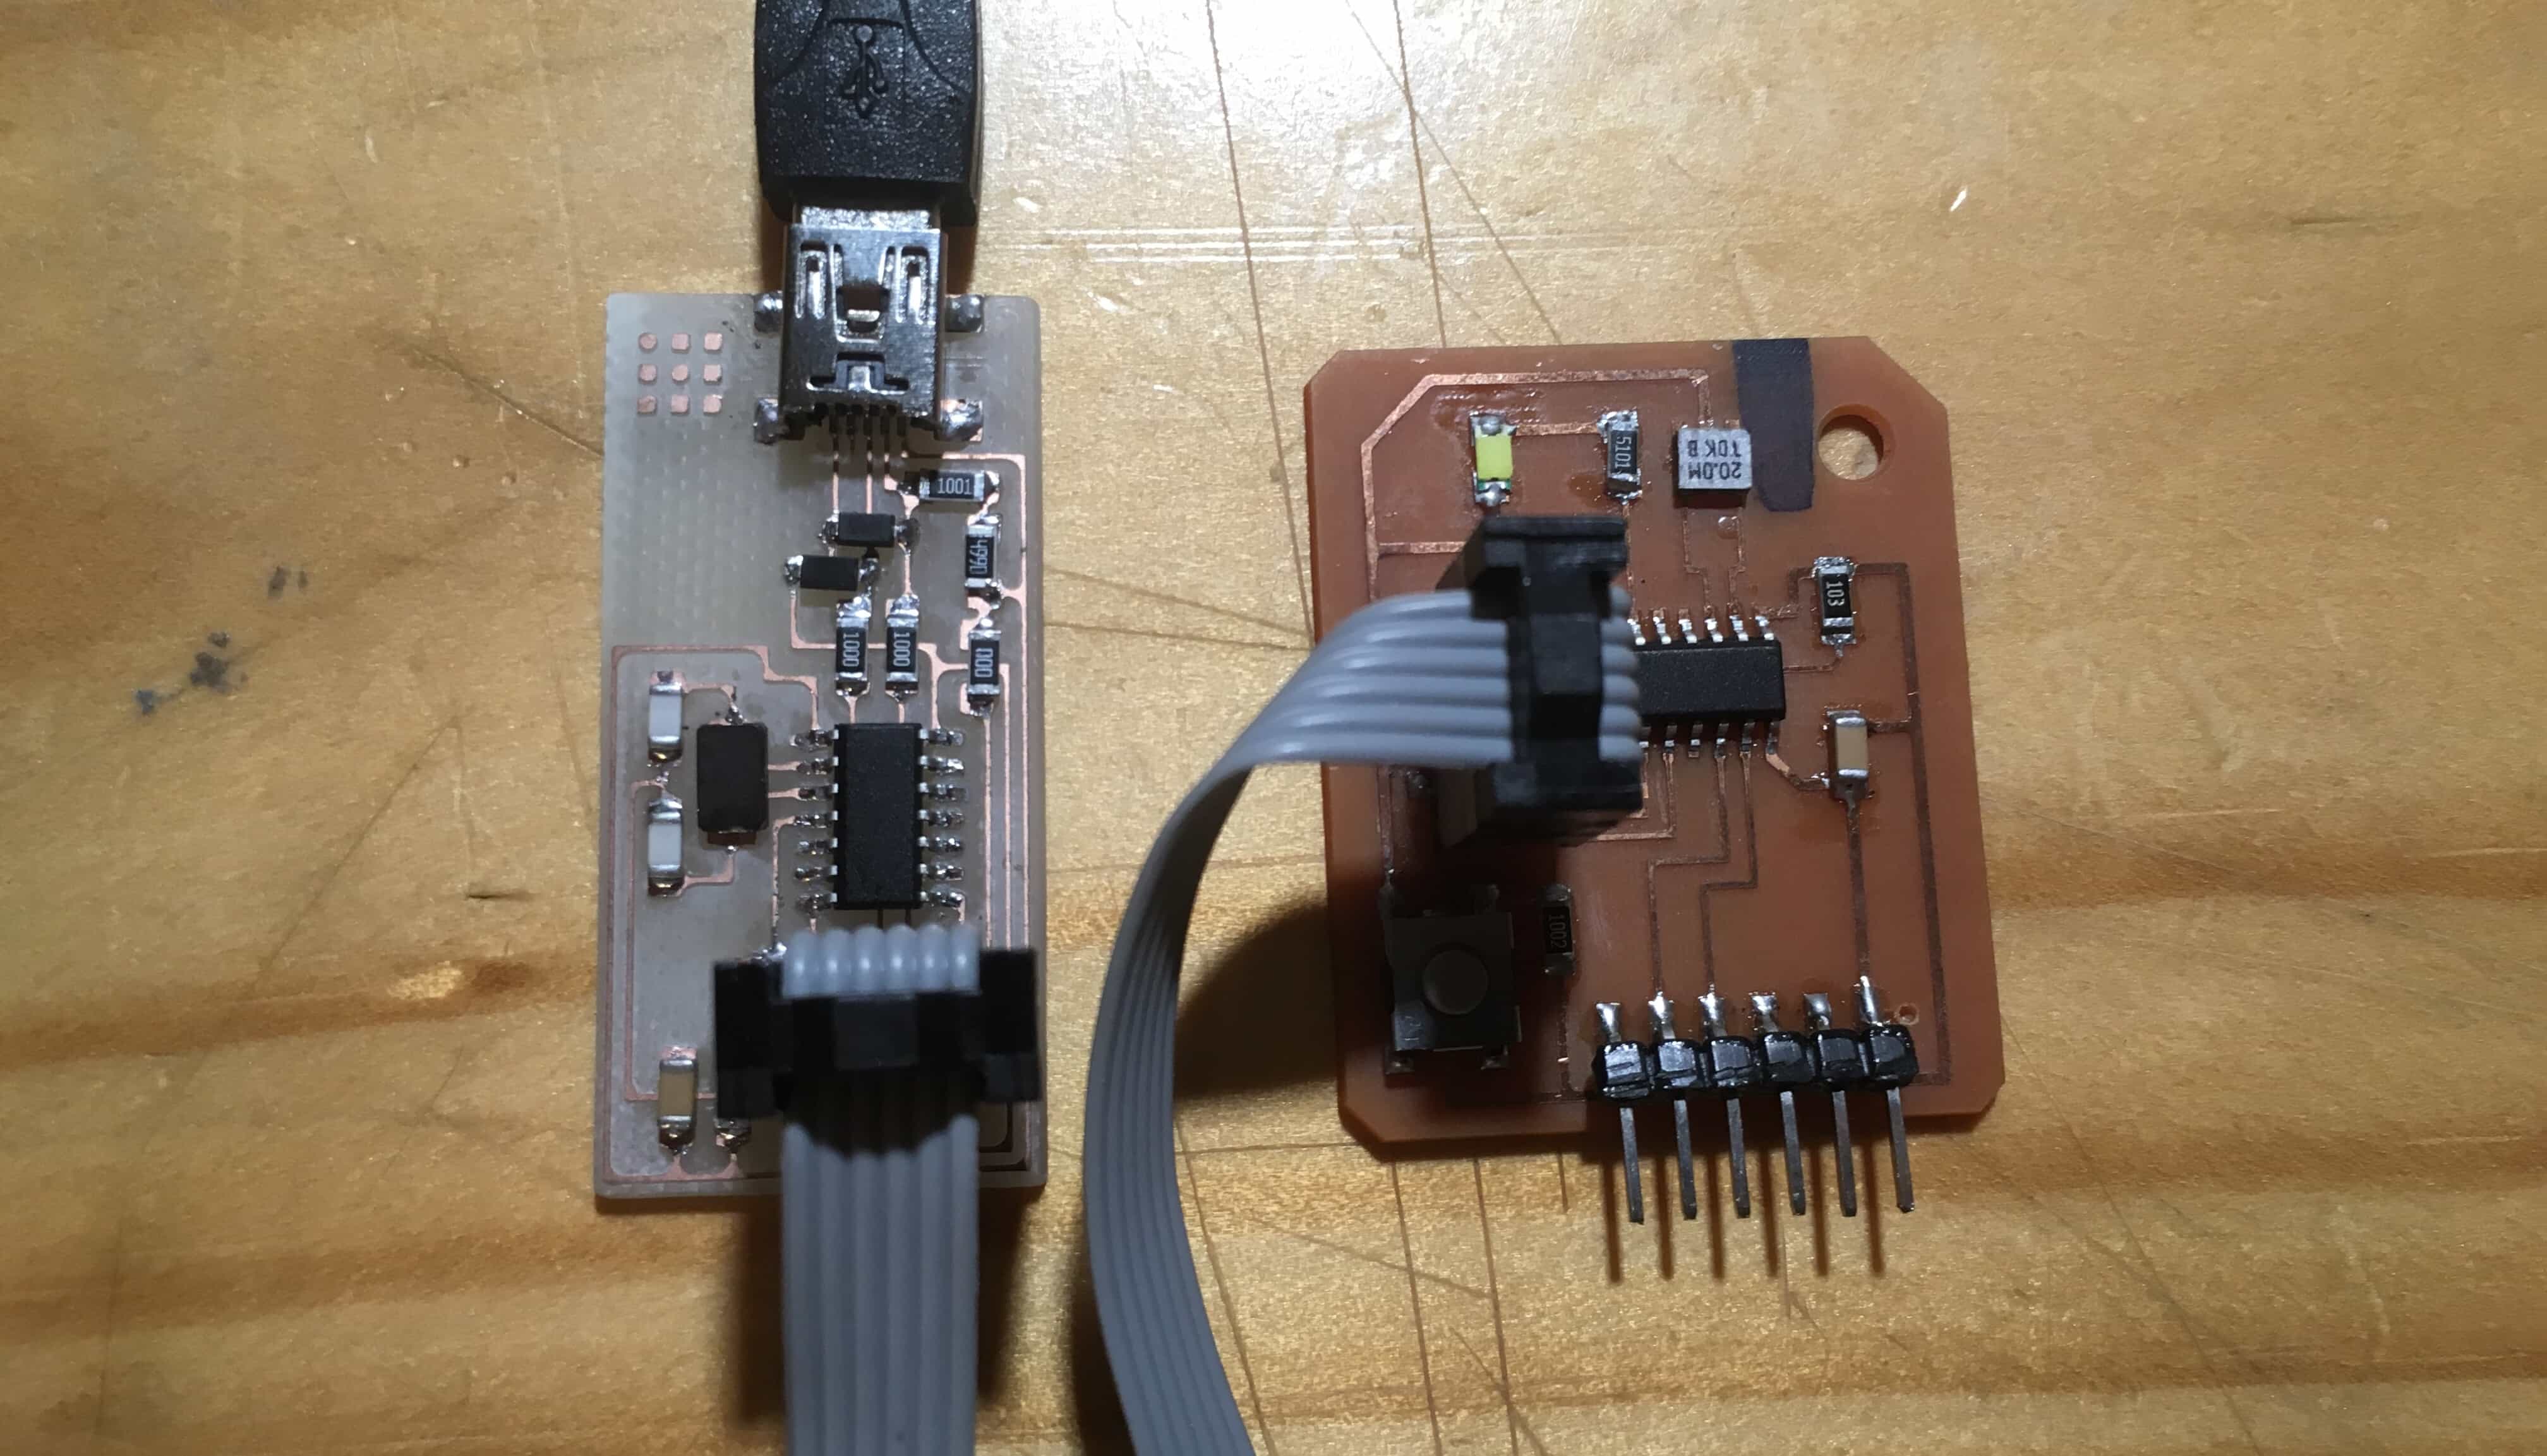
First, connect the board with Fab ISP correctly.
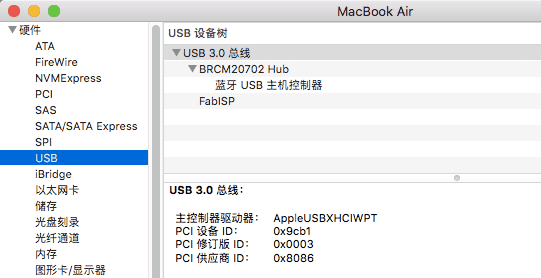
Second, connect the Fab ISP to your computer, and check the USB device to see if "Fab ISP" appears.
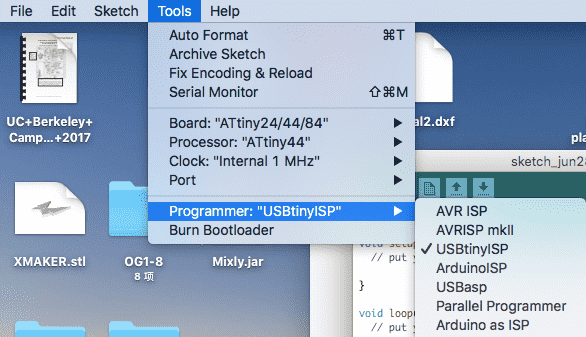
Third, choose "usbtiny" as the programmer in Arduino, and do not choose port. Then burn the bootloader or upload your code.
Video: Programming the hello board with Fab ISP
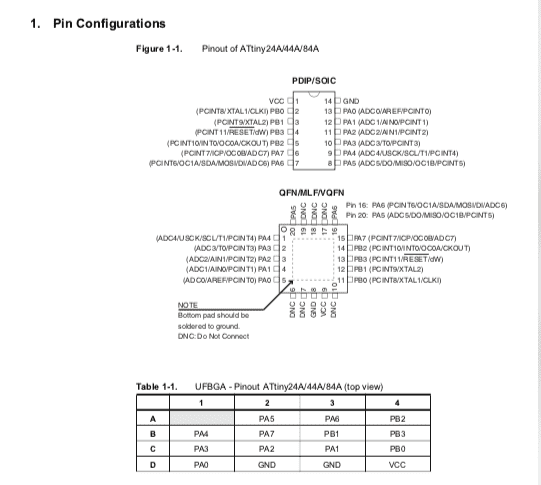
READ THE ATTINY DATASHEET
Be clear about the functions of each pin. Some pins can both output and input, while some pins cannot; some pins can only used for energy supply (GND VCC), some can be used to reset (RST).
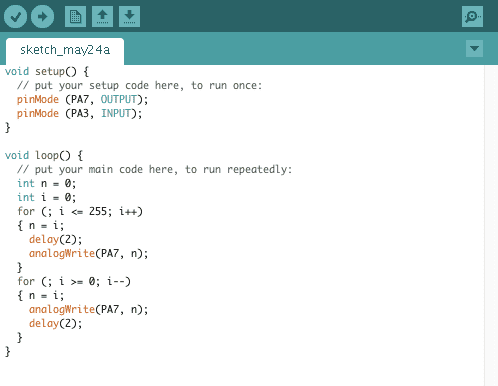
As I know, Pins A have ADC functions, which means you can use those pins to read or send analog signals. For my program, I am connecting the LED to PA7 so that I can change the brightness of LED with analog output.
I used a "for" cycle in the program, which allowed PA7 to output value from 0 to 255 and then 255 to 0, creating a breathing light effect.
For Pins B, they have to connect an outside voltage in order to work. And they do not have ADC functions.
Importantly, PB0 and PB1 have "XTAL" functions, which means if I want to add an external clock, I have to connect the two pins of my resonator to PB0 and PB1.
For PA0, it has a special function "AREF" , which means if you want to measure the voltage through Pin A, you can connect PA0 to a standard voltage, which is stable, helping you read the voltage without any interference of the input voltage at VCC.
WARNING: ATTINY 44 / 45 ARE 8-BIT MICROCONTROLLERS, THE ADC VALUE IS BETWEEN 0~255.
PROGRAM YOUR BOARD
Now we can use Arduino IDE to program the ATtiny board. I use the board to program a breathing light with the LED on the board.
Finished, breathing light.
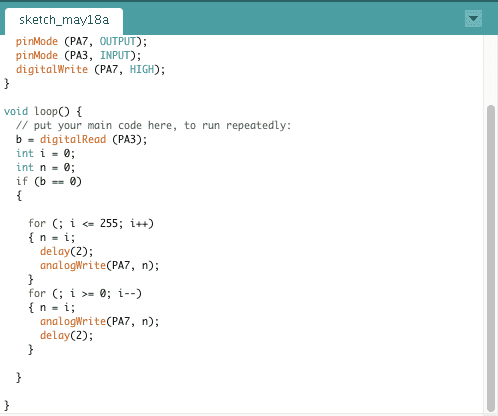
Then I edited the code to make the LED blink only when I press the button on the board.
Here is the code.