Assignment
Group assignment:characterize your lasercutter, making test part(s) that vary cutting settings and dimensions.
individual assignment:
Cut something on the vinylcutter design, lasercut, and document a parametric press-fit construction kit, accounting for the lasercutter kerf, which can be assembled in multiple ways.
Files
Plants_3stk_pdfPlants_3stk_svg
Plants_pdf
Plants_svg
Card_svg
Lamp_pdf
Lamp_svg
Test_pdf
Test_svg
Fidget_svg
Power_button_svg
Vinyl cutter
I’ve used the vinyl cutter a lot. I’ve been using it to make prints for t-shirts. I mostly use my own drawings, take a picture of them or scan them and trace the picture in inkscape. Afterwards I use the heat press to set the print on the shirt.We have two different kind of vinyl cutters in our FabLab.
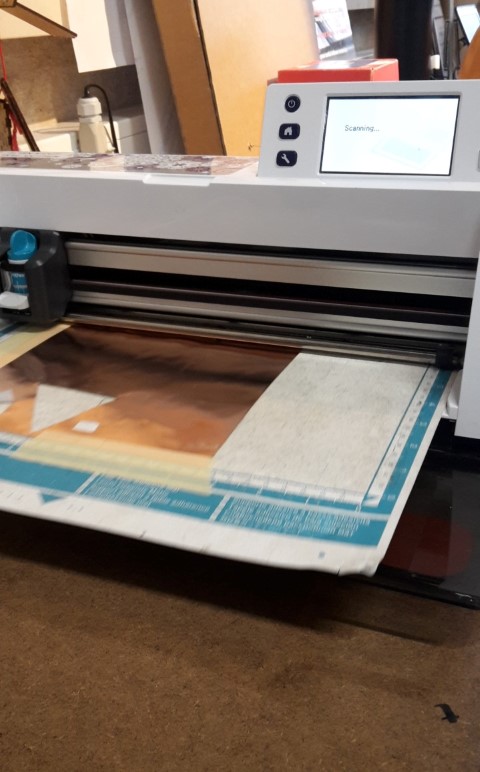
We have the scan and cut which is really smart in the way that you can make your own drawing, then the machine will scan it. Afterwards you scan the piece you want to cut to see where it is on the paper and then drag the design onto the paper. Now you can start the machine to cut.
The scan and cut is really good to get all the small scraps and pieces used that you normally would throw away.
The only downside about using this machine is if the back paper loses its “stickiness” because then the piece you are cutting out could get loose and the cut would be unfinished. This can sometimes be solved with masking tape or temporary sticking spray glue.
The other vinyl cutter we have is for more detailed pieces. The material is better stuck in this machine and you put in a whole roll of vinyl in at a time. This is also for bigger stickers because you can make it as wide and long as the roll is.
How to operate the machines
Vinyl cutter:Expert pro vinyl cutter: In our lab we don’t change the settings, we use these settings.

Start with choosing the colour you want to use for your design.
In our lab we have several colours both for textile and normal vinyl for stickers.
Put the whole role in the holder behind.
Remember to check if you are cutting on the right side of the role.
When you have inserted the role, carefully push the wheels so it fits to the material. Have in mind that the wheels have to be above the other wheels/ on the white bars.
Put the level down. This will lock it.
Then press the upper or lower arrow. Now the head with the needle will move from side to side and measure the size/width of the material.
You can also adjust the needle if you are cutting in a thicker material.


Computer:
First open the program Flexi10.
Then go to file to open your file.
Find your file and open it.
Or if you want to make a test in order to see if the vinyl cutter is cutting through you can make a square in the program.
When you have the design ready press the Cut/Plot in the top (it looks like a cutting knife).
It will open two new windows, one is to control the order of jobs - minimise this. The other is to make the settings for your design.
In the top right there is a question mark. If this is pushed, it should communicate with the machine and give the correct width of the material.
There are some small buttons in the right lower corner.
The first one is where you want to place your design.
The man is how you want to turn your design.
The mirrored F should be pressed if your design needs to be mirrored.
As a default the machine remember if it was mirrored or not before, from the previous design. This can be a problem if you want to make a sticker, because then it might get mirrored. So you just have to check if the design is correct before you start the cut.
Then you can also decide the size if you hadn’t decided it before importing the file.
When you are finished, you can press send and the job will begin.


Brother scan and cut:
Turn on the machine on the power button.
Insert the mat underneath the wheels and push the bottom on the top right.
The mat will now move.
Now you can either add a drawing and scan it in, add a scan by usb as an svg or you can choose a pattern.
Then you can place the material you want to use on the mat. If it is not filling the whole sheet you can scan in the piece while it’s on the mat.
Our mats are quite used, so the sticking part of the mat is not so sticky anymore. I then have to take the mat out of the machine and apply non-permanent sticker. We use a spray for this.
Then I can place the material and secure it.
Then it will show up on the screen where the material is.
You can then place the design on the material by dragging it or move it by arrows on the screen.
When you have placed the design you can click on the cutting knife that will appear on the screen.
The “play/pause” button on the right bottom will now light up. This means it is ready to cut.
When you press the button, the machine will start making the design.
You can use several kinds of material, like cardboard or paper and of course vinyl. You just adjust the needle.
There is a grey lever that you can push up, now you can get the needle out and adjust it by turning where the numbers are.


Pop-up card
I tried to make a pop-up card on the scan and cut machine. I wanted to make it with lines in it so I could fold different ways. This didn’t work that well because the paper was to thin and folded back when I tried closing the card. But I managed to fold it in a special way that looked nice. Afterwards I glued it to a piece of white paper.


Laser cutter
I’ve been working with the laser cutter before, I’m not an expert in the engraving part, but I understand the basics. I’ve been using the laser cutter to work on some different earring designs I’m working on.How to operate the machines
Machine: Universal laser systems.When you are making a file in inkscape for the laser it needs to be saved with specific line thickness and colours.
For our machine we have the settings:
RGB red 255. Cutting line. Line thickness: 0.025mm.
RGB black. Engraving. No line thickness limit.
Save file as pdf.
You start by turning on the computer, when it has started up you can turn on the laser.
The bed in the laser will now adjust a bit.
Open your file on the machine.
Press print.
Now you can either make the settings for the laser here, or wait and do it in the lasers program.
The lasers program will not pop op automatically when you press print.
There are different buttons on the right on the screen.
The first is zoom.
The second is very useful. When the lit of the laser is open it will point on the plate. In this way it is easier to see if you are inside the plate or not.
When you have placed the laser in the right lower corner you can choose the design by pressing the third button.
This will show some points around the design. Choose the point in the lower right corner and click the button saying “to pointer”.
The design will now move to the place you pointed with the laser.
You can also move it manually by pulling it with the third button.
The fourth button is for if you want to duplicate the design.
The fifth button you can check how long time your job will take.
When you are done placing it, you can go to settings.
You can either choose the material in the material database, then it will give you some pre-settings. But you can also make your own settings, but maybe still have in mind what the material suggest for the material you are about to cut.
With the design on the screen I think I had these settings for 3mm plywood:
Red: Power-100, Speed-11, PPI-100, Z-3mm.
Black: Power-88, Speed-100, PPI-500, Z-3mm.
Remember to turn on the air flow. Otherwise it can ruin the laser and it’s bad for your health.
Our Airflow is normally around 425 M3/H.
Remember to close the lit. Even though the laser can’t cut while it’s open.
Then you can press the big play button and the laser will begin.
You can pause the design if you want to check something and then resume it.
When it’s done the laser will move back to the edge and you can take out the design.


Idea
I like to scetch out my ideas. In this way i have a better feeling how to make it afterwards. Specially now that I’m learning to use this 3D program Solidworks. So in this way it is very helpfull to me to make a scetch on paper. It is also easier to explain to others if there is something you need help with understanding, or if you need some input.We needed to design something for a pressfit construction. I have never succeeded (but also never tried that hard) in making a good pressfit construction. I thought of something simple and useful, so I figured I’d make a lamp. I sketched out how I wanted the lamp to be and began making it.
Lamp number 1
I designed the lamp in Solidworks. I made 5 different pieces. One circle which should be in the top and bottom and this should be where you put the sides on. Then I made one of the sides and saved it as 4 different document, then I only needed to change the width of the pieces. I used the assembly funktion to show how my lamp should look when it is done. I had some troubles with the pieces not wanting to fit together but I got some help and we found out that it was because all the pieces was horizontal, so I needed to turn the side piece vertical. Now I could assemble the lamp piece by piece.For cutting in the cardboard I used the settings:
50 Speed
12 on the one on the right
The first prototype I made did not work out. If I wanted to keep the lamp together, I needed to use some glue. I designed the lamp so I could make it in different ways because the sides you put on the lamp is different widths. Because I made it pretty small, I didn't account for the space around the pressfit on the sides.


Lamp number 2
The second attempt to make a lamp was more successful because I made a test piece to start with. I made a square in solidworks and removed some other squares from the piece. I then made the small squares in different widths so I could use this to test the width of the material.

Now I had the width so I could make the pressfit work perfectly. I scaled up the lamp and made some small changes. I changed for example the walls, rounded them and made them the same width. I also changed the pressfit, I made the thing you slide it in longer. This gives more stability. I changed the space around the pressfit and made it bigger, also to make it more stable. The cardboard I used is 4.5 mm wide and I needed to make the pressfit 4.1 mm wide. This is because the laser eat away some of the material.
I didn’t think about if I had enough cardboard, so I only had enough of the 4.5 mm cardboard for half a lamp.


Fidget Spinner
I made a tiny fidget spinner just for fun also with pressfit construction, this worked perfectly.
Wildcard
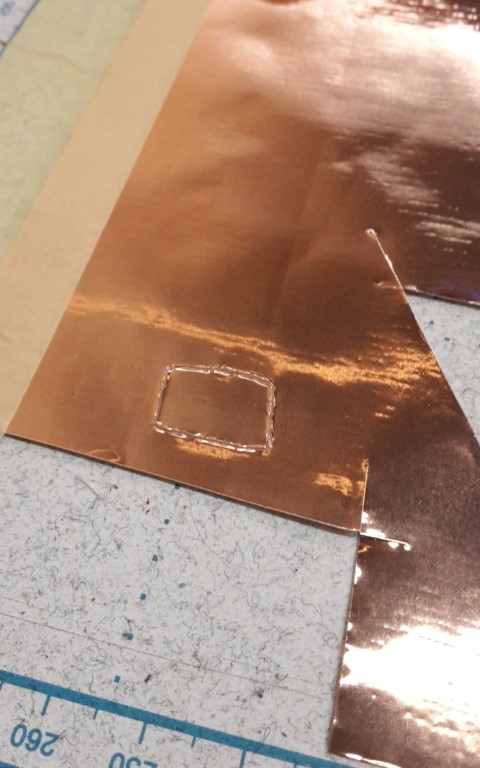
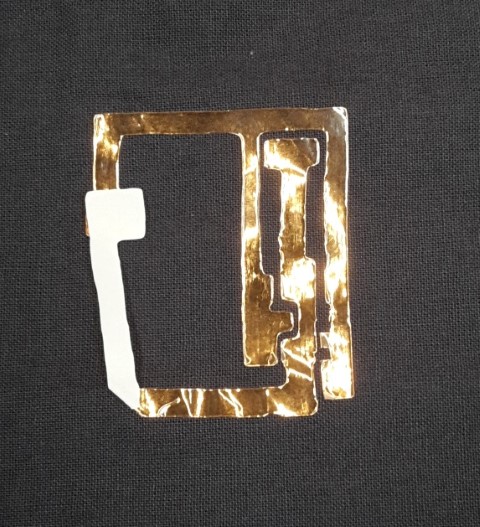
For the Wildcard week I used the scan and cut to first scan in a trace I made with a black pen on paper, and afterwards to cut it out.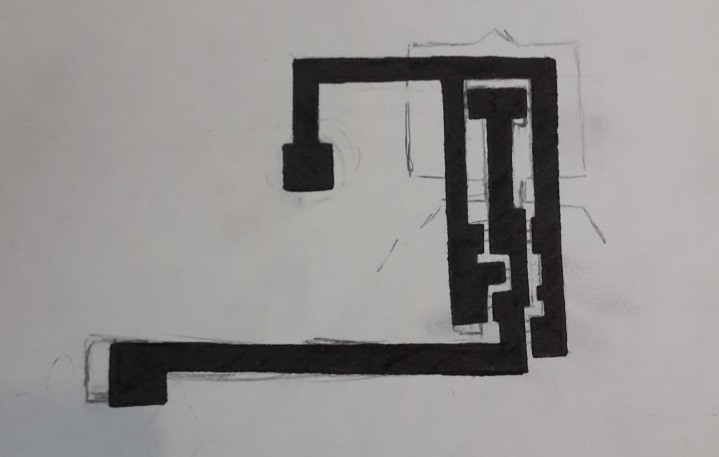
Then i used the Scan and cut to scan the path I just drew and trace it. I then made a test on paper to see how the trace was. It didn’t come out perfect but it was okay. I then made a square for testing the depth of the cutting needle because I have never used this material before. When I was happy with the dept I started the cut.
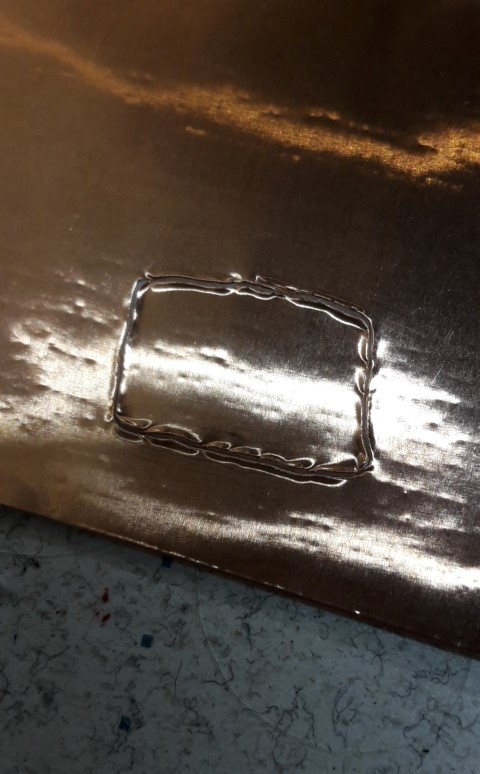
It turned out okay but I had to fix a few things with a scissor.

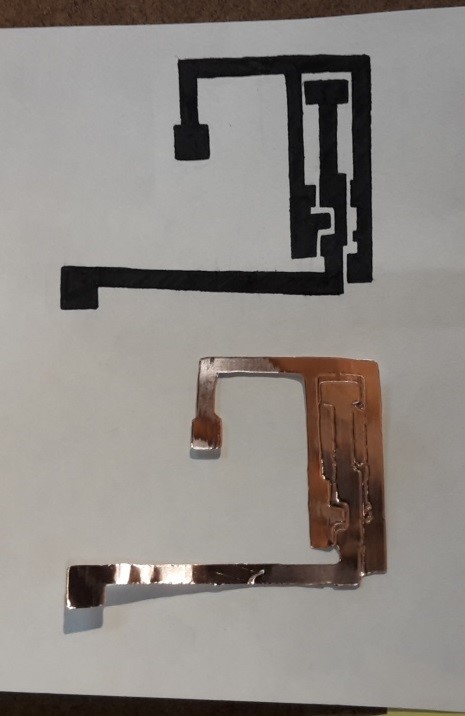
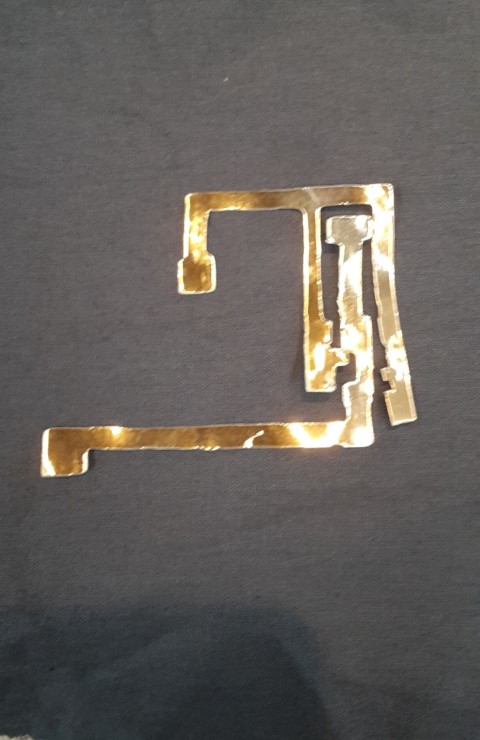
After I fixed this I could attach it to the fabric. I kept the paper on the arm i bended so I can use it as a button without it sticking to everything.
I also added a Power button to the robot. I made the design in Inkscape and cut it on the scan and cut.