Assignment
Group assignment:- Design a machine that includes mechanism+actuation+automation.
- Build the mechanical parts and operate it manually.
- Document the group project and your individual contribution.
We devided the tasks among the group. My task was to make a 3D model of the machine.
Group page
See more on the group page here.We have devided the tasks between the group members.
I have been making the 3D model of the printer.
The start of the design
I started with trying to make a model of what I thought the printer would look like. I had been reserching a lot and found out that most people had made a Delta printer when working with clay. I decided also to do this.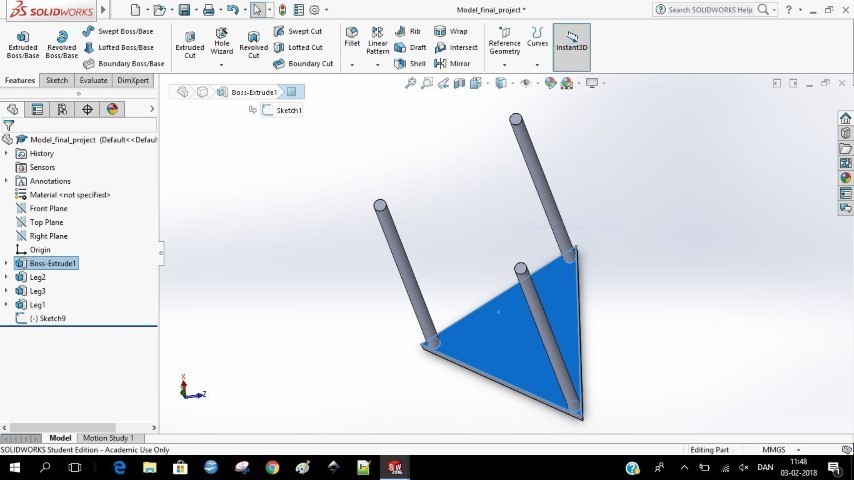
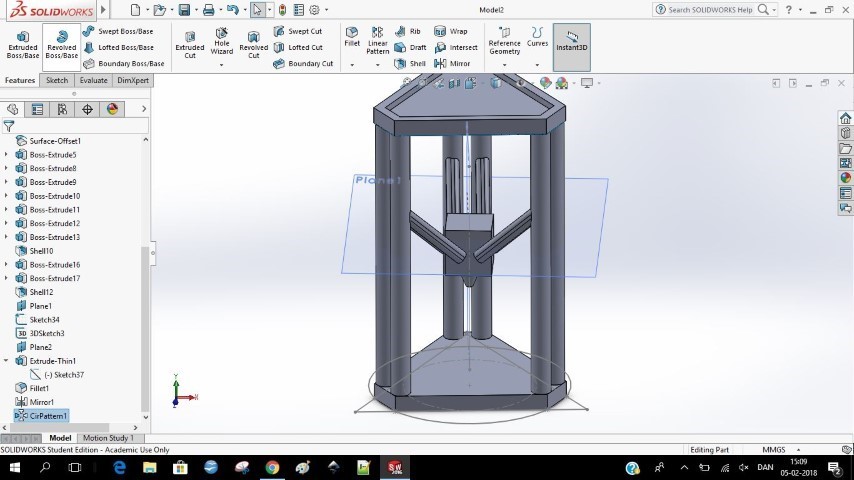
3D Model
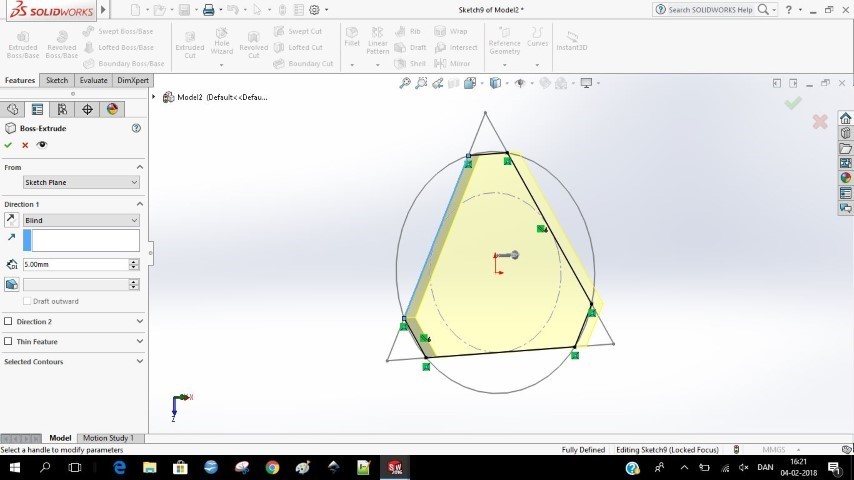
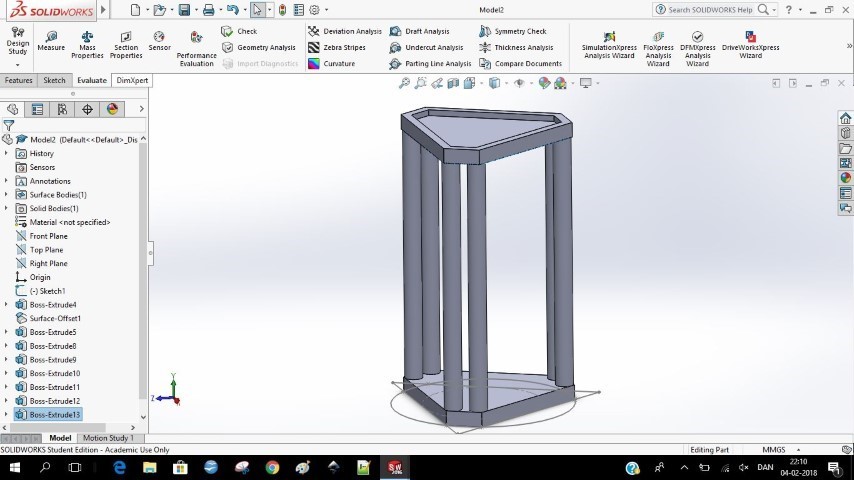
I have been working on the 3D model of the printer. I have made the model in Solidworks. I first made the parts and then assembled them afterwards.


Final Model
I found the Nema17, traxxas and the LM12UU bearings online on grabcad.com and downloaded them.I then downloaded Jonathans file that we also used for the laser cutter, and traced it. The model was not parametric, so this made it hard to assemble it.
I then took the design and made it from the bottom with the same measurements and then made it parametric.
This also made it a lot faster to assemble the whole thing in the end.
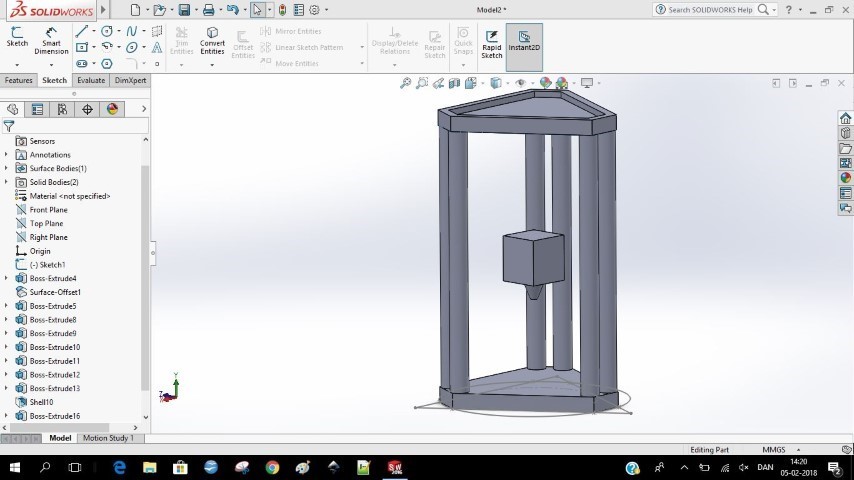
The Middle part and the bearing holder for the side is something my fellow fab Academy students designed.
I then got their files in order to add it to the final model.
The bottom and top plates are made from several pieces of 3mm mdf on top of each other. We had to make the design this way because our CNC machine is not working. The middle piece is made of plywood. And the side bars is 3D printed pieces.
I have assembled some of the big parts seperately and afterwards asembled them in another file.
I had a problem with my computer while making this. So I experienced that my computer would crash and even though I had saved the file, It would change it somehow so it would contain no data.
After experiencing this I started dividing the model up in different sections and saving them under new names all the time. Then was sure to have something and not starting all over again.
The middle part was an Illustrator file. So I had some problems with it because I only have Inkscape. I re-drew the middle part, but with the same measurements. This was easier than trying to do something with the Illustrator file.
I designed the screws and the steel rods myself.


Here you see the movement of the model.
Problems
I had some problems when I had to get some of the files for the machine. Because I needed both the bearing holder, but also the middle part. The bearing holders were 3D printed and made in fusion. I use Solidworks and I couldn't get the correct files and they needed to be modified.The middle piece was an Illustrator file. This had several layers and it was easiest to make it all over by myself in Solidworks.
My computer is not so good anymore, so sometimes it will just freeze and then reboot. This happened when I had just opened the assemble file in Solidworks. I was almost done with the file but it was saved when my computer shut down. Then it turned on again, but then when I tried to open the assemble file, I couln't. The files symbol has changed and is now yellow. We also tried opening the file on another computer, but this was not plausible either. So somehow my computer has changed the files contens while rebooting because there was nothing in the file.
This was a major setback because I then had to make the files again. This is why I decided to make the assemble seperately. And then I also saved several times as a new document to make sure that it wouldn't do the same - in this way I had a backup.
The metal rods going to the center wouldn't fix to the middle part.
Challanges with the group work
I am using Solidworks and Inkscape, all the other are using fusion and one is using Illustrator. So when I had to use their files in the 3D model, there were some challenges in converting it.I re-drew the middle part, but with the same measurements. This was easier than trying to do something with the Illustrator file.
Improvements in the design
You could try with working with a different models of the machine. Instead of a Delta type you could try with the Cartesian or Polar type.You just have to have in mind that it is supposted to be used for clay. So maybe a machine where the buildplate is the thing moving is not the best.
This is because clay has a much longer drying time and with too much movement it could colapse during a print.
Upgrades
Add belt to the model.Add all the screws.
Add cable ties.