Interface and Application Programming
Assignment
- Write an application that interfaces with an input or output device that you made
Files
Initial thoughts
After being introduced to the different languages and softwares available in this I week I started to search around to see how the students in the previous years where doing this week's assignment. I saw that many were using the language called Processing which makes it easy to talk to a serial port. I would like to have used Python for this week and looked into doing this more in depth, but because I was still debugging my motorboard form the output week, I chose to play around with Processing because of time management.
Using Processing with Touch Sensor
To get started with processing I choose to use the touchsensor I made in the input device week. I found a student from last year in Iceland called Birkir who made a light sensor board of Neils work with Processing. I decided to look into his code and modify it for the touch sensor board. For this to work I would have to understand the principles of the code. First I looked into the code that was running on the microcontroller which was made in the Arduino IDE.
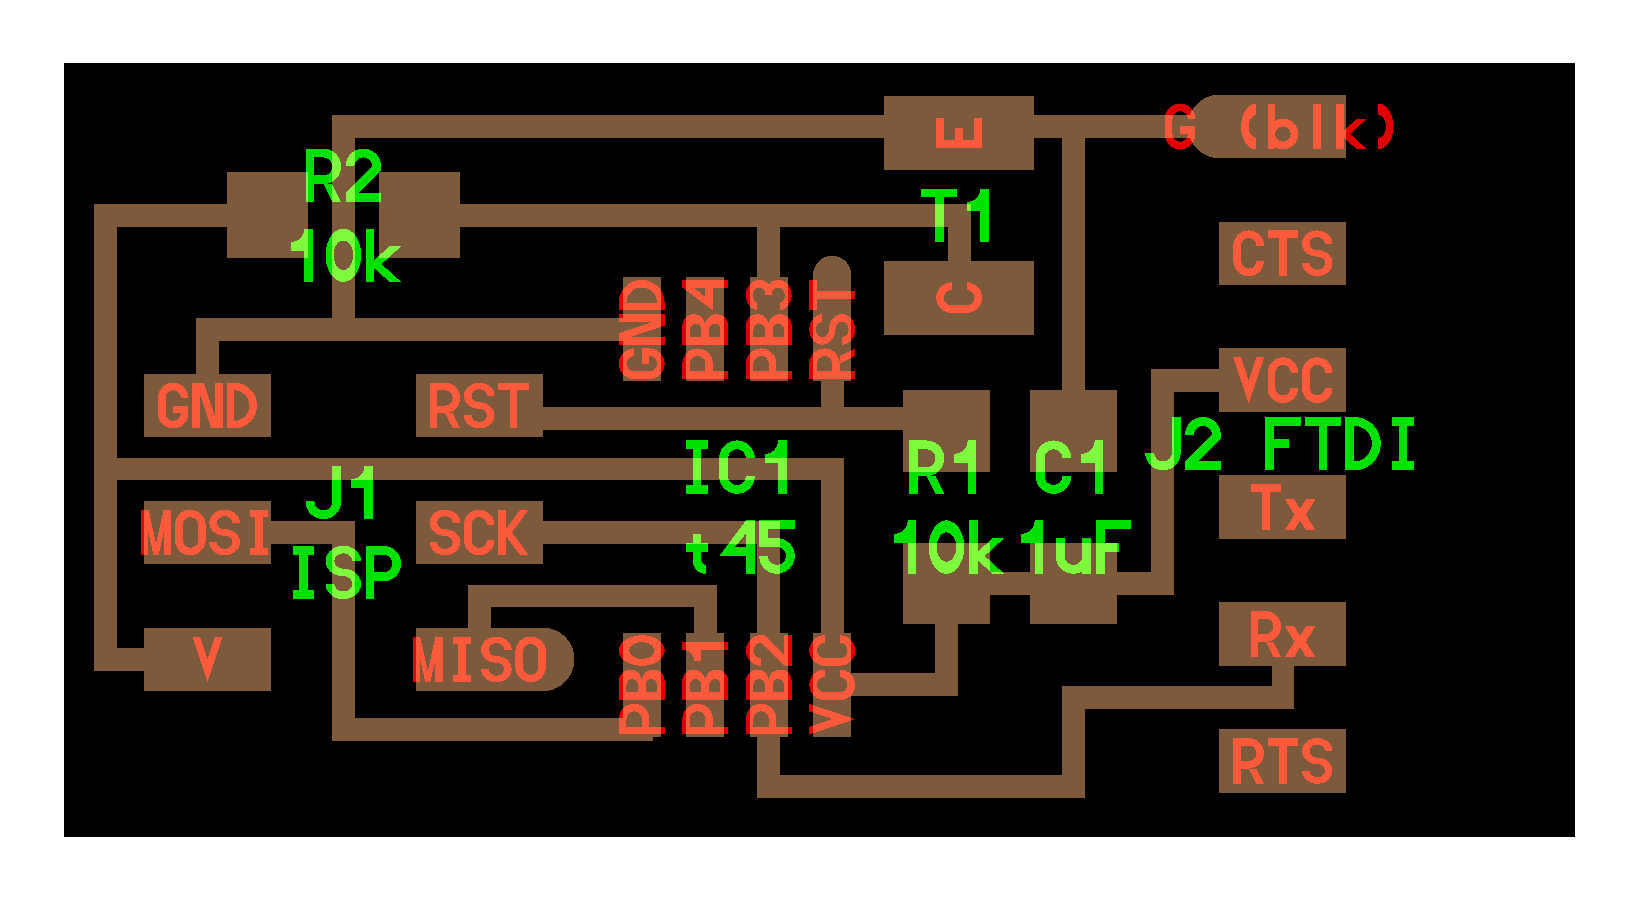
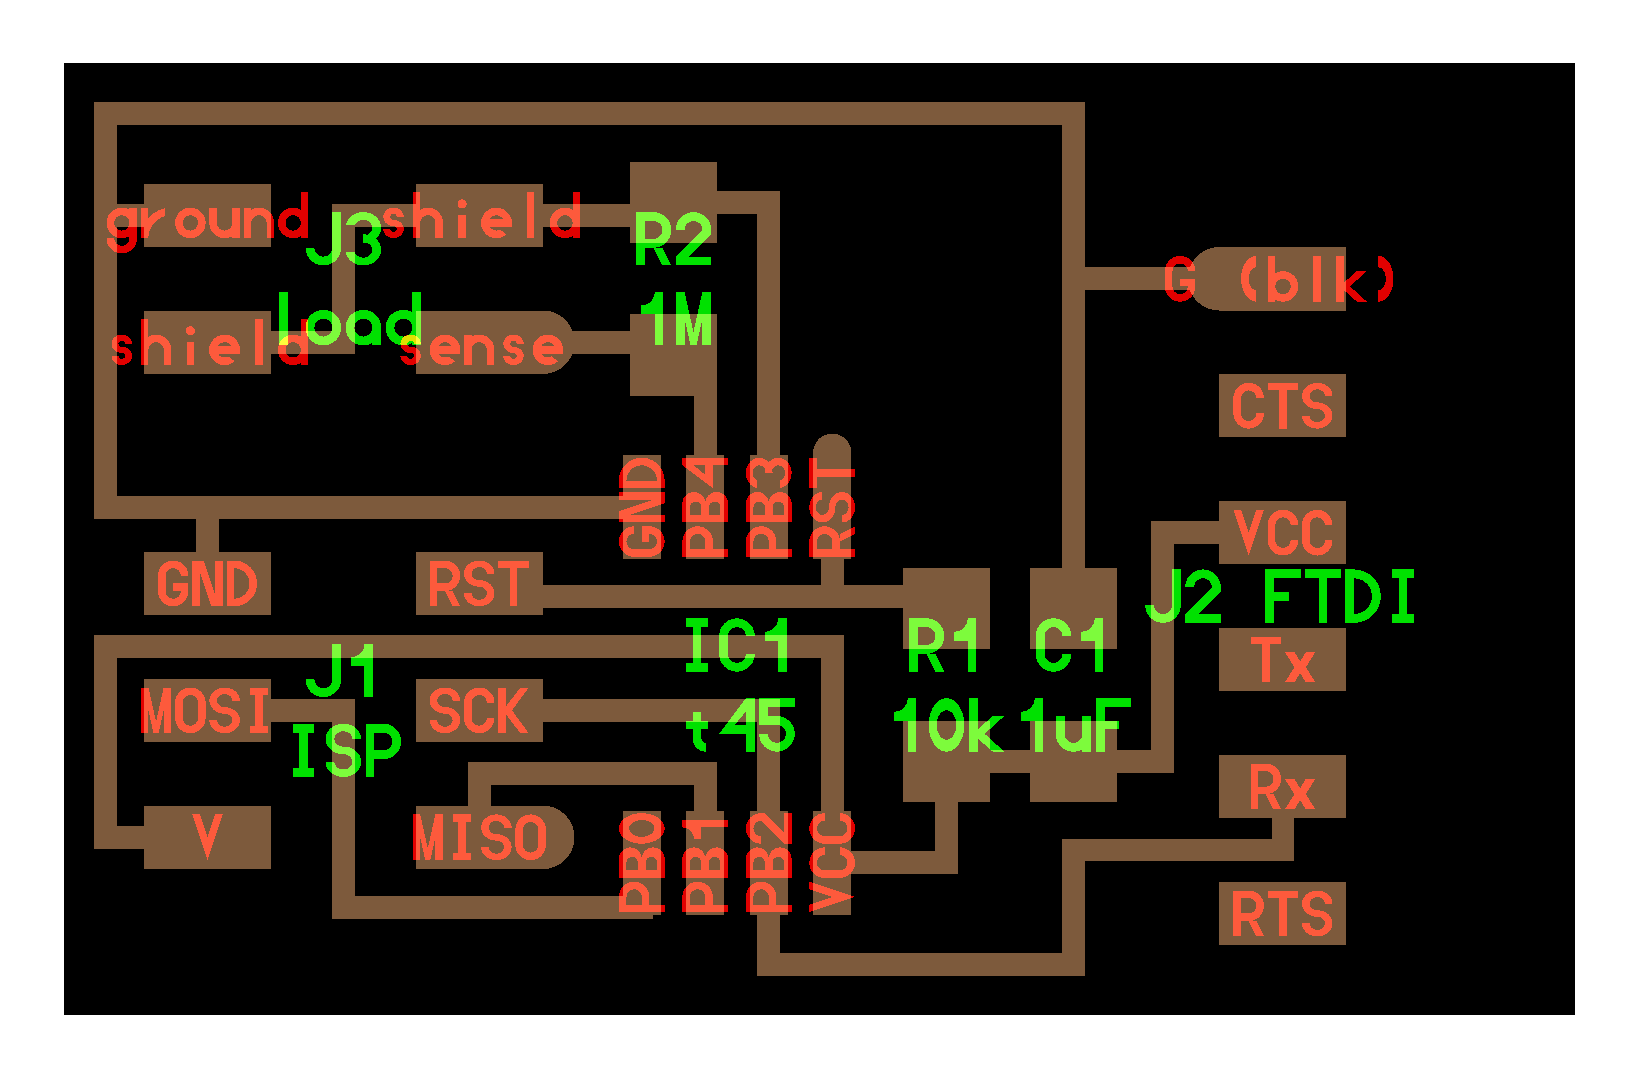
The first thing I noticed about it was all the pin references that I had to get right. The light sensor board that the code was made for is luckily using the same microcontroller as the touch sensor board. Underneath you see the traces of both boards, with the light sensor being the first one:


The Rx and Tx pins were the same on the two boards, but I did not see any reason having Tx specified when it's not connected to a pin on the microcontroller. I decided not to delete it since the only gain is memory which shouldn't be a problem in this case. Next thing to take a look at was the analog pin which is where the input comes from. It's not the same on the two boards so I changed this to pin number 3 which should be the pin I will be using for this.
After uploading the above code to the microcontroller, I downloaded Processing and opened the code for the light sensor board:
Most of the code in Processing is about the layout and design for the interface, but there are some crucial thing to change for it to work. I had to specify the serial port which I found in the Arduino IDE:
The sketch is changing the interface of the display when the value becomes greater than 300. I looked at my week about input devices to see how the touch sensor is reacting and changes the value to 250.
Lastly I decided to change the layout of the display to something more appropriate for a touchsensor. In order to understand how I could do this I watched the introduction course to Processing found on there own website. The video was very good at explaining how window size, geometric shapes, text and colors where working. In order to add more advanced stuff than just simply text I went to there tutorials section and found a written guide "P3D" which explained how to use 3 dimensional objects and effects. Under lighting I found spotligt and directional light which I thought would fit well with the kind of "push to see action" I'm using.
After implementing these ideas the sketch came out like this:
Activating the interface with the touch sensor connected it looked like this:
Making an Animation with Processing
After having made still pictures I wanted to do some sort of animation. I found a video on Youtube with the guy from Processing called "Coding Challenge #4: Purple rain in Processing" which explains how to make an animation of rain.
The guy was very fast at making the code so I had to pause a lot to get a grasp of everything he did.
The main concept of his way of doing this was to make two sketches. One much like the one I have in the first example, while the other one was a class describing the characteristics of the raindrops. In the beginning of this class the positions of the drops, the length and the speed along the y-axis are declared. Under "void fall" it is described how each drop will fall. Under "void show" the appearance of the drops are outlined.
In the main sketch I would be using the same concept as from when I was doing the touch sensor since I would like to activate the rain only when the sensor was pressed. Underneath you see how this was made. The differences are that before void setup a single drop is made into an array of 500. Under void setup there is a loop for the array and under void draw there is two references to the "drop" class.
This is the understanding I took from the tutorial. I'm not sure if everything is correct since it's a lot of theory to get under the skin. But as you see underneath the program is working:
Final Notes
This week gave me a good idea of how interface programming works. I feel confident doing basic Processing stuff. Once I get into more advanced animation stuff I would still have to put in more hours in order to fully understand the capabilities.