Principles and practices//
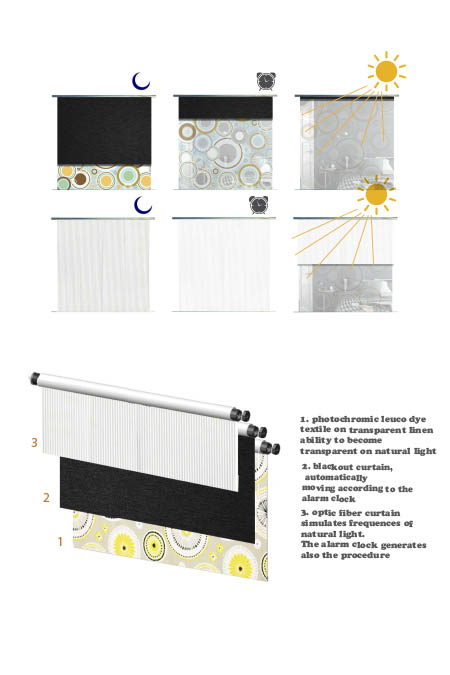
Functionality diagrams
For the first week of fab academy i had to create the path that i wanted to follow: the final project. I always wanted to create a system of movable blinds that could allow everybody to wake up in an natural way no matter the geographical context. More of this idea will be unfloded in the final project page but the 3d collages above can give a first idea about the system.The diagrams indicate how the blinds will move according to the time and light in the room. An easy way to create these diagrams is to work in illustrator/inskape with photocollages of symbols, pictures and textures. A possible path to follow could be open illustrator and open a new file -> place the png file of your wish -> trace bitmap(choose the apropriate style for you, i recommend high quality picture for colorful pictures and silouttes for b&w pictures) -> expand the traced bitmap and ungroup -> delete what you don't need -> adjust it by clickong the right button and trasformation button -> make same for all the parts of your photocollage -> assemble your photocollage.
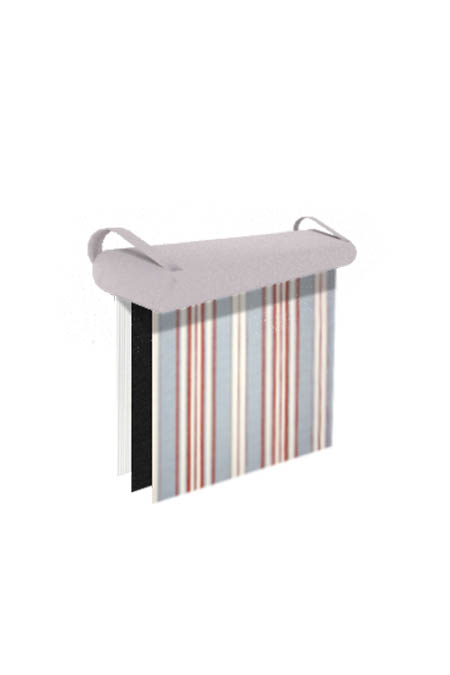
Description sketch
For this system of blinds I would like to combine smart textiles, electronics and mechaninical design. A simulation of natural light could be made with optic fiber textile that will be programmed to give light pretty close to the frequences and tints of the natural light. The last blind will be a textile with photophobic paint that will change color (trasparent) when natural light reaches the textile. This sketch is a mixture of 3d and 2d collage. From the 3d software save the image as a pngand place it afte to the 2d software like illustrator or inskape. After, you placed the file with right click press transformation and resize the image the way you want. A good trick is also to create a clipping mask by adding an outline on the top of your image and then click right click make clipping mask. This way you create the exact cut that you want to your image.
Introduction to git
An important part of fab academy is git and unfortunatelly i am clueless. The best way to fight with new softwares in to start from scratch , from basic tutorials. Git is a way of communication for the fab academy world and good use of it will make communications better.After the basic tutorials and the dowmloading i focuced on how to enter a file, add new files and push the new files back to the git.What i followed to push the files is open git bash -> place the files that you want to push in the repository file -> enter the repository file from git bush with the cd command. Example cd /D , cd Documents, cd repository file -> When you have reached the repository file the color of the file in git bash will change into green -> comment: git status-> git add . -> git status -> git commit -m "your comment goes here" -> git push.
Experimenting with html and css
The second big challenge of this week is coding. Our websites will document our progress and of course they should be made entirely from us. Since i always wanted to learn hot to code with html and css i strated agaim with tutorials. I started first with html and i strarted to build some assignments chapter by chapter. For the first weeks i decided to chose a ready template from a webiste and modify it according to my needs and taste.Codeacademy was a nice school since combines theory and exercises.I placed my images in html like this img src="imagegoeshere.jpg" alt="image text"and i specified the sizes by adding in the tag style="width:px;height:px;. To insert a link, i used the tag with the href attribute to indicate the webpage you want. Example: a href="http://www.google.com" all inside braquets.
Technical specifications//
HOW I PUSHED A FILE IN GIT//Step 1_ open git bash. Step 2_ place the files that you want to push in the repository file. Step 3_ enter the repository file from git bush with the cd command. Example cd /D , cd Documents, cd repository file. When you have reached the repository file the color of the file in git bash will change into green. Step 3_ comment: git status-> git add . -> git status -> git commit -m "your comment goes here" -> git push.
HOW I ADDED AN IMAGE TO HTML//type img src="imagegoeshere.jpg" alt="image text" inside braquets since is an html command . You can also specify the width and height of an image with the style attribute by adding inside the tag style="width:px;height:px;.
HOW I ADDED A LINK TO HTML//To insert a link, use the tag with the href attribute to indicate the webpage you want. Example: a href="http://www.google.com" all inside <> . You can also make a link to another page in your website simply by writing the file name a href="page2.html" inside <>.
Conclusions//
The conclusion of this week is that fab academy has to do with learning new things and getting out of your confort zone. Nevertheless, a slow and stable learning procedure is highly recomented ;-)
Links//
5 Designers Using Smart Textiles in Intelligent Ways, code academy