Molding and casting//

Tile design
For the molding and casting week i chose to design a tile since as an architect there were a lot of times that i had to design a tile synthesis but until now i never knew how to mold it or cast it.The design combines small details like letters but also medium scale design. The purpose of the mold is to be food safe since i would like to try different kind of materials from chocolate until liquid fimo clay and concrete.
Designing the mold
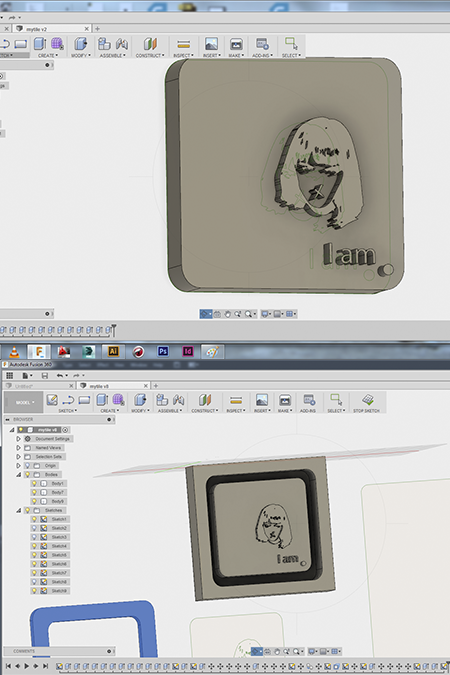
The initial design was made in illustrator, saved and exported as a svg file. The extrude and the molding design was worked at fusion 360 and finally was saved as a stl file. The molding design was designed according to the wax dimentions and considering also the milling time in the rolland mill mashine.Since the first step is the negative piece of the mould a deep canal was designed around the tile. This tile will be the walls of the wax mould.

Modela software 1
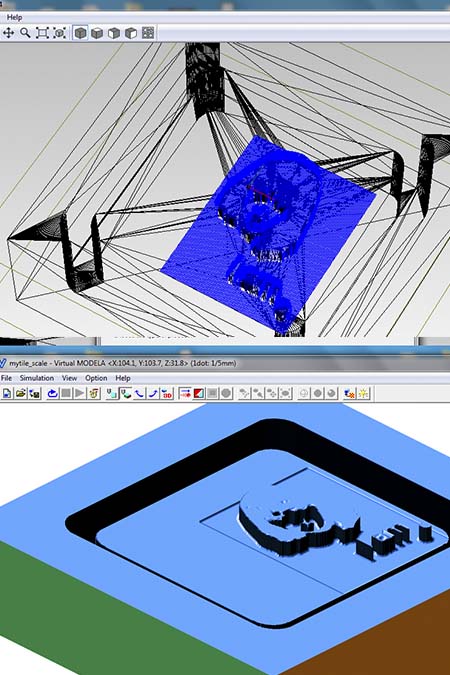
Before i finish this documentation i think that is essential to refer to the modela software which is the software that prepared my stl file fro the rolland mashine.The first thing i did was to import the stl file of the mould and then to set the margin, the depth, the type of the process(roughing),the selected cutting surface (top +z), to set the cutting area and depth of it and to choose the type of the tool path in order to create a contour line. I chose an upcut and i continued with tsetting the cutting parameters and with the most important: the bit. I used a ball bit of 1,59 mm diameter and 1/64 inch 2fl bn for engraving the details and a 1/8 inch bit for cutting the surfaces.
Modela software 2
In the end after setting all the parameters in a correct way i run a simulation and checked all the possible errors. My file was ready to be milled.
Milling the mould
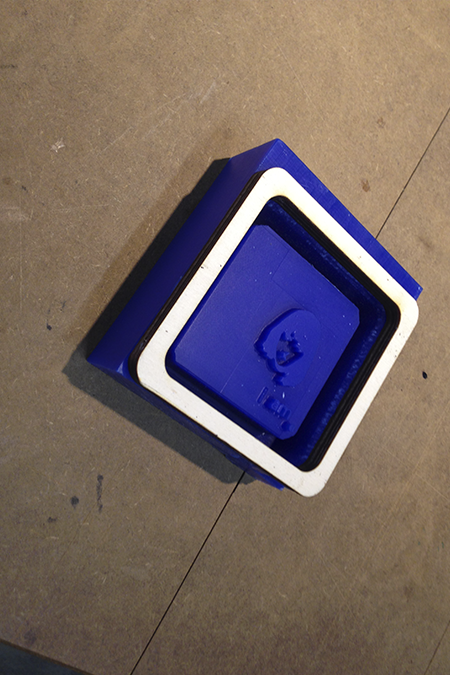
A big piece of wax was milled in the roland mill mashine. The stl file was uploaded to the special software and two different bits was used. The 1/64 inch bit for the engraving part and the small details and in the end the 1/32 inch bit for cutting the canal around.Some wooden frame was added in order to create a strong base for the tile.The base was laser cut.
Preparation for casting
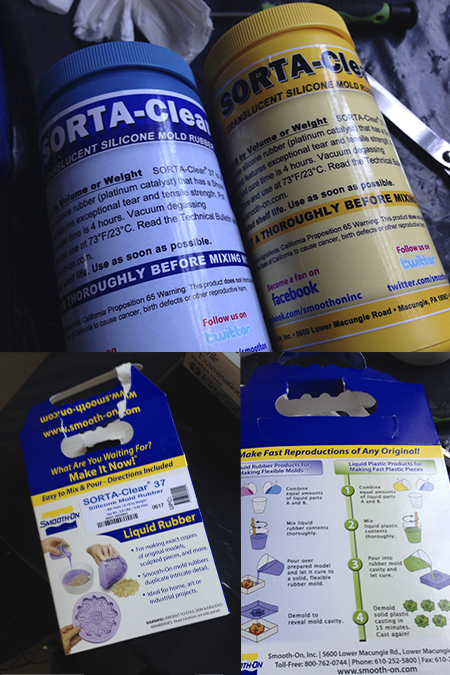
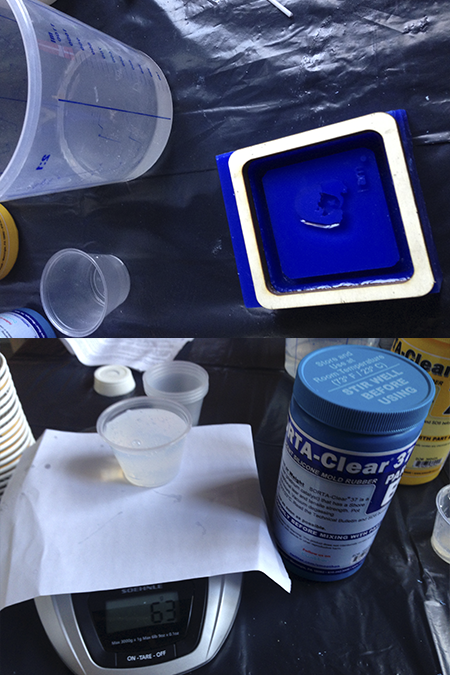
A food safe liquid rubber material was used for molding.The package contains two different liquids and their mixture brings the final one. The analogy is 1:1 and both liquids need to be very well mixed separately before to mix them together.
Mixing the casting liquids
Before start mixing the liquids i needed to calculate the right amount i needed in total. I poured some water in my wax and then i weighted the ml of the water. I calculated the same amount of casting liquid and then i started to mix them as described in the step above.

Into the mold
After 25 minutes(it cannot be more than this since the stabizing procedure starts after 25 minutes) is poured the mix in my mould from very high and controlled cup in order to avoid air bubbles to enter the liquid. When all the casting liquid is inside the mould is good to hit the wax for tem nimutes with periodoc movements so the bubbles come to the surface.
The final product
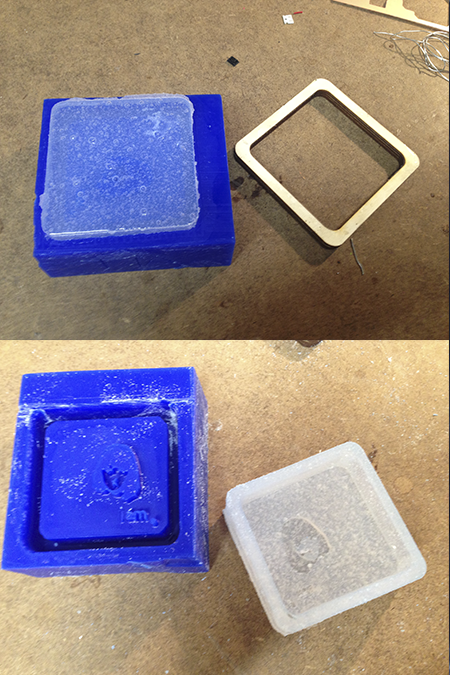
The waiting time of 4 hours was not a waste of time since the cast came out very clear and flexible. It was a bit hard to remove it from the wax since the shape was not helping a lot.
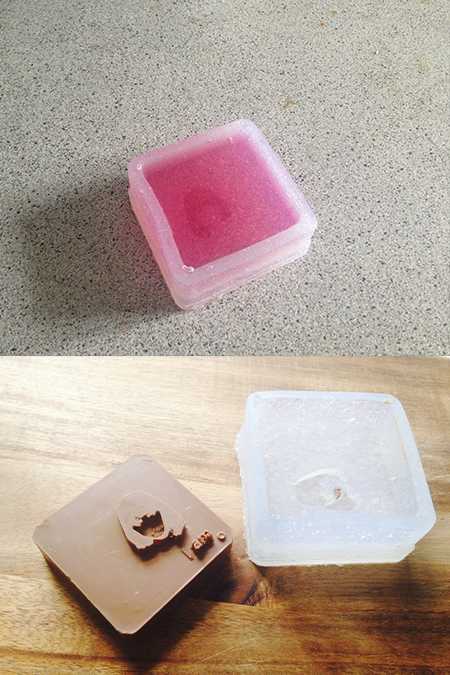
Chocolate and jelly tiles
The idea of this cast was to be able to use as a food mold firstly and as a concrete one later. The quality of the cast is quite good but the details could be a bit bigger for better results.
Technical specifications//
HOW I CREATED A MOULD IN FUSION//Step 1_ I opened fusion and inserted the 2d svg file that was created at illustrator/inskape. Step 2_ I placed the svg file in the axis that i wanted and placed in the right position. Step 3_ i went to toolbox create-> extrude and i extruded every part according to the dimentions i wanted in order to create the tile. Step 4_ I went to sketch-> create a rectancle and i created a rectancle around the tile.Step 5_I sketched another rectancle a bit bigger size than my tile on the top of the rectancle and i extruded it. The final result was a frame abit bigger that the tile. Step 6_ i created a common base on the bottom of the tile and the rectancle. Step 7_ My final outcome was ready. I exported as an stl.
HOW I PREPARED A STL FILE FOR MILLING//sTEP 1_ I opened the modela software and imported the stl file. Step 2_ i set the margin, Step 3_ the depth. Step 4_ the type of the process(roughing) Step 5_the selected cutting surface (top +z), I set the cutting area and depth of it and I chose the type of the tool path in order to create a contour line Step 6_ I chose an upcut and continued with setting the cutting parameters and the most important: the bit. Step 7_i used a ball bit of 1,59 mm diameter and 1/64 inch 2fl bn for engraving the details and a 1/8 inch bit for cutting the surfaces. Step 8_ i pressed from the toolbar the simulation button and run a simulation. Step 9_ everything was the way i wanted so i saved the file and opened the milling software.
Conclusions//
The conclusion of this week is that the initial design has to be designed and calculated according to the characteristics of the milling mashine, and the bits that it can support. Time is also very important for the casting experience.
Links//
Modela software,fab academy tutorial, Rolland milling mashine, Fusion 360,