

Assignment
Design and produce something with a digital fabrication process (incorporating computer-aided design and manufacturing) not covered in another assignment, documenting the requirements that your assignment meets, and including everything necessary to reproduce it. Possibilities include (but are not limited to) composites, textiles, biotechnology, robotics, and cooking.Wildcard Week

Bitmap to Vector
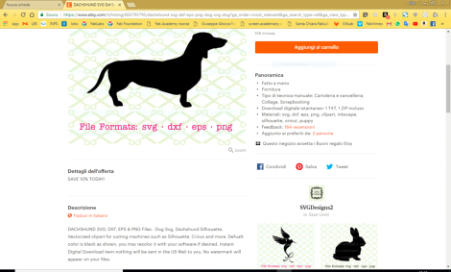
Using the inkscape software I can create a vector version of the dachshund image and bones. I think it's very nice a keychain with my dog that dominates a giant bone! This software is very powerful, it has many functions to customize strokes, shapes and colors.

The keyring dog
The idea for this week came to me thinking of my dachshund dog named Kyra. A keychain to hang on the wall in the shape of a dachshund seems to me very nice and also a useful object for the house. I started looking with google an image of dachshund, I found one that I liked and I captured the screen with the capture tool windows. Later I imported the bitmap file into the inkscape program and turned the image into a vector file dxf to work with laser cut machine.

Let's go to the ShopBot!
I realize the 3D model in Rhinoceros and prepared files for ShopBot in Cut3D, with those parameters and exported all in .spb(mm), ready to be launched in our ShopBot.The material I milled with ShopBot is polystyrene, so soft and easily moldable.
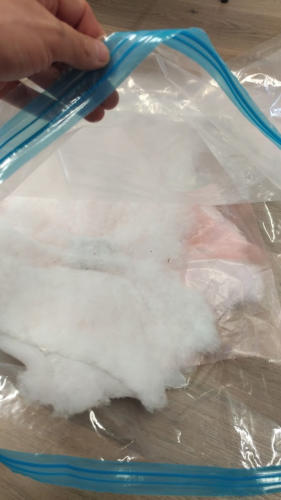
1 - I cutted the cotton in small pieces
2 - I took a vacuum bag
3 - I prepared some sheets about perforated film the breather material
and in the end the release film.
The order inside the vacuum bag is breather, perforated, release, mold, release, perforated, breather
.
The following day I opened the bag and removed the object.
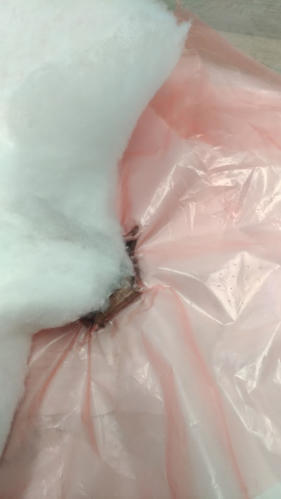


The Final Result…. very Ugly!
I really don’t like it … and so I think to make my handle with 3d printing!


Original Files and Useful Links
Composite
For my Wildcard I decided to try with Composites.The 3D model I made is an Handhold, because I thing to use is as a part of my final project.In my Box Food Saver there is a removable drawer and so I need a handle to open it. I'm undecided whether to use 3D printing or this technique. Let's see the result I can get and then I can decide.I prefer to cut two, in case it breaks.Let's try this technique!
After that, I started with the core of this week: textile(in my case,cotton)and resin. I choose cotton because I have small part to fill and I think that is the best material for me in this case. The resin I used is the Super sap ONE epoxy (link datasheet: https://entropyresins.com/wp-content/uploads/2014/03/Super-Sap-ONE-SDS-NAM-English.pdf) It needs two parts: A part(epoxy) B part (hardener) As I read from datasheet, the ratio (by volume) between A and B part is 2:1, and they need to be mixed for 2 minutes. The resin must be spread in a maximum of 25 minutes, then it will start to react and become very hot. But before starting, I prepared all stuffs I need: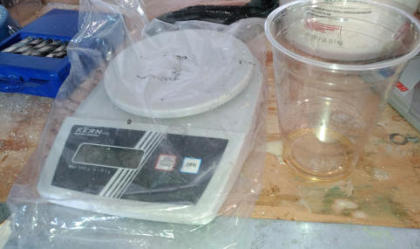
Electronic scale and disposable container
The site with the image of the dachshund
Vectorized image
Inkscape software screen


The handle, molded in Rhino 3D
The ShopBot has finished milling the pieces
The size of the pieces does not seem suitable
Virtual and reality together
So
I
start
mixing
A
and
B
parts
and
after
2
minutes
I
started
to
spread
the
resin
and
the cotton.
Sorry, I have no photo about this passage because my gloves was full of resin!
Than
I
inserted
my
handhold
inside
the
vacuum
bag
as
I
explained
before
and
I
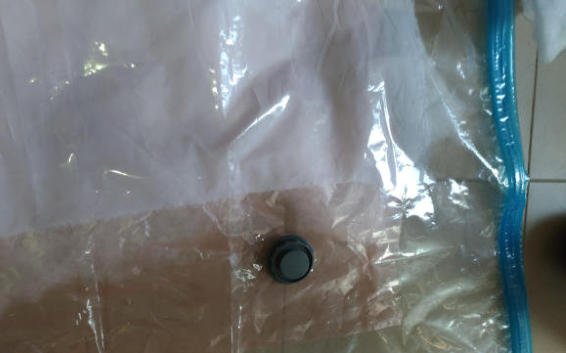
kindly removed the air inside with a vacuum.
Than I leaved it curing for all night.
The vacuum bag

The vacuum bag on the floor
We open the envelope
I remove the material
I can not believe my eyes...