Week 1: Principles and practices, project management
My first weekly assignment was to design a personal website, to learn about version control system and to think about
my final project. To see the plan and the sketch of my final project let's see this page.
The site
My knowledge in sites's creation is really poor, so I had to work hard and learn a bit html language, which at first makes a little fear but then you
get used to it, so I looked for an editor for the web development and I found Atom.
After having installed it I started to follow various tutorials and sites that helped me to learn the html language.
Short description of the composition of a site: Hypertext Markup Language (HTML) is the language used for describe how will be the webpage. Its consist of 3 parts, html, head, body plus title parts. Each part is wrapped by a tag( <, />) and here is a brief meaning.
Characters between < html > and < / html > describe for the Webpage.
Characters between < head > and < / head > describe the invisible contents of the Webpage.
Characters between < body > and < / body > describe contents for the Webpage.
Characters between < title > and < / title > describe contents for the title of Webpage.
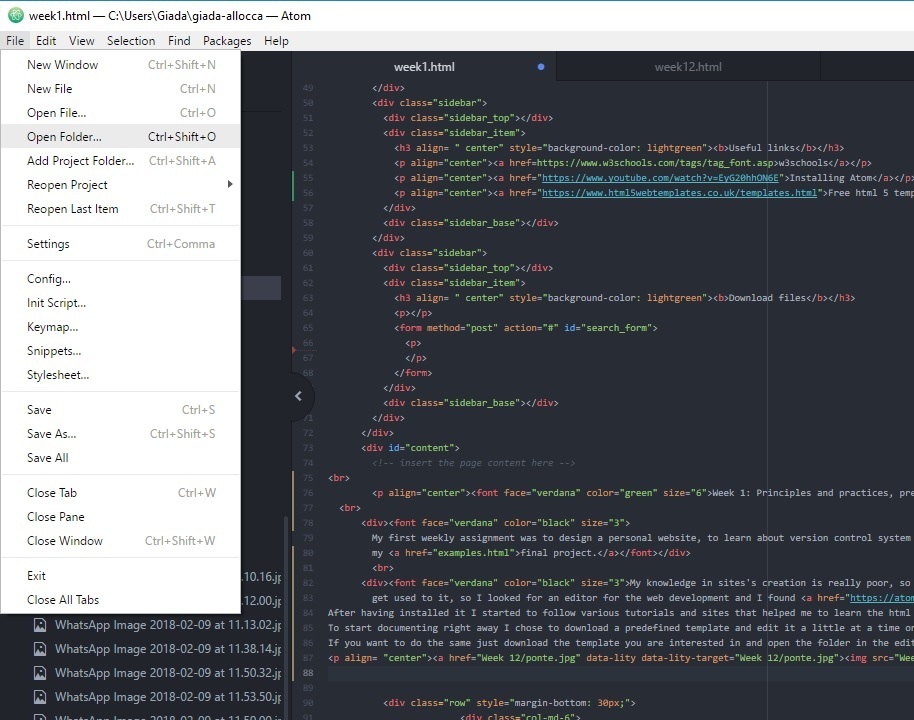
To start documenting right away I chose to download a predefined template and edit it a little at a time on this site. If you want to do the same just download the template you are interested in and open the folder in the editor, as in the picture below.
Short description of the composition of a site: Hypertext Markup Language (HTML) is the language used for describe how will be the webpage. Its consist of 3 parts, html, head, body plus title parts. Each part is wrapped by a tag( <, />) and here is a brief meaning.
Characters between < html > and < / html > describe for the Webpage.
Characters between < head > and < / head > describe the invisible contents of the Webpage.
Characters between < body > and < / body > describe contents for the Webpage.
Characters between < title > and < / title > describe contents for the title of Webpage.
To start documenting right away I chose to download a predefined template and edit it a little at a time on this site. If you want to do the same just download the template you are interested in and open the folder in the editor, as in the picture below.
At this point, by selecting the page you want to edit, you can start making changes, such as creating paragraphs, inserting
photos and links. if you want to add an html page to the site just copy an existing one and paste it in the same folder
(this way you will not waste time to redo the pages every time).
A very useful site to practice the html language is w3schools, which provides very simple examples for each tag that
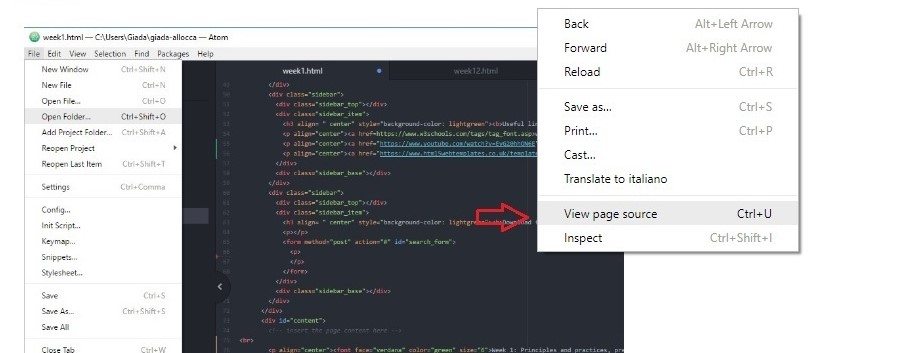
you want to add to our site page. another method that I found useful was to see the source of the pages that had interesting features and copy them in my editor.
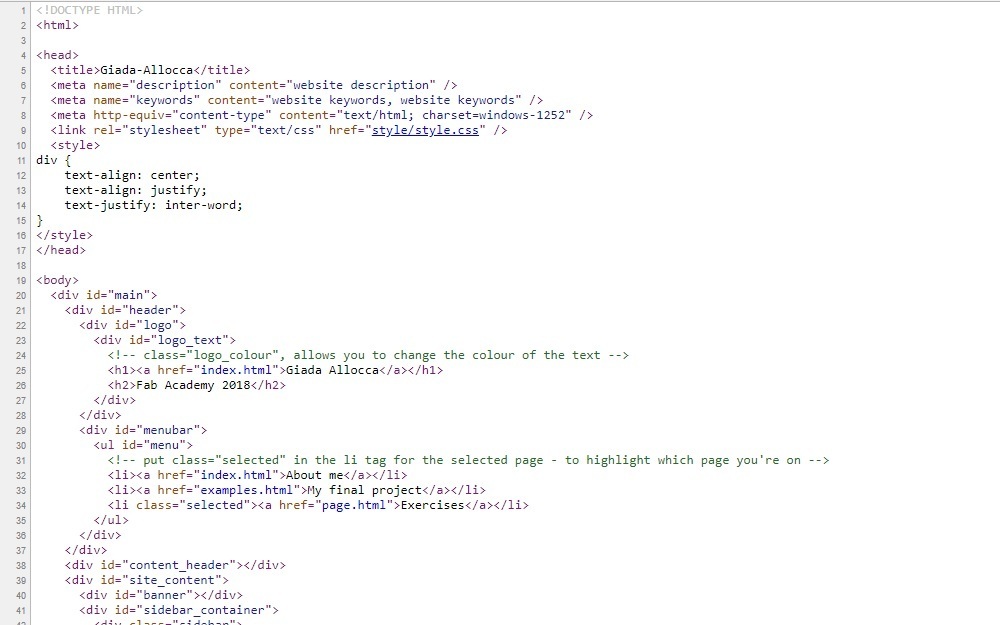
To do this, simply click the right mouse button anywhere on the page and select "view page source".
What will appear will be more or less always this (depends on the complexity of the site).
Git
The first step was install git bash on my pc. My instructor Matteo helped me to generate a new SSH key and setup the repository,
so I tried to add other files alone, but it was difficult, so I searched for another tutorial and I found
this. I searched another tutorial and I found Git tutorial
- Try git and I followed it and I started to write down some of the commands which I thought might have been useful.
Then I started to search material for the final project and when I wanted to add my new files on the gitlab repository
I was stopped by an error.
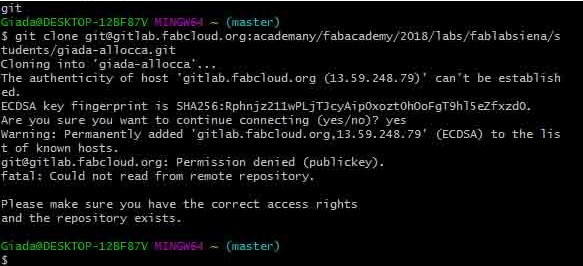
I went to the Fab Lab and my instructor found the problem: I accidentally deleted the SSH key for the git, so he helped me to
regenerate the key.
These are the git commands I've taken note of, (those in bold are basically the ones you'll always use)
- Git status: to check the repository
- Git add . : to add all the changes
- Git commit -m "text": this confirms all new files in the repository (and you can add a text to describe what you did)
- Git push origin master: to uploading all new files in the repository.
Update 08/11/2018
Since my pc is dead and I took a new one, I had to install all the software again, one of them is Git.
First of all I searched the procedure in the old documentations (beacause I didn't remember very well all the steps) and I found
this documentation. I followed all the steps
and I'll show you some of them.
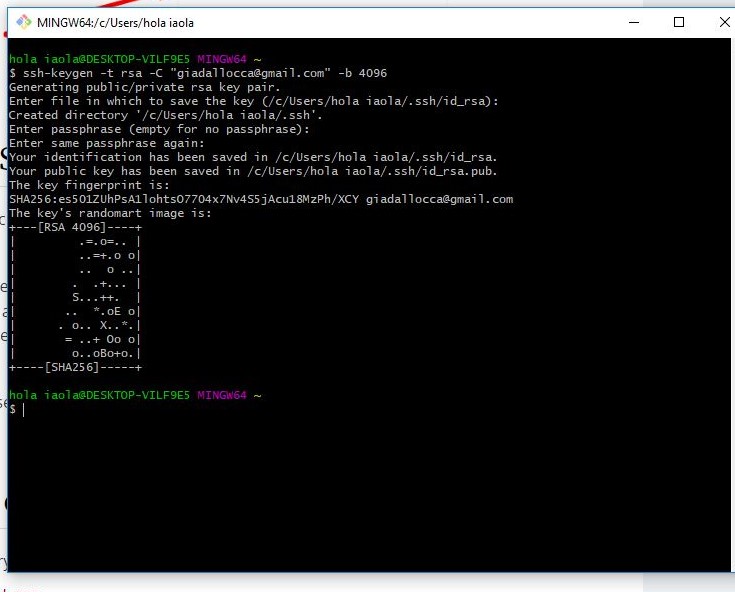
sshkey generation
When you open git you have to past this command in the shell
ssh-keygen -t rsa -C "your.email@example.com" -b 4096
and this is what happen
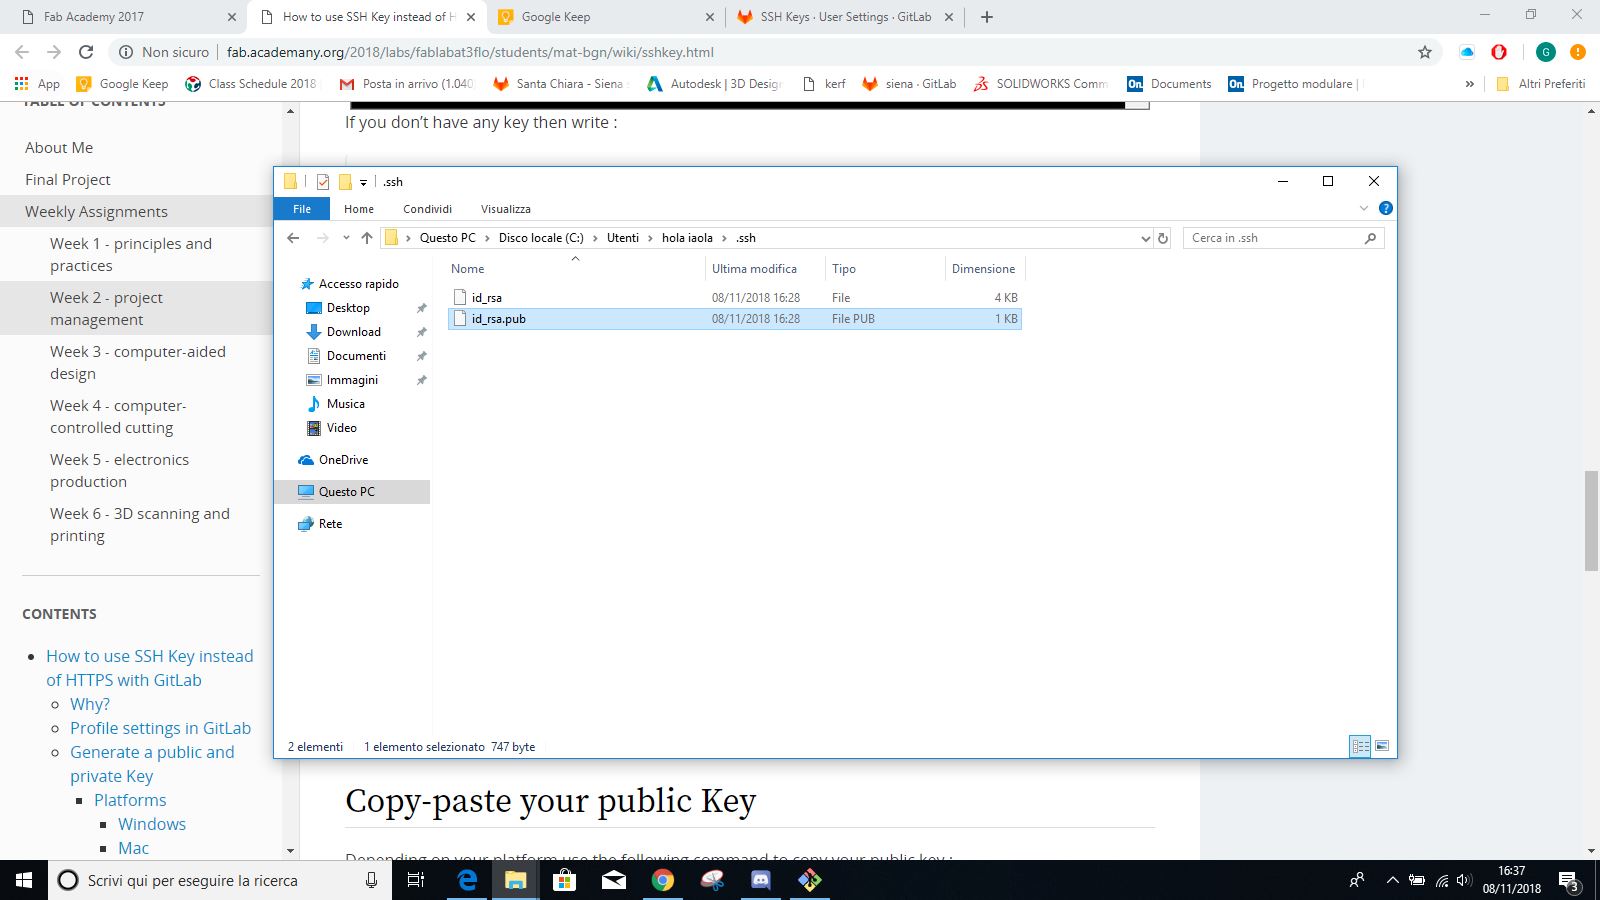
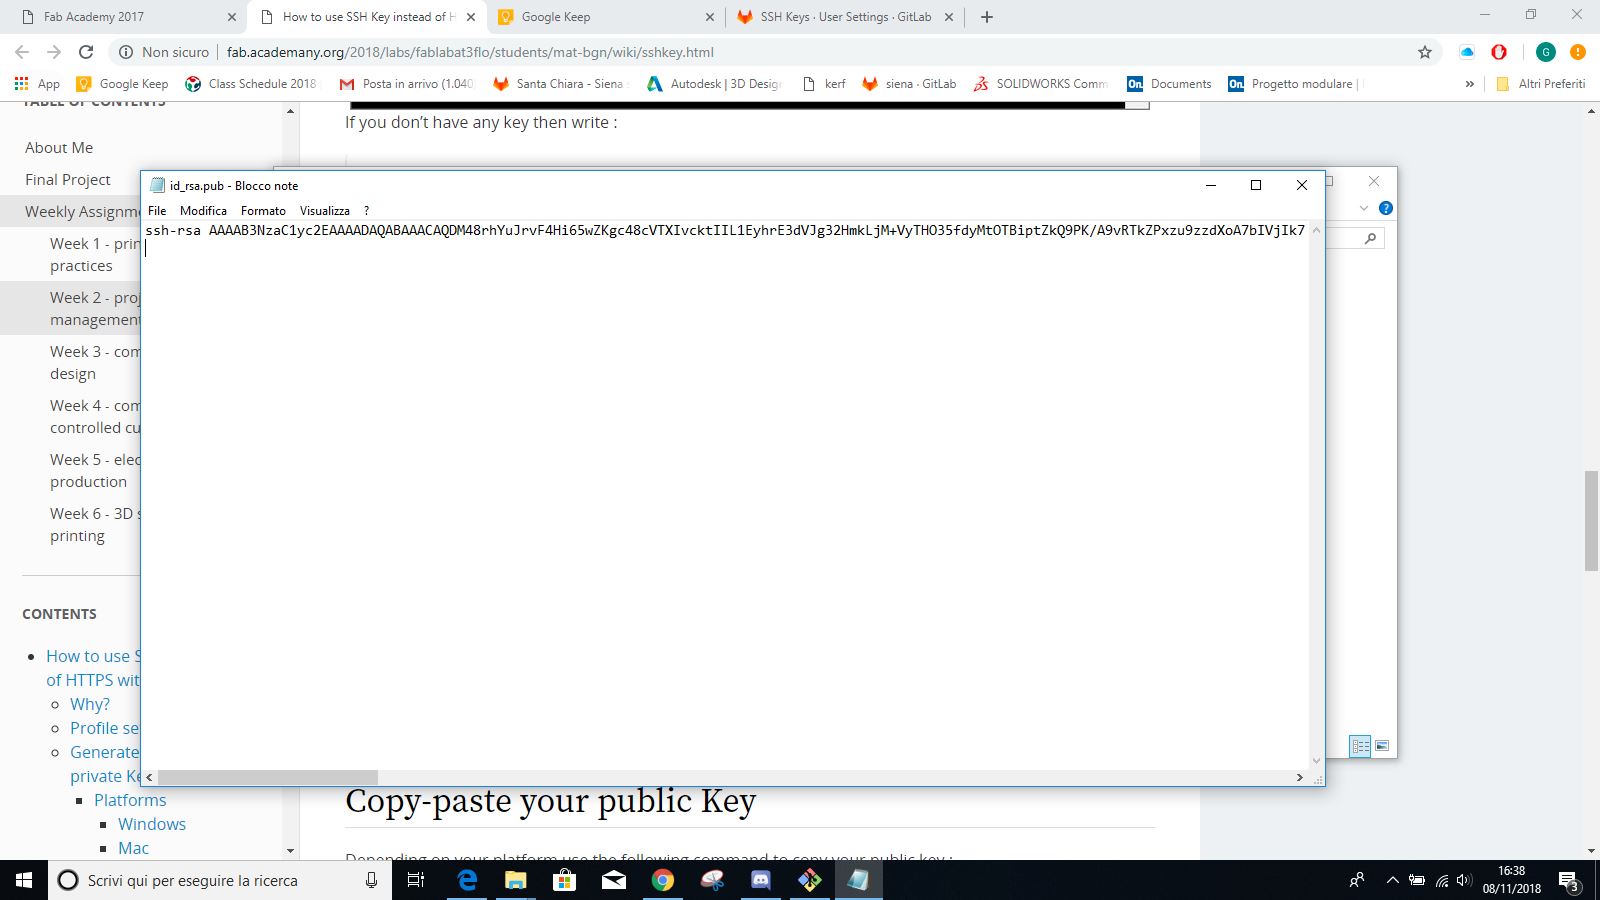
To copy the key, simply follow the path where it was saved. In this case I opened the file with a text editor.
Before doing anything else try your connection to Gitlab with this command:
ssh -T git@gitlab.fabcloud.org
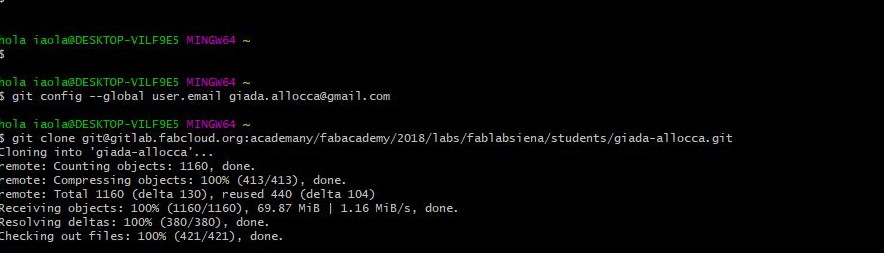
write "yes". then you have to change the user name and user email with yours
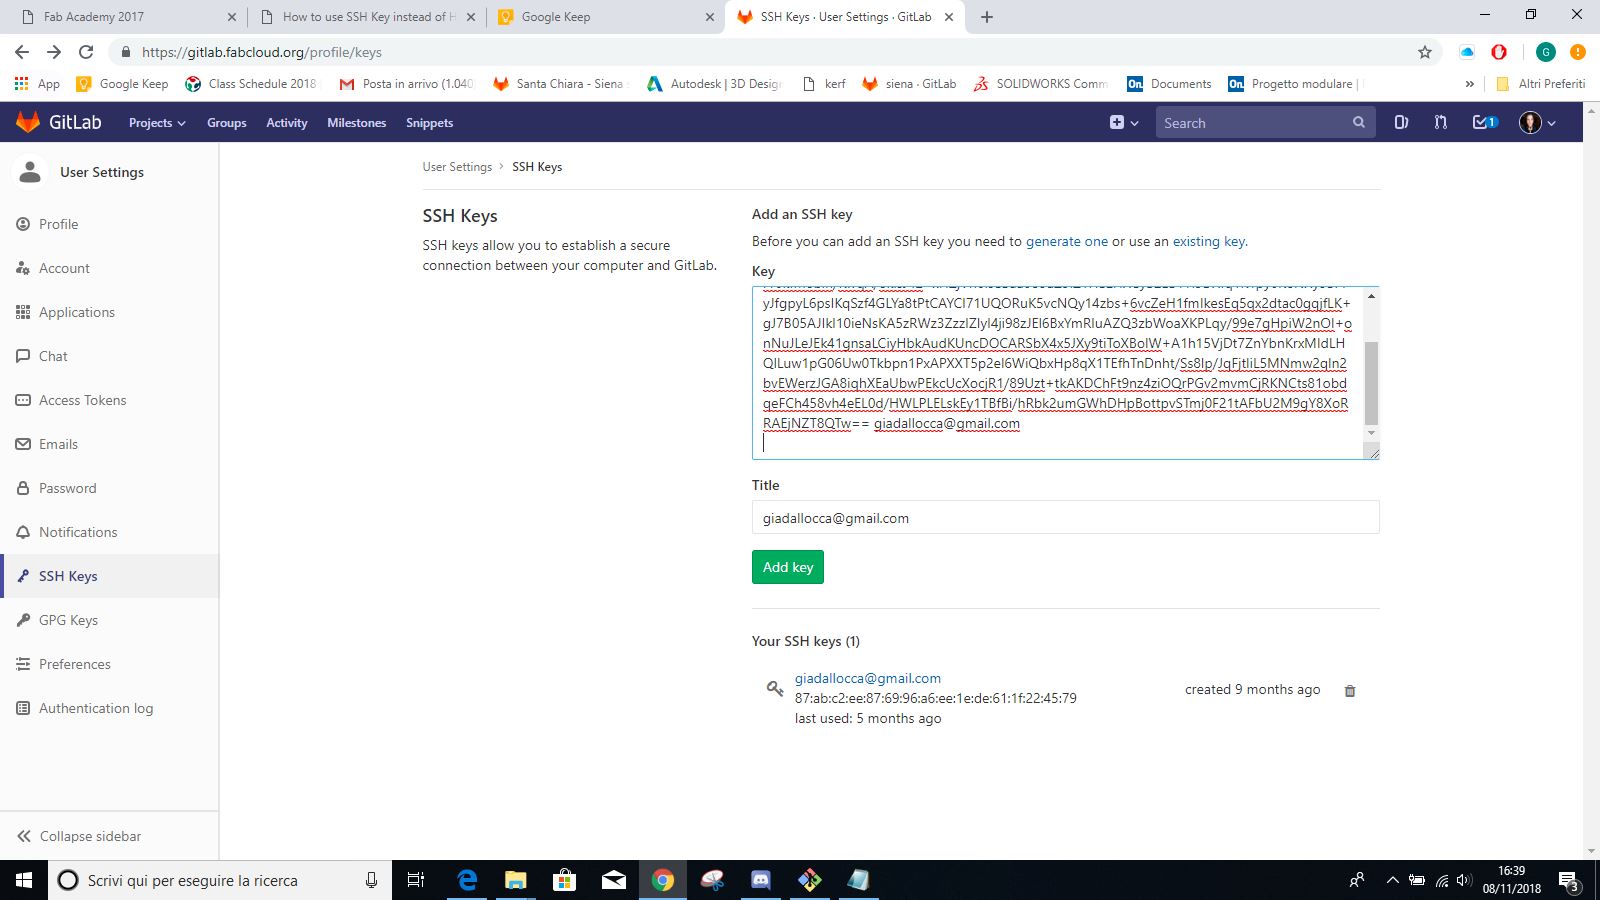
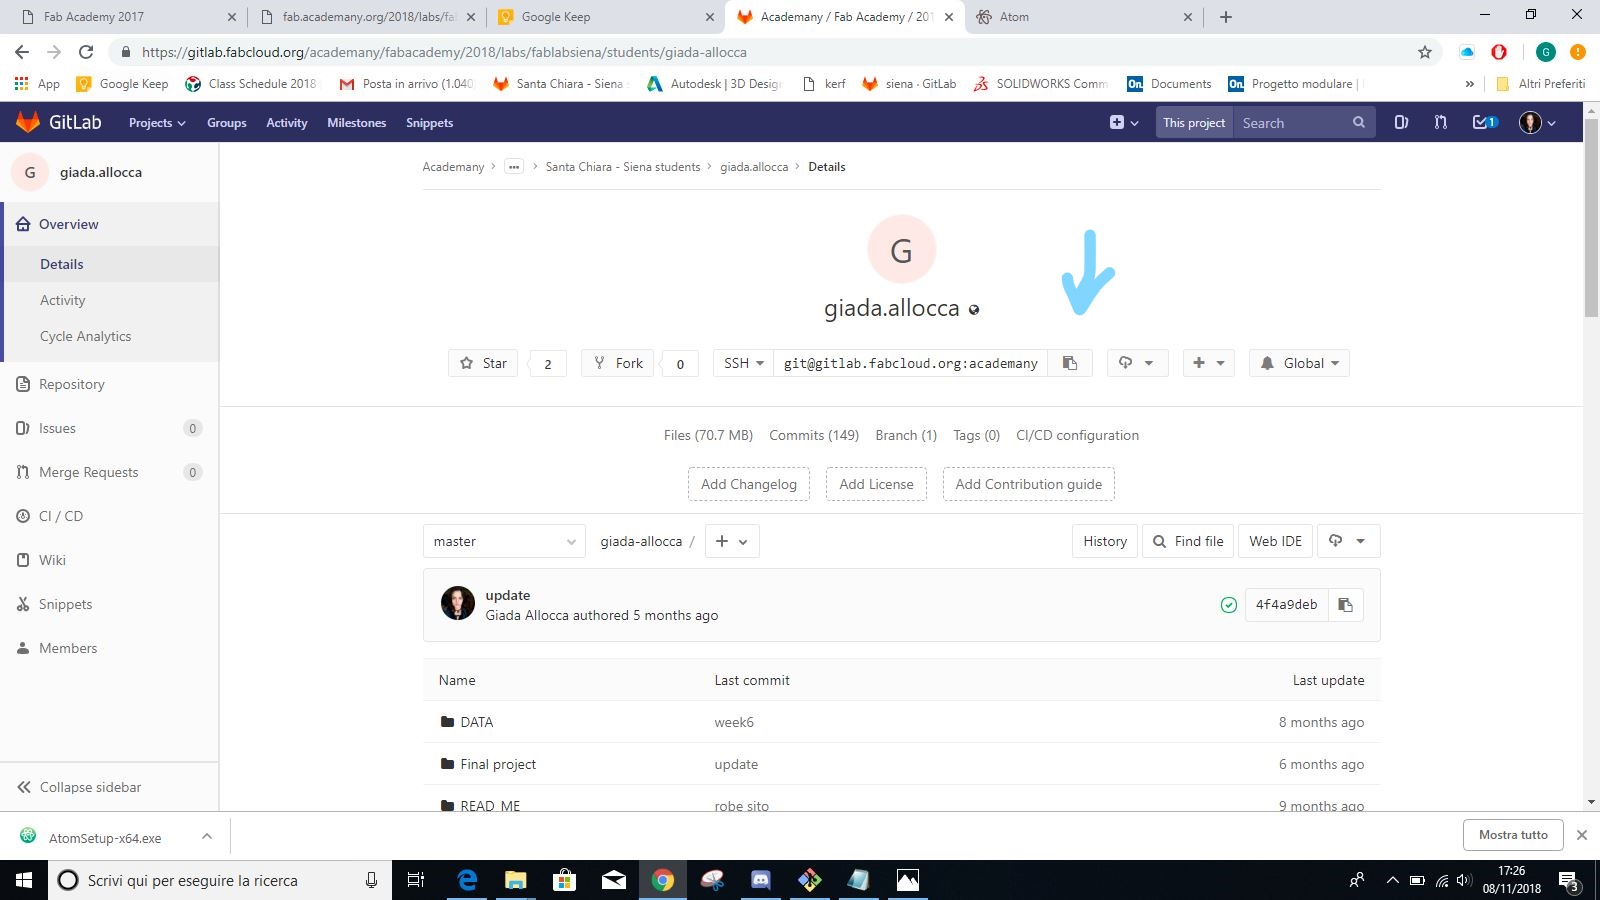
then go to your profile on GitLab -> details and copy this line
then past it on the bash with the mouse
cd Desktop/giada-allocca/
when the "master" word appears it means that you are making changes in that folder
sshkey generation
When you open git you have to past this command in the shell
ssh-keygen -t rsa -C "your.email@example.com" -b 4096
and this is what happen
To copy the key, simply follow the path where it was saved. In this case I opened the file with a text editor.
Before doing anything else try your connection to Gitlab with this command:
ssh -T git@gitlab.fabcloud.org
write "yes". then you have to change the user name and user email with yours

then go to your profile on GitLab -> details and copy this line
then past it on the bash with the mouse
cd Desktop/giada-allocca/
when the "master" word appears it means that you are making changes in that folder