Output device
Things to do:
2) Add an output device to a microcontroller board you've designed and program it to do something
Have I achieved this week's goals?
RGB led
During this week I decided to redraw the board I did the previous one. Particularly, I changed the microcontroller because I needed more available pins to connect my output device too. So, before adding the other elements, I put the ATtiny44 on my schematic drawing. I paid attention to leave the right pins for the output device (in my case will be an RGB led). Consequently, I added the RGB led: the anode must be linked to the VCC and I obviously used three resistors. In order to be sure about them, I asked myself: "How can I choose the right resistors for each colour?" Considering the fact I didn't add an external voltage to my board, I had to use the internal one (source voltage= 5V). I addition, I knew the diode forward current was 20mA and...what more? I needed to read the RGB Led datasheet to know which were the values related to the diode forward voltage.

Next, I applied the first Ohm's law and I found the right values for my three led's resistors.
R= V/I --> 5V (source voltage) = 2 (diode forward voltage) / 20mA (diode forward current) --> The result is 150Ω
So, I would have been put two 100ohm resistors for the red light. In order to calculate the other values, I changed the diode forward value and I applied the same principle I wrote above. Despite that, I got a bit lost, because I put the wrong resistors on the schematic file and consequently I got wrong when I soldered the board. Basically, after having calculated them, you have to chose the resitor focusing the attention on the value you've already found. Even if I asked myself a good question about checking for the right values, I completely ignored the values I found after the calculation. I did it just for inexperience and because I was afraid to burn the rgb led. Consequenlty, I put higher values and only after, I became aware that they were exagerate and inappropriate. In spite of everything, I read on the Internet that the RGB led works until the 1Kohm resistor without any kind of problem and that's what happened to me. Anyway, I learned that it is extremely important asking things about the unknown principles and looking for that. More than this, it is essential to respect them, and don't be worried just for being scared about a possible burnt led. At the same time, it's good to have faced with big failures and ridiculous things. It's part of the game and I'm strongly convinced you learn by your mistakes. Getting to the point, even if I did some mistakes in this first part, I proceeded working on the assignment and when I was on my Eagle's schematic file, I decided to add a jumper in order to avoid an infinte labyrinth of route traces around my VCC or GND. Before doing it, I tried to rotate my components many times, but it was a bit intricate. I succed organizing all of them, but I had a yellow line (unrouted trace) because of a frame between the VCC route and the GND ones. For this reason, I added the component I mentioned few lines above.
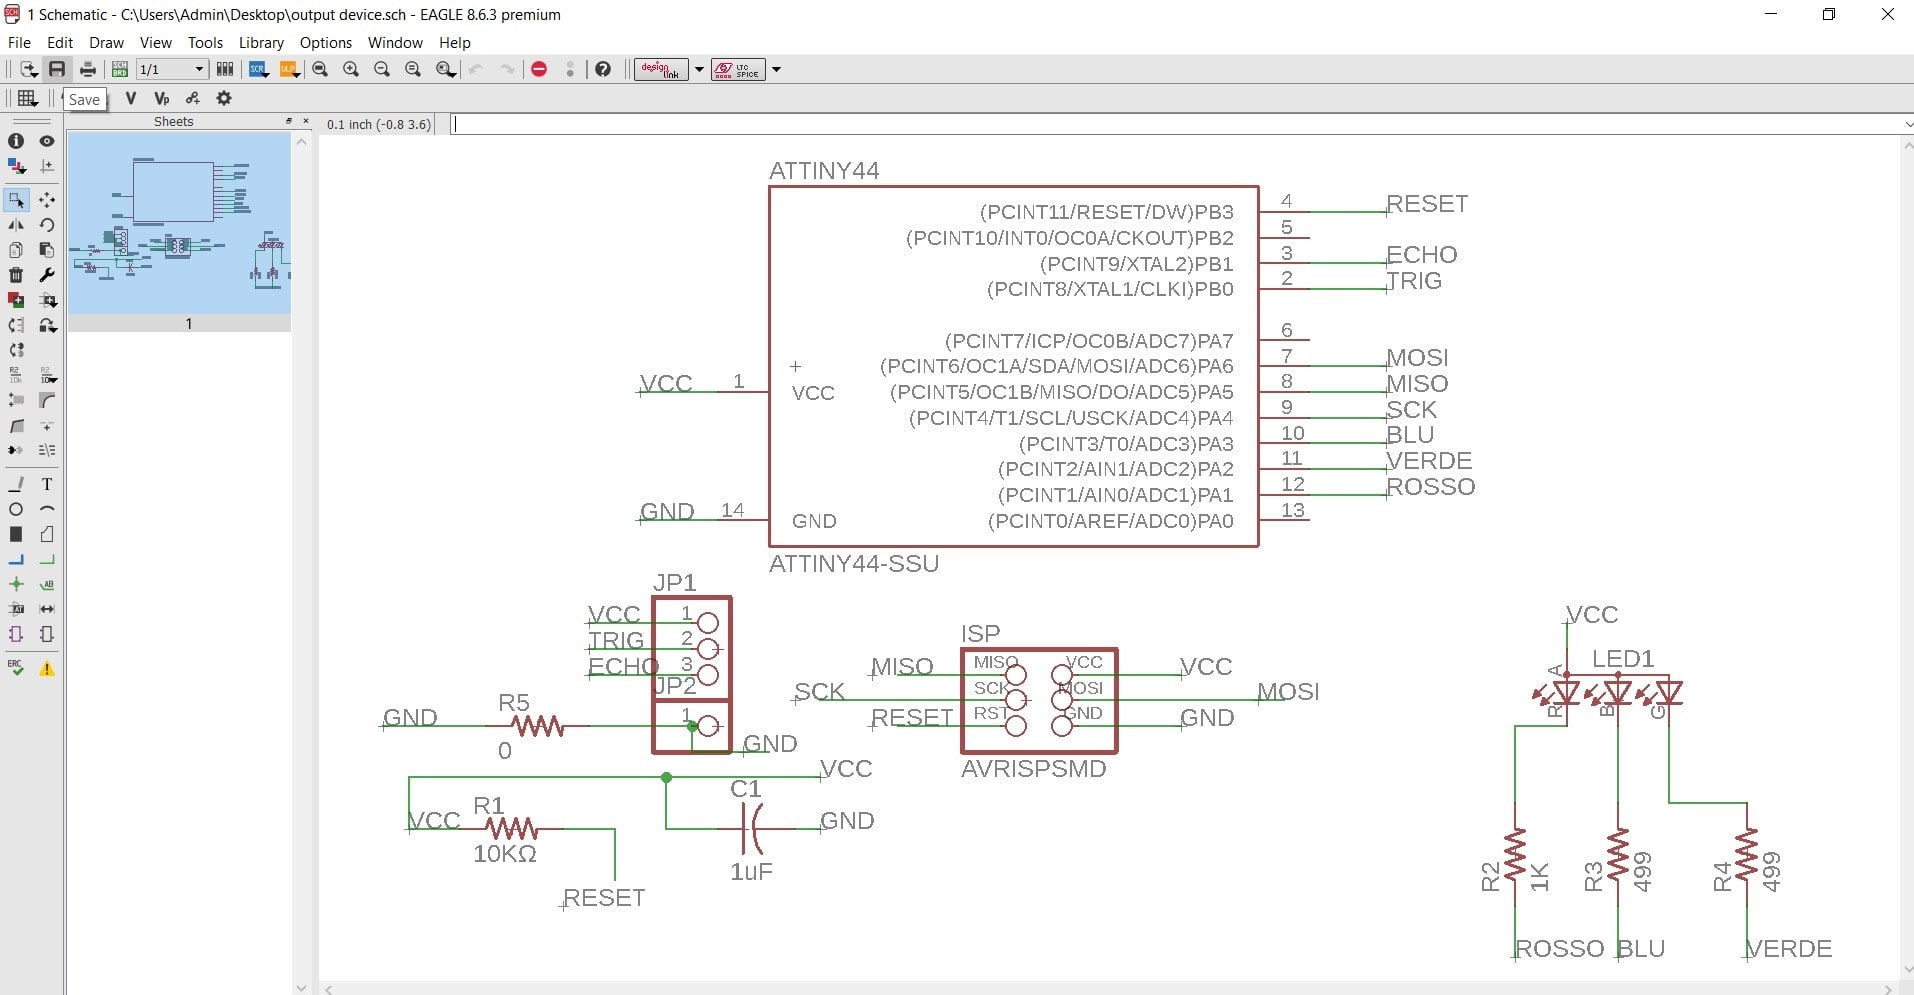
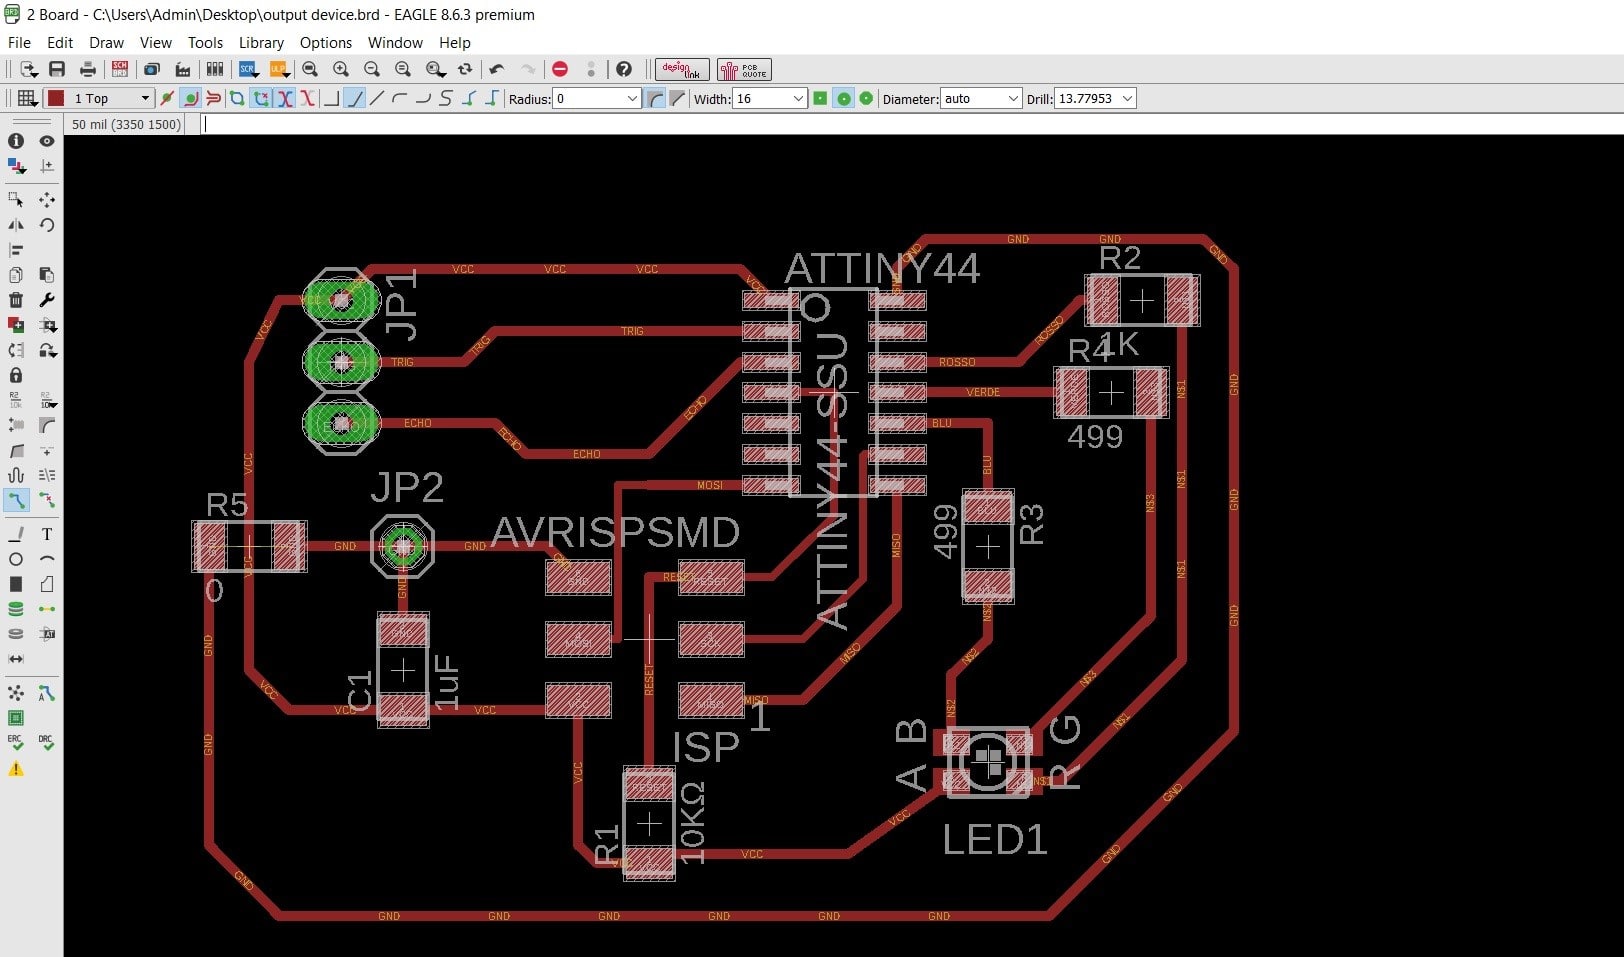
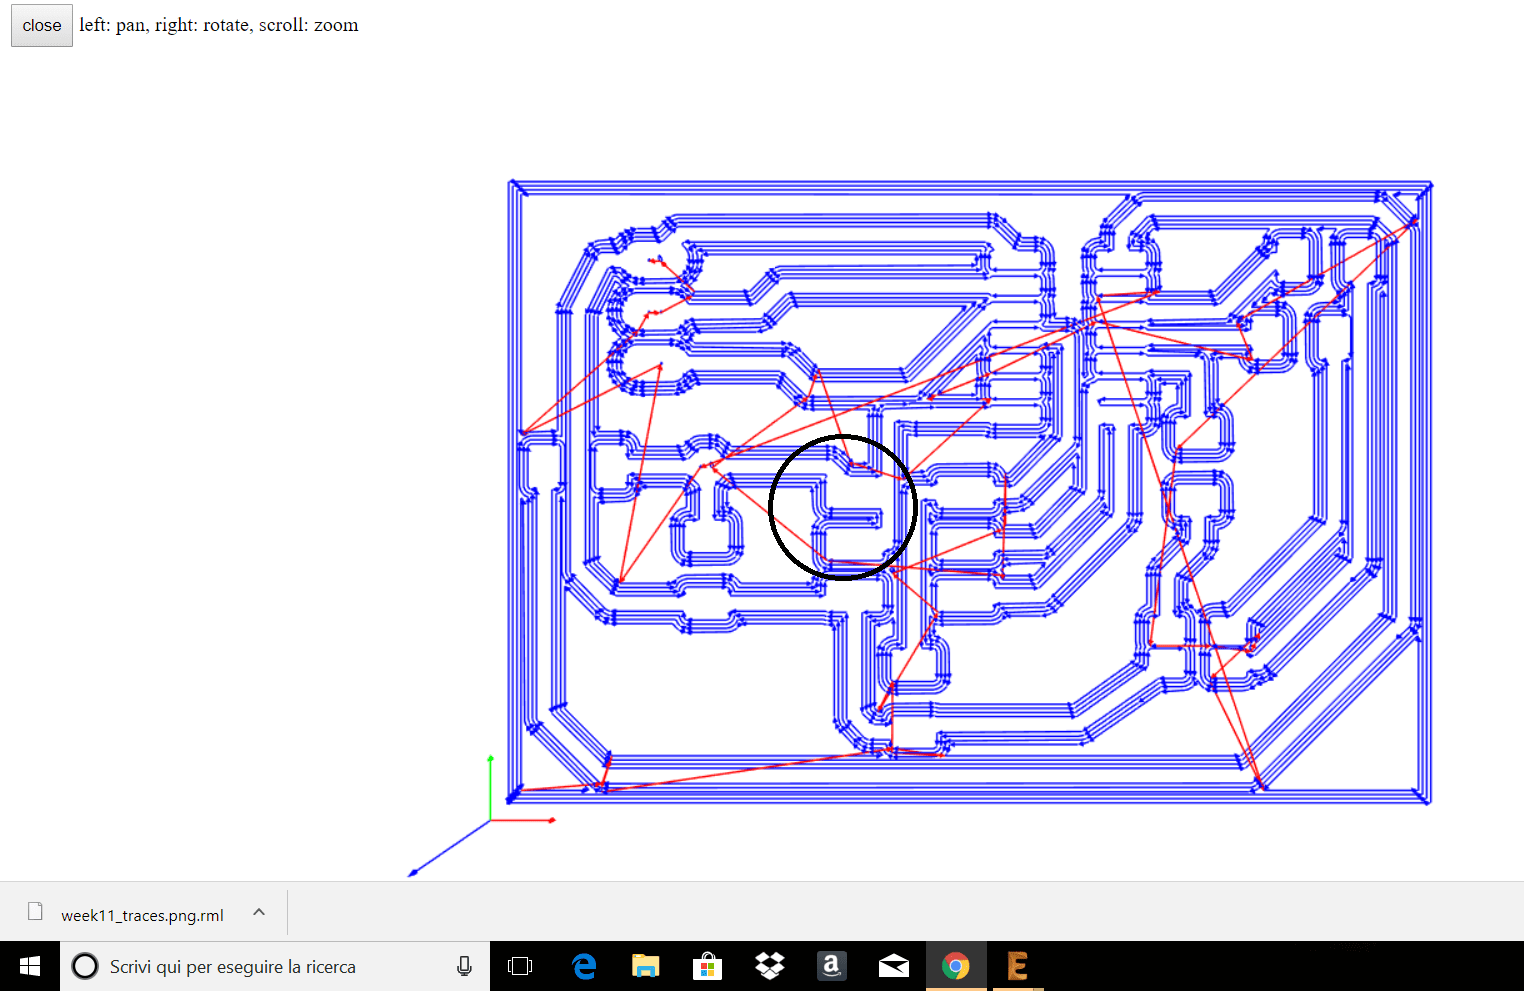
Then, I exported the image as I did during the previous weeks (e.g see week 6 or week 10). After that, I went on Fab Modules to create the rml files. Thanks to view option, I noticed one of my route trace was too near to an other one and it can be seen in the picture below. Consequently, I came back to my board file on Eagle and I edited the routes I thought wouldn't have been good to be milled properly.
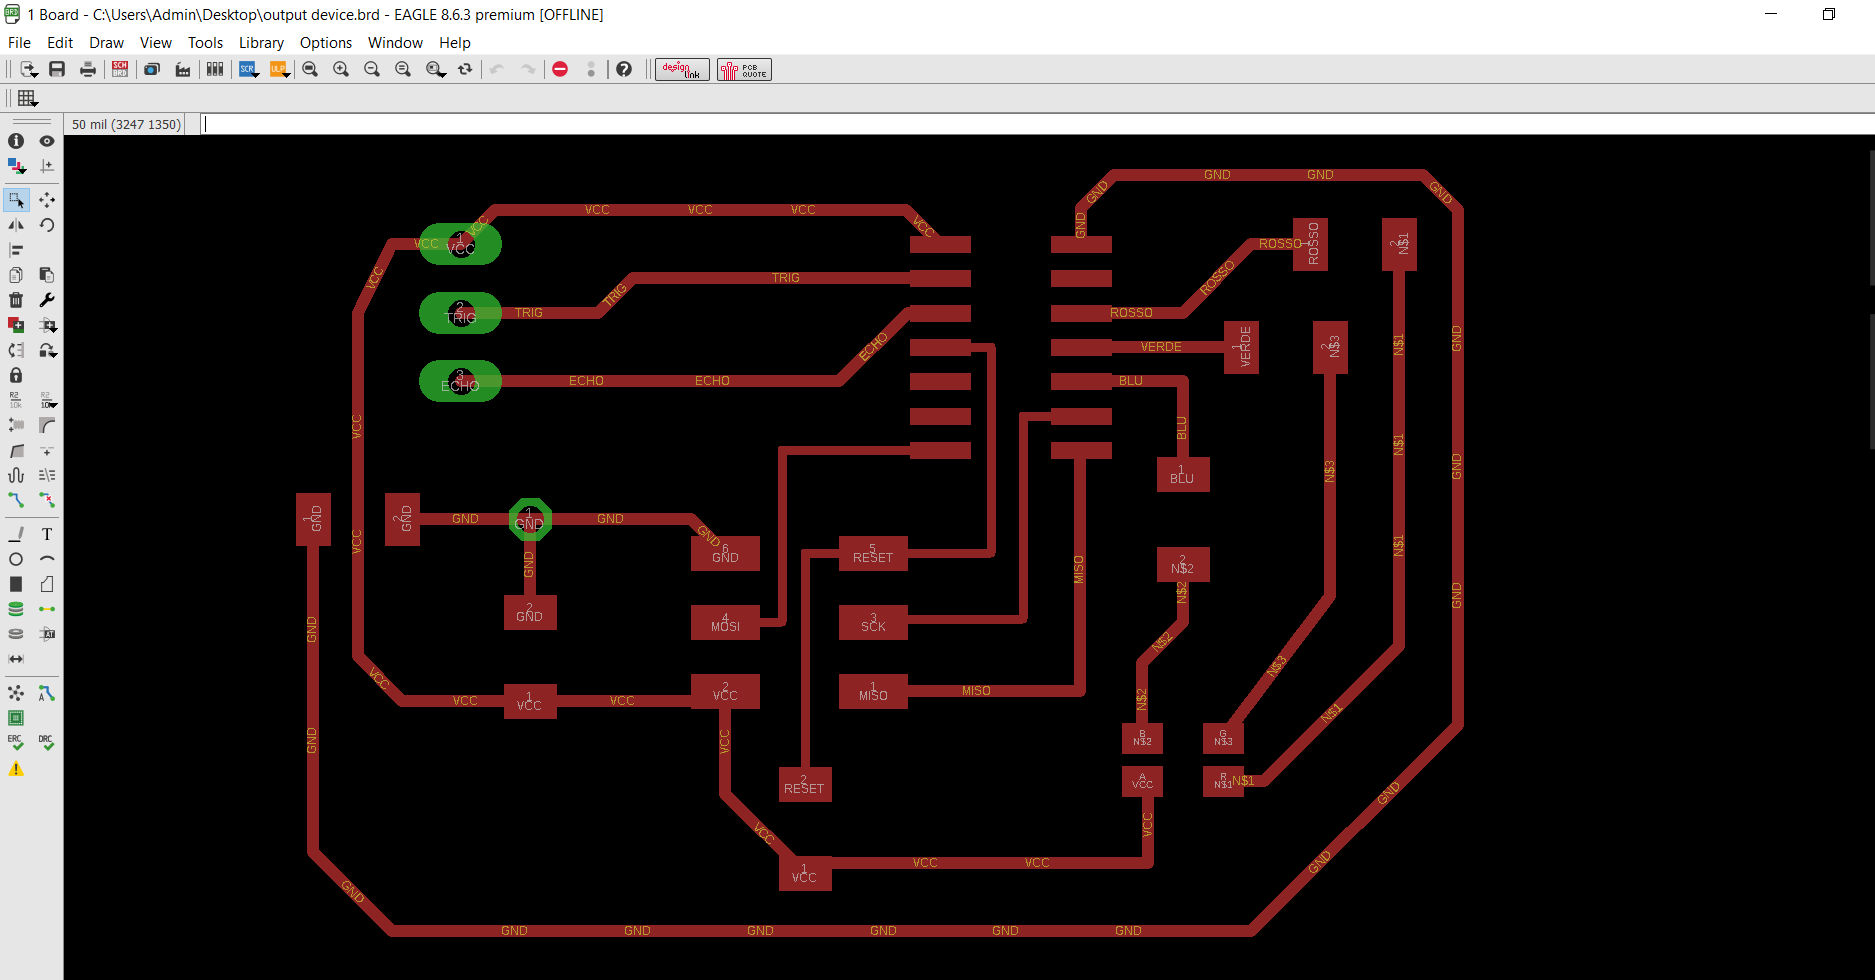
After few minutes, I saved the newest version of my file and I exported it with the same values I'm getting used to set (Visible layers: top, pad, vias / Export image in 1000 dpi, windows area, monochrome). The finished board looked like the following one:
Next, I opened Gimp and I started creating three different files: I wanted traces, outline and drills. Unfortunately, I noticed I had a problem related to the drills milling (the same I had in the input device week (see the board's shot). In fact, even if I created different levels (different in background and foreground colours), when I milled the drills, they weren't perfeclty aligned as they were on my .png files.
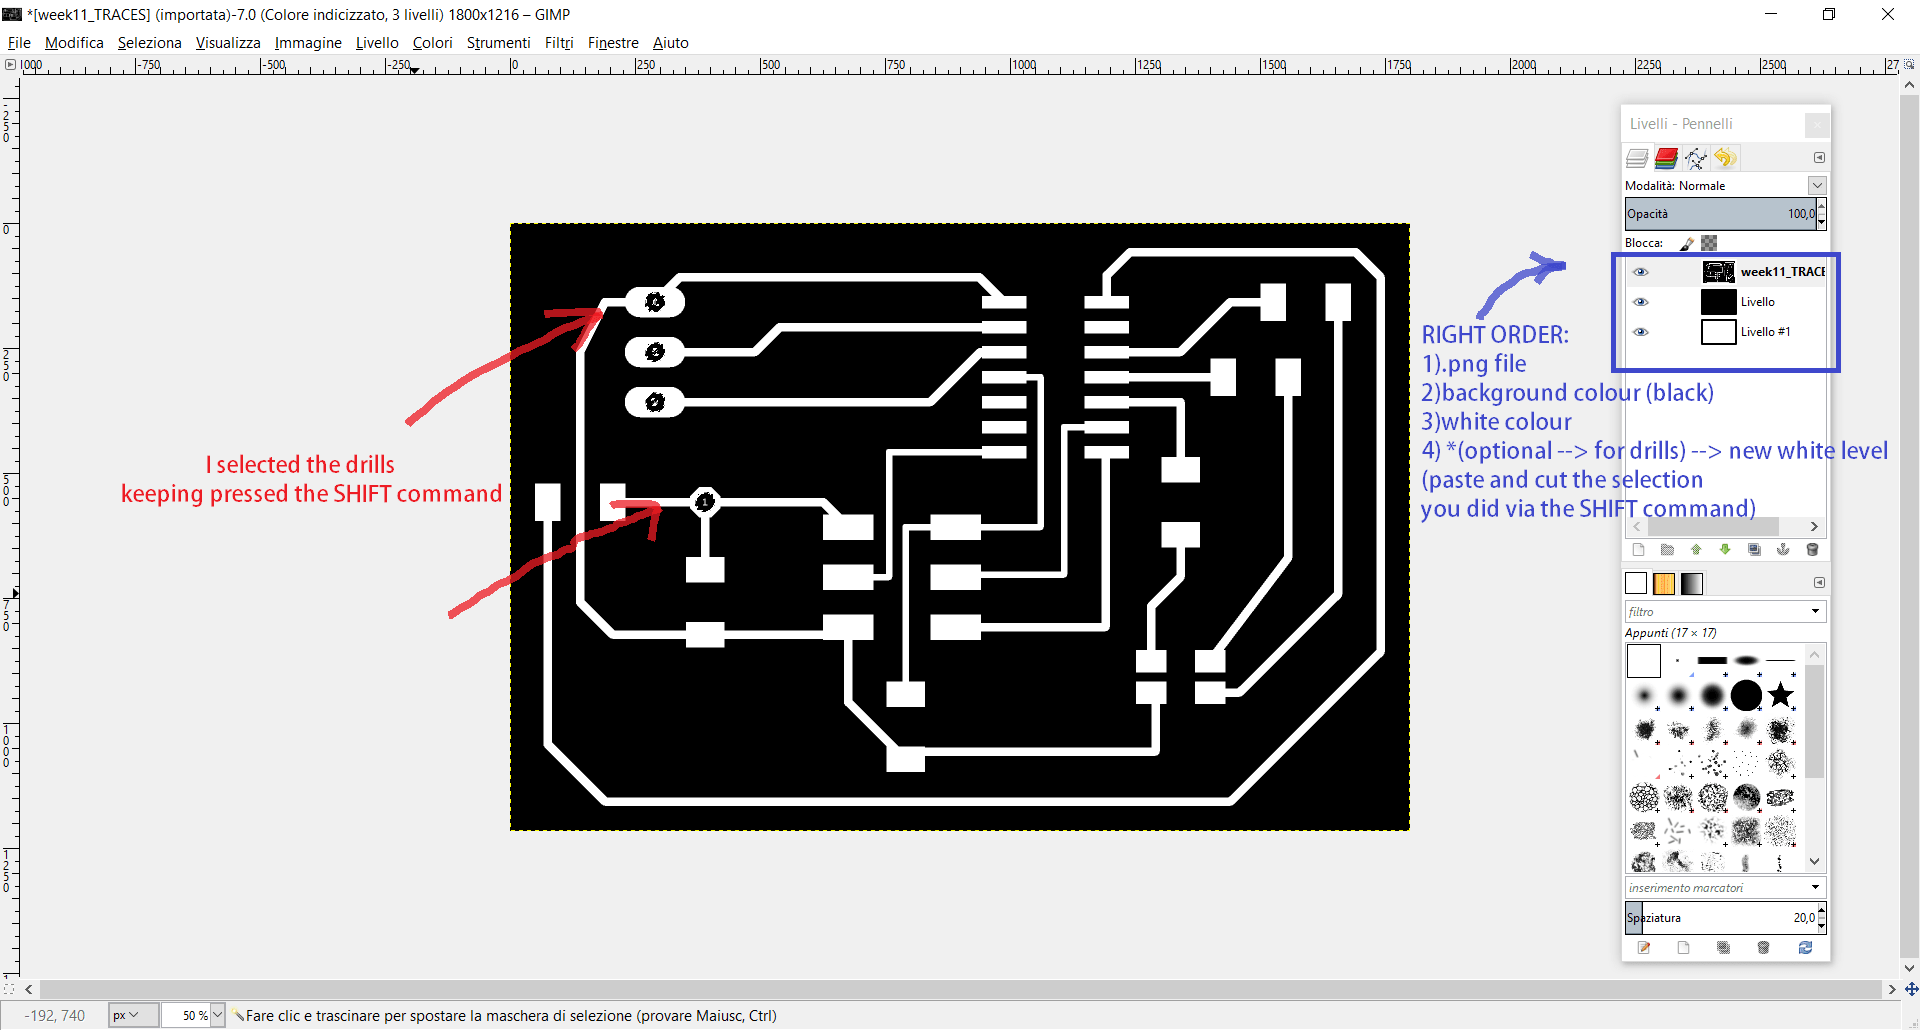
I'm really sure to have milled them with the right tips (1/64 to mill traces and 1/32 to mill outline and drills) and I used the Fab Modules properly (see the workflow I followed here. I don't know which is the problem linked to this circumstance. Anyway, it has been a bit difficult soldering the male pin header and fixing the tin around them. In order to be sure of its working operation, I tested the board connections with the multimeter: the were good. In other words, even if the drills weren't perfectly aligned, the boards connections worked and there was current flowing trhough the device. Nevertheless, I found problems to program it. Considering the fact I saw the Error = -1 on the laptop screen I thought there was a mistake on the Eagle's schematic file. So, I decided to look at it with one of my instructor. There weren't mistakes related to the electronics components, so it was really strange.
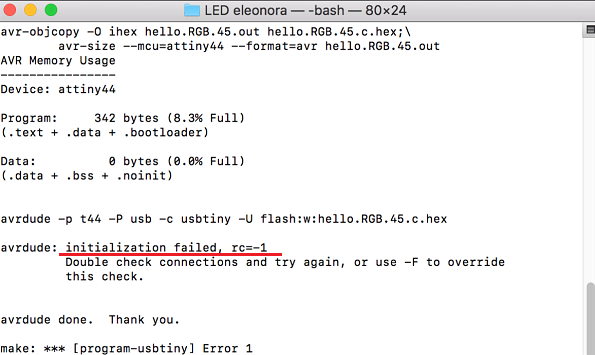
In order to find the problem, I checked again all the soldered parts and I couldn't observe anything strange or wrong. Maybe my programmer didn't work properly? It could be! Then, I tested it too...and it worked as previous times. Honestly, during my debug workflow I didn't find a problem for sure. How I fixed my problem? Probably I ruined the MCU during my soldering and unsoldering operations. In fact, putting on the board a new ATtiny 44, my board "magically" started working and I hadn't no more bugs in programming codes. Let me say sorry to have used "magically", no pun intended, but I checked many things and I solved the problem only in this way. To beginners in electronic could be remain a hardly explainable thing.
Talking about the codes, I used the make file available on this weekly assignment's webpage (click here and after a first attempt I looked for some codes, trying to have a gradual approach to more complex programming language.
NeoPixel leds & buzzer
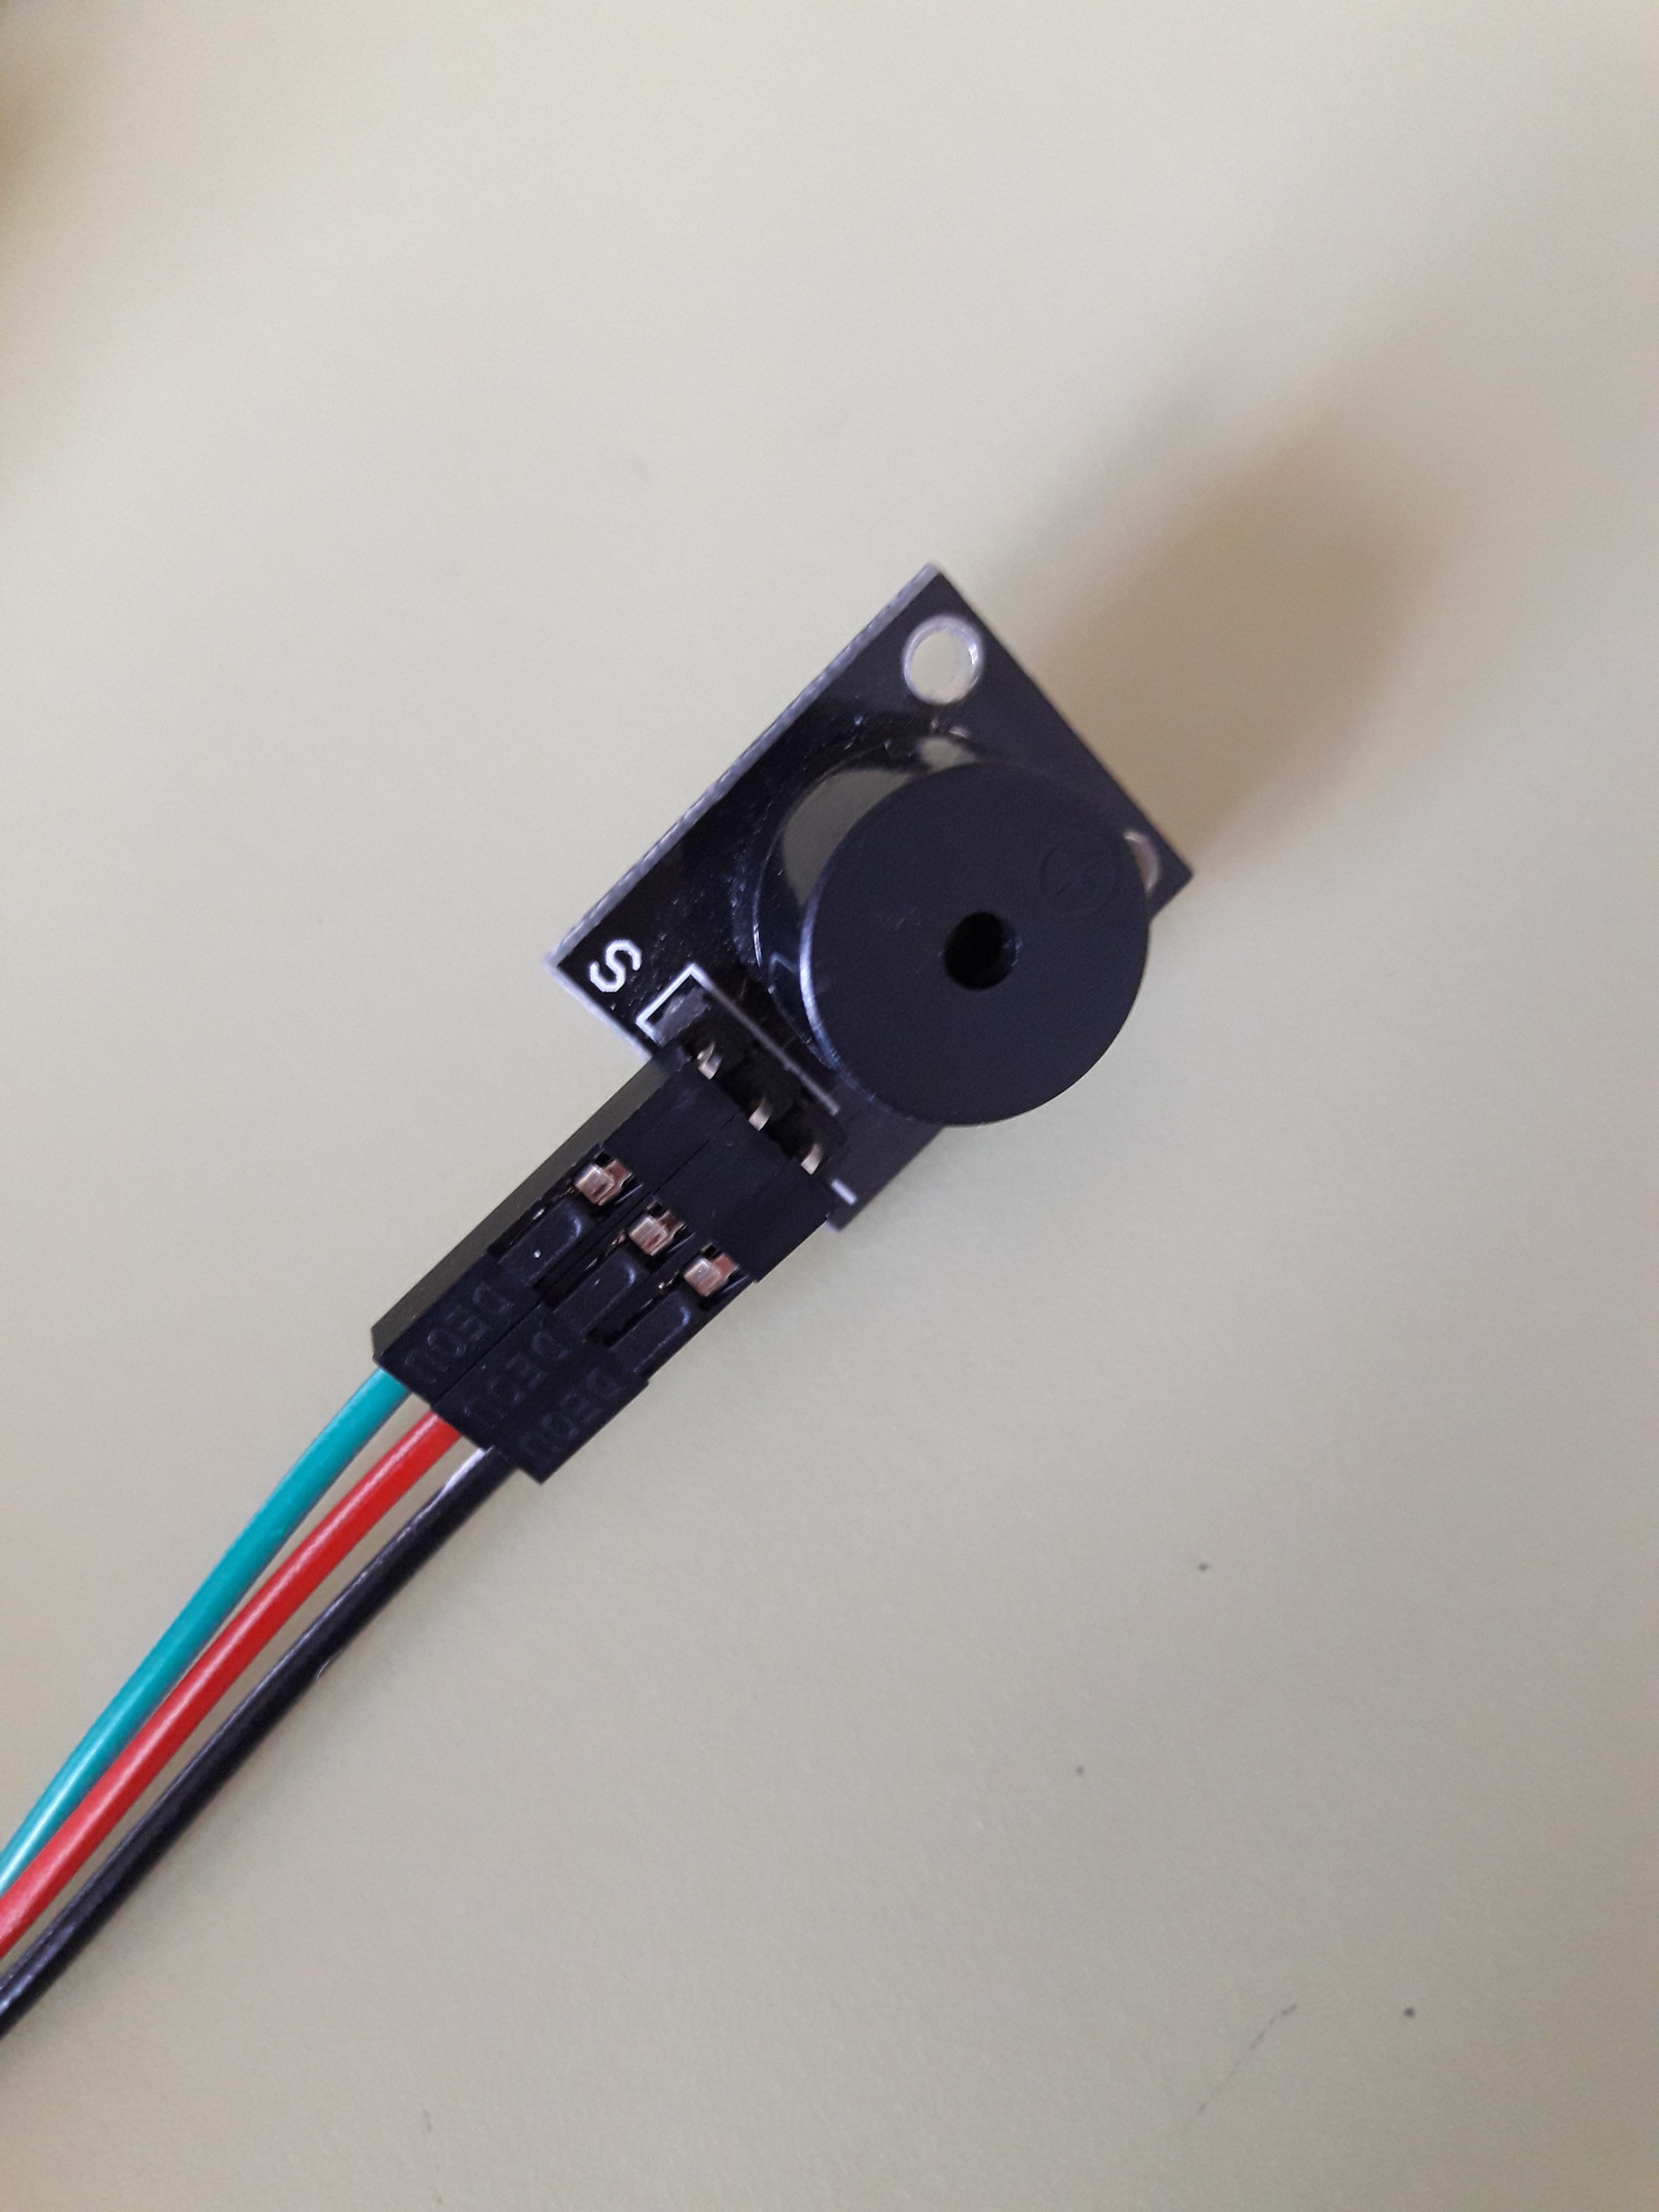
Considering the fact, I'm going to use some leds in my final project, I would like to do some tries with them. They will work as alerts together with a buzzer. I have never used a ready-made electronics component until now and I really loved the NeoPixel leds because they could have been sewed using a sequence connection. Moreover, during this week, both the elements I'm going to use (leds and buzzer) will receive an input from the pressure sensor (more details on input device week & final project). The communication works thanks to bluetooth modules connection and the buzzer and the leds are linked to the slave board (reader). First of all, I looked for the Flora Neopixel leds on Adafruit website and I paid attention to their features. I noticed they were connected to GND, VCC and an analogic pin. On the contrary, the buzzer needed a PWM pin. That's the reason why I looked again at the ATmega 328p datasheet to see which pins were dedicated to that functions. Doing so, I did the schematic correctly. More than the PWM pin (that represents the signal pin), also the buzzer needed a wired connection with VCC and GND.
![]()
Final test! ;)
Here, there's a short video that show how my devices work, they both represent essential elements for the final project's success. This video was just one of my first attempt, in order to focus my attention on final project development.
Conclusion
Being honest, I could divide this weekly assignment into two parts. The first one, is related to the RGB led and I got a bit lost because of mistakes in chosing resistor values for it. Then, I increased the awareness and I also realized it would have been normal because I'm getting used to face with with these things for the first time. Nothing has been easy, because during the electronics and programming week, I have to do more efforts than other weeks. After some tries and failures, I became more sure in using the last output devices I mentioned. Having increased the awareness of the needed pins (e.g PWM or the analog one?) I saw the last part of the week as a small challenge. It doesn't deny the fact I have to study a grat quantity of books, watching many and many tutorials and fail (again) many times too. All the things I did during this similar weeks required me lots of efforts and patience. I also know that there are just the basic concepts of this infinite world. Anyway, I'm here to learn and I'm getting used to put myself on the line during every week!
Useful links:
RGB ledATtiny44 datasheet
RGB Led datasheet
Led calculator
Ohm's law
analogWrite
digitalWrite
FloraNeopixel led
FloraNeopixel datasheet
Buzzer
Buzzer features 1
Buzzer fatures 2
