WEEK 5 - 3D SCANNING AND PRINTING
Assignment - group assignment: test the design rules for your 3D printer(s)
Here is the link to Group assignment.
individual assignment: design and 3D print an object that could not be made subtractively 3D scan an object (and optionally print it)
3D Printing
Machine
mannequin
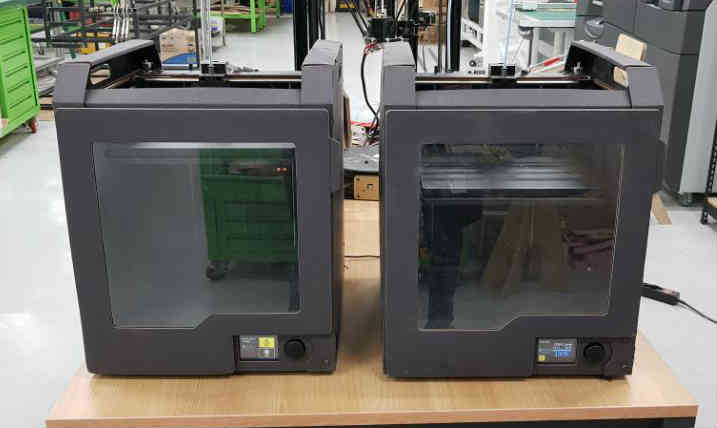
DP200
There are two kinds of 3D printer in innovation fablab. Those are DP200 from SIndoh, Mannequin from opencreator. Those two venders are based in Korea.
For Sindoh DP200, it’s fdm system and supports both of ABS and PLA. It has slicer program itself, I can download on its
website. (3DWOX-Sindoh)
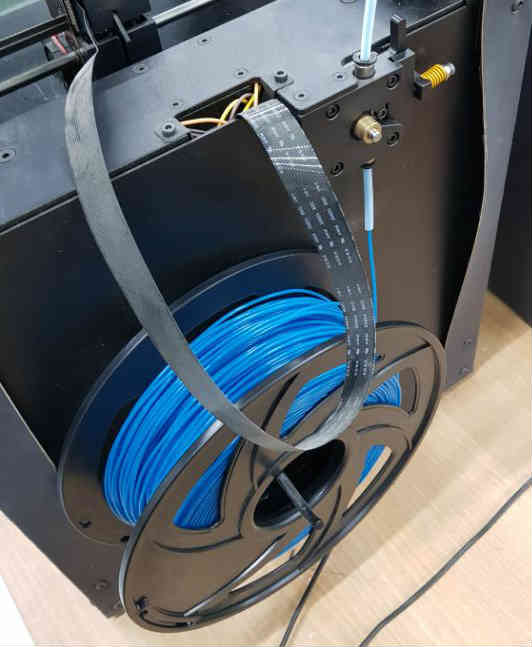
And they have their own filament and there is smart chip that contains kind of filament, color, remaining amount. So slicer program knows their printers and filaments. So it has default values for filament. They have 7 colors for ABS, and 9 colors for PLA.
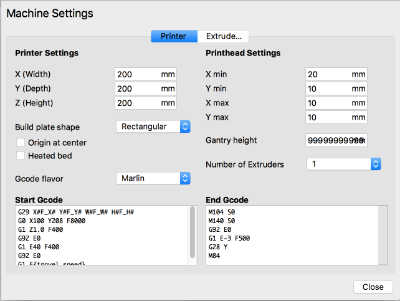
For Opencreator Mannequin, it’s fdm system and supports only PLA. Because it can’t heat the printing bed. They are small company and doesn’t have it’s own slicer. So I can use open source slicer Cura from Ultimaker. And I have to add a custom printer and copy the code and some value like filament thickness, size of machine and height of printhead for mannequin from instructor.
Tolerance test
First I have to find some reference to test the design rules for your 3D printer. I searched ‘tolerance test’ from thingiverse.
click image to visit page.
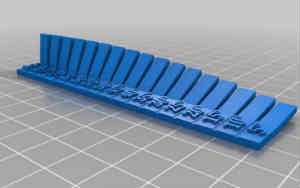
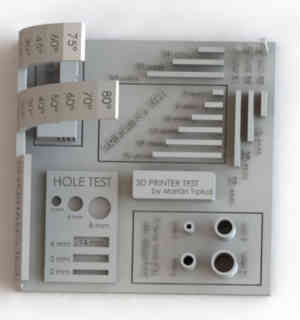
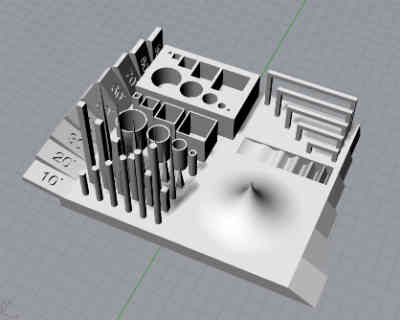
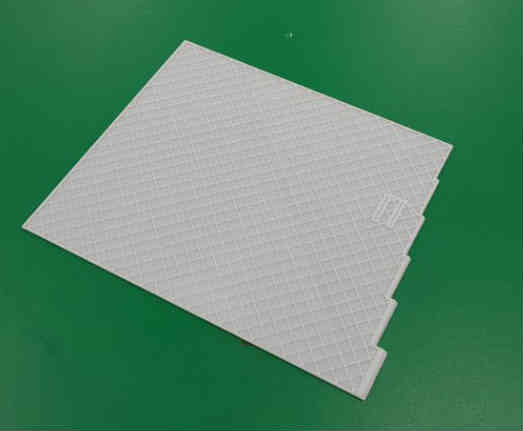
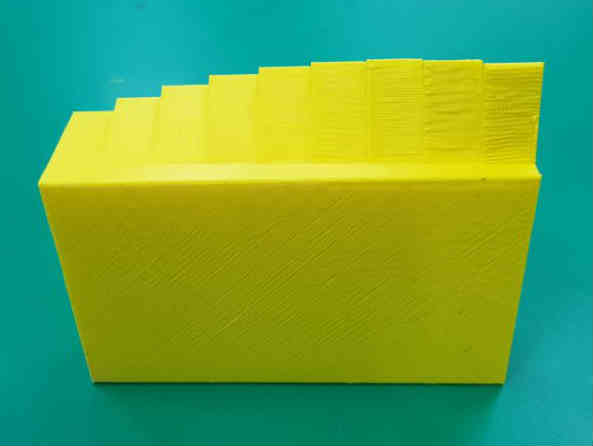
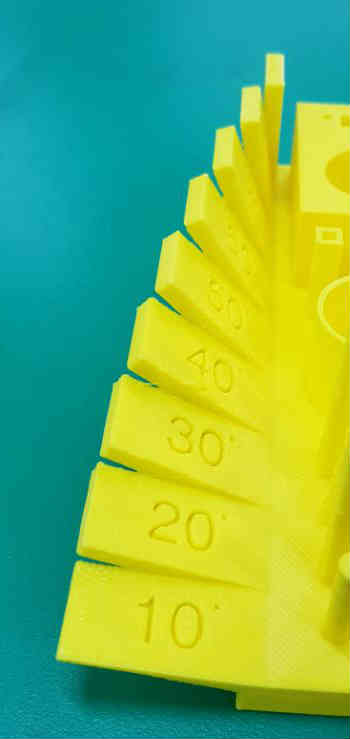
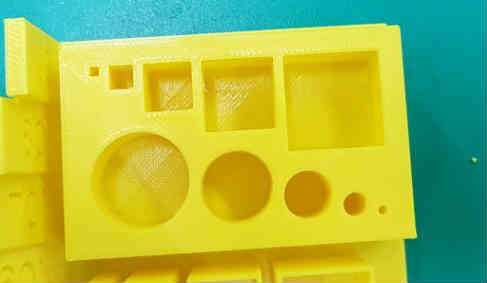
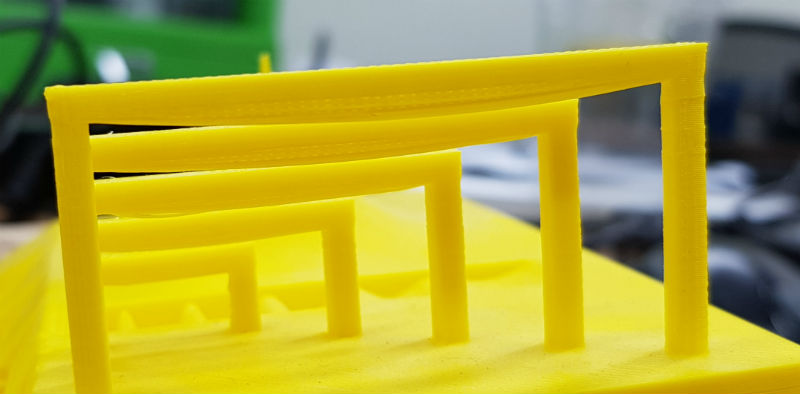
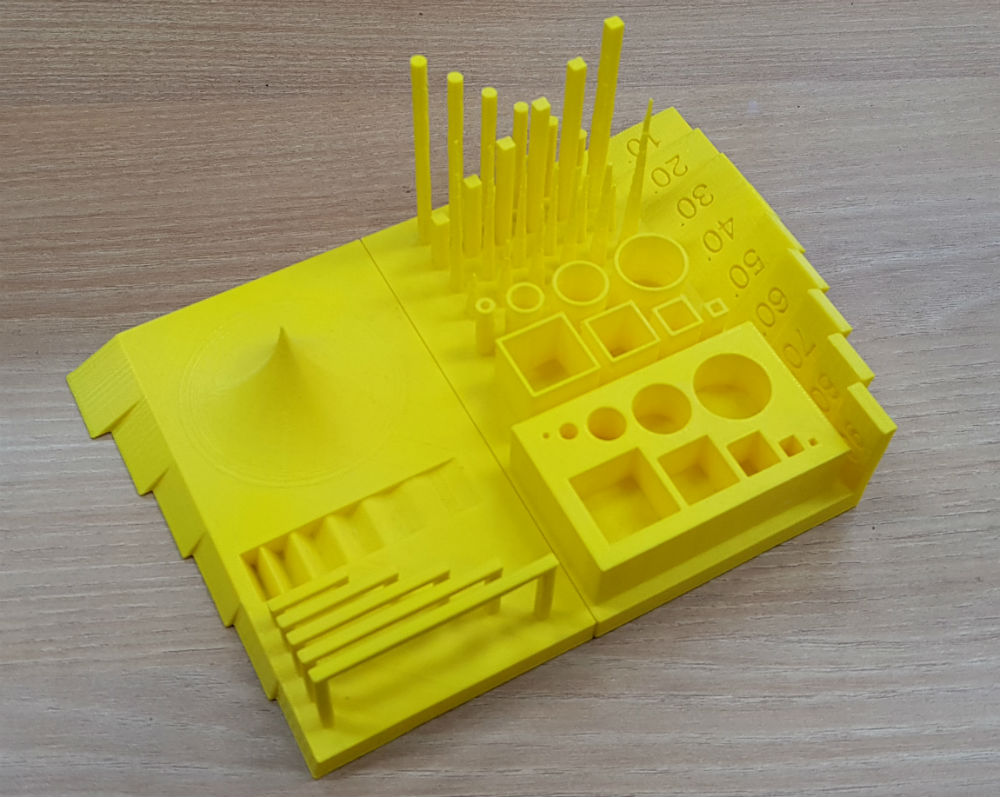
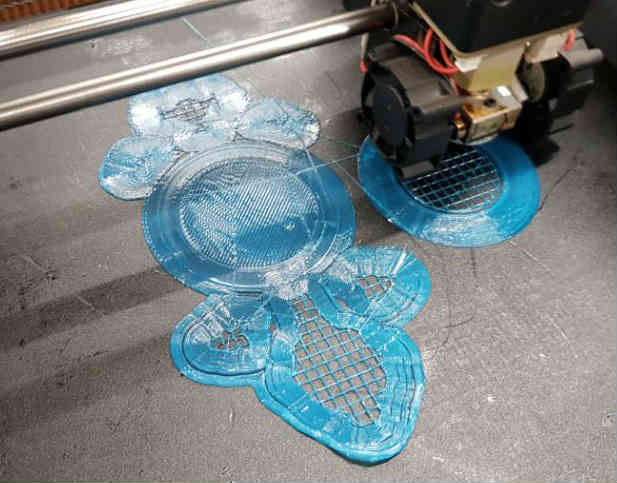
And based on these two models, I modeled my own tolerance test to make it efficiently at once. It contains overhang test on the left side to not interrupt other test if it fall down, height test with thin horn and rod, hole test with square and circle shape, difference size, wall test with 2mm thick wall shaped square and circle, difference size, bridging test with various length, curve test with waving hole and angle test from the bed.
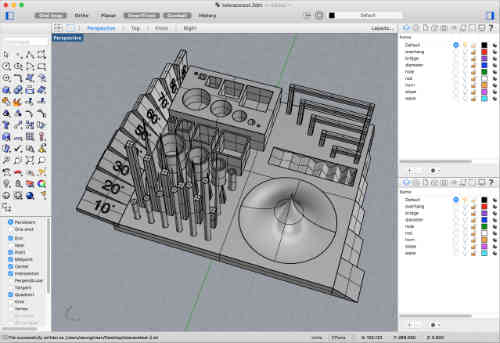
After modeling I exported that file to .stl file, and open at 3DWOX sindoh’s slicer and put default value. When I create gcode, the alarm popped up about it may need support part. But It’s test about various challenges, so I ignored the message.
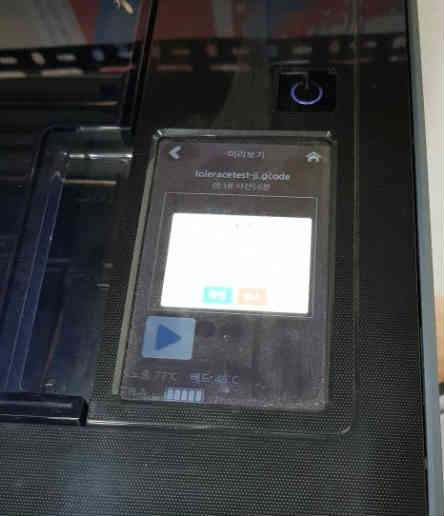
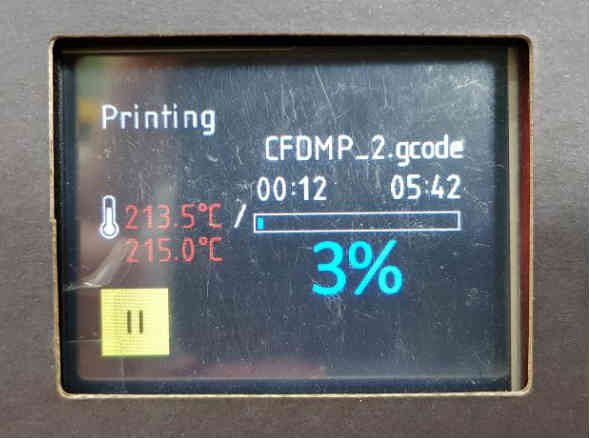
It took almost 19 hours. I put the code file to printer. And wait until next day. Then I checked the output but it didn’t came out. I thought it was power problem. So I tried agin with the same file. And, next day, it came same result. It made raft perfectly but on the raft it makes only about 3 or 4 layers and stoped buy saying works done on the display.
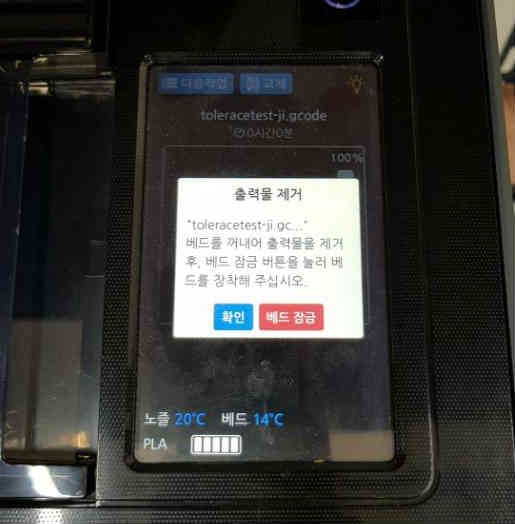
So it wasn’t power problem but error I think.
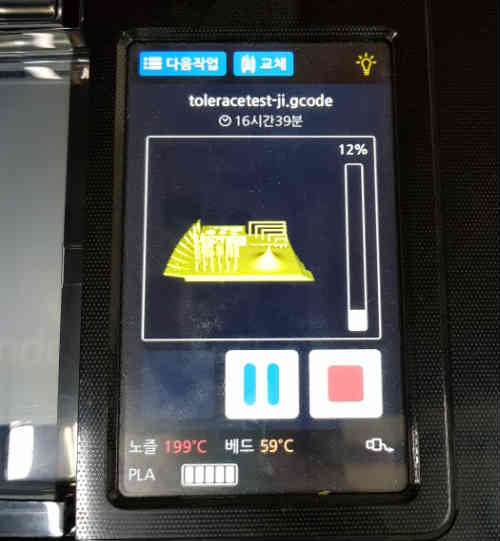
So I modified model, I cut the test model in two parts, left and right. I create gcode and printed it again. I used yellow filament and another sindoh machine. And after about 12hours, it came out fine.
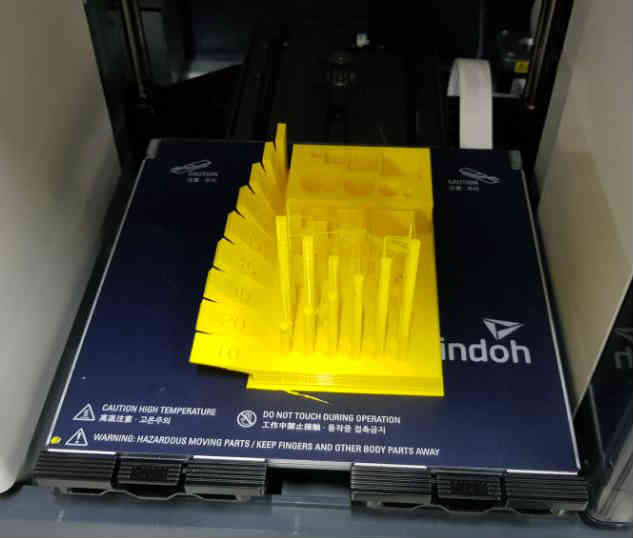
For the overhang test, it seemed filament little settled down on 10 and 20 degree. But it can be printed without supporter. And over 20degree those are fine.
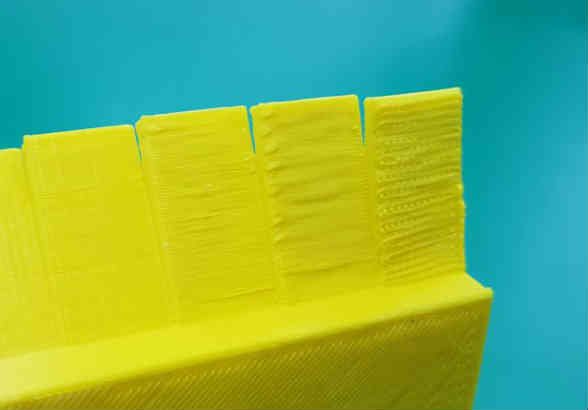
For the horn and rod height test, it seemed thickness of object mattered for the quality. Thick square and circle rods were fine, but square and circle horns were not that clean and those had kind of seams. These shape is very tricky for some other printers. But, it went up fairy well.

For the wall test, those have same thickness of wall but diameters and length of squares were different. If objects are bigger, nozzle moves long and flow can be better than smaller objects.
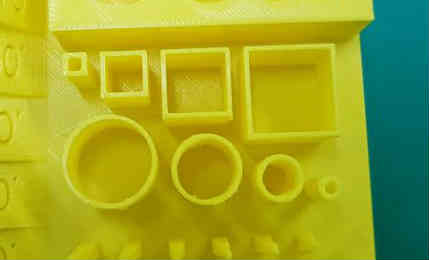
For the hole test, those are all fine regardless of size of the hole and shapes.
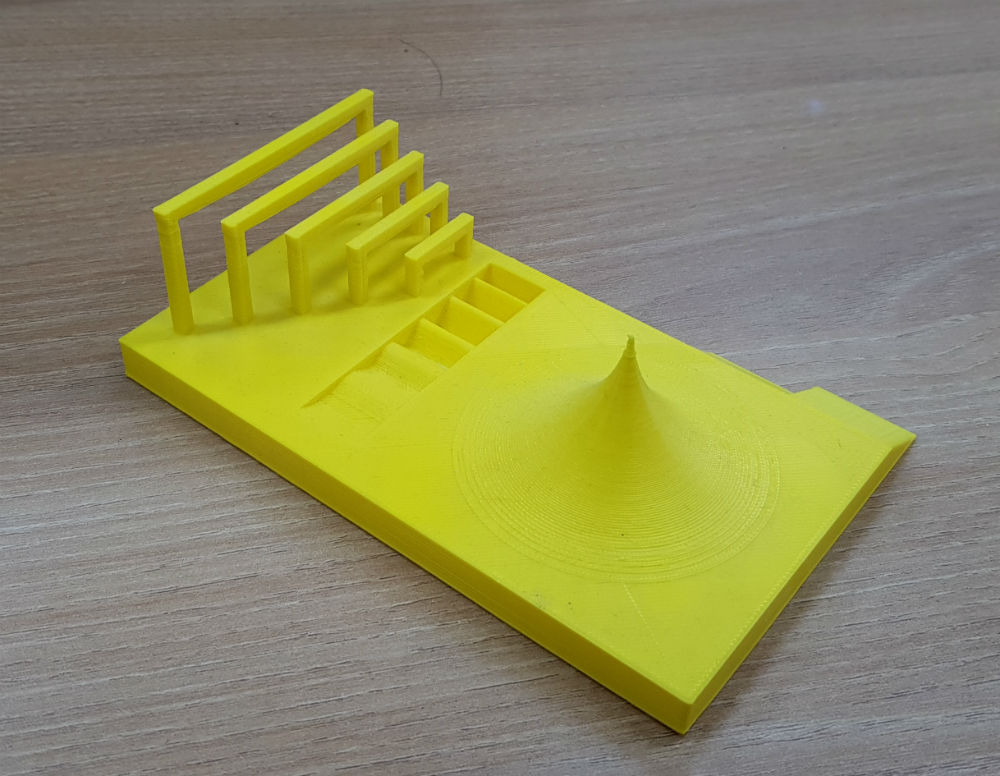
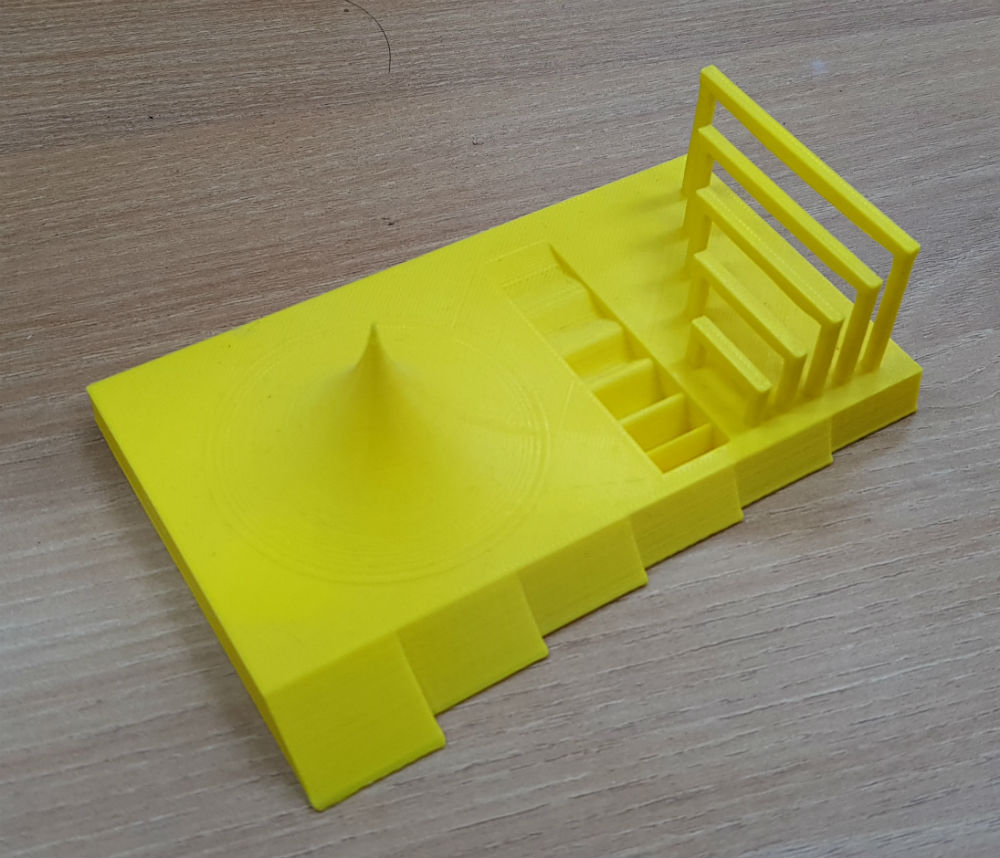
For the bridge test, they are fine but there is slightly sinked part at length 60.
For another horn test and curve test. those have smooth curve surface.
Material - PLA
Bed fix form - raft
Layer height - 0.2mm
Wall thickness - 0.8mm
Top/bottom thickness - 0.8
Infill density - 15%
Nozzle temperature - 200℃
Bed temperature - 60℃
Filament diameter - 1.75mm
Flow - 100%
Print speed - 40mm/s
Travel speed - 180mm/s
Retraction speed - 30mm/s
Length - 6mm
Fan speed - 50%
Support - no generate
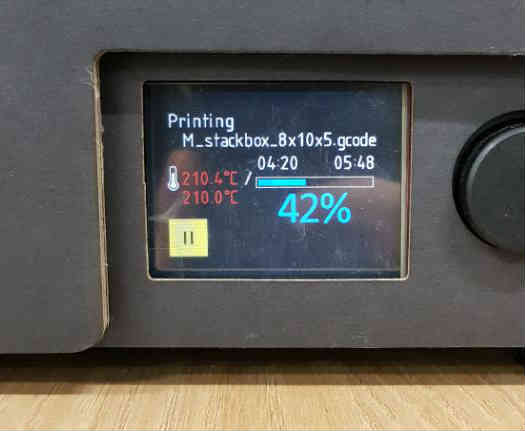
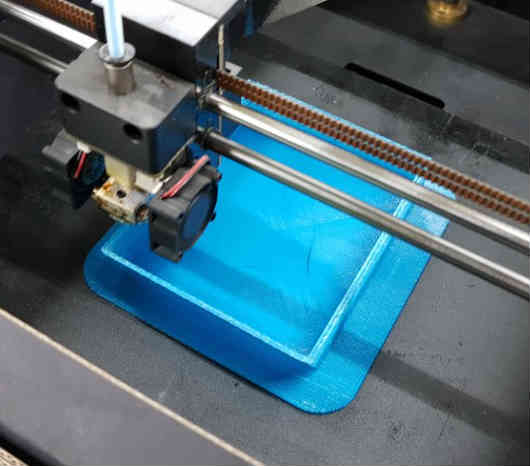
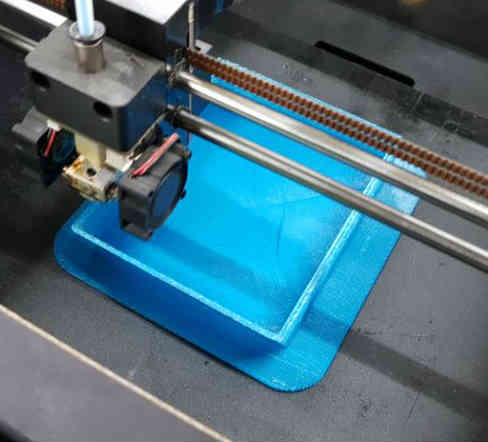
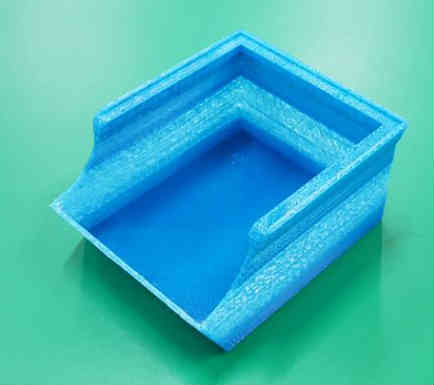
Testing Box
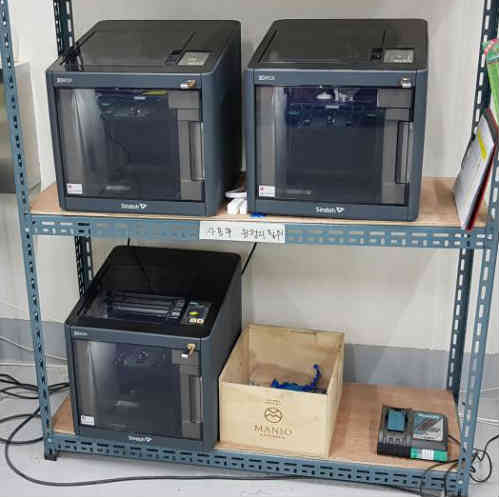
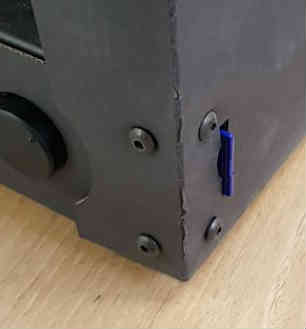
Those two mannequin machines weren’t used for a long time. So we tried to print former model on SD card.
These images show how to put SD card to mannequin machine.
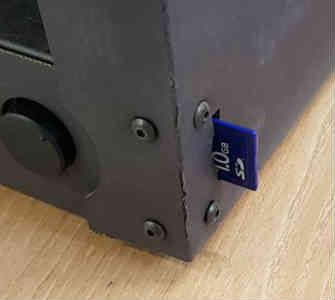
After some test for leveling the bed, it started printing. Brim was fine and proceed was fine too.
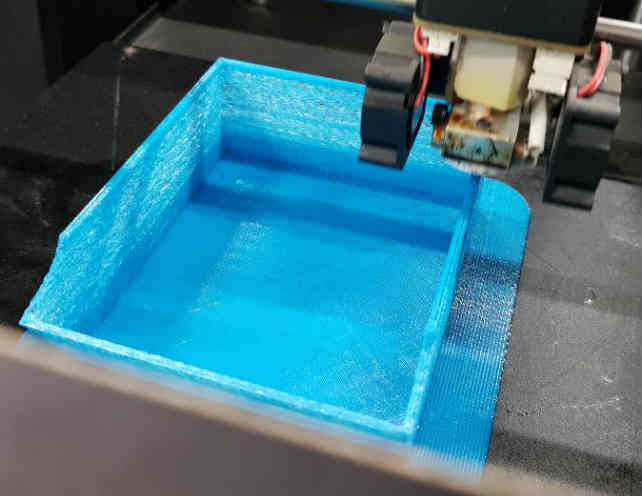
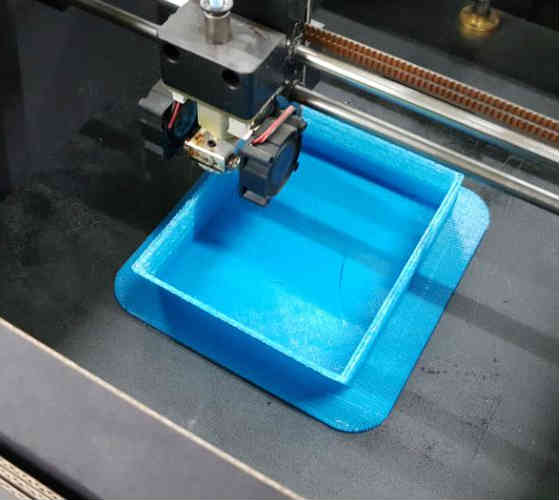
After an hour, it sounds like some clicking. I checked the condition of printer, there was some problem with feeding motor. Motor could not pull the filament roll and retract every 5 seconds.
I thought it was problem about nozzle temperature or filament roll. So I unrolled the filament roll by my hand and set the nozzle temperature to 215 degree. And It came out properly. After work done, box has thin and coarse wall on middle of body. it was really easy to tear apart.
Material - PLA
Bed fix form - brim
Layer height - 0.2mm
Wall thickness - 0.8mm
Top/bottom thickness - 0.8
Infill density - 15%
Nozzle temperature - 210℃
Filament diameter - 1.75mm
Flow - 100%
Print speed - 50mm/s
Travel speed - 120mm/s
Support - not generate
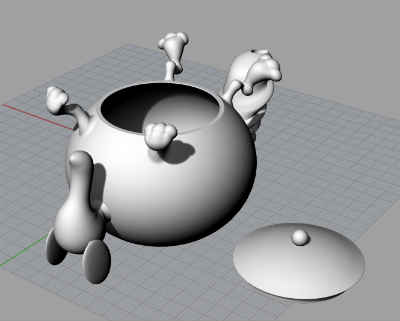
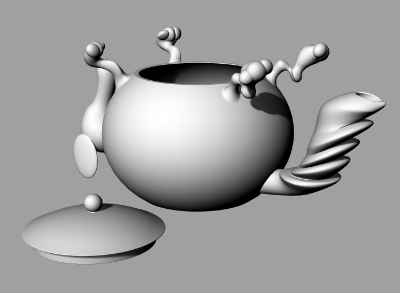
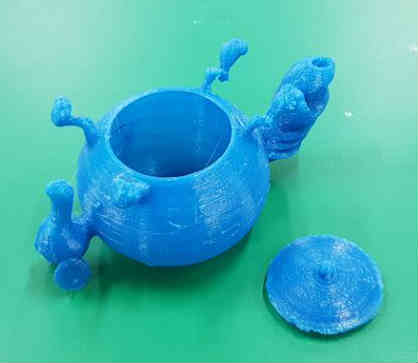
Dog shaped Tea Pot
I tried to print dog shaped tea pot I modeled before.It has complex shape on tail part that has water nozzle and can not be made with subtractive method.
I printed out with those two kinds of printers.
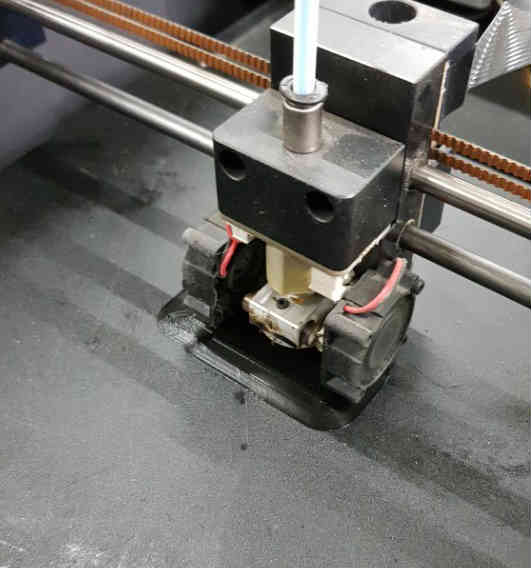
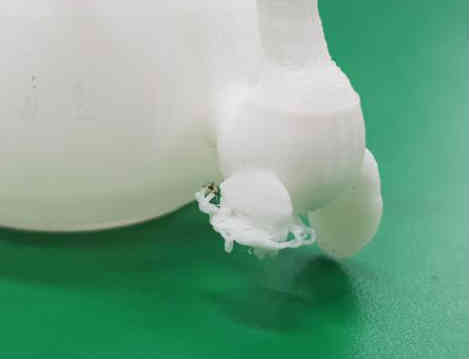
For the mannequin machine, starting with brim part, there was little floating part but i ignored because it was brim to make support.
After printing done,
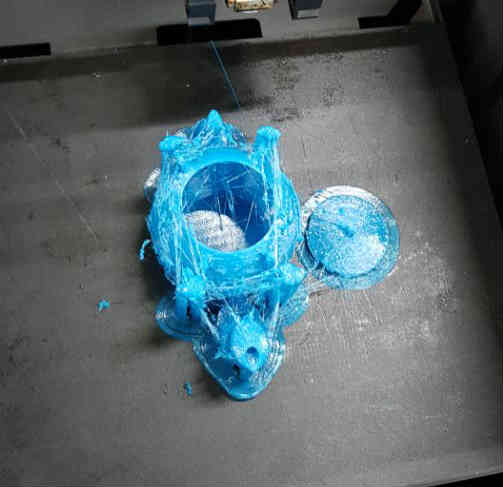
it looks so dirty it had bunch of seams and even hard to figure out the shape. I removed out put by using chisel. And tried to remove brim, support and seams. It was hard to remove by only bare hand, so I used cutting knife. Pot and support were connected and had one body. So I cut every part by myself.
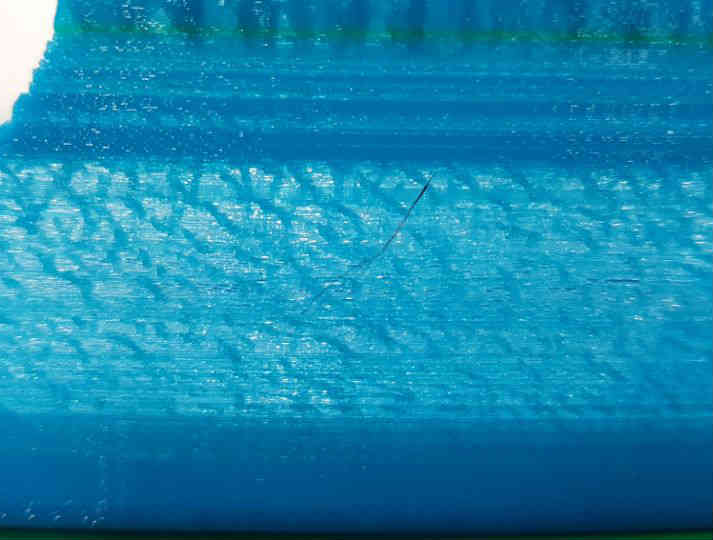
In this process, the thinnest part right hind leg was broken and I bonded those parts after. This is result. And it still has rough surface.
Material - PLA
Bed fix form - brim
Layer height - 0.2mm
Wall thickness - 0.8mm
Top/bottom thickness - 0.8
Infill density - 15%
Nozzle temperature - 215℃
Filament diameter - 1.75mm
Flow - 100%
Print speed - 50mm/s
Travel speed - 120mm/s
Support - generate
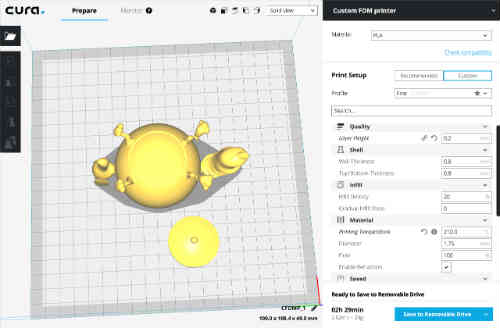
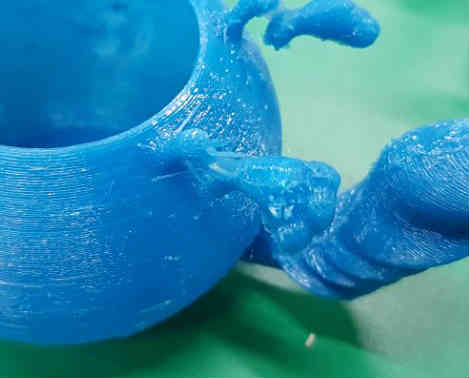
For the sindoh DP200 machine, out put looks quite better than mannequin’s.
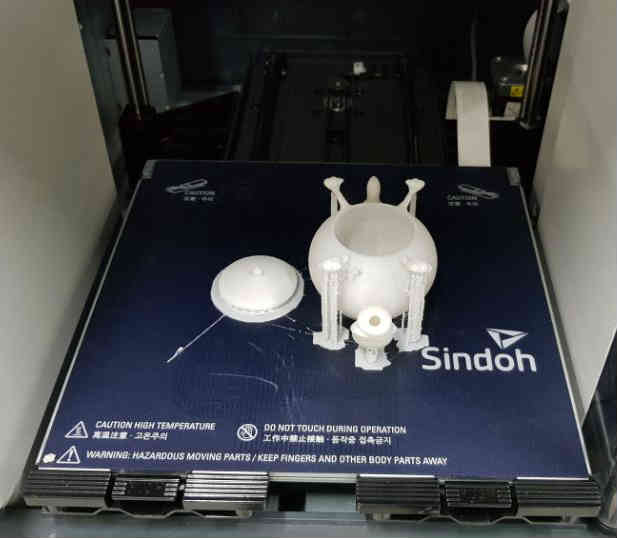
After remove from the bed of machine, I tried to remove raft and support part. It was easily removed by just hand and it has smoother surface than mannequin’s. But there were two problem. One is dog’s right ear that doesn’t have raft and every layers were on the air.
And other problem was hind legs. Those have few layers on the air even there was supporters.
Material - PLA
Bed fix form - raft
Layer height - 0.2mm
Wall thickness - 0.8mm
Top/bottom thickness - 0.8
Infill density - 15%
Nozzle temperature - 200℃
Bed temperature - 60℃
Filament diameter - 1.75mm
Flow - 100%
Print speed - 40mm/s
Travel speed - 180mm/s
Retraction speed - 30mm/s
Length - 6mm
Fan speed - 50%
Support - generate
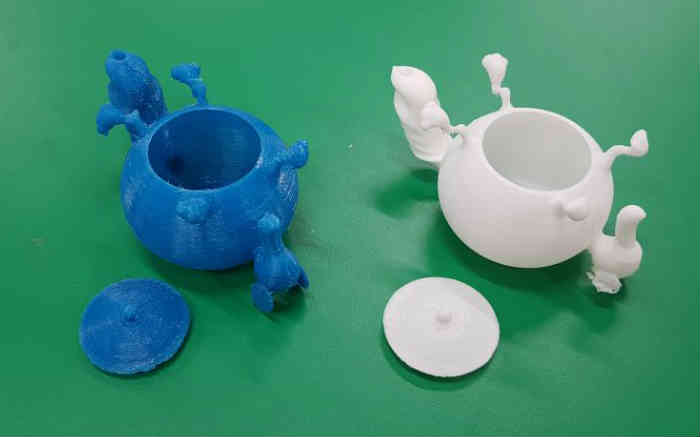
Sindoh win
3D Scanning
I tried to scan myself. I saw the tutorial video on youtube and followed. Link
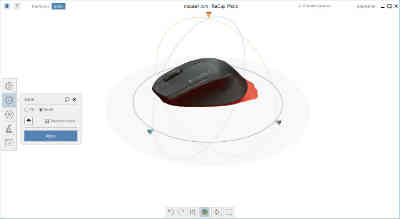
The program name was Remake before but now it’s Recap.
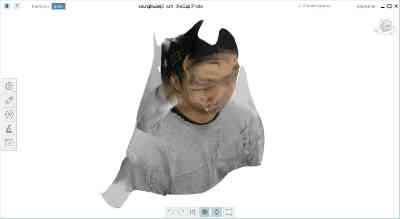
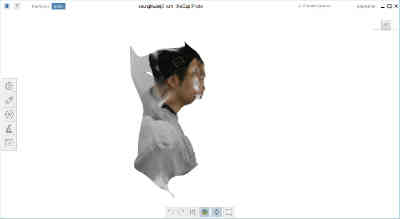
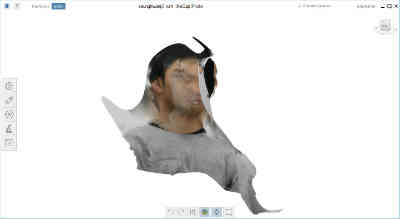
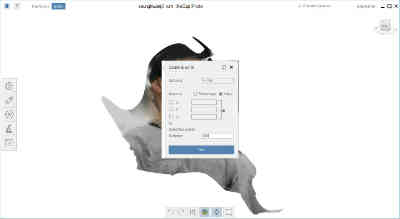
First, I took pictures with my colleague Sunghyun. I sat on the rotating chair and turn little bit at every shoot. First round was on eye level and he took about 10 pictures. Second was looking up level and third was looking down level. After all shoot, I got 34 pictures of me and uploaded to Recap program from Autodesk. After uploading, I push the generate button to make a 3D scanned file of me. But error message came out at processing 18%. So I tried again and got same result. So I tried again and finally got the result. I opened .rcm file and there was a monster. It came out just front surface of me and it was terrible.
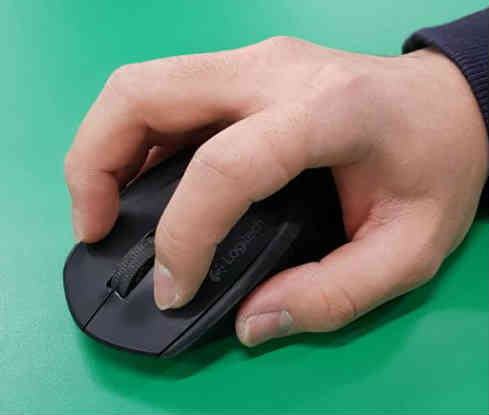
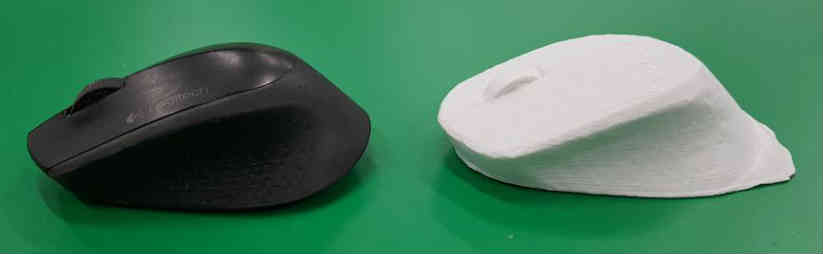
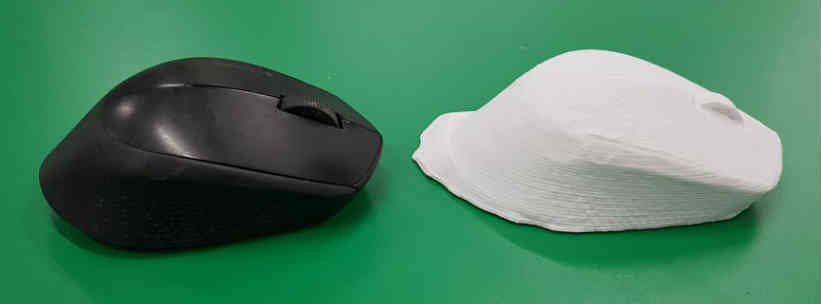
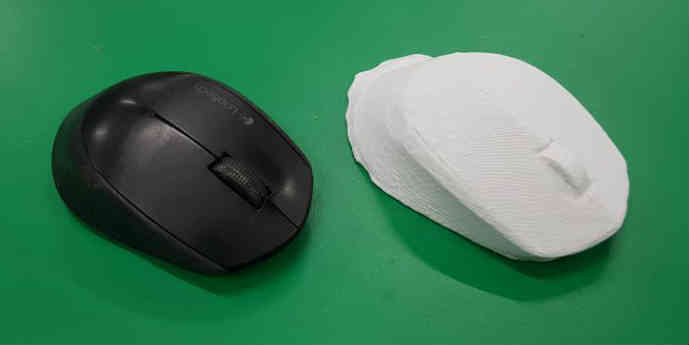
Then, I tried to scan my mouse. Same as former process, I put my mouse on rotating chair and took pictures by my phone. I took 64 pictures of various point of views. And I uploaded those to program and pushed the generate button and prayed. After few minutes, it finished generating and I opened the file. It was fine and I trimmed unnecessary part by using level and lasso tool. Then, I modified the density of mesh to make file lighter. I also put scale value by using two points. First I measured longest length of my mouse. It was 108mm. And I clicked the same points that I measured on program. And put same value. Then I got the same scaled virtual mouse with my real mouse. I exported to .stl file and create gcode file. I tried the material abs filament. I put default values that offered from sindoh, and printed.
Output was fine,
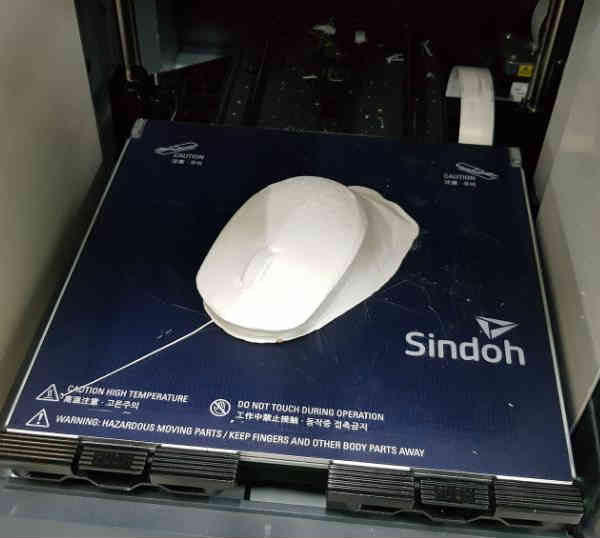
after removing from bed using chisel, I tried to remove raft.
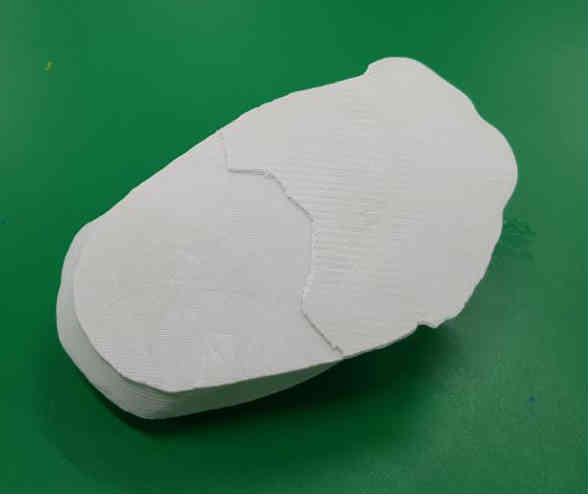
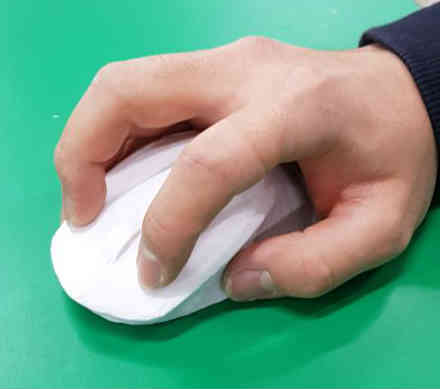
But difference to place filament, it sticked to body of mouse. So I had to use cutting knife and cut part to part. Compared to original mouse, it has little wavy surface but same grip and shape. And compared to PLA, it has less reflecting surface on ABS.

Material - ABS
Bed fix form - raft
Layer height - 0.2mm
Wall thickness - 0.8mm
Top/bottom thickness - 0.8
Infill density - 15%
Nozzle temperature - 230℃
Bed temperature - 90℃
Filament diameter - 1.75mm
Flow - 110%
Print speed - 40mm/s
Travel speed - 180mm/s
Retraction speed - 50mm/s
Length - 6mm
Fan speed - 3%
Support - not generate
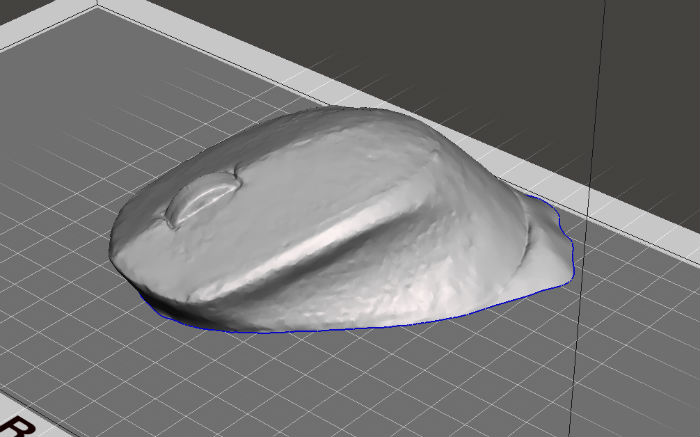
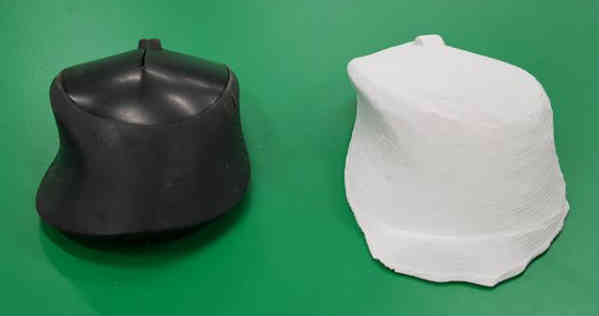
also I did post-process scan. I opened mouse.stl file on meshmixer. and cut unnecessary part behind the mouse.
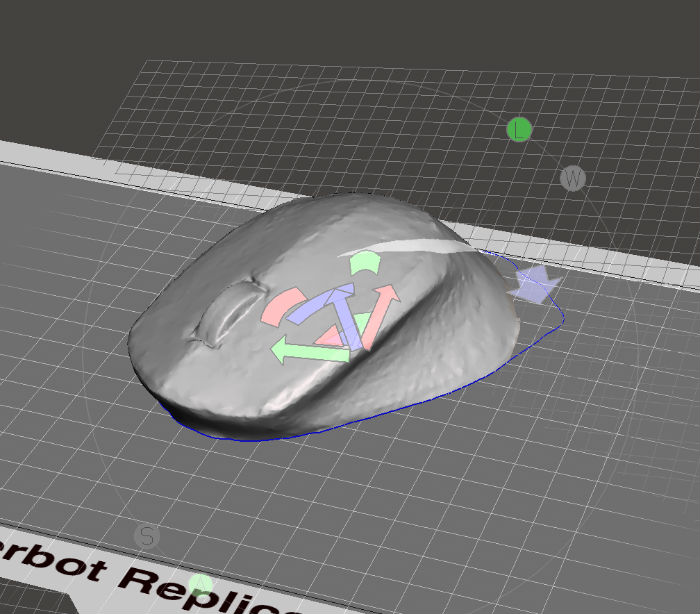
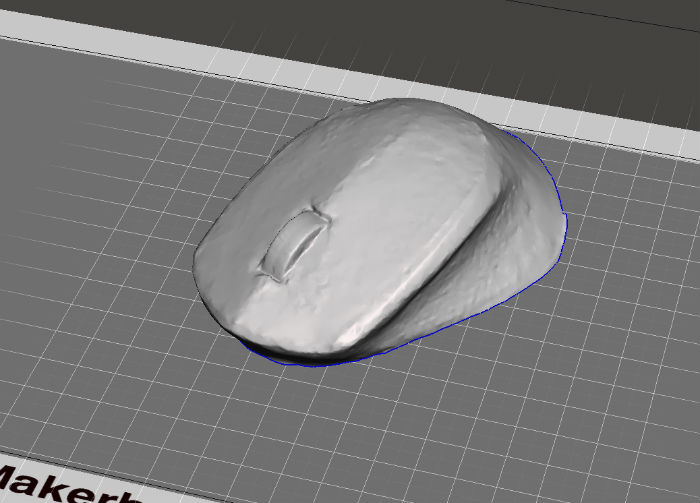
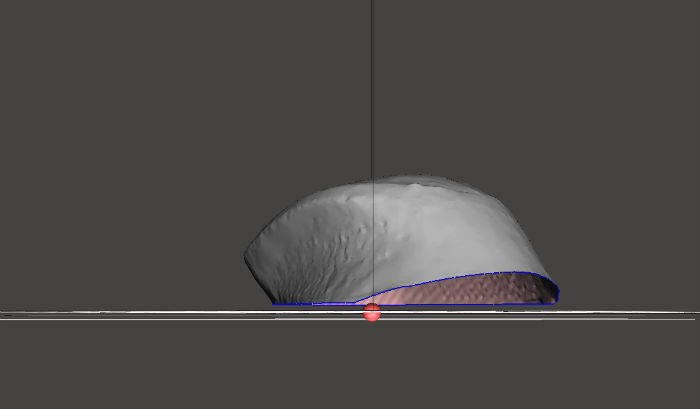
then there was hole because i cut. so I used 'make solid' tool to make solid.

then I got a solid mouse.
Here are my works.
Download