

WEEK 6
Scanning & 3D Printing
Equipment
Scanning
- Hardware: Microsoft Kinect, XYZ Handy Scan
- Software: Scanect, XYZscan Handy. Meshmixer
3d Printing
- Hardware: Creatable D2
- Software: Fusion, Cura
- Material: PLA
SCANNING
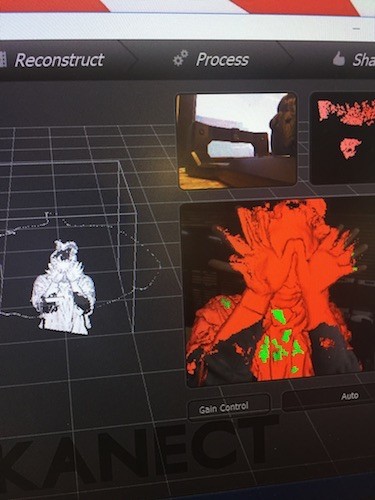
Kinect
Microsoft Kinect has a camera that reads colors and an infrared sensor to determine depth. Using information received through both camera and sensor, it creates a 3d compsition as you move the camera around your object.
A classmate and I helped each other scan one another. We propped ourselves on a swiveling chair as this seemed the most efficient method to get 360 rotation.
The first few scans we had a bit trouble getting a complete reading. We found that it helped to be a bit further away from the subject being scanned as this was a consistent way to get an overhead scanning. The scan was satisfactory but I noticed that it did not perform well in capturing details such as my individual fingers. It also failed to recognize a massive portion of my elbows/ forearms. One of lab workers suggested it could be that the kinect was less sensitive to certain colors- I was wearing a grey sweatshirt.
First Scan


More attempts
Loads of holes still remained but I decided this would be a good exercises in using software to clean up or fix bad scans.
MeshMixer
Importing scan into Meshmixer
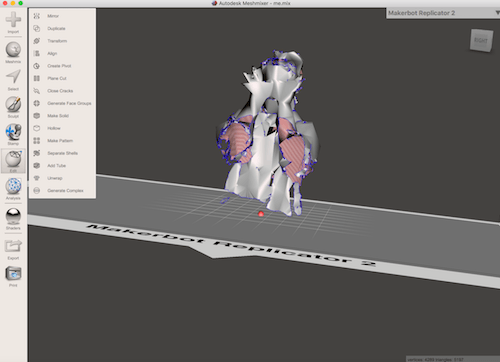
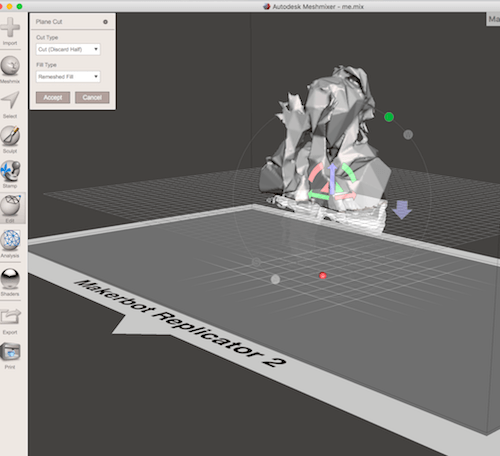
Plane Cut
Fill Hole
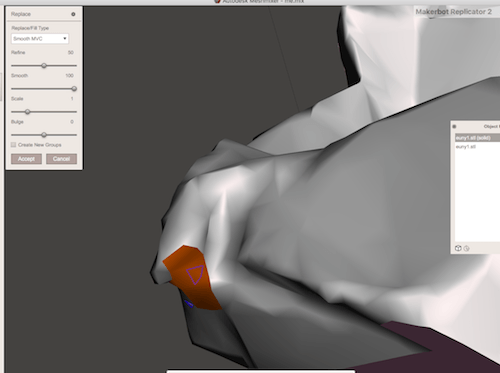
Fill in holes manually: S to select triangle mesh around hold and F to repair/fill
Make Solid

Scale
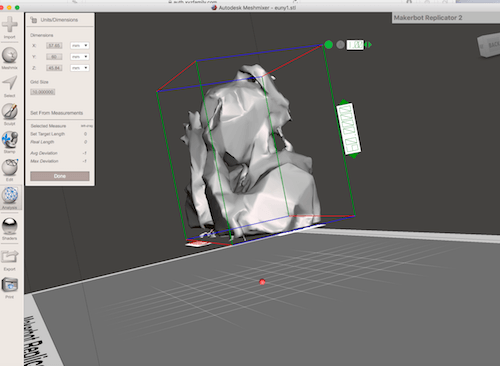
Scale objects before importing into Cura
Edit: Reduce
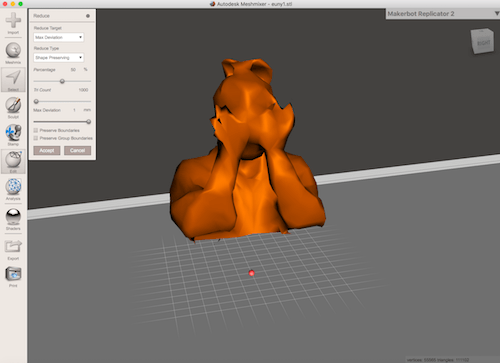
Max Deviation set to 1mm

Max Deviation set to .001 mm
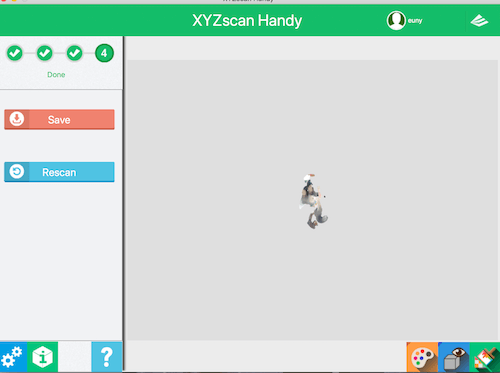
XYZ Handy Scan
I tried out the XYZ Handy scanning equipment because it was recommended as being superior to the Kinect, although I thought we had pretty good results with it. The Handy Scan is handheld deveicer that you hold horizontally and move around your subject similar to the Kinect. In the software you can select the type of scan: Head and Object. My first attempt with the XYZ was trying to get a scan of my classmates hand which proved to be quite difficult. The scan kept losing track of the object and it was very unstable.We would have to keep backtracking to get a reread of the scan. It seems to be very sensitive to any changes, which was difficult because my classmates hand was getting tired from holding it up for so long. The initial scan took a significant amount of time because it was not getting good reads and it also had very poor results.Sunhee's Hand
I thought that due to small movements of the hand that this may be the reason for the poor results. I tried out a stationary object to see if this would yield better results. Nope.
Santa Claus Figurine
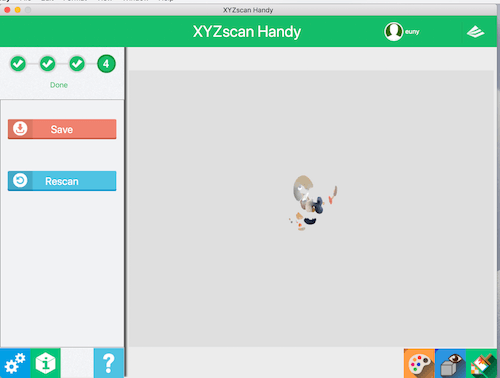
In the end, it was quite tedious using the XYZ handscan and it was taking a lot of time. I decided to give up on it.Not a fan of the handy scan.
3D PRINTING
Creatable D2 from Ateam Ventures
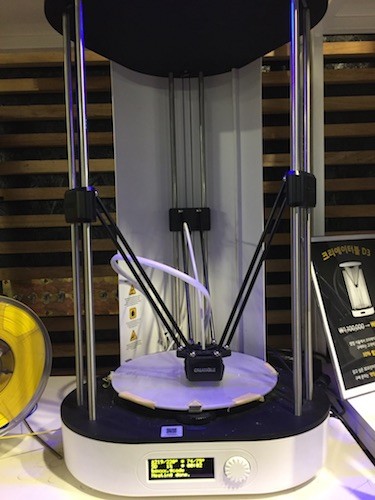
Using Seoul Lab's 3d Printer
SPECS
Print: Fused Filament Fabrication
Nozzle Diameter: .4 mm
Filament Diameter: 1.75 mm
Software: Cura
Supported file types: .stl, obj., amf., dae.
Connectivity: SD Card, USB Port
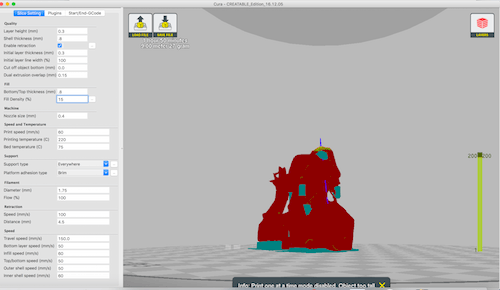
Settings for Print
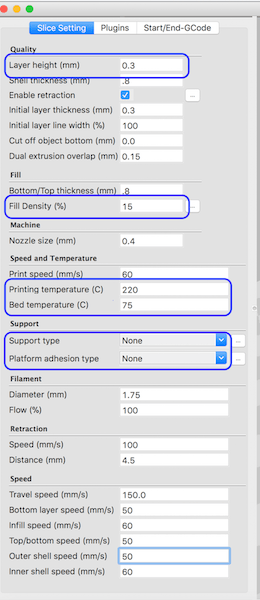
Settings
Settings in blue are variable and the others should stay relatively constant- Layer height:the thickness of the filament being layed down on top of one another. (we were suggested to use .3 for most prints unless it has fine details or has thin components)
- Fill Density: the density of the mesh. The higher the density, the stronger the print but also it will take significantly longer
- Printing temperature: Ordinarily the temperature/ range is between 0-200. However because of the cold temperature in Seoul's lab during the winter, the settings need to accomodate by increasing by 10 degrees.
- Support Type: Touching baseplate- Support structure will be only for the parts that touch the baseplate, everywhere- create structural support for every part (good if your piece has a lot of overhangs)
- Platform adhesion type: Brim- creates a thin under the print making it easier to remove, Raft- thicker layer like a platform when something needs a stable base
Failed Prints

This was one of many prints that looks like a pile of ramen noodles. I had been told by the workers that prints that looks like this was probably due to the filament not flowing out correctly. Apparently the filament extruder can weaken with time and needs to be either replaced or adjusted before the print. I didn't get to take a photo of the first few fails because someone had thrown them away in the morning before I got to the lab.Test Attempt

As I stood by to watch the print, I noticed that initially there were very thin filmanet layers coming out. Then at some point, it stopped coming out all together. This seemed like what had happened to my initial print and attributed it to the filmanet extractor. Since I was not in the position to replace any parts of the printer, I figured I would try to manually feed the filmanet and check if I could get it to flow properly.
Selecting Change Filament from printer
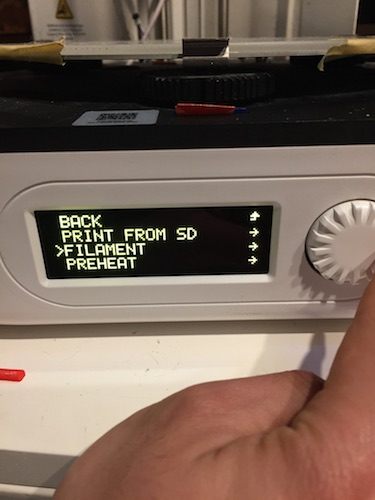
Select Change Filament -> Load Filmaent -> Extrude
You will get the command FOR EXTRUDING ROTATE CLOCKWISE Turn the knob clockwise until the filament comes out in a steady stream.

Tolerance Tests
Angle test
Angle test downloaded from Thingiverse.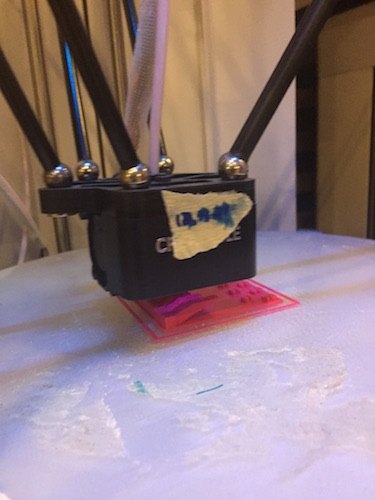

Printing using .3 layer thickness. Infill: 30. From angles 60-70, the filament was quite loosely bound, especially underneath. Printing took about 2 hours.
Printing
Meshmixer .stl file into Cura
Save file onto SD Card to be read by printer.
Selecting Print
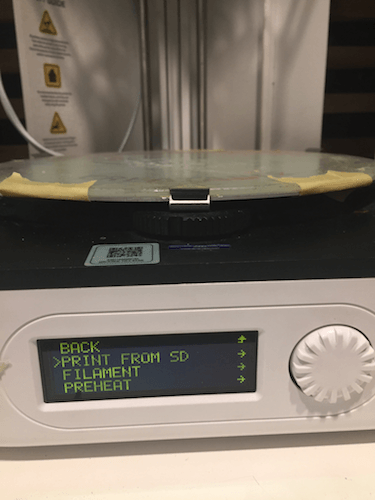
Select print from SD and find the file to be printed.
Final Print
Assignment
Our assignment for the week was to create Object that cannot be made subtractively. I designed hollow cubes that would be joined together with a small ring.Design in Fusion

Checking Interference
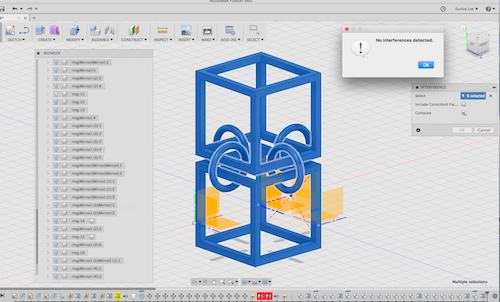
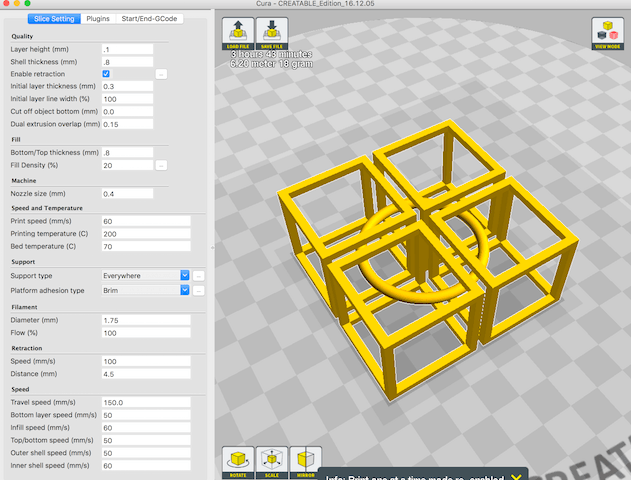
Change file in .stl format to be read by Cura. GO to Make, select 3d Print and choose software that you'll be using to print.
Box in Cura

Check the printing layers
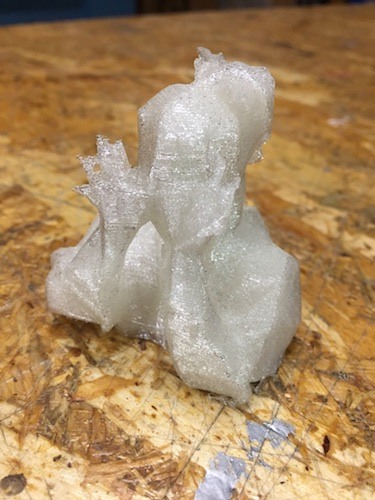
Printing Test- .3 Layer Thickness
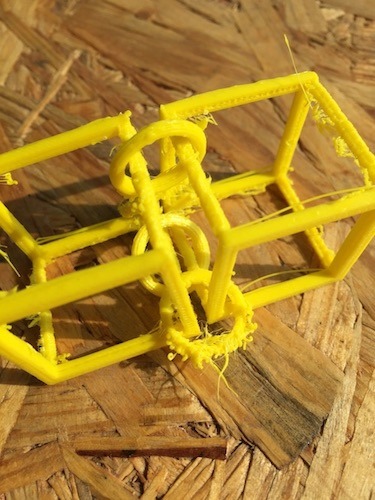
The structure held up fine with all the rings detatched, but overall the print was pretty messy. One of the fablab workers said that there have been problems with the 3d printers themselves.

While trying to clean up the print a bit more, one of the rings broke. The material is quite brittle and didn't take much force to snap it. The print was made with .3 layer thickness which was the default of the lab, but since the cube was quite thin, I did a test print with a thickness of .1 and .08.
Test- .1 Layer Thickness

Test- .08 Layer Thickness

Another malfunctioning of the machine. But I was happy with the layer of .1 as it seemed sturdy, so I continued printing my design.
Settings of final design
Final Print

I don't really like using the 3d printers as it takes a very long time, and they are constantly malfunctioning. There were always problems with the filmament extraction, which can get really frustrating when you were halfway through an 8 hour print only to have it create problems. However, I do see the benefits of it for fabricating broken or missing parts to something as you can create almost any shape with it