Week 4
Computer Controlled Cutting
Equipment
Laser Cutter
- Hardware: X Cut 1390, X Cut 1390 M
- Software: Fusion
- Material: 3mm MDF
Vinyl Cutter
- Hardware: Roland?
- Software: Illustrator, Vinyl
- Material: Vinyl sticker sheet
Laser Cutting
Video Tutorial on how to operate the laser cutter in the FabLab Seoul.Finding Kerf
Test Speed & Power Settings
Aim to use minimum power when making a cut.
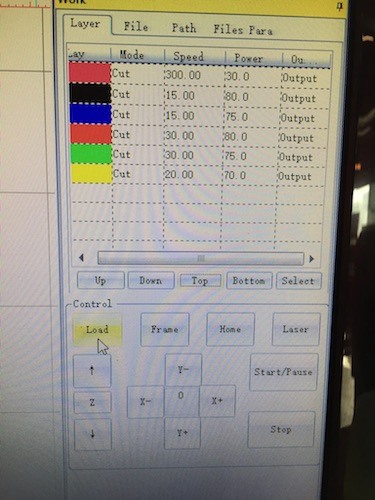
Optimal settings for cutting 3 mm MDF: Speed: 15 Power: 75
Select vectors and choose the appropriate settings for each one based on whether you want to cut through or do engravings. Group similar cuts by color coordinating them. Sequence the cuts so that inner cuts are at the top of the list ie. Cut from the inside and make your way out.
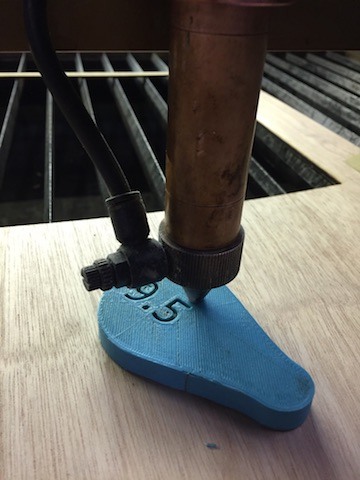
Try out different speeds & power for your material to determine the best combination. Once finished with your design, upload file to send to the cutter.Measure 9.5 mm from laser
Load the material being cut into the lasercutter. Put the z distance of the laser from the material 9.5 mm as is this is the optimal focal distance of the lens.
Measure frame
Move the laser to the top right corner of your desired frame. This is the origin point. Set Origin point and select frame. If the frame fits within the parameters of the material without overlapping another cut, then proceed with the cut.Estimating Kerf
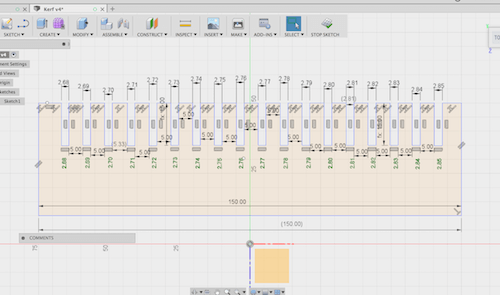
First cut a hole out of the material to take an estimate of the kerf. Outer Dimension of wood piece was 50 mm and Inner dimension of box was 49.75. Estimated kerf at .125 (.25/2).
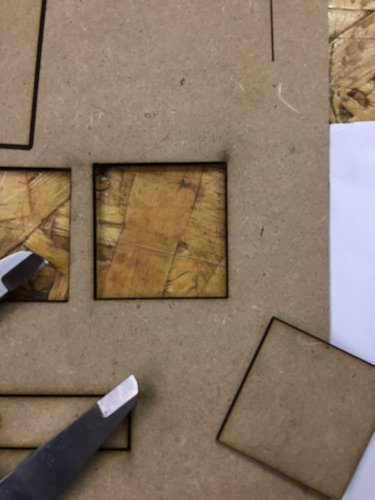
When making test cuts will -.25 as starting point (double kerf) since we will be trimming from both sides. 2.75 and going up/ down in increments of .01 mm.
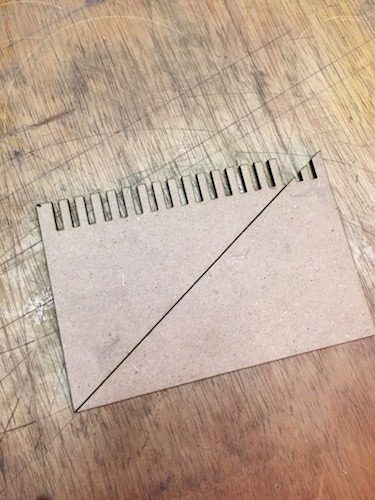
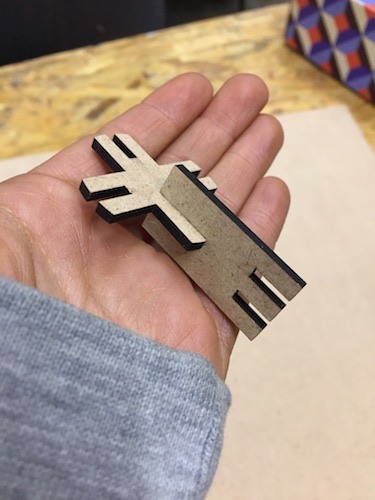
Didn't realize that construction lines from Fusion 360 transferred over to the Laser Works program. Forgot to remove a construction line in the lasercutting program so it made a diagonal slice through the comb.
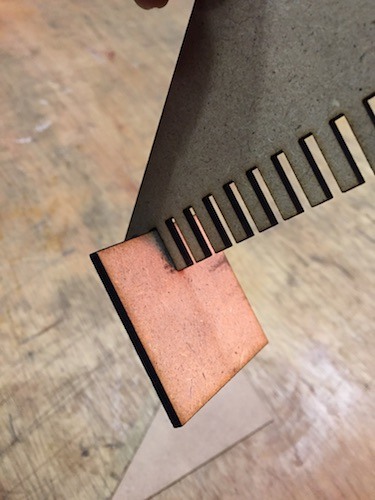
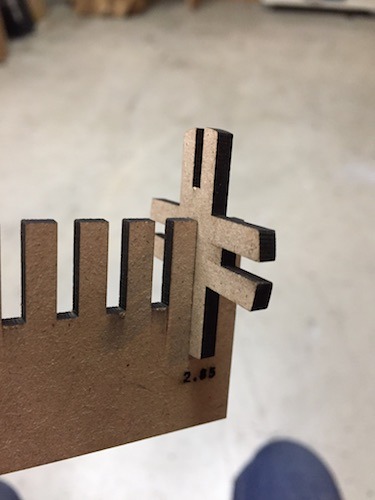
Fit in around 2.82
I was working with another labmate at the time and we later realized that he hadn't measure the material away from the laser at 9.5 mm. Also I had not been tracking the speed/ power of my cuts when trying to determine the kerf. It was getting late at the lab, so I decided to try the whole process again the next day.
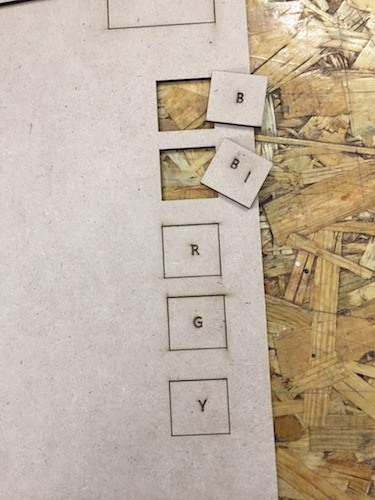
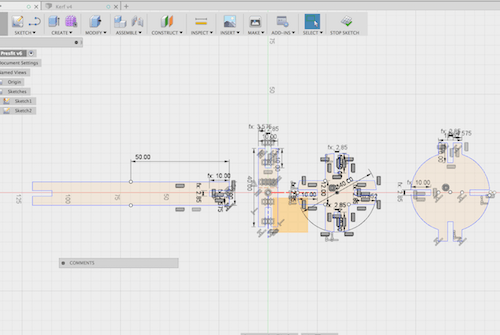
New measuring comb sketch with labels. Note: In order for texts to be read in Lasercutting software from Fusion 360 -> Explode text: Click text, Right click, Explode text
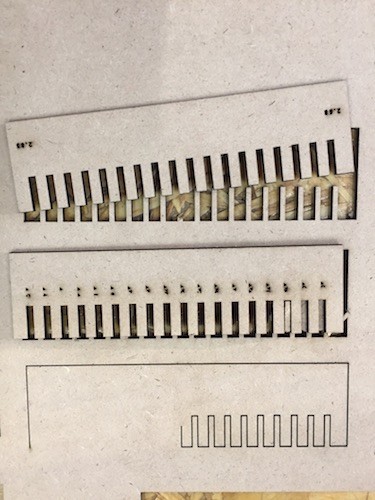
Bottom comb- Forgot to put the engraving settings at top
Middle comb- Laser didn't make clean cut through so had to increase power. Also the text was too small in Fusion 360 (2 mm) to translate well in the laser cutting sofware and didn't quite show up
Top Comb- Speed: 15 Power: 80
Fits well at 2.77
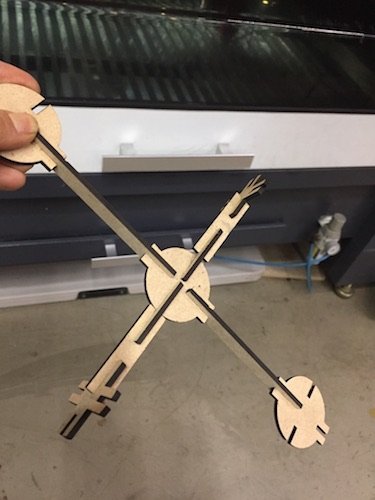
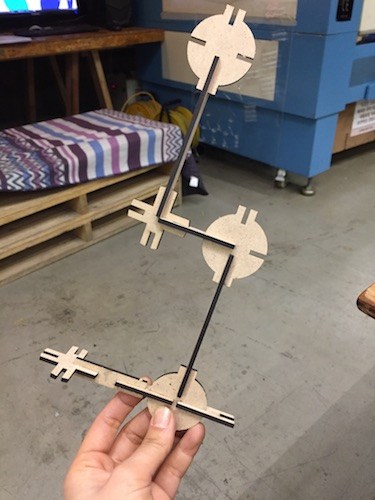
Press Fit Construction
Parametric Design
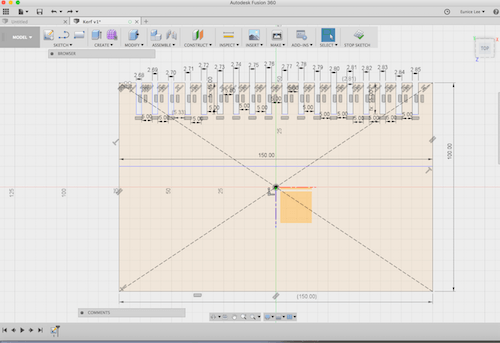
In Fusion, you can assign values parametrically. Select Modify from the toolbar and choose Change parameters.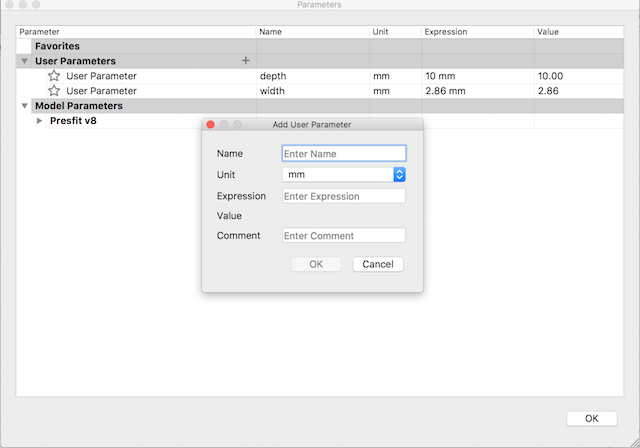
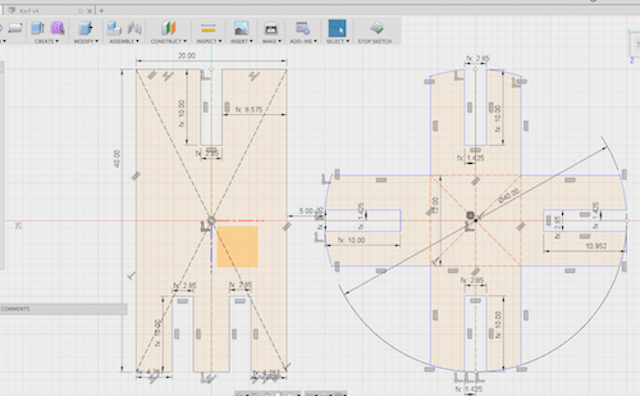
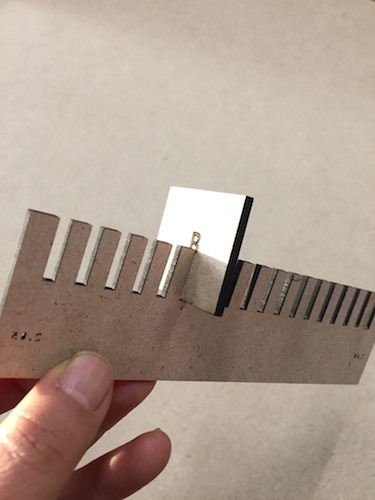
Fit seemed better suited now at 2.85. Modified parameter settings.
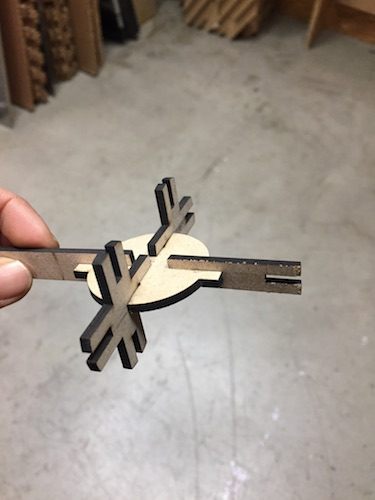
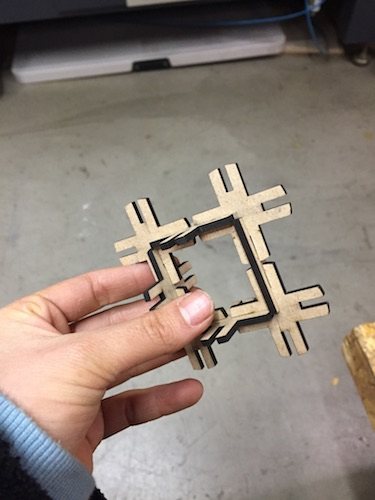
A few pieces weren't holding together, so I took up a notch to 2.86. Seems to be the sweet spot for the 3.0 mm MDF.
Vinyl Cutter
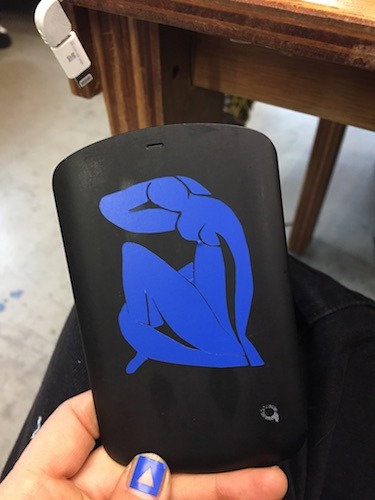
Found Blue Nude painting by Matisse on the internet.Create DXF file using Illustrator
Image trace -> Trace & select Default -> Expand -> Ungroup -> Outline -> Save as DXF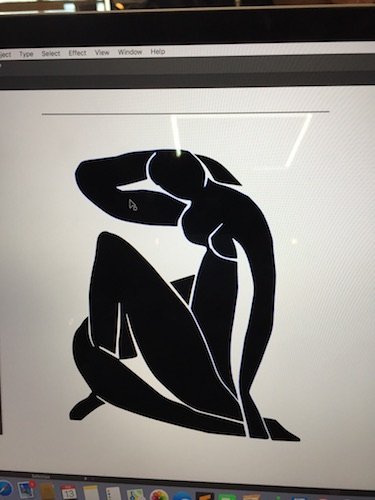
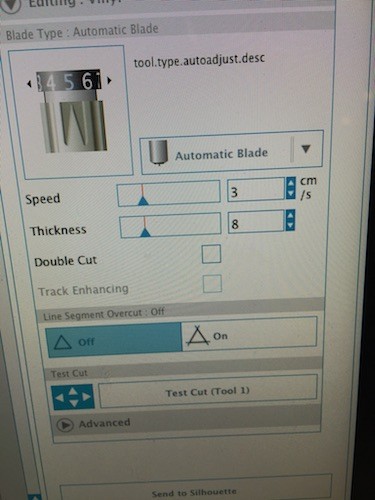
Import DXF file into vinyl cutting software. First test cut with settings & results.
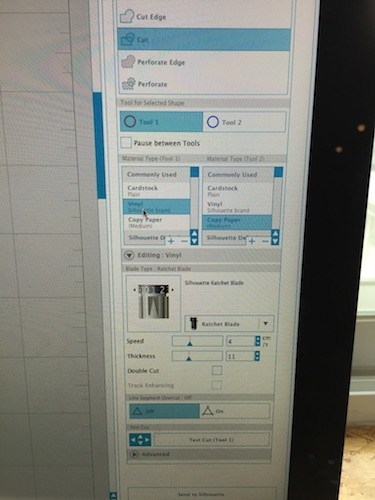
The sticker was all kinds of messed up so I lowered the speed as well as thickness.
Second round of test cut
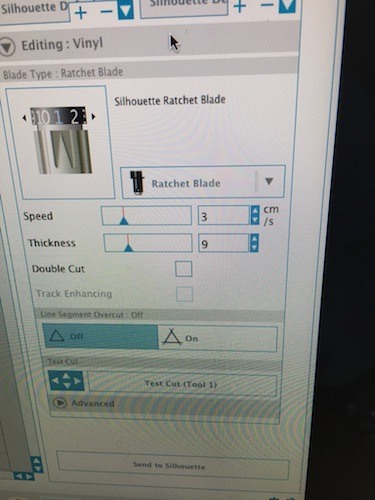
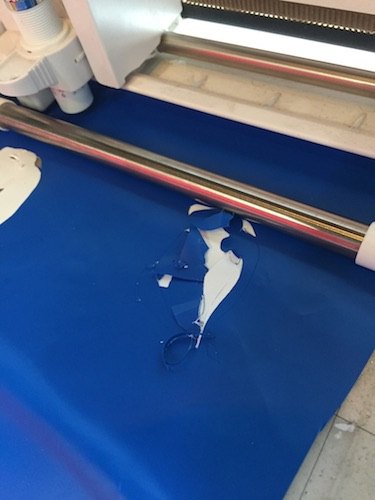
Same results. One of the lab workers walked by and noted that my blade settings were set to ratchet. Should be on auto blade.
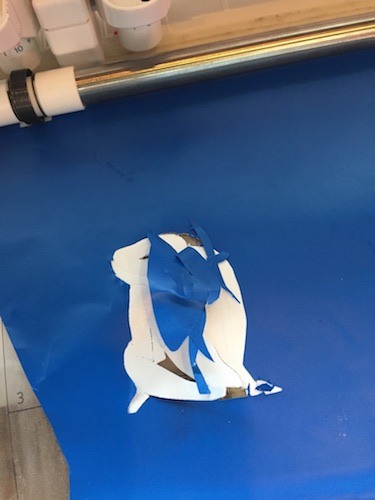
Third try

Done
Phone snapped a partial selfie while putting the vinyl sticker on the back of it.