Assignment 2
24.1.2018
Topic: Project Management
Goals of this week:
- Make a website and describe how you did it (individual)
- Introduce yourself (individual)
- Document steps for uploading files to archive (individual)
- Push to the class archive
Fab Academy began properly this week with a GitLAB assigment. I started this week by
learning how to use git. When I learned to use it, I created my own webpage HTML. file
and pushed it to the gitLAB repository.
Learning to use git
Installing git
After the worldwide lecture, Ivan gave us a lecture about git to help us students to create gitLAB
repository. He also teached me to create local git repository for my macOS.
To use gitLAB properly with macOS, git has to be downloaded to macOS by using third
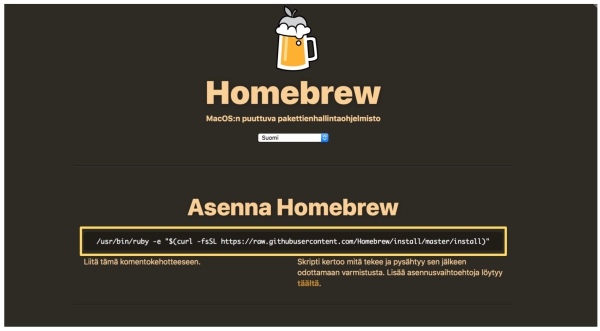
party package manager. I went to Homebrew site to download Homebrew package manager
for macOS. To download homebrew, I run installing command in macOS terminal (yellow box):
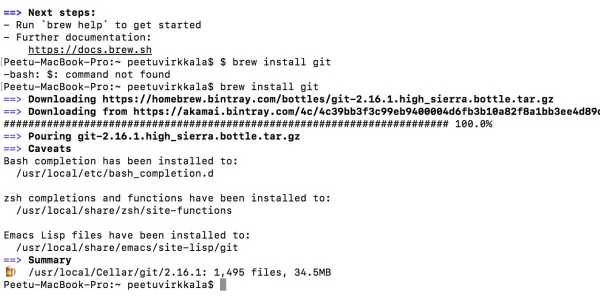
After installing homebrew, I run "brew install git" command in terminal to install git:
Creating SSH-key pair
Next I had to clone my repository from gitLAB to my computer. Each Fabacademy student have
their own repository when the course starts. Students update their webpages by updating their
repository.
Repository can´t be cloned before the SSH key pair has been created. SSH key pair is created so
that gitLAB can identify my computer as a peetu_virkkala repository owner. SSH key pair consist of
following keys:
- Public key = can be shared and is stored in gitLAB
- Private key = Should not be shared and is stored to my computer
I created this keypair by typing "ssh-keygen -t rsa -C "your.email@example.com" -b
4096" after launching git in terminal with following change:
- "your.email@example.com" is replaced with my own e-mail
Next git asked if I wanted to create password for my SSH keypair. I created password for this keypair
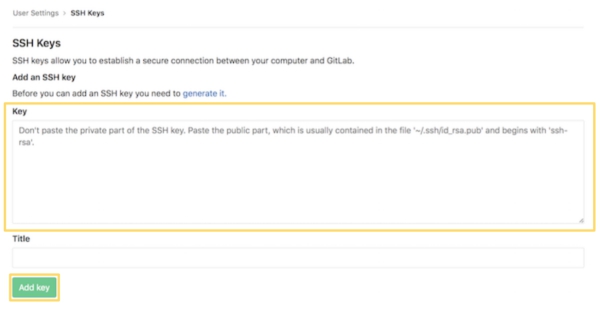
and typed "open -a Finder /usr/local/bin" to locate my public SSH key code on my computer. Then,
I copied my public key code, and pasted it to my gitLAB SSH keys page (yellow boxes):
Cloning a gitLAB repository to local
Next it was time to create local repository. First I navigated to my desktop in terminal
by using command:
"cd /Users/peetuvirkkala/Desktop"
Then I created local repository folder to my desktop by using command
"git clone git@gitlab.fabcloud.org:academany/fabacademy/2018/labs/fablaboulu/students/
peetu-virkkala.git"
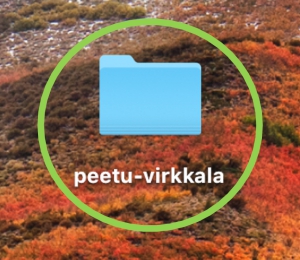
This created file to be used with local repository to my desktop:
Creating my first website and pushing it to gitLAB repository
I created my first html site by using Sublime Text Editor. I didn´t have previous experience
with HTML so I wrote first very simple HTML page with Sublime:
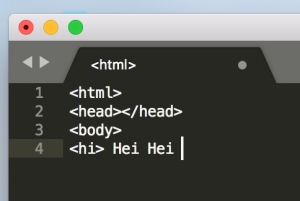
I saved this file as index.html to peetu-virkkala folder so that it would be opened as my student page.
Before sending the code to gitLAB, I prepared my gitLAB repository for html. by creating following HTML.
file in my repository. This file was created so that my website would be deployed in a public server.

This file was created manually in my gitLAB repository by creating new file and by chosing ci.yml
template:


Next it was time to send my html. file to local repository and then to my gitLAB repository. This
can be done:
- Saving index.html to my desktop folder "peetu-virkkala" (DONE ALREADY)
- (1) By ensuring that you have the latest version of the repository
- (2) By sending files from "peetu-virkkala" to my local repository
- (3) By pushing my local repository files to gitLAB repository
(1)
Ensuring that you have the latest verion of the repository can be done by using following command:
- "git pull origin master" to pull latest version of the repository to your computer
(2)
Files are sended to local repository in git by using following commands:
- Navigate to your folder with cd command. In my case: "cd /Users/peetuvirkkala/Desktop/peetu-virkkala"
- Write "git add --all" to group all new and changed files in peetu-virkkala folder to commit in local repository
- "git commit -m "message"" to store snapshot in the local repository
(3)
After (1) files are pushed from local repository to gitLAB repository by using following command:
- "git push origin master" to synchronize local and remote repository by pushing all new or
or changed files from local repository to gitLAB repository
When this was done and after waiting few seconds, my first version of Fabacademy student website
was online:

Next, it was time to edit my page´s further.
Creating proper site
Due to my lack of experience in HTML, I decided to use previous student´s Fabacademy site
as a base for my own student site. After looking through few nice, but more complicated
sites, I ended up choosing Fablab Oulu 2017 graduate Yrjö Louhisalmi´s student
site as a foundation for my site.
I copied HTML code from Yrjö´s site and began to edit it in Sublime Text Editor step by step towards my
personal needs:

I had problems to understand all the functions that Yrjö had in his code so I simplified the code first
until it was easier to read.
For start, I made following changes to Yrjö´s sites by editing his code in Sublime Text editor:
- Changed index-page image by editing:"img src="steps.png" -> img src="my_prefered_image.jpg":

- Changed About me-page image by deleting Yrjö´s script and adding similar image-file structure as above:

- Edited index-page headline text by changing Yrjö Louhisalmi to my name and by adding Finland-word:

After playing a while with the HTML. code I was happy with my edits and I decided to save the files and push them
to gitLAB.

Everything worked as I expected. I had now completed this week´s assigments. Next, it was time to continue
updating the site during coming weeks.
EXTRA - Storing my project related materia
Before starting Fabacademy, I knew that it would be demanding and time consuming course,
so I wanted to use good storing solution for my memos and files.
For memos, I decided to use OneNote, which I found to be very usefull tool to store pictures
and text organized way. My OneNote is constructed as follow:
- Section for Fab Lab
- Individual pages for data I have contained from each week (text, pictures, recordings, etc.)
- Individual pages for raw text and pictures which I then add to code with Sublime
How this looks in OneNote:

For working files, I don´t have yet any flexible storing solution. I´m working time to time on my
laptop and desktop computer and have problems to send files between them. One solution could be
to prepare git also for my desktop computer (I have it only right now for my laptop) so I could
send files straight to gitLAB repo where I could access them from different computers.
However, even thou I will be definetly trying that in the future, I think that I will first try to
share these files between some file storing solutions which I have previously used like Dropbox,
Google Docks and Sharepoint.
EDIT: Found out that I can embed files to onenote and open them with different computers. I will
be using now this function as a primarly way to transfer files between my computers.
FILES made THIS WEEK

This work is licensed under a Creative Commons Attribution 4.0 International License.


