covered in another assignment, documenting the requirements that
your assignment meets, and including everything necessary to reproduce it.
(Individual)
Deciding what to do
From the start, I knew that I wanted to do something related to textiles. After researching more about the textile academy,I found the offical wiki-site and began to learn more about textile fabrication posibilities. I also read more about engraving
fabrics with Epilog laser cutter.
I decided to create something usefull for my final project. For start, I want to create a smart power On/Off switch for my mainboard
To do this, I will knit to the beanie (green area) a strip of fabric (red area) on the both sides of the helmet.
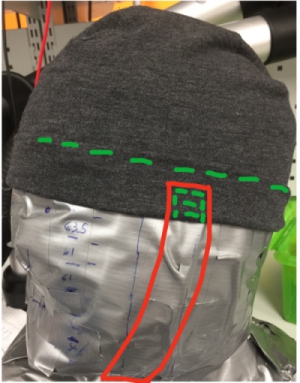
Then I will attach these strips together with a buckle clip to create bacic bicycle helmet kind-of locking mechanism. However, I
will embed copper to these pieces (yellow) to create power cord: When the connection is locked, the mainboard is powered on:
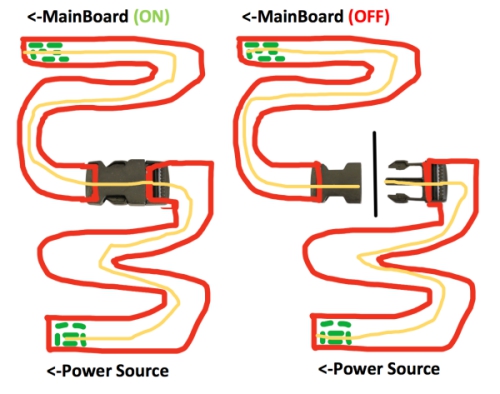
Hence, my week assigment requirements are as follows:
- Create durable locking strip for beanie
- Engrave fabric strips so that cooper strip can be embended to it
- Get power going through the locking strip when it is locked
To achieve these requirements, I need following bill of materials:
- Pieces of embedable fabric (preferably synthetic leather or wool)
- Sewing needle and thread for sewing
- Laser cuttable material for strip
- 3d printing material for buckle strip
- Copper sticker sheet for electronics
- Paper glue
And following machines and working procedures:
- Laser cutter (Laser cutting)
- 3d printer (3d printing)
Next it was time to start working!
Oops! Change of plans
When I discussed with my local instructor about my plan for this week, I learned that it wasn´t different enough from laser cuttingweek assigments. Addition to this, it didn´t help that I managed to buy synthetic leather that shouldn´t be cut with a laser cutter
because it contains PVC:
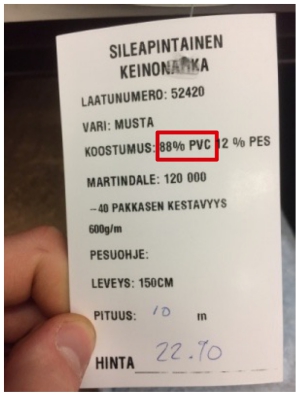
Therefore, I decided instead to test digital embroidering. Our university´s Faculty of Education has a high-end digital embroidery
machine: Bernina 580 . I decided to use it for this week´s assigment to create decorations for my final project.
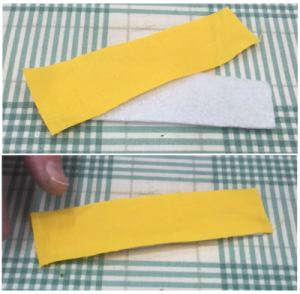
At first, I was thinking about embroidering paper because I needed a material which was sturdy. However, I ended up using normal fabric which
is ironed to sticky underfabric after the embroidery. This option was sturdy enough for my use.
Before creating my own design, I first learned how to use the machine and the software
Learnign to use the software
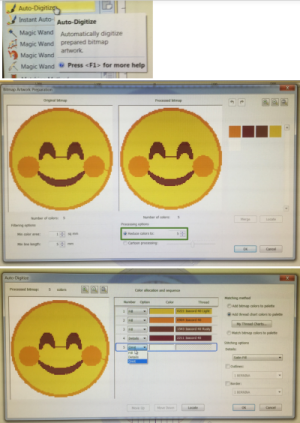
The design is created for the machine by using BERNINA Embroidery Software 8. I learned following function from the software:- Open the software, click "File, click "Insert Artwork" and choose your file.
- Choose "Auto-Digitize to prepare your design for embroidery. Choose the amount of colors you want
to use and specify option for different colors in your design: Fill = filled with fabric below, Details
= On top of fill and Omit = Not sewed at all. - Choose the hoop you are using by right cliking "Show Hoop".
- By clicking "Details icon, you can check how your design will look after embroidery:
- You can "Group" and "Ungroup" your design to modify different layers:
- By right clicking one of the layers, you can choose "object properties" to change multiple settings related to sewing:
- You can edit details in your designs by clicking them:
- On the right bottom side, You can choose:"My Threads" to specify which brand´s threads you are using:
- By clicking "Color Wheel icon, you can change multiple colors of your design at the same time:
- When your design is ready, click "write to Card/Machine to prepare your file for embrodery
- I chosed to save my file to USB
- Go to home screen (Dark-purple)
- Go to settings (Blue)
- Go to tutorials (White)
- Go to modelling (Red)
- Activate help function (Orange)
- Dim the lights of the machine (Yellow)
- Clear the embroidery process (Green)
- Changes according to screen (Bright-purple)
- My own desing as a pdf. file
- My own desing as a bmp. file (prepared in Corel Draw SE)
- My own desing as a exp. file (prepared in BERNINA Embroidery Software 8)
- Test design as a bpm. file
- Test design as a exp. file


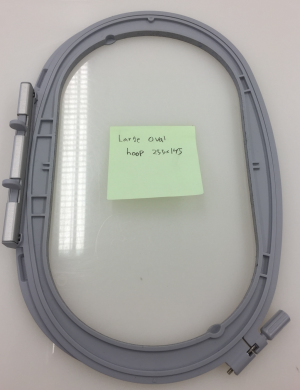
The machine had only one hoop but I didn´t know what size it was. Measuring or searching the numbers found
from the side of the hoop didn´t help, but after a while, I found out that the hoop couldn´t be measured normal way:

Nevertheless, I noticed that different sized Bernina´s hoop´s are shaped differently, so I finally managed to identify
the hoop as a large oval hoop:


The file was now ready and I knew how to use the software, next, it was time to learn to use the machine
Learning to use the machine
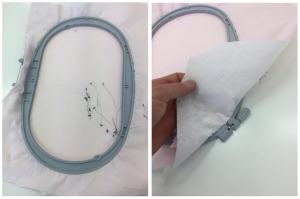
Using the machine starts by preparing the hoop. I used red fabric and underlay fabric top of each other.I put them through the hoop and tightened the hoop:
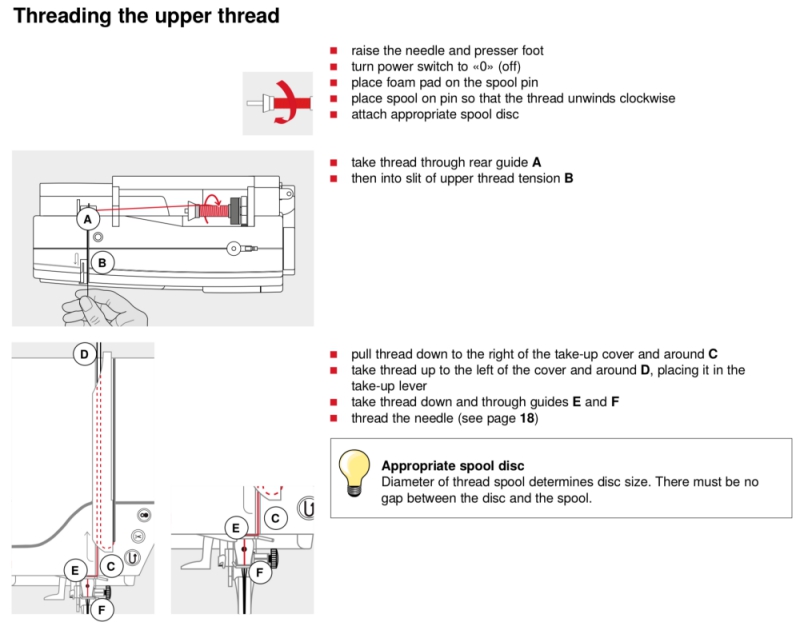
Next you need to prepare up- and down-string. Upstring is prepared by attaching the roll on the top of the machine
and by pulling string down to the needle according to following instruction:
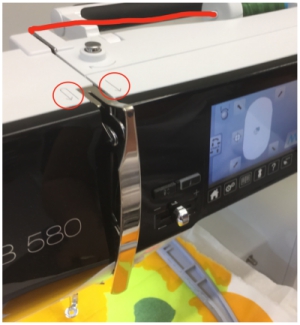
Down-string is prepared by following the instruction seen below:
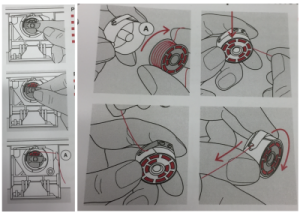
The end result should look like this:
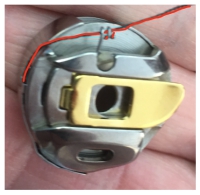
When the strings are ready, you can lock the down-string container (first picture) and attach the hoop to the machine
(second picture)
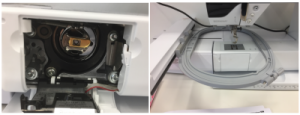
Next it is time to power the machine from the power button. When the machine is powered, UI screen goes on.
You can use it as follows:
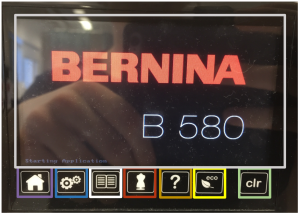
When the machine has powered up completely, following screen appears. I attached usb and clicked usb-icon (Red) to find my
design.
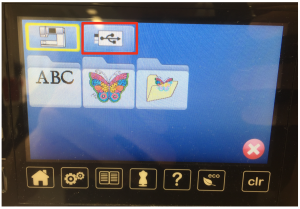
I clicked my design (Red) to choose it.
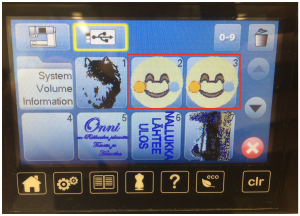
(For the next few parts, I use reference images.)
When the design is chosen, the machine shows how the printing would look like. Click the hoop logo (Red) to choose right
sized hoop:

When the right hoop was chosen, I clicked Check icon (Red) to check that the emboidering area was correct.

Everything was fine so I reclicked the logo to go back (Red)
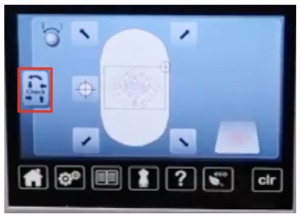
Then I clicked sewing-icon (Red) to go to sewing preparation mode
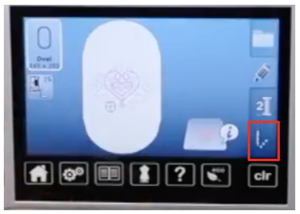
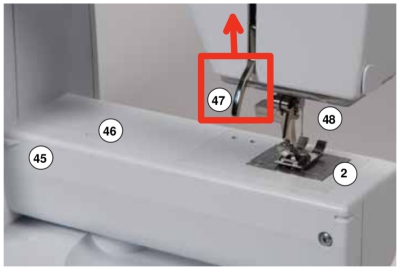
Screen changed, I manually dropped the sewing foot by pulling the switch up behind the machin (Red)...
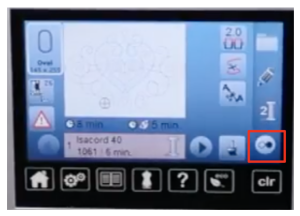
...and clicked the starting button (Red):
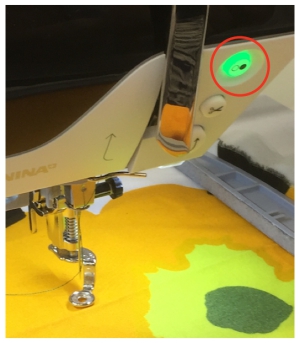
Machine was now ready to embroid, to start the process, I pressed the physical starting button (Red) for few seconds:
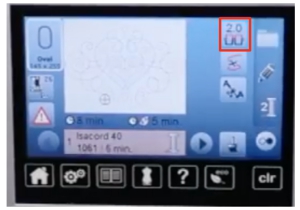
However, when the machine began embroidering, either the down-string or the up-string always snapped. After trying to
figure out solution to this problem for few hours, me and Marta found out that the string tighness setting had too small
value. To fix this problem, we rose it to 4 by changing the following setting to 4 (Red):
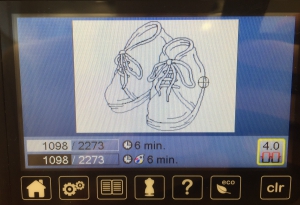
Finally, I was able to create one of machine´s test designs: shoes. Sometimes the machine stopped and I had to cut the
string and continue.

Process could be followed all the time on the UI-screen. After a while, my design was ready.
Creating my own design
I downloaded free trial of Bernina Embroidery software to my home computer but I couldn´t create my own design because thesoftware uses Corel Draw SE as an editing software, and I didn´t have that. Instead, I created the design at the university.
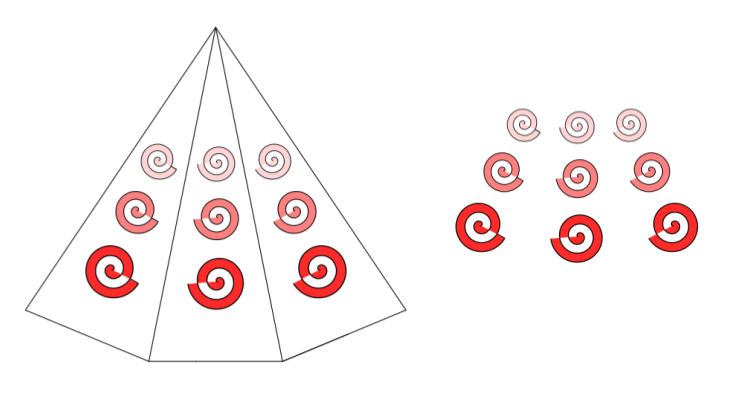
First I made the design in Inkscape and saved it as an emf. file. I designed my design so that you could cut it so that
symmetrical pyramid could be formed from it. (Left: with pyramid lines, Right: file saved as an emf. file)
Then I opened the file in Embroider software design window and clicked convert to convert the file to Embroidery as an Embroidery file:

When this was done, I followed steps mentioned before and began to embroider the design:
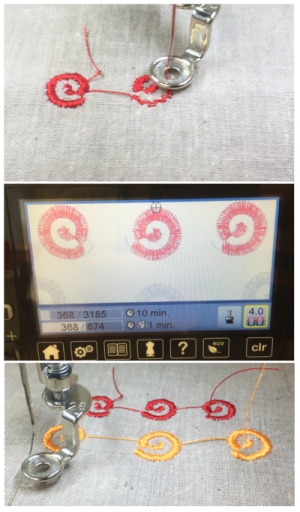
The end result was good. I removed it from the machine and ironed it to underlay fabric:
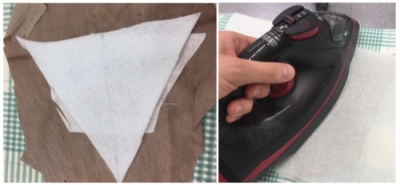
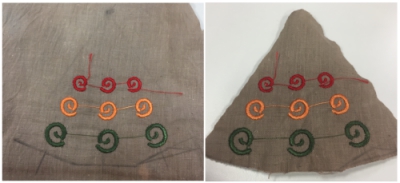
Then I drew triangle outlines on the fabric and cut according to them. Next time, I should leave more fabric on the sides create invisible
seam.
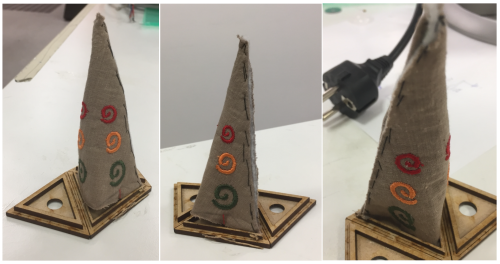
Finally, I knitted the design together by hand. The end result was what I expected, and I will be using the same process also in my final project.
FILES made/used THIS WEEK

This work is licensed under a Creative Commons Attribution 4.0 International License.