Making the website
During the first week of FabAcademy we had an instruction session with our local instructor Iván Sánchez Milara abuout building our own personal websites. As I have previous experience in html, css, php, asp javascript etc. so I was pretty confident I could do it - I decided to attend however, as I have not been doing web development actively for over 10 years now. I thought it might be time to refresh my knowledge! Iván advised us to search for Bootstrap templates, which were a completely new thing for me. He also advised us to keep it simple so that the site will be easy to update, and to select a fluid template, rather than a basic one. Fluid templates adapt to the size of the screen, so if you use one, your site won't look like crap when you view it on a smartphone, a tablet etc. I didn't use too much time selecting my template. I found it from the first bootstrap template site I visited (Startbootstrap.com), from the first page of the search results. It was a one page portfolio template called 'Stylish portfolio', and I took it to use as it is, as I thought that is looks clean and smart.
 At first I only replaced the information on the frontpage with my own. Then I started branching out from my frontpage page, creating some "subpages" that you access through the menu on the frontpage. The subpages are: About me, Final project, Week 1, Week 2 (I will be adding more pages as the project proceeds). For all of these subpages, all I did was copied the index.html file that is my frontpage, and edited the text to show. So all of these subpages are basically just simplified versions of the frontpage.
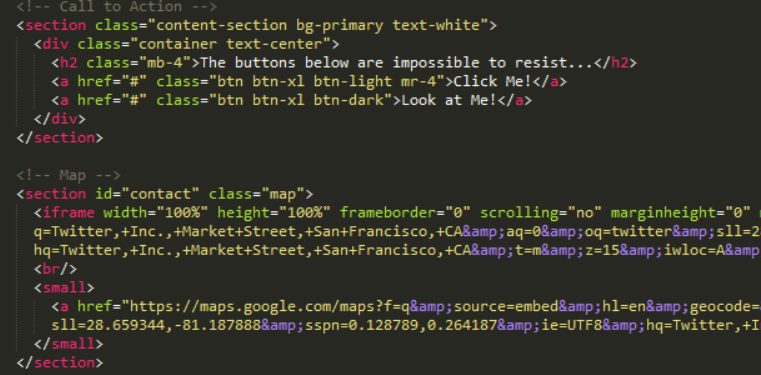
However, after looking the pages through, I decided that not all that is visible in the frontpage, needs to be visible in the subpages, and decided to take some unnecessary sections out. For example in the frontpage, the original template featured a map on the bottom of the page, as well as buttons with links to the website owners social media accounts. I decided to only feature these in the 'about me' section which is on subpage aboutme.html, and remove it from other pages. Luckily all of these sections were clearly marked in the original template so it was easy to modify. I also decided to replace the photos used in the template as my own to make the site more personal, keeping in mind what our local instructor Iván had explained: When uploading the site to Git, all images should be max 200kb to keep the required space on the server low.
I was quite happy with the fonts, the layout etc of the template that I had selected, so I left the stylesheets for the page as they are. To edit the html code I at first used just WordPad, although in local instructions alternatives such as NotePad ++, SublimeText and Brackets were suggested. What can I say - I am old school! Really old school. It was not until I visited the FabLab in Oulu for our second local instruction (about using GIT), I saw another FabStudent Marta construct her website using SublimeText and really liked the look of it: all of the different kinds of code and html tags are so easy to tell apart, I would never go back to Wordpad again. Live and learn!
Working with GIT to publish the website
Next it was time to publish the first version of my website, and to start working with GIT. By that time we had already learned something about GIT in our global lectures and in the recitation. Or some people had atleast.The only thing I had grasped at this point was that GIT is used for version control - you can document your progress as you go and, and by using GIT to store different versions, you will not lose anything. As I had not used GIT before, I would say that for me, those initial lessons were a little useless as they came before we had had any chance to download and install the program or experiment with it at all, so most of the time I had no idea what the instructors were talking about.
Thankfully, we again had our local instruction on thursday, where Iván helped us install GIT into our computers, explained the most commonly used commands, and helped us publish the first version of our FabAcademy website. The first thing I did, was download GIT for Windows and install it. The installation ran pretty smooth, no problems there. I used the default setting, just clicking yes yes, forward forward etc during the installation. After the installation was finished I noticed that there are actually 3 different programs there - GIT GUI, GIT Bash, and GIT CMD. Iván explained that for now, we would be using GIT Bash, a command line interface where we would be using simple commands to push our site online.
But before I could actually use GIT to push anything online, I would need to login to my account in gitLab Fabcloud and generate a pair of public/private keys. I had gotten my login info to FabCloud from the Fabacademy via email, checked it out, and changed my passwords already, and Ivan talked me through the process.
First, we opened GIT CMD, and typed in:ssh-keygen -t rsa -C "heidi.hartikainen@oulu.fi" -b 4096Z. The command generated the keys for me, and the public/private key combo was stored on my computer in a folder called .ssh

id_rsa is the private key
id_rsa.pub is the public key
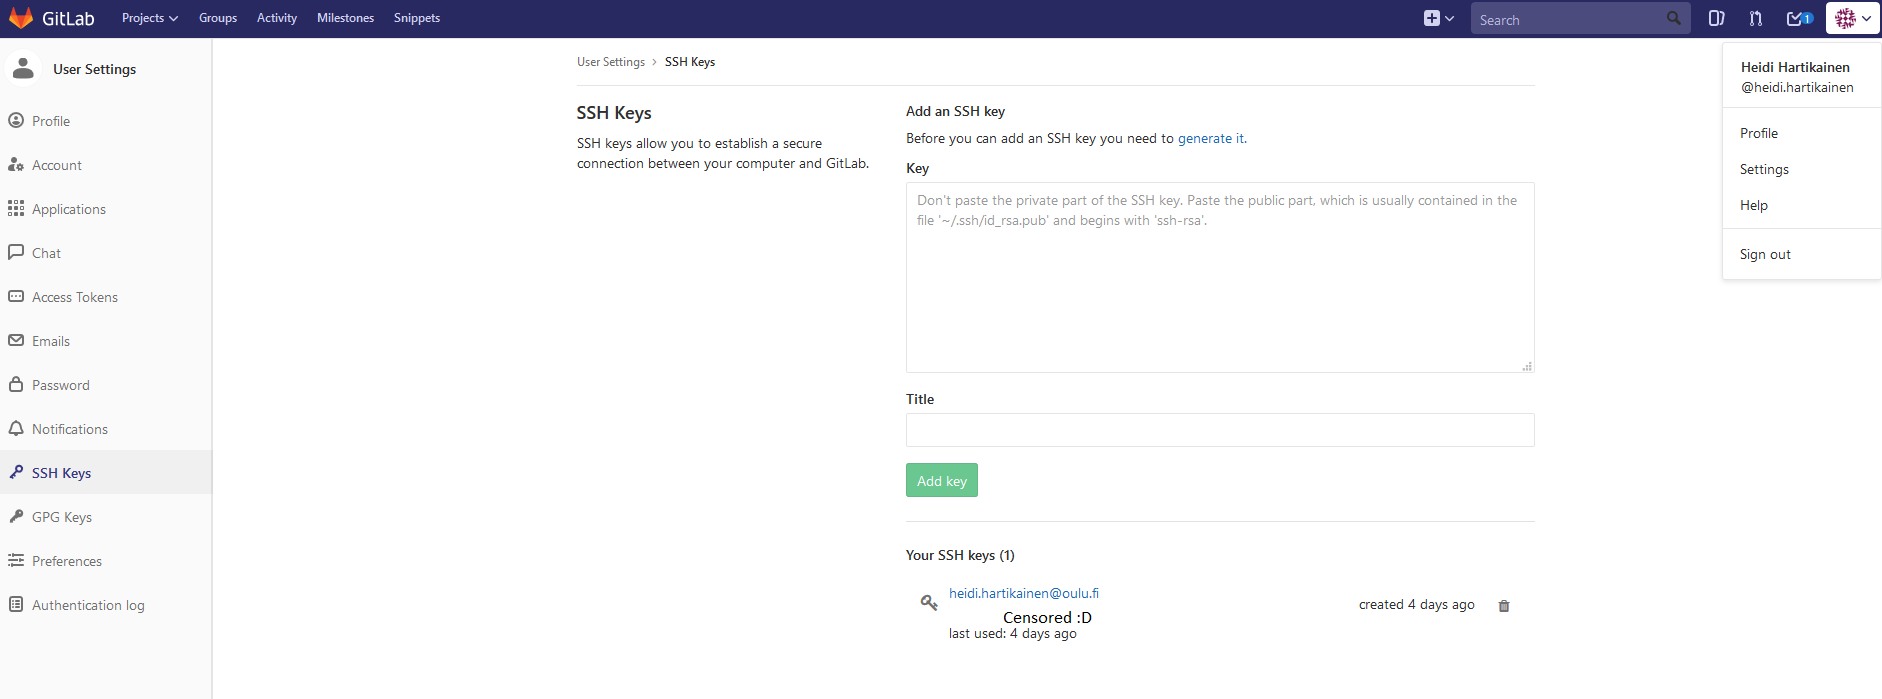
Next I opened the file that includes the public key (id_rsa.pub) with notepad, and copied its content. Then opened my webbrowser, went to our gitLab Fabacademy profile, opened settings --> ssh keys, and pasted it there. Ta-da - Now when I try to upload my stuff, the server knows it is me and lets me proceed!
The next thing that I needed to do, was to clone my global repository from my gitlab fabcloud to my computer, or in other words, create a local repository. I returned to GIT CMD and wrote the clone command: git clone git@gitlab.fabcloud.org:academany/fabacademy/2018/labs/fablaboulu/students/heidi-hartikainen.git. After the 'clone' command, my my global repository folders appeared in my local machine. I then I proceeded to copy my website files into this local repository workspace.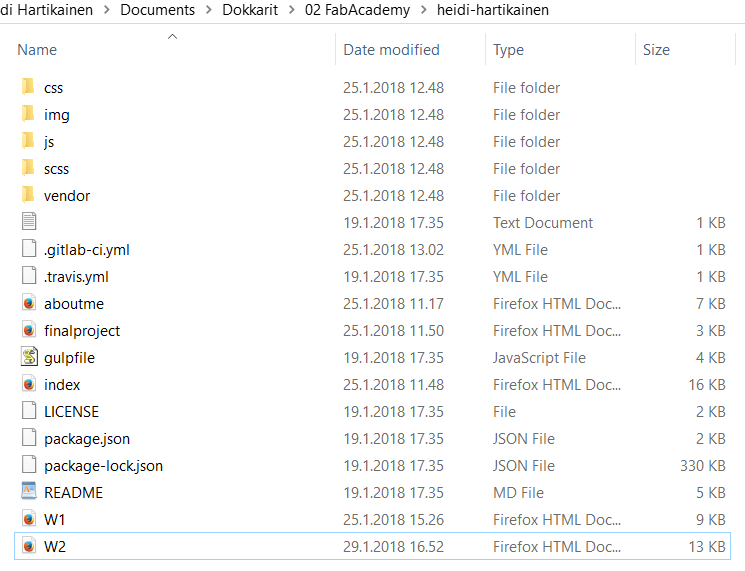
Next I typed the following command to sync my local repository with the remote repository: git pull origin master. Apparently, this is not usually necessary if you are working on the repo alone, but it does no harm, so we were told that it is in good form to do this before pushing any new changes.git add . that snapshots the file in preparation for versioning, and git commit -m "[descriptive message]" that then records those file snapshots permanently in version history, and git push origin master that uploads my local commits to GitLab (Thankyou GIT cheatsheet for providing me those explanations of what the commands do!).
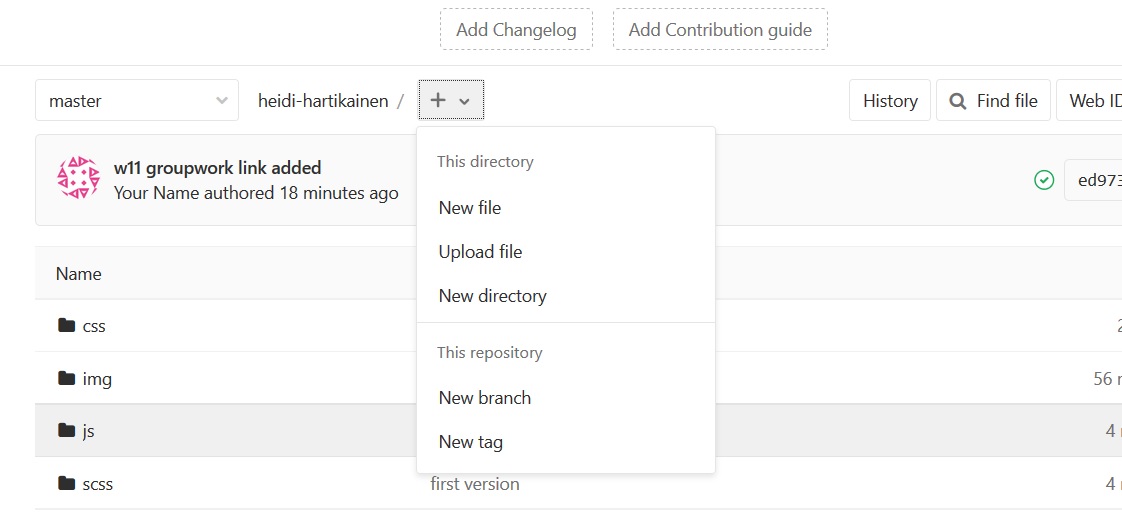
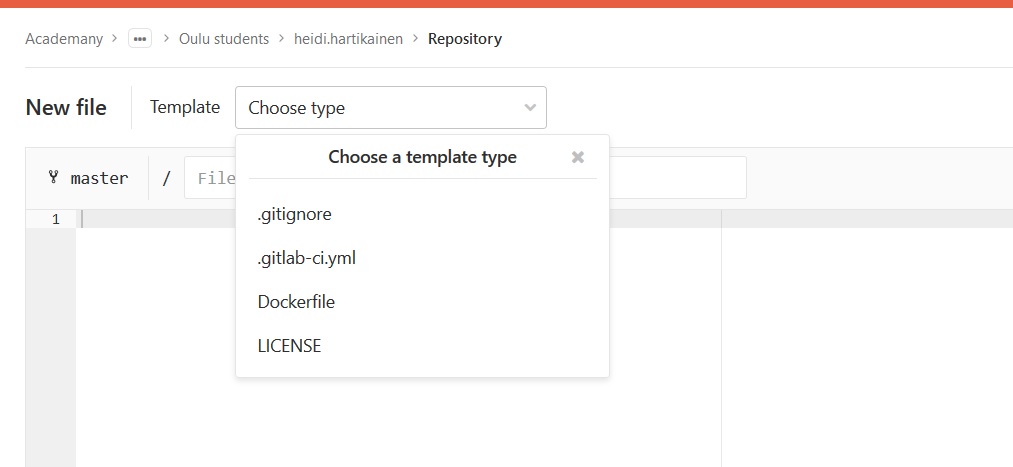
In order to see my webpage in fabacademy.org, I lastly needed to create a new file in my remote repo called .gitlab-ci.yml. I clicked on the plus sign on the root of my repository, and selected to create a new file
I selected the file type to be .gitlab-ci.yml
The contents of the file
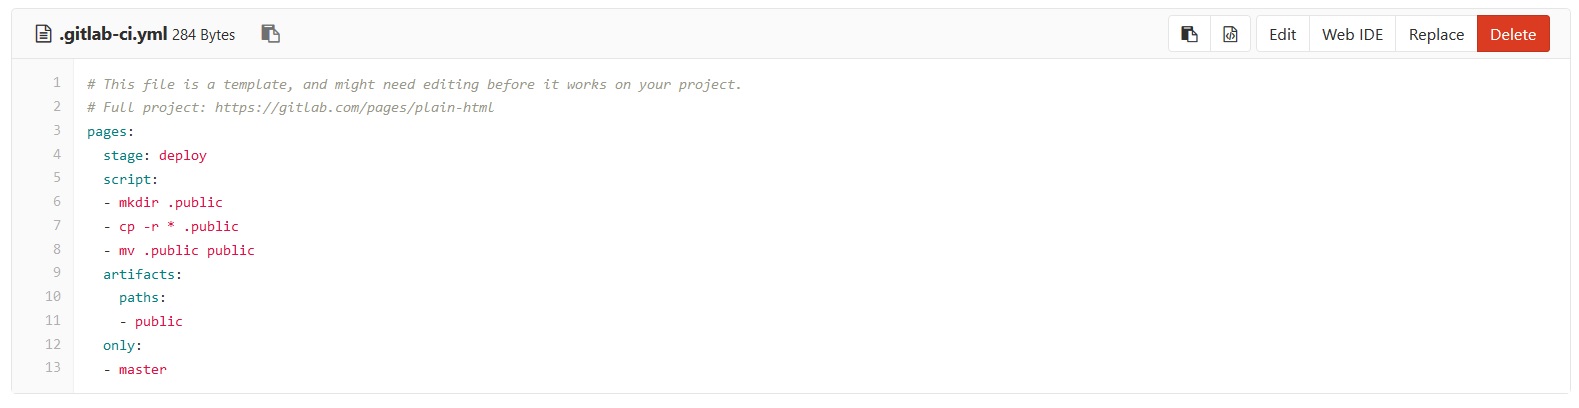
This file is created so that my website is deployed in a public server. I selected ‘HTML’ as the template stype which tells GitLab to read my files as HTML. When I did the pull again, the file was copied also to my local repo.

After publishing the first version of my website, I read through some GIT tutorials, that helped be better understand what I can do with GIT in the future. The tutorials I used were:
- Git - The simple guide by Roger Dudler
- What is Git by Atlassian
Problems had, lessons learned, questions that remain
Problems
- I ran into problems while trying to use GIT at home, something about the private and public keys not working. The keys were stored on my university network drive folder, but even when I connected to the university network through VPN and was able to access the files, i got an error message.
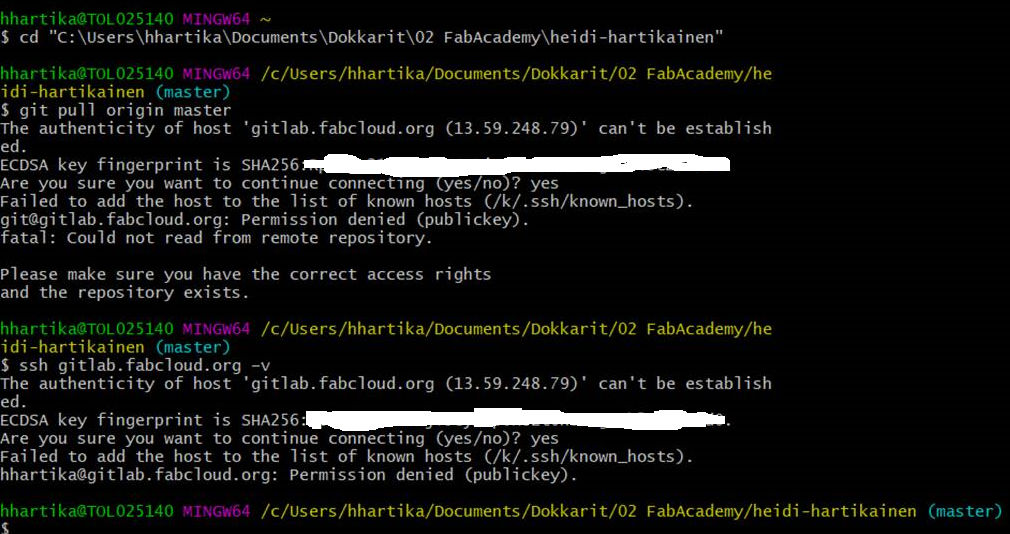
Had to ask for help from local instructors, but the issue still remains unsolved.
Lessons
- I pretty much did everything and then tried to document backwards. Even though I was warned. Doh! Documentation is hard and you cannot remember all afterwards, you should do it constantly while working. (Related to this: I hope someone checks these every week to see if they are adequate, so if corrections are needed, they are not all left at the end of FabAcademy)
- Git seems like a complicated program, but I remain confident that at first I can survive with pretty much the pull, add, commit and push commands

Questions that remain:
- What is the difference betweeb GIT, Gitlab, Github??
- We are using GIT, but why are there GIT GUI, GIT Bash and GIT CMD - Could we use any of those? Why Bash?
Copyright © Heidi Hartikainen 2018
Template copyright ©Blackrock Digital LLC 2013-2018

This work is licensed under a Creative Commons Attribution-NonCommercial-ShareAlike 4.0 International License.