Week 17: Wildcard Week (Composite)
This week's tasks:
- Assignment:
- Designing and producing something with a digital fabrication process (incorporating computer-aided design and manufacturing) not covered in another assignment, documenting the requirements that our assignment meets, and including everything necessary to reproduce it.
Challenges:
- Designing the pictures frames considering 2 molds was quite challenging.
- Creating the composite was quite challenging. Specially wraping the transparent film while making enough empty space for later on. I had to wrap and unwrap a few times and the material was sticky and hard to manage.
- Orienting two parts of the mold after applying the fabric covered with resin and before compressing them was quite tricky.
- The process of creating the composite was quite heating and warm. I would like it more if it had happened in the cold winter of Finland :-D
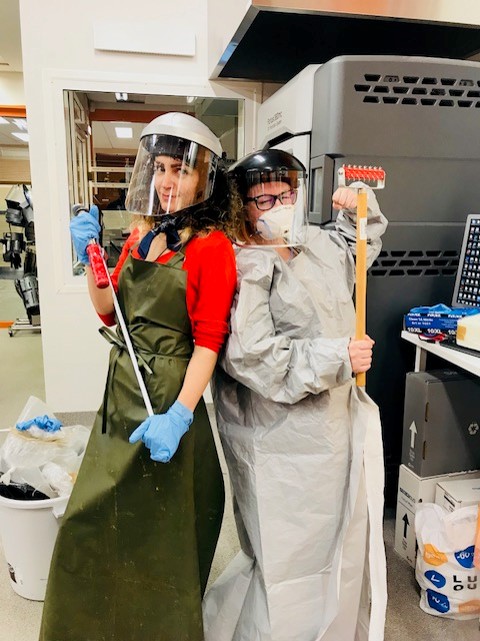
- Although I had covered all parts of my body, the smell of resin and hardener mix was quite strong and I felt a bit of burning in my eyes. Anyways our look with those coverings, which were big for us was very funny.
- The gloves were Large size and big for me and could easy comes out. And it was difficult to manage pulling them up while having lots of resin on them.
Recommendations:
- Proper covering of the mold before placing the fabric there is quite important.
- Removing the excess of the mix of the hardner and the resin is essential.
- Just in case, I suggest considering some extra milimeters (for example 10 mm) of the fabric around your design (if possible, of course depends on the design and the shape) because later on you would be able to saw or cut those extra parts.
Technology used:
- Fusion 360
- Inkscape
- Laser Cutting Machine
- CNC Machine
- Clamp
- Electronic Saw
A word about this week's task
I decided to make a picture frame for this week using composite. I designed the frame using fusion 360. I cut the molds using CNC machine. I created the composite using Super SAP one Epoxy resin and hardener.
Mold Design
Unsuccessful Design
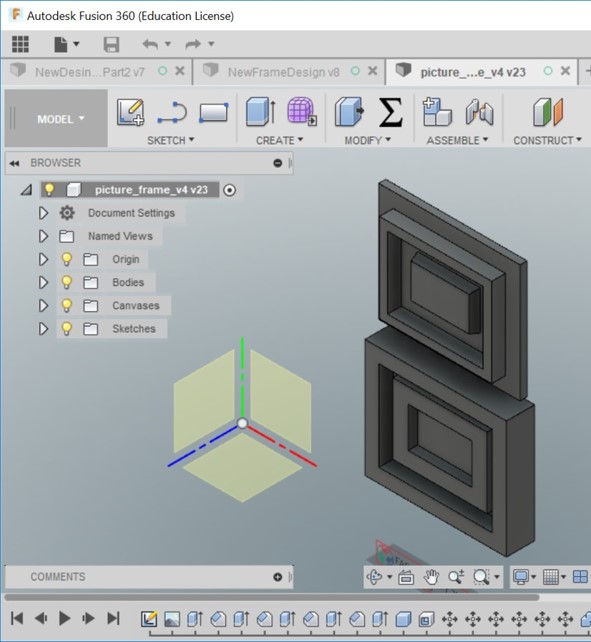
Problem:
I spend a lot of time on designing the picture frame that I had in mind. But after the modeling was done and I switched to CAM, for some reason that was not understandable for me and for some other people that I asked around, mill track generation did not work successfully. For some reason I do not have those setups on my file (probably it is not saved) so I do not remember the exact errors! But I tried different options such as 3D Adaptive, 3D Pocket, 2D Adaptive and 2D Pocket and it did not work.
I had designed both sides of the mold in an individual file and I had copied the first body of the first part to create the second part. I also had used lots of features such as a set of chamfers, extrusions, align and so on. So it was difficult to identify the problem.
Solution:
But as far as we figured out, the problem was with the design because when we copied the sketch and the body of the first part of the mold in a new project and did the CAM for it, it worked!
Therefore instead of spending much more time on fixing the issue with the current design I decided to make a 2 new projects each for one part of the mold.
The First Part Design
I drew 2 rectangles. One of them inside the other one.Sketch > Rectangle > Center Rectangle
The smaller one: 260 mm x 160 mm
The bigger one: 200 mm x 100 mm
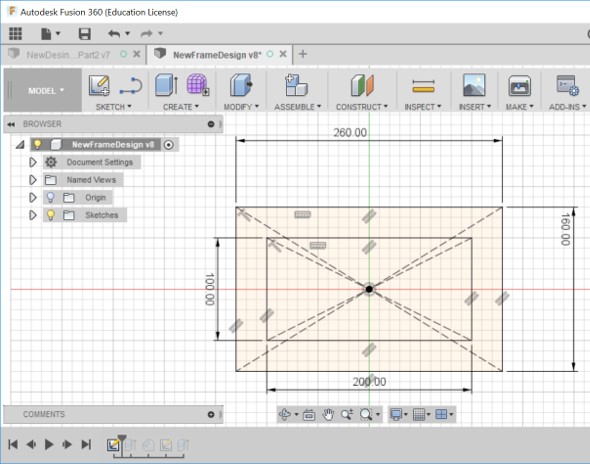
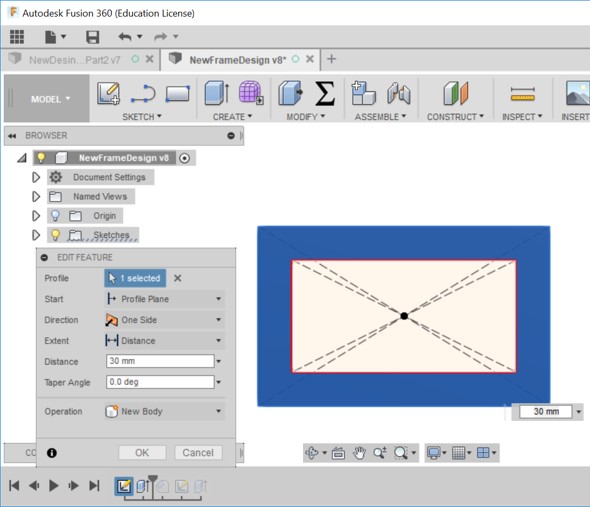
Then I extruded the outer rectangle to 30 mm distance.
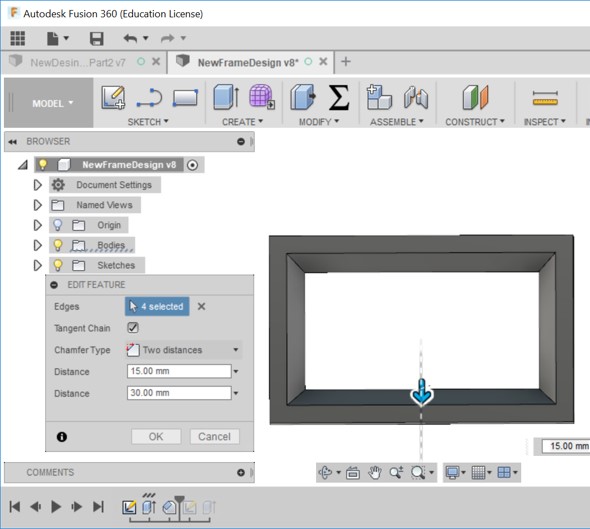
Then I selected 4 lines of the rectangle and right click and then Chamfer. I selected 2 distances chamfer type. And I used the values of 15 mm and 30 mm.
Then I created a new sketch and drew a rectangle with the size of 360 mm x 240 mm as the shell around the object.
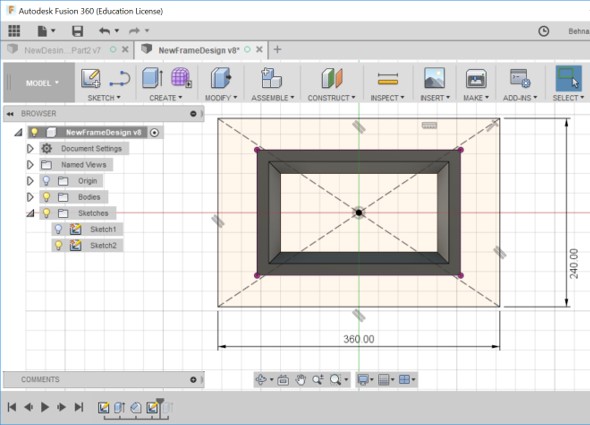
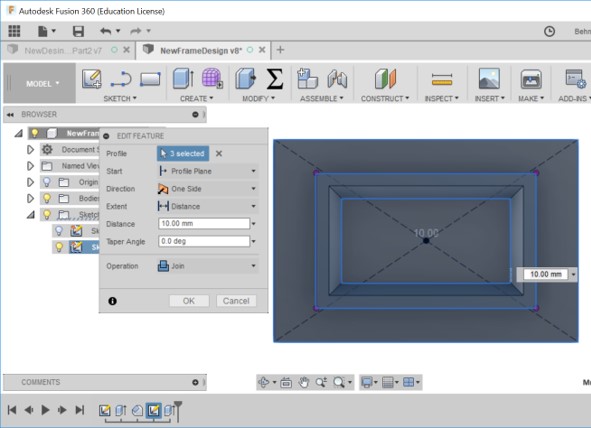
I did 3 selections of the inner and outer outline of the frame and the shell and did the extrusion of 10 mm distance.
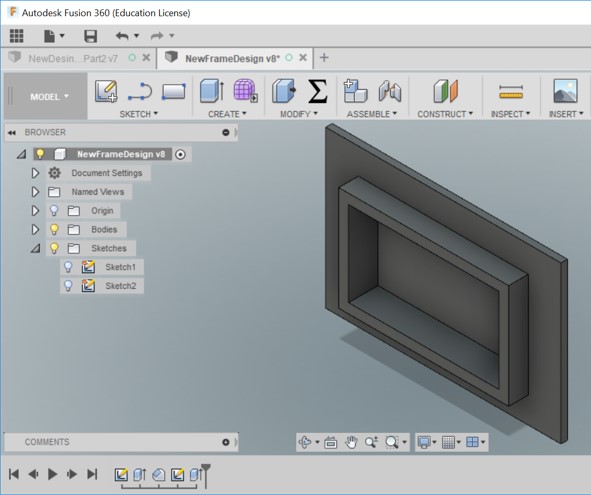
The picture below represents the final result for the part 1.
The Second Part Design
For the second part of the mold, I created a new project, a new sketch and started with drawing a rectangle with the dimensions of 224 mm x 124 mm. I had lots of challenges and calculations and of course also so that I could calculate the exact dimensions so that 2 parts of the mold would nicely goes inside the first part. The calculation of it was quite challenging and I tried different numbers that I wrongly had calculated. But eventually after thinking a lot and constant calculations, I figured out the numbers.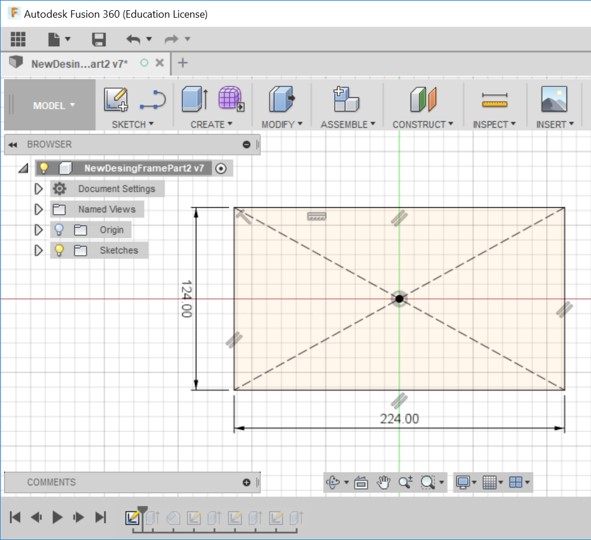
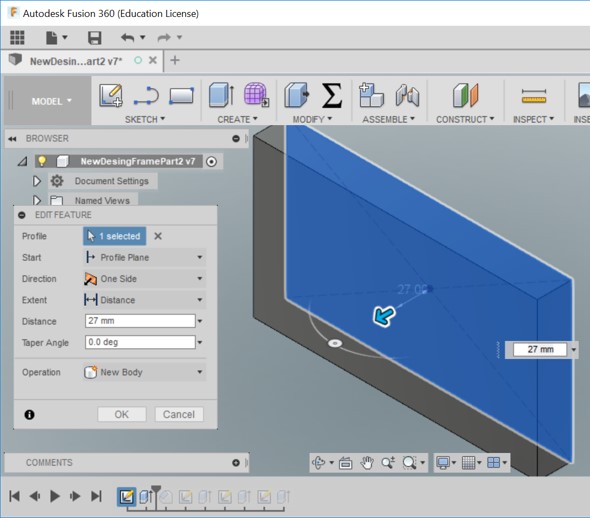
I extruded the rectangle to 27 mm distance (3 mm smaller than the part1).
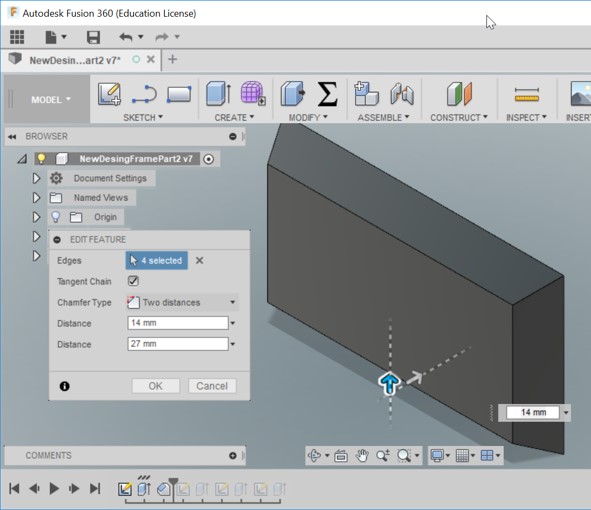
Then applying the chamfer of 14 mm and 27 mm.
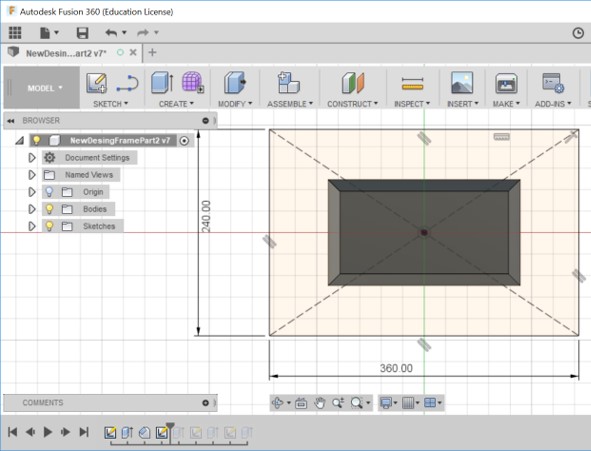
Then sketching the rectangle with the dimensions of 360 mm x 240 mm considering the first rectangle to be placed in the middle of this one. So the centers of the rectangles are overlapping.
Then selecting the outlines of both rectangles and extruding to the distance of 10 mm.
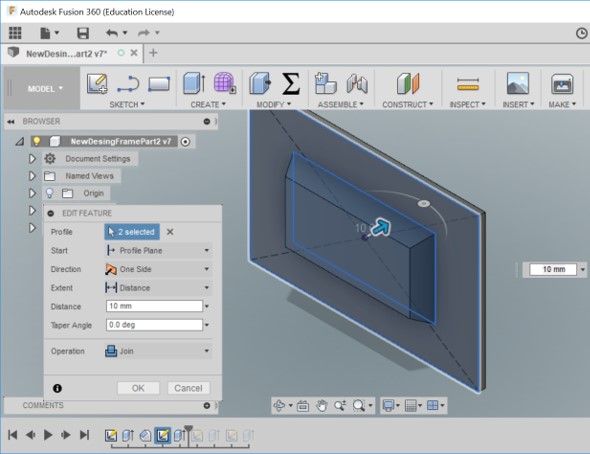
Then drawing another centered point rectangle with the dimensions of 266 mm x 166 mm. Which basically means it would be placed around the smaller rectangle.
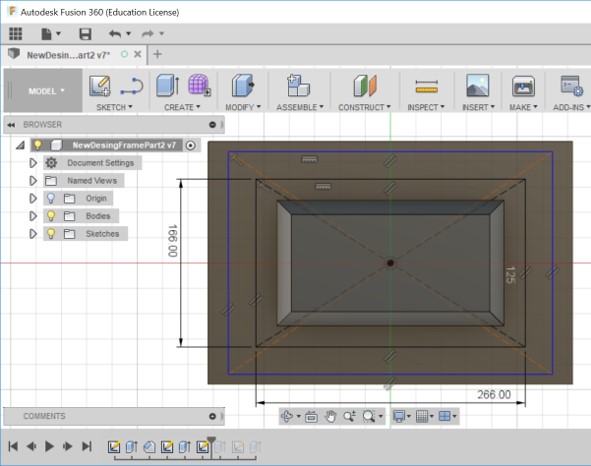
Then the extrusion with 27 mm for the later rectangle.
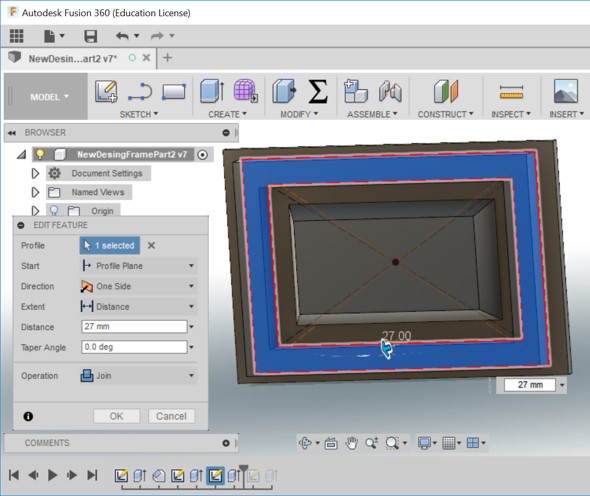
Now because I wanted to adjust the distance of all area around the second rectangle to the same size as the picture frame, I drew a rectangle covering those areas and then I extruded to 27 mm.
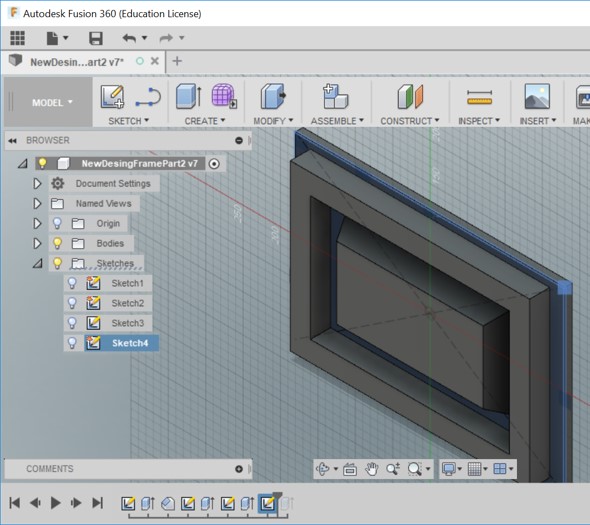
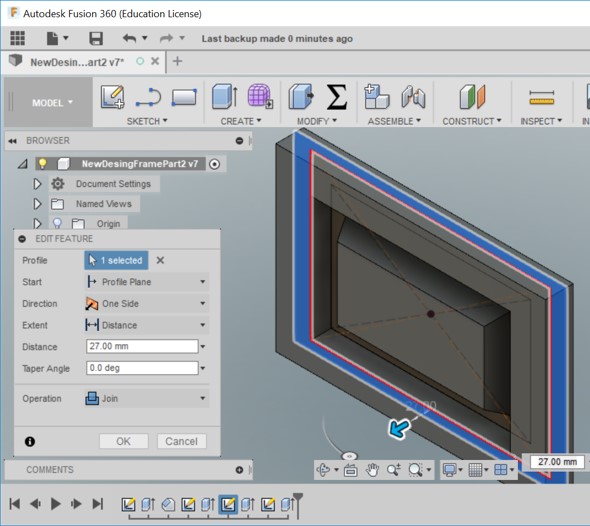
The picture bellow represents the final design result for the second part.
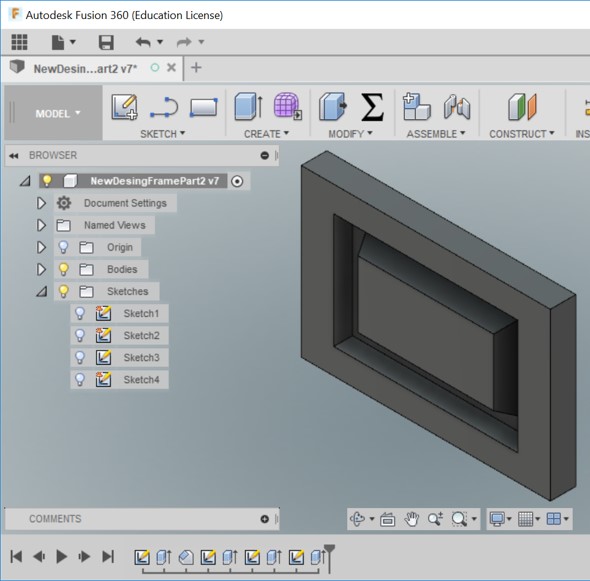
Creating CAM for the First Part of the Mold
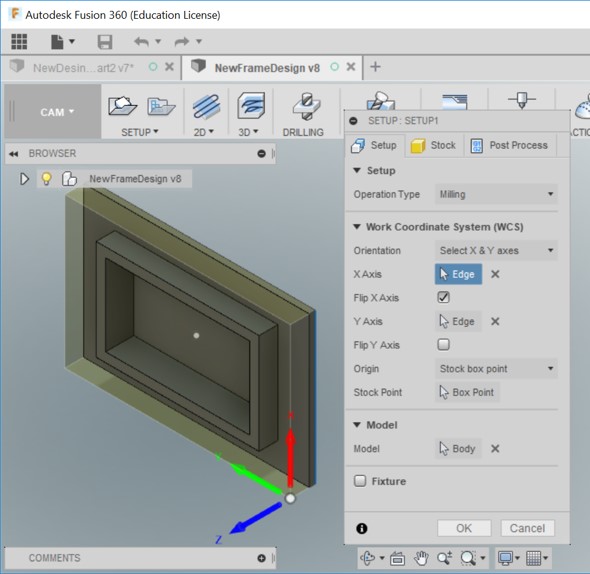
I have explained the features for CAM that I use in Computer Controlled-Machining Week. I use the pre-setting of fab lab oulu configurations for my selected tool. So here I briefly document the features and their values that I change. Switching to CAM and then: setup: new setupFrom setup Tab:
Operation type: millingWork Coordinate systems: Orientation: select x and y axes
Origin: stock box point and selecting the box point
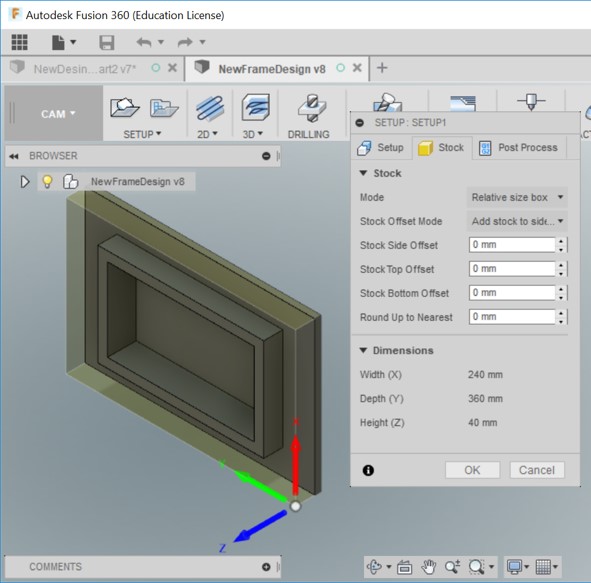
From Stock Tab:
Stock side offset: 0 mmStock top offset: 0 mm
Stock bottom offset: 0 mm
Round up to nearest: 0 mm
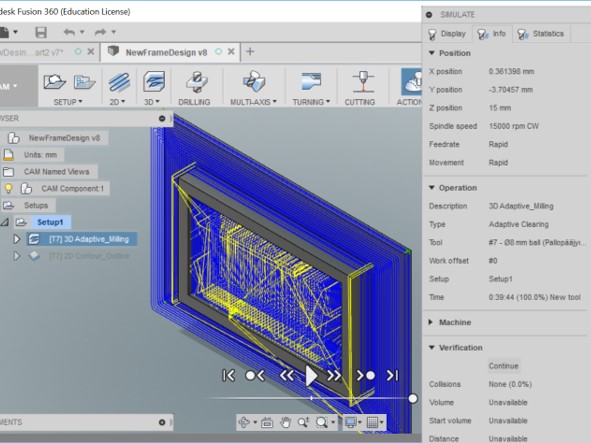
I defined 2 setups. One for milling and the other for the outline. For Milling:
3D: Adaptive Clearing
Tool Tab > select > Fab lab Oulu > 8 mm - Ball
The feed and speed values would be loaded automatically after tool selection.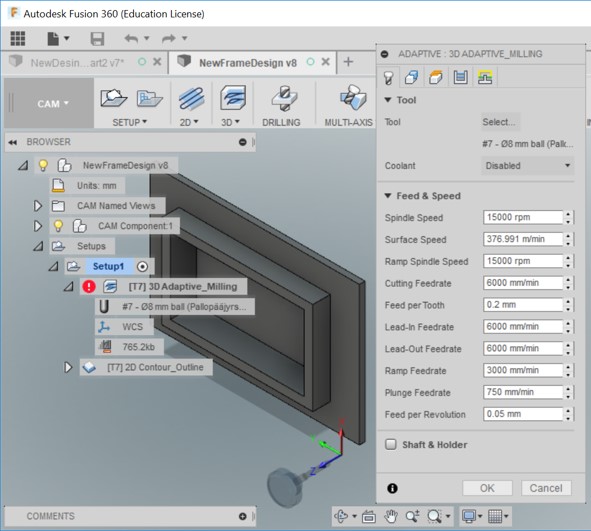
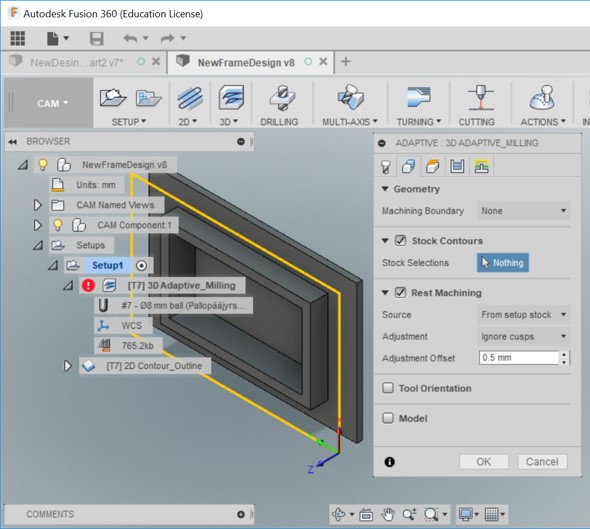
Geometry Tab
I continued with the default values here.Adjustment Offset under Rest Machining is 0.5 mm.
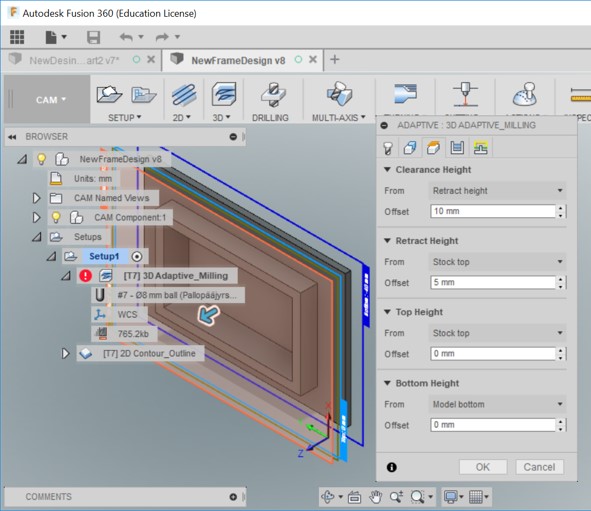
Heights Tab
Clearance height: From Restract Height: offset 10 mmRetract Height: From stock top: Offset 5 mm
Top Height: From Stock Top: Offset 0 mm
Bottom Height: From Model Bottom: Offset 0 mm
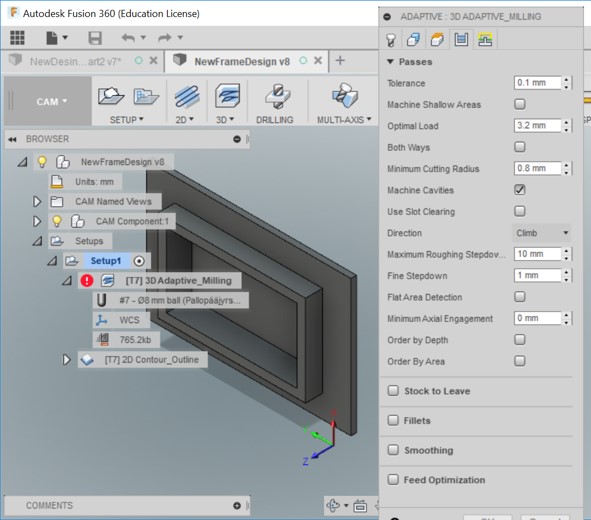
Passes Tab
All the default settings except unchecking 'stock to leave'. andMaximum Roughing stepdown: 10 mm.
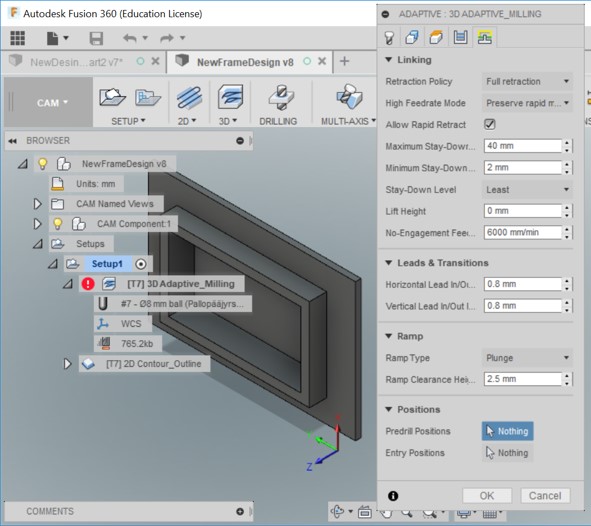
Linking Tab
All the default settings except:Ramp: ramp type: Plunge
Actions: Simulate: Play
All good and in the info tab I was informed that it takes around 40 minutes.
For Outline:
2D: 2D Contour
Tool Tab
The same as the previous one. And as I explained above.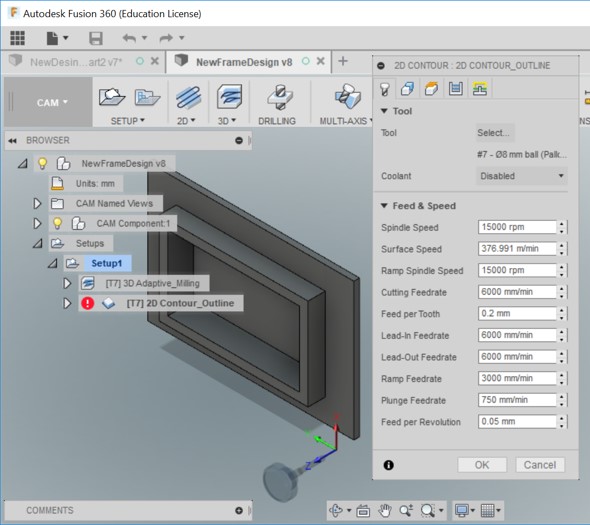
Geometry Tab
Everything unchecked (predefined setting).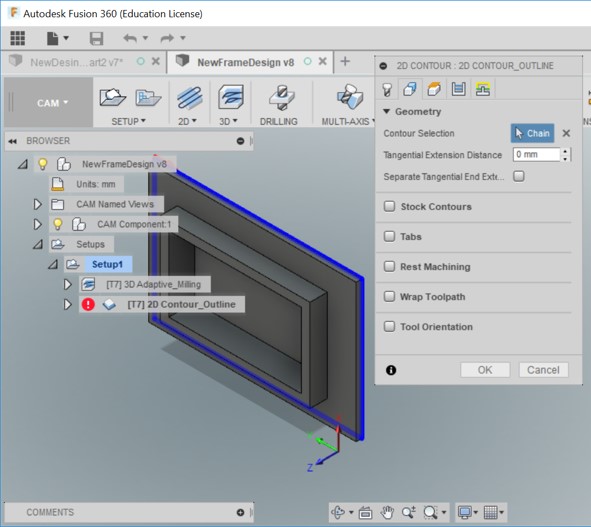
Heights Tab
Exactly the same setting as I explained above for the milling.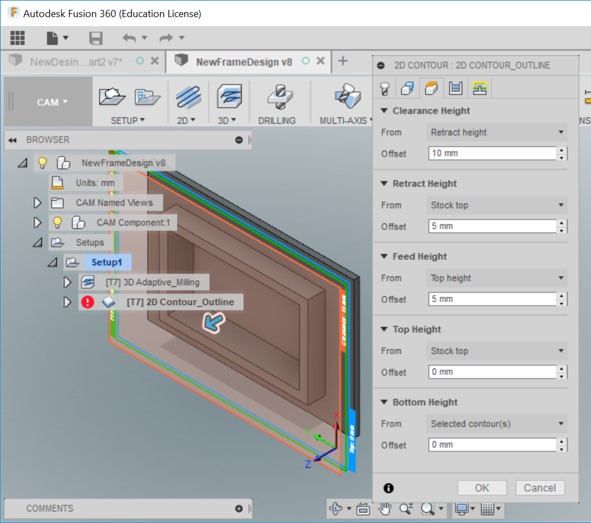
Passes Tab
All the default settings except unchecking 'stock to leave'. andMaximum Roughing stepdown: 10 mm.
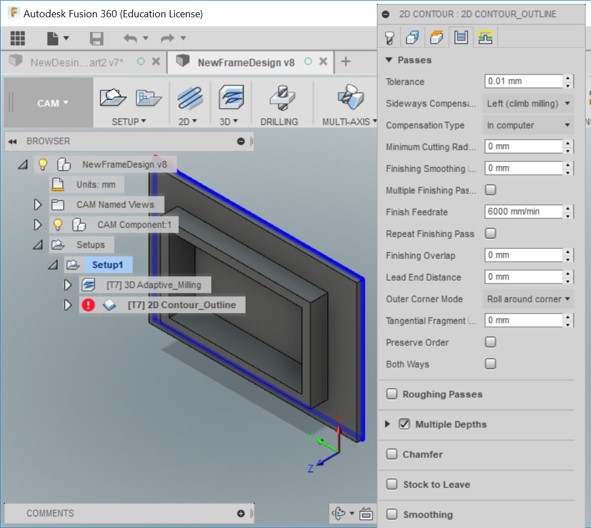
Linking Tab
Safe distance: 11 mm.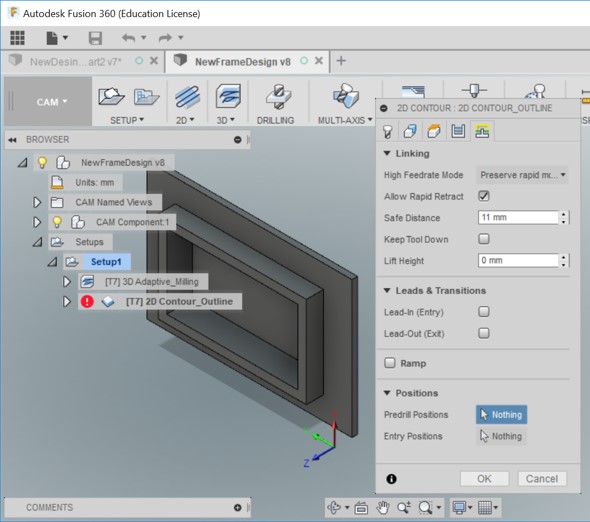
Actions: Simulate: Play
All good.
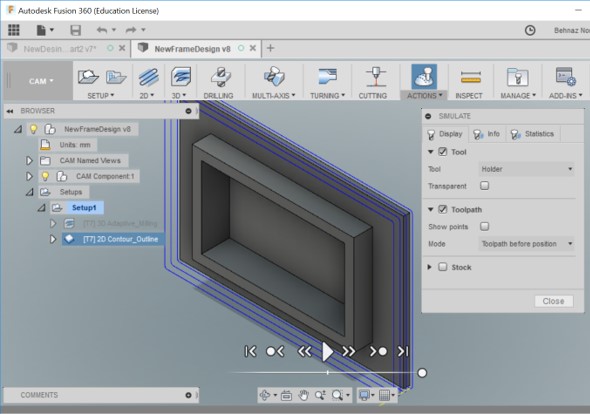
I did exactly the same process for the second part of the mold. The milling takes around 30 minutes.
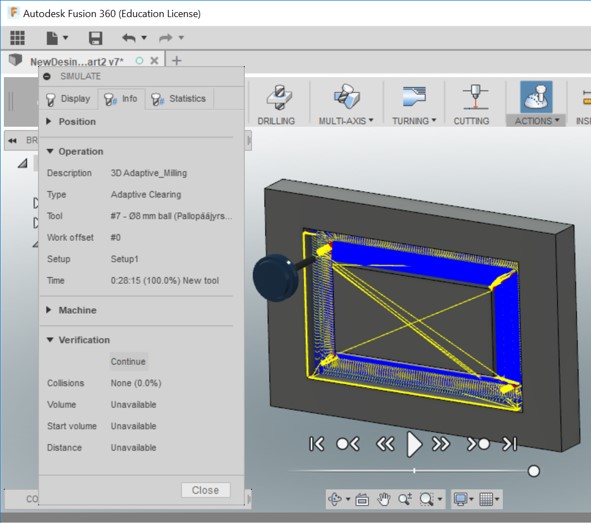
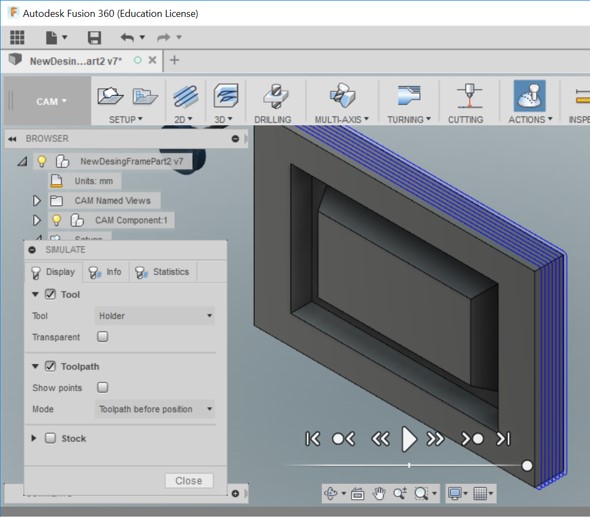
Generating G codes
I generated 4 G-codes. 2 for each project.Actions: Post Process: using fab lab Oulu configurations: naming it and saving it. I have explained in detail the process in Computer controlled Cutting Week.
Machining
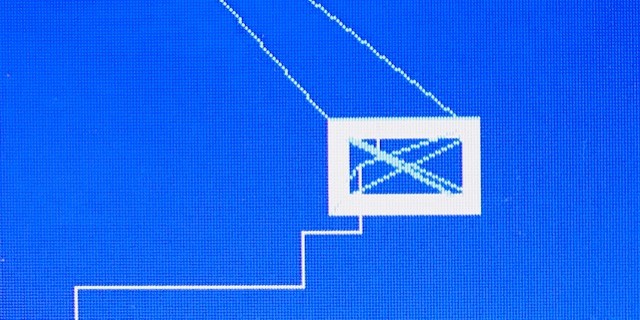
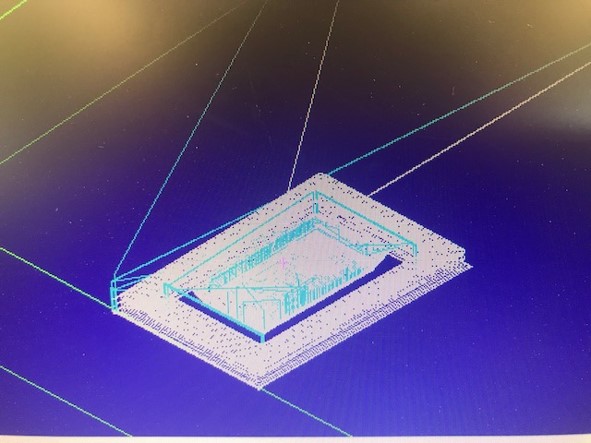
I have explained in detail the process for working with CNC machine in Computer controlled Cutting Week.I first cut part 2 milling and then the outline. Then I did the same for the part 1. Since I have explained in detail how to utilize the CNC machine in computer controlled cutting week, I briefly list the steps that I took to initialize cutting here (along with pictures in the following):
- turning the machine on
- turning the computer on
- attaching the material on the table of the machine using drill
- defining X/Y axis
- defining Z axis (I did it manually) because the material was too high and I could not place the calibration under it
- opening the file ( file:open and load)
- spindle 10% and on
- simulate
- if simulate is ok then spindle 100%
- start
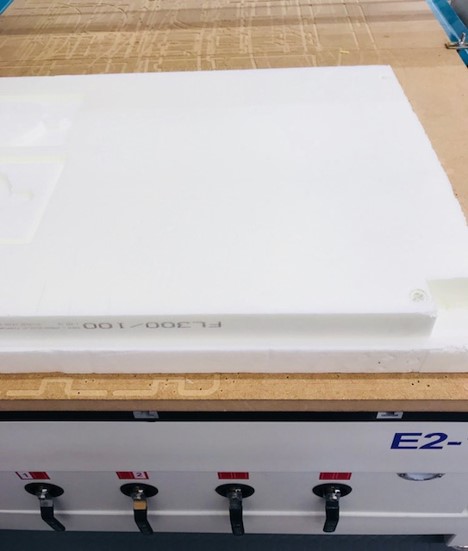


Creating the Composite
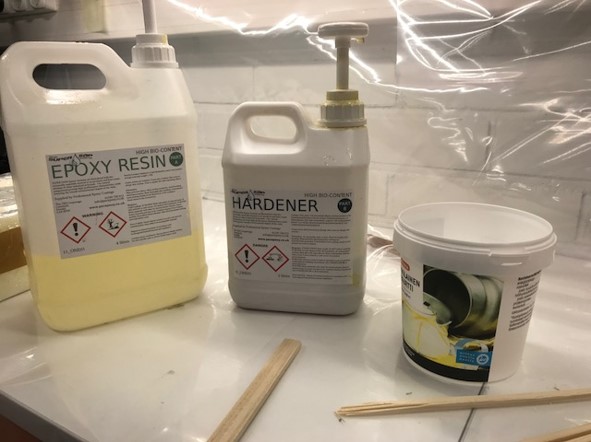
For composite, I used Burlap Fabric and Super Sap One as a resin. For Super Sap, there were two components:1.Resin
2.Hardener
Reading the Datasheets
I first started with reading the safety datasheet for resin and hardener, which could be found in the following pages:Reading the Technical Datasheet
After reading the technical datasheet (Link to the Technical Datasheet), we figured out that in the processing data section it is mentioned that:- Mix Ratio by volume is: 2:1
- Pot life is: 18 minutes. So it should not takes a lot when we are applying resin to the fabric.
- The recommended Full Cure Time is: 7 days
Cutting the Burlap Fabric
I wanted to cut a few layers of the fabric. So I started with measuring and calculating the dimension that I need to cut. I did it with the measure tool in fusion 360 and I considered different indents and outdents of the design that affects the dimensions. Because the fabric should be bended in some areas. And I also considered 2 cm more from each side. Then following Ivan's Documentation, I liked the idea of cutting the pieces with laser cutting machine and it could also be a new experience cutting a very thin material with laser cut machine. So I drew a rectangle with my calculated size, which was: 307,082 mm x 408,082 mm.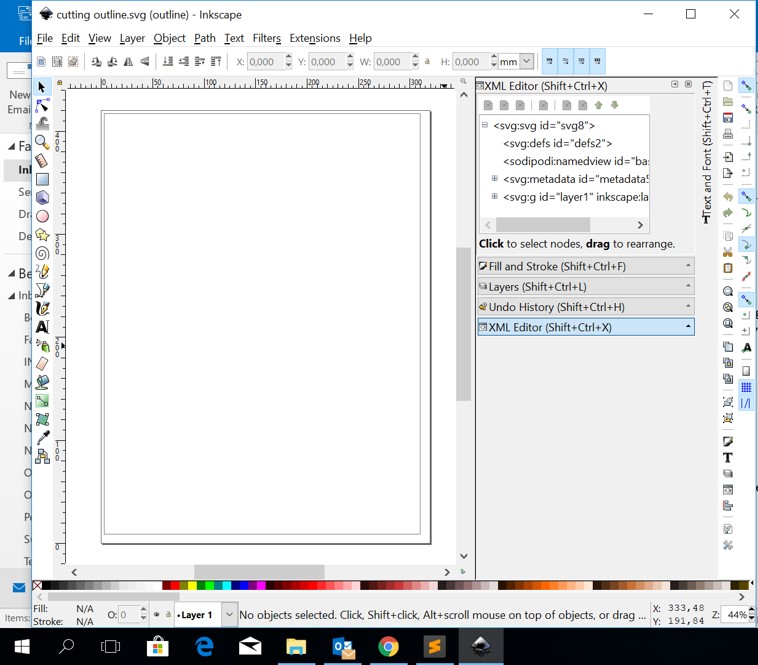
As Ivan had experienced and tested the cutting values for this material and suggested in his documentation I also used 50% - 50% - 50% for the first cut. It was good but as Jari suggested I tried 60% for power and it was better. Then I made some cuts on the corners for easier bending later on.

Creating the Composite
We followed Ivan's documentation and used Jari 's guidande for this stage.- First I wrapped both parts of the mold with 2 layers of transparent film. The idea is to prevent the application of the resin with the mold. Enough space should be considered for covering the depth of the mold later on with the fabric.
- Then we mixed the hardner and the resin in a same proportions and I stired it to get them well mixed.
- Then I spread the mixure all over the first layer of the fabric. Jari suggested to used hand (of course using gloves) to spread it better and also removing the excess of the material. I felt really warm in my hands while spreading the liquid with hand. The heat and the power of the mix was too much.
- Then I placed the fabric on the mold and tried to position it and covering the corners.
- Then I did the same for the other layers. I used the overall of 4 layers. And we were not sure if it is enough! Lets see later on.
- I made some holes in a layer of transparent film and wrapped it around the molds.
- Then I placed a layer of polyester on the top of the mold covered with transparent film.
- Then again covering it with a layer of transparent film.
- Then I oriented two parts of the mold. Which was not easy! I am not sure if they were oriented well!
- And wrapped them while they fit together again with transparent film.
- Now it was time to use some weight and to compress the mold. We used clamps for this purpose.

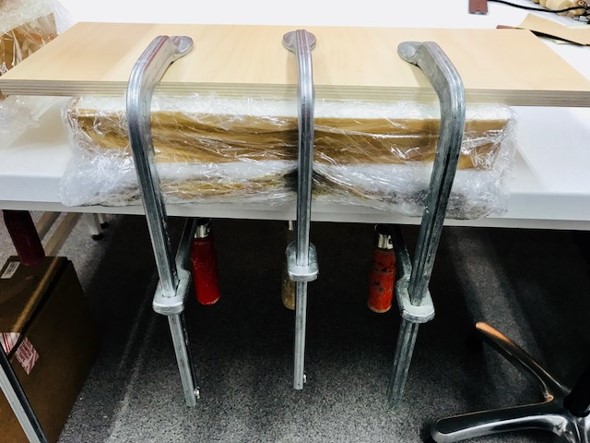
The day after, I released the composite from the compress to see the results.
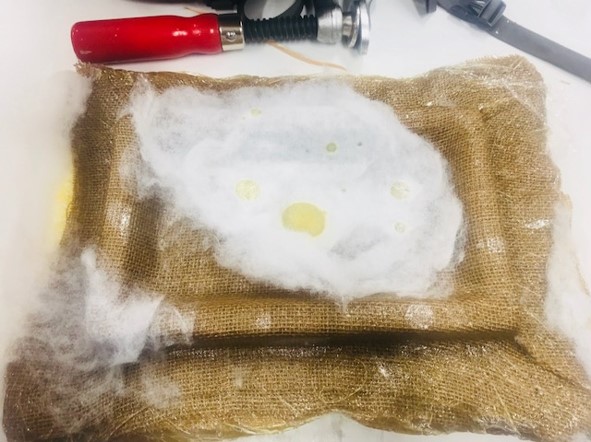
After removing the clamps and also removing the transparent film from around the molds and separating 2 parts, I saw that a bit of the mix was over the polyester layer, as you see in the following picture. But hopefully I could easily manage to remove the polyester with hand.
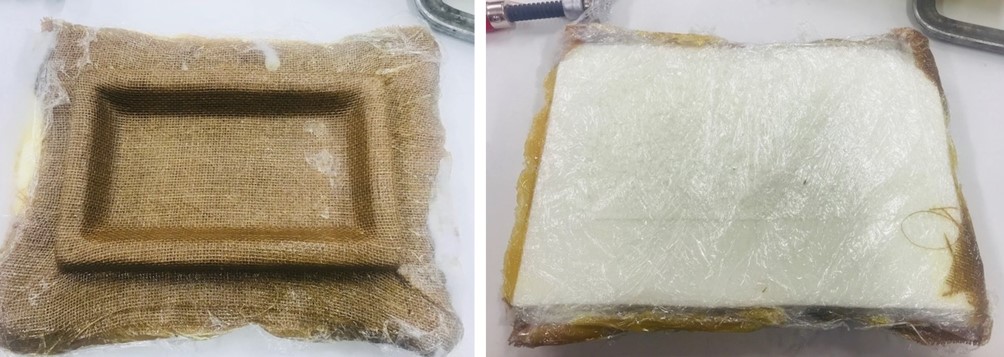
After removing all layers of plastics, it was almost impossibe to remove the mold from the back of the composite. Because there were some of mix around the corners that caused a tight stick between the mold and the composite. As I had a plan to cut around the frame anyways, I did not bother removing the mold at this stage. And Jari suggested that probably having the mold attached to the composite makes it easier for cutting using electronic saw. The following pictures demonstrate the situation that I have just explained.
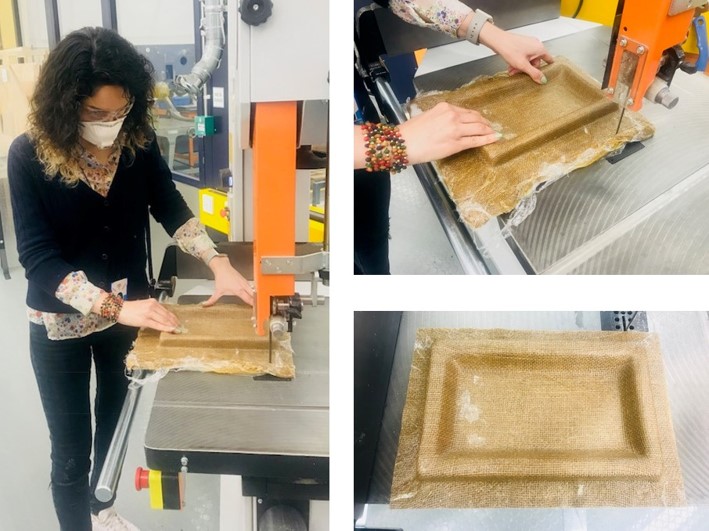
Therefore I used the electronic saw to cut around the frame to make a fit frame with equal measures of each side. And also to be able to remove the mold from it. And as you see in the following pictures, it led to a good result. And it is a real composite which is very hard.
There was a little bit of the polyester remained there as you see in the picture. I did try to remove it with a cutter with scratching it. But that was quite a mess and lots of chips flied all over my clothes. And frankly speaking, since this area would be covered with a picture, I did not care to clean it 100%.
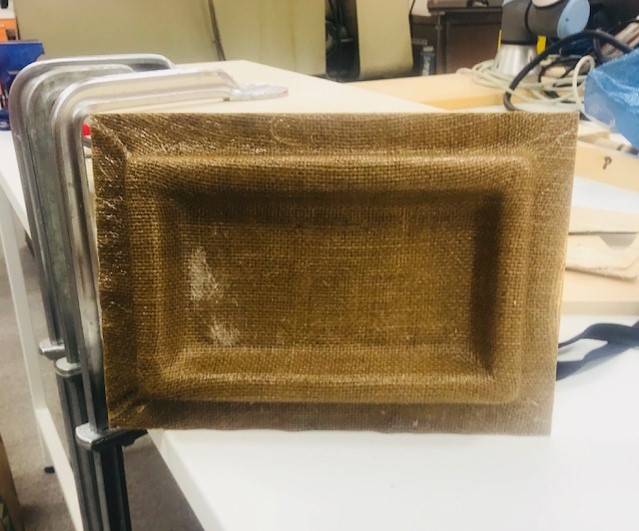
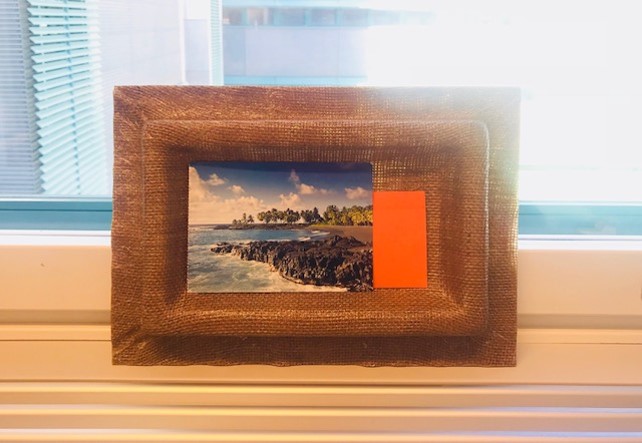
The following picture represents the final result. The picture would be replaced with fab academy students 2018 and staff later on :-) I also have a plan to cover the back of the frame or color it or somehow decorate it. I am anyways satisfied with the result.
Original Design Files
.nc for milling of part 1.nc for Outline of Part1
.nc for Milling of part1
.nc for Outline of Part2
.nc for Outline of Part2
.f3d for Design Frame Part1
.f3d for Design Frame Part2
.stl for Design Frame Part1
.stl for Design Frame Part2