I performed composites during the 2017 cycle which I have included below. I also created a "Hollow Mask Illusion" by vacuum forming 0.020" thick PETG sheets with a MDF plug milled on a CNC router.
I fabricated a saddle using a composite of canvas and clear epoxy resin.
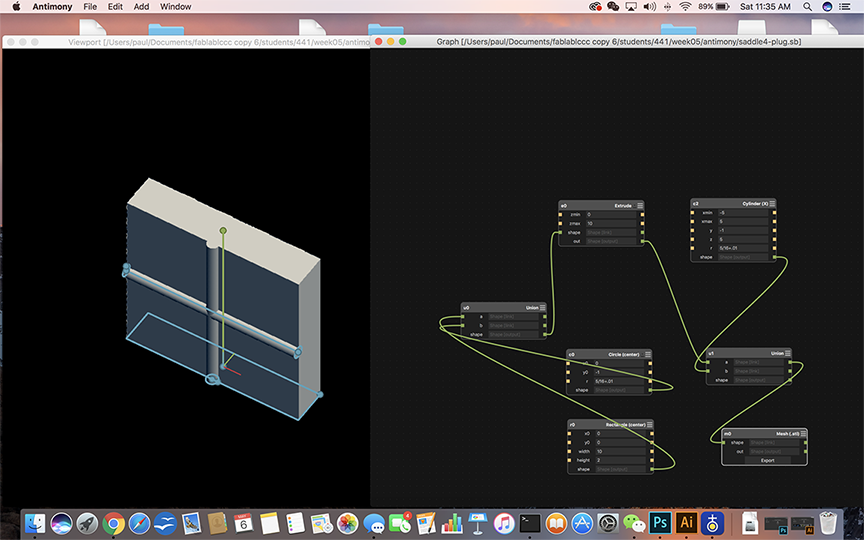
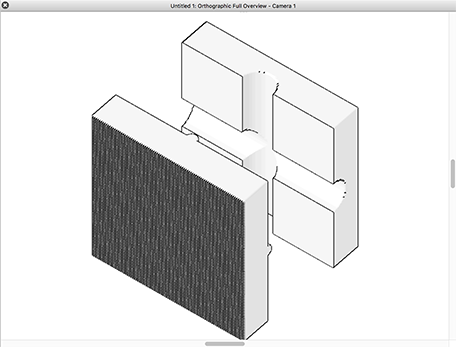
First I designed the mold using Antimony.

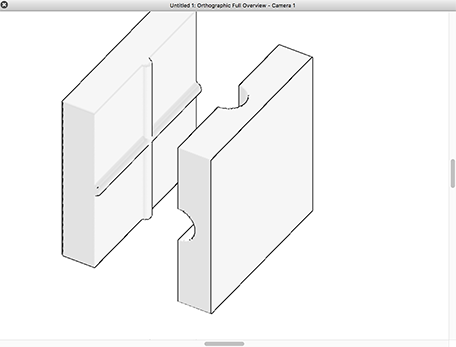
This is the top part of the mold. Some people refer to this as the plug.
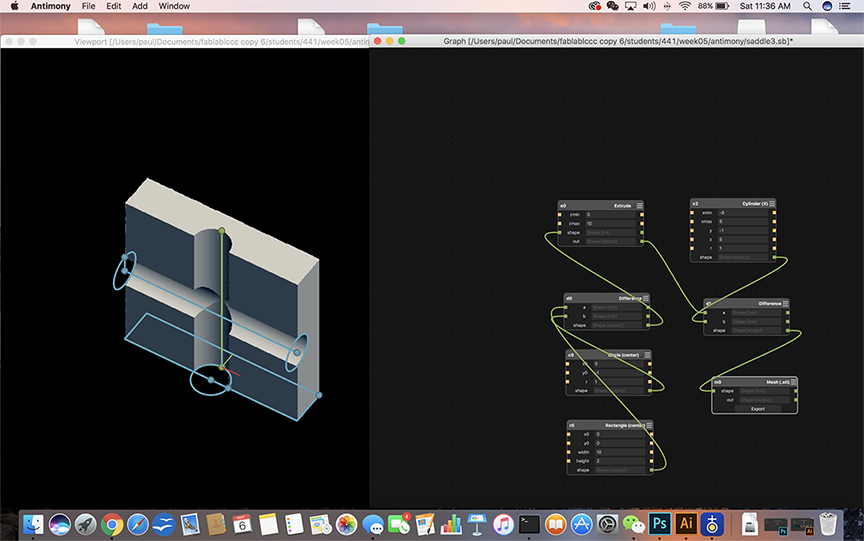

This is the bottom part of the mold.
Next, I export the model as a STL file and verify parts fit together using Chief Architect. Chief Architect and Antimony work well together.
Next, I import the STL files into Aspire and prepare toolpaths for cutting closed cell foam on Forest Scientific CNC router.
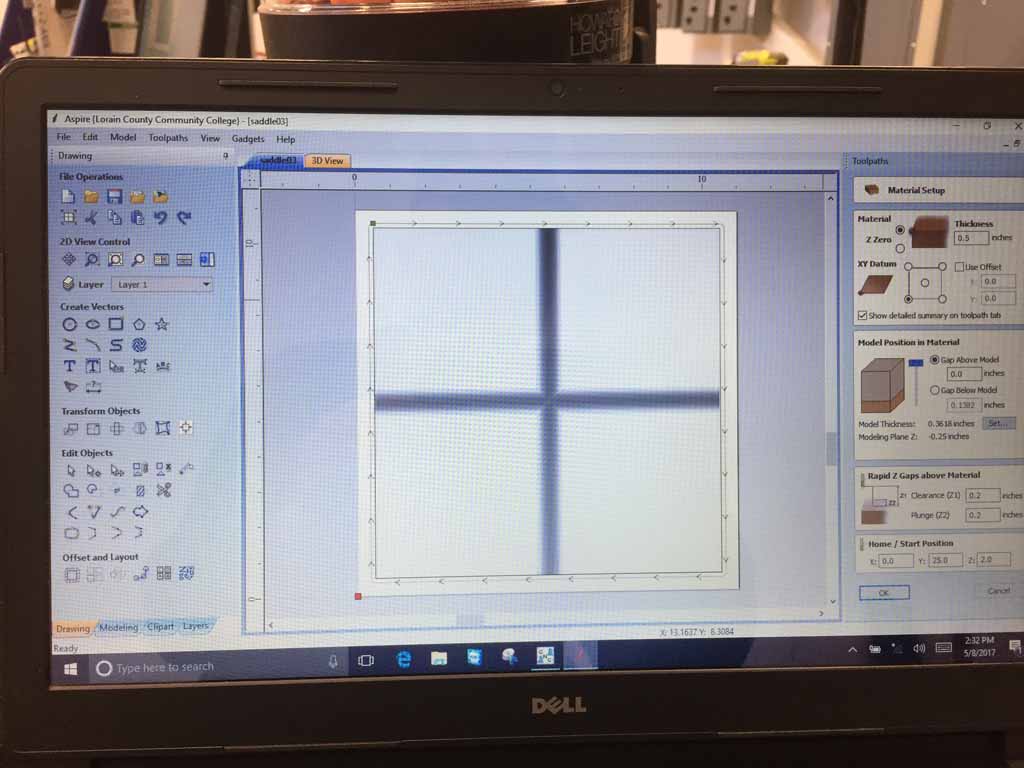
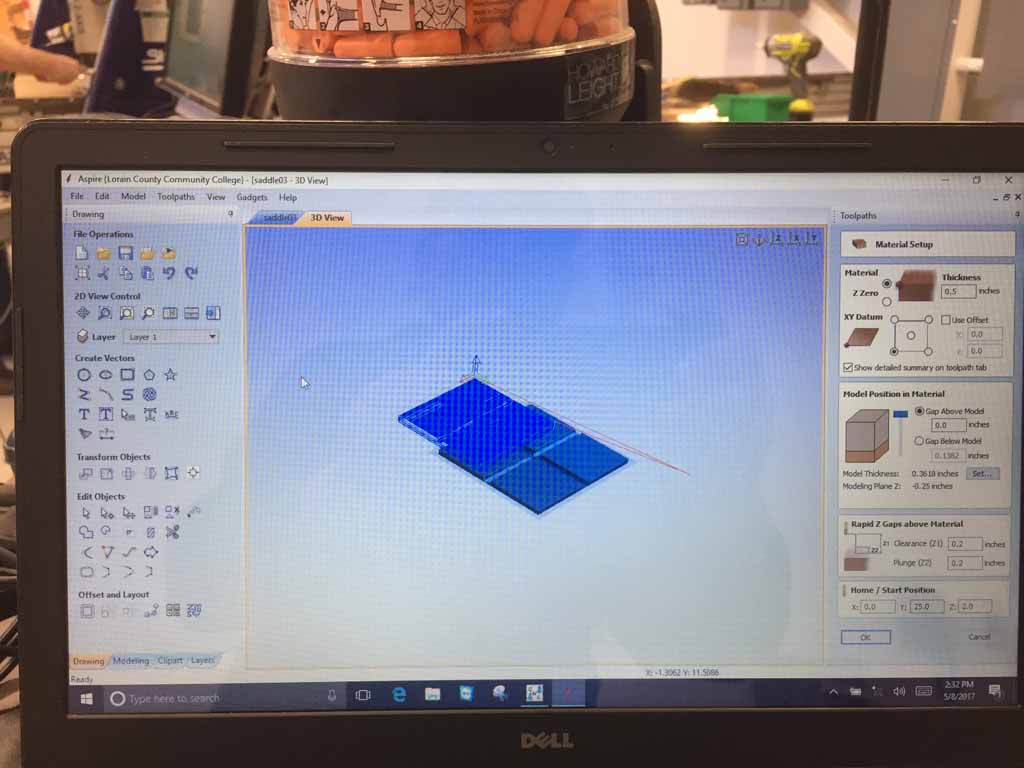
Setting up the toolpath with Aspire.
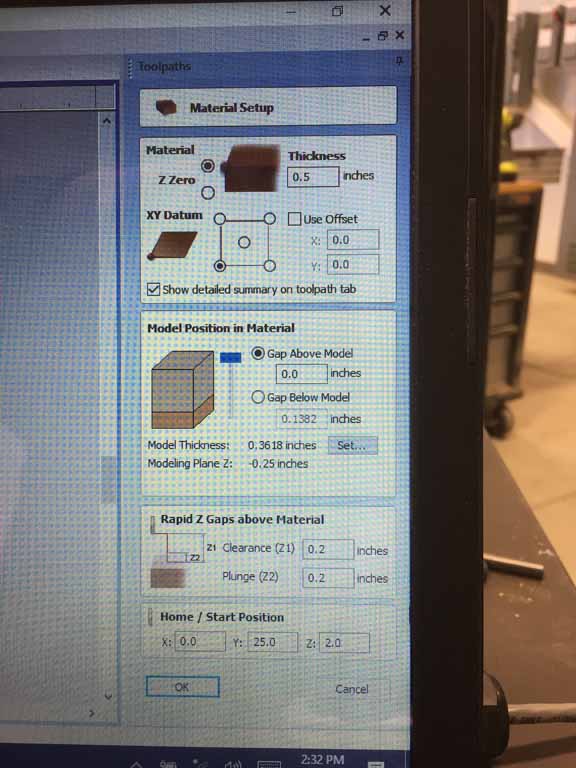
Material Setup settings.
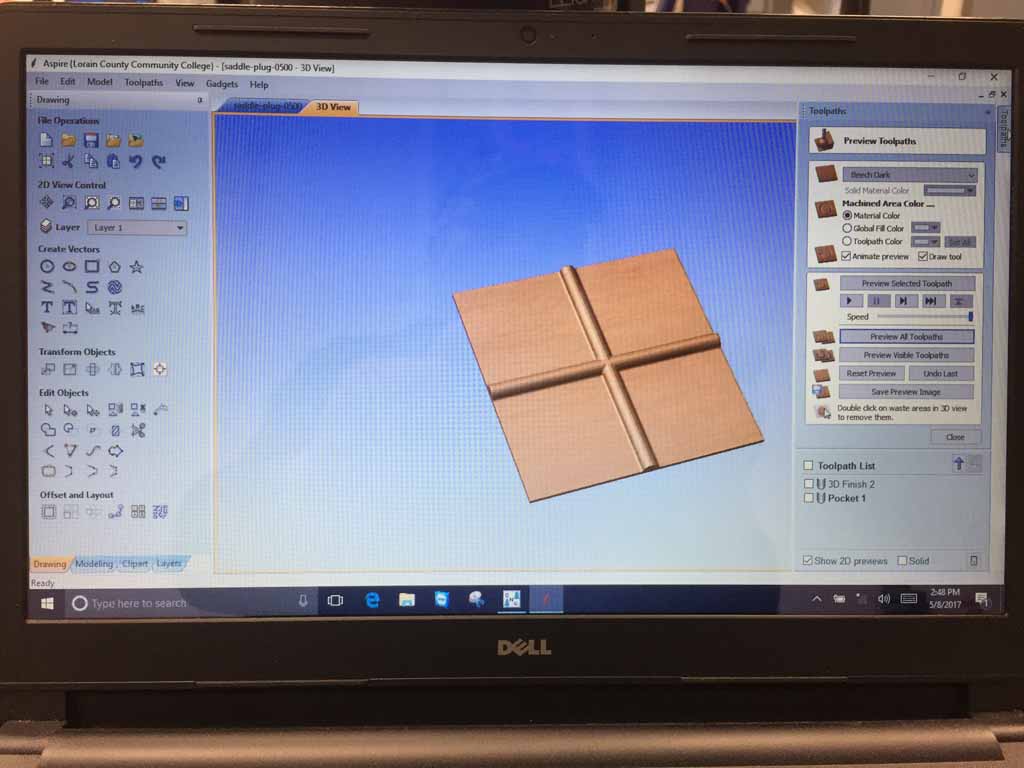
Review toolpath.
Next we transfer the toolpath files to the router:
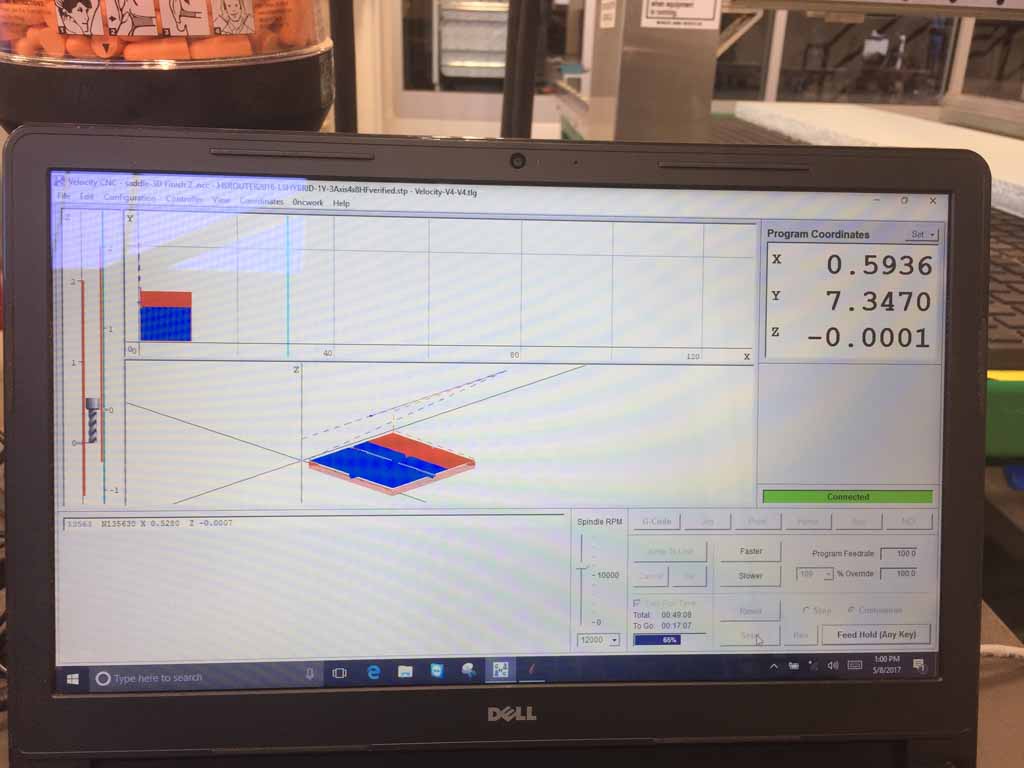
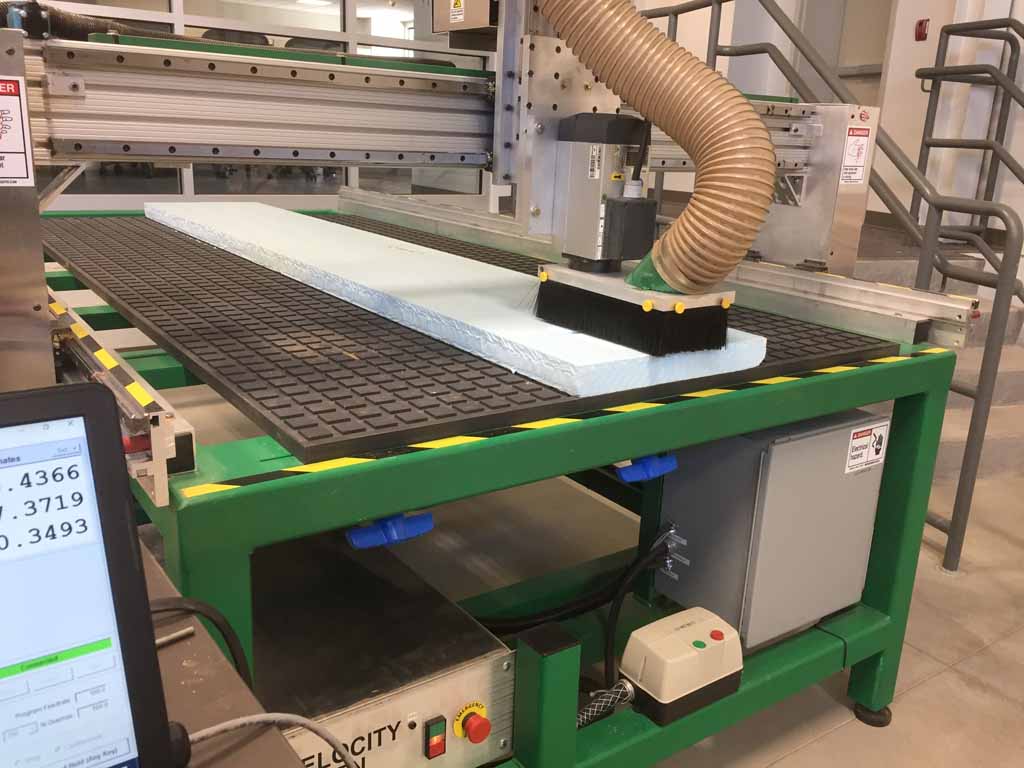
The Forest Scientific is a well made machine, closed loop servo motors. The interface is more similar to a metal cutting CNC control. The vacuum table made setting up the part REAL EASY!
Milling out the bottom half. Using 1/2 inch ball nose end mill. Spindle speed = 12,000 rpm. Feedrate 100 inches per minute.
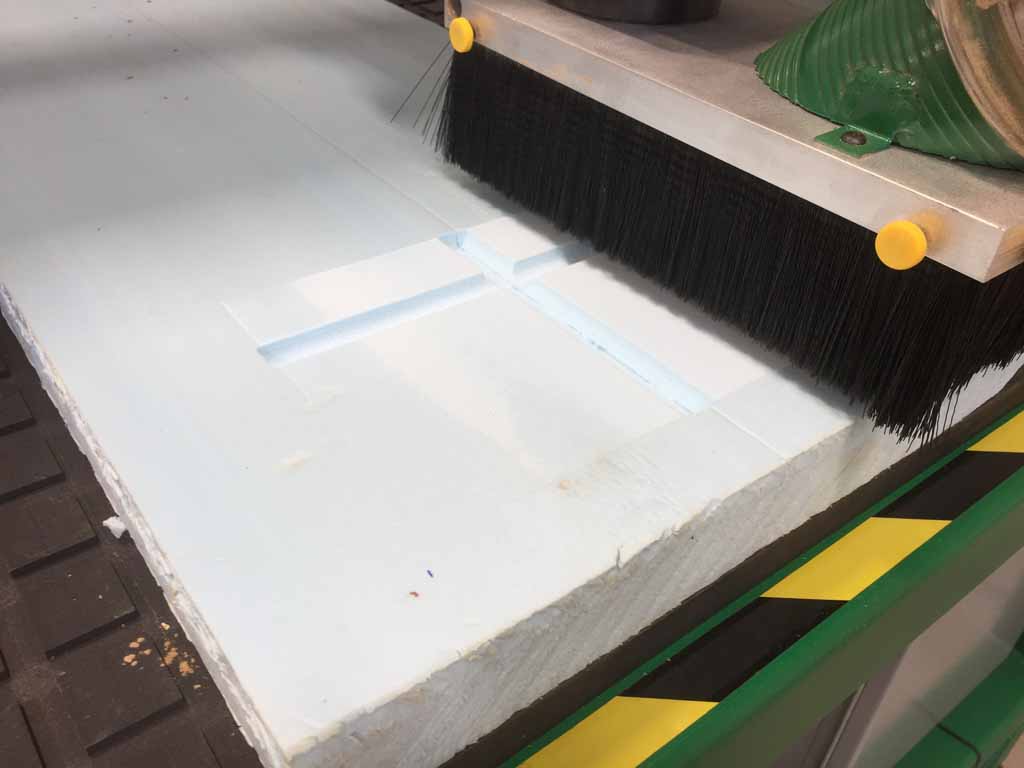
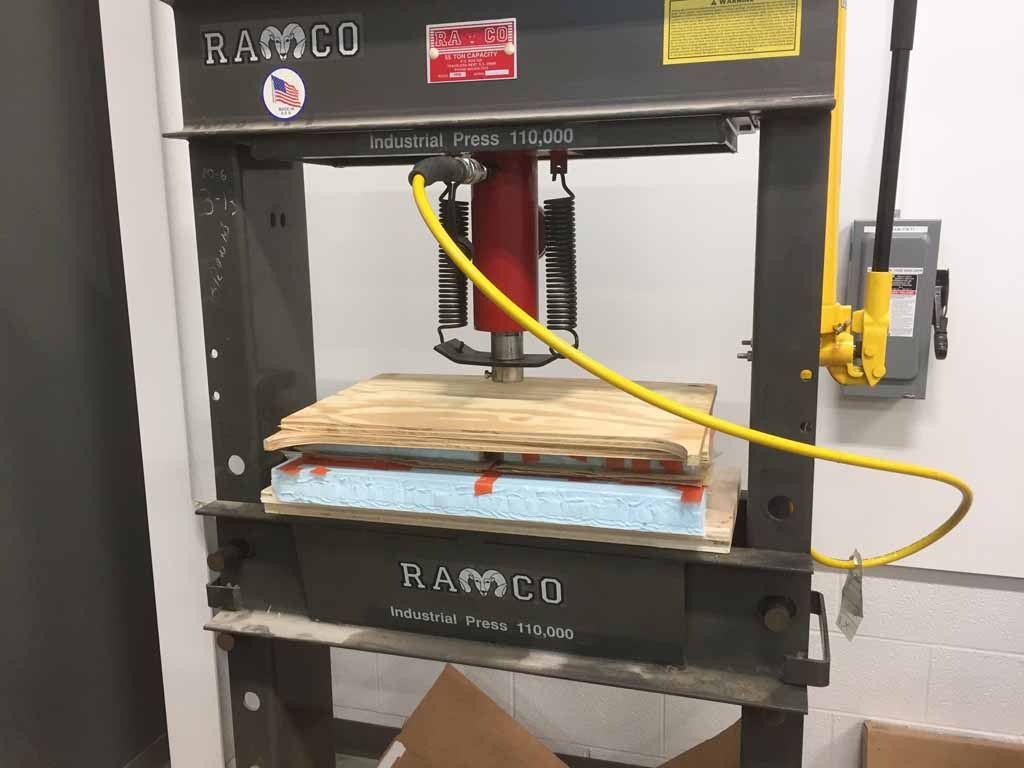
After mold is machined, get ready to put in press. Cover foam with release film.
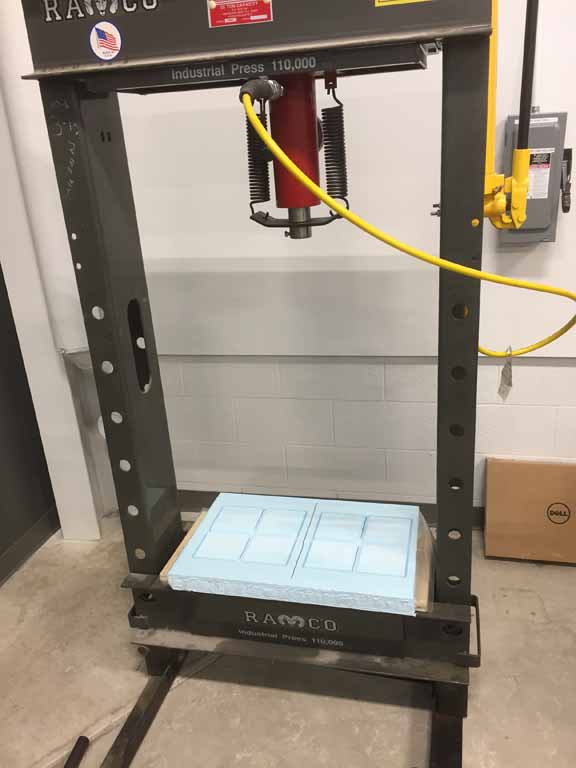
H-Frame Press, foam mold on top of two layers of plywood sitting on top of press bed.
Tape up mold with release film.
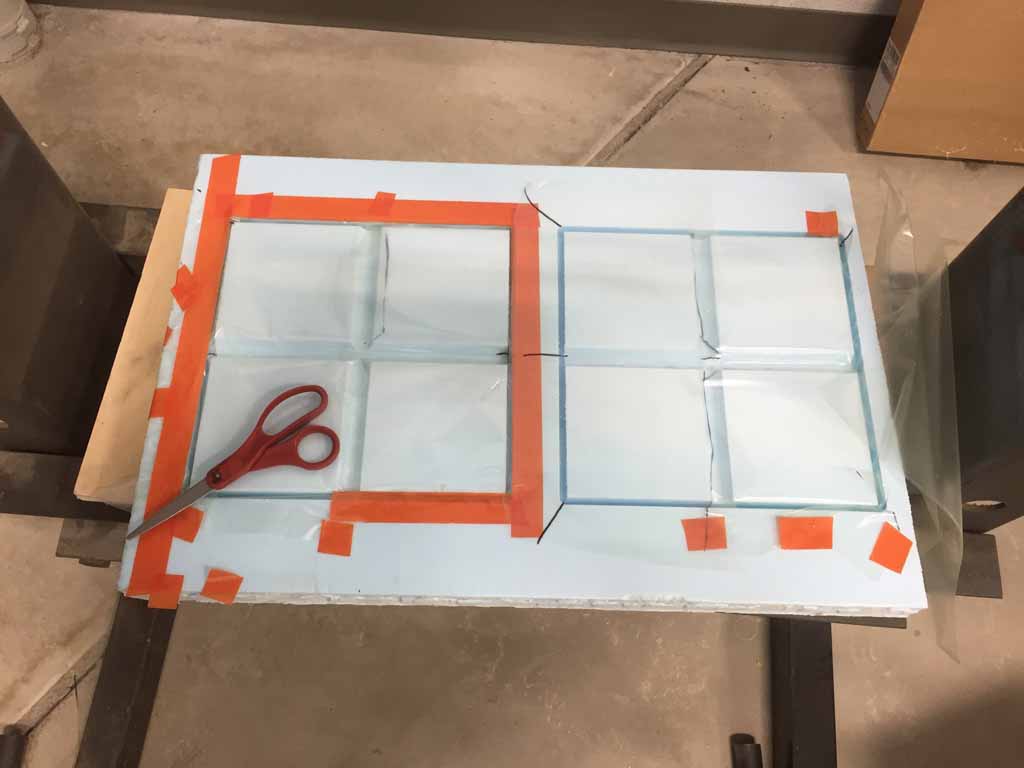
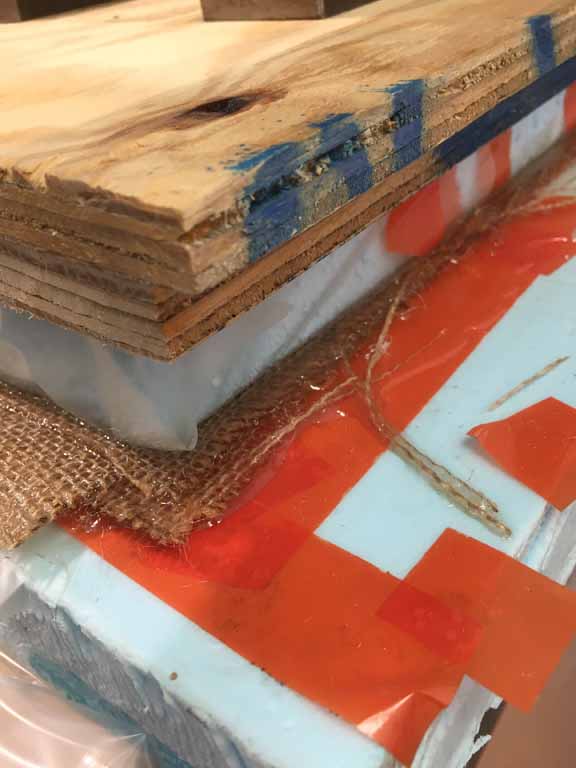
Place taped up molds in press. "Try out dry" the correct height and shimming. Take out. Try out a couple of pieces of burlap. I made a decision to apply the resin in quadrants, and slitting corners whedre contour would create wrinkles. Where to cut and crease is an artform. I tried to use my knowledge of making my "rack" while I was in the United States Navy, as well as my experience with TPI Composites and the MIT Manta GT Solar Powered Race Car as a method of folding and tucking. It was still very difficult working by myself. Having an extra set of hands would make the whole process much easier. I used tape to tack things down as I was dry fitting the layers ahead of time until I thought I would have a nice layup package.
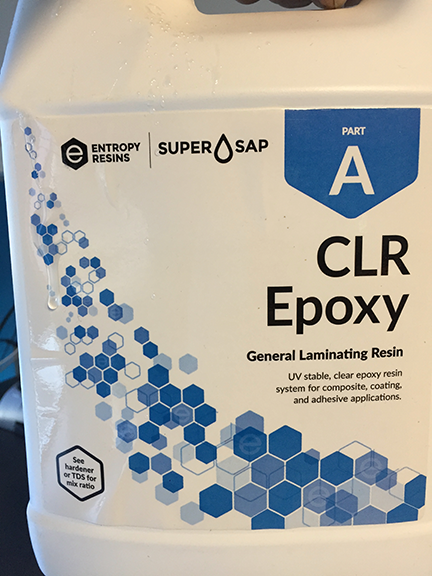
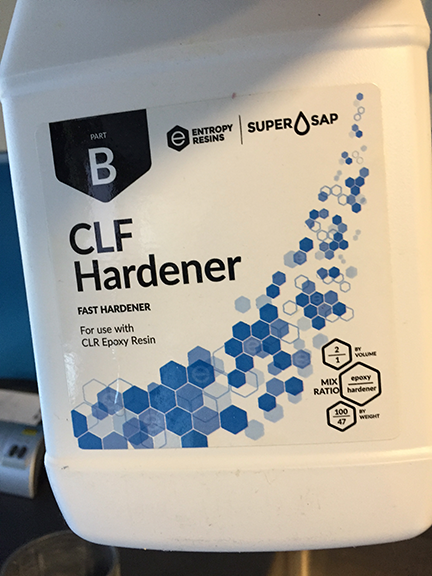
We were supplied this environmentally friendly resin by our Lab boss, Scott Zitek.
It's still resin, so read the instructions and the MSDS - Material Safety Data Sheet.
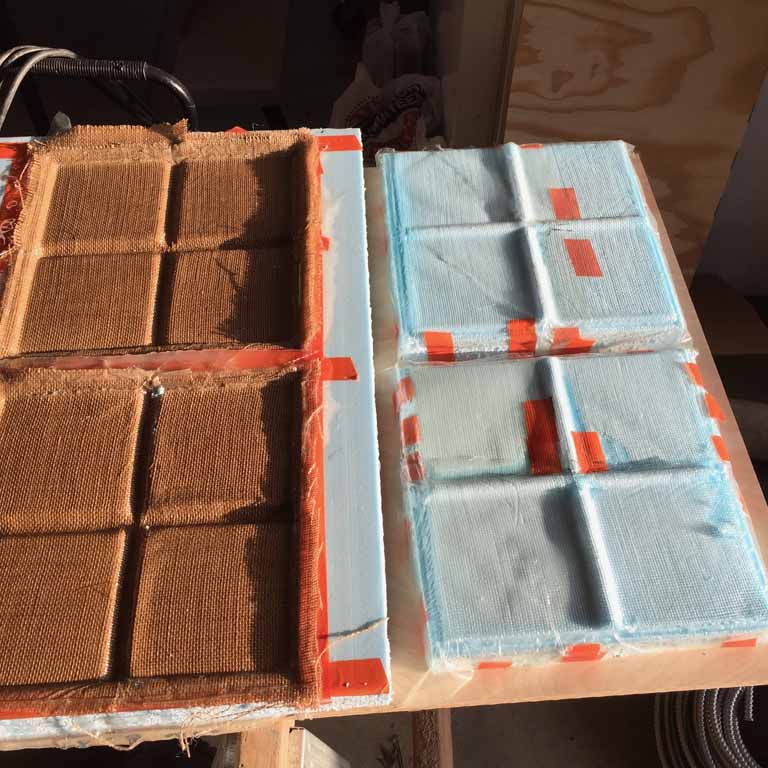
Ok, so all my burlap pieces are cut and ready to go, and organized in a neat stack.
When you are busy with resin, time is limited and you are all sticky like a tar-baby.
The mold, which is closed cell foam is covered and taped with release film and ready to go as well. I tried compressing the mold with the film and nothing stressed or tore, so it is good to go. Make sure everything works before mixing.
Mix resin and wet burlap, layup on mold which is covered with release film. I used 4 layers of burlap, pre-impregnating each layer before laying in the mold, assembling the pieces in the same fashion as the dry-run. Unfortunately, I was covered in resin at this point and could not grab my camera and have pictures.
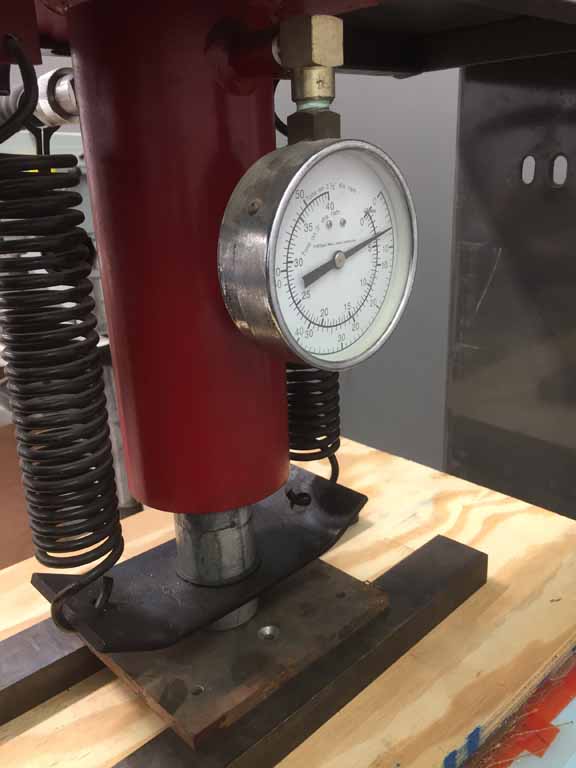
Put mold with layup into press and apply pressure until resin starts to squeeze out, about 3 tons pressure. The press setup was new and I had a lack of pressure at first. We had to bleed the air out of the press before it would work. We applied about 3000 psi on the hydraulic cylinder. I eztimate we had about 4000 pounds of pressure on the mold. The closed cell foam started to compress. I didn't want to chance breaking the mold. The mold was about 288 square inches. Quick calculation, 4000 pounds over 288 square inches is 13.88 pounds per square inch, roughly about the same as atmospheric pressure. That would be the equivalent as if I vacuum bagged the mold.
Once resin starts to squeeze out, let set overnight to cure.
Remove from press, break apart by hand. Pull real hard! Some of the resin leaked to the edges and by the release film onto the closed cell foam.
The cloed cell foam seemed to get eaten away by ither the resin, or the heat of the cure.
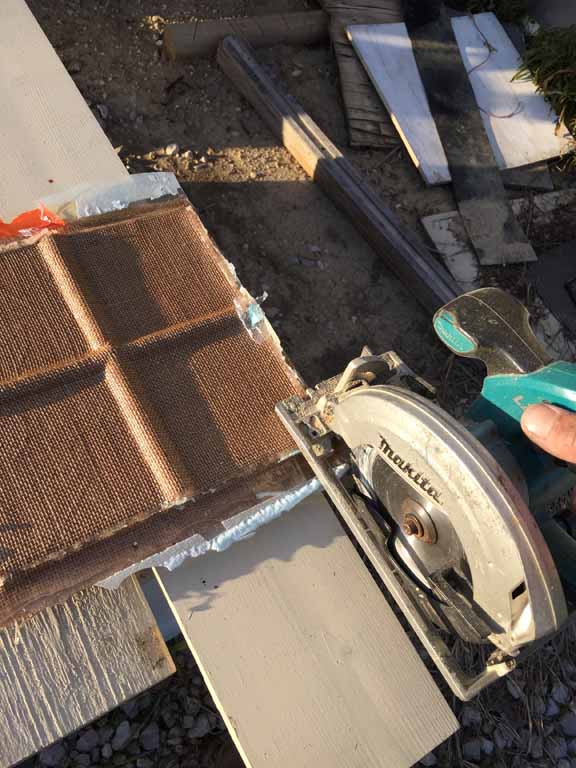
Trim with circular saw.
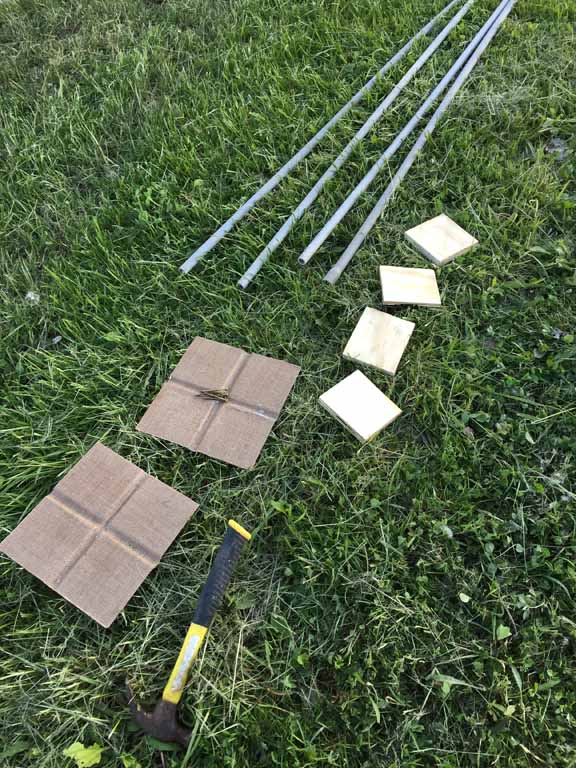
Assemble with 1/2" PVC conduit, plywood backers and spacers, wood screws, hammer and ground pins.
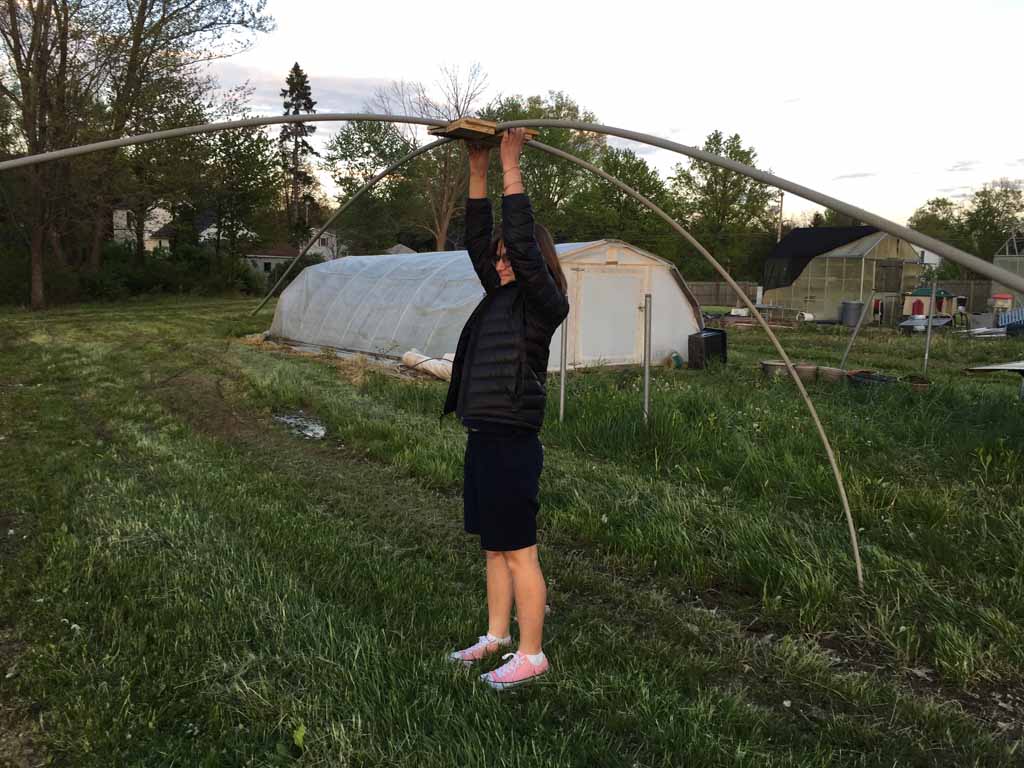
Have helper handy to hold in place while you bow the tubing over the ground pins.

Adjust ground pins for desired span and height.
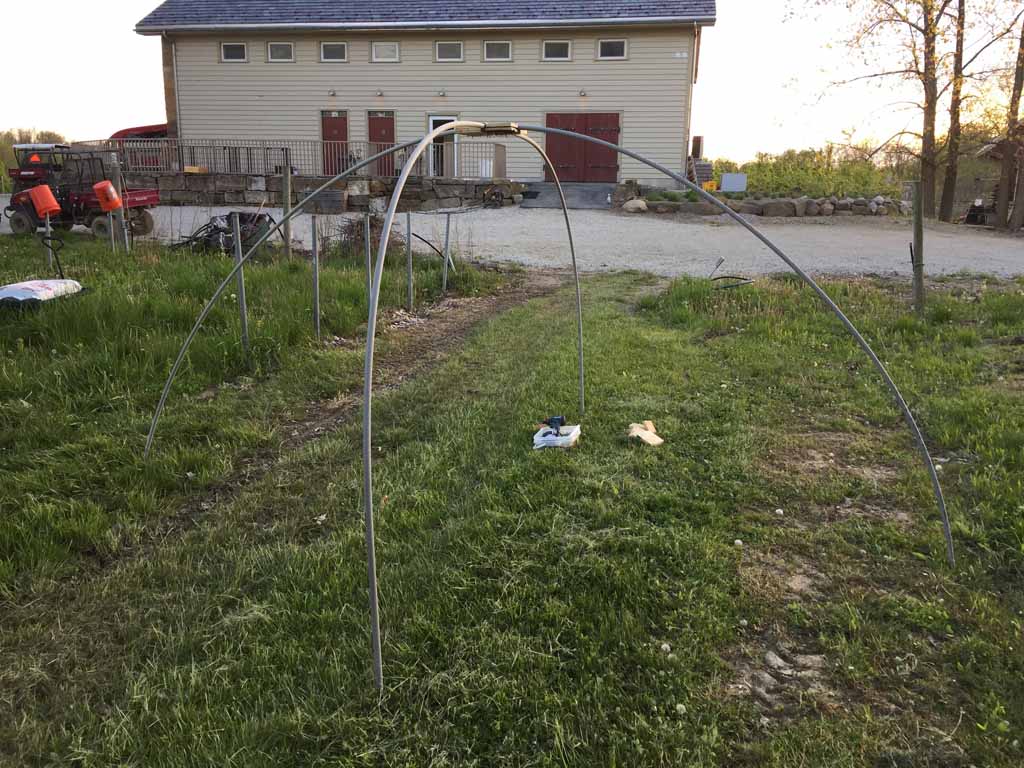
Completed cold frame / hoop house, portable shelter frame. Next time I would mold the wood inserts with the composite.
(id='hollowmask')
Earlier this year, I received the following message from Frasier Hamilton, a board member at Menlo Park Academy, a public charter school in inner-city Cleveland, Ohio.
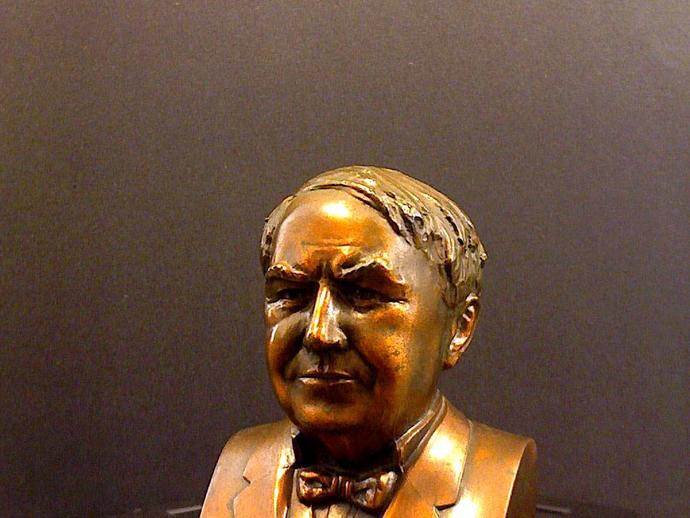
Paul - We visited a museum of illusions when we were in Slovenia this summer. One of the exhibits was a wall of hollow heads set up in a grid and backlit. http://muzejiluzij.si/en/portfolio-items/einstein-hollow-face-illusion/
We have a perfect place to put something like this in the new Menlo building, but I would need help with printing out 9 hollow Edison heads. Do you have any advice where we could get this done locally? Maybe getting kids involved. The faces are about life size, which means a bigger 3-d printer I am guessing.
Trust all is well!
Thanks
I first looked fopr a 3D model of Thomas Edison, and I found one here: https://www.thingiverse.com/thing:143111
I imported the STL file into Autodesk Fusion 360, and scaled the Z axis to flatten out the profile. After that, I imported the modified STL file into Aspire and generated a 3D toolpath. Roughcut 1/4 inch end upcut centercut mill, 14,000 rpm, 100ipm, 0.300" depth per pass; finish cut 1/4" ball noze, 14,000 rpm, 30 ipm.
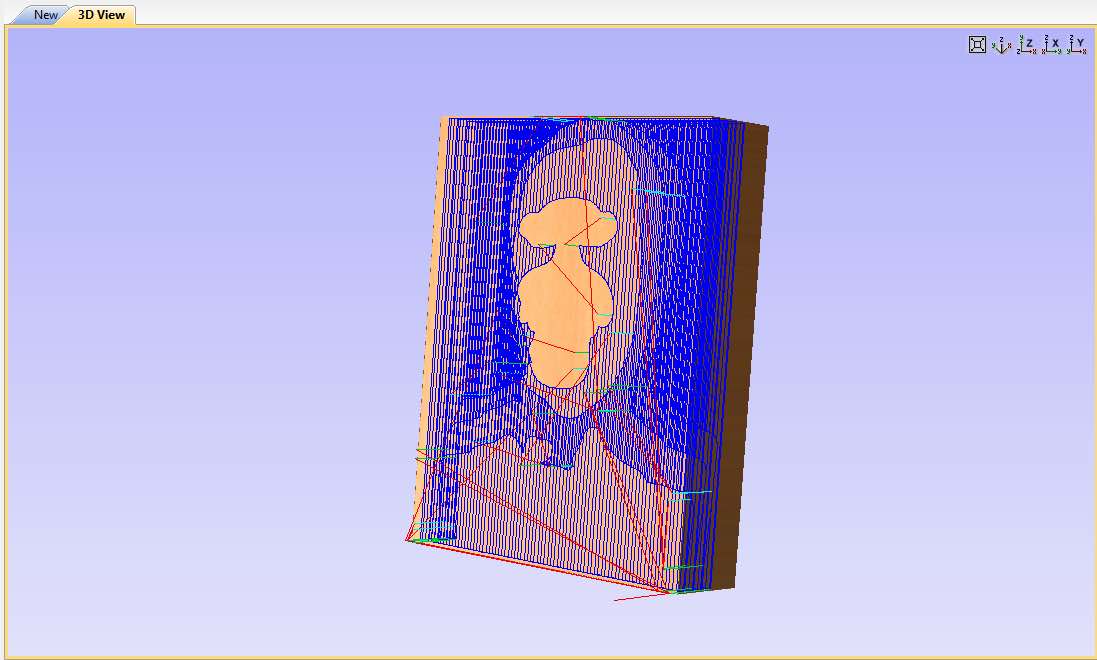
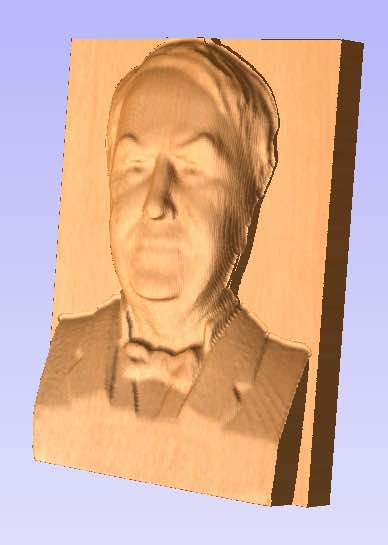
I rendered the model to see if it was what I wanted.
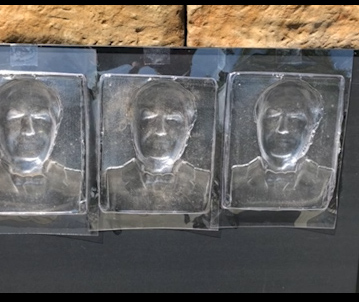
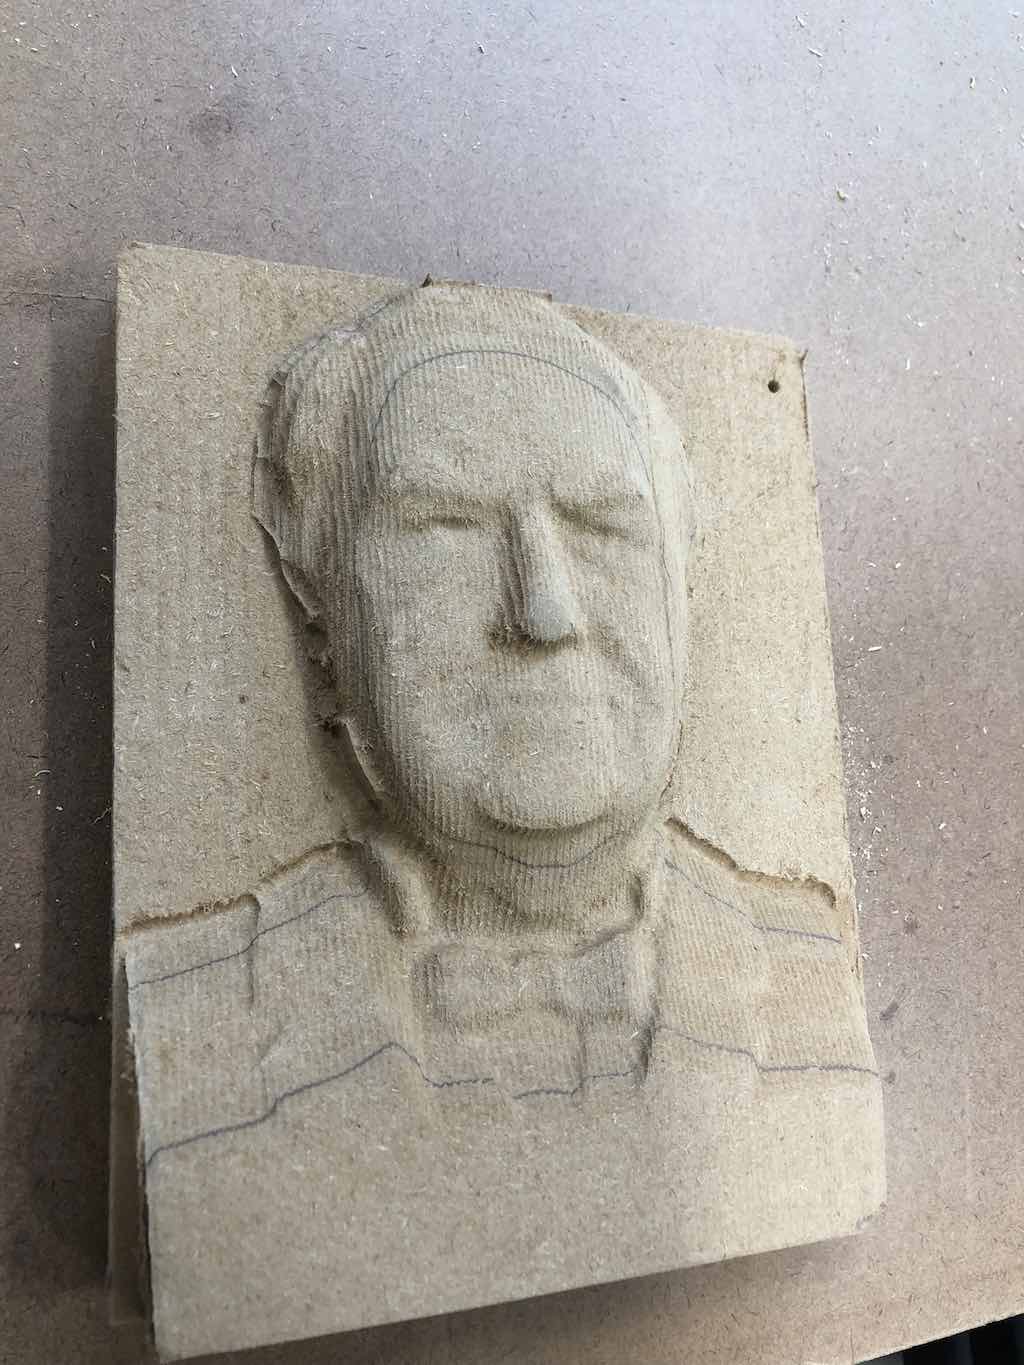
I epoxy glued 4 sheets of MDF, 1/2" thick x 8" wide x 10" high. I placed them on the vacuum table of the CNC router and milled the profile.
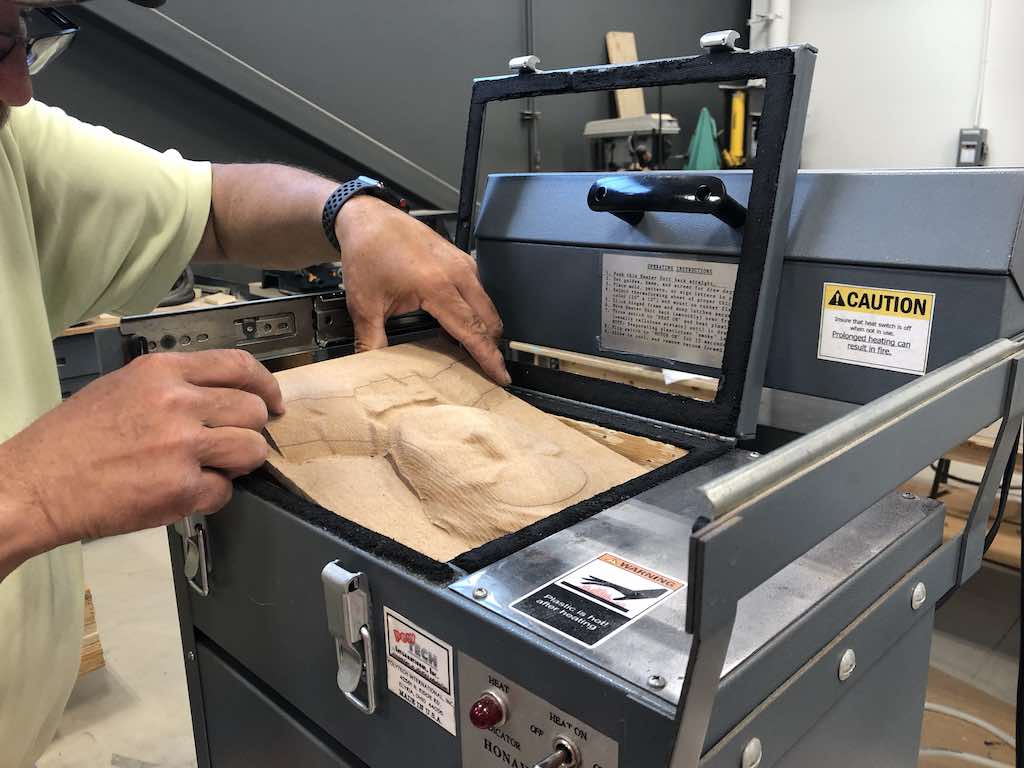
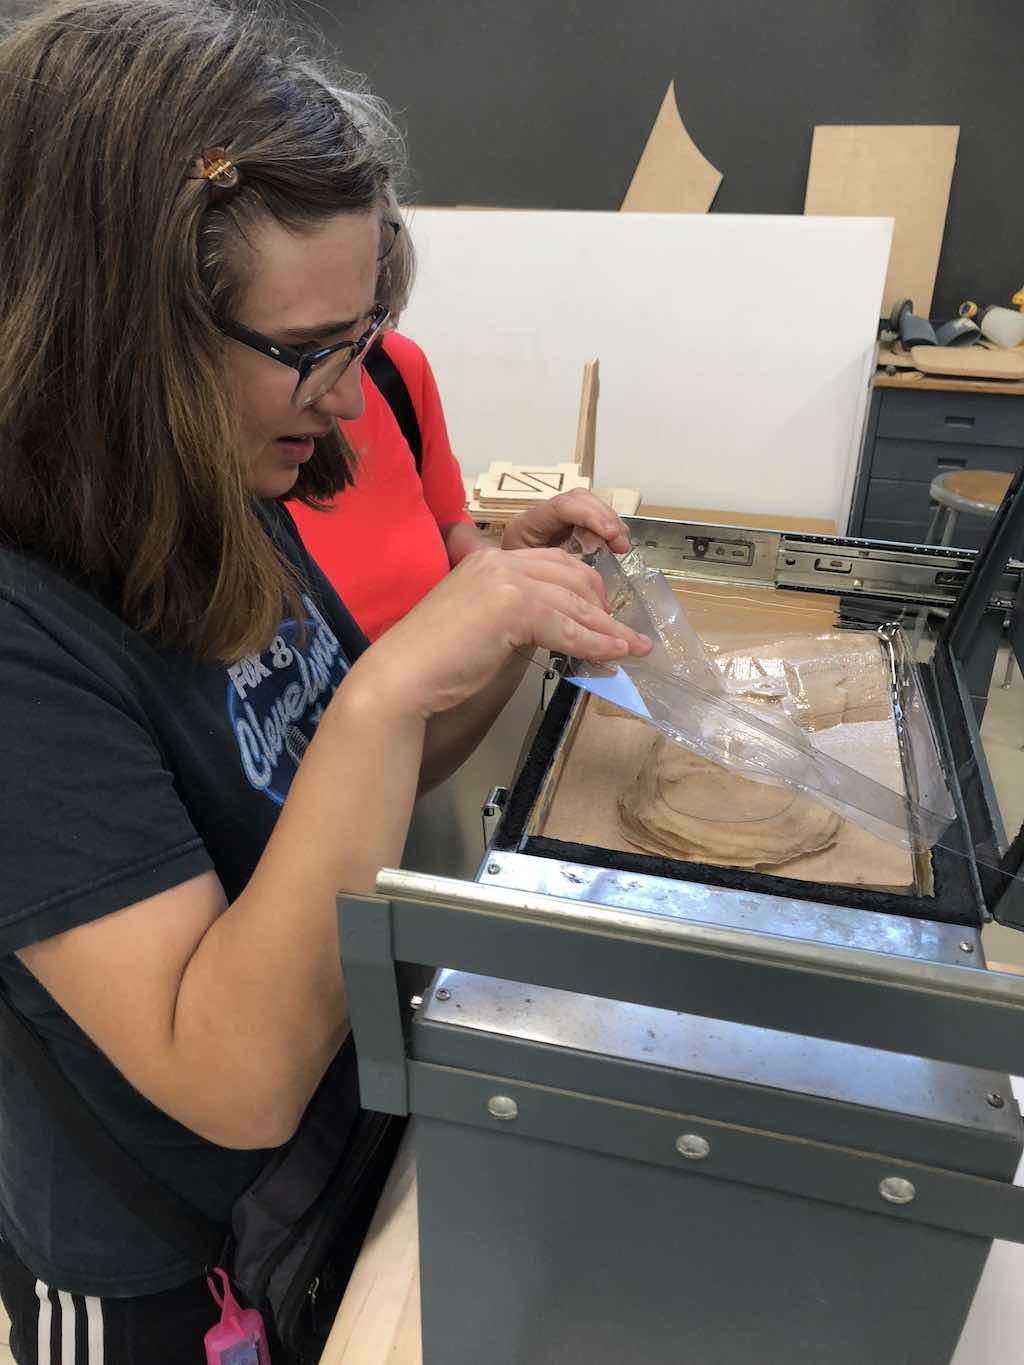
I sanded the plug a little and inserted it into the vacuum former.
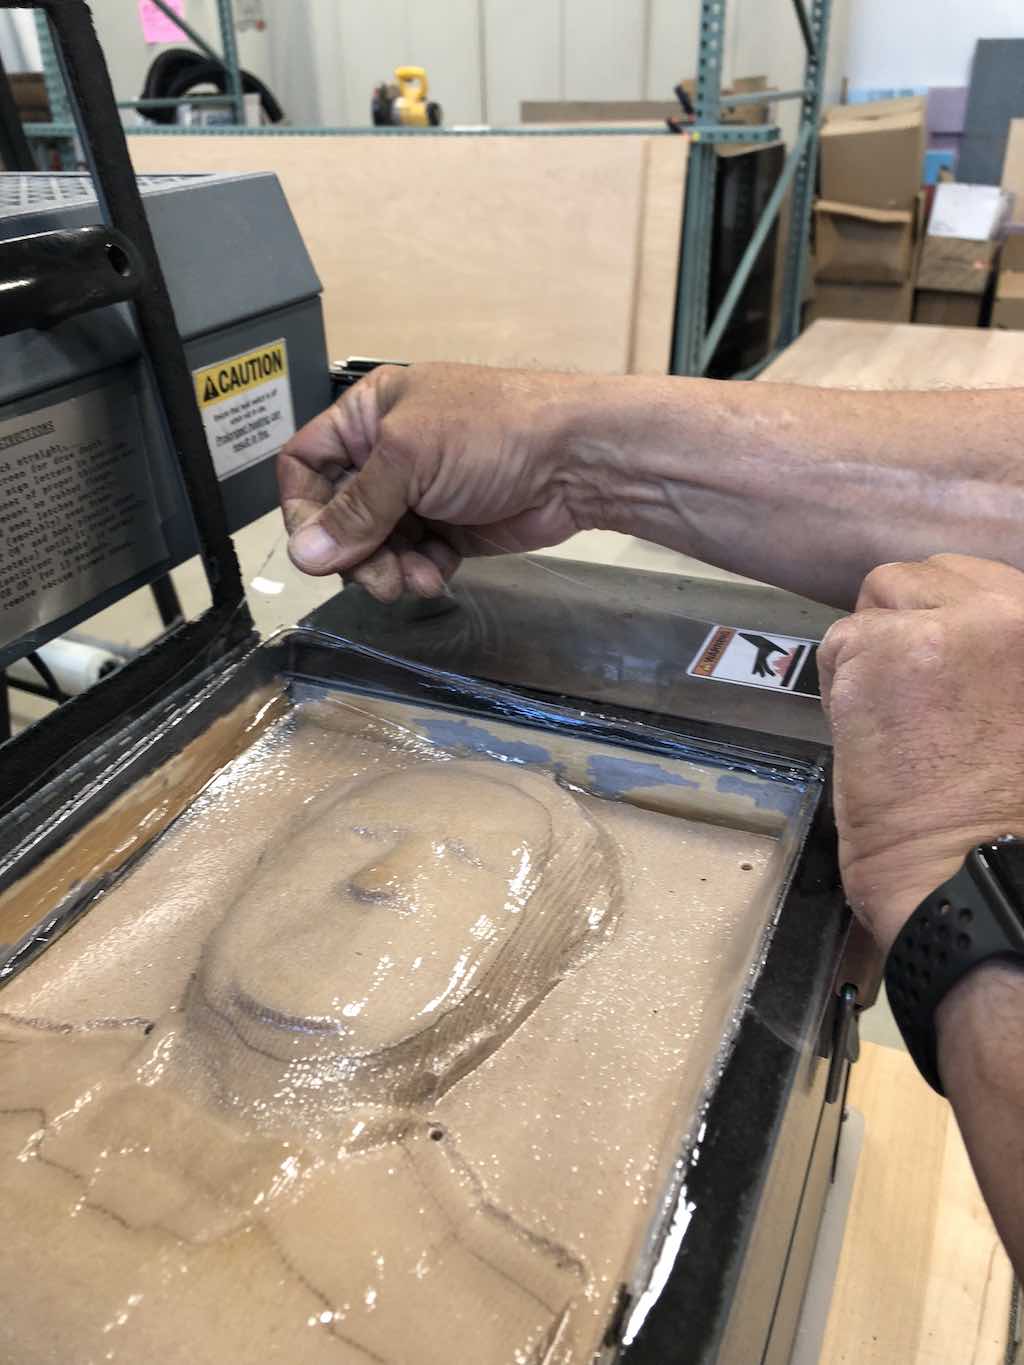
I next cut the PETG sheets to fit the machine with a scissors, and played around with exposure time. The best results were obtained by cooking for 1 minute and 15 seconds.
Once everything is figured out, it is very economical and fast to thermal vacuum form.
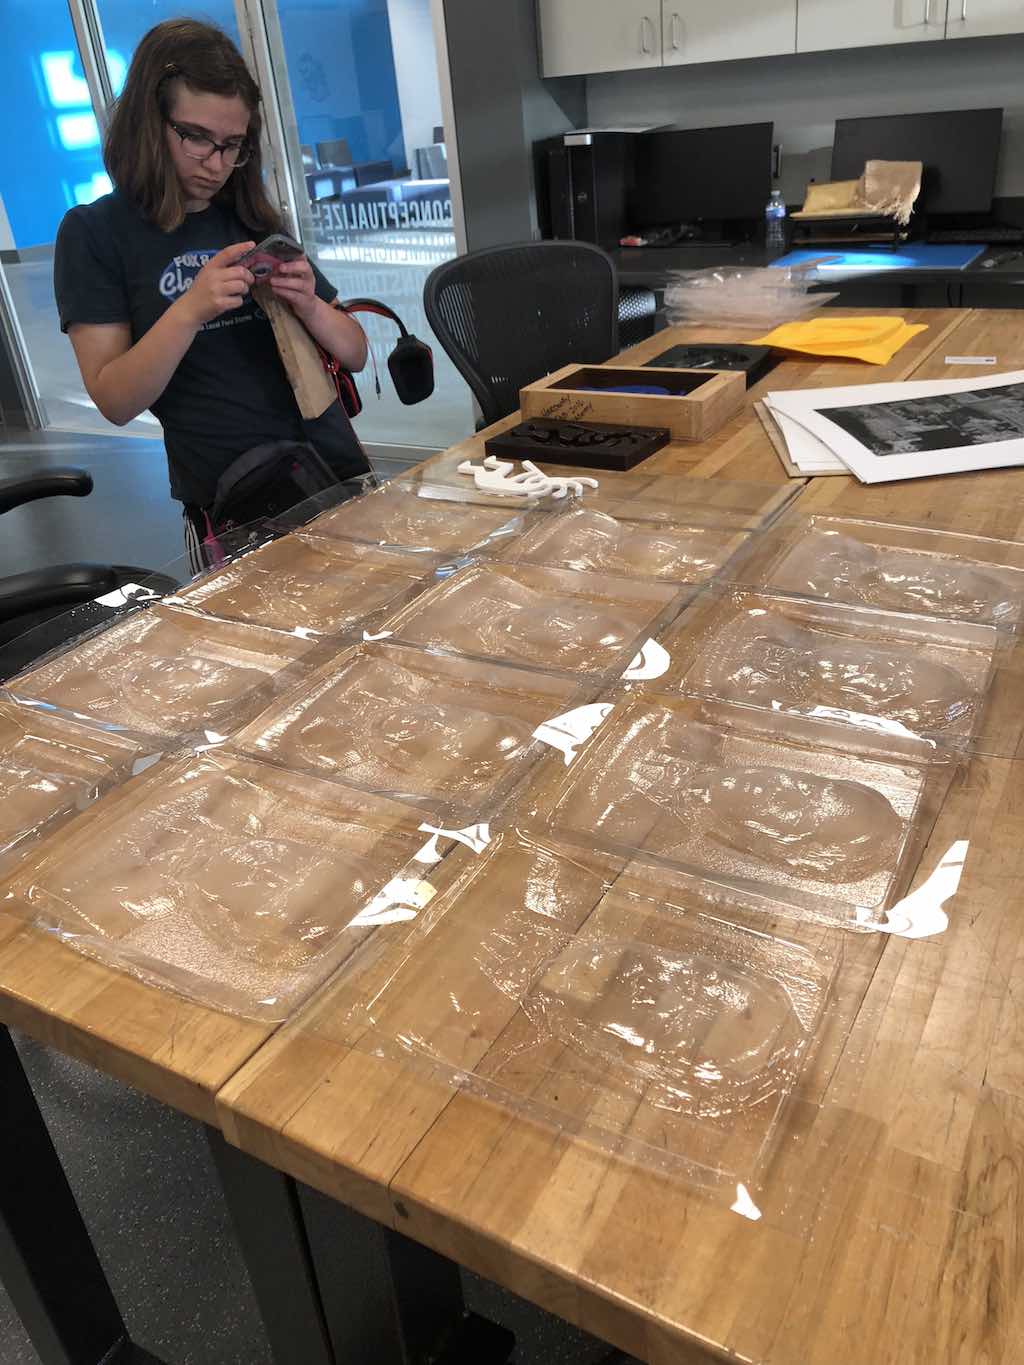
These molds will have to be "painted" with magic markers to accentuate some of the facial features. Next time, I might use solid wood, and possibly paint the wood with high temperature paint.