_underway_in_the_Pacific_Ocean_on_31_May_2015.jpeg)
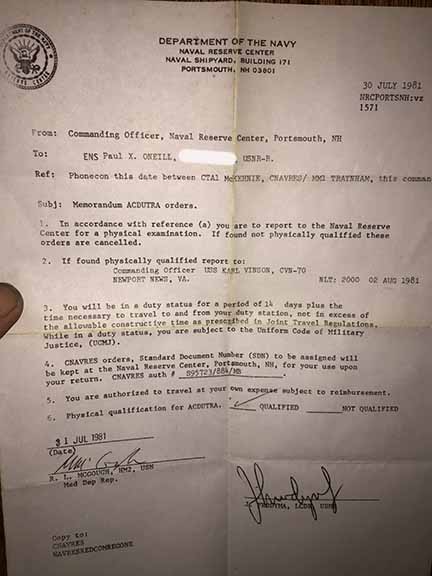
I cannot say that I have not used HTML (Hyper-Text Meta Language) before, even though I would like to. The first time I used hypertext was on the United States Navy aircraft carrier USS Carl Vinson, during her construction in 1981 at Newport News Shipbuilding. The system we used was called ZOGNET, which was implemented on a network of DEC PDP-11/Unix minicomputers. At the time, this was exceedingly novel, and never done before. The system used ZOG, or hypertext, as the main tool for documentation and data entry, and used a crude version of TCP. Vinson even had a gateway between ZOGNET and a cluster of Wang word processing minicomputers. Most of the software was written in Pascal and most non-combat systems were documented using HTTP. The system was classified at the time as a ARPA system. I worked under the supervision of Captain Richard Martin, USN who is a very distinguished naval officer, the head of the Office of Naval Researech/ARPA, and a distinguished faculty member of The Robotics Institute at Carnegie Mellon University. It was very novel at the time to help install the first ARPAnet/MILnet on a combat ship. The internet of today was built upon these early ARPAnet systems. I was very fortunate to have had this experience.
HTML5, which is commonly used today, is much more robust than the systems I used 36 years ago. I am not very good at writing webpages. In fact, I am really bad at it. I think it's time to retool and get up to date. I initially started by using Star Office, because it is a free download, and had a word processor which could also edit files. I figured I would edit a document file as I did way back when, and get through the first couple of weeks. While I struggled getting back in the game, I explored some other systems and tools, most of which I did not care for. I explored Gitbook. I found Gitbook to be very disorganized and buggy, and more geared to someone involved in a collaborative project. I explored Atom. Again, too complicated and buggy. Atom brought my Macbook to it's knees, and required me to download a lot of other stuff to make it work. I happened to have a subscription to Adobe Creative Cloud, which I use to design and print winelabels for my winery. Part of that suite of tools includes a product called Dreamweaver. Since I already subscribed to Adobe, I decided to try it. It was prettyturn-key, meaning easy to install and operate. This app was somewhat efficient on my platform (Macbook Pro). The application allows you to switch between three modes, "Code", "Design", and "Split", which splits the screen and panes both the Code window and the Design, or presentation window, and moves the cursor simultaniously between the two. I found this to be very helpful, because I could open existing HTML5 files and start to learn how some of the tags work.
I came across a nice resource to help decipher some of the HTML tags I thought would be useful, which I found at HTML.COM.
Learn HTML Code, Tags, and CSS at HTML.COM
Another additional resource I found in the Fabcloud repository, is a page which is very helpful for many of the Fabacademy classes. It was compiled by mohammed.abuelhagag, Educational Program Manager and Fab Academy instructor at Fab Lab Egypt. It includes the following:
Week 2: project management
- https://getbootstrap.com/
- https://bootswatch.com/
- http://strapdownjs.com/
- https://guides.github.com/features/mastering-markdown/
Week 3: computer-aided design
- Fusion 360 Youtube Channel: https://www.youtube.com/user/AutodeskFusion360
- Product Design in Fusion 360: https://academy.autodesk.com/curriculum/product-design-fusion-360
Week 4: computer-controlled cutting
- https://maker.js.org/
- RDWorks Learning lab series: https://www.youtube.com/watch?v=YvrMeUUzaBo&list=PLeKaKWOIPgi_XP6Nxzeapp-vUMCLQyVMB
- http://www.thunderlaser.com/troubleshooting/how-to-import-pdf-files-into-rdworks.html
Week 5: electronics production
- Modela 20X user guide: http://support.rolanddga.com/docs/documents/departments/technical%20services/manuals%20and%20guides/mdx-20-15_use_english_r5.pdf
- PCB Basics: https://learn.sparkfun.com/tutorials/pcb-basics
- http://blog.bantamtools.com/milling-pcbs
- https://support.bantamtools.com/hc/en-us/sections/115001027886-PCB-Workflow
- http://www.altium.com/documentation/15.1/display/ADES/((The+Board))_AD
Week 8: computer-colntrolled machining
Contribution: @kai.naito
- Japanese wood joints introduced in gif
- Traditional Wood Joint System in Digital Fabrication
This is a senior research on the traditional wood joints by Kanasaki, K. former student of Prof. Tanaka (founder of the first Fablab in Japan).- 50 digital downloadable joints(png & pdf)
- 3D data available for few simple Japanese wood joint technique
You can visit the source of this list by following this link:
https://gitlab.fabcloud.org/academany/fabacademy/2018/class/blob/master/resources.md
The following shows how I used Dreamweaver to embed hyperlinks within my webpage which link to the Local Review Rubric:
I opened the HTML document with Dreamweaver. I switched from the "Design" mode to "Split" scrfeen mode. Then I scrolled down to the line which contained the content "pushed to the class archive". The HTML language for this line reads: <li>pushed to the class archive</li></ul></blockquote>. I inserted the text <a href=#push> at the beginning of the line, and </a> at the end of the line to convert the text to a hyperlink, and have the hyperlink jump to the section in the page which contains a tag that looks like this: ID="push".

I next went to line 183. Line 183 contains the language for the header "Example of a push to the repository." I manually inserted the text id='push' right after the beginning of the header.

First, GIT is considered a DVCS, or Distributed Version Control System, unlike centralized version control systems such as CVS, Subversion, and Perforce. GIT is more like a mini-file system which mirrors your local hard drive, just taking snapshots of your hard drive and only addressing those files which have changed. Furthermore, the different versions are distributed AND mirrored among anyone who has access rights to the files. More explaination on this right here. This link directs you to Chapter 1.3 of the "Getting Started" document which is part of the Git https://git-scm.com/
There are four protocols which Git uses:
1. Local - This is where you set up the repository on the physical hard drive on the computer you are working on. May be useful where people share the same computer. May also be useful perhaps on a submarine where you do not have access to the internet, or on a surface ship where communications is restricted.
2. HTTP - This is used where the repository is set up remotely on the internet. It is newer and more popular. To access the repository, use a user name and password to authenticate. Corporate firewalls usually allow traffic through HTTP ports.
3. SSH - This is also used to access repositories which are located on the internet. To access the repository, you must have an authentication key set up on your computer. Password authentication optional authentication.
3. GIT - This is also used to access read-only repositories which are located on the internet. Very fast, no authentication. Little overhead.
Further explaination of these protocols can be found here.
Static Site Generators, Adobe Dreamweaver
As I progressed in the weeks at Fabacademy 2017, I started compiling a lot of screenshots and files. Using the OpenOffice text editor started to get tedious. It was frustrating going from different machines which were already set up to interface with the various equipment at the local fablab. In my instance, Lorain County Community College (LCCC) was primarily a Microsoft Windows based facility with many of the machines feeding Corel CDR files and Autodesk DXF image files to produce results. Having a thumb drive is pretty essential, especially since you cannot install anything on the computers in the lab. Furthermore, the courseware suggests you try different systems, which often neccessitate different platfoms. I searched for a static site generator which would interface with Gitlabs. I thought I found one called "Middleman." I started installing it on my Mac. It is a Linux application, so I thought I may be able to get it running on my Mac. I had Xcode installed already. I figured out how to install Ruby and Gem. The more I got into it, the more cumbersome it seemed. I stepped back for a minute and thought what else I could use which would be less cumbersome. I went back to the class outline and I saw Dreamweaver. I already use Adobe Creative Cloud and have access to the entire Adobe suite of applications, so I decided to try Adobe Dreamweaver to manage my content. Dreamweaver makes writing content a little easier, and lets you switch from a coding screen to a design screen pretty painlessly. Photoshop makes it easier to crop and edit photos and screenshots as well.
I continued to work on installing Ubuntu on my 3-year-old Lenovo laptop. The laptop was all messed up from when Microsoft decided for me to upgrade it to Windows 10. After the Windows 10 upgrade, it didn't work, the screen was pitch black, and you needed a flashlight to see what was on the display. After much, much troubleshooting, I managed to get Windows 10 working well enough to proceed with Ubuntu installation. I downloaded Ubuntu from the internet and created an installation with a blank DVD-R media. I installed Ubuntu on a seperate partition. The result was a dual-boot laptop which starts up directly into Grub. Need to continue working on my dual-boot. In the interim, to invoke the Windows boot menu, you must press Fn12 during the startup logo which drives you into the Windows boot menu. From there you can select Windows. With the beginning of Fabacademy 2018, Windows 10 supports an subsystem which supports Linux. You can choose which distribution of Linux you like, such as Ubuntu, Debian, and OpenSUSE. To install, follow the instructions here: https://docs.microsoft.com/en-us/windows/wsl/install-win10.
As I progressed into week 2 and beyond, I learned about a cad package called Antimony, which was developed by Matt Keeter while at MIT. I noticed during a tutorial that Matt was using a Macbook to run Antimony. With that, I realized that it might be advantageous to have a multitude of platforms in order to try and explore different applications and packages. The Mac operating system, IOS, seems like a stripped-down Linux system. In order to use many of the applications needed for Fabacademy, you need to install Xcode, which adds many Linux commands to your terminal shell.

I installed Xcode on my Macbook and a SSH key as well which provides me a Linux shell and the ability to run Git from a command line. Make sure you have your Mac is plugged into a wall outlet. Takes a LONG time.


The 2018 cycle has much improved documentation regarding setting up your repository for your webpage, authored,and many thanks to Fiore Basile. The document which was discussed in the January 29, 2018 recitation can be found here: http://fab.academany.org/2018/recitations/gitlab.html#1
Even after listening to the recitation on Git, my repository was not working. First, my login for the 2017 cycle logged me into the 2017 archive and would not let me access the 2018 archive. I made a visit to LCCC and sat down with Chris Rohal. Chris explained to me that I had a new user id. After I got that, I cloned my repository,but I could still not push my files to my repository. I entered my problem into the problem tracker, but my local instructors were not listed. I issued the problem to Fiore, which I was very reluctant to do since he is extremely busy managing all of the student accounts. I made another trip to see Chris Rohal, and spent a good couple of hours together. Chris explained to me about a file which wasd not included inmy repository called .gitlab-ci.yml YOU MUST HAVE THIS FILE IN THE ROOT OF YOUR REPOSITORY!!!. The contents for mine is as follows:
pages:
stage: deploy
script:
- mkdir .public
- cp -r * .public
- mv .public publicartifacts:
paths:
- public
only:
- master
This file tells Gitlab how you want your work processed by Gitlab. This is a good link to read about your CI file. https://gitlab.fabcloud.org/help/ci/quick_start/README.md CI stands for Continuous Integration.
| Description: | Link: | Why you need this: |
| HTML | Learn HTML Tags Links and CSS at HTML.com | If you do nopt know any HTML, this is a good place to start learning. |
| Link where you sign into Fablabs.io repository | 2018 Repository: https://gitlab.fabcloud.org/academany/fabacademy/2018/labs/fablablccc/students/paul-oneill 2017 Repository: http://git.fabacademy.org/users/sign_in?redirect_to_referer=yes |
Get your copy your SSH key here and use it with your Linux shell when using bash and various git commands. |
| Project dashboard | http://git.fabacademy.org/ | GUI interface to project webpage. See whats going on in the remote repository. |
| How to set up your FabCloud repository | http://fab.academany.org/2018/recitations/gitlab.html#1 | Getting Started document for GitLab and FabCloud. |
| Git Extended Cheat Sheet | http://archive.fabacademy.org/archives/2017/doc/gitCheatSheet.html | A list of useful Git commands |
| Fabacademy Tutorial Living Repo | https://gitlab.fabcloud.org/academany/fabacademy/2018/docs/FabAcademy-Tutorials | A repository of useful Fabacademy tutorials |
Review management has constantly been evolving within Fabacademy. At this point in time, I am working with my local instructors to utilize the Nueval application. I started to use it during the end of the 2017 cycle and it did not work smoothly. This year, it seems to operate well on my end. However, it appears that the local instructors have not been set up properly to be able to interact in a real-time fashion. It seems that Chris Rohal was programmed by Fabacademy as the only local instructor, when Scott Zitek is actually the instructor who is supposed to be reviewing my materials. Also, there are no local instructors assigned to my issue tracker in Gitlabs. I had a discussionwith Scott about this. I suggested that Scott have Chris forward emails generated by the Nueval app. Scott is stuck on the Gitlab issue tracker. It sounds like there is a technical deficiency with the people managing the repository and this issuer cannot be resolved by the insteructors at LCCC. These issues have made it difficult to get the review process rolling, requiring me to track people, drive many miles, down and have sit down meetings only to find that things don't work as they should, and no immediate plan for a resolution. As a stop-gap, I am communicating to the local instructors by email.
My instructor, Scott Zitek, directed me to hot link each week's evaluation criteria at the beginning of each weeks page, in order to make it easier for him where to find the required information which meets review criteria. The purpose is to make sure that Ihave met the criteria of each week. Given that Nueval is not working for the instructors at LCCC, this is a good stop-gap measure.
There is a lot of information in the Gitlab tutorial. The most difficult, and misgiving part of Gitlab, is getting set up correctly. I am attempting to boil this information down to a step-by-step recipe that someone without any experience can get started without any major difficulties.
The very first thing I did was get a reliable platform. I chose a MacBook. A MacBook operating system seems to be a stripped down and slightly modified Unix/Linux system. Make sure you have ample space on your hard drive. Before you begin anything, install XCode. Make sure you are plugged in, have a lot of time to download it.
Once you have cloned the Lorain CCC remote repository to a local directory on your favorite laptop, you may begin working. I finally figured out a strategy which makes using command line commands easier. First, set up a subfolder for each week. Within each weeks subfolder, have your webpage for the week. Within the folder, have a subfolder for photos and a subfolder for files. Weed out what you don't need. I have been using Adobe Photoshop CC 2017 to edit the photos to jpg or png at a reduced resolution and quality. I finally started using Adobe Dreamweaver CC 2017 to edit my weekly web pages. I already have a subscription for this suite since I use it for wine labels. I thought I would further utilize the subscription.
Don't be afraid to not complete and spiral back to the various weeks. Keep current, and get to know the following commands:
Type in the following from terminal application on Macbook. All characters are literal. In other words, you must eneter everything EXACTLY how it looks, including upper and lower case, spaces, and so forth. The following example is for pushing the index.html file, which is the first page displayed by my website.
ls
cd Documents
cd fablab2018
cd paul-oneill
git status
git pull
git add index.html
git status
git commit -m "updating my index file"
git push
Your session should look something like this:

Oh, and every now and then, make a copy of your directory. Stash an older version away in case somethinghappens to your computer,or the repository. You should do your work in a local directory and move the items you are happy with and want to publish to yourr local repository, which in my case was a directory named "./Documenmts/fablab2018/paul-oneill"
During the 2017 cycle, during the weeek which covered 3Dscanning, I added some files which were excessively large. This was further complicated by the repository crashing during the beginning of the cycle. This year, Fabacademy had Fiore Basile present two recitations regarding GIT. I thought the recitations were immensely helpful, and the supporting documentation is also very helpful. There is a page regarding Large Files which canbe found here:
http://fab.academany.org/2018/recitations/version-control.html#57
Since I amusing a Mac, from my command line terminal, I typed:
port install git-lfs
...and 5 minutes later I got multiple screens of stuff which I didn't understand. However, the last few lines seemed meaningful:
Downloading https://homebrew.bintray.com/bottles/git-lfs-2.4.0.high_sierra.bottle.tar.gz######################################################################## 100.0%==> Pouring git-lfs-2.4.0.high_sierra.bottle.tar.gz==> CaveatsUpdate your git config to finish installation:
# Update global git config $ git lfs install
# Update system git config $ git lfs install --system==> Summary🍺 /usr/local/Cellar/git-lfs/2.4.0: 65 files, 8.4MBPauls-MacBook-Pro-2:paul-oneill paul$
I will need to learn more about large file system. I have contacted my instructor about using this. In the interim, I will be investing time exploring the following link: