Tasks:
- Evaluate and select 2D and 3D software
- Demonstrate and describe processes used in modelling with 2D and 3D software
2D Design: Raster + Vector
AutoCAD
CorelDRAW
Photoshop
Illustrator
Graphtec Studio
Raster vs. Vector
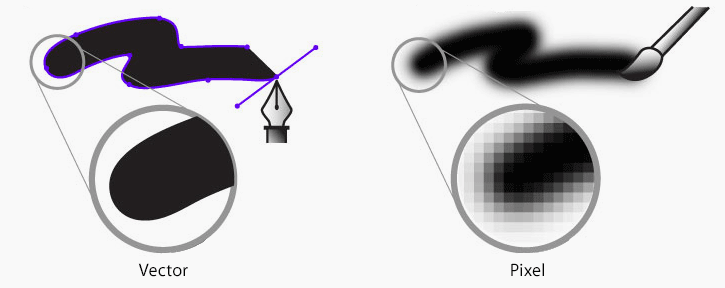
There are two main type of image files: Raster and Vector. Raster images consist of pixel-based programs or captured with a camera or scanner and are more common than vector images. They are commonly seen as jpg, gif, png, etc. Vector images are created through vector softwares and are the typically images that will be applied onto a physical product. Vectors are also used in CAD, engineering, 3D graphics, and graphic design applications.
I am fairly comfortable with photoshop, and have used it in all of the images on my site: touch ups & adjustments, cropping, rotating, image sizing, etc. If I need to draw something out, I usually will create the vectors in illustrator, and then import them in photoshop as a .png layer, and manipulate things from there.
Vector
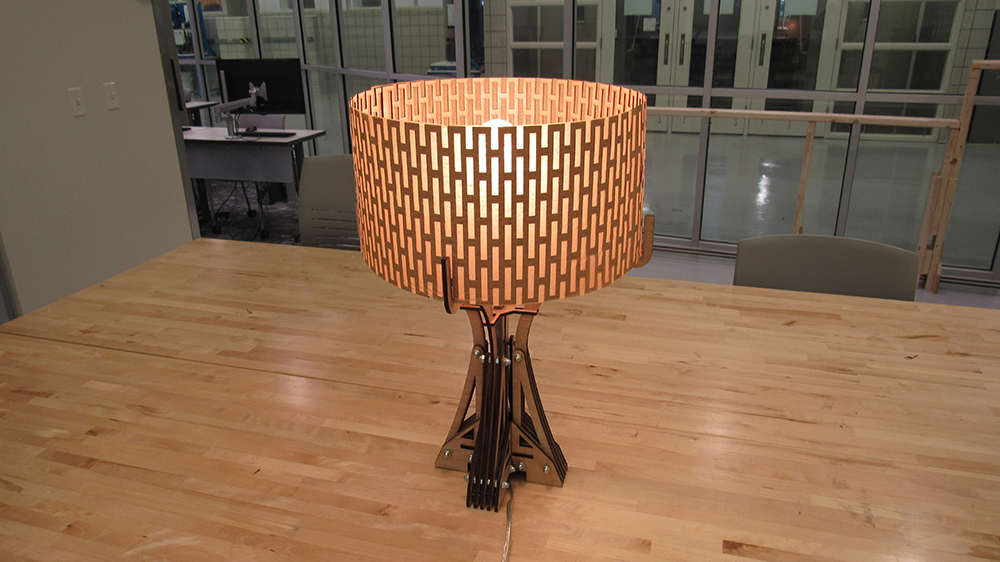
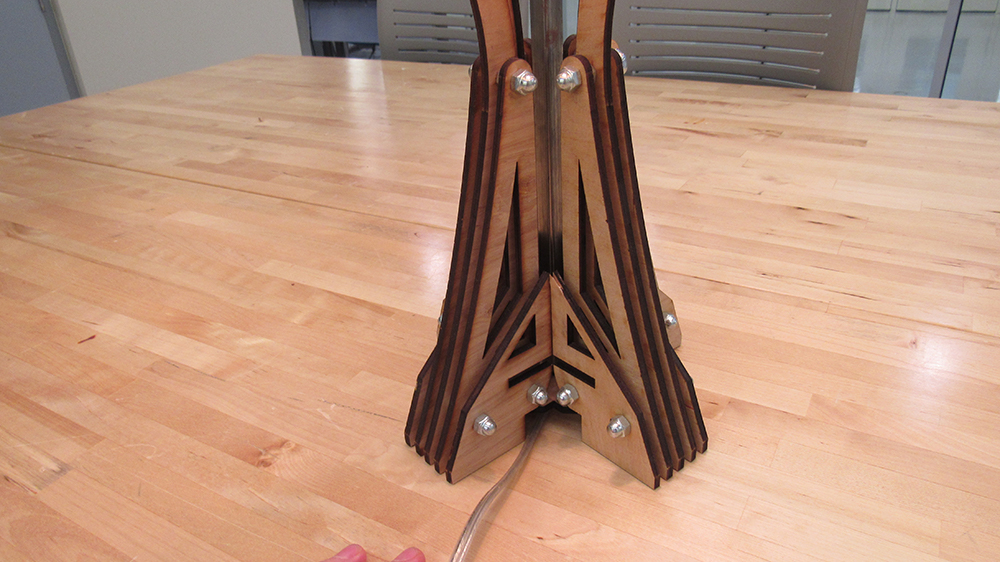
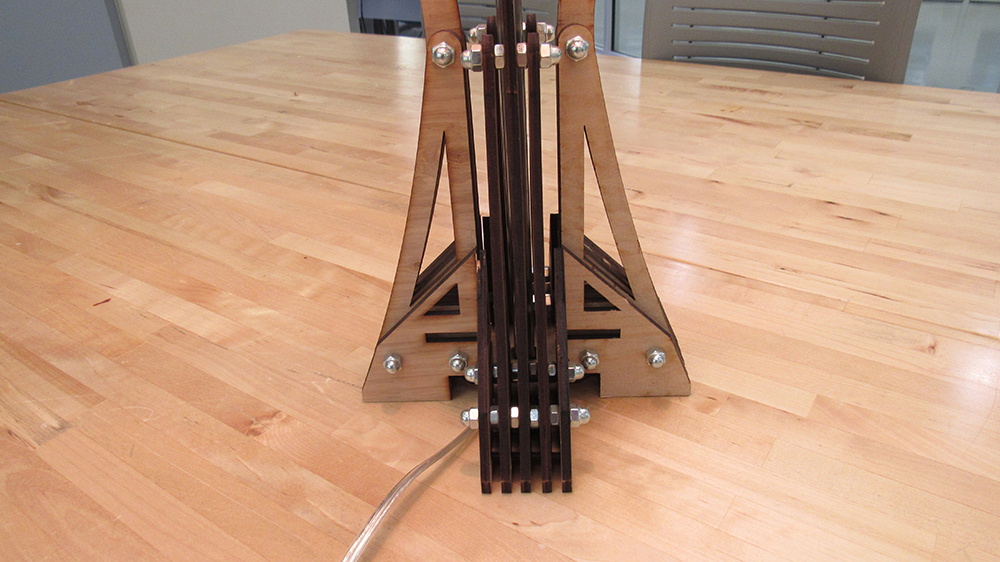
CorelDRAW is the standard program we use with our laser cutter. It is an underwhelming program similar to photoshop + illustrator. For this week, my project for 2D is designing and cutting out of wood the body components for a table lamp.
These lines are all Hairline weight vector lines, so the laser will read it as cutting paths.
I got all the pieces cut out, drilled some holes for 1/4" threaded rods, nuts, and caps. I also decided to make a living hinge lamp shade out of two pieces of a 3mm thick 8"x 24" basswood that I had adhered some paper to for light diffusion.
Raster
Back to Photoshop, while I am still on a mandala craze, I decided to make a couple while testing out some surface technique ideas I have. Using the laser, I'll burn off layers to reveal the base surface underneath.
With another mandala I made in AutoCAD (see Week 4), I imported it into CorelDRAW. All the lines started as vectors, thus, very thin. I selected different groups of curves and assigned them varrying line weights to achieve a look I liked through Corel; In doing this, I have now converted them into raster components of a raster image
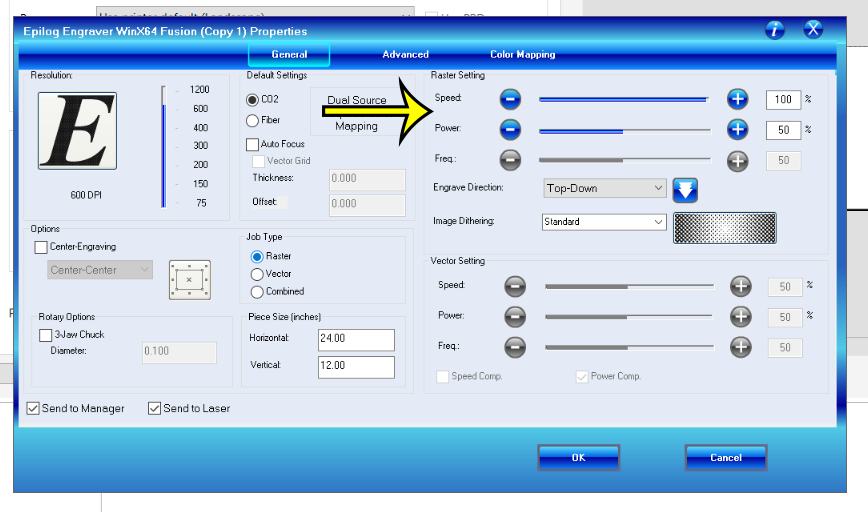
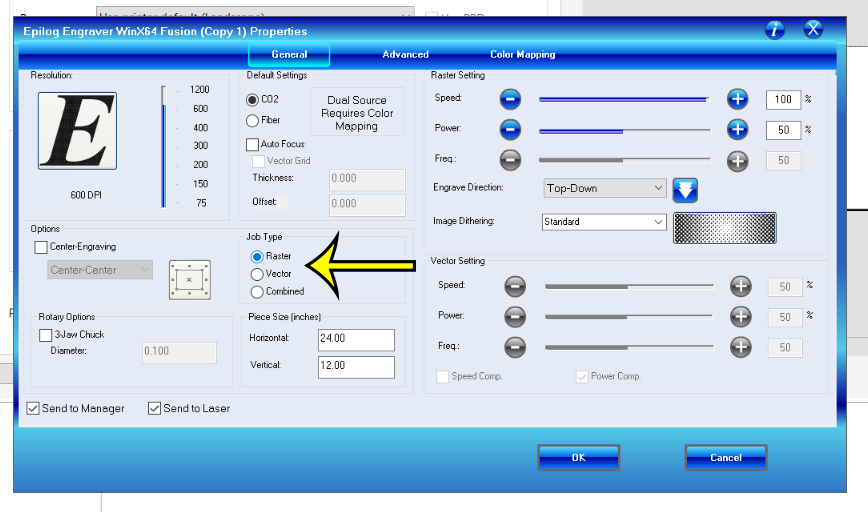
Once I had everything arranged the way I wanted it, made sure none of the lines were vectors (or of "hairline" thickness), and centered the image on my workpiece, I am ready t send to the laser. Our laser reads raster images as portions to engrave.
Once I had it set to vector, Set the correct piece size to match the artboard size in Corel, and adjust the laser settings, I am all set to engrave.
3D Design
Rhino
Solidworks
One of the few things in this course I am already somewhat capable at, for 3D designing I primarily use Rhino and Solidworks. This week, I want to make a type of 'trophy-like vase' with both 3D printed and laser cut components. This project is perfect for all aspects of this assignment, and will hopefully look great when it's finished.
First, I started playing with some vase-forms, and then began narrowing down which ones I liked.
After I narrowed a few down, I begoan work on a pattern for the exterior of the vase-form. I like to take a break from working on the same object for an extended period to give myself sometime to think of other things and come back to it with a refreshed mind
Once I finished coming up with a shape, using the Array transformation, I aArrayed it linearly to form a row of about 50 'cells'. Once that row was formed, I arrayed the row linearly down to make a sheet 8 rows deep. Once I had my surface made, I used a 'Boolean Union' command to join all the pieces into one closed polysurface. From here, I can manipulate the surface as I like, and will wrap the vase-form with it. To do this, I will use the 'Flow Along Surface' Transformation
This is after I trimmed off the extra cells that overlapped on the cell sheet I prepared, and I scaled the vase-form so that the cell sheet ends meet perfectly and the pattern appears to be seamless.
Now, I start mapping out the base layers I will cut out of acrylic on the laser. I want to get an idea of how the whole thing will look together, so I draw one shape and copy it multiple times, altering it slightly each time, and then organize them all in a stack.
.png)
.png)
.png)
.png)

.png)
.png)
