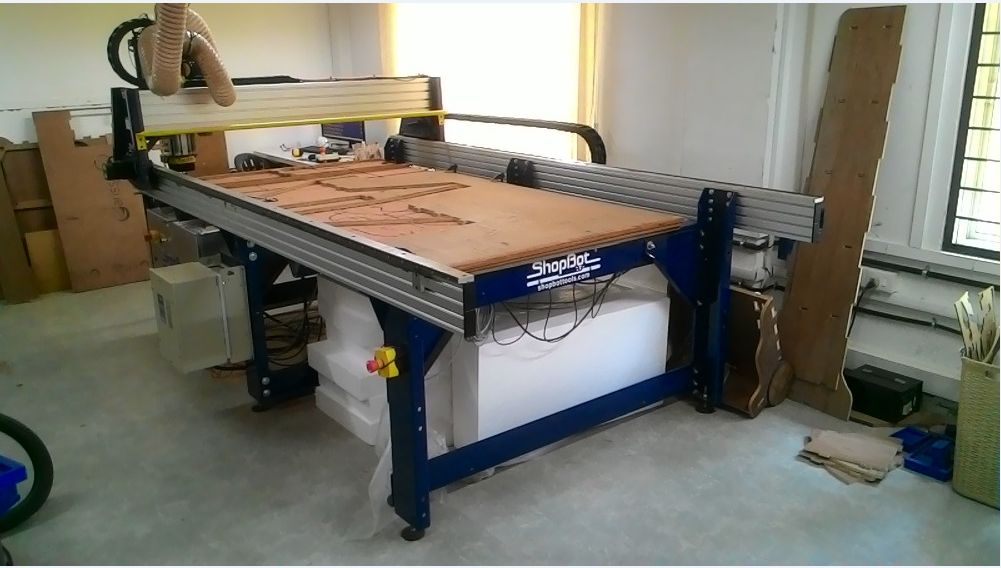
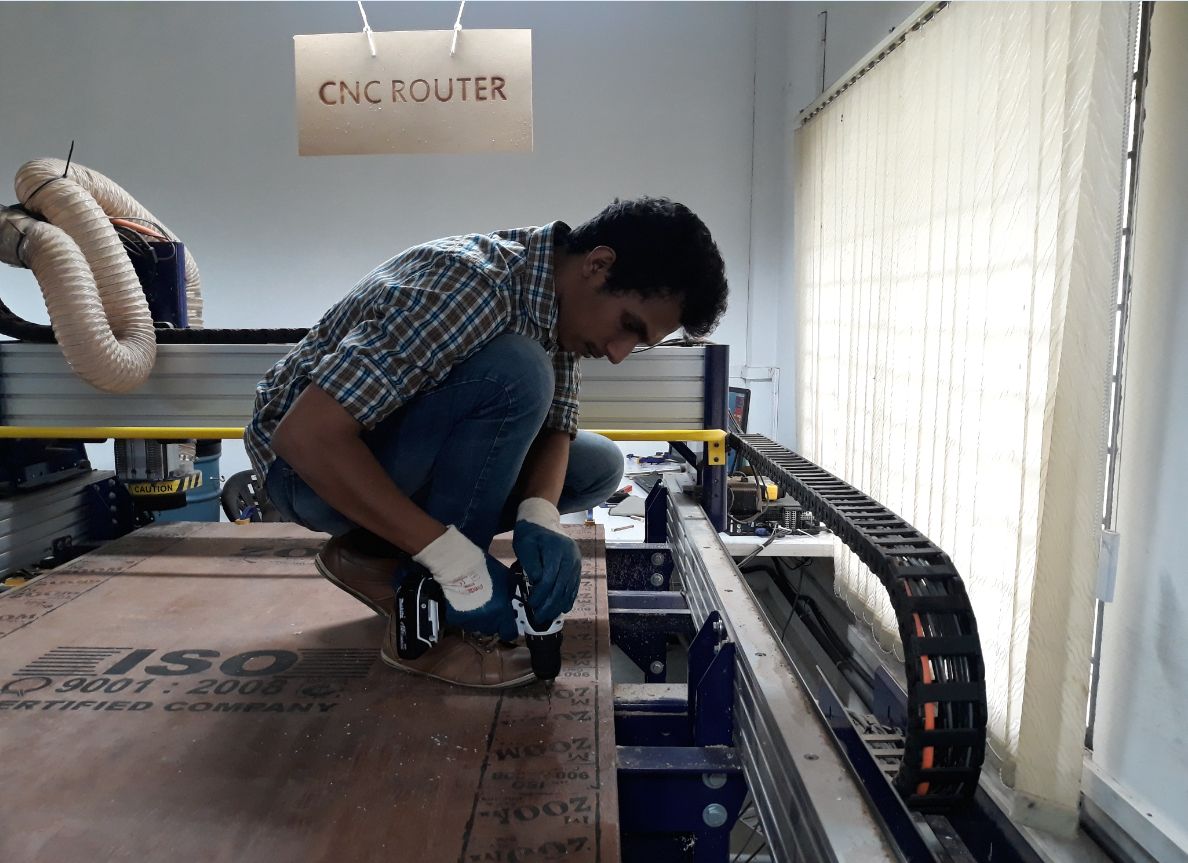
Shopbot is a large machine with bed size of 8x4. It performs operations on plywood.
This week is about making something big. The lab is equipped with a CNC wood cutting and milling machine.
Its called the Shopbot.
Shopbot is a large machine with bed size of 8x4. It performs operations on plywood.
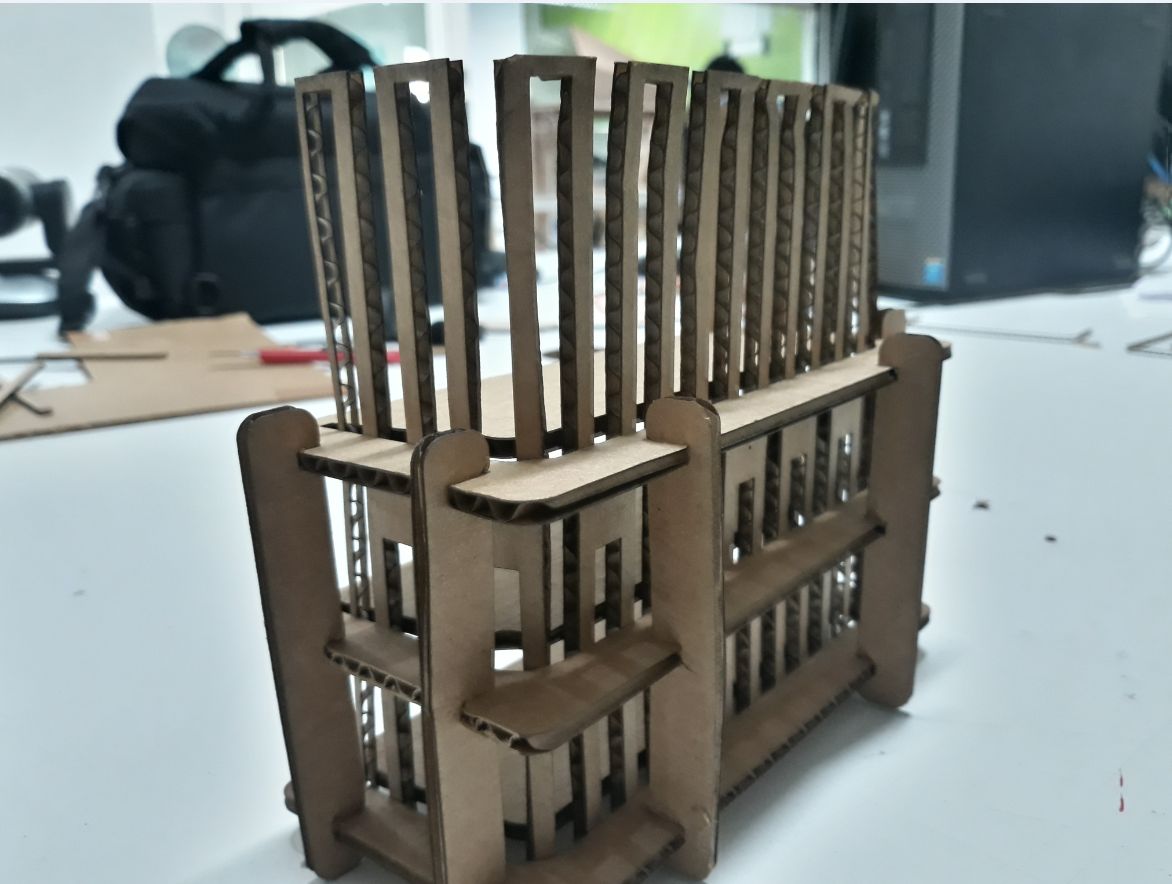
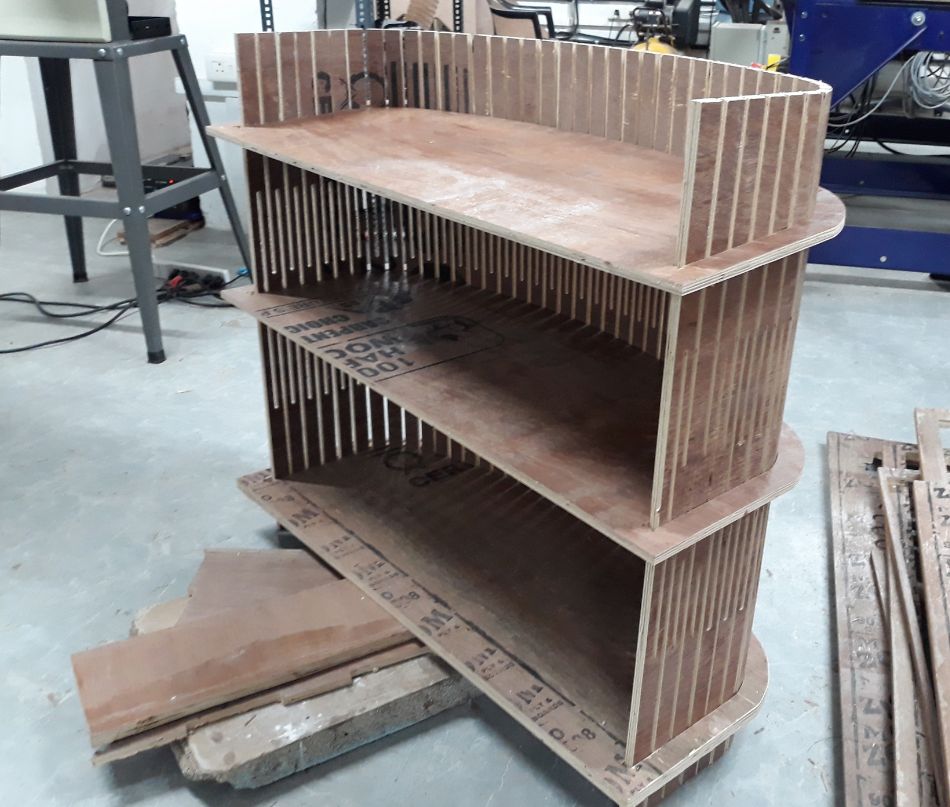
When the assignment was given, the first thing that came to my mind was to build a furniture that could be used in the lab. The idea of building tables and chairs didnt quite fascinate me. I thought of implementing a minimalistic design yet something that appears beautiful and usable. I then decided to build a shelf with two racks held together with a living hinge. The living hinge itself will act as the base of the shelf.
I designed the shelf using Solidworks and made a miniature model of the shelf scaled to the ratio 1:5. Below is the design
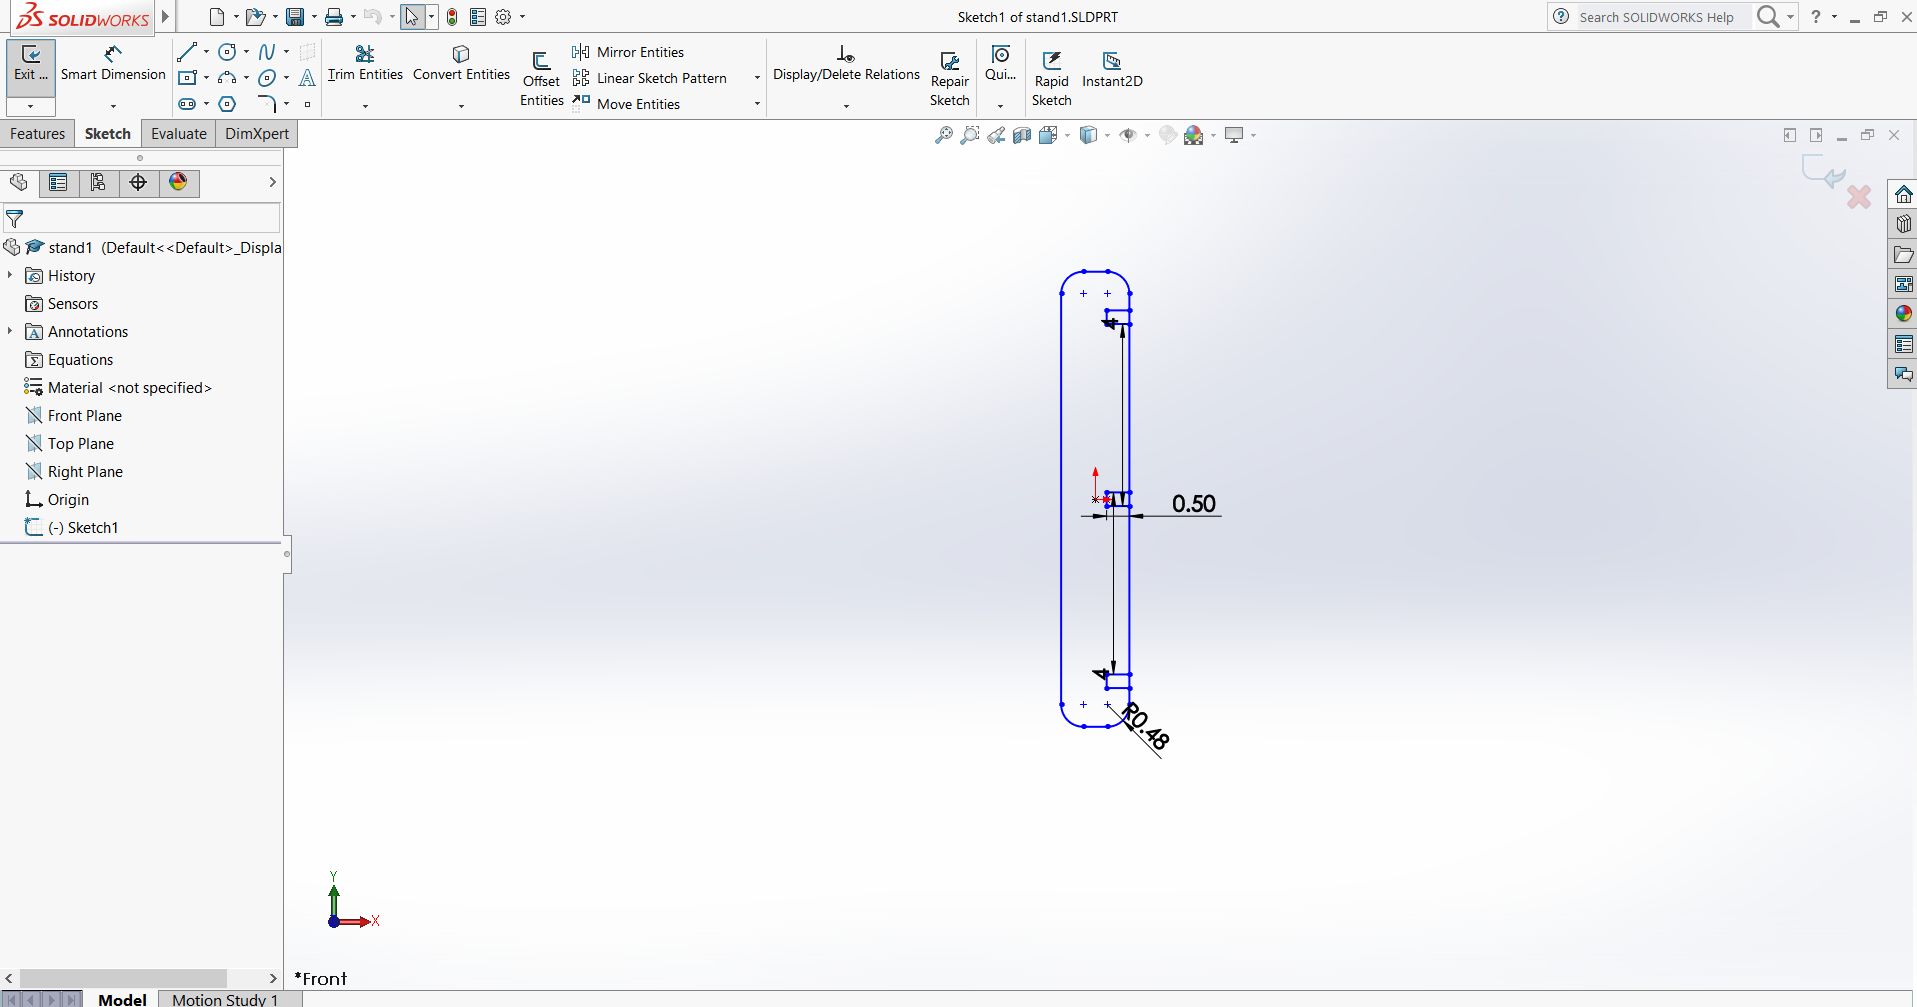

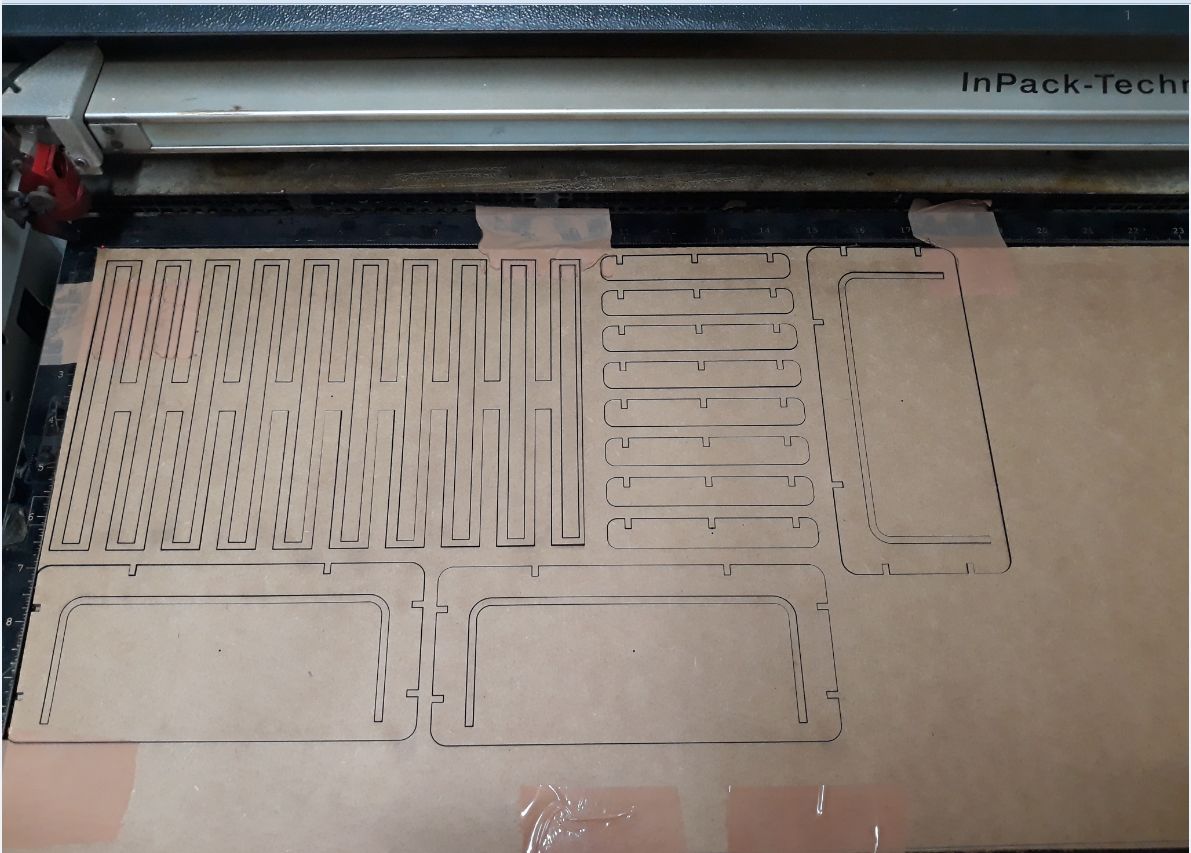

It is difficult to insert the living hinge into the recess provided , though i had provided clearance for pushing it through. I suppose this is because the living hinge design has wider links. Hence i have to redesign a hinge that has cuts quite closer to each other so that it bends more smoothly. Also ply wood will not yield as easily as cardboard hence more clearance needs to be given.
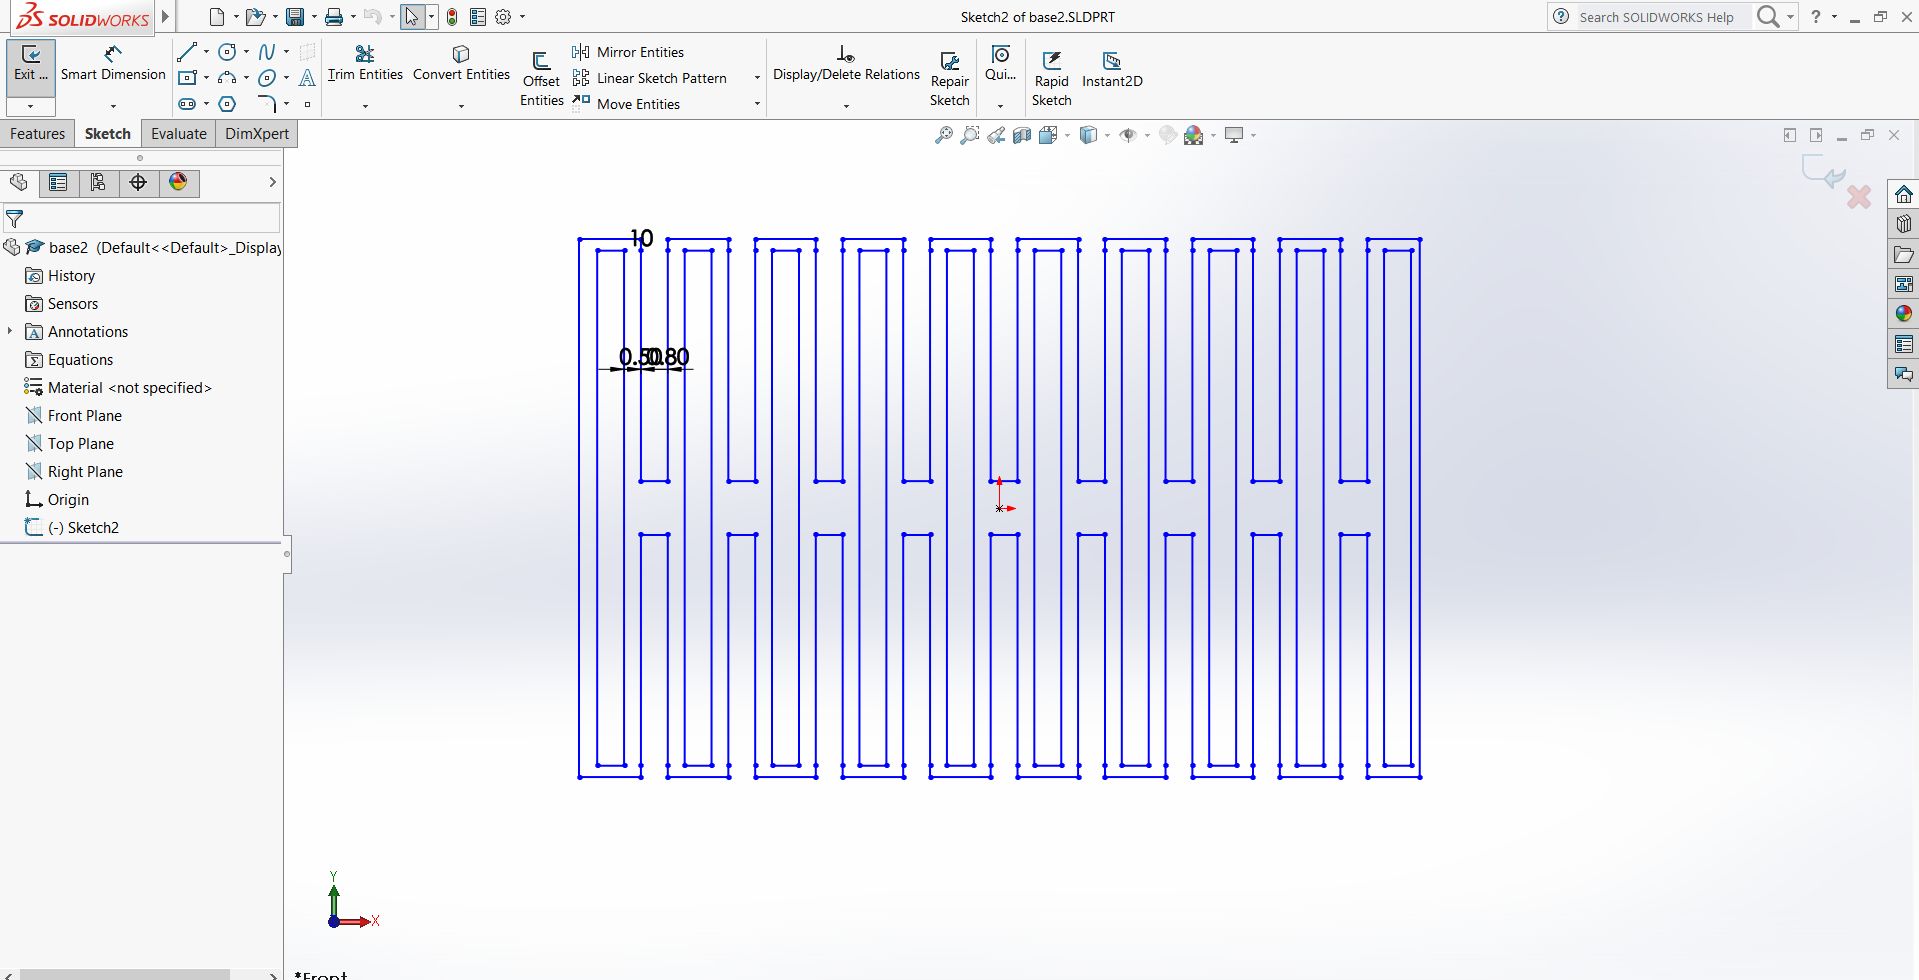
The changed the hinge design to strokes only design. This helped me achieve a narrower link in the hinge, in this way it was easy to bend the hinge through the recess. Also after regional review, I was guided to change the recess design slightly so that the bends are not so sharp. Hence considering all the faults with the intial design I changed my deisgn to this.
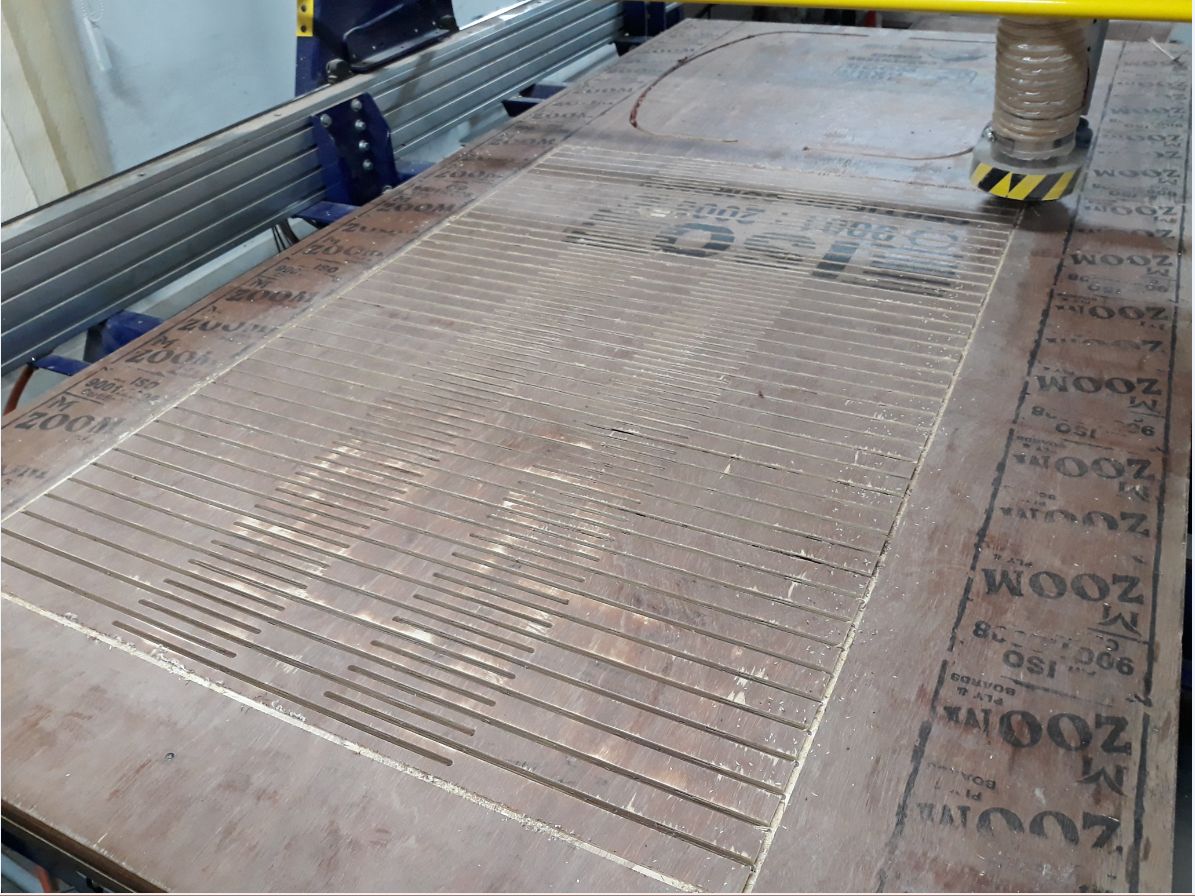
The distance between the stroke were set to 1.5 cm so that during cutting the strokes don't merge as the diametre of the drill bit was 6 mm. Hence the strokes were placed accordingly. Once the design was completed it was exported as DXF file.
The design file is imported to VCarve software where the components are arrannged in th work space. The sheet available in the lab is of the dimension 8' x 4'. Hence the dimension of the workspace is set in VCarve. The components are arranged in such a way that most of the space is utilised.
For the purpose of fixing the working material (plywood) on the bed, screws are used. Using VCarve the screw locations are set. In this way the user gets a clear idea where to place the screws. If the screws are randomly placed , there are chances that the drill bit may pass through the screww and this will cause damage to the machine. The machine marks the location of the screws with a 1mm deep holes. The screws are then fixed manually.
The DXF file is imported to VCarve. The contours for cutting are selected in the design and the
operation is selected.
Parameters to adjust
After generating all the path for various operations save the file to a suitable location. Now open shopbot software and select cut file
If for some reason there is a manfunctioning of the machine or other incidents that could harm the machine, the machine can be stopped immediately by pressing the stop button .
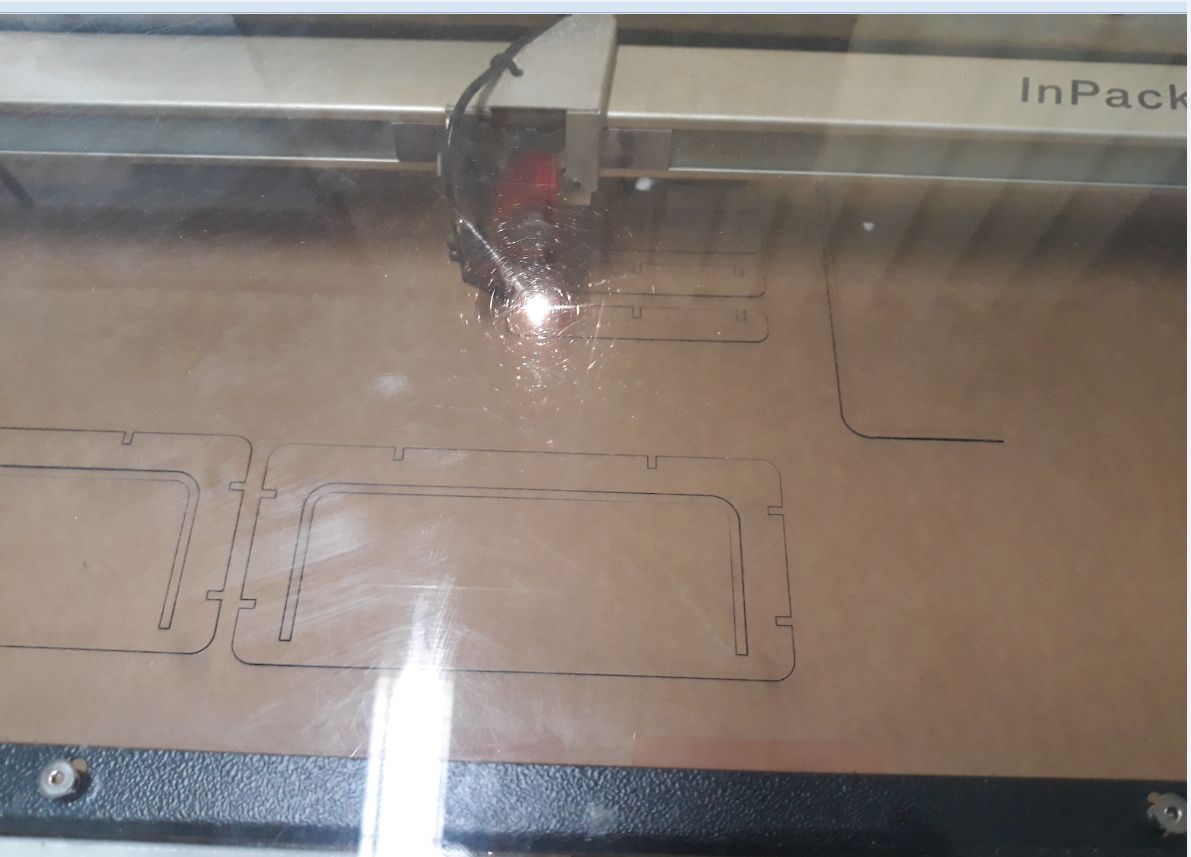
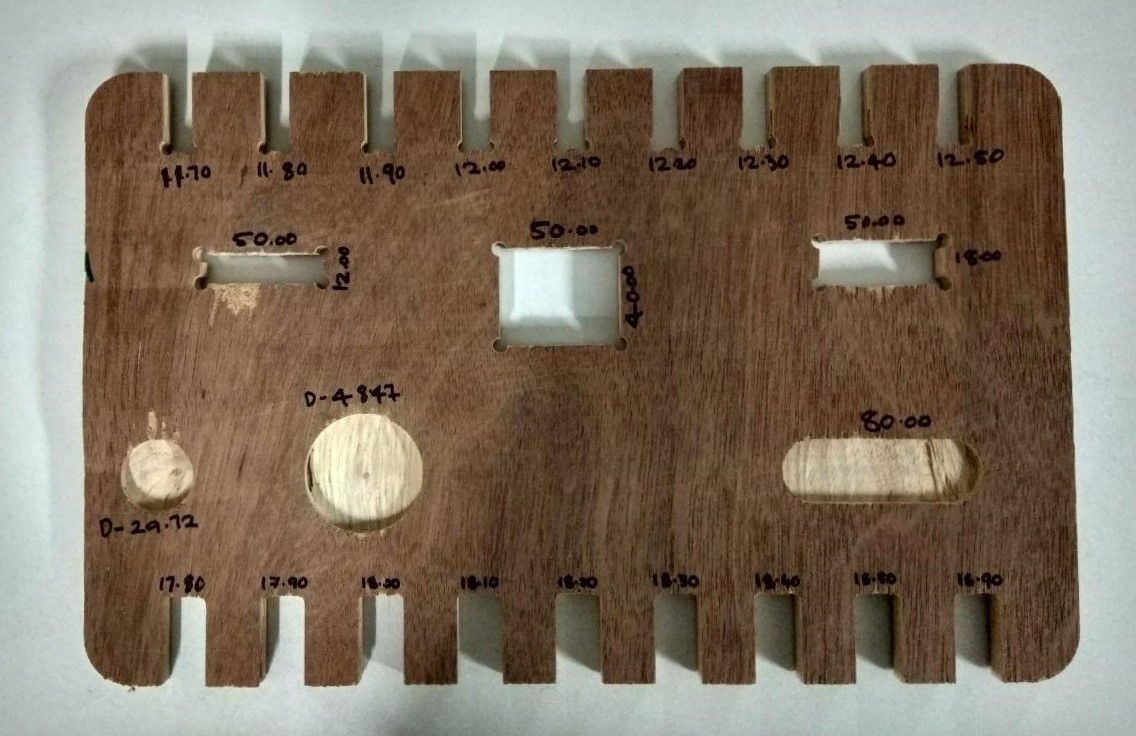
Before proceeding with making the cut , we had to make a test cut. This will help us understand more about the runout, alignment,speeds, feeds, and toolpaths for our machine. So we made a test design to learn about the machine tolerances
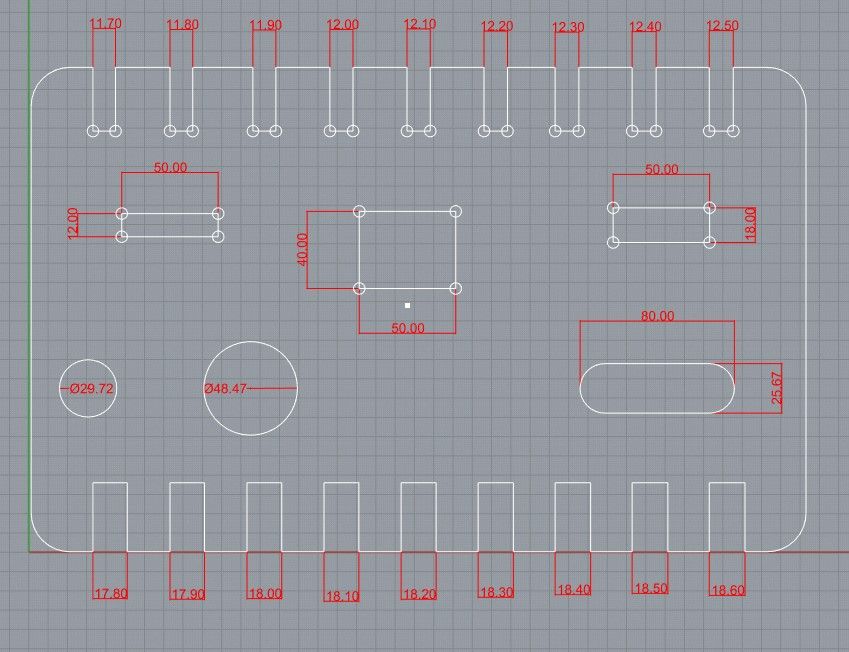
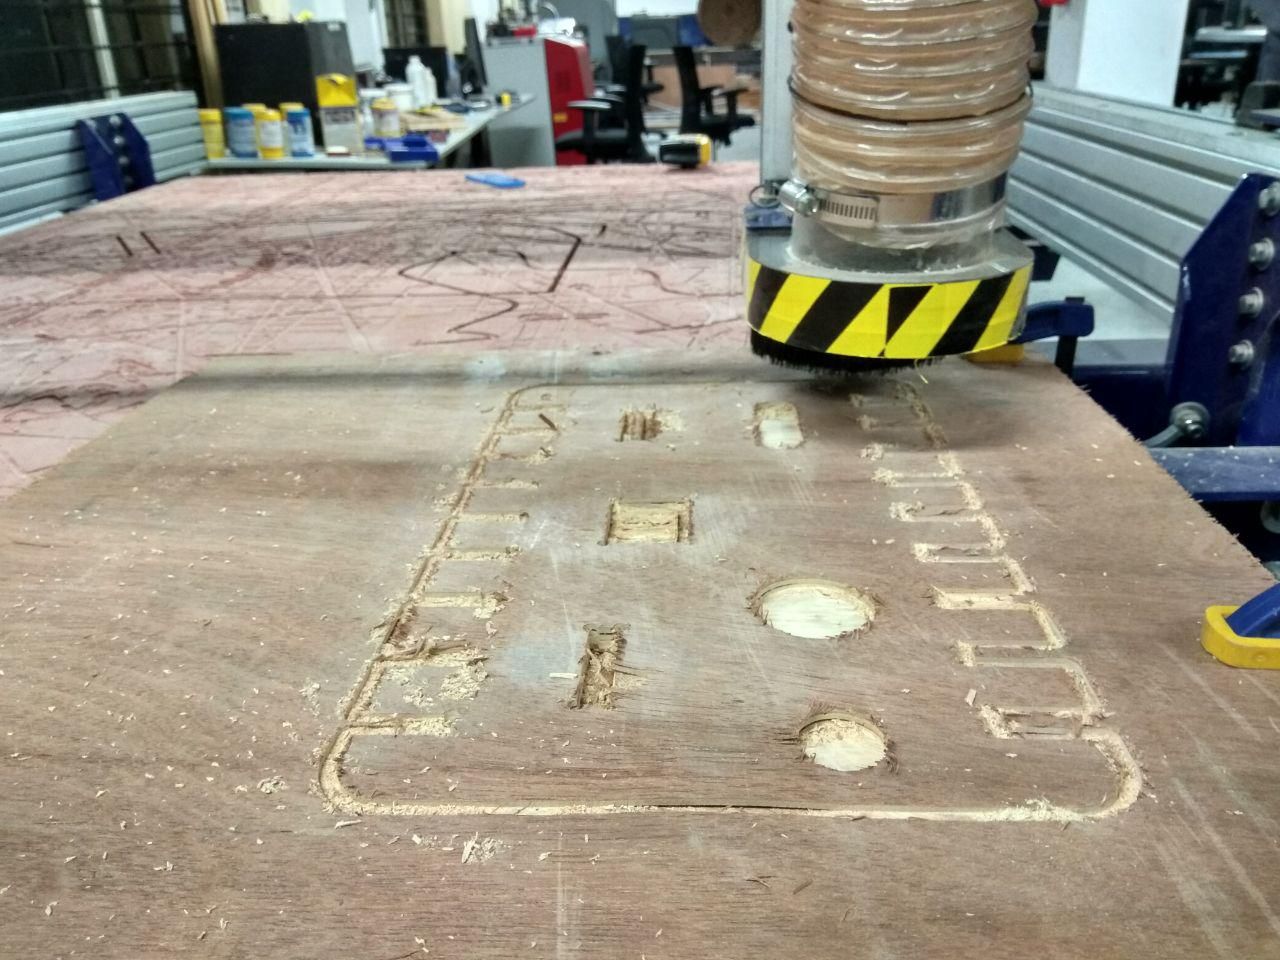
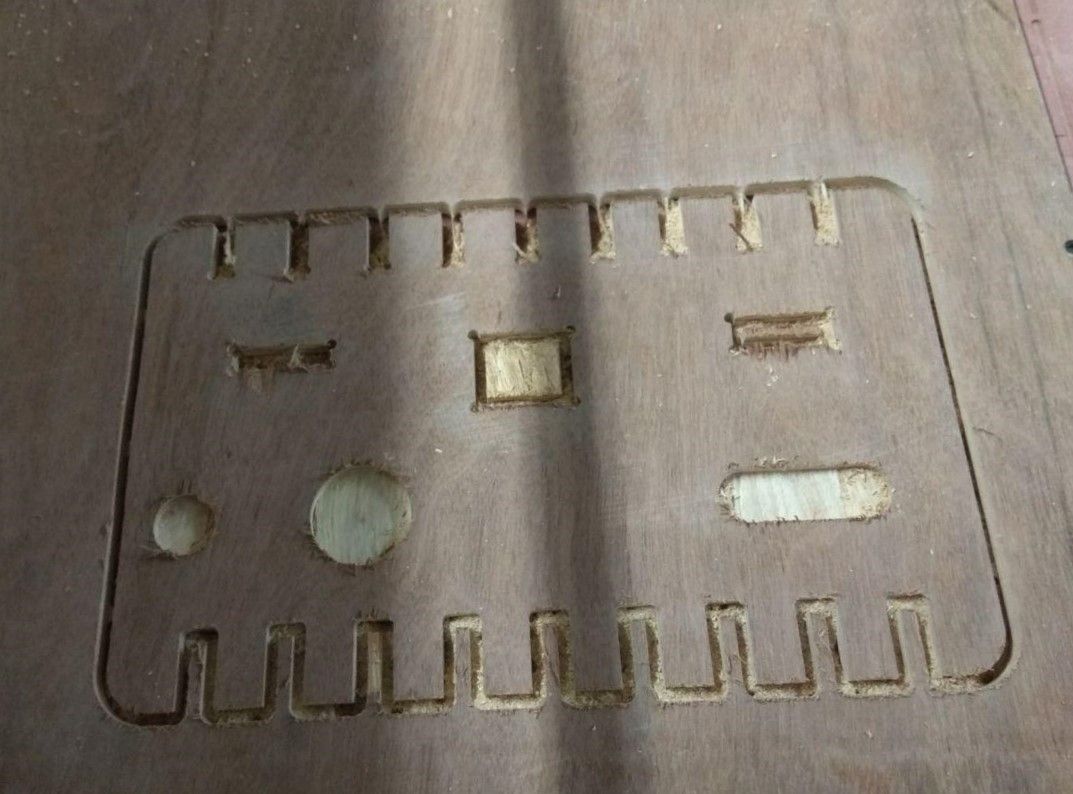
Test cut Hero shot
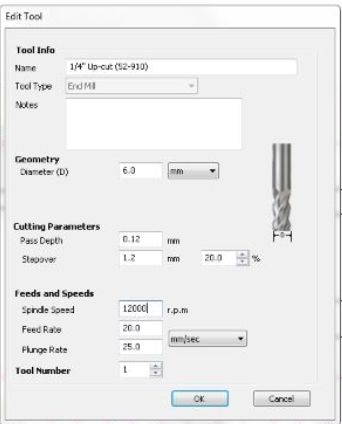
The cutting parametres have an important role in the machining process. Here we set the spindle speed, feed rate etc.. for the machine.

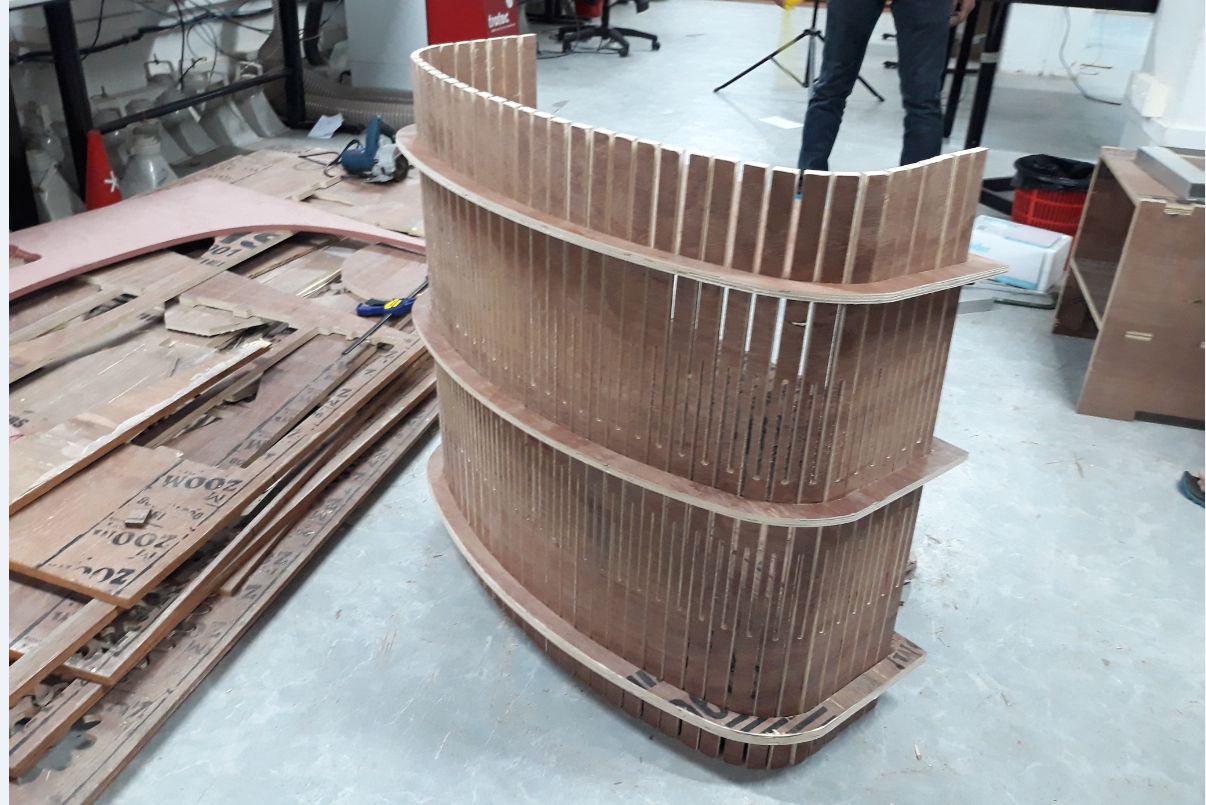
The final product was perfect. The hinge bent successfully and could be fit in the recess easily.
The tightness was sufficient but not sufficient enough to hold the racks in place. In oroder the keep the racks
in place L clamps were used.
Click below links to download design files