sudo apt-get install flex byacc bison gcc libusb-dev avrdude
sudo apt-get install gcc-avr
Then type:
sudo apt-get install avr-libc
sudo apt-get install libc6-dev
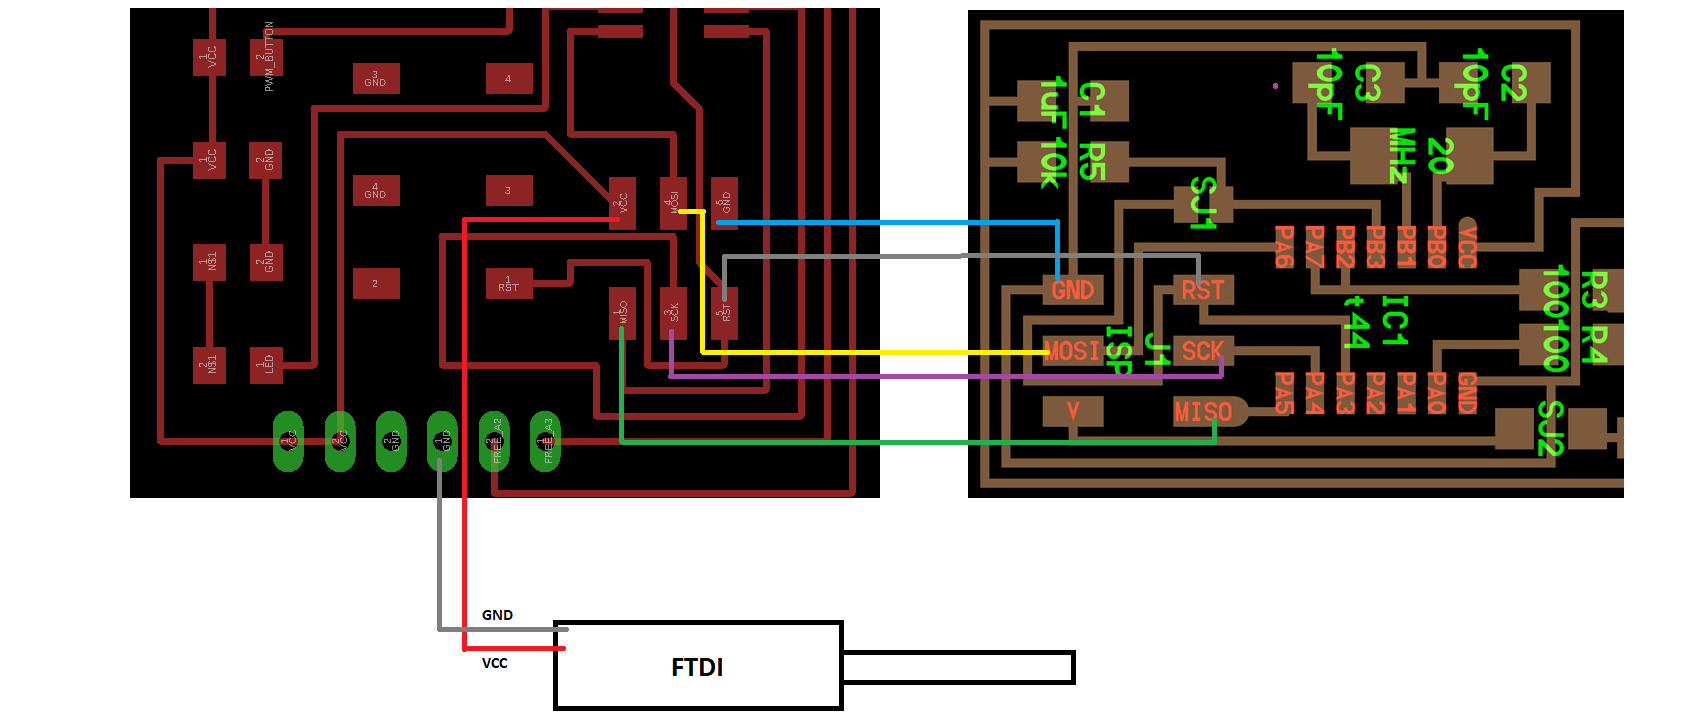
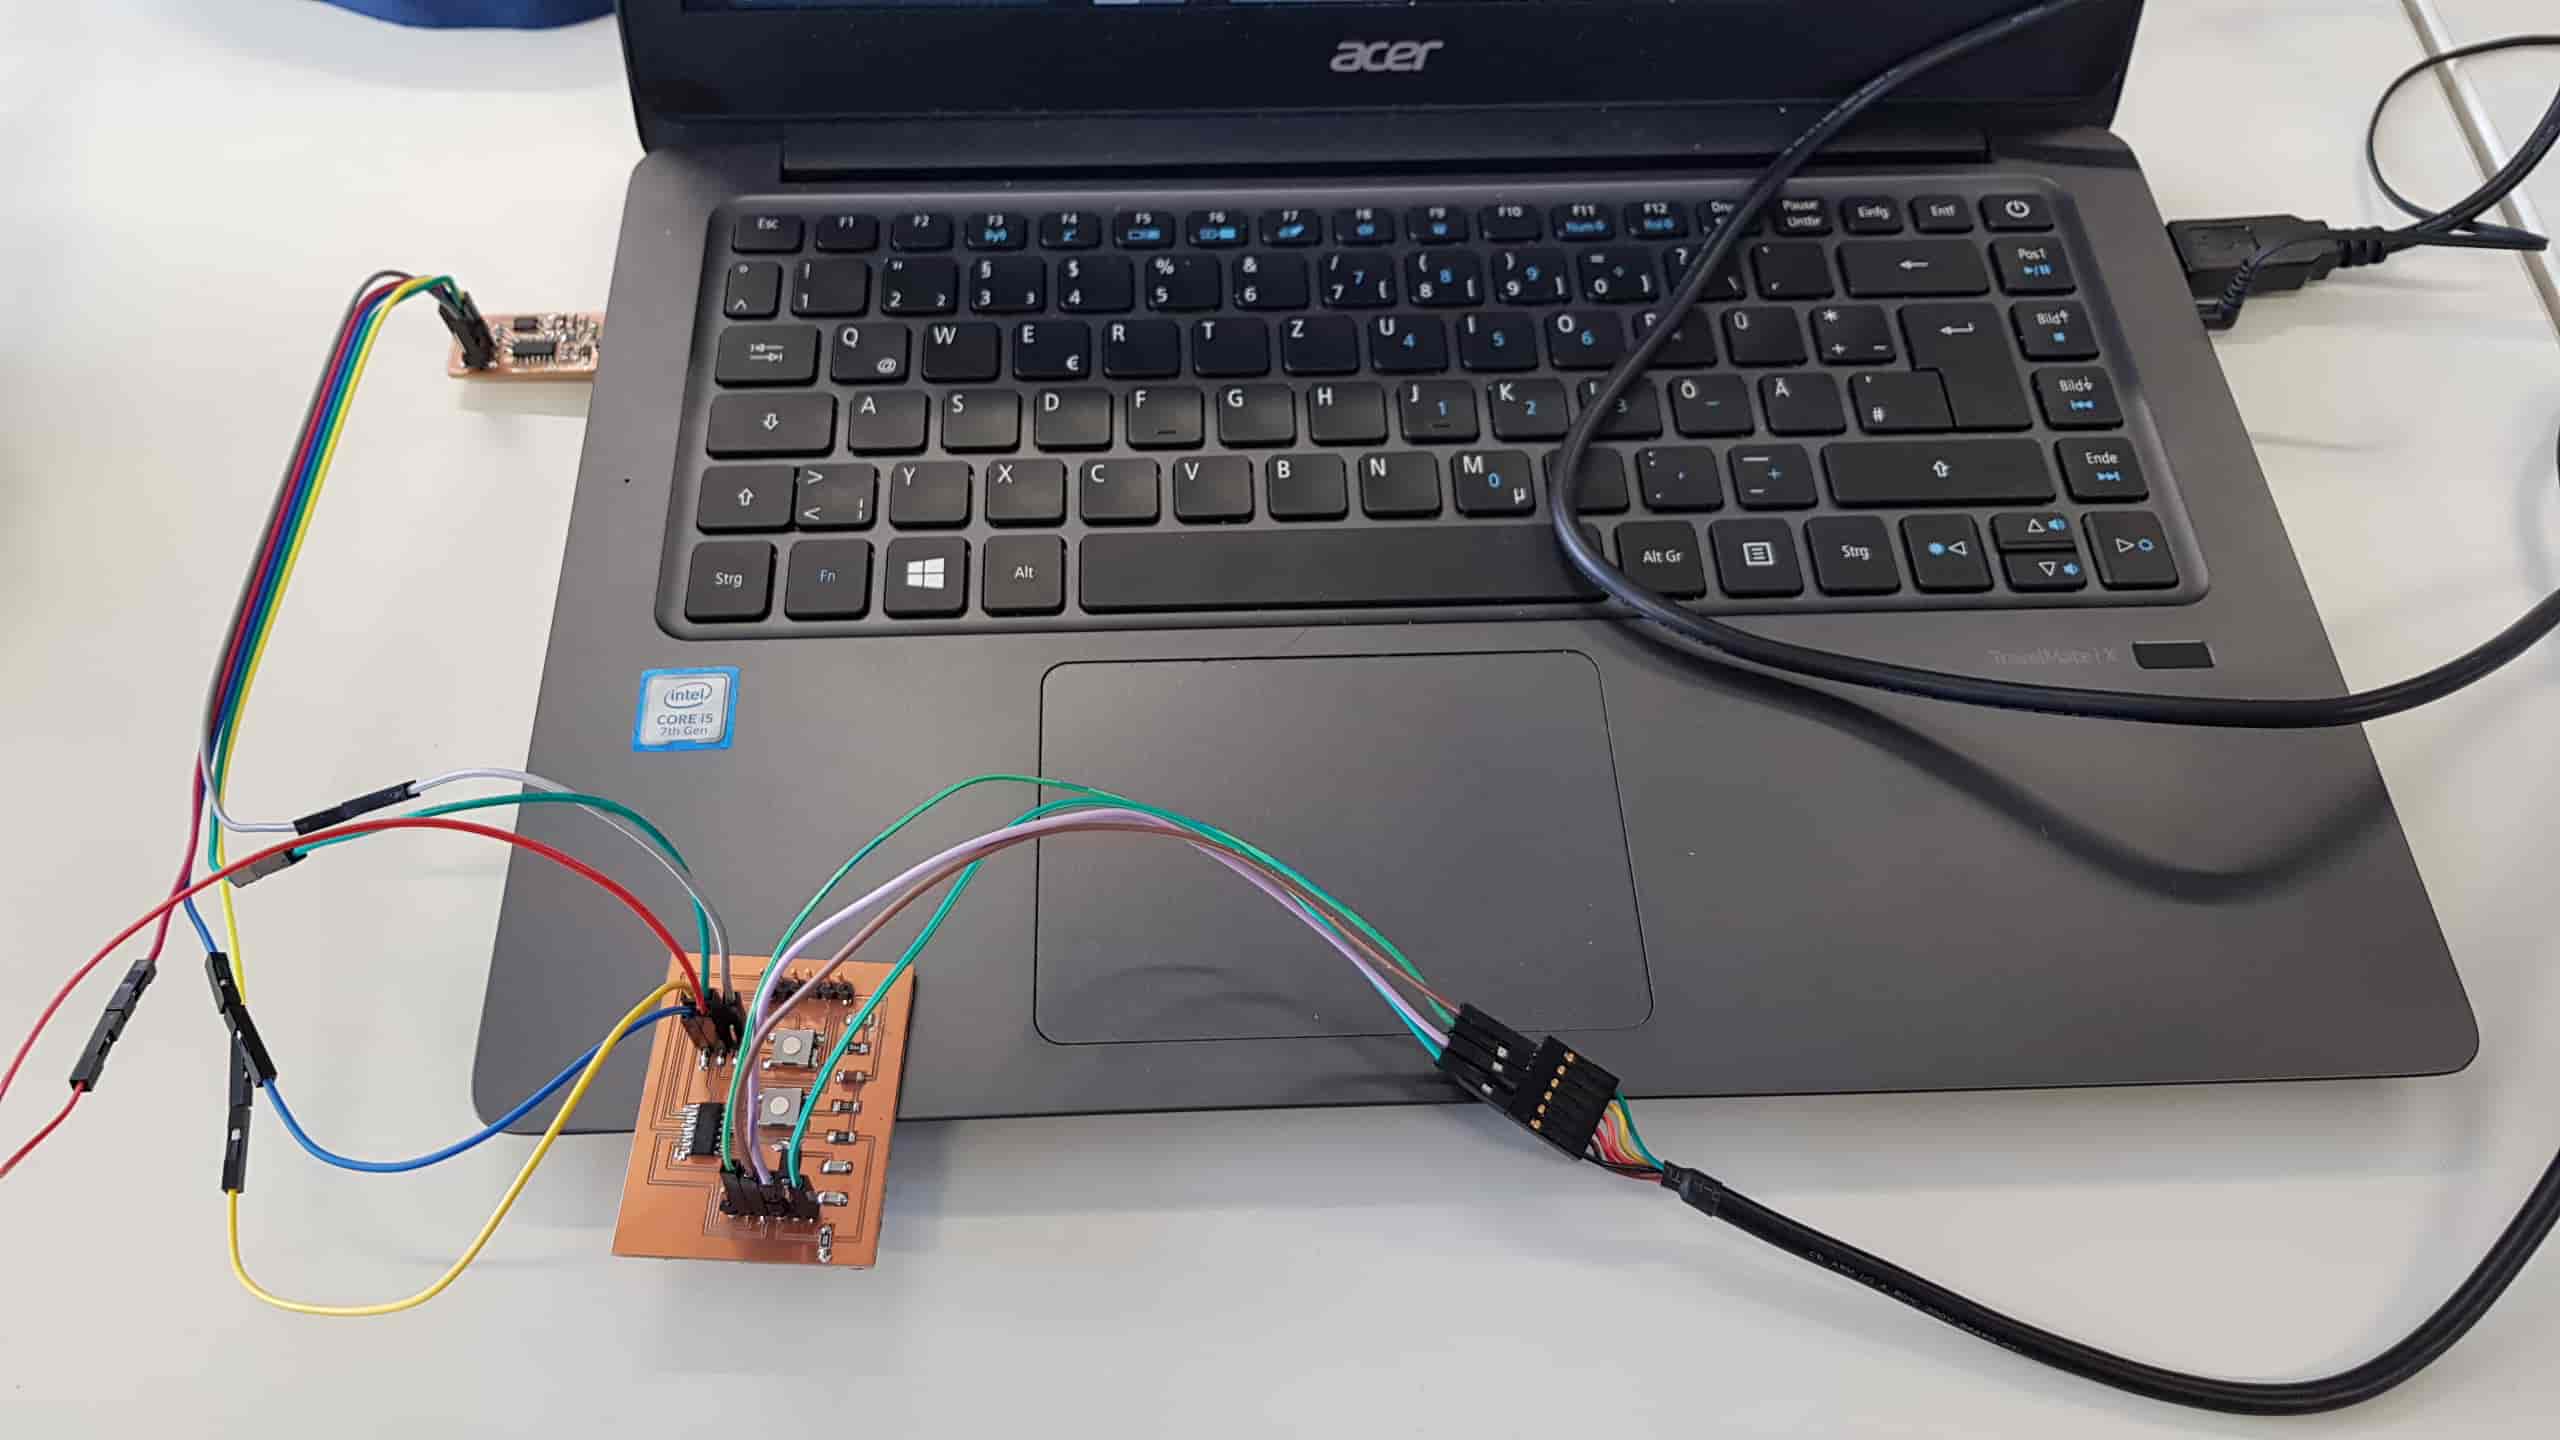
-MOSI to -MOSI
-MISO to -MISO
-SCK to -SCK
-RESET to -RESET
-GND to -GND
To power my HelloBoard I have used the FTDI cable.
            PROJECT=hello.ftdi.44.echo.interrupt
            SOURCES=$(PROJECT).c
            MMCU=attiny44
            F_CPU = 20000000

            CFLAGS=-mmcu=$(MMCU) -Wall -Os -DF_CPU=$(F_CPU)

            $(PROJECT).hex: $(PROJECT).out
              avr-objcopy -O ihex $(PROJECT).out $(PROJECT).c.hex;\
              avr-size --mcu=$(MMCU) --format=avr $(PROJECT).out

            $(PROJECT).out: $(SOURCES)
              avr-gcc $(CFLAGS) -I./ -o $(PROJECT).out $(SOURCES)

            program-bsd: $(PROJECT).hex
              avrdude -p t44 -c bsd -U flash:w:$(PROJECT).c.hex

            program-dasa: $(PROJECT).hex
              avrdude -p t44 -P /dev/ttyUSB0 -c dasa -U flash:w:$(PROJECT).c.hex

            program-avrisp2: $(PROJECT).hex
              avrdude -p t44 -P usb -c avrisp2 -U flash:w:$(PROJECT).c.hex

            program-avrisp2-fuses: $(PROJECT).hex
              avrdude -p t44 -P usb -c avrisp2 -U lfuse:w:0x5E:m

            program-usbtiny: $(PROJECT).hex
              avrdude -p t44 -P usb -c usbtiny -U flash:w:$(PROJECT).c.hex

            program-usbtiny-fuses: $(PROJECT).hex
              avrdude -p t44 -P usb -c usbtiny -U lfuse:w:0x5E:m

            program-dragon: $(PROJECT).hex
              avrdude -p t44 -P usb -c dragon_isp -U flash:w:$(PROJECT).c.hex

            program-ice: $(PROJECT).hex
              avrdude -p t44 -P usb -c atmelice_isp -U flash:w:$(PROJECT).c.hex
            PROJECT=main # Another Projectname
            SOURCES=$(PROJECT).c
            MMCU=attiny84 # here I have changed the MCU too
            F_CPU = 20000000
            MCU=t84 #here we I have addead an additional varialble, so we can change it instantly, an not change it from line to line

            CFLAGS=-mmcu=$(MMCU) -Wall -Os -DF_CPU=$(F_CPU)

            $(PROJECT).hex: $(PROJECT).out
              avr-objcopy -O ihex $(PROJECT).out $(PROJECT).c.hex;\
              avr-size --mcu=$(MMCU) --format=avr $(PROJECT).out

            $(PROJECT).out: $(SOURCES)
              avr-gcc $(CFLAGS) -I./ -o $(PROJECT).out $(SOURCES)

            program-bsd: $(PROJECT).hex
              avrdude -p $(MCU) -c bsd -U flash:w:$(PROJECT).c.hex # and here we have replaced the t84 with $(MCU)

            program-dasa: $(PROJECT).hex
              avrdude -p $(MCU) -P /dev/ttyUSB0 -c dasa -U flash:w:$(PROJECT).c.hex

            program-avrisp2: $(PROJECT).hex
              avrdude -p $(MCU) -P usb -c avrisp2 -U flash:w:$(PROJECT).c.hex

            program-avrisp2-fuses: $(PROJECT).hex
              avrdude -p $(MCU) -P usb -c avrisp2 -U lfuse:w:0x5E:m

            program-usbtiny: $(PROJECT).hex
              avrdude -p $(MCU) -P usb -c usbtiny -U flash:w:$(PROJECT).c.hex

            program-usbtiny-fuses: $(PROJECT).hex
              avrdude -p $(MCU) -P usb -c usbtiny -U lfuse:w:0x5E:m

            program-dragon: $(PROJECT).hex
              avrdude -p $(MCU) -P usb -c dragon_isp -U flash:w:$(PROJECT).c.hex

            program-ice: $(PROJECT).hex
              avrdude -p $(MCU) -P usb -c atmelice_isp -U flash:w:$(PROJECT).c.hex
sudo make -f hello.make program-usbtiny-fuses
            overflow@OverFlow:~$ cd
            overflow@OverFlow:~$ clear
            overflow@OverFlow:~$ cd Hellotest/
            overflow@OverFlow:~/Hellotest$ sudo make -f hello.make program-usbtiny-fuses
            [sudo] password for overflow:
            avr-objcopy -O ihex main.out main.c.hex;\
            avr-size --mcu=attiny84 --format=avr main.out
            AVR Memory Usage
            ----------------
            Device: attiny84

            Program:     988 bytes (12.1% Full)
            (.text + .data + .bootloader)

            Data:         12 bytes (2.3% Full)
            (.data + .bss + .noinit)


            avrdude -p t84 -P usb -c usbtiny -U lfuse:w:0x5E:m

            avrdude: AVR device initialized and ready to accept instructions

            Reading | ################################################## | 100% 0.00s

            avrdude: Device signature = 0x1e930c (probably t84)
            avrdude: reading input file "0x5E"
            avrdude: writing lfuse (1 bytes):

            Writing | ################################################## | 100% 0.00s

            avrdude: 1 bytes of lfuse written
            avrdude: verifying lfuse memory against 0x5E:
            avrdude: load data lfuse data from input file 0x5E:
            avrdude: input file 0x5E contains 1 bytes
            avrdude: reading on-chip lfuse data:

            Reading | ################################################## | 100% 0.00s

            avrdude: verifying ...
            avrdude: 1 bytes of lfuse verified

            avrdude: safemode: Fuses OK (E:FF, H:DF, L:5E)

            avrdude done.  Thank you.

            overflow@OverFlow:~/Hellotest$
-Short buttonpress: Dot
-Some longer button press: a Line
-Aproxx. >1 sek press: space between words
-Approx. >2 sek press: / -> for new line
I have only changed the main function.
int main(void) {

  main

 DDRB = (0 << PB2);// here is the button pin as an input
 DDRA = (1 << PA7);// here i declare the LED pin

   set clock divider to /1

  CLKPR = (1 << CLKPCE);
  CLKPR = (0 << CLKPS3) | (0 << CLKPS2) | (0 << CLKPS1) | (0 << CLKPS0);

   initialize output pins

  set(serial_port, serial_pin_out);
  output(serial_direction, serial_pin_out);

  // main loop

long tmp =0; // to save the clock value
char tmpchar[10]; // for the experimets, inorder to output some number
int waspressed = 0; // wrols like a boolean
timer_();// here we start the timer function

  while (1) {
 if(bit_is_clear(PINB, PB2)){// if the button is pressed, logic lvl low. A very helpful function bit_is_clear().
   waspressed = 1; // here I set the value of waspressed int to 1, to store the information, that the button was pressed
   PORTA |= (1< 200){ // the TCNT0 value can only store the values between 0 to 255, so thats why I made the tmp var to store the clock value
     tmp = tmp+TCNT0; // here I store the prox. clock value
     TCNT0 = 0; // clear up the value on TCNT0
   }

 }if (!bit_is_clear(PINB, PB2) && waspressed == 1){ // here we check if the button was released, !after it was pressed!
   PORTA &= ~(1< 5000000 && tmp < 20000000){
       //counter++;
       //itoa(counter, tmpchar, 10);
       put_string(&serial_port, serial_pin_out,"-" ); 1/4 to >20000000 => 1 second
       //put_string(&serial_port, serial_pin_out, tmpchar );
   }
   if(tmp > 20000000 && tmp <40000000){
       //counter++;
       //itoa(counter, tmpchar, 10);
       put_string(&serial_port, serial_pin_out,"  " );//this is space
       //put_string(&serial_port, serial_pin_out, tmpchar );
   }
   if(tmp>40000000){
      put_string(&serial_port, serial_pin_out,"  /  " ); // New sentence
   }

   waspressed = 0;// clear the values, for the reuse
   tmp=0;
 }

     }
  }
make -f hello.make
            overflow@OverFlow:~/Hellotest$ make -f hello.make
            avr-objcopy -O ihex main.out main.c.hex;\
            avr-size --mcu=attiny84 --format=avr main.out
            AVR Memory Usage
            ----------------
            Device: attiny84

            Program:     988 bytes (12.1% Full)
            (.text + .data + .bootloader)

            Data:         12 bytes (2.3% Full)
            (.data + .bss + .noinit)


            overflow@OverFlow:~/Hellotest$
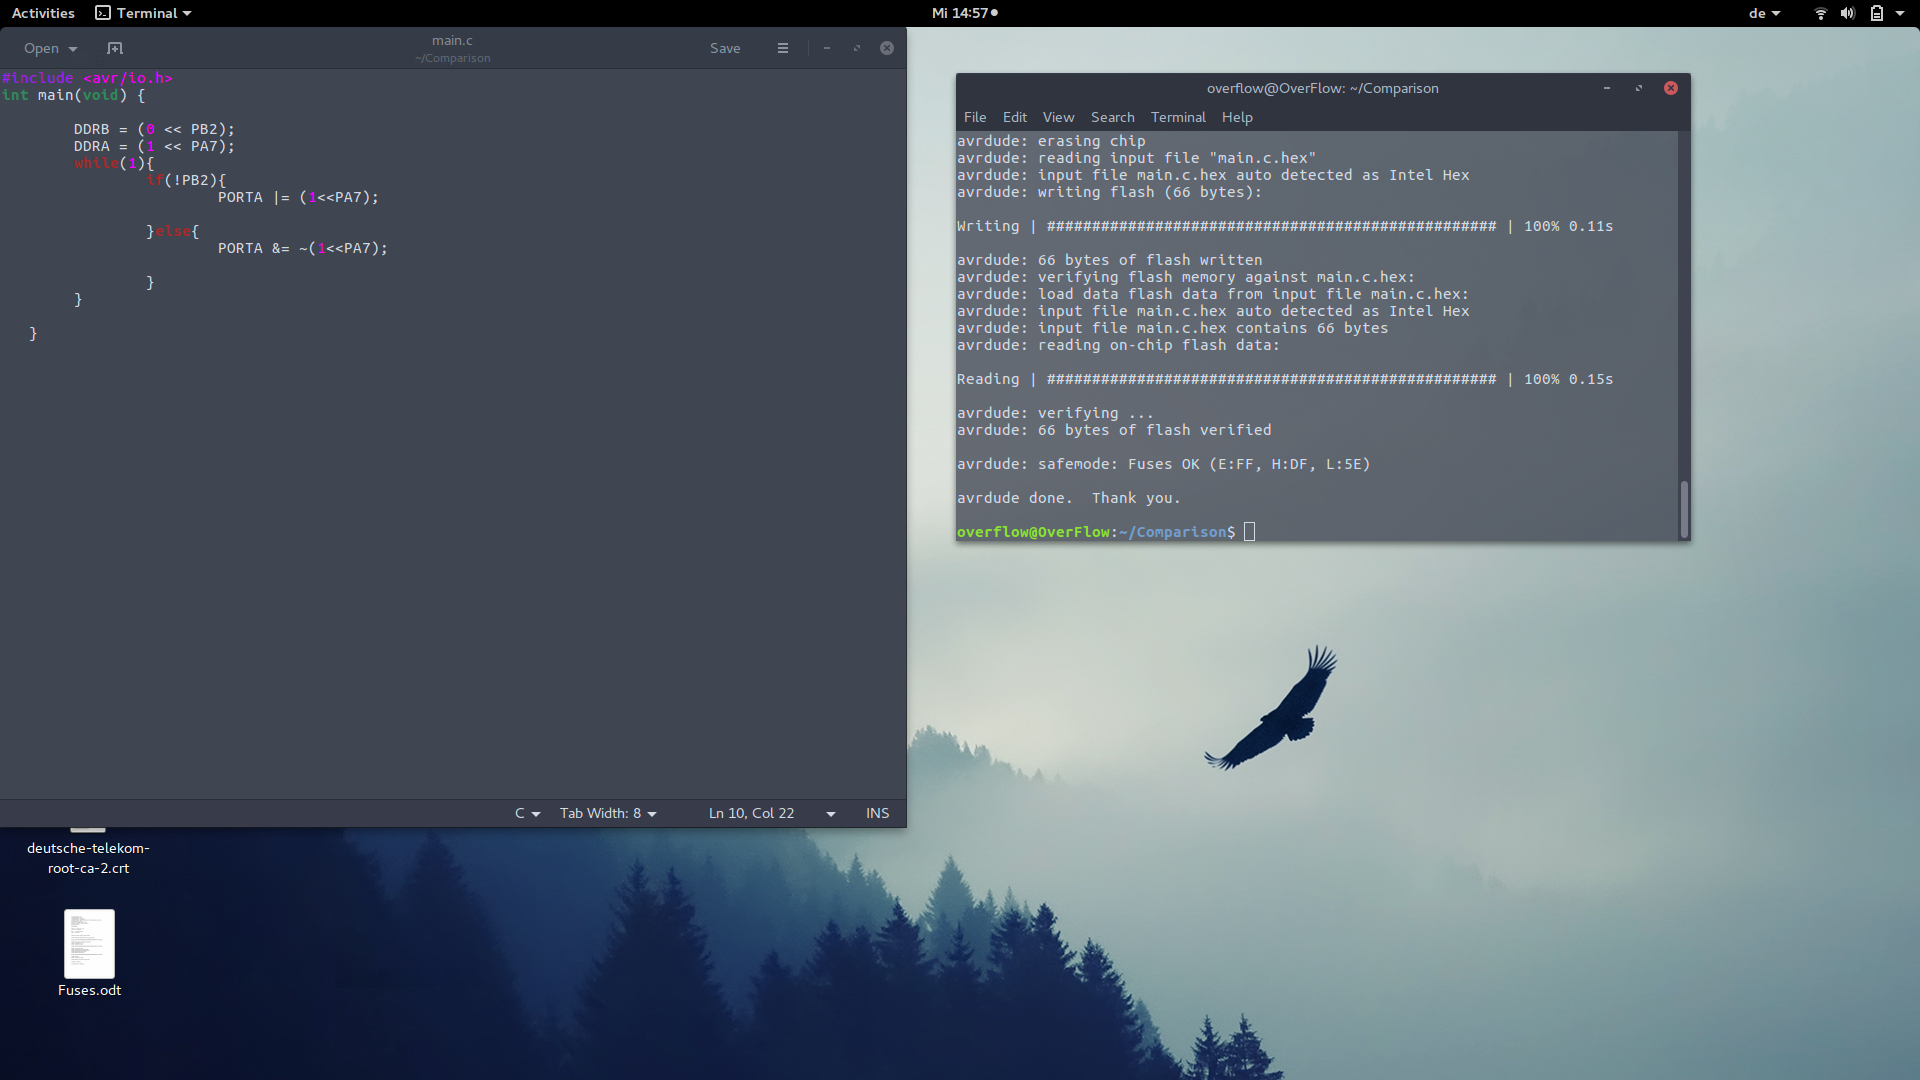
make -f hello.make program-usbtiny
            overflow@OverFlow:~/Hellotest$ make -f hello.make program-usbtiny
            avr-objcopy -O ihex main.out main.c.hex;\
            avr-size --mcu=attiny84 --format=avr main.out
            AVR Memory Usage
            ----------------
            Device: attiny84

            Program:     988 bytes (12.1% Full)
            (.text + .data + .bootloader)

            Data:         12 bytes (2.3% Full)
            (.data + .bss + .noinit)


            avrdude -p t84 -P usb -c usbtiny -U flash:w:main.c.hex

            avrdude: AVR device initialized and ready to accept instructions

            Reading | ################################################## | 100% 0.00s

            avrdude: Device signature = 0x1e930c (probably t84)
            avrdude: NOTE: "flash" memory has been specified, an erase cycle will be performed
                     To disable this feature, specify the -D option.
            avrdude: erasing chip
            avrdude: reading input file "main.c.hex"
            avrdude: input file main.c.hex auto detected as Intel Hex
            avrdude: writing flash (988 bytes):

            Writing | ################################################## | 100% 0.82s

            avrdude: 988 bytes of flash written
            avrdude: verifying flash memory against main.c.hex:
            avrdude: load data flash data from input file main.c.hex:
            avrdude: input file main.c.hex auto detected as Intel Hex
            avrdude: input file main.c.hex contains 988 bytes
            avrdude: reading on-chip flash data:

            Reading | ################################################## | 100% 1.16s

            avrdude: verifying ...
            avrdude: 988 bytes of flash verified

            avrdude: safemode: Fuses OK (E:FF, H:DF, L:5E)

            avrdude done.  Thank you.

            overflow@OverFlow:~/Hellotest$
                ;hello.asm
                ;  turns on an LED when you press the button on PB2

                .include "tn84def.inc"

                  ldi r20,0b00000000; this is made for the Logic LVL low.


                on:
                  ldi r16,0b10000000; here we immediately load 10000000 to register 16
                  ; I also have found, that ldi can be used only by higher reg. like 16-31
                  out DDRA,r16; here we use out and write the register value to the DDRA reg.
                  out PortA,r16; the same proc. but to the Port A -> here we give power to the LED
                off:
                  ldi r16,0b00000000; I could actually use r20, but i use another reg. -> understandable
                  out DDRA,r16; same as above
                  out PortA,r16; same as above


                  in r17,PINB; i havend found it needed to declare the DDRB, because all the values
                  ; are 0 as default(my suggestion), so I am reading the value from it. And write to res 17
                  cp r17,r20; here I compare them,
                  brne off; if the LL = HIGH(button released or not pressed), it is off
                  breq on; if the LL = LOW(button pressed), it is on;
sudo apt-get install avra
avra hello.asm
                overflow@OverFlow:~/Assembler$ avra hello.asm
                AVRA: advanced AVR macro assembler Version 1.3.0 Build 1 (8 May 2010)
                Copyright (C) 1998-2010. Check out README file for more info

                   AVRA is an open source assembler for Atmel AVR microcontroller family
                   It can be used as a replacement of 'AVRASM32.EXE' the original assembler
                   shipped with AVR Studio. We do not guarantee full compatibility for avra.

                   AVRA comes with NO WARRANTY, to the extent permitted by law.
                   You may redistribute copies of avra under the terms
                   of the GNU General Public License.
                   For more information about these matters, see the files named COPYING.

                Pass 1...
                tn84def.inc(44) : PRAGMA directives currently ignored
                tn84def.inc(48) : PRAGMA directives currently ignored
                tn84def.inc(53) : PRAGMA directives currently ignored
                tn84def.inc(54) : PRAGMA directives currently ignored
                tn84def.inc(646) : PRAGMA directives currently ignored
                tn84def.inc(647) : PRAGMA directives currently ignored
                tn84def.inc(648) : PRAGMA directives currently ignored
                tn84def.inc(649) : PRAGMA directives currently ignored
                Pass 2...
                tn84def.inc(44) : PRAGMA directives currently ignored
                tn84def.inc(48) : PRAGMA directives currently ignored
                tn84def.inc(53) : PRAGMA directives currently ignored
                tn84def.inc(54) : PRAGMA directives currently ignored
                tn84def.inc(646) : PRAGMA directives currently ignored
                tn84def.inc(647) : PRAGMA directives currently ignored
                tn84def.inc(648) : PRAGMA directives currently ignored
                tn84def.inc(649) : PRAGMA directives currently ignored
                done

                Used memory blocks:
                   Code      :  Start = 0x0000, End = 0x000A, Length = 0x000B

                Assembly complete with no errors.
                Segment usage:
                   Code      :        11 words (22 bytes)
                   Data      :         0 bytes
                   EEPROM    :         0 bytes
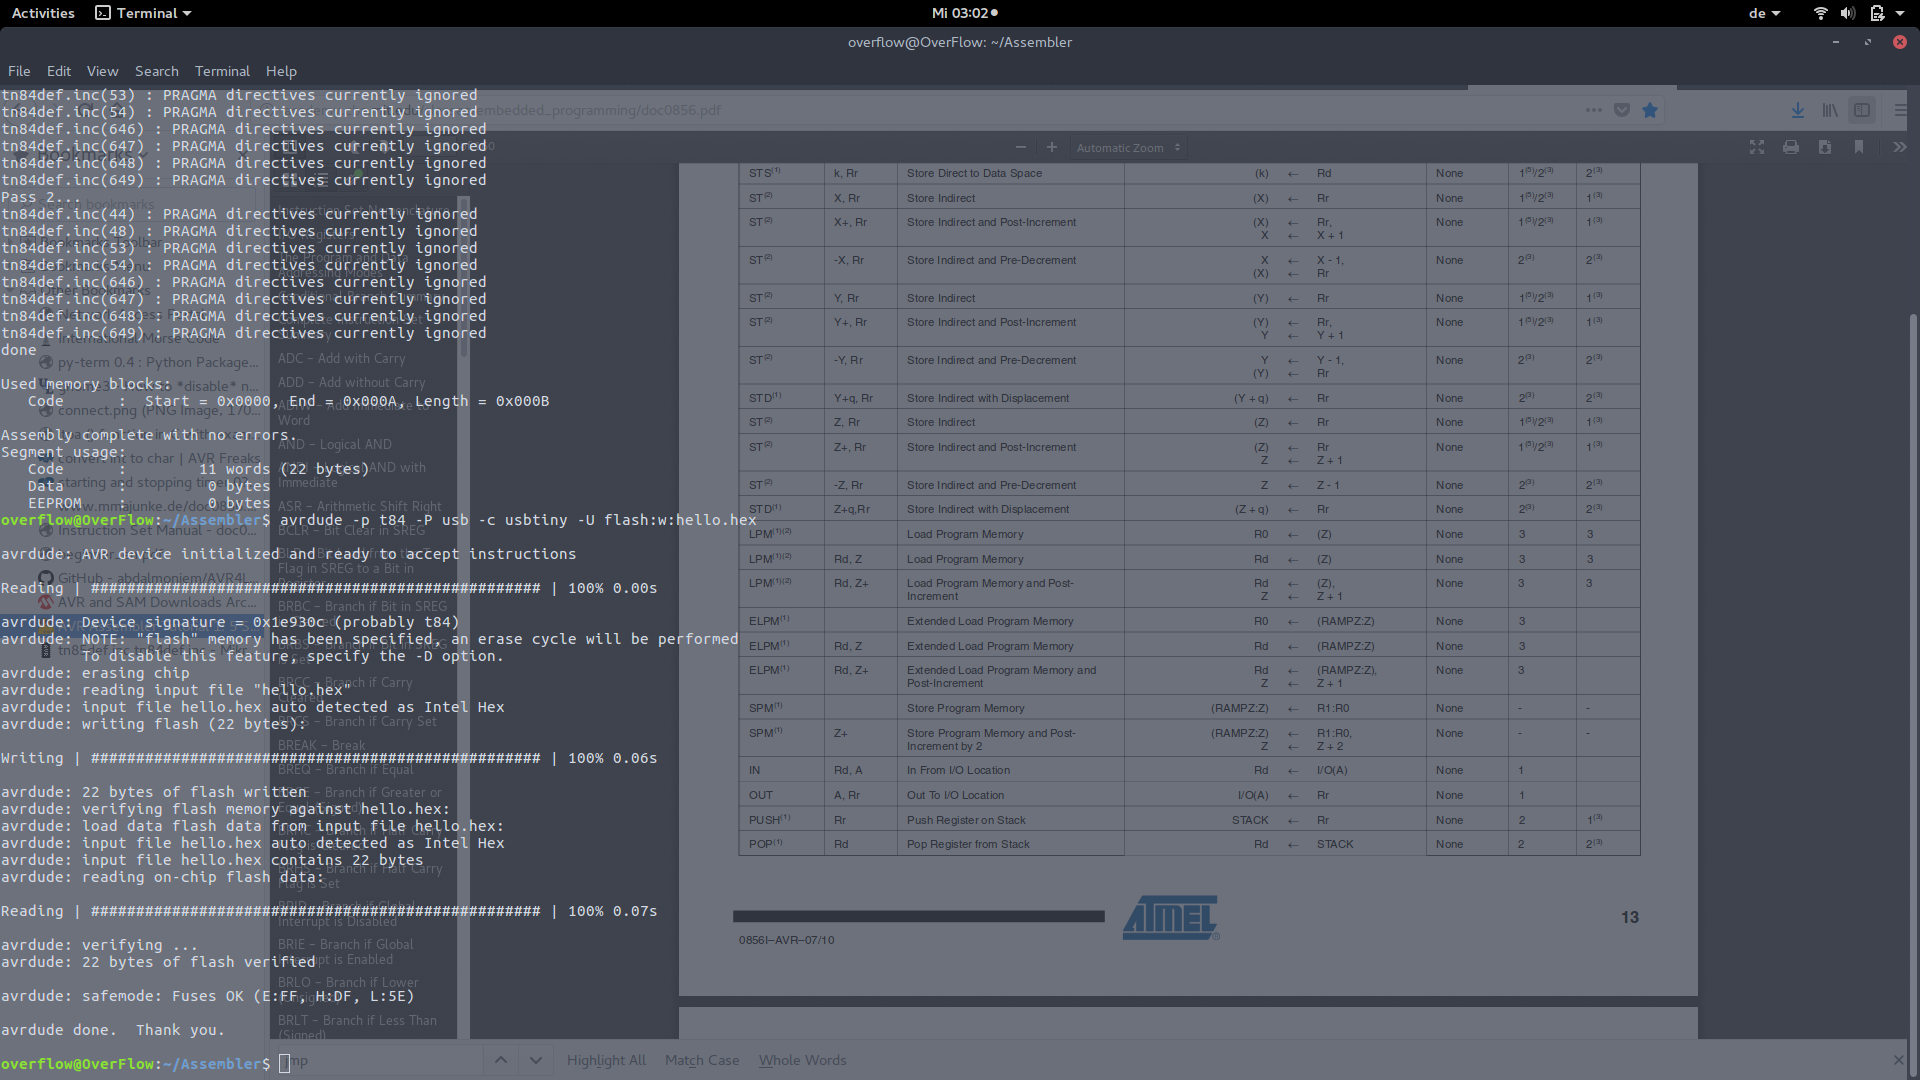
avrdude -p t84 -P usb -c usbtiny -U flash:w:hello.hex
                overflow@OverFlow:~/Assembler$ avrdude -p t84 -P usb -c usbtiny -U flash:w:hello.hex

                avrdude: AVR device initialized and ready to accept instructions

                Reading | ################################################## | 100% 0.00s

                avrdude: Device signature = 0x1e930c (probably t84)
                avrdude: NOTE: "flash" memory has been specified, an erase cycle will be performed
                         To disable this feature, specify the -D option.
                avrdude: erasing chip
                avrdude: reading input file "hello.hex"
                avrdude: input file hello.hex auto detected as Intel Hex
                avrdude: writing flash (22 bytes):

                Writing | ################################################## | 100% 0.06s

                avrdude: 22 bytes of flash written
                avrdude: verifying flash memory against hello.hex:
                avrdude: load data flash data from input file hello.hex:
                avrdude: input file hello.hex auto detected as Intel Hex
                avrdude: input file hello.hex contains 22 bytes
                avrdude: reading on-chip flash data:

                Reading | ################################################## | 100% 0.07s

                avrdude: verifying ...
                avrdude: 22 bytes of flash verified

                avrdude: safemode: Fuses OK (E:FF, H:DF, L:5E)

                avrdude done.  Thank you.

                overflow@OverFlow:~/Assembler$
#include < avr/io.h >
int main(void) {

	DDRB = (0 << PB2);
	DDRA = (1 << PA7);
	while(1){
		if(!PB2){
			PORTA |= (1<<PA7);

		}else{
			PORTA &= ~(1<<PA7);

		}
	}

   }